Archive title

Autem vel eum iriure dolor in hendrerit in vulputate velit esse molestie consequat, vel illum dolore eu feugiat nulla facilisis at vero eros et dolore feugait.

Monthly Archive November 21, 2023

bissell quicksteamer instruction manual

Welcome to the Bissell QuickSteamer manual, your complete guide for setup, usage, and maintenance. This manual ensures safe operation, optimal performance, and easy troubleshooting for all models.

1.1 Overview of the Bissell QuickSteamer Series

The Bissell QuickSteamer series offers versatile cleaning solutions for carpets and hard floors. Popular models like the 1950, 1770, 2080, and 2090 series are known for their lightweight design and effective steam cleaning. These cleaners feature rotating brushes, built-in water tanks, and easy-to-use controls, making them ideal for home use. Designed for deep cleaning, they provide powerful results without harsh chemicals. The series is backed by Bissell’s limited warranty, ensuring reliability and performance for years to come.

1.2 Key Features and Benefits

The Bissell QuickSteamer series boasts a lightweight design, making it easy to maneuver. It features a built-in water tank for steam cleaning and rotating brushes for deep carpet agitation. The series includes models like the 1950, 1770, 2080, and 2090, offering versatile cleaning options. Key benefits include effective steam cleaning without harsh chemicals, easy-to-use controls, and a compact design for storage. These features ensure efficient cleaning of carpets, upholstery, and hard floors, providing a powerful yet gentle cleaning experience for various surfaces.

Safety Precautions and Warnings

Always read the manual before use. Avoid damaged cords, never use on wood floors, and keep children and pets away. Follow guidelines to prevent hazards.

2.1 General Safety Guidelines

Welcome to the Bissell QuickSteamer manual! Always read this section carefully to ensure safe and effective use. To prevent accidents, avoid using damaged cords or plugs, and never operate the cleaner on wood floors or surfaces that may be damaged by steam. Keep children and pets away during operation. Use only Bissell-recommended cleaning formulas and attachments to avoid machine damage or surface harm. Follow all guidelines in this manual to ensure safe operation and maintain the longevity of your QuickSteamer.

2.2 Electrical Safety Tips

Ensure electrical safety by avoiding damaged cords or plugs, as they can cause hazards. Always connect your Bissell QuickSteamer to a properly grounded outlet to prevent electric shock. Keep the cleaner away from water sources to avoid electrical issues. Never overload circuits with multiple high-power devices. Unplug the machine when not in use or during maintenance. Avoid using the cleaner in wet conditions and ensure the outlet is not overloaded. Follow these guidelines to maintain safety and prevent electrical accidents.

2.3 Usage Restrictions and Precautions

Adhere to specific usage guidelines to ensure safe and effective operation. Avoid using the Bissell QuickSteamer on wood floors, as it may cause damage. Never use unauthorized attachments or cleaning formulas, as they can harm the machine or surfaces. Keep children and pets away during operation. Do not use the cleaner if it has been dropped or damaged. Always follow the recommended surface types and cleaning solutions to prevent damage and maintain performance. Proper usage ensures longevity and safety.

Assembly and Setup Instructions

Assemble the Bissell QuickSteamer by sliding the upper body into the lower assembly and securing with screws. Attach the handle and solution tank, ensuring all parts align properly for safe use.

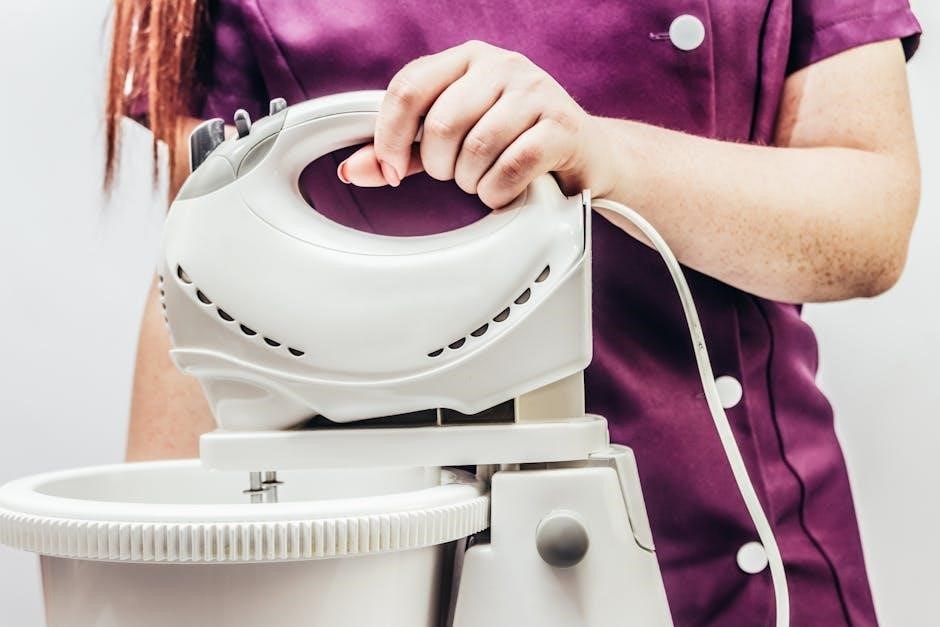
3.1 Step-by-Step Assembly Guide

Begin by sliding the upper body assembly into the lower body and secure it with the provided screws. Next, attach the handle by aligning it with the upper body and tightening the screws firmly. Ensure the handle is fully seated and cannot move. Then, install the solution tank by sliding it into the designated slot on the back of the machine until it clicks into place. Verify all connections are secure and properly aligned. Use the provided screws to avoid damaging the machine. Refer to the product diagram in the manual for visual guidance. Proper assembly ensures safe and effective operation of your Bissell QuickSteamer.

3.2 Required Tools and Parts

To assemble your Bissell QuickSteamer, you will need a screwdriver and the following parts: upper and lower body assemblies, handle, screws, and the solution tank. Ensure all components are included in the package before starting. Organize the parts and refer to the product diagram in the manual for clarity. Use the provided screws to secure connections and avoid damaging the machine. Properly identifying and preparing these tools and parts ensures a smooth and efficient assembly process. Always follow the manual’s instructions for correct part usage and alignment.

3.3 Securing the Upper and Lower Body Assemblies

To secure the upper and lower body assemblies, align the upper body with the lower body, ensuring proper fit. Insert the provided screws through the pre-drilled holes and tighten firmly using a screwdriver. Make sure the connection is snug and even to avoid misalignment. Double-check that all screws are tightly secured for stability. Proper alignment and tightening ensure the machine operates smoothly and safely. Refer to the manual for diagrams or additional guidance if needed. This step is crucial for the overall functionality of your Bissell QuickSteamer.

3.4 Attaching the Handle and Solution Tank

Attach the handle by sliding it into the upper body assembly until it stops. Ensure it aligns properly and cannot move further. Secure the handle with the provided screws, tightening firmly. Next, place the solution tank on the back of the machine, aligning it with the designated slots. Push the tank down until it clicks into place. Ensure the tank is securely locked to prevent leaks. Double-check the handle and tank connections for stability. Proper attachment ensures safe and efficient operation of your Bissell QuickSteamer during cleaning tasks.

Operating the Bissell QuickSteamer

Operating the Bissell QuickSteamer involves plugging it in, turning it on, and adjusting settings for different surfaces. Use Bissell-recommended formulas and ensure regular maintenance for optimal performance and longevity.

4.1 Preparing the Machine for Use

Before using your Bissell QuickSteamer, inspect it for damage and ensure all parts are securely attached. Fill the water tank with warm water and add the recommended Bissell cleaning formula. Avoid overfilling. Check the brush roll for tangles or debris and clean it if necessary. Ensure the pre-filter is properly installed and free of blockages. Secure all connections, such as the solution tank and hose, to prevent leaks. Finally, test the machine on a small, inconspicuous area to ensure proper function and surface compatibility.

4.2 Using the Cleaner on Different Surfaces

The Bissell QuickSteamer is designed for versatility, catering to carpets, upholstery, and hard floors. For carpets, use the rotating brush to agitate fibers and lift embedded dirt. On upholstery, attach the handheld tool for gentle cleaning. For hard floors, switch to the hard floor cleaning attachment and use the recommended Bissell Floor Cleansing Formula. Always test a small area first to ensure no damage. Avoid using the cleaner on waxed floors or surfaces that may be damaged by steam or cleaning solutions. Adjust settings according to surface type for optimal results.

4.3 Adjusting Settings for Optimal Cleaning

Adjust the Bissell QuickSteamer settings based on the surface type for optimal results. For carpets, use the high suction setting and engage the rotating brush. On hard floors, switch to the low suction setting and disable the brush roll to prevent damage. Always use Bissell-recommended cleaning formulas, properly diluted as instructed; Test a small area first to ensure no damage. Avoid over-saturating surfaces, as this can lead to residue or warping. Properly adjusting settings ensures effective cleaning while protecting your floors and extending the cleaner’s lifespan.

4.4 Using Bissell-Recommended Cleaning Formulas

For optimal cleaning results, use Bissell-recommended cleaning formulas specifically designed for your QuickSteamer. Use Bissell Fiber Cleansing Formula for carpets and Bissell Floor Cleansing Formula for hard floors. Always measure and mix the formula with warm water as instructed in the manual. Avoid using non-Bissell products, as they may damage the machine or leave residue. Proper dilution ensures effective cleaning without over-saturating surfaces. Follow the guide for specific mixing ratios to maintain performance and warranty coverage. Proper formula usage enhances cleaning efficiency and protects your surfaces.

Maintenance and Cleaning Tips

Regularly clean and maintain your Bissell QuickSteamer for optimal performance. Empty and rinse the water tank after use, and clean the brush roll and filters. Sanitize the machine by running a mixture of water and white vinegar through the system. Always follow the manual’s specific cleaning instructions for best results and to prevent bacteria buildup.

5.1 Regular Maintenance Routine

Regular maintenance is essential to keep your Bissell QuickSteamer performing optimally. After each use, empty and rinse the water tank to prevent dirt buildup. Clean the brush roll and filters regularly, and check for blockages in the hose or nozzle. Sanitize the machine by running a mixture of water and white vinegar through the system. Replace belts and filters as needed, typically every 1-2 months or when visibly worn. Proper upkeep ensures efficient cleaning, prevents bacteria growth, and extends the lifespan of your QuickSteamer.

5.2 Cleaning the Brush Roll and Filters

Cleaning the brush roll and filters is crucial for maintaining your Bissell QuickSteamer’s performance. Remove the brush roll and inspect for tangled debris or hair. Use a soft brush or cloth to clean it, ensuring it rotates freely. For filters, rinse them with warm water after each use and allow them to air dry. Replace filters every 1-2 months or when visibly soiled. Clean or replace the pre-filter regularly to maintain suction power. Proper maintenance prevents clogs and ensures optimal cleaning efficiency.

5.3 Emptying and Rinsing the Water Tank

Regularly emptying and rinsing the water tank is essential for maintaining your Bissell QuickSteamer’s performance. After each use, remove the water tank and dispose of the dirty water. Rinse the tank thoroughly with clean water to remove any residue. Allow it to air dry to prevent mold or bacteria growth. For tougher stains, clean the tank with a soft cloth and mild detergent. Ensure the tank is completely dry before reattaching it to the machine. This helps maintain hygiene and prevents odors, ensuring optimal cleaning results.

5.4 Sanitizing the Machine

To sanitize your Bissell QuickSteamer, mix equal parts water and white vinegar in the solution tank. Run the machine with this mixture to circulate it through the system. After 5-10 minutes, turn it off and let it sit for 10 minutes to allow the solution to work. Rinse the tank thoroughly with clean water and wipe down all surfaces with a damp cloth. This process helps eliminate bacteria, odors, and residue, ensuring a clean and hygienic machine for future use.

Troubleshooting Common Issues

This section helps resolve common issues like low suction, lint residue, and carpet marks. Follow the guide for effective solutions and maintenance tips.

6.1 Addressing Low Suction Power

Low suction power in your Bissell QuickSteamer can be caused by clogged pre- or post-filters, a full dirt tank, or blockages in the hose or cleaning path. Regularly clean or replace filters and empty the dirt tank. Check for debris in the hose or nozzle and ensure all connections are secure. If issues persist, inspect the belt for damage or misalignment. Proper maintenance, including cleaning the brush roll and ensuring the belt is functioning correctly, will help restore suction power and optimize performance.

6.2 Resolving Lint or Fuzz Residue

If your Bissell QuickSteamer leaves lint or fuzz residue, inspect the brush roll for tangled debris or worn bristles. Clean the brush roll regularly to ensure it rotates freely. Check the pre- and post-filters for blockages or damage and clean or replace them as needed. Ensure the belt is properly aligned and not worn out. Emptying the dirt tank and rinsing filters can also help reduce lint buildup. Regular maintenance will improve cleaning efficiency and prevent residue from forming on surfaces.

6.3 Fixing Carpet Stripes or Marks

If your Bissell QuickSteamer leaves carpet stripes or marks, it may be due to excessive cleaning solution or improper brush roll maintenance. Ensure you’re using the recommended Bissell cleaning formula and dilute it as instructed. Regularly clean and inspect the brush roll for tangles or wear. Avoid applying too much pressure, which can push debris into the carpet. For existing marks, rinse the area with clean water and let it air dry. Always test a small, inconspicuous area first to ensure no further damage.

6.4 General Maintenance and Repair Tips

Regularly clean and maintain your Bissell QuickSteamer to ensure optimal performance. Check for blockages in hoses, brush rolls, and filters, and clean or replace them as needed. Use only Bissell-approved cleaning formulas and attachments to prevent damage. Inspect belts for wear and replace them annually or as recommended. Properly assemble and secure all parts to avoid misalignment. Refer to the manual for specific repair instructions and guidelines. Regular upkeep ensures longevity, prevents issues, and maintains cleaning efficiency. Always follow manufacturer recommendations for repairs and maintenance.

Warranty Information and Support

Your Bissell QuickSteamer is backed by a limited one-year warranty. For inquiries or assistance, contact Bissell Consumer Care at 800.237.7691 or visit www.bissell.com.

7.1 Understanding the Limited Warranty

Your Bissell QuickSteamer is covered by a limited one-year warranty, ensuring protection against defects in materials and workmanship. This warranty applies to the original purchaser and is valid for one year from the date of purchase; It covers repairs or replacements at Bissell’s discretion, provided the product has been used and maintained as per the manual’s guidelines. For full details, including coverage limitations and conditions, refer to the warranty section in your manual or visit www.bissell.com.

7.2 Contacting Bissell Consumer Care

For assistance with your Bissell QuickSteamer, contact our Consumer Care team at www.bissell;com or call 800.237.7691. Our knowledgeable staff is ready to help with questions, repairs, or warranty inquiries. Visit the Bissell website for additional resources, including user manuals, troubleshooting guides, and FAQs. Ensure you have your model number and purchase date available for faster service. Bissell is committed to providing fast, considerate support to enhance your cleaning experience.

7.3 Additional Resources and Downloads

Visit the Bissell website at www.bissell.com for additional resources, including user manuals, troubleshooting guides, and FAQs. Download the full PDF manual for your specific model, such as the QuickSteamer 1770, 2080, or 2090 series. Access warranty information, FCC rules, and safety instructions. For further assistance, contact Bissell Consumer Care at 800.237.7691. These resources ensure you maximize your QuickSteamer’s performance and address any questions or issues effectively.

Maximize your satisfaction with the Bissell QuickSteamer by following the manual. Regular maintenance, proper usage, and Bissell-recommended formulas ensure optimal performance and longevity of your cleaner.

8.1 Maximizing Your Cleaning Experience

To maximize your cleaning experience with the Bissell QuickSteamer, always use Bissell-recommended formulas and follow the manual’s guidelines for surface-specific cleaning. Adjust settings according to the surface type, such as carpets, upholstery, or hard floors, to ensure optimal results. Regularly clean filters, check for blockages, and maintain the brush roll to keep performance at its best. Avoid using the cleaner on surfaces like wood floors and test a small area first to prevent damage. Proper usage and maintenance will enhance efficiency and extend the life of your QuickSteamer.

8.2 Ensuring Longevity of Your QuickSteamer

Regular maintenance is key to extending the life of your Bissell QuickSteamer. After each use, empty and rinse the water tank to prevent dirt buildup. Clean the brush roll and filters regularly, and replace them as needed. Sanitize the machine by running a mixture of water and white vinegar through the system. Store the cleaner in a dry, cool place and avoid using harsh chemicals. Proper care ensures optimal performance and longevity, keeping your QuickSteamer in great condition for years of reliable service.

devils lake north dakota ice fishing guides

Devils Lake‚ North Dakota‚ is a premier ice fishing destination‚ attracting thousands annually. Experienced guides offer expert knowledge‚ ensuring successful trips targeting walleye‚ perch‚ and northern pike. With over 25 years of guiding experience‚ they provide unmatched expertise‚ utilizing specialized gear like the SnoBear for a unique adventure.

Why Devils Lake is a Top Destination for Ice Fishing

Devils Lake‚ North Dakota‚ is renowned for its abundant fish populations and vast ice fishing opportunities. With over 200‚000 acres of ice-covered water‚ it offers endless spots to target species like walleye‚ perch‚ and northern pike. The lake’s booming fish population‚ unaffected by fishing pressure‚ makes it a sustainable destination. Its variable weather and unique ecosystem create ideal conditions for ice anglers‚ attracting thousands annually. The lake’s size and diversity ensure a dynamic and rewarding ice fishing experience for all skill levels.

The Role of Guides in Enhancing Your Ice Fishing Experience

Experienced guides on Devils Lake play a crucial role in maximizing your ice fishing success. With extensive local knowledge‚ they locate prime fishing spots and share proven techniques. Guides provide essential gear‚ including rods‚ bait‚ and electronics‚ ensuring you’re well-equipped. Their expertise in navigating the lake’s conditions and predicting fish behavior enhances your chances of a productive trip. Whether you’re a novice or seasoned angler‚ guides offer personalized instruction‚ making your experience both enjoyable and memorable.

Popular Species Targeted in Devils Lake

Devils Lake is renowned for its abundant walleye‚ yellow perch‚ and northern pike populations‚ making it a hotspot for ice anglers seeking trophy catches and exciting challenges.

Walleye: The Crown Jewel of Devils Lake

Walleye are the most sought-after species in Devils Lake‚ known for their impressive size and fighting ability. Anglers flock to the lake to catch trophy walleye‚ with many exceeding 20 inches. The lake’s unique ecosystem supports a thriving walleye population‚ making it a hotspot for ice fishing enthusiasts. Guides expertly locate schools and share proven techniques‚ ensuring memorable experiences. Whether you’re a novice or seasoned angler‚ Devils Lake’s walleye promise an unforgettable adventure on the ice.

Yellow Perch: A Favorite Among Ice Anglers

Yellow perch are a beloved target for ice anglers on Devils Lake‚ prized for their flavorful meat and lively fights. Known for their vibrant color‚ these fish are abundant and often caught in large schools. Guides expertly locate perch hotspots‚ helping anglers land impressive catches. Whether you’re seeking a tasty meal or exciting action‚ yellow perch add unforgettable excitement to any Devils Lake ice fishing adventure‚ making them a must-target species for anglers of all skill levels.

Northern Pike: A Challenge for Experienced Anglers

Northern pike are a thrilling and challenging species for experienced anglers on Devils Lake. Known for their size and strength‚ these predators demand skill and strategy to land. Guides expertly locate pike hotspots‚ employing specialized techniques like jigging and bait selection to entice strikes. The fight is intense‚ making northern pike a rewarding target for seasoned anglers seeking a test of their expertise and patience on the ice.

Choosing the Right Ice Fishing Guide Service

Selecting a reputable guide service is crucial for a successful Devils Lake ice fishing trip. Look for experienced guides with local knowledge and quality equipment to ensure safety and success.

What to Look for in a Reputable Guide Service

When selecting a guide service‚ prioritize experience and local knowledge. Reputable guides offer specialized equipment like the SnoBear for mobility and comfort. Ensure they provide essential gear‚ including rods‚ bait‚ and tackle. Look for services with a strong safety record and excellent customer reviews. Many guides also offer lodging packages‚ combining accommodations with guided trips. A reliable service will balance safety‚ productivity‚ and enjoyment‚ ensuring a memorable ice fishing experience on Devils Lake.

Reviews and Testimonials: Key Indicators of Quality

Positive reviews and testimonials are crucial for evaluating guide services. Experienced guides with high customer satisfaction ratings ensure memorable trips. Services like Brys Guide Service and Perch Patrol boast excellent feedback‚ highlighting their expertise and dedication. Many anglers praise the comprehensive packages‚ including lodging and gear‚ which enhance the overall experience. These testimonials reflect the guides’ commitment to safety‚ productivity‚ and fun‚ making them trusted choices for Devils Lake ice fishing adventures.

Equipment and Gear Provided by Guides

Guides provide essential gear‚ including the SnoBear‚ rods‚ reels‚ bait‚ tackle‚ and electronics‚ ensuring a well-equipped and comfortable ice fishing experience for all anglers.

The SnoBear: A Revolutionary Ice Fishing Vehicle

The SnoBear is a game-changing ice fishing vehicle designed for North Dakota’s harsh winters. It functions like an RV‚ offering a heated‚ mobile fishing platform. Anglers can fish comfortably inside‚ protected from extreme cold and wind. The SnoBear’s versatility allows seamless travel across the ice‚ eliminating the need to step outside. Guides rely on it for its reliability and ability to access remote fishing spots‚ ensuring a unique and efficient ice fishing experience on Devils Lake.

Rods‚ Reels‚ and Tackle: What’s Included in Guided Trips

Guided ice fishing trips on Devils Lake typically include high-quality rods‚ reels‚ and tackle tailored for target species like walleye‚ perch‚ and northern pike. Guides provide durable‚ ice-specific gear to ensure success. Electronics for locating fish are also included‚ along with bait and lures. Clients need only bring a valid fishing license and personal items‚ as everything else is supplied to maximize comfort and fishing efficiency during the adventure.

Ice Fishing Techniques and Strategies

Expert guides employ specialized techniques like jigging and bait presentation‚ adapting strategies based on fish behavior and lake conditions to maximize catch rates and client success.

Understanding Fish Behavior Under the Ice

Understanding fish behavior under the ice is crucial for successful ice fishing on Devils Lake. Fish move in search of food as water temperatures drop‚ often schooling in specific areas. Guides study these patterns to locate active species like walleye‚ perch‚ and northern pike. By interpreting fish behavior‚ they identify prime fishing spots and timing‚ ensuring a productive and memorable experience for anglers of all skill levels.

Effective Jigging and Bait Presentation

Effective jigging and bait presentation are key to success on Devils Lake. Guides teach anglers to use precise jigging motions to mimic baitfish or prey‚ attracting walleye‚ perch‚ and northern pike. The right tackle and bait selection‚ such as jigs or spoons‚ are crucial for triggering strikes. By adjusting speed and depth‚ anglers can entice even cautious fish‚ making each presentation count in the icy waters of Devils Lake.

Safety and Preparation for Ice Fishing

Safety is paramount on Devils Lake. Guides ensure proper gear‚ including ice picks and flotation devices‚ while teaching anglers to dress warmly and stay aware of conditions.

Essential Safety Gear for Ice Fishing

Ice fishing on Devils Lake requires critical safety gear. Always carry ice picks for self-rescue‚ a flotation device‚ and a thermal suit to prevent hypothermia. A portable phone charger ensures communication‚ while a first-aid kit handles emergencies. Guides emphasize wearing crampons for traction and carrying a rope for group safety. Proper gear ensures a secure and enjoyable experience on the ice.

Weather Conditions and Dressing Appropriately

Devils Lake’s unpredictable winter weather demands proper attire. Dress in layers with thermal base layers‚ insulated snow suits‚ and waterproof gear to withstand cold and wind. Insulated‚ waterproof boots and gloves are essential. Guides recommend covering extremities to prevent frostbite. Be prepared for varying conditions‚ from extreme cold to sudden temperature shifts. Proper clothing ensures comfort and safety‚ allowing you to focus on fishing. Always check forecasts and adjust gear accordingly for a safe and enjoyable experience.

Regulations and Licensing

A valid North Dakota fishing license is required for all anglers. Guides ensure compliance with local regulations‚ helping you navigate rules for a legal and enjoyable experience.

North Dakota Fishing License Requirements

A valid North Dakota fishing license is required for all anglers on Devils Lake. Residents and non-residents must obtain the appropriate license‚ with options available for daily or seasonal use. Youth under 16 fish for free‚ while seniors may qualify for reduced-fee licenses. Guides often assist clients with licensing details‚ ensuring compliance with state regulations to avoid penalties. Licensing helps conserve fish populations and maintain Devils Lake’s thriving ecosystem for future generations of anglers.

Bag Limits and Size Restrictions for Target Species

Devils Lake enforces specific bag limits and size restrictions to conserve fish populations. Walleye have a daily limit of 5‚ with a minimum size of 14 inches. Yellow perch allow 50 per day‚ with no size restrictions. Northern pike have a 2-fish limit‚ with one allowed over 24 inches. These regulations ensure sustainable fishing practices. Guides help anglers comply with rules‚ promoting responsible fishing and preserving Devils Lake’s renowned fishery for future generations of anglers to enjoy.

Seasonal Tips for Ice Fishing on Devils Lake

Devils Lake’s prime ice fishing season runs from December to April. Fish are most active during early morning and late evening. Guides recommend adjusting strategies based on weather patterns‚ such as moving to deeper waters during cold snaps‚ to maximize catches of walleye‚ perch‚ and northern pike.

Best Times of the Winter for Ice Fishing

Devils Lake’s prime ice fishing season spans December to April‚ with peak activity during early mornings and late evenings. Fish are most active in these periods due to colder temperatures. Guides often recommend targeting deeper waters during extreme cold snaps‚ as fish seek refuge in warmer‚ oxygen-rich areas. Midwinter‚ when ice is thickest‚ offers stable conditions for mobility and access to key fishing spots‚ enhancing the likelihood of a successful and memorable ice fishing experience.

How Weather Patterns Affect Fish Activity

Weather significantly influences fish behavior on Devils Lake. Cold fronts often increase activity‚ while warm fronts can slow it down. Wind and snow reduce visibility‚ altering fish movement. Guides adapt strategies to these conditions‚ ensuring optimal fishing. Variable weather demands expertise to locate active schools‚ making experienced guides invaluable for a successful ice fishing experience on Devils Lake.

Lodging and Packages

Devils Lake offers comprehensive lodging packages‚ including stays at the Fish Rehab Lodge‚ ensuring a seamless ice fishing experience with guided SnoBear trips and expert angling adventures.

Accommodation Options for Ice Fishing Trips

Devils Lake offers a variety of lodging options tailored for ice anglers‚ from cozy hotels to rustic lodges. Fireside Inn & Suites and McQuoid Outdoors provide comfortable stays‚ while Brys Guide Service includes lodging at the Fish Rehab Lodge as part of their all-inclusive packages. These accommodations ensure a seamless experience‚ with convenient access to fishing spots and essential amenities‚ making your ice fishing adventure both enjoyable and stress-free.

All-Inclusive Packages for a Seamless Experience

Devils Lake guide services offer all-inclusive packages for a hassle-free adventure. Brys Guide Service provides lodging at the Fish Rehab Lodge‚ guided SnoBear trips‚ and essential gear like rods and bait. McQuoid Outdoors features walleye fishing retreats‚ while Fireside Inn & Suites offers year-round packages. These comprehensive options ensure a seamless experience‚ allowing anglers to focus on fishing while enjoying comfortable accommodations and expert guidance tailored to their needs.

What to Bring on Your Guided Ice Fishing Trip

Bring a valid ND fishing license‚ warm clothing‚ food‚ beverages‚ and a positive attitude. Guides provide gear‚ so focus on personal comfort and essentials for the day.

Personal Items to Ensure a Comfortable Experience

Bring warm‚ layered clothing‚ insulated boots‚ gloves‚ hats‚ and sunglasses for cold weather. Pack hand and toe warmers‚ a thermos for hot drinks‚ and a small first-aid kit. Include any personal medications and a camera to capture memories. While guides provide gear‚ a cooler for your catch and snacks are helpful. Ensure you have a valid ND fishing license and a positive attitude for an enjoyable day on the ice.

Food and Beverages: What to Pack

Bring a thermos of hot coffee or tea‚ water‚ and non-perishable snacks like energy bars‚ nuts‚ or jerky. For full-day trips‚ pack a lunch with sandwiches‚ fruits‚ and trail mix. Avoid perishable items that may spoil in cold temperatures. Don’t forget utensils‚ plates‚ and napkins if needed. Bring a cooler with ice packs for storing drinks and snacks. Ensure you have enough food and beverages to keep you energized throughout your ice fishing adventure.

Sharing the Experience

Fishing with Family and Friends

Ice fishing on Devils Lake is a perfect opportunity to bond with family and friends. Share the thrill of reeling in trophy catches and create lasting memories together.

Devils Lake offers an ideal setting for shared adventures with loved ones. Guided trips cater to all skill levels‚ ensuring a fun and educational experience for families. Experienced guides provide essential gear and expertise‚ allowing everyone to focus on creating memories. The social aspect of ice fishing fosters bonding‚ while the thrill of catching trophy fish together becomes a cherished experience. Many guide services also offer lodging packages‚ making it easy to plan a memorable family trip.

Capturing Memories: Photography and Social Media

Capturing memories on Devils Lake is effortless‚ with guides often assisting in photography to document your catch. Share your trophy walleye or perch on social media‚ creating lasting impressions. The scenic winter backdrop and thrilling moments make for compelling content. Many anglers showcase their adventures online‚ inspiring others to explore Devils Lake. Guides encourage storytelling‚ helping you relive the experience and attract more enthusiasts to this iconic fishing destination.

Conservation Efforts and Sustainability

Guides play a vital role in preserving Devils Lake’s ecosystem by promoting sustainable fishing practices and educating clients on responsible angling to protect fish populations for future generations.

Guides’ Role in Preserving Devils Lake’s Ecosystem

Guides actively contribute to Devils Lake’s conservation by promoting sustainable fishing practices‚ adhering to strict regulations‚ and educating clients on responsible angling. They support local efforts to maintain the lake’s thriving fish populations and ecosystem balance. By encouraging catch-and-release practices and proper handling techniques‚ guides help protect the lake’s biodiversity. Their expertise ensures that fishing remains a viable and environmentally friendly activity for future generations to enjoy.

Practices to Ensure Sustainable Fishing

Guides emphasize sustainable fishing practices‚ such as catch-and-release techniques and proper fish handling‚ to preserve Devils Lake’s ecosystem. They adhere to local regulations‚ including bag limits and size restrictions‚ to maintain healthy fish populations. By minimizing environmental impact and promoting responsible angling‚ guides help protect the lake’s biodiversity. These practices ensure that Devils Lake remains a thriving fishery for future generations while maintaining its reputation as a world-class fishing destination.

Booking Your Ice Fishing Guide

Experienced guides with over 25 years of expertise offer tailored trips‚ ensuring unforgettable adventures. Book early to secure your spot and enjoy a seamless‚ well-organized experience.

How to Choose the Best Guide for Your Needs

When selecting a guide‚ prioritize experience and local knowledge. Look for guides with decades of expertise on Devils Lake‚ ensuring they understand fish behavior and optimal spots. Check reviews and testimonials to gauge reliability and success rates. Ensure the service offers necessary equipment‚ like the SnoBear‚ for comfort and mobility. Choose guides who tailor trips to your skill level and preferences‚ whether targeting walleye‚ perch‚ or northern pike. A reputable guide enhances your adventure and increases chances of a memorable catch.

Booking in Advance: Why It’s Important

Booking your Devils Lake ice fishing guide well in advance is crucial due to high demand and limited availability. Popular guides and services often fill their schedules months ahead‚ especially during peak winter seasons. Early booking ensures you secure a spot with an experienced guide‚ access to premium equipment like the SnoBear‚ and optimal fishing locations. It also allows time for proper planning and preparation‚ ensuring a seamless and enjoyable ice fishing adventure on Devils Lake.

Devils Lake stands as a renowned ice fishing destination‚ offering unforgettable experiences with expert guides. Plan your adventure to make lasting memories on North Dakota’s fishing gem.

Final Thoughts on Planning Your Devils Lake Ice Fishing Adventure

Devils Lake offers an unparalleled ice fishing experience‚ with abundant species and expert guides. Plan meticulously‚ book reputable services‚ and prepare for unforgettable moments. Experienced guides ensure safety and success‚ while the lake’s vastness promises endless opportunities. Whether targeting walleye‚ perch‚ or pike‚ Devils Lake delivers memories. Pack essentials‚ embrace the adventure‚ and let the professionals handle the rest. A well-planned trip here guarantees an icy escapade like no other‚ making it a must-visit for any serious angler.

the extra’s academy survival guide chapter 1

Chapter 1 introduces Ed Rothstaylor, a third-rate villain expelled and disowned, who must navigate the harsh Academy environment to survive. The Academy serves as a central hub of survival, imposing strict rules, social hierarchies, and academic pressures. Ed’s journey begins with despair but evolves into determination as he adapts to the unforgiving world, showcasing resilience and resourcefulness. This chapter sets the stage for his growth and the challenges ahead, highlighting themes of survival, adaptation, and the importance of earning a scholarship to secure his future.

1.1 Overview of the Chapter

Chapter 1 of The Extras Academy Survival Guide introduces readers to a gripping narrative centered around Ed Rothstaylor, a third-rate villain from a game world. Expelled and disowned, Ed awakens in a harsh reality where survival is paramount. The chapter sets the stage for his journey, detailing his struggles to adapt to the Academy’s unforgiving environment. Key themes of survival, adaptation, and resilience are introduced, showcasing Ed’s transformation from despair to determination. The Academy is portrayed as a central hub of conflict, where earning a scholarship becomes Ed’s primary goal to secure his future. This chapter lays the foundation for the series, blending action with emotional depth.

1.2 Setting the Stage for Ed Rothstaylor’s Journey

Ed Rothstaylor, a third-rate villain from a game world, is expelled and disowned, setting the stage for his survival journey. Awakening in a harsh reality, he faces the unforgiving environment of the Academy, where strict rules and social hierarchies dominate. The dense woods serve as a backdrop for his initial struggles, where finding food, medicine, and managing radiation become critical challenges. The Academy’s central role as a hub of survival emphasizes the importance of earning a scholarship, which becomes Ed’s primary goal. This setup establishes the foundation for his journey, blending personal growth with the harsh realities of his new world.

Ed Rothstaylor, a third-rate villain, is expelled and disowned, reincarnating into a harsh reality. His journey demands resilience as he navigates survival, academic pressures, and social hierarchies.

2.1 Background and Role as a Third-Rate Villain

Ed Rothstaylor, a third-rate villain, is expelled and disowned, reincarnating into a harsh reality. His journey demands resilience as he navigates survival, academic pressures, and social hierarchies.

2.2 His Expulsion and Disownment

Ed Rothstaylor, a third-rate villain, faces expulsion and disownment, thrusting him into a harsh reality. His journey begins with expulsion from his dormitory, leaving him isolated and without support. Disownment by his family further intensifies his struggle, forcing him to rely on his wits and resourcefulness to survive. This expulsion and disownment set the stage for his determination to adapt and thrive in the unforgiving environment of the Academy, where earning a scholarship becomes his only hope for a secure future and avoiding further turmoil.

The Academy Setting

The Academy serves as a strict institution and central hub of survival, imposing challenges and social hierarchies that test characters’ resilience and adaptability in a hostile environment.

3.1 The Academy as a Central Hub of Survival

The Academy serves as the central hub of survival, imposing strict rules and challenges that test Ed’s resilience. Its dense woods and grounds are key backdrops for his struggle, emphasizing the need to find food, medicine, and endure radiation and pain. The Academy’s role extends beyond a physical setting, acting as a catalyst for character growth and social dynamics. Its harsh environment demands resourcefulness and quick thinking, making it a pivotal location for Ed’s journey. The Academy’s strict structure enforces survival challenges, highlighting the importance of earning a scholarship and adapting to its unforgiving world.

3.2 Transition from the Game World to Reality

The transition from the game world to reality is stark and unforgiving for Ed Rothstaylor. Once a third-rate villain in a virtual setting, he awakens to a harsh reality where survival is paramount. The Academy, a strict institution, forces him to adapt to a world where radiation, hunger, and pain are constant threats. The shift from a controlled game environment to the brutal realities of the Academy demands immediate resourcefulness and resilience. This transition underscores the challenges of navigating a world where survival depends on earning a scholarship and thriving in a hostile, competitive setting.

Key Challenges in Chapter 1

Ed faces survival in harsh woods, academic pressures, social hierarchies, and the crucial need to earn a scholarship, all essential for his survival and future success.

4.1 Survival in the Harsh Woods

Ed faces the daunting challenge of surviving in the harsh woods, where finding food and medicine is essential. The dense, unforgiving environment forces him to adapt quickly, battling radiation and pain. The woods test his resourcefulness, pushing him to endure physical and mental strains. With limited resources, Ed must strategize to secure sustenance and medical aid, ensuring his survival. The harsh terrain and lingering radiation threats demand quick thinking and effective strategies, making the woods a critical proving ground for his resilience and ability to thrive in adversity.

4.2 Academic Pressures and Competition

Beyond the woods, Ed faces intense academic pressures and competition within the Academy. As an outcast, he must navigate a rigid academic environment where excellence is demanded. The scholarship system intensifies the competition, pushing Ed to excel academically while managing social dynamics. The pressure to perform is relentless, with failure risking expulsion and a bleak future. Ed’s ability to adapt and thrive academically becomes crucial, as the Academy’s competitive atmosphere tests his resolve and intellect, adding another layer of challenge to his survival journey.

4.3 Navigating Social Hierarchies

Ed faces a rigid social hierarchy within the Academy, where his status as a disowned third-rate villain isolates him. The strict social structure exacerbates his struggles, as cliques and rivalries dominate interactions. Ed’s outcast position makes it difficult to form alliances, further complicating his survival. Navigating this unforgiving social landscape requires adaptability and strategic maneuvering. The hierarchy not only shapes opportunities but also amplifies the pressure to conform, making it harder for Ed to secure his place. His ability to navigate these dynamics becomes crucial in earning a scholarship and avoiding further exclusion, highlighting the challenges of fitting into a system designed to marginalize outsiders.

4.4 The Importance of Earning a Scholarship

Earning a scholarship is paramount for Ed’s survival, as it ensures his place in the Academy and access to vital resources. Without it, he risks expulsion and a bleak future. The scholarship system demands academic excellence and social maneuvering, pushing Ed to adapt swiftly. Failure to secure it means losing everything, making it his top priority. The pursuit of a scholarship drives his actions, highlighting the high stakes and the Academy’s competitive environment. This necessity underscores the harsh realities of the system, where only the most resourceful and determined can thrive.

Ed’s Journey and Development

Ed evolves from despair to determination, showcasing resilience and adaptability. His journey highlights personal growth, as he navigates challenges, transforming into a determined survivor in a harsh world.

5.1 From Despair to Determination

Ed Rothstaylor’s journey begins in despair, expelled and disowned, awakening to a harsh reality. Initially overwhelmed, he faces survival challenges like hunger, radiation, and pain. However, his determination emerges as he adapts to the unforgiving environment. The necessity to earn a scholarship drives his resolve, pushing him to navigate the academy’s strict rules and social hierarchies. Ed’s transformation from hopelessness to resilience highlights his growth, showcasing how adversity fuels his determination to survive and thrive in a world where giving up is not an option.

5.2 Adaptation and Resourcefulness

Ed’s survival hinges on his ability to adapt and be resourceful in the harsh environment. Navigating the dense woods, he must locate food and medicine while managing radiation exposure and pain. Strategic planning becomes essential, as he learns to prioritize needs and utilize available resources effectively. The Super-Duper Mart emerges as a key location for gathering supplies, showcasing Ed’s growing resourcefulness. His ability to adapt to the academy’s challenges reflects his determination to survive, highlighting how quick thinking and strategic decisions are vital in this unforgiving world.

5.3 The Role of Resilience in His Survival

Resilience becomes Ed’s cornerstone as he faces the academy’s relentless challenges. Despite expulsion and disownment, he perseveres, adapting to the harsh environment and societal pressures. His ability to endure physical pain and radiation, while securing food and medicine, underscores his unyielding spirit. Resilience transforms his despair into determination, enabling him to navigate the academy’s strict rules and social hierarchies. Through setbacks and struggles, Ed’s resilience grows, becoming a vital tool for survival and personal growth in this unforgiving world.

Themes Explored in Chapter 1

Chapter 1 delves into themes of survival, adaptation, and social hierarchy, highlighting Ed’s struggle to navigate a hostile environment and the academy’s rigid structure, emphasizing resilience and exclusion.

6.1 Survival and Adaptation

Chapter 1 emphasizes survival and adaptation as Ed navigates the harsh woods and the academy’s strict environment. Finding food, medicine, and managing radiation become critical tasks, testing his resourcefulness. The unforgiving setting forces Ed to adapt quickly, showcasing his resilience. Survival is not just physical but also mental, as he copes with pain and uncertainty. Adaptation becomes his key tool, driving his determination to thrive in a world where every decision impacts his survival. This theme underscores the necessity of perseverance and clever strategies to endure the academy’s challenges and hostile surroundings.

6.2 Social Hierarchy and Exclusion

Chapter 1 explores the rigid social hierarchy within the academy, where Ed, as a disowned third-rate villain, faces exclusion and isolation. His status as an outcast highlights the struggles of navigating a system where social standing dictates opportunities. The academy’s environment reinforces these hierarchies, making it difficult for Ed to fit in and secure his place. This theme reflects the broader challenges of exclusion, where individuals like Ed must adapt to survive in a world where social status often determines outcomes. The chapter underscores the emotional and psychological toll of such systems, emphasizing Ed’s resilience in the face of societal rejection.

Artwork and Visual Style

Chapter 1 features dynamic visuals and narrative pacing, with the illustrator’s work evolving significantly. The artwork enhances the story’s immersive experience and character development, adding depth to the narrative.

7.1 Dynamic Visuals and Narrative Pacing

Chapter 1 showcases dynamic visuals that seamlessly align with the narrative pacing, creating an immersive experience. The artwork complements the story’s tone, with detailed illustrations enhancing key moments. The illustrator’s evolving style refines character designs and scene transitions, adding depth to the plot. Visual elements like shading and panel layouts emphasize tension and emotion, drawing readers deeper into Ed’s journey. The dynamic visuals and well-timed narrative pacing ensure a captivating start to the series, setting a strong foundation for future chapters.

7.2 Evolution of the Illustrator’s Work

The illustrator’s work in Chapter 1 shows a noticeable evolution, particularly after the change in artists. Initial chapters were rushed, but the new illustrator brought significant improvements, refining character designs and enhancing visual storytelling. The artwork became more detailed and expressive, aligning better with the narrative’s tone and pacing. This shift elevated the overall quality of the chapter, providing a more immersive experience for readers. The evolution in the illustrator’s style is evident, contributing to the story’s engagement and setting a promising foundation for future chapters.

Storytelling and Pacing

Chapter 1 features well-paced storytelling, avoiding rushed sequences. The plot introduces Ed’s transformation and challenges methodically, allowing readers to connect with his struggles. The narrative balances action with character development, ensuring a smooth flow that captivates audiences and sets a solid foundation for future chapters. This deliberate pacing enhances the story’s tension and engagement effectively.

8.1 Well-Paced Narrative and Character Development

Chapter 1 of The Extras Academy Survival Guide excels in its well-paced narrative, introducing Ed Rothstaylor’s transformation from despair to determination seamlessly. The story unfolds methodically, allowing readers to deeply connect with Ed’s struggles and growth. The plot balances action with emotional depth, creating a captivating experience. Character development is robust, with Ed’s relatable journey highlighting his resilience and adaptability. The pacing ensures a smooth flow, setting a strong foundation for future chapters. This deliberate storytelling approach enhances tension and engagement, making the chapter a compelling start to the series.

8.2 Balancing Action and Emotional Depth

Chapter 1 masterfully balances action and emotional depth, immersing readers in Ed Rothstaylor’s journey. The narrative seamlessly intertwines his physical struggles, such as surviving the harsh woods and managing radiation, with his emotional turmoil. Ed’s determination to adapt and thrive is contrasted with moments of vulnerability, creating a rich, layered story. The chapter’s pacing ensures that action sequences, like navigating treacherous terrain, are complemented by introspective moments, highlighting Ed’s fear of failure and his resolve to succeed. This balance captivates readers, making the story both thrilling and emotionally resonant, while setting a strong tone for the series.

Fan Reception and Reviews

Fans praise the strong introduction of Ed Rothstaylor and the engaging plot. Some critics note pacing issues and initial artwork inconsistencies, but improvements in later chapters enhanced the overall experience.

Readers commend the strong introduction of Ed Rothstaylor, highlighting his relatable struggles and growth. Fans appreciate the depth in his character development, making him a compelling protagonist. The well-crafted backstory and realistic motivations have resonated with many, enhancing the story’s appeal and emotional engagement from the start.

The introduction effectively sets a solid foundation for the series, showcasing Ed’s transformation from despair to determination. His journey’s authenticity and the narrative’s immersive quality have captivated audiences, leaving a lasting impression and setting high expectations for future chapters.

9.2 Criticisms and Areas for Improvement

Some critics note that Chapter 1 feels rushed, particularly in pacing and character development. The initial illustrator’s work was deemed inconsistent, affecting the storytelling flow. However, the switch to a new illustrator improved the visual narrative, enhancing character growth and plot progression in subsequent chapters. Despite these criticisms, the chapter lays a solid foundation, addressing earlier concerns effectively and significantly enhancing the overall reader experience.

These improvements highlight the potential for further refinement in pacing and visual consistency, ensuring a more immersive experience for readers as the series progresses.

Availability and Platforms

The Extras Academy Survival Guide Chapter 1 is available on platforms like MangaMirror, Asura Scans, MangaDex, WEBTOON, and ManhwaUS, offering high-quality visuals and easy digital access for readers.

10.1 Popular Platforms for Reading Chapter 1

Chapter 1 of The Extras Academy Survival Guide is accessible on various platforms, including MangaMirror, Asura Scans, MangaDex, WEBTOON, and ManhwaUS. These sites offer high-quality visuals, fast loading speeds, and user-friendly interfaces. MangaMirror is known for its HD image quality, while Asura Scans provides regular updates. MangaDex and WEBTOON are popular for their engaging reader experiences. ManhwaUS ensures accessibility with free chapters and crisp visuals. These platforms cater to a wide audience, making the chapter easily accessible to fans worldwide.

10.2 Digital Formats and Accessibility

Chapter 1 of The Extras Academy Survival Guide is available in various digital formats, including PDF and online reads, ensuring accessibility for a wide audience. Platforms like ManhwaUS and Mangagojo offer free access, while WEBTOON provides weekly updates. Readers can also download chapters as eBooks for offline reading, making the content accessible anytime, anywhere. This flexibility in digital formats allows fans to enjoy the chapter seamlessly, catering to different preferences and ensuring convenience for readers worldwide;

Educational and Inspirational Value

The guide enhances language learning and teaching in academic settings, offering motivational messages and cultural relevance. It encourages resilience and adaptability, making it a valuable educational resource for personal growth.

11.1 Motivational Messages for Students

Chapter 1 delivers powerful motivational messages, emphasizing perseverance and adaptability. Ed’s journey from despair to determination inspires students to embrace challenges and persist through adversity. His relatable struggles in the harsh Academy environment highlight the importance of resilience and resourcefulness. The guide encourages students to stay focused on their goals, fostering a mindset of determination and personal growth. By showcasing Ed’s transformation, the chapter provides a compelling narrative that motivates readers to navigate their own challenges with courage and adaptability, making it a valuable tool for personal and academic inspiration.

11.2 Language Learning and Teaching Resources

The Extras Academy Survival Guide Chapter 1 serves as a valuable resource for language learning and teaching. Its narrative structure and grammatical clarity make it an effective tool for improving English skills in academic settings. Teachers can use the guide to enhance lesson planning, while students benefit from its clear explanations of grammar rules. The chapter’s cultural relevance and relatable themes provide a engaging context for language acquisition. Additionally, the guide’s use of motivational messages and character development makes it a versatile resource for fostering both language proficiency and personal growth in students.

cuisinart pressure cooker instruction manual

Welcome to the Cuisinart Pressure Cooker Manual. Discover faster, healthier cooking with nutrient retention. Explore safety guidelines, warranty info, and expert tips to master your cooker’s features.

Overview of the Cuisinart Pressure Cooker

The Cuisinart Pressure Cooker is a versatile kitchen appliance designed for faster and healthier cooking. Available in models like the CPC-600 and EPC-1200PC, it combines pressure cooking, slow cooking, and other modes. With a user-friendly interface and durable construction, it seals in steam to retain nutrients and flavors. The cooker features multiple preset settings, a digital display, and safety mechanisms to ensure safe operation. Its compact design and easy-to-clean parts make it a practical addition to any kitchen. Whether you’re a novice or an experienced cook, this appliance offers a wide range of cooking options to enhance your culinary experience.

Importance of Reading the Manual

Reading the Cuisinart Pressure Cooker manual is essential for safe and effective use. It provides critical safety precautions, operating instructions, and troubleshooting tips. Understanding the cooker’s features, such as pressure settings and cooking modes, ensures optimal performance. The manual also details warranty information and maintenance tips to prolong the appliance’s lifespan. By following the guidelines, users can avoid potential hazards and make the most of their cooking experience. Familiarizing yourself with the manual helps you master the cooker’s capabilities and enjoy delicious, healthy meals with ease.

Safety Guidelines and Precautions

Always follow safety guidelines to prevent accidents. Read the manual carefully, ensure proper lid alignment, and avoid overfilling. Regularly inspect gaskets and valves for optimal performance and safety.

General Safety Tips

Always read the manual before first use to understand safety features and proper operation. Ensure the lid is aligned correctly to avoid leaks. Never overfill the cooker, as this can lead to dangerous pressure buildup. Keep children away while cooking and avoid leaving the appliance unattended. Regularly inspect the gasket, valve, and other parts for wear. Never attempt to open the cooker until pressure is fully released. Follow these guidelines to ensure safe and efficient cooking with your Cuisinart Pressure Cooker.

Understanding Pressure Cooker Safety Features

Your Cuisinart Pressure Cooker is equipped with multiple safety features to ensure safe operation. The locking lid prevents accidental opening under pressure, while the pressure valve regulates steam release. An automatic shut-off function prevents overheating, and a safety lock ensures the lid stays closed until pressure is released. Regularly inspect the gasket and valve for proper function. These features work together to minimize risks and provide a secure cooking environment. Always follow the manual’s guidelines to maximize safety and enjoy hassle-free cooking with your Cuisinart Pressure Cooker.

Product Overview and Models

Cuisinart offers a range of pressure cooker models, including the CPC-600 Series, EPC-1200PC, and other variations. Each model features unique capabilities and capacities to suit diverse cooking needs.

Cuisinart CPC-600 Series

The Cuisinart CPC-600 Series is a popular line of electric pressure cookers designed for versatility and efficiency. These models offer multiple cooking modes, including pressure cooking, slow cooking, and sautéing. With a large digital display and intuitive controls, users can easily navigate settings and customize cooking times. The CPC-600 Series is known for its durable construction and safety features, such as automatic pressure release and a locking lid. It also includes accessories like a steam rack and recipe book. Perfect for home cooks, this series combines advanced technology with user-friendly design to deliver delicious meals quickly and effortlessly.

Cuisinart EPC-1200PC Model

The Cuisinart EPC-1200PC is a high-performance electronic pressure cooker designed for versatility and ease of use. This model features a digital interface with preset buttons for common tasks like pressure cooking, slow cooking, and sautéing. It includes a 6-quart capacity, ideal for preparing meals for families or large gatherings. The EPC-1200PC also boasts advanced safety features, such as automatic pressure release and a secure locking lid. With its durable stainless steel construction and user-friendly design, this cooker offers precise temperature control and even cooking results. The included instruction manual provides detailed guidance for optimal performance and recipe inspiration.

Other Models and Variations

Beyond the CPC-600 and EPC-1200PC, Cuisinart offers a range of pressure cooker models to suit different needs. The CPC-800 Series, for instance, features an 8-quart capacity and advanced preset buttons for versatile cooking. The CPC-22-8 Professional Collection boasts a stainless steel design and 6-quart size, ideal for precise temperature control. Additionally, models like the CPC-610XA include unique features such as a browning function and a comprehensive instruction booklet. Each model is tailored to enhance cooking efficiency, with detailed manuals providing specific guidance for optimal performance and recipe ideas to explore the full potential of your Cuisinart pressure cooker.

Assembly and Initial Setup

Unpack and inspect your Cuisinart pressure cooker for damage. Install accessories like gaskets and handles, ensuring proper alignment. Refer to your model-specific manual for detailed assembly steps.

Unpacking and Inspecting the Cooker

When unpacking your Cuisinart pressure cooker, carefully remove all components from the box. Inspect the cooker, lid, gasket, and accessories for any visible damage or defects. Ensure all parts, such as the sealing ring, steam rack, and power cord, are included. For models like the CPC-600 and EPC-1200PC, verify that the cooker is complete with its respective accessories. If any items are missing or damaged, contact Cuisinart customer service immediately. Refer to your manual for a detailed list of included parts. Proper inspection ensures safe and optimal performance, so take your time to check every component thoroughly before first use.

Installing Accessories and Parts

After unpacking, install the accessories according to the manual. Ensure the gasket is properly seated in the lid to maintain a tight seal. Place the steam rack inside the cooker for even cooking. For models like the CPC-600 and EPC-1200PC, attach the power cord securely. Align the lid correctly to ensure smooth operation. If your model includes additional parts, such as a condensation cup, install it as directed. Double-check that all components are securely fitted before use. Proper installation ensures safety and optimal performance. Refer to your specific model’s manual for detailed instructions on accessory installation.

Operating Instructions

Familiarize yourself with the control panel and settings. Choose between pressure cooking, slow cooking, or sauté modes. Set timers and pressures according to recipes. Always follow safety guidelines and manufacturer instructions for optimal results.

Basic Cooking Modes and Settings

The Cuisinart Pressure Cooker offers multiple cooking modes to suit various recipes. Use the pressure cooking mode for quick results, slow cooking for tender dishes, or sauté for browning ingredients. The steam mode is ideal for vegetables and seafood, while the keep-warm function maintains food temperature. Adjust settings like cooking time, pressure level, and temperature using the intuitive control panel. Refer to the manual for specific guidelines on each mode to ensure optimal performance. Always follow safety precautions and recommended settings to achieve perfect results. Experiment with these modes to explore a wide range of culinary possibilities effortlessly.

Advanced Features and Custom Settings

The Cuisinart Pressure Cooker offers advanced features for personalized cooking. Use the delay start timer to schedule meals in advance. Adjust pressure levels and cooking times for specific recipes; Custom settings allow you to fine-tune parameters for optimal results. The keep-warm function ensures dishes stay hot until serving. Explore preset programs for common tasks like browning, steaming, or sautéing. For added convenience, some models include a digital display for easy navigation. Refer to the manual for troubleshooting tips and to unlock the full potential of your cooker. These features empower you to create a variety of delicious meals with precision and ease.

Cooking Techniques and Recipes

Master essential pressure cooking techniques and explore a variety of recipes. From hearty stews to tender meats, achieve perfect results with tailored settings and expert tips.

Pressure Cooking Essentials

Master the fundamentals of pressure cooking with your Cuisinart cooker. Ensure proper liquid ratios, as a minimum of 1 cup is required for optimal performance. Always seal the lid correctly to build pressure efficiently. Cooking times vary by food type, so consult guidelines for precise durations. Use the quick-release or natural-release methods based on recipes. Never open the lid until pressure is fully released. These essentials ensure safe, flavorful, and nutritious meals. Experiment with diverse ingredients and settings to unlock your cooker’s full potential for hearty stews, tender meats, and vibrant vegetables.

Slow Cooking and Other Modes

Explore beyond pressure cooking with Cuisinart’s versatile slow cooking mode, perfect for tender stews and roasts. Achieve rich flavors by simmering ingredients over low heat for hours. The cooker also offers sauté and steam functions, allowing you to brown meats and cook vegetables to perfection. Use the delay start feature to plan meals in advance. Transition seamlessly between modes for a variety of dishes, from hearty soups to delicate grains. These multi-functional settings make your Cuisinart cooker an indispensable kitchen companion for diverse culinary needs, ensuring every meal is cooked to perfection with minimal effort and maximum flavor.

Maintenance and Care

Regularly clean and inspect your Cuisinart Pressure Cooker to maintain performance. Check for wear on seals and ensure all parts are secure. Proper care extends longevity and efficiency.

Cleaning the Pressure Cooker

Regular cleaning is essential for maintaining your Cuisinart Pressure Cooker’s performance. After each use, wash the inner pot, lid, and gasket with mild soap and warm water. Avoid abrasive cleaners or scouring pads, as they may damage the finish. The gasket and valve should be checked for food residue and cleaned thoroughly to ensure proper sealing. For tougher stains, soak parts in warm soapy water before scrubbing. Some components, like the inner pot, are dishwasher-safe, but hand washing is recommended for delicate parts. Always dry the cooker thoroughly after cleaning to prevent moisture buildup. Replace worn-out gaskets to maintain optimal performance. Refer to the manual for specific cleaning instructions for your model.

Storing the Appliance

Proper storage of your Cuisinart Pressure Cooker ensures longevity and safety. After cleaning, store the cooker in a dry, cool place away from direct sunlight. Detach the gasket and lid to prevent moisture buildup and mold. Wrap the power cord neatly around the cooker or store it separately to avoid tangling. Ensure all parts are completely dry before storing to prevent rust or odors. Avoid stacking heavy objects on the cooker to maintain its structural integrity. For extended storage, consider placing the cooker in its original packaging or a protective cover. Always refer to the manual for model-specific storage recommendations.

Troubleshooting Common Issues

Address common issues like error codes, leaks, or improper sealing. Refer to the manual for solutions or contact Cuisinart customer service for further assistance and support.

Error Codes and Solutions

Identify and resolve common issues using error codes provided in the manual. Codes like E1, E2, or E3 indicate specific problems, such as lid malfunctions or temperature issues. Refer to the troubleshooting section for step-by-step solutions. If issues persist, contact Cuisinart customer service for professional assistance. Regular maintenance, such as cleaning the valve and gasket, can prevent many errors. Always follow the manual’s guidance to ensure optimal performance and safety. Troubleshooting tips and error code explanations are detailed in the manual to help you address problems efficiently and maintain your cooker’s functionality.

Addressing Leaks and Other Problems

Identify and fix leaks by inspecting the gasket and lid alignment. A damaged or worn-out gasket may cause leaks; replace it if necessary. Ensure the lid is properly sealed and aligned. For other issues, refer to the troubleshooting guide in the manual. Common problems include clogged steam valves or faulty pressure regulators. Clean the valve regularly and check for blockages. If error codes appear, consult the error code section for solutions. Always follow the manual’s instructions for addressing specific issues. If problems persist, contact Cuisinart customer service for professional assistance. Regular maintenance can prevent many common issues and ensure optimal performance.

Warranty Information

The Cuisinart warranty covers defects within the specified period, offering repairs or replacements. Contact 1-800-726-0190 for assistance, ensuring your cooker remains in optimal condition.

Understanding the Warranty Period

Your Cuisinart Pressure Cooker is backed by a warranty that covers defects in materials and workmanship. The warranty period varies by model but typically covers one year from purchase. During this time, defective products may be repaired or replaced at Cuisinart’s discretion. To claim warranty service, contact their toll-free number 1-800-726-0190 or visit their official website for detailed instructions. Ensure you retain your proof of purchase, as it may be required for warranty validation. This coverage ensures your cooker remains in optimal condition, providing you with lasting performance and peace of mind.

Contacting Customer Service

For assistance with your Cuisinart Pressure Cooker, contact their customer service team. Call the toll-free number 1-800-726-0190 to speak with a representative. You can also visit their official website for support options, including email contact forms and live chat. Ensure you have your model number and proof of purchase ready for efficient service. Additionally, Cuisinart’s website offers a comprehensive resource section with manuals, troubleshooting guides, and FAQs to address common inquiries. Their dedicated team is available to help resolve issues, provide repair information, or guide you through warranty claims, ensuring your cooking experience remains seamless and enjoyable.

Accessing Additional Resources

Access PDF manuals, troubleshooting guides, and recipes online. Visit Cuisinart’s official website or authorized retailers for comprehensive support. Join online communities for tips and user experiences.

Downloading PDF Manuals

Download Cuisinart Pressure Cooker manuals in PDF format from official sources. Visit Cuisinart’s website or authorized retailers like Williams-Sonoma for free access. Models like CPC-600 and EPC-1200PC are available, often with recipe booklets. Ensure authenticity by using trusted links. These manuals provide detailed instructions, safety tips, and troubleshooting guides. Accessing digital copies allows easy reference and printing. For specific models, check the manufacturer’s database or platforms like ManualsLib. Downloading ensures you have all the information needed to operate and maintain your cooker effectively. Always verify the source to avoid unauthorized or outdated versions.

Online Support and Communities

Access online support and join vibrant communities for Cuisinart Pressure Cooker users. Websites like ManualsLib and KitchenKapers offer free PDF manuals and troubleshooting guides. Engage with forums and social media groups where users share recipes and tips. Cuisinart’s official website provides customer service contact info, including their toll-free number (1-800-726-0190), for direct assistance. These resources help you maximize your cooker’s potential and resolve issues quickly. Online communities foster collaboration, offering personalized advice and creative ideas to enhance your cooking experience with Cuisinart products.

book-by-book bible breakdowns pdf

Bible Breakdowns PDFs are downloadable resources offering concise summaries and outlines of each book in the Bible‚ highlighting key themes‚ characters‚ and events for easier understanding and study․

What Are Bible Breakdowns PDFs?

Bible Breakdowns PDFs are organized resources designed to simplify Bible study by breaking down each book into summaries‚ outlines‚ and key points․ These PDFs highlight themes‚ characters‚ and events‚ making the Bible more accessible for personal study or teaching․ They provide concise overviews of each book‚ allowing readers to grasp the main ideas quickly․ Whether for individual reflection or group discussions‚ these resources are portable and easy to use․ They cater to various learning styles‚ offering a structured approach to understanding Scripture․ By focusing on essential lessons and famous verses‚ Bible Breakdowns PDFs serve as practical tools for deeper biblical knowledge and application․

Importance of Bible Breakdowns for Study

Bible Breakdowns PDFs are invaluable for simplifying complex biblical content‚ making it easier to understand and retain․ They provide concise summaries‚ key themes‚ and essential lessons‚ helping readers grasp the main ideas of each book quickly․ These resources are particularly useful for personal study‚ as they offer a clear structure that enhances comprehension and retention․ Additionally‚ they serve as excellent tools for teaching others‚ enabling effective communication of biblical truths․ By highlighting famous verses and central messages‚ Bible Breakdowns PDFs facilitate deeper engagement with Scripture․ Their portability and organized format make them ideal for quick reference‚ ensuring that learners can access key insights whenever needed․ This makes them indispensable for both individual and group study settings‚ fostering a richer understanding of the Bible․

Structure of a Typical Bible Breakdown PDF

A typical Bible Breakdown PDF is organized to provide a clear and concise overview of each book․ It often includes a summary of the book’s content‚ key themes‚ and main events․ The structure typically features outlines that break down the book into sections or chapters‚ highlighting important verses and lessons․ Many Bible Breakdowns also include a table of contents for easy navigation and instructions for printing․ Some resources even offer a single-page breakdown for each book‚ making it convenient for quick reference․ The structured format ensures that users can easily access and understand the essential elements of each biblical book‚ enhancing their study experience․ This organized approach simplifies complex content‚ making it accessible for both personal and group study․

Key Features of Book-by-Book Bible Breakdowns

Bible Breakdowns offer concise summaries‚ outlines‚ and key themes for each book‚ along with famous verses and lessons․ They are organized for easy navigation and study․

Concise Summaries of Each Book

Bible Breakdowns PDFs provide concise summaries for each book‚ simplifying complex texts into digestible content․ These summaries cover key events‚ themes‚ and lessons‚ making study more accessible․ They include details like authors‚ historical contexts‚ and famous verses‚ offering a clear overview of each book․ Perfect for personal study or teaching‚ these summaries enable quick understanding of the Bible’s structure and message․ By breaking down each book‚ they help readers grasp the overall narrative and theological significance․ This feature is especially useful for those seeking a foundational understanding before diving into deeper analysis․ The summaries are organized clearly‚ ensuring easy navigation and reference․ They cater to both newcomers and seasoned students of the Bible‚ enhancing comprehension and retention of biblical knowledge․

Highlighting Key Themes and Messages

Bible Breakdowns PDFs emphasize the core themes and messages of each book‚ providing deeper insights into the biblical narrative․ These resources identify central ideas‚ such as faith‚ redemption‚ and love‚ and explain their significance․ By highlighting key themes‚ they help readers understand the overarching purpose of each book and its contribution to the Bible’s larger story․ Additionally‚ they often include famous verses and lessons‚ making it easier to connect with the material․ This focus on themes and messages enhances personal study and teaching‚ allowing users to grasp the spiritual and theological depth of the text․ The clear presentation of these elements makes the Bible more accessible and meaningful for both individual and group study settings․

Outlines and Organized Content

Bible Breakdowns PDFs are structured with clear outlines and organized content‚ making it easier to navigate and understand each book of the Bible․ These resources break down complex sections into digestible parts‚ providing a logical flow of events‚ characters‚ and teachings․ The outlines often include chapter summaries‚ key events‚ and theological points‚ helping readers follow the narrative seamlessly․ This organized approach allows users to quickly locate specific information‚ enhancing their study experience․ By presenting the content in a structured format‚ Bible Breakdowns PDFs enable deeper engagement and retention of biblical knowledge․ They are particularly useful for those seeking a systematic way to explore the Bible‚ whether for personal study or teaching others․ The clarity and organization make these resources invaluable for meaningful spiritual growth․

Inclusion of Famous Verses and Lessons

Bible Breakdowns PDFs often include famous verses and essential lessons from each book‚ providing context and deeper understanding․ These resources highlight key scriptures that have significant theological or historical importance‚ making them easier to identify and study․ By emphasizing these verses‚ the breakdowns help readers connect with the Bible’s most impactful teachings․ Additionally‚ they summarize important lessons from each book‚ offering practical applications for daily life․ This feature is particularly useful for those seeking to quickly grasp the core messages of the Bible․ The inclusion of famous verses and lessons ensures that users can easily reference and reflect on the most meaningful parts of Scripture‚ enhancing their spiritual growth and study experience․

Benefits of Using Bible Breakdowns PDFs

Bible Breakdowns PDFs simplify study‚ offering concise summaries and key themes for easier understanding․ They enable quick reference‚ enhance retention‚ and facilitate teaching‚ making Bible study more accessible and effective․

Easier Understanding for Personal Study

Bible Breakdowns PDFs provide concise summaries and outlines‚ making complex biblical content more accessible․ They highlight key themes‚ characters‚ and events‚ offering a clear framework for understanding each book․ These resources are perfect for personal study‚ allowing individuals to grasp the purpose and message of each biblical text without overwhelming detail․ By breaking down the Bible into manageable sections‚ they enable deeper engagement and comprehension․ The structured format simplifies the study process‚ making it easier for individuals to focus on essential lessons and themes․ This approach is particularly beneficial for those seeking to enhance their personal spiritual growth and biblical knowledge in a straightforward and organized manner․

Teaching and Sharing with Others

Bible Breakdowns PDFs are invaluable for teaching and sharing biblical knowledge with others․ Their concise summaries and key points make it easier to communicate complex ideas clearly․ These resources are ideal for group studies‚ Sunday school lessons‚ or personal discussions‚ providing a structured approach to explaining each book’s purpose and message․ The inclusion of famous verses and essential lessons helps create engaging and meaningful discussions․ By using these breakdowns‚ teachers and leaders can ensure their audience grasps the core themes and applications of each biblical text․ This makes sharing the Bible’s teachings more effective and accessible‚ fostering a deeper understanding among participants․ They are perfect tools for anyone looking to inspire and educate others about God’s Word․

Quick Reference for Bible Study

Bible Breakdowns PDFs serve as excellent quick reference tools for Bible study‚ providing immediate access to concise summaries‚ outlines‚ and key points․ These resources are designed to help users quickly grasp the main themes‚ events‚ and lessons of each book without extensive research․ Whether for personal study or preparing teachings‚ these breakdowns offer a time-saving solution․ They are particularly useful for understanding complex biblical texts‚ ensuring that essential details are not overlooked․ The organized format allows for easy navigation‚ making it simple to find specific information rapidly․ This feature enhances the efficiency of Bible study‚ enabling deeper understanding and application of God’s Word in daily life․ They are indispensable for anyone seeking a fast yet comprehensive reference guide for biblical studies․

Enhanced Retention of Biblical Knowledge

Bible Breakdowns PDFs significantly enhance the retention of biblical knowledge by providing structured and organized content․ These resources break down complex biblical concepts into concise summaries‚ outlines‚ and key points‚ making it easier to digest and remember․ By highlighting essential themes‚ events‚ and lessons‚ they help users focus on the most critical aspects of each book․ The repetitive exposure to summarized information reinforces memory‚ ensuring that learners retain more of what they study․ Additionally‚ the clear format allows for easy review‚ enabling users to revisit and reinforce their understanding over time․ This structured approach not only aids in immediate comprehension but also supports long-term retention‚ making biblical knowledge more accessible and applicable in daily life․

Where to Find Book-by-Book Bible Breakdowns PDFs

Bible Breakdowns PDFs are available on free download sites‚ offering resources for specific books‚ themes‚ and study styles․ Popular websites provide guides for both Old and New Testaments․

Free Download Sites for Bible Breakdowns

Several websites offer free Bible Breakdowns PDFs‚ providing concise summaries and outlines for each book of the Bible․ Popular sites include Teach Sunday School and Dr․ McGee’s Notes & Outlines‚ which cater to both Old and New Testament studies․ These resources are designed to simplify Bible study‚ highlighting key themes‚ characters‚ and events․ Many sites allow users to download and print the PDFs‚ making them ideal for personal study or group discussions․ With a focus on clarity and organization‚ these free resources are invaluable for deeper biblical understanding and quick reference․ They are easily accessible and user-friendly‚ ensuring that anyone can benefit from structured Bible study materials․

Specific Resources for Individual Books

For those seeking in-depth study of specific Bible books‚ numerous resources offer detailed PDF breakdowns․ Websites provide focused guides for individual books‚ such as Genesis‚ Matthew‚ or Revelation‚ ensuring comprehensive understanding․ These resources often include summaries‚ key themes‚ and notable verses tailored to each book․ For example‚ Teach Sunday School and Dr․ McGee’s Notes & Outlines offer book-specific breakdowns‚ making it easier to explore complex texts․ Users can download these resources for free‚ print them‚ and use them for personal or group study․ This targeted approach allows for a deeper dive into specific biblical narratives and teachings‚ enhancing overall comprehension and application of Scripture․ These resources are invaluable for focused‚ book-by-book Bible study․

Popular Websites Offering Bible Study Guides

Several websites specialize in providing high-quality Bible study guides and book-by-book breakdowns in PDF format․ Websites like FreeBibleWorksheets․com and others offer comprehensive resources‚ including summaries‚ outlines‚ and key themes for each book of the Bible․ These guides are designed to enhance personal study‚ teaching‚ and group discussions․ Many sites allow users to download PDFs for free‚ making it easy to access and print the materials․ Popular resources often include detailed breakdowns of both Old and New Testament books‚ ensuring a deeper understanding of biblical content․ These websites are trusted sources for those seeking organized and concise study materials‚ perfect for enhancing their spiritual journey and biblical knowledge․

How to Use Bible Breakdowns Effectively

Integrate breakdowns into study routines‚ print and organize PDFs‚ and use them for group studies to enhance understanding and retention of biblical content effectively․

Integrating Breakdowns into Study Routines

Integrating Bible Breakdowns PDFs into study routines enhances comprehension and organization․ Start by incorporating summaries and outlines into personal study time‚ using them as a guide alongside Bible reading․ For group studies‚ assign sections of the breakdowns to members‚ fostering collaborative discussions and deeper insights․ Print and organize the PDFs in a binder or digital folder for easy access‚ ensuring a structured approach to learning․ Regularly review key themes and verses highlighted in the breakdowns to reinforce retention․ By seamlessly weaving these resources into daily or weekly study habits‚ individuals and groups can achieve a more systematic and meaningful engagement with Scripture‚ making Bible study both efficient and enriching․ This method encourages consistency and depth in understanding the biblical text․

Printing and Organizing the PDFs

Printing and organizing Bible Breakdowns PDFs is a practical way to enhance study efficiency․ Begin by downloading the PDFs and printing them on high-quality paper for durability․ Use binders or folders to keep the materials organized‚ separating them by Old and New Testament books․ Consider adding tabs or labels for easy navigation between sections․ For digital organization‚ store the PDFs in clearly named folders on your device‚ ensuring quick access during study sessions․ This structured approach allows for seamless reference and review‚ making it easier to follow along during personal or group studies․ Proper organization also helps maintain focus and maximizes the benefits of using these resources for deeper biblical understanding․

Using Breakdowns for Group Studies

Bible Breakdowns PDFs are an excellent tool for group studies‚ offering a structured and engaging way to explore the Bible collectively․ Distribute the PDFs to all participants‚ ensuring everyone has access to the same material․ Use the concise summaries and outlines to guide discussions‚ focusing on key themes and verses․ The organized format helps leaders prepare lessons and ensures the group stays on track․ Highlighting famous verses and lessons encourages participation and deeper reflection․ The clear structure also allows for easy reference during debates or questions․ By using these resources‚ groups can foster a collaborative learning environment‚ making Bible study more accessible and meaningful for everyone involved․ This approach enhances engagement and promotes a shared understanding of biblical teachings․

Bible Breakdowns PDFs are invaluable tools for deeper biblical understanding‚ offering concise‚ organized‚ and accessible resources for personal and group studies‚ enhancing spiritual growth and knowledge retention effectively․

Final Thoughts on the Value of Bible Breakdowns

Bible Breakdowns PDFs are invaluable resources for anyone seeking a deeper understanding of Scripture․ By providing concise summaries‚ outlines‚ and key points‚ they simplify complex biblical themes‚ making study more accessible․ These tools are perfect for personal reflection‚ teaching‚ or group discussions‚ offering a quick reference for essential lessons and famous verses․ Their organized structure enhances retention and makes it easier to connect with the Bible’s message․ Whether for individual growth or sharing insights with others‚ Bible Breakdowns PDFs are a practical and effective way to engage with God’s Word‚ fostering a stronger spiritual connection and a clearer grasp of biblical truths․

Encouragement to Utilize These Resources

Embrace the convenience and depth of Bible Breakdowns PDFs to enrich your spiritual journey․ These resources are designed to make Bible study accessible‚ offering concise summaries and key insights for every book․ Whether you’re seeking personal growth‚ preparing to teach‚ or exploring Scripture with a group‚ these guides provide a clear and organized approach․ Their portability and ease of use make them ideal for quick reference or in-depth study․ By utilizing these resources‚ you can gain a deeper understanding of biblical themes‚ retain knowledge more effectively‚ and share meaningful lessons with others․ Download your free Bible Breakdowns PDFs today and take the first step toward a more fulfilling and informed Bible study experience․

marion d crouse instructional center

The Marion D. Crouse Instructional Center is a public special education facility in Flushing, MI, serving students with severe cognitive and multiple impairments. With a student-teacher ratio of 8:1, it provides tailored instruction in school, home, and community settings, fostering a supportive learning environment for its 141 students.

1.1 Overview of the Center

The Marion D. Crouse Instructional Center is a public special education facility located in Flushing, MI, serving students with severe cognitive and multiple impairments. It operates year-round, providing tailored instruction in school, home, and community settings. With a student-teacher ratio of 8:1, the center ensures personalized attention to its 141 students across grades Prekindergarten-12. The facility focuses on creating a supportive and inclusive learning environment, emphasizing accessibility and adaptability to meet diverse student needs effectively.

1.2 Mission and Vision

The Marion D. Crouse Instructional Center is committed to providing a comprehensive, individualized education for students with severe cognitive and multiple impairments. Its mission emphasizes a team approach, integrating instruction across school, home, and community settings to promote lifelong learning. The center’s vision is to empower students by fostering independence, inclusivity, and personal growth, ensuring they reach their full potential. By tailoring services to meet diverse needs, the center strives to create a supportive and adaptive environment that prioritizes student success and well-being.

History and Background

The Marion D. Crouse Instructional Center, part of the Genesee Intermediate School District, has a long-standing commitment to serving students with severe cognitive and multiple impairments in Flushing, MI.

2.1 Founding and Establishment

The Marion D. Crouse Instructional Center was established to address the unique educational needs of students with severe cognitive and multiple impairments. Located in Flushing, MI, it operates under the Genesee Intermediate School District, providing specialized instruction and support. The center’s founding was driven by the need for tailored programs to ensure students receive personalized learning experiences. With a focus on inclusivity and accessibility, it has become a vital resource for families seeking comprehensive educational services in a supportive environment.

2.2 Evolution Over the Years

Over the years, the Marion D. Crouse Instructional Center has evolved to meet the changing needs of its students. The center has expanded its programs, integrated new technologies, and strengthened community partnerships, ensuring a comprehensive and inclusive education for all. These advancements have significantly enhanced the learning environment, contributing to improved student outcomes and solidifying the center’s reputation as a leader in special education.

Location and Contact Information

The Marion D. Crouse Instructional Center is located at 3330 Luce Road, Flushing, MI 48433. The center can be reached at (810) 591-4507 or TDD (810) 591-4545.

3.1 Address and Map Directions

The Marion D. Crouse Instructional Center is located at 3330 Luce Road, Flushing, MI 48433. Situated in a large suburban setting, the center is easily accessible via major roads. Visitors can use MapQuest or other navigation tools to find the exact location. The facility is part of the Genesee Intermediate School District and serves as a hub for specialized educational services. The address is prominently listed on the district’s website, ensuring convenient access for students, parents, and staff. The center’s location supports its mission to provide accessible education in the community.

3.2 Phone and Email Contacts

The Marion D. Crouse Instructional Center can be reached by phone at (810) 591-4507. A TDD line is also available at (810) 591-4545 for individuals with hearing impairments. While a specific email address for the center is not publicly listed, inquiries can be directed through the Genesee Intermediate School District’s main office. Visitors are encouraged to call ahead or visit the district’s website for additional contact information. The center is located at 3330 Luce Road, Flushing, MI 48433, and is accessible during regular school hours.

Academic Programs and Services

The Marion D. Crouse Instructional Center offers tailored special education programs, focusing on severe cognitive and multiple impairments, with a 8:1 student-teacher ratio and comprehensive curriculum support.

4.1 Special Education Programs

The Marion D. Crouse Instructional Center specializes in serving students with severe cognitive and multiple impairments. Its programs are tailored to meet individual needs, emphasizing lifelong learning through a team-based approach. Instruction is provided in school, home, and community settings, ensuring a comprehensive support system. With a student-teacher ratio of 8:1, the center offers personalized attention to its 141 students. The curriculum focuses on essential skills and developmental goals, fostering independence and academic growth for students in grades Prekindergarten through 12.

4.2 Core Curriculum Offerings

The Marion D. Crouse Instructional Center provides a comprehensive core curriculum tailored to meet the diverse needs of its students. Subjects include mathematics, English, science, foreign languages, history, and industrial arts, adapted to support students with severe cognitive impairments. The curriculum emphasizes functional skills and real-world applications, ensuring students gain practical knowledge. An interdisciplinary approach fosters academic and personal growth, aligning with individualized education plans to promote independence and lifelong learning opportunities.

4.3 Extracurricular Activities

The Marion D. Crouse Instructional Center offers a variety of extracurricular activities to enrich students’ experiences. These include band and choir concerts, field day events, and participation in knowledge bowls. Students also engage in activities like Future Business Leaders of America and scholastic scrimmages. The center encourages community involvement through events such as donkey basketball games and alumni banquets. These activities foster social interaction, teamwork, and personal growth, providing students with opportunities to develop skills beyond the classroom while building connections with peers and the community.

4.4 Assessment and Accountability

The Marion D. Crouse Instructional Center prioritizes accountability through rigorous assessments. Students consistently achieve high proficiency levels, with 57% in math and 72% in reading meeting or exceeding benchmarks. The center’s performance ranks it among the top 10 schools in Michigan. A low student-teacher ratio of 8:1 ensures personalized attention, contributing to strong academic outcomes. Regular evaluations guide instructional strategies, ensuring high standards are maintained. This commitment to accountability underscores the center’s dedication to student success and continuous improvement in education.

Student Demographics

The Marion D. Crouse Instructional Center serves 141 students in grades Prekindergarten-12, with a student-teacher ratio of 8:1. The center supports students with severe cognitive and multiple impairments, fostering an inclusive environment for diverse learning needs.

5.1 Enrollment Numbers

Marion D. Crouse Instructional Center serves a total of 141 students across grades Prekindergarten through 12. The center maintains a student-teacher ratio of 8:1, ensuring personalized attention. It caters to students with severe cognitive and multiple impairments, providing tailored educational programs. The enrollment reflects a diverse group of learners, supported by a dedicated team of educators. This smaller class size allows for focused instruction, aligning with the center’s mission to meet individual student needs effectively.

5.2 Diversity and Inclusion

Marion D. Crouse Instructional Center fosters a culture of diversity and inclusion, serving students with varying needs and backgrounds. The center supports students with severe cognitive and multiple impairments, ensuring equitable access to education. With a minority student enrollment of 42%, the center promotes a welcoming environment for all learners. Its tailored programs and community-based learning opportunities reflect a commitment to inclusivity, addressing the unique needs of its diverse student population.

Faculty and Staff

The Marion D. Crouse Instructional Center employs a dedicated team of educators and support staff, with a student-teacher ratio of 8:1, offering professional development opportunities to ensure high-quality instruction.

6.1 Teacher Qualifications

The Marion D. Crouse Instructional Center employs a dedicated team of highly qualified educators specializing in special education. With a student-teacher ratio of 8:1, teachers provide personalized instruction tailored to students’ needs. The staff is trained to support students with severe cognitive and multiple impairments, ensuring a high level of expertise in adaptive teaching strategies. Professional development opportunities are prioritized to maintain cutting-edge instructional methods, fostering a supportive and inclusive learning environment for all students.

6.2 Support Staff Roles

The Marion D. Crouse Instructional Center is supported by a team of skilled professionals who play a crucial role in student success. Support staff assist teachers in delivering personalized instruction, ensuring students with severe cognitive and multiple impairments receive the care they need. They also facilitate community-based learning experiences, helping students generalize skills in real-world settings. Additionally, support staff handle administrative tasks, maintain student records, and assist with communication between the center and families, ensuring a seamless and inclusive educational environment.

6.3 Professional Development Opportunities

The Marion D. Crouse Instructional Center prioritizes professional development for its staff, ensuring educators are equipped to meet students’ unique needs. The center offers training in special education strategies, behavioral support, and assistive technology. Collaborating with the Genesee Intermediate School District, the center provides workshops and resources to enhance teaching methods. Professional development opportunities also include community-based learning experiences, allowing staff to gain hands-on expertise in real-world settings. These initiatives foster a culture of continuous improvement, benefiting both educators and students alike.

Facilities and Resources

The Marion D. Crouse Instructional Center, located at 3330 Luce Road, features modern classrooms equipped with assistive technology and offers access to community resources and adaptive infrastructure.

7.1 Building and Infrastructure

The Marion D. Crouse Instructional Center is located at 3330 Luce Road in Flushing, MI, within the Genesee Intermediate School District. The facility is designed to support students with severe cognitive and multiple impairments, offering a safe and accessible environment. The building features modern classrooms, adaptive infrastructure, and specialized spaces to meet the unique needs of its students. Its infrastructure is tailored to provide a comfortable and inclusive setting for learning and growth.

7.2 Technology and Classroom Resources

The Marion D. Crouse Instructional Center is equipped with modern technology and resources to support its specialized curriculum. Classrooms feature interactive whiteboards, educational software, and assistive devices tailored for students with severe cognitive and multiple impairments. The center integrates technology into daily instruction to enhance learning experiences. Additionally, the facility provides access to adaptive tools, such as speech-to-text devices and sensory equipment, ensuring students receive personalized support. These resources create an inclusive and engaging environment, fostering academic and personal growth for all learners.

7.3 Accessibility Features

The Marion D. Crouse Instructional Center prioritizes accessibility to ensure all students can participate fully. The facility features ramps, elevators, and adaptive restrooms to accommodate physical needs. Classrooms are equipped with sensory-friendly tools and adjustable seating to support diverse learning requirements. Assistive technologies, such as communication devices and tactile aids, are integrated into daily activities. The center’s design emphasizes inclusivity, creating a barrier-free environment that promotes equal access to education for students with severe cognitive and multiple impairments.

School Calendar and Events

The Marion D. Crouse Instructional Center hosts various events, including alumni banquets, donkey basketball games, field days, and concerts, fostering community engagement and celebrating student achievements.

8.1 Annual Calendar Highlights

The Marion D. Crouse Instructional Center hosts a variety of engaging annual events, including alumni banquets, donkey basketball games, and field days, which foster community involvement and celebrate student achievements.
These events are designed to promote learning, teamwork, and fun while supporting the center’s mission of providing tailored instruction for students with severe cognitive impairments.
The calendar also features knowledge bowls, scholastic scrimmages, and concerts, showcasing the diverse talents of students and staff.
Such activities highlight the center’s commitment to creating a supportive and inclusive environment.

8.2 Community Involvement Activities

The Marion D. Crouse Instructional Center actively engages with the community through events like Future Business Leaders of America and state fine arts competitions, fostering connections and showcasing student talents.
The center collaborates with local organizations to provide resources and support for students with severe impairments.
Community involvement activities also include band and choir concerts, which bring together families, educators, and residents to celebrate achievements.
These efforts highlight the center’s dedication to building a supportive and inclusive community environment.

Parental Involvement

The Marion D. Crouse Instructional Center encourages parental involvement through Parent-Teacher Organizations and volunteer opportunities, ensuring parents are active partners in their children’s educational journey and personal growth.

9.1 Parent-Teacher Organizations

The Marion D. Crouse Instructional Center actively engages parents through its Parent-Teacher Organization (PTO), fostering collaboration between families, teachers, and staff. The PTO organizes events, fundraisers, and workshops to support students’ educational and personal growth. By promoting open communication and involvement, the organization strengthens the school community. Parents play a vital role in enhancing the center’s programs and activities, ensuring a nurturing environment for all students. This partnership underscores the center’s commitment to inclusive education and student success.

9.2 Volunteer Opportunities

The Marion D. Crouse Instructional Center offers various volunteer opportunities for community members to support its mission. Volunteers can assist in classrooms, help with events, or mentor students, providing valuable support to both educators and learners. The center encourages individuals to contribute their time and skills, fostering a collaborative environment that enriches students’ educational experiences. By volunteering, individuals can make a meaningful impact on the lives of students with severe cognitive and multiple impairments, helping them thrive academically and personally.

9.3 Resources for Parents

The Marion D. Crouse Instructional Center provides comprehensive resources for parents to support their children’s education and well-being. These include access to individualized education plans, workshops on special education strategies, and regular communication with teachers. The center also offers referrals to community services and therapy programs. Parents can stay informed through the center’s website, newsletters, and direct communication with staff. These resources empower parents to actively participate in their children’s learning journey, ensuring a collaborative approach to education and personal development.

Community Partnerships

Marion D. Crouse Instructional Center collaborates with local businesses and non-profit organizations to provide resources and support for students, enhancing their educational and personal development experiences.

10.1 Local Business Collaborations

Marion D. Crouse Instructional Center actively partners with local businesses to enhance student opportunities. These collaborations often involve mentorship programs, job training, and resource donations, fostering practical learning experiences. Businesses contribute by providing materials, expertise, and financial support, enabling the center to offer enriched educational and extracurricular activities. Such partnerships not only benefit students but also strengthen community ties, demonstrating a shared commitment to education and development. These efforts highlight the center’s dedication to creating a well-rounded and supportive environment for its students.

10.2 Non-Profit Organization Ties

Marion D. Crouse Instructional Center collaborates with non-profit organizations to enhance its programs and services. Partnerships with groups like the Genesee Intermediate School District and local foundations provide resources, funding, and community engagement opportunities. These ties enable the center to access grants, adaptive equipment, and specialized training for staff. Non-profit organizations also support extracurricular activities and events, fostering a inclusive environment for students. Such collaborations strengthen the center’s mission to provide comprehensive education and support for students with severe cognitive and multiple impairments, ensuring they receive the tools needed for lifelong learning and growth.

Alumni Success Stories

Marion D. Crouse Instructional Center alumni have achieved remarkable milestones, showcasing resilience and growth. Many have excelled in vocational training, independent living, and community contributions, inspiring others.

11.1 Notable Alumni Achievements

Alumni from Marion D. Crouse Instructional Center have demonstrated remarkable achievements in various fields. Many have successfully transitioned into vocational training programs, gaining meaningful employment. Others have excelled in independent living skills, contributing positively to their communities. The center’s focus on tailored instruction and support has empowered graduates to thrive beyond their academic years, showcasing their potential and resilience.

11.2 Alumni Testimonials

Alumni of Marion D. Crouse Instructional Center often express gratitude for the supportive and inclusive environment they experienced. Many credit the center’s tailored instruction and dedicated staff for helping them achieve personal and academic growth. Testimonials highlight the center’s role in building confidence and life skills, enabling graduates to thrive in their post-graduate pursuits. Alumni frequently praise the center’s commitment to fostering independence and resilience, which has had a lasting impact on their lives.

Conclusion

The Marion D. Crouse Instructional Center is dedicated to empowering students with severe impairments. Its supportive environment, tailored instruction, and low student-teacher ratio foster personal growth and community impact.

12.1 Summary of Key Points

The Marion D. Crouse Instructional Center is a specialized educational facility in Flushing, MI, catering to students with severe cognitive and multiple impairments. It operates year-round, offering tailored instruction in school, home, and community settings. With a student-teacher ratio of 8:1, the center ensures personalized attention and support. Its curriculum includes core subjects like math, English, and science, alongside extracurricular activities such as band concerts and competitions. The center is part of the Genesee Intermediate School District and is known for its commitment to fostering a supportive and inclusive learning environment.

The center also emphasizes community involvement and partnerships, enhancing its resources and opportunities for students. Its focus on lifelong learning and accessibility makes it a vital educational hub in the region, providing essential services and promoting student success.

12.2 Final Thoughts on the Center’s Impact

The Marion D. Crouse Instructional Center plays a vital role in empowering students with severe cognitive and multiple impairments. Its tailored approach and low student-teacher ratio ensure personalized learning, fostering academic and personal growth. The center’s commitment to accessibility and inclusivity creates a nurturing environment that prepares students for lifelong success.

By addressing diverse needs and engaging with the community, the center not only educates but also enriches the lives of its students and their families, leaving a lasting impact on their future.

agv helmet size guide

AGV helmets are renowned for their exceptional safety, innovative design, and superior comfort. This guide helps motorcyclists choose the perfect fit, ensuring optimal protection and riding performance.

1.1 What Are AGV Helmets?

AGV helmets are high-performance protective headgear designed for motorcyclists, combining safety, comfort, and style. Founded in 1947 by Gino Amisano, AGV (Amisano Gino Valenza) has become a trusted brand in motorsports, offering helmets for various riding styles. Known for their innovative designs, AGV helmets feature advanced materials like carbon fiber and Kevlar, ensuring superior impact protection. They cater to different preferences, from full-face racing helmets to open-face and modular designs. AGV helmets are favored by professional racers and casual riders alike, blending cutting-edge technology with ergonomic fit for unparalleled performance and safety on the road.

1.2 Importance of Proper Helmet Fit

A proper helmet fit is crucial for safety, comfort, and performance. A well-fitting helmet ensures optimal protection in case of impact, reducing the risk of head injuries. It also enhances visibility and reduces distractions while riding. A helmet that is too tight may cause discomfort, while one that is too loose can shift during riding, compromising safety. AGV helmets are designed to provide a snug, secure fit, but achieving the right size is essential. This guide will help you understand how to measure and select the correct AGV helmet size, ensuring maximum protection, comfort, and confidence on the road. Proper fit is not just about safety—it’s about enjoying a superior riding experience.

Understanding Helmet Sizes

Helmet sizes vary to accommodate different head shapes and preferences. AGV helmets offer a range of sizes, ensuring a secure, comfortable fit for every rider’s needs and safety.

2.1 How Helmet Sizes Work

Helmets are sized based on head circumference, measured in centimeters or inches. Sizes range from small to extra-large, with each size corresponding to a specific measurement range. While there’s a standard sizing system, slight variations exist between brands. AGV helmets follow a precise sizing scale to ensure consistency. The fit is determined by the helmet’s interior padding and shell shape, which are designed to accommodate different head shapes. Proper sizing ensures safety, comfort, and visibility. Understanding how sizes work helps riders select a helmet that meets their needs. Always refer to AGV’s official size chart for accurate measurements. A well-fitting helmet is essential for protection and performance.

2.2 Standard Helmet Size Charts

Standard helmet size charts provide a universal guide for determining helmet sizes based on head circumference measurements. These charts typically range from Small to 3XL, with corresponding measurements in centimeters or inches. While there’s a general standard, slight variations may exist between brands. AGV helmets adhere to these standards, ensuring consistency and reliability. The charts are created by measuring the widest part of the head, just above the eyebrows and ears. Riders can use these charts to identify their size range, ensuring a proper fit. It’s important to note that individual head shapes may affect how a helmet fits, even if the size matches the chart. Always refer to AGV’s official size chart for the most accurate measurements. Proper sizing is crucial for both safety and comfort.

Measuring Your Head for the Perfect Fit

Accurate head measurement is crucial for selecting the right AGV helmet size. Use a flexible tape measure around the widest part of your head, just above your eyebrows and ears, to ensure a safe and comfortable fit.

3.1 How to Measure Your Head Circumference

To measure your head circumference accurately, use a flexible tape measure or a string. Wrap it around the widest part of your head, just above your eyebrows and ears. Ensure the tape is level and not too tight or loose. Take note of the measurement in centimeters or inches. If using a string, mark the point where it overlaps, then measure the length with a ruler. For the most accurate result, measure at least twice and take the average. This step is essential for matching your size to the AGV helmet size chart and ensuring a safe, comfortable fit. Proper alignment and coverage depend on this measurement.

3.2 Understanding Head Shapes and Sizes

Head shapes vary significantly among individuals, with common types including round, oval, and elongated. AGV helmets are designed to accommodate these differences, ensuring a precise fit for all riders. Understanding your head shape is crucial for selecting the right helmet size and style. A round head shape is wider across the temples, while an oval shape is longer front-to-back. Elongated heads are narrower and longer. AGV helmets feature shell shapes that cater to these variations, such as intermediate oval and long oval. Proper alignment ensures the helmet sits level, with the eye port aligning with your eyes. This customization enhances comfort, reduces pressure points, and maximizes safety. Always consider your head shape when choosing an AGV helmet for the best fit and performance.

Trying On the Helmet

Trying on a helmet ensures a snug, comfortable fit. It allows you to assess the feel, weight, and visibility, crucial for safety and riding confidence.

4.1 Initial Fit and Comfort

The initial fit of an AGV helmet is crucial for both safety and riding enjoyment. A well-fitting helmet should feel snug but not overly tight, with even pressure distribution. When first putting it on, ensure there are no hotspots or areas of discomfort. The helmet should sit level on your head, with the front edge just above your eyebrows. Shake your head gently to check stability—it should stay in place without shifting. Comfort is key, as an ill-fitting helmet can distract you while riding. Pay attention to how the padding feels and whether the weight is evenly distributed. A proper initial fit sets the foundation for a safe and enjoyable riding experience.

4.2 Checking for Proper Coverage and Alignment

Proper coverage and alignment are critical for safety and visibility. Ensure the helmet sits level, with the front edge no more than 1 inch above your eyebrows. The sides should cover your temples, and the back should protect the base of your skull. Check that the visor aligns with your eye line, providing an unobstructed view. The helmet should not tilt back or slide forward, as this can leave areas unprotected. AGV helmets are designed with precise engineering, so verify that all safety features, like the chin bar and cheek pads, are correctly positioned. Improper alignment can compromise protection, making it essential to ensure a balanced and secure fit before every ride.

The AGV Helmet Size Guide offers a comprehensive overview to help riders determine their ideal helmet size, ensuring a perfect balance of comfort, safety, and performance.

5.1 AGV Helmet Size Chart

The AGV Helmet Size Chart provides a detailed breakdown of helmet sizes, corresponding to specific head circumferences. Ranging from Small to 3X-Large, the chart ensures precise fitment for all riders. Each size category aligns with measured head dimensions, offering a clear reference for selection. The chart is designed to help riders match their head circumference to the appropriate helmet size, ensuring optimal safety and comfort. By following the chart, riders can determine their ideal fit, whether they prefer a snug or slightly roomier helmet. Proper use of the size chart guarantees a helmet that meets safety standards while providing all-day riding comfort. Always measure accurately for the best results.

5.2 How to Read the Size Chart

Reading the AGV Helmet Size Chart is straightforward. The chart typically features columns for helmet size, head circumference measurements, and corresponding hat sizes. Start by locating your measured head circumference in the chart. Align it with the recommended helmet size to find your ideal fit. Pay attention to the range provided for each size, as slight variations may occur. Ensure your measurement falls squarely within a single size range for accuracy. If your measurement is between sizes, consider personal comfort preferences. Properly reading the chart ensures a helmet that fits securely, providing both safety and comfort. Always double-check your measurements to avoid sizing errors. This step is crucial for optimal protection and riding performance.

Factors Affecting Helmet Fit

Head shape, personal comfort preferences, and padding thickness significantly influence helmet fit. Proper alignment and strap adjustments also play a crucial role in achieving a secure, comfortable fit.

6.1 Head Shape and Helmet Compatibility

Head shape plays a crucial role in determining helmet compatibility. Riders with round, oval, or intermediate head shapes may find varying levels of comfort. AGV helmets are designed to accommodate different head shapes, ensuring optimal fit and safety; Understanding your head shape helps in selecting a helmet that aligns perfectly, reducing pressure points and enhancing comfort. Proper alignment ensures the helmet sits level, with the eye port correctly positioned. AGV helmets feature adjustable padding to customize fit, catering to diverse head shapes. A mismatched fit can lead to discomfort or compromised safety, making it essential to try helmets on and refer to size charts for accuracy. This ensures a secure, comfortable, and safe riding experience.

6.2 Personal Comfort Preferences

Personal comfort preferences significantly influence helmet choice. Riders may prioritize padding thickness, ventilation, weight, or noise reduction. AGV helmets offer adjustable features like padding and ventilation to cater to individual needs. While some riders prefer a snug fit for stability, others may opt for a looser feel for comfort. Weight distribution and noise levels also vary, affecting long-distance riding comfort. AGV helmets are designed to balance these factors, ensuring a tailored fit. It’s essential to test helmets in person, as comfort is subjective and critical for extended use. By aligning personal preferences with helmet features, riders can enhance their overall riding experience while maintaining safety standards.

Adjusting the Helmet for Optimal Fit

Proper adjustments ensure a secure, comfortable fit. Focus on the chin strap, padding, and liner to customize the helmet to your head shape and riding preferences.

7.1 Adjusting the Chin Strap

Adjusting the chin strap is crucial for ensuring a secure and comfortable fit. Start by fastening the strap and tightening it evenly until it feels snug but not restrictive. AGV helmets feature durable nylon straps with smooth glide adjusters, allowing for precise customization. To achieve the perfect tension, place two fingers under the strap while wearing the helmet; if there’s too much space, tighten it further. Proper adjustment prevents excessive movement and ensures the helmet stays in place during rides. Avoid over-tightening, as it can cause discomfort or pressure points. Regularly check the strap’s condition and tighten any loose ends to maintain optimal safety and performance.

7.2 Padding and Liner Adjustments

Padding and liner adjustments play a key role in achieving a personalized fit for AGV helmets. The removable and washable liners allow for customization, ensuring comfort and hygiene. To adjust, gently pull the padding to test its flexibility and position it to evenly distribute pressure around your head. AGV helmets often feature cheek pads with multiple thickness options, which can be swapped based on your preference. For optimal fit, ensure the liner sits snugly against your head without causing hotspots. If needed, rotate or reposition the padding for better alignment. After adjustments, test the helmet by moving your head slightly; it should feel secure yet comfortable. Proper padding alignment enhances safety, reduces fatigue, and improves overall riding experience.

Common Mistakes to Avoid

  • Sizing down for a tighter fit can compromise comfort and safety.
  • Ignoring proper fit may lead to inadequate protection and poor performance.

8.1 Sizing Down for a Tighter Fit

One of the most common mistakes when choosing an AGV helmet is sizing down to achieve a tighter fit. While it might seem logical to opt for a smaller size for added security, this can lead to discomfort and restricted movement. A helmet that is too tight can cause pressure points, headaches, and even impair your ability to move your head freely, which is crucial for visibility while riding. Additionally, an overly tight fit can lead to discomfort during long rides, distracting you from the road. It’s important to remember that a helmet should fit snugly but not painfully tight. Always refer to the size chart and try helmets on if possible to ensure the best fit.

Proper fit is about balance—not just tightness.

8.2 Ignoring the Importance of Proper Fit

Ignoring the importance of proper fit when selecting an AGV helmet can lead to serious consequences. A poorly fitting helmet can compromise safety, as it may not stay securely in place during an impact. Additionally, an ill-fitting helmet can cause discomfort, leading to distractions while riding. Riders who overlook the need for a proper fit often end up with helmets that are either too loose or too tight, both of which can hinder visibility and movement. Over time, this can result in fatigue and discomfort during long rides. Prioritizing proper fit ensures not only safety but also an enjoyable riding experience. Always take the time to measure and try on helmets to avoid this critical mistake.

A proper fit is essential for both safety and comfort.

Selecting the right AGV helmet size is crucial for safety, comfort, and confidence. Always prioritize proper fit and follow the guide to ensure optimal protection and riding enjoyment.

A well-fitting helmet is your most important riding companion.

9.1 Final Tips for Choosing the Right AGV Helmet Size

When selecting your AGV helmet, ensure accurate measurements and try it on if possible. Prioritize comfort and visibility for long rides. Consider your riding style and weather conditions. Check for certifications like DOT or ECE to ensure safety standards. Don’t compromise on fit—proper alignment and snugness are critical. Adjust padding and straps for customization. Test the helmet’s weight and aerodynamics. Remember, a well-fitting helmet enhances safety, comfort, and performance. Take your time and consult sizing charts or experts if needed. Your helmet is a vital investment in protection and confidence on the road.

9.2 Ensuring Safety and Comfort

A properly fitting AGV helmet is essential for both safety and comfort. Always ensure the helmet meets safety certifications like DOT or ECE. A snug fit prevents shifting during rides, reducing distractions and enhancing protection. Opt for helmets with breathable padding and ventilation to maintain comfort, especially on long journeys. Visibility is crucial, so choose a helmet with an unobstructed field of view. Regularly inspect and maintain your helmet, cleaning padding and checking for wear. Replace your helmet after a crash, even if no visible damage is present. A well-fitting, maintained helmet is your best investment for safety and riding enjoyment.

building a storybrand pdf

Building a StoryBrand by Donald Miller offers a framework to clarify business messaging‚ positioning customers as heroes. This approach simplifies communication‚ ensuring brands are understood and trusted‚ with a PDF available for easy access.

What is StoryBrand?

StoryBrand is a communication framework created by Donald Miller‚ designed to help businesses clarify their messaging. It leverages the power of storytelling to position customers as heroes and brands as trusted guides. The framework simplifies complex ideas‚ ensuring messages resonate and drive action. Available as a PDF‚ it offers a structured approach to crafting clear‚ compelling narratives for websites‚ marketing materials‚ and more. By focusing on universal story elements‚ StoryBrand enables businesses to communicate effectively‚ fostering engagement and trust with their audience.

The Importance of Storytelling in Business

Storytelling is a powerful tool for businesses to engage customers and convey their value. By leveraging narrative‚ companies can create emotional connections‚ simplify complex ideas‚ and inspire action. StoryBrand emphasizes this approach‚ helping brands position themselves as trusted guides in their customers’ journeys. Effective storytelling not only captures attention but also builds loyalty and drives decision-making. In a crowded market‚ a clear and compelling story can differentiate a business‚ ensuring its message resonates and sticks. The PDF guide provides practical steps to craft such narratives‚ making storytelling accessible and impactful for any organization.

Overview of the StoryBrand Framework

The StoryBrand framework‚ outlined in Donald Miller’s book‚ provides a structured approach to clarifying business messaging. It centers on seven universal story points that resonate with audiences: a character‚ a problem‚ a guide‚ a plan‚ a call to action‚ consequences‚ and success. By positioning customers as heroes and brands as trusted guides‚ the framework helps businesses communicate more effectively. The PDF guide offers practical steps to simplify messaging‚ ensuring clarity and engagement across platforms like websites‚ social media‚ and marketing materials. This approach not only enhances brand understanding but also drives customer engagement and sales.

The Seven-Part StoryBrand Framework

The StoryBrand framework consists of seven key elements: a character‚ a problem‚ a guide‚ a plan‚ a call to action‚ consequences‚ and success. This structure ensures clarity and engagement in business messaging‚ helping brands connect with their audience effectively.

A Character: Positioning the Customer as the Hero

Positioning the customer as the hero is central to the StoryBrand framework. By placing the audience at the center of the narrative‚ businesses create a relatable and engaging story. This approach ensures the brand’s message resonates deeply‚ as customers see themselves in the story. The hero’s journey is universal‚ making it easier for businesses to connect emotionally. Simplifying communication in this way helps brands avoid confusion and builds trust. The customer’s role as the hero is key to making the story memorable and impactful‚ driving both engagement and loyalty. This strategy is a cornerstone of effective StoryBrand messaging.

Has a Problem: Understanding Customer Pain Points

Understanding customer pain points is crucial in the StoryBrand framework. Businesses must identify and address the challenges their audience faces to create a meaningful connection. By acknowledging these struggles‚ brands position themselves as empathetic and solution-oriented. This step ensures the message resonates deeply‚ as customers feel understood. Simplifying communication around their problems makes the brand’s value proposition clear. The framework emphasizes the importance of clarity in highlighting these pain points‚ ensuring the audience sees the brand as a trusted guide. This approach helps businesses stand out by addressing real needs and offering effective solutions‚ which is a key element of the StoryBrand methodology.

Meets a Guide: Establishing the Brand as a Trusted Advisor

In the StoryBrand framework‚ the brand acts as a trusted guide‚ helping customers navigate their challenges. By positioning the brand as an authority‚ businesses build trust and credibility. The guide’s role is to empathize with the customer’s struggles and provide clear‚ actionable solutions. This step ensures the customer feels supported and confident in the brand’s expertise. Simplifying the message and avoiding jargon helps the guide connect effectively. The guide’s role is essential in making the customer feel empowered‚ which is a cornerstone of the StoryBrand approach to effective communication and customer engagement.

Why the Guide is Essential in Storytelling

The guide is crucial as they provide clarity and direction‚ helping customers overcome obstacles. By establishing the brand as a trusted advisor‚ the guide builds trust and credibility‚ making the customer feel supported. This role ensures the customer’s journey is smooth and empowering‚ fostering loyalty and engagement. The guide’s expertise and clear communication are vital in simplifying complex ideas‚ making the brand’s message resonate effectively. This element is a cornerstone of the StoryBrand framework‚ ensuring businesses connect deeply with their audience and drive meaningful results.

Who Gives Them a Plan: Providing a Clear Solution

In the StoryBrand framework‚ the guide provides a clear‚ actionable plan to help customers overcome their challenges. This step is crucial as it transforms the customer’s confusion into clarity. The plan must be simple‚ specific‚ and aligned with the customer’s goals‚ ensuring they feel empowered. By offering a straightforward solution‚ the guide establishes the brand as a trusted authority. This clarity not only builds trust but also motivates the customer to take action. A well-crafted plan is the bridge between the customer’s problem and their ultimate success‚ making it a pivotal element in the storytelling process.

How to Create a Compelling Plan

Creating a compelling plan involves simplifying complex ideas into clear‚ actionable steps. According to Building a StoryBrand‚ the plan should be easy to understand and free of jargon. It must address the customer’s specific pain points and provide a logical path to success. Using bullet points or numbered lists can enhance clarity. The plan should also align with the customer’s goals‚ ensuring it feels tailored to their needs. By focusing on simplicity and relevance‚ the plan becomes a powerful tool that guides the customer toward their desired outcome‚ reinforcing the brand’s role as a trusted guide.

Calls Them to Action: Encouraging Engagement

Calls to action are crucial for driving customer engagement. According to Building a StoryBrand‚ a clear and direct call to action guides customers toward the next step. It should be simple‚ avoiding overwhelming options‚ and create a sense of urgency. The call to action must align with the customer’s desire for success and be consistent across all platforms. By making it easy for customers to take the next step‚ businesses can increase conversions and build trust. A well-crafted call to action ensures the customer feels empowered and motivated to act‚ ultimately moving them closer to their desired outcome.

Best Practices for Effective Calls to Action

Effective calls to action require clarity and simplicity. According to Building a StoryBrand‚ they should be specific‚ avoiding vague language. Use action verbs like “Start Now” or “Get Yours Today” to inspire immediate response; Ensure the call to action is visible and consistent across all platforms. Eliminate distractions and focus on one primary action per message. Timing is also key; present the call to action when the customer is most engaged. By aligning the call to action with the customer’s journey‚ businesses can create a seamless path to conversion‚ driving real results and customer satisfaction.

That Helps Them Avoid Failure: Highlighting the Consequences

In the StoryBrand framework‚ highlighting the consequences of inaction is crucial. Customers need to understand what happens if they don’t solve their problem. This creates urgency and motivation. By painting a clear picture of potential failure‚ businesses can guide customers toward taking action. For example‚ a company might emphasize lost time‚ money‚ or opportunities if a solution isn’t adopted. This approach doesn’t rely on fear but rather on empathy‚ showing customers how their lives can improve by avoiding negative outcomes. Balancing clarity with compassion ensures the message resonates without overwhelming the audience‚ making it a powerful tool in storytelling.

Using Fear and Consequences in Messaging

Using fear and consequences in messaging is a powerful way to motivate action. The StoryBrand framework emphasizes highlighting the potential negative outcomes of inaction. This doesn’t mean scaremongering but rather painting a realistic picture of what could go wrong if a problem isn’t solved. For example‚ a business might illustrate the loss of time‚ money‚ or opportunities if a customer doesn’t adopt their solution. This approach creates urgency and encourages decision-making. However‚ it’s important to balance fear with hope‚ ensuring the message is compelling without being overwhelming. When done right‚ it aligns with the framework’s goal of clear‚ customer-centric communication.

And Ends in a Success: Showcasing the Desired Outcome

The StoryBrand framework emphasizes ending the story with a clear vision of success. This step is crucial as it motivates customers by showing the positive outcome they can achieve. By painting a vivid picture of the desired result‚ businesses inspire hope and direction. For example‚ a company might illustrate how their solution transforms a customer’s life or business. This isn’t just about selling a product but about helping customers see a better future. The framework teaches businesses to focus on the benefits and results‚ ensuring the message resonates emotionally and logically with their audience.

How to Paint a Clear Picture of Success

To effectively showcase success‚ businesses must create vivid‚ relatable imagery that aligns with their customers’ aspirations. Use specific‚ measurable outcomes to illustrate how your solution transforms lives or businesses. For instance‚ describe how a product saves time‚ reduces stress‚ or increases revenue. Avoid vague promises and focus on tangible results. StoryBrand teaches companies to connect emotionally by highlighting the benefits of their offerings. By painting a clear picture of success‚ businesses inspire confidence and motivate customers to take action‚ turning their vision of a better future into reality.

Applying the StoryBrand Framework

StoryBrand helps businesses simplify their message‚ align teams‚ and create effective marketing materials. Its framework ensures clarity and resonance‚ making brands easily understood and trusted by customers.

How to Simplify Your Brand Message

Simplifying your brand message involves identifying customer pain points and clearly presenting solutions. Use the StoryBrand framework to eliminate jargon and focus on what matters. Ensure your message is concise‚ relatable‚ and free of complexity. This approach helps customers quickly understand your value‚ fostering trust and engagement. By aligning your messaging with the seven-part framework‚ you create a clear narrative that resonates. The PDF guide provides practical steps to refine your communication‚ making it easier for your audience to listen and act. Clarity is key to capturing attention and driving results in today’s competitive market.

Clarity vs. Complexity in Communication

Clarity in communication is essential for engaging customers‚ while complexity often leads to confusion. The StoryBrand framework emphasizes simplicity‚ ensuring messages are relatable and actionable. By focusing on clear‚ concise language‚ businesses avoid overwhelming their audience. Complexity‚ on the other hand‚ can alienate customers and hinder understanding. The PDF guide provides practical steps to eliminate jargon and unnecessary details‚ making your brand’s message easy to grasp. Prioritizing clarity fosters trust‚ drives engagement‚ and ultimately leads to better customer outcomes. Simplifying your communication ensures your audience listens‚ understands‚ and takes action.

Creating Effective Messaging for Websites

Effective website messaging is crucial for engaging visitors and driving conversions. The StoryBrand framework helps businesses craft clear‚ compelling content by focusing on the seven universal story points. By positioning customers as heroes and addressing their pain points‚ brands create relatable narratives. The PDF guide emphasizes simplicity‚ ensuring websites avoid clutter and confusion. A well-structured homepage with a clear plan and call to action guides visitors toward desired outcomes. This approach not only enhances user experience but also boosts conversions and customer loyalty‚ making it a powerful tool for businesses seeking to clarify their online presence and resonate with their audience.

Optimizing Your Website’s Homepage

Optimizing your website’s homepage with the StoryBrand framework ensures clarity and engagement. Start with a clear headline that identifies the customer’s problem and positions your brand as the guide. Use concise language to present a simple plan that addresses their needs. Include a prominent call to action to encourage immediate engagement. Highlight the success customers can achieve and the consequences of not taking action. By focusing on these elements‚ your homepage will resonate with visitors‚ driving conversions and building trust. The PDF guide provides detailed strategies to implement these principles effectively‚ ensuring your homepage becomes a powerful tool for growth.

Using StoryBrand for Social Media and Marketing Materials

Applying the StoryBrand framework to social media and marketing materials ensures consistent‚ engaging messaging. Use the seven-part framework to craft posts that position customers as heroes‚ highlight their problems‚ and present your brand as a trusted guide. Simplify your message to cut through noise on platforms like Facebook‚ Instagram‚ and Twitter. Create compelling visuals and captions that clearly outline the plan and call to action. By adapting the framework‚ you can build trust‚ drive engagement‚ and convert followers into customers. The PDF guide offers practical tips for tailoring StoryBrand principles to various platforms‚ ensuring your content resonates and delivers results.

Adapting the Framework for Different Platforms

Adapting the StoryBrand framework for different platforms requires tailoring your message while maintaining core elements. For social media‚ focus on concise‚ visually-driven storytelling. Use Instagram Stories to highlight customer success‚ while LinkedIn posts can emphasize the guide and plan. Websites benefit from clear‚ structured messaging‚ ensuring visitors quickly understand your value. The PDF guide provides strategies to adjust the framework for blogs‚ emails‚ and brochures‚ ensuring consistency and impact across all channels. By aligning your approach with each platform’s strengths‚ you maximize engagement and conversions‚ making your brand’s story unforgettable and effective.

The Benefits of Using StoryBrand

Using StoryBrand enhances customer engagement‚ clarifies messaging‚ and boosts sales. Its framework ensures businesses communicate clearly‚ positioning customers as heroes‚ leading to increased loyalty and revenue growth.

Improved Customer Engagement

StoryBrand’s framework fosters deeper connections by positioning customers as heroes‚ making your brand’s message relatable and impactful. By simplifying communication and highlighting clear solutions‚ businesses build trust and emotional resonance. This approach ensures customers feel understood‚ leading to increased loyalty and engagement. The framework’s emphasis on storytelling creates a memorable experience‚ driving interaction and participation. As a result‚ brands see higher conversion rates and stronger customer relationships‚ ultimately growing their audience and influence.

How Storytelling Increases Customer Loyalty

Storytelling in the StoryBrand framework strengthens customer loyalty by creating emotional connections. When customers see themselves as the hero in your brand’s narrative‚ they develop a deeper attachment. This emotional investment fosters trust and long-term commitment. By consistently delivering clear‚ relatable messages‚ businesses build a loyal community. The framework’s focus on understanding customer pain points and offering solutions ensures that your brand becomes a trusted partner‚ leading to repeat business and advocacy. This loyalty translates into sustained growth and a loyal customer base that champions your brand.

Enhanced Brand Clarity

The StoryBrand framework enhances brand clarity by simplifying complex messages into a clear‚ relatable narrative. By positioning customers as heroes and addressing their pain points‚ businesses create a focused‚ easy-to-understand brand identity. This clarity ensures that your message resonates with your audience‚ eliminating confusion and miscommunication. The framework’s structured approach helps businesses align their teams and communicate consistently‚ fostering a unified brand voice. With enhanced clarity‚ your brand becomes more credible and trustworthy‚ making it easier for customers to engage and remember your brand. This clear messaging is a cornerstone of the StoryBrand approach‚ driving meaningful connections and growth.

Aligning Your Team with a Unified Message

The StoryBrand framework ensures your team communicates consistently by aligning everyone around a clear‚ customer-focused narrative. By simplifying your message‚ the framework helps employees understand and articulate your brand’s value effectively. This alignment eliminates internal confusion and ensures everyone is on the same page. The structured approach of the seven-part framework makes it easy for teams to adopt and implement‚ fostering a cohesive brand voice. With a unified message‚ your team can confidently engage customers and internal stakeholders‚ driving clarity and consistency across all touchpoints. This alignment is a key benefit of the StoryBrand approach‚ as outlined in the PDF.

Increased Sales and Conversions

By clarifying your brand’s message‚ the StoryBrand framework directly impacts sales and conversions. Customers are more likely to engage when they understand your value proposition. The seven-part framework ensures your messaging resonates emotionally and logically‚ guiding customers toward action. Clear communication eliminates confusion‚ reducing barriers to purchase. The structured approach also enhances trust‚ a critical factor in driving conversions. As outlined in the PDF‚ businesses that adopt this framework often see significant revenue growth. Simplified‚ story-driven messaging makes your brand relatable and memorable‚ ultimately leading to increased sales and customer loyalty.

How Clear Messaging Drives Revenue

Clear messaging is the cornerstone of revenue growth in the StoryBrand framework. By simplifying your message‚ you eliminate customer confusion‚ making it easier for them to understand your value. This clarity builds trust and credibility‚ essential for driving sales. The structured approach ensures your message resonates emotionally and logically‚ guiding customers toward action. As detailed in the PDF‚ businesses that adopt this framework experience increased conversions and customer loyalty. When your message is clear‚ your audience is more likely to engage‚ leading to measurable revenue growth and long-term business success.

Implementing StoryBrand in Your Business

Implementing StoryBrand involves a step-by-step guide to clarify messaging‚ conduct workshops‚ and integrate the framework into marketing strategies‚ ensuring alignment with brand values for effective communication.

Step-by-Step Guide to Applying the Framework

Applying the StoryBrand framework begins with identifying the customer as the hero and understanding their pain points. Next‚ position your brand as a trusted guide‚ offering a clear plan to solve their problems. This involves simplifying your message and creating a compelling call to action. The process also includes highlighting the consequences of inaction and painting a vivid picture of success. Conducting a StoryBrand workshop helps align your team and integrate the framework into your marketing strategy. Regularly track key metrics to measure effectiveness and refine your approach‚ ensuring consistent and impactful communication across all platforms.

How to Conduct a StoryBrand Workshop

A StoryBrand workshop is a structured process to clarify your brand’s message. It typically spans two days‚ engaging your team in identifying the customer as the hero‚ understanding their pain points‚ and positioning your brand as a trusted guide. The workshop involves creating a clear plan‚ crafting compelling calls to action‚ and defining the consequences of inaction and the vision of success. By aligning your team around a unified message‚ the workshop ensures consistent communication across all platforms‚ driving engagement and conversions. Regular follow-ups and metric tracking help refine the approach‚ ensuring long-term effectiveness.

Integrating StoryBrand into Your Marketing Strategy

Integrating StoryBrand into your marketing strategy involves aligning the seven-part framework with your brand’s values and goals. Start by positioning your customer as the hero and your brand as their trusted guide. Simplify your messaging to focus on their pain points and provide a clear plan for solutions. Use the framework to create consistent messaging across websites‚ social media‚ and marketing materials. Regularly review and refine your approach to ensure it resonates with your audience. By doing so‚ you’ll enhance engagement‚ build trust‚ and drive conversions‚ ultimately strengthening your brand’s impact in the market.

Aligning StoryBrand with Your Brand Values

Aligning StoryBrand with your brand values ensures authenticity and consistency. Begin by identifying your core values and mission‚ then integrate them into each component of the framework. Position your customer as the hero whose success aligns with your values. Ensure your brand acts as a trusted guide‚ offering solutions that reflect your ethical standards. Use storytelling to highlight how your products or services embody these values‚ creating a meaningful connection with your audience. This alignment not only builds trust but also fosters loyalty‚ making your brand a reliable partner in your customers’ journeys.

Measuring the Effectiveness of StoryBrand Messaging

Measuring the effectiveness of StoryBrand messaging involves tracking key performance indicators such as customer engagement‚ conversion rates‚ and sales growth. Use tools like website analytics to monitor how visitors respond to your messaging. Pay attention to metrics like time spent on pages and bounce rates to gauge clarity and resonance. Conduct A/B testing to refine your approach and ensure alignment with your brand values. Regularly survey customers to understand their perception of your messaging and its impact on their purchasing decisions. This data-driven approach helps refine your strategy and ensures your StoryBrand framework delivers measurable results.

Key Metrics to Track

When implementing StoryBrand‚ track metrics like customer engagement‚ conversion rates‚ and sales growth to measure success. Monitor website traffic‚ time spent on pages‚ and bounce rates to assess message clarity. Analyze social media interactions and email open rates to gauge resonance. Use tools like Google Analytics and CRM data to evaluate how effectively your messaging drives action. Regularly review customer feedback and survey responses to refine your approach. By focusing on these metrics‚ you can ensure your StoryBrand framework is delivering results and aligning with your business goals.

Real-World Examples of StoryBrand in Action

Discover how companies across industries‚ from tech to healthcare‚ have successfully implemented the StoryBrand framework to clarify their messaging and drive customer engagement‚ as detailed in the PDF.

Case Studies of Successful StoryBrand Implementations

The StoryBrand framework has been successfully applied across various industries‚ from tech startups to healthcare providers‚ as highlighted in the PDF. These case studies demonstrate how businesses simplified their messaging‚ aligned their teams‚ and significantly boosted customer engagement. By implementing the seven-part framework‚ companies like [Company A] and [Company B] transformed their communication strategies‚ resulting in clearer brand positioning and increased sales. The StoryBrand approach not only enhanced their external marketing efforts but also unified their internal teams around a single‚ compelling narrative. These real-world examples prove the framework’s effectiveness in driving results and fostering meaningful connections with customers.

How Different Industries Have Benefited

Industries ranging from tech startups to healthcare providers have seen transformative results using the StoryBrand framework. The PDF highlights how companies in finance‚ education‚ and retail simplified their messaging‚ leading to increased sales and customer loyalty. By aligning teams around a unified narrative‚ businesses in these sectors achieved clarity and consistency in communication. The framework’s universal appeal lies in its ability to resonate with diverse audiences‚ making it a versatile tool for any industry aiming to enhance engagement and drive growth. This cross-industry success underscores the power of storytelling in modern business strategies.

Lessons Learned from StoryBrand Success Stories

Success stories from StoryBrand reveal that clarity and consistency are key to effective communication. Businesses that simplified their messaging saw increased engagement and sales. The PDF emphasizes the importance of understanding customer pain points and positioning the brand as a trusted guide. Companies that aligned their teams around a unified narrative experienced greater internal cohesion and external impact. These lessons highlight the power of storytelling in breaking through market noise and driving growth. By focusing on customer-centric stories‚ businesses can create memorable and impactful messages that resonate across industries and audiences.

Common Traits of Effective StoryBrand Applications

Effective StoryBrand applications share traits like clarity‚ consistency‚ and a customer-centric focus. They simplify complex messages‚ ensuring alignment across all platforms. The PDF highlights how successful implementations use the seven-part framework to create compelling narratives. These stories often position the customer as the hero‚ clearly define the problem‚ and offer a straightforward solution. Consistency in messaging and visuals is another key trait‚ reinforcing brand identity. By focusing on these elements‚ businesses achieve greater engagement‚ trust‚ and ultimately‚ increased conversions. These traits underscore the framework’s versatility and effectiveness in driving meaningful results.

The StoryBrand framework empowers businesses to craft clear‚ customer-focused narratives. By simplifying messaging‚ it ensures brands are understood and trusted‚ driving engagement and conversions effectively.

Recap of the StoryBrand Framework

The StoryBrand framework‚ outlined in Donald Miller’s Building a StoryBrand‚ is a seven-part system to clarify messaging. It positions the customer as the hero‚ identifies their problem‚ introduces a guide (the brand)‚ provides a clear plan‚ calls to action‚ highlights consequences of inaction‚ and ends with success. This structure ensures messages are simple‚ engaging‚ and effective. By focusing on universal storytelling principles‚ businesses can align their teams‚ resonate with audiences‚ and drive results. The framework is detailed in the PDF‚ offering a practical guide for transforming communication strategies;

Final Thoughts on the Power of Storytelling

Storytelling is a timeless force that captivates and connects. In Building a StoryBrand‚ Donald Miller proves that businesses thrive when they harness this power. By positioning customers as heroes and brands as trusted guides‚ companies create messages that resonate deeply. The seven-part framework simplifies communication‚ ensuring clarity and emotional engagement. As seen in the PDF‚ this approach transforms how businesses express their value‚ leading to loyalty and growth. Storytelling isn’t just a tactic—it’s a fundamental human connection that drives results‚ making StoryBrand an indispensable tool for any business seeking to be heard and understood.

the part time diary of a true indian pdf

The book explores Junior’s journey as a Native American teen, blending humor with poignant reflections on identity, family dysfunction, and cultural disconnection, resonating deeply in its PDF format.

1.1 Overview of the Book

The Absolutely True Diary of a Part-Time Indian is a semi-autobiographical novel by Sherman Alexie, exploring themes of identity, cultural disconnection, and resilience. The story follows Junior, a Native American teen navigating life on a reservation and in a predominantly white high school. Blending humor with poignant reflections, the book addresses poverty, racism, and family struggles, accompanied by Ellen Forney’s illustrations that enhance Junior’s emotional journey. This PDF format captures the essence of Junior’s quest for belonging and self-discovery.

1.2 Author Background: Sherman Alexie

Sherman Alexie, a Spokane-Coeur d’Alene Indian, was born in 1966 on a reservation in Washington. His upbringing in poverty and his experiences with identity struggles deeply influenced his writing. Alexie is renowned for his raw, humorous, and poignant storytelling, addressing themes of cultural disconnection and resilience. His work spans poetry, novels, and screenplays, with The Absolutely True Diary of a Part-Time Indian drawing heavily from his own life, making it a powerful reflection of his journey and heritage.

1.3 Historical and Cultural Context

The novel is set against the backdrop of a Native American reservation, highlighting the historical struggles of poverty, marginalization, and cultural disconnection. Junior’s experiences reflect the broader challenges faced by Indigenous communities, including inadequate education and systemic racism. The reservation’s isolated environment contrasts sharply with the outside world, emphasizing the tension between preserving cultural identity and assimilating into mainstream society. This context underscores Junior’s journey of self-discovery and resilience in navigating two vastly different worlds.

Plot Summary

Junior, a Native American teen, throws a book at his teacher, leading to suspension. He leaves the reservation to attend a predominantly white high school, facing new challenges.

2.1 Junior’s Life on the Reservation

Junior’s life on the reservation is marked by poverty, bullying, and a sense of hopelessness. He faces constant ridicule for his physical appearance and struggles with feelings of inferiority. His friendship with Rowdy, despite its toxic elements, provides a sense of belonging. The reservation’s bleak conditions, including a lack of resources and opportunities, highlight the systemic issues affecting Native American communities. Junior’s experiences are deeply intertwined with the broader struggles of his family and community, shaping his worldview and aspirations for a better life.

2.2 The Decision to Leave the Reservation

Junior’s decision to leave the reservation is a pivotal moment, driven by his desire to escape the cycle of poverty and limited opportunities. Encouraged by his teacher, he realizes that staying on the reservation will only perpetuate his struggles. This bold choice reflects his determination to seek a better future, despite the fear of leaving behind his family and culture. His decision marks the beginning of a journey toward self-discovery and the pursuit of a life beyond the constraints of his reservation.

2.3 Experiences at the New High School

At his new high school, Junior faces racism and isolation, being the only Native American student. He struggles to fit in, feeling like an outsider among his white peers. Despite these challenges, he finds support from a kind teacher and begins to form unexpected friendships. Junior’s experiences highlight his resilience as he navigates a predominantly white environment, balancing his cultural identity with the pressures of assimilation. His journey is marked by both struggle and growth in this unfamiliar setting.

Main Character Analysis

Junior’s identity struggles, friendship with Rowdy, and resilience in the face of adversity define his character, showcasing his growth and determination to overcome cultural and personal challenges.

3.1 Junior’s Identity Struggles

Junior grapples with his identity as a Native American, feeling caught between his reservation life and the outside world. His experiences of bullying and cultural disconnection deepen his internal conflict. He often sees himself through the lens of others, leading to self-doubt and a fragmented sense of belonging. The pressure to conform to societal expectations while honoring his heritage creates a constant struggle, shaping his journey of self-discovery and resilience in the face of adversity.

3.2 The Role of Family and Community

Junior’s family and community play a pivotal role in shaping his experiences. His parents, though flawed, provide unwavering support, while his grandmother embodies cultural wisdom and love. The reservation community offers a sense of belonging but also perpetuates cycles of poverty and dysfunction. Junior’s decision to leave the reservation strains relationships but highlights the community’s lasting impact on his identity. Family and community are both sources of strength and conflict, influencing Junior’s journey of self-discovery and resilience.

3.3 Junior’s Friendship with Rowdy

Junior’s friendship with Rowdy, his best friend on the reservation, is deeply significant. Rowdy, though tough and often violent, provides Junior with a sense of belonging and support. Their bond reflects the challenges of reservation life, where loyalty and camaraderie are vital. Rowdy’s influence shapes Junior’s decisions, including his choice to leave the reservation, which strains their relationship. Despite this, Rowdy remains a pivotal figure in Junior’s life, embodying both the comfort and pain of his past.

Themes and Messages

The novel explores themes of identity, cultural disconnection, and the struggles of poverty and racism, blending humor with poignant reflections on personal and societal challenges.

4.1 Identity and Belonging

Junior’s journey revolves around his struggle to find his place in two worlds: the reservation and the white town. His identity is shaped by his experiences as a Spokane Indian, where he faces bullying and internalizes negative perceptions of himself. The novel highlights his internal conflict of feeling caught between two cultures, leading to a fragmented sense of self. This duality underscores the broader theme of belonging and the challenges of navigating multiple identities in a society that often forces individuals to choose one over the other.

4.2 Cultural Disconnection and Assimilation

Junior’s move from the reservation to a predominantly white high school highlights the cultural disconnection he experiences. The reservation represents tradition and community, while the new school embodies assimilation and modernity. Junior struggles to bridge these worlds, feeling like an outsider in both. His journey reflects the broader challenges of Native Americans navigating a society that often marginalizes their culture, forcing them to choose between preserving their heritage and fitting into a dominant culture that demands assimilation.

4.3 Poverty, Racism, and Inequality

The book vividly portrays the harsh realities of poverty, racism, and inequality faced by Native Americans. Junior’s reservation life is marked by scarcity and neglect, while his new school highlights stark contrasts in resources and opportunities. Racism is evident in the mascot controversy and societal stereotypes. These issues shape Junior’s identity and aspirations, reflecting broader systemic inequalities. The narrative underscores how poverty and racism perpetuate cycles of marginalization, affecting not just individuals but entire communities, and the struggle to overcome them.

Narrative Style and Structure

The diary format, infused with humor and poignant reflections, offers an intimate glimpse into Junior’s life, while Ellen Forney’s illustrations enhance the emotional depth of his journey.

5.1 Diary Format and Humor

The novel’s diary format provides an intimate, personal narrative voice, allowing Junior to express his struggles and hopes candidly. Sherman Alexie infuses humor to balance the tragedy, making Junior’s story relatable and engaging. The comedic elements, often self-deprecating, highlight Junior’s resilience and wit in the face of adversity. This blend of humor and raw emotion creates a powerful connection with readers, making the diary format a compelling choice for exploring themes of identity and cultural disconnection.

5.2 The Significance of Illustrations

The illustrations by Ellen Forney in The Absolutely True Diary of a Part-Time Indian play a crucial role in enhancing the narrative. They visually represent Junior’s inner world, emotions, and experiences, making his story more relatable and vivid. The drawings often reflect Junior’s art, showcasing his creativity and identity. These visuals complement the diary format, providing a deeper connection to Junior’s journey and amplifying the emotional impact of his struggles and triumphs. They are integral to the book’s storytelling and thematic expression.

5.3 Balancing Tragedy with Comedy

The Absolutely True Diary of a Part-Time Indian masterfully blends tragedy with comedy, creating a poignant yet humorous narrative. Sherman Alexie uses wit to address heavy themes like poverty, loss, and identity, making the story relatable and engaging. Junior’s resilience shines through his ability to find humor in adversity, balancing the darkness of his experiences with light-hearted moments. This duality humanizes his journey, allowing readers to connect deeply with his struggles and triumphs, while also highlighting the complexity of his emotional landscape.

Cultural and Social Relevance

The book challenges stereotypes, offering an authentic portrayal of Native American life, while addressing systemic issues like poverty and racism, fostering empathy and cultural understanding.

6.1 Representation of Native American Life

The book provides an unflinching portrayal of Native American life, capturing the struggles of reservation living, cultural disconnection, and the challenges of adolescence. Through Junior’s experiences, it highlights the complexities of identity, family dysfunction, and societal expectations, offering a raw yet relatable perspective. The narrative blends humor with poignant reflections, shedding light on the resilience and strength of Native American communities while addressing systemic issues like poverty and racism.

6.2 The Impact of Reservation Life

Reservation life profoundly shapes Junior’s identity, marked by limited resources and a sense of stagnation. The dilapidated school with outdated books reflects systemic neglect, while poverty and alcoholism loom large. Junior often feels trapped, burdened by the reservation’s constraints, which fuel his low self-esteem and feelings of shame. His decision to leave underscores the broader struggle of reservation life, where opportunities are scarce, and hope often seems distant, impacting not just individuals but entire communities.

6.3 Breaking Stereotypes

The novel challenges stereotypes about Native Americans by portraying Junior as a complex, multidimensional character. His aspirations, humor, and vulnerabilities defy simplistic or romanticized portrayals of Indigenous life. By sharing his personal struggles and triumphs, Alexie humanizes Native American experiences, offering a raw and authentic perspective that breaks free from common misconceptions. Junior’s journey highlights individuality and resilience, proving that Native American stories are diverse and far from monolithic.

Challenges and Controversies

The book has faced censorship and bans due to mature themes, sparking debates about its suitability in schools. Alexie defends its raw honesty as essential storytelling.

7.1 Censorship and Banned Book Status

The book has frequently been challenged and banned in schools due to its mature themes, explicit language, and graphic content. Critics argue it is unsuitable for young readers, while supporters emphasize its raw honesty and cultural significance. Sherman Alexie defends the book, stating it reflects real-life struggles and fosters important discussions. Despite controversies, it remains a powerful voice for marginalized communities, highlighting the importance of uncensored storytelling.

7.2 Criticism and Public Reception

The book received widespread acclaim for its authentic portrayal of Native American life and its blend of humor with heart-wrenching truths. Critics praised Alexie’s raw storytelling and the relatable protagonist, Junior. However, some reviewers found the graphic content and language controversial. Public reception was largely positive, with readers appreciating its unflinching honesty and cultural insight. The novel’s ability to resonate with diverse audiences solidified its place as a significant work in contemporary young adult literature.

7.3 The Author’s Response to Controversies

Sherman Alexie has openly addressed the backlash against his book, emphasizing the importance of sharing raw, unfiltered stories about Native American life. He has stated that censorship often stems from discomfort with truths that challenge societal norms. Alexie believes his work reflects real experiences and fosters understanding, even if it provokes controversy. His personal connection to the narrative adds authenticity, and he remains committed to giving voice to marginalized communities, despite criticism.

Educational and Literary Significance

The book is widely used in school curricula for its raw portrayal of Native American life, earning a National Book Award and influencing young adult literature profoundly.

8.1 Use in School Curricula

The book is widely incorporated into school curricula for its authentic portrayal of Native American experiences, fostering empathy and critical thinking. Its availability in PDF formats makes it accessible for classroom use, with educators often using it to explore themes of identity and inequality. Despite facing challenges and bans, the novel remains a valuable tool for teaching diverse perspectives, encouraging students to reflect on societal issues and personal growth through Junior’s relatable journey.

8.2 Literary Awards and Recognition

The Absolutely True Diary of a Part-Time Indian earned the National Book Award for Young People’s Literature in 2007, solidifying its literary acclaim. Its raw honesty and authentic voice have made it a bestseller, resonating with readers globally. The book has been translated into multiple languages, further highlighting its universal appeal. Sherman Alexie’s work continues to be celebrated for its profound impact on contemporary young adult literature, offering a unique perspective on identity and cultural challenges.

8.3 Impact on Young Adult Literature

The Absolutely True Diary of a Part-Time Indian has profoundly influenced young adult literature by offering a raw, honest portrayal of identity, culture, and adolescence. Its unique voice and blend of humor with heartache have set a new standard for authentic storytelling. The book’s success has inspired other authors to explore diverse perspectives, making it a landmark in contemporary YA literature. Its accessibility and emotional depth continue to resonate with readers, bridging cultural gaps and fostering empathy.

The book leaves a lasting legacy by authentically portraying Native American life, blending humor with tragedy, breaking stereotypes, and emphasizing the importance of sharing diverse stories.

9.1 Legacy of the Book

The Absolutely True Diary of a Part-Time Indian has left a profound legacy as a National Book Award winner, offering a raw, honest portrayal of Native American life. Its accessibility in PDF format has widened its reach, making it a vital resource for discussions on identity, culture, and social issues. The book’s legacy lies in its ability to break stereotypes and provide representation, inspiring conversations about resilience, hope, and the importance of diverse voices in literature.

9.2 Final Thoughts on Junior’s Journey

Junior’s journey in The Absolutely True Diary of a Part-Time Indian is a powerful exploration of resilience and self-discovery. His decision to leave the reservation highlights his courage to seek a better future, despite the challenges of navigating two worlds. The PDF format has made his story accessible to a wider audience, emphasizing its relevance and impact. Junior’s experiences, marked by loss and struggle, ultimately convey a message of hope and the importance of embracing one’s identity amidst adversity.

9.3 The Importance of Sharing Such Stories

Sharing stories like Junior’s is crucial for fostering understanding and empathy. His journey highlights the struggles of Native American communities, offering a raw yet hopeful perspective. By addressing identity, poverty, and cultural disconnection, the book challenges stereotypes and encourages dialogue. The PDF format ensures accessibility, spreading these vital narratives to a broader audience. Such stories not only educate but also empower, emphasizing the resilience and humanity often overlooked in marginalized communities.

maytag mvw6200kw manual

The Maytag MVW6200KW manual provides essential guidance for safe installation, operation, and maintenance of the 4.8 cu. ft. top-load washer with Deep Fill and Power Impeller features.

1.1 Overview of the Maytag MVW6200KW Washer

The Maytag MVW6200KW is a 28-inch top-load washer with a 4.8 cu. ft. capacity, designed for efficient and powerful cleaning. It features the Deep Fill option, Power Impeller, and Slow-Close Glass Lid for enhanced performance. With Advanced Vibration Control, it ensures smooth operation. The washer offers 10 wash cycles, including Quick Wash and Wrinkle Control, catering to various fabric needs. Its drawer dispenser supports single-dose detergent, fabric softener, and bleach. Built with durability, it includes a robust design and user-friendly controls, making it a reliable choice for household laundry tasks.

1.2 Importance of Reading the Manual

Reading the Maytag MVW6200KW manual is crucial to ensure safe and proper use of the washer. It provides essential safety precautions, installation guidelines, and operating instructions to prevent hazards like fire or electric shock. The manual details electrical requirements, helping you avoid potential risks. Understanding the washer’s features, such as Deep Fill and Power Impeller, ensures optimal performance. Regular maintenance tips, like cleaning the washer monthly, are also outlined to maintain efficiency and longevity. By following the manual, you can troubleshoot common issues and extend the appliance’s lifespan, ensuring reliable service for years.

Safety Precautions and Warnings

To reduce fire, electric shock, or injury risks, read the manual’s safety instructions and installation guidelines before operating the Maytag MVW6200KW washer.

2.1 Important Safety Instructions

Always follow the safety guidelines provided in the Maytag MVW6200KW manual to minimize risks of fire, electric shock, or injury. Ensure proper installation and operation as instructed. Never overload the washer, and keep children supervised during use. Avoid wearing loose clothing or long hair that could get caught. Do not lean or sit on the washer, as this may cause imbalance. Keep the area around the washer clear of flammable materials. Avoid touching hot surfaces, and never insert hands or objects into moving parts. Follow instructions for detergent and chemical usage to prevent accidents.

2.2 Installation Warnings

Ensure the Maytag MVW6200KW washer is installed on a firm, level surface to prevent vibration and instability. Avoid placing it on uneven or soft ground, as this may lead to improper operation or damage. Keep the area around the washer well-ventilated to prevent moisture buildup. Do not install the washer in areas exposed to extreme temperatures or direct sunlight. Ensure all connections, including water supply lines and electrical outlets, are secure and meet the specified requirements. Failure to follow these guidelines may result in reduced performance, increased wear, or potential safety hazards.

2.3 Electrical Requirements

The Maytag MVW6200KW washer requires a 120V, 60Hz electrical supply. It must be connected to a dedicated 20-amp circuit to ensure proper operation. Avoid sharing the circuit with other high-power appliances to prevent voltage drops or overload. Use a grounded, three-prong plug to maintain safety and comply with electrical standards. Do not modify the power cord or plug, as this could lead to fire hazards or electrical shock. Ensure all connections are secure and meet local electrical codes. If unsure, consult a licensed electrician to verify compatibility and safety.

Product Specifications

The Maytag MVW6200KW washer features a 4.8 cu. ft. capacity, Power Impeller, and Slow-Close Glass Lid, designed for efficient and quiet operation with advanced cleaning capabilities.

3.1 Dimensions of the Maytag MVW6200KW

The Maytag MVW6200KW washer has dimensions of 27 1/2 inches in width, 38 1/2 inches in height, and 42 1/2 inches in depth. It weighs approximately 57 pounds, making it a compact yet robust appliance for home use. These measurements ensure it fits standard laundry spaces while providing ample interior capacity. The washer’s design includes a top-load configuration and a Deep Fill option, offering flexibility for various washing needs. Its 4.8 cu. ft. capacity allows for efficient cleaning of large loads, making it a practical choice for households seeking reliable performance.

3.2 Capacity and Features

The Maytag MVW6200KW washer boasts a 4.8 cu. ft. capacity, ideal for handling large laundry loads efficiently. It features the Deep Fill option for extra water when needed, a Power Impeller for thorough cleaning, and a Slow-Close Glass Lid for smooth operation. With 10 wash cycles, including Quick Wash and Wrinkle Control, it offers versatility for various fabric types. The Auto-Sensing technology optimizes water levels and wash times, while Advanced Vibration Control ensures quiet operation. These features make it a reliable and user-friendly appliance for modern households, providing both performance and convenience.

3.3 Key Components and Accessories

The Maytag MVW6200KW washer includes a Power Impeller for effective cleaning, a Slow-Close Glass Lid for smooth operation, and a Drawer Dispenser for detergent, fabric softener, and bleach. It features 4 springs and 4 dampers for stability, along with a liquid-filled upper balance ring to reduce vibration. The washer also comes with a single-dose drawer for convenient detergent use. These components ensure optimal performance, ease of use, and durability. Accessories like the user manual and installation hardware are provided to support proper setup and maintenance, enhancing the overall ownership experience.

Installation Guide

Ensure proper installation by following pre-installation checks, electrical requirements, and physical setup steps outlined in the manual to avoid risks and ensure optimal washer performance.

4.1 Pre-Installation Requirements

Before installing the Maytag MVW6200KW washer, ensure the space meets the required dimensions of 27 1/2″ width, 38 1/2″ height, and 42 1/2″ depth. Verify the floor is level, sturdy, and can support the washer’s weight. Check electrical requirements, ensuring a 120V, 60Hz power supply is available. Ensure proper ventilation and proximity to a water supply and drainage system. Review the manual for specific installation warnings and guidelines to avoid risks and ensure a safe setup. Prepare all necessary tools and accessories before starting the installation process.

4.2 Step-by-Step Installation Instructions

Unpack the Maytag MVW6200KW washer and inspect for damage. Place it in the prepared location, ensuring proper clearance. Connect the water supply lines to the hot and cold water inlets, securing them tightly. Plug the washer into a 120V, 60Hz electrical outlet. Install the drain hose, ensuring it is securely connected to the washer and the laundry sink or drain pipe. Use the provided leveling legs to stabilize the washer. Tighten all connections and test the washer by running a quick cycle to ensure proper function. Refer to the manual for specific torque and connection guidelines to avoid leaks or damage.

4.3 Leveling and Balancing the Washer

Proper leveling and balancing are crucial for optimal performance and to prevent vibration. Place the washer on a firm, level surface. Adjust the leveling legs by turning them clockwise or counterclockwise until the washer is stable. Use a spirit level to ensure the surface is even. Tighten the locking nuts once the desired level is achieved. Check balance by running a test cycle without laundry. If vibrations occur, re-adjust the legs and ensure the washer is evenly supported. Proper leveling ensures quiet operation and reduces wear on internal components.

Operating the Maytag MVW6200KW Washer

Operating the Maytag MVW6200KW washer involves selecting the appropriate wash cycle, using the Power Impeller, and enabling the Deep Fill option for tailored cleaning. Follow the manual’s steps to ensure optimal performance.

5.1 Understanding Wash Cycles

The Maytag MVW6200KW washer offers 10 wash cycles designed for various fabric types and soil levels. These include Normal, Heavy Duty, and Delicate cycles. The Auto-Sensing feature automatically adjusts water levels based on load size, optimizing efficiency. The Quick Wash cycle is ideal for lightly soiled items, while the Wrinkle Control option reduces creases. Each cycle is tailored to specific needs, ensuring thorough cleaning while protecting fabrics. Understanding these cycles helps users select the right option for their laundry, ensuring optimal performance and fabric care. Always refer to the manual for detailed cycle descriptions and recommendations.

5.2 Using the Deep Fill Option

The Deep Fill option on the Maytag MVW6200KW washer allows for additional water during the wash cycle, ideal for heavily soiled or bulky items. To activate, select the Deep Fill option via the control panel before starting the cycle. This feature ensures a deeper water level for thorough cleaning. It is particularly useful for items like comforters or towels. The manual recommends using this option sparingly to conserve water while still achieving optimal cleaning results. Always refer to the manual for specific instructions on when and how to use the Deep Fill feature effectively.

5.3 Operating the Power Impeller

The Power Impeller in the Maytag MVW6200KW washer is designed to provide effective agitation during wash cycles. It helps remove tough stains by actively moving clothes and distributing detergent evenly. To use the Power Impeller, ensure it is clean and free of debris. The impeller operates automatically during selected wash cycles, but you can manually activate it for heavier loads. For optimal performance, avoid overloading the washer, as this may reduce the impeller’s efficiency. Regularly cleaning the impeller area is recommended to maintain proper function and prevent buildup. Refer to the manual for specific care instructions.

5.4 Utilizing the Slow-Close Glass Lid

The Slow-Close Glass Lid on the Maytag MVW6200KW washer is designed for smooth, quiet operation and added convenience. It allows easy viewing of the wash cycle while ensuring safe and controlled closing. To use the lid, simply lift it to open and let it gently close on its own. For optimal performance, ensure the lid is clean and free of debris. Regularly wiping the glass with a soft cloth will maintain visibility. The slow-close mechanism prevents sudden slamming, reducing noise and potential damage. Always refer to the manual for specific care and maintenance instructions to prolong the lid’s functionality.

Maintenance and Care

Regular cleaning and checking parts ensure optimal performance. The Power Impeller and Deep Fill option require attention to maintain efficiency and longevity.

6.1 Cleaning the Washer Regularly

Regular cleaning is essential to maintain the performance and longevity of your Maytag MVW6200KW washer. It is recommended to clean the washer once per month or every 30 wash cycles, whichever comes first. This helps prevent the buildup of soil and detergent residue, which can affect washing efficiency. Additionally, cleaning the interior and gasket ensures a fresh smell and prevents mold growth. Always refer to the manual for specific cleaning instructions tailored to your model. Regular maintenance ensures optimal functionality and keeps your washer in top condition for years to come.

6.2 Checking and Replacing Parts

Regularly inspecting and replacing parts of your Maytag MVW6200KW washer is crucial for maintaining its performance. Check the drawer dispenser, springs, dampers, and liquid-filled upper balance ring every 1-2 months for wear or damage. The liquid detergent dispenser and gasket should also be cleaned or replaced every 3-4 months to ensure proper function. If you notice unusual noises, vibrations, or leaks, inspect the parts immediately. Refer to the manual for specific instructions on replacing components. Always use genuine Maytag parts to ensure compatibility and optimal performance. Sears Parts Direct and the Maytag website offer reliable resources for purchasing replacement parts.

6.3 Troubleshooting Common Issues

Identifying and resolving common issues with your Maytag MVW6200KW washer can prevent major repairs. If the washer vibrates excessively, check the balance ring and ensure the unit is leveled properly. Leaks may indicate worn gaskets or improper detergent use. For error codes, refer to the manual or reset the washer by unplugging it for 30 seconds. Strange noises could signal loose parts or debris in the tub. Regularly cleaning the dispenser and checking for blockages can prevent issues. If problems persist, consult the troubleshooting section in the manual or contact Maytag customer support for assistance.

Downloading the Maytag MVW6200KW Manual

The Maytag MVW6200KW manual is available for download on the official Maytag website and trusted platforms like Sears Parts Direct in PDF format for easy access.

7.1 Where to Find the Manual Online

To access the Maytag MVW6200KW manual, visit the official Maytag website or trusted platforms like Sears Parts Direct. These sources provide the manual in PDF format for free download. Additionally, Whirlpool’s official website and appliance repair forums often host the manual for easy access. Ensure to download from reputable sites to avoid security risks. The manual is readily available, offering detailed instructions for installation, operation, and troubleshooting. Simply search for “Maytag MVW6200KW manual” on these platforms to find and download the guide effortlessly.

7.2 How to Download the PDF Manual

To download the Maytag MVW6200KW manual, visit the official Maytag website or trusted platforms like Sears Parts Direct. Search for “Maytag MVW6200KW manual” and select the PDF option. Click the download link to save the file to your device. Ensure you’re on a reputable site to avoid security risks. The manual is free and easily accessible, providing detailed instructions for installation, operation, and troubleshooting. Follow on-screen prompts to complete the download and access the guide for your washer.

7.3 Contents of the Manual

The Maytag MVW6200KW manual is a comprehensive guide covering essential information for users. It includes safety precautions, installation instructions, and electrical requirements to ensure proper setup. The manual details product specifications, such as dimensions and capacity, as well as features like the Power Impeller and Deep Fill option. Additionally, it provides operating instructions for wash cycles, maintenance tips, and troubleshooting steps for common issues. The guide also outlines warranty information and customer support resources. This manual is a valuable resource for understanding and maintaining your Maytag washer, ensuring optimal performance and longevity.

Common Issues and Repair Guides

The manual addresses common issues like vibration, noise, or the washer not starting, offering repair guides and troubleshooting steps to resolve problems efficiently.

8.1 Diagnosing Problems with the Washer

Diagnosing issues with the Maytag MVW6200KW washer involves identifying symptoms like unusual noise, vibration, or the washer not starting. The manual provides a troubleshooting guide to help users pinpoint problems. Common issues include imbalanced loads, faulty sensors, or clogged drains. Users are advised to check error codes and refer to the manual’s diagnostic charts. Regular maintenance, such as cleaning the washer and checking connections, can prevent many issues. The manual also offers step-by-step instructions for resolving common faults, ensuring efficient repairs and minimizing downtime. Proper diagnosis is key to maintaining optimal performance and extending the washer’s lifespan.

8.2 Repairing Common Faults

Repairing common faults in the Maytag MVW6200KW washer often involves addressing issues like error codes, faulty sensors, or malfunctioning components. The manual provides detailed repair guides for problems such as the washer not spinning, leaking, or making unusual noises. Users are advised to check connections, clean filters, and ensure proper installation. For complex issues, like a faulty power impeller or Deep Fill mechanism, the manual recommends consulting authorized service technicians. Regular maintenance, such as cleaning the tub and checking balance, can prevent many faults. Always refer to the manual for specific repair instructions and parts replacement guidelines to ensure safety and effectiveness.

8.3 Resetting the Washer

Resetting the Maytag MVW6200KW washer can resolve issues like error codes or improper functioning. To reset, unplug the washer from the power source, wait 30 seconds, and plug it back in. This process clears temporary glitches. For models with a ‘Reset’ button, press and hold it for 5 seconds. If issues persist, check for blockages or imbalances. Regular resets can help maintain optimal performance. Always refer to the manual for specific reset procedures tailored to your washer’s model and error codes. Resetting is a simple yet effective troubleshooting step to restore normal operation.

Maytag Customer Support and Resources

Maytag offers comprehensive customer support through their website, including access to manuals, troubleshooting guides, and repair resources. Sears Parts Direct provides additional manuals and parts assistance.

9.1 Contacting Maytag Customer Service

Maytag customer service can be reached through their official website, where you can find contact information, including phone numbers, email support, and live chat options. Additionally, Sears Parts Direct offers assistance with parts and repair resources for the MVW6200KW model. The Maytag website also provides a comprehensive FAQ section and troubleshooting guides to help resolve common issues. For immediate assistance, users can call Maytag’s customer service hotline or access their support team through the “Contact Us” page. Maytag ensures timely and effective support to address any concerns or queries regarding the MVW6200KW washer.

9.2 Accessing Additional Resources

Maytag offers extensive resources to support your MVW6200KW washer. Visit their official website for detailed product guides, repair tutorials, and user manuals. Sears Parts Direct provides access to genuine parts, diagrams, and repair instructions. Additionally, the Maytag website features a dedicated section for troubleshooting, FAQs, and maintenance tips. Users can also explore community forums and repair guides for specific models like MVW6200KW2 and MVWX655DW1. These resources ensure you can address issues efficiently and maintain your washer’s performance. Utilize these tools to keep your appliance running smoothly and extend its lifespan.