Category title

Autem vel eum iriure dolor in hendrerit in vulputate velit esse molestie consequat, vel illum dolore eu feugiat nulla facilisis at vero eros et dolore feugait.

Category Archive PDF

gymnopédie no 1 sheet music pdf free

Gymnopédie No. 1 Sheet Music PDF Free: A Comprehensive Guide

Discover readily available, free PDF sheet music for Satie’s Gymnopedie No. 1, encompassing various keys like A, Bb, C, Eb, F, and G major.

Erik Satie’s Gymnopedie No. 1, a cornerstone of minimalist piano repertoire, captivates listeners with its serene and contemplative atmosphere. Composed in 1888, this piece, alongside its companions, represents a departure from the Romantic excesses of the era, embracing simplicity and harmonic subtlety.

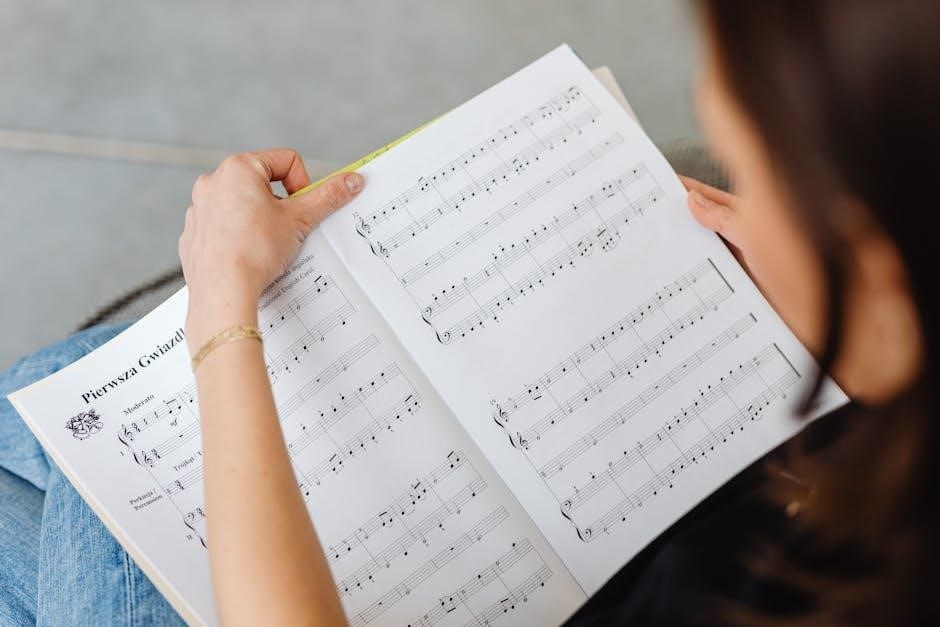
Its enduring appeal stems from its deceptively simple structure and evocative melody. The availability of free sheet music PDFs has further democratized access to this beautiful composition, allowing pianists of all levels to explore its delicate nuances. Finding reliable sources for these PDFs is key, as quality and accuracy can vary.

This guide will navigate the landscape of online resources, offering insights into various arrangements and formats, ensuring a rewarding musical experience with Satie’s timeless masterpiece.

The Historical Context of the Gymnopedies

Composed in 1888, the Gymnopedies – including the iconic No. 1 – emerged during a period of transition in European music. Satie deliberately rejected the prevailing Romantic style, opting for a more understated and unconventional approach. The title itself, “Gymnopédies,” references ancient Greek festivals involving nude dancing, hinting at a ritualistic and archaic quality.

Published in Paris, these pieces initially received limited attention, yet they gradually gained recognition for their unique harmonic language and melodic simplicity. The increasing availability of free sheet music PDFs in recent years has sparked renewed interest, allowing wider access to Satie’s innovative work.

Understanding this historical backdrop enriches the appreciation of Gymnopedie No. 1, revealing it as a precursor to modern minimalist music.

Why Gymnopedie No. 1 Remains Popular Today

Gymnopédie No. 1’s enduring appeal lies in its serene beauty and deceptively simple structure. The piece evokes a sense of calm and introspection, offering a respite from the complexities of modern life. The widespread availability of free sheet music PDFs has undoubtedly contributed to its continued popularity, enabling musicians of all levels to learn and perform it.

Its accessibility, combined with its timeless quality, makes it a staple in piano repertoire. Furthermore, arrangements for instruments like cello, organ, and guitar broaden its reach. The piece’s evocative nature also lends itself well to film and television soundtracks, further cementing its cultural significance.

Finding Free Sheet Music Online

Explore resources like Michael Kravchuk’s arrangements, Reddit’s r/piano, and various websites offering Gymnopedie No. 1 sheet music in convenient PDF format.

Reliable Sources for Free PDF Downloads

Locating trustworthy sources for free Gymnopedie No. 1 sheet music requires careful navigation. Several online platforms offer PDFs, but verifying legitimacy is crucial. Michael Kravchuk provides one-page and two-page versions, alongside Sibelius files, offering convenient options for pianists.

The r/piano subreddit on Reddit frequently hosts discussions and shares of sheet music, including Satie’s Gymnopedie No. 1. However, always exercise caution regarding copyright. Websites dedicated to free sheet music archives, while plentiful, demand scrutiny to ensure legality and accuracy of the transcription. Prioritize sources that clearly state their licensing or offer public domain arrangements. Remember to always respect copyright laws when downloading and using sheet music.

Michael Kravchuk’s Arrangements

Michael Kravchuk offers a readily accessible collection of Gymnopedie No. 1 sheet music in PDF format. His arrangements stand out due to the availability of multiple versions catering to different preferences. You can find both a concise, one-page version ideal for quick practice and a more traditional two-page layout for performance.

Furthermore, Kravchuk provides the sheet music in Sibelius file format (.sib), allowing users with Sibelius software to edit and customize the arrangement. These resources are easily discoverable online, providing a convenient starting point for anyone seeking free, well-presented sheet music for this iconic piece. His offerings are a popular choice among pianists.

Reddit (r/piano) as a Resource

The r/piano subreddit frequently serves as a valuable hub for musicians seeking sheet music, including Erik Satie’s Gymnopedie No. 1. Users often share links to free PDF versions or discuss their experiences with different arrangements. A post from July 2020 demonstrates active requests for the sheet music, indicating a consistent demand within the community.

While not a dedicated repository, r/piano provides a platform for direct interaction and exchange. Members often offer advice on finding reliable sources and can provide feedback on interpretations. It’s a dynamic resource where you might discover lesser-known arrangements or receive helpful tips from fellow pianists.

Beware of Copyright and Licensing Issues

Navigating free sheet music for Gymnopedie No. 1 requires caution regarding copyright. While Satie’s compositions are in the public domain, specific arrangements or editions may still be protected. Downloading from unverified sources carries the risk of encountering illegal copies or versions with inaccurate transcriptions.

Always prioritize legal and licensed options when possible, even if they require a small purchase. Utilizing reputable platforms ensures you’re supporting composers and publishers. Be wary of websites promising “free” downloads that seem too good to be true, as they may violate copyright laws or contain malware. Respecting intellectual property is crucial.

Available Keys and Transpositions

Explore Gymnopedie No; 1 sheet music in diverse keys: A Major, Bb Major, C Major, Eb Major, F Major, and G Major, offering flexibility.

Sheet Music in A Major

Finding Gymnopedie No. 1 sheet music in A Major is frequently achievable through online resources offering free PDF downloads. Michael Kravchuk provides a readily accessible version in this key, available as both a one-page and a two-page arrangement, catering to different printing preferences and visual learning styles.

The A Major transposition offers a bright and clear tonality, potentially favored by pianists seeking a slightly more uplifting interpretation of Satie’s melancholic masterpiece. When sourcing from online platforms, always verify the accuracy of the transcription and consider the overall presentation quality.

Remember to be mindful of copyright considerations when utilizing freely available sheet music, and support composers and publishers whenever possible through legitimate channels.

Sheet Music in Bb Major

Locating Gymnopedie No; 1 sheet music in Bb Major is facilitated by several online platforms offering free PDF versions. Michael Kravchuk’s arrangements include a dedicated Bb Major transcription, providing pianists with an alternative key to explore the piece’s emotive qualities. This key is often preferred for its resonance on certain instruments.

The Bb Major transposition presents a slightly warmer tonal color compared to A Major, potentially enhancing the piece’s inherent wistfulness. When downloading, ensure the PDF is clear and legible, and cross-reference with recordings to confirm accuracy.

Always exercise caution regarding copyright and licensing when accessing free sheet music online, respecting the intellectual property of the composer.

Sheet Music in C Major

Finding Gymnopedie No. 1 sheet music in C Major is remarkably straightforward, as it’s a frequently offered key among free PDF resources. Michael Kravchuk provides a C Major arrangement, making it easily accessible for pianists of varying skill levels. This key is often favored for its simplicity and clarity on the piano.

The C Major version avoids sharps or flats, potentially simplifying the reading experience for beginners. When sourcing PDFs, prioritize those with clean notation and accurate fingerings.

Remember to be mindful of copyright restrictions when utilizing free online sheet music, and consider supporting composers through legal purchase options when possible.

Sheet Music in Eb Major

Locating Gymnopedie No. 1 sheet music in Eb Major presents a slightly less common, yet still attainable, option for pianists seeking alternative keys. Michael Kravchuk’s collection includes an Eb Major arrangement, providing a free PDF download for those preferring this tonal center. This key offers a different color and feel compared to C Major or G Major.

Eb Major introduces three flats, potentially adding a subtle complexity for beginner players. Ensure the PDF source offers clear notation and accurate musical markings. Always verify the legitimacy of free downloads to avoid copyright infringements.

Exploring different keys can enhance musical understanding and interpretation.

Sheet Music in F Major

Finding Gymnopedie No. 1 sheet music in F Major is achievable through several online resources offering free PDF downloads. Michael Kravchuk’s arrangements specifically include a version transposed to F Major, catering to pianists who prefer this key. This transposition introduces one flat, offering a different harmonic texture compared to C Major.

F Major is a frequently requested key, making it relatively easy to locate reliable sheet music. When downloading, prioritize sources that guarantee accurate notation and clear readability; Always be mindful of copyright restrictions and licensing terms associated with free sheet music.

Experimenting with F Major can unlock new expressive possibilities.

Sheet Music in G Major

Locating Gymnopedie No. 1 sheet music in G Major is readily possible through online platforms offering free PDF downloads. Michael Kravchuk’s collection features a dedicated arrangement in G Major, appealing to pianists seeking this specific key. This key signature introduces one sharp, altering the overall tonal color compared to C Major.

G Major provides a brighter, more resonant sound, potentially enhancing the piece’s delicate character. When sourcing free sheet music, prioritize websites known for accuracy and clarity. Remember to respect copyright guidelines and licensing agreements associated with these materials.

Exploring G Major offers a unique interpretation.

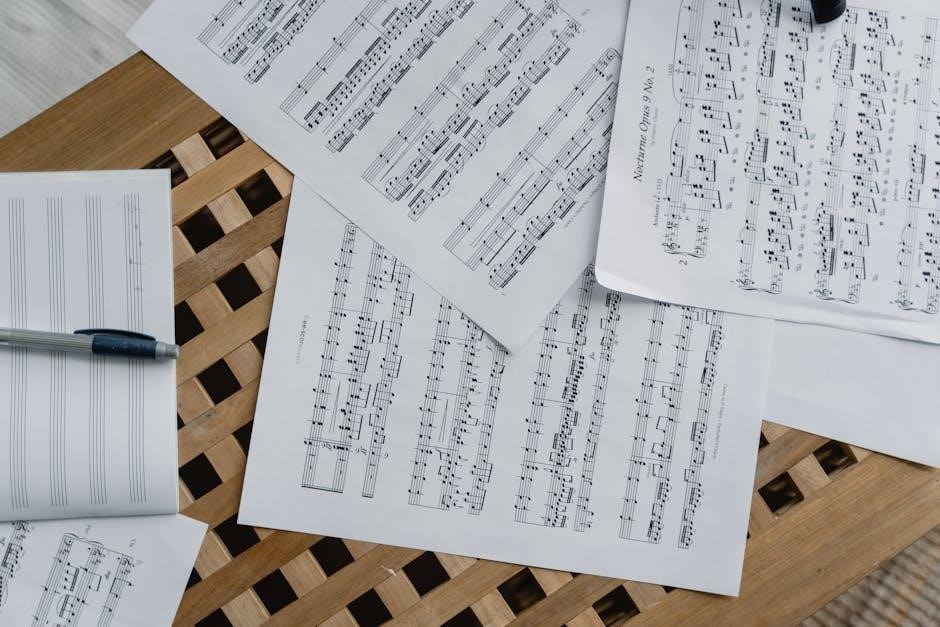
Sheet Music Formats and Versions

Explore one-page and two-page PDF versions, Sibelius (.sib) files, and simplified arrangements catering to beginner pianists seeking free Gymnopedie No. 1 sheet music.

One-Page vs. Two-Page Versions

Choosing between one-page and two-page versions of Gymnopedie No. 1 sheet music often depends on personal preference and reading ease. One-page versions, like those offered by Michael Kravchuk, present the entire piece condensed onto a single sheet, ideal for quick practice or performance without page turns.

Conversely, two-page versions offer a more traditional layout, potentially providing clearer visual spacing and larger notation, which can be beneficial for beginners or those who prefer a less cluttered appearance. The availability of both formats ensures accessibility for diverse learning styles and performance needs when seeking free PDF sheet music. Consider your comfort level and the context of your playing when selecting the most suitable version.

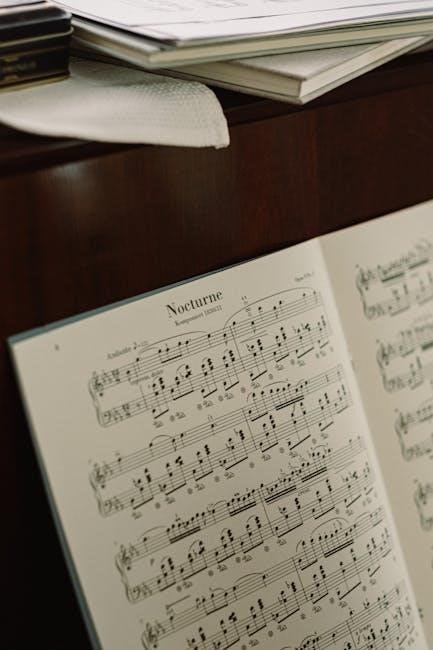
Sibelius File Format (.sib)

Alongside readily available PDF versions, Gymnopedie No. 1 sheet music can also be found in the Sibelius file format (.sib). This format is native to the Sibelius music notation software, offering a unique advantage for musicians who utilize this program. .sib files allow for full editing capabilities – you can transpose, adjust dynamics, or even create custom arrangements directly within Sibelius.

However, if you don’t own Sibelius, you’ll need the software to open and utilize these files. While PDFs are universally accessible, the .sib format caters specifically to users invested in the Sibelius ecosystem, providing a more interactive and customizable musical experience when accessing free sheet music.

PDF Format: Advantages and Disadvantages

PDF (Portable Document Format) is the most common way to distribute Gymnopedie No. 1 sheet music for free online, offering significant advantages in accessibility. PDFs are universally readable across various devices and operating systems, requiring no specialized software for viewing. However, PDFs are static; editing the music – transposing or altering dynamics – isn’t easily done without dedicated music notation software.

Furthermore, the quality of free PDF scans can vary; Some may be clear and accurate, while others might suffer from poor resolution or editing errors. Despite these drawbacks, the convenience and widespread compatibility of PDFs make them the preferred choice for sharing and accessing sheet music quickly.

Simplified Arrangements for Beginners

Learning Gymnopedie No. 1 can be daunting for beginners, but simplified arrangements are widely available as free PDF downloads. These versions often reduce the complexity by omitting ornamentation, simplifying rhythms, or using fewer chords. Consequently, they provide a more accessible entry point for novice pianists to learn this beautiful piece.

These arrangements typically focus on the core melody and harmonic structure, allowing students to build foundational skills. While they may not capture the full nuance of Satie’s original composition, they offer a rewarding learning experience and a stepping stone towards mastering the complete work. Seek out versions specifically labeled “easy” or “beginner.”

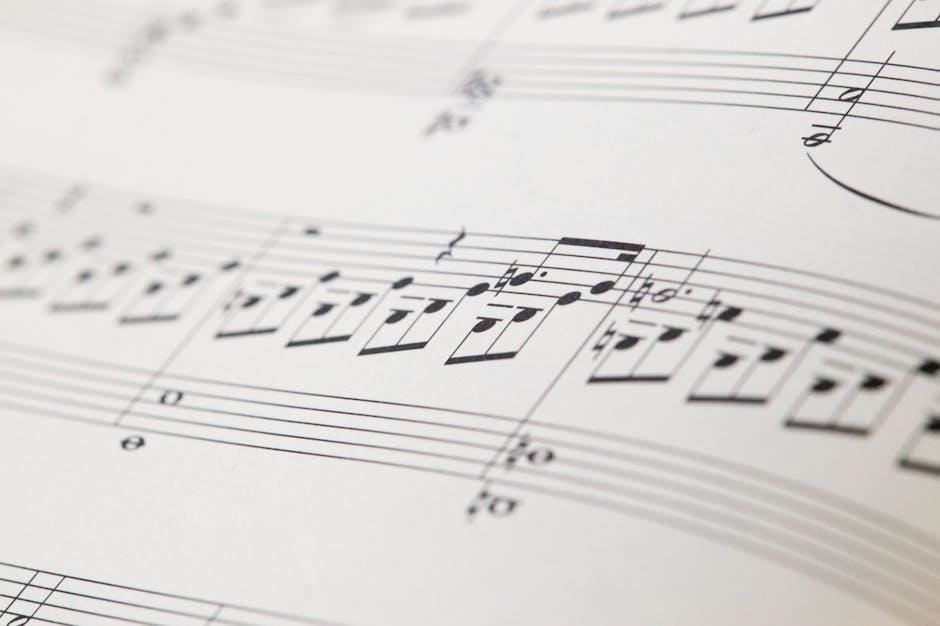
Understanding the Sheet Music

Deciphering the key signature, dynamics, tempo, and musical structure is crucial for accurately performing Satie’s Gymnopedie No. 1 from a PDF score.

Reading the Key Signature

Identifying the key signature in Gymnopedie No. 1 sheet music is fundamental to correct performance. Commonly found in A major, Bb major, C major, Eb major, F major, and G major, the key signature dictates the sharps or flats present throughout the piece.

Understanding these accidentals is vital; they alter specific notes, influencing the overall harmonic color. For instance, sheet music in A major will display sharps, while those in Eb major will feature flats. Accurately recognizing the key signature ensures you play the correct notes, preserving Satie’s intended melodic and harmonic landscape. Beginners should carefully examine the beginning of the score to determine the key before starting to play.

Interpreting Dynamics and Articulation

Gymnopédie No. 1 generally calls for subtle dynamics, often indicated by p (piano – soft) or mp (mezzo piano – moderately soft). Paying close attention to these markings is crucial for capturing the piece’s serene and contemplative mood. Articulation, while not heavily emphasized, often involves legato phrasing – smooth and connected notes.

Beginners practicing with free PDF sheet music should focus on achieving a consistent touch and avoiding abruptness. Reddit discussions highlight the importance of dynamics, with players seeking feedback on their interpretations. Mastering these nuances elevates the performance beyond simply playing the correct notes, bringing Satie’s vision to life.

Tempo and Rhythm Considerations

Gymnopédie No. 1’s tempo is typically marked as lent et avec beaucoup expression – slow and with much expression. Maintaining a consistent, unhurried pace is vital for conveying the piece’s tranquil character. The rhythm is deceptively simple, primarily utilizing quarter and half notes;

However, subtle rhythmic freedom and rubato (slight speeding up and slowing down) can enhance the musicality. When using free PDF sheet music, carefully observe any suggested tempo markings. Online resources and forums, like those found on Reddit, often discuss appropriate tempos for different interpretations, aiding in a nuanced performance.

Navigating the Musical Structure

Gymnopédie No. 1 follows a relatively straightforward ternary (ABA) structure. The A section, characterized by its gentle melody, is repeated after a contrasting B section. When reviewing free PDF sheet music, pay attention to repeat signs and section markings.

Understanding this structure helps with memorization and interpretation. The piece’s harmonic simplicity, primarily utilizing chords in A major (or other transposed keys), contributes to its calming effect. Online resources often provide analyses of Satie’s harmonic language. Carefully examine the sheet music for dynamic and articulation markings, as these are crucial for shaping the musical phrases.

Legal and Licensed Sheet Music Options

Explore one-time purchase or subscription services for verified, legal sheet music of Gymnopedie No. 1, ensuring quality and supporting composers.

One-Time Purchase vs. Subscription Services

Choosing between a one-time purchase and a subscription service for Gymnopedie No. 1 sheet music depends on your playing frequency and repertoire needs. A one-time purchase, as highlighted by sources, offers immediate, permanent access to the specific piece without recurring fees. This is ideal if you only need this particular composition.

Conversely, subscription services provide access to a vast library of sheet music, potentially beneficial for those learning numerous pieces or exploring diverse composers. However, access ceases upon subscription termination. Verified sheet music, available through one-time purchases, ensures accuracy and legality, supporting musicians and copyright holders. Consider your long-term musical goals when deciding which option best suits your requirements.

Benefits of Verified Sheet Music

Opting for verified sheet music of Gymnopedie No. 1 offers significant advantages over freely available, potentially inaccurate PDFs. Verified sources, like those offering legal and licensed options, guarantee musical fidelity and correct notation, crucial for accurate learning and performance. Musicians verify these editions, ensuring quality and minimizing errors often found in unverified online copies.

Furthermore, supporting verified sheet music upholds copyright laws and fairly compensates the composer and publishers. This practice encourages continued creation and preservation of musical works. Digital delivery provides instant access after purchase, eliminating shipping delays. Choosing verified sheet music is an investment in your musical development and supports the music community.

Digital Delivery and Instant Download

Acquiring Gymnopedie No. 1 sheet music through legal and licensed platforms frequently provides the convenience of digital delivery. This means, upon completing your purchase, the PDF file is immediately available for download, bypassing traditional shipping times. This instant access allows pianists to begin learning and practicing Satie’s beautiful composition without delay.

The benefit extends to accessibility; your purchased sheet music is stored digitally, readily available on various devices. No more concerns about lost or damaged physical copies! This streamlined process, coupled with secure payment options, offers a modern and efficient way to obtain high-quality sheet music for this iconic piece.

Gymnopédie No. 1 for Different Instruments

Explore arrangements adapting Satie’s work for cello, organ, and guitar, offering diverse interpretations beyond the original piano score, often found as free PDFs.

Arrangements for Cello

Discover beautiful cello adaptations of Erik Satie’s Gymnopedie No. 1, readily available in PDF format online. These arrangements transpose the delicate piano melody to the rich, resonant tones of the cello, offering a unique and emotive listening experience.

Many free sheet music sources provide cello-specific scores, catering to varying skill levels. You can find versions suitable for both beginner and advanced cellists. These arrangements often maintain the simplicity and harmonic beauty of the original composition while showcasing the cello’s expressive capabilities.

Searching online databases and music communities frequently yields downloadable PDFs, allowing cellists to easily access and perform this beloved piece. The cello version beautifully captures the melancholic and serene character of Satie’s masterpiece.

Arrangements for Organ

Explore the captivating sound of Erik Satie’s Gymnopedie No. 1 reimagined for the organ, with numerous free PDF sheet music options available online. The organ’s majestic and sustained tones lend a unique depth and grandeur to this already atmospheric piece.

These arrangements often utilize the organ’s diverse stops to create a rich harmonic texture, enhancing the Gymnopedie’s inherent beauty. Scores are accessible for organists of varying skill levels, from beginner to advanced, allowing broad accessibility.

Finding these PDFs is simplified through online music archives and dedicated sheet music websites. The organ adaptation transforms the intimate piano piece into a powerful and evocative sonic experience.

Arrangements for Guitar

Discover the delicate beauty of Satie’s Gymnopedie No. 1 beautifully adapted for the guitar, with numerous free PDF sheet music resources readily available. The guitar’s intimate and expressive qualities perfectly complement the piece’s tranquil and melancholic mood.

These arrangements often feature fingerstyle techniques to replicate the piano’s harmonic richness, creating a captivating and nuanced sound. Guitarists of all levels can find suitable arrangements, from simplified versions for beginners to more complex transcriptions.

Online archives and sheet music websites provide easy access to these PDFs, allowing guitarists to explore this iconic composition in a new light.

Resources and Archives

Explore monthly sheet music archives, including selections from November 2023 and back to 1949, for Gymnopedie No. 1 PDFs and related blogs.

Exploring Monthly Archives of Sheet Music

Delving into online sheet music archives reveals a wealth of resources for finding Gymnopedie No. 1 in PDF format. Websites maintain extensive monthly catalogs, offering a chronological exploration of available scores. For instance, archives showcase significant uploads from November 2022 (52 entries), September 2022 (58 entries), and a peak in June 2022 with 94 available pieces.

Further back, December 2021 held 44 entries, while older months like November 2021 and October 2021 still provide options. These archives aren’t limited to just Gymnopedie No. 1; they offer a broader collection, but diligent searching within these monthly listings can unearth various arrangements and editions of Satie’s beloved composition.

Sheet Music Published in 1949

Discovering sheet music editions published in 1949 offers a glimpse into the historical availability of Gymnopedie No. 1. While finding a direct, free PDF from this era can be challenging, records indicate its presence in circulation. Online archives sometimes feature scans of older publications, though access often requires joining for free or navigating copyright restrictions.

These vintage editions, typically two pages in length, represent early printings of Satie’s work. They provide a unique perspective on the piece’s presentation and notation standards of the time. However, modern, cleaner PDF versions are generally more accessible for contemporary musicians seeking a free download.

Utilizing Online Sheet Music Blogs

Online sheet music blogs frequently curate and share links to free PDF scores, including Gymnopedie No. 1. These blogs act as valuable resources, compiling offerings from various sources and often categorizing them by composer or instrument. However, users should exercise caution, verifying the legality and accuracy of the provided sheet music.

Blogs may feature arrangements for piano, cello, organ, or guitar, catering to diverse instrumental preferences. Regularly checking these platforms can uncover newly added scores or updated links. Remember to respect copyright guidelines and support composers by considering legal, licensed options when available.

alaska route map pdf

Alaska Route Map PDF: A Comprehensive Guide

Planning an Alaskan adventure? Accessing detailed PDF maps is crucial for navigating this vast terrain, offering offline access and comprehensive route information․

These digital resources, sourced from Bells Alaska Maps, DOT&PF, and Alaska․org, provide essential details for a successful journey along iconic highways like the Alaska Highway (ALCAN)․

Downloadable maps assist with understanding milepost systems, road conditions, and potential challenges, ensuring a well-prepared and unforgettable Alaskan exploration․

Embarking on a journey through Alaska demands meticulous planning, and a cornerstone of that preparation is a reliable route map, ideally in PDF format․ The Alaska Route, encompassing the famed Alaska Highway (ALCAN) and numerous connecting roadways, presents unique navigational challenges due to its sheer scale and remote character․

These PDF maps, readily available from sources like Bells Alaska Maps and the Alaska Department of Transportation & Public Facilities (DOT&PF), aren’t merely visual guides; they are essential tools for understanding the intricacies of Alaskan travel․ They provide critical details regarding road conditions, distances, and available services – information often unavailable through standard GPS systems․

The historical context of the Alaska Highway, originally constructed during World War II, adds another layer of complexity․ Understanding the nuances of milepost systems, which differ between Yukon and Alaska, is vital for accurate navigation․ PDF maps offer a comprehensive overview, allowing travelers to confidently traverse this breathtaking, yet demanding, landscape․

What is the Alaska Highway?

The Alaska Highway (ALCAN), officially known as the Alaska Highway, is a 1,387-mile (2,232 km) highway stretching from Dawson Creek, British Columbia, to Delta Junction, Alaska․ Originally built during World War II for military transport, it now serves as a vital link for commerce and tourism․ Navigating this iconic route requires careful planning, and PDF maps are indispensable tools․

Detailed PDF maps, such as those offered by Bells Alaska Maps and Alaska Highway Journey, showcase the highway’s historical context and current conditions․ These maps highlight key landmarks, services, and potential challenges along the route․ Understanding the 40-mile discrepancy between Yukon and Alaska mileposts, as noted in Bells Alaska Maps resources, is crucial for accurate positioning․

Accessing these PDF versions allows for offline map access, a necessity given the limited cell service in many areas․ They provide a comprehensive overview, enabling travelers to confidently explore the vast and stunning landscapes along the ALCAN․

Importance of a PDF Map for Planning

PDF maps are paramount when planning an Alaska route, offering significant advantages over relying solely on digital maps or cell service․ Alaska’s vastness and limited connectivity make offline access essential, a key benefit of downloadable PDF formats․ Resources like those from Alaska․org and the Alaska DOT&PF provide comprehensive route details․

These maps facilitate pre-trip planning, allowing travelers to identify potential stops, services, and challenging sections of road․ Understanding elevation changes, as highlighted in resources like the University of Wisconsin cartography project, is crucial for vehicle suitability․ PDF maps also aid in interpreting milepost markers and map symbols․

Furthermore, the ability to print PDF maps provides a physical backup, invaluable in areas with no signal․ They empower informed decision-making, ensuring a safer and more enjoyable Alaskan adventure․

Key Alaska Routes & Highways

Alaska’s major routes, like the ALCAN, Parks, Glenn, and Richardson Highways, are detailed in available PDF maps, aiding navigation and trip planning effectively․

The Alaska Highway (ALCAN) — Detailed Overview

The Alaska Highway (ALCAN), a legendary route stretching through British Columbia and Yukon into Alaska, demands thorough preparation, and PDF maps are indispensable tools․ Resources like Bells Alaska Maps offer detailed PDF versions specifically for the ALCAN, showcasing its vastness and complexities․

These maps highlight key locations like Destruction Bay and Faro, alongside ferry routes near the Gulf of Alaska․ A crucial detail revealed in these maps is the 40-mile discrepancy between Yukon and Alaska milepost systems – Alaska retains the original mileposts, requiring careful interpretation․

Understanding this difference, as noted in Bells Alaska’s resources, is vital for accurate navigation․ Furthermore, PDF maps from Alaska Highway Journey provide historical context and downloadable route maps, enhancing the overall planning experience․ These maps are essential for visualizing the highway’s path and anticipating potential challenges along the way․

Parks Highway: Accessing Denali National Park

The Parks Highway serves as a primary artery for reaching Denali National Park, and reliable PDF maps are paramount for planning this journey․ While specific PDF maps dedicated solely to the Parks Highway aren’t explicitly detailed in the provided sources, comprehensive Alaska road map books, like those from Alaska․org, will include it․

These broader maps are crucial for understanding the highway’s connection to the wider Alaskan road network․ The Ultimate Alaska Road Map Book highlights the limited paved road infrastructure in Alaska, suggesting potential unpaved sections along the Parks Highway that rental vehicles may be restricted from – a critical consideration․

Utilizing PDF maps allows travelers to pre-plan routes, identify potential stops, and assess road conditions․ Coupled with information regarding elevation changes (as noted in the Alaska Highway Journey resources, applicable to Alaskan highways generally), these maps ensure a safer and more informed trip to Denali․

Glenn Highway: Anchorage to Glennallen

The Glenn Highway, connecting Anchorage to Glennallen, is a scenic but potentially challenging route, making detailed PDF maps essential for travelers․ While dedicated PDF maps focusing solely on the Glenn Highway aren’t directly referenced in the provided sources, comprehensive Alaska road maps – such as those available from Bells Alaska Maps and Alaska․org – will cover this key corridor․

These PDF resources are vital for understanding the highway’s route, potential stops, and connections to other Alaskan roadways․ The Alaska․org map book emphasizes the limited paved road network in Alaska, hinting at possible unpaved sections along the Glenn Highway where vehicle restrictions might apply․

Offline access to these PDF maps is particularly valuable, given potentially limited cell service․ Pre-planning with these maps allows for informed decisions regarding vehicle suitability and anticipated travel times, enhancing the overall Glenn Highway experience․

Richardson Highway: Connecting Valdez and Fairbanks

The Richardson Highway, linking Valdez and Fairbanks, demands careful planning, and readily available PDF maps are indispensable tools for a safe and enjoyable journey․ While specific PDF maps dedicated solely to the Richardson Highway aren’t explicitly mentioned in the provided sources, comprehensive Alaska road maps – like those from Bells Alaska Maps and Alaska․org – will detail this crucial route․

These PDF resources are critical for understanding elevation changes, as noted in the Aaron Jing study referencing highway width variations based on altitude․ The Alaska․org map book highlights the prevalence of unpaved roads, suggesting potential sections on the Richardson Highway requiring suitable vehicle types․

Offline access to these PDF maps is paramount due to limited cellular connectivity․ Utilizing these maps beforehand allows for informed decisions regarding travel conditions and potential road closures, ensuring a well-prepared Richardson Highway adventure․

Understanding Alaska Route Maps

PDF maps are essential for interpreting Alaska’s unique milepost systems and symbols, as detailed by DOT&PF and Bells Alaska Maps, aiding navigation․

Reading Milepost Markers

Understanding milepost markers is fundamental when navigating Alaskan routes, as highlighted in resources like Bells Alaska Maps and the Alaska Highway Journey guide․ Unlike the contiguous United States, Alaska and Yukon utilize differing milepost systems, creating potential confusion for travelers․

Alaska maintains the original mileposts, while the Yukon has undergone highway reconstruction resulting in a 40-mile discrepancy․ Therefore, a map displaying both systems, or a clear understanding of this difference, is vital․ Mileposts indicate the distance from the beginning of the highway, typically from the border or a major junction․

These markers are crucial for pinpointing your location, estimating arrival times, and referencing points of interest detailed on PDF maps․ Always cross-reference milepost readings with your map to ensure accurate positioning, especially when relying on offline navigation․ Paying attention to these markers enhances safety and simplifies trip planning throughout Alaska’s extensive road network․

Interpreting Map Symbols and Legends

Alaska route maps, particularly in PDF format from sources like Alaska․org and the DOT&PF, employ specific symbols and legends to convey crucial information․ These aren’t always intuitive, demanding careful interpretation for safe and efficient travel․

Common symbols denote services – gas stations, lodging, hospitals – and points of interest like parks and historical sites․ Road classifications, indicated by color or line style, reveal whether a route is paved, gravel, or under construction; Understanding these distinctions is vital, as many rental vehicles prohibit travel on unpaved roads․

PDF map legends also illustrate elevation changes, ferry routes (as shown on Bells Alaska Maps), and potential hazards․ Always familiarize yourself with the map’s key before embarking on your journey․ Accurate interpretation of these symbols ensures you’re prepared for the road ahead and can make informed decisions regarding your route and vehicle suitability․

Differences Between Yukon and Alaska Mileposts

A critical detail when using Alaska Highway (ALCAN) PDF maps is understanding the discrepancy between Yukon and Alaska milepost systems․ Due to highway reconstruction within the Yukon Territory, a significant 40-mile difference exists between the two regions’ milepost calculations, as highlighted by Bells Alaska Maps․

Alaska continues to utilize the original milepost numbering, while the Yukon has adjusted its system․ This means a location marked as mile 500 in Alaska might be referenced as mile 540 in the Yukon․ PDF maps often indicate this offset, but it’s crucial to be aware of it to avoid confusion during navigation․

Always verify which milepost system a map employs and cross-reference information when planning your route․ Ignoring this difference can lead to miscalculations and potential delays, especially when relying on directions or meeting points․

Where to Find Alaska Route Maps in PDF Format

Numerous online resources offer downloadable Alaska route maps in PDF format, including Bells Alaska Maps, the Alaska DOT&PF, Alaska․org, and Alaska Highway Journey․

Bells Alaska Maps ⎯ Alaska Highway Map

Bells Alaska Maps is a highly recommended source for detailed Alaska Highway maps available in PDF format․ Their offerings include comprehensive maps showcasing the Gulf of Alaska and key locations along the ALCAN, such as Burwash Landing, Destruction Bay, and Faro․

These maps are particularly valuable for visualizing the route through the Yukon and Alaska, highlighting features like Kluane Lake and the Mackenzie River․ Notably, Bells Alaska Maps acknowledges a 40-mile discrepancy between Yukon and Alaska mileposts due to highway reconstruction in the Yukon Territory․

Alaska continues to utilize the original milepost system, making Bells’ maps essential for accurate navigation․ You can directly access their Alaska Highway Map PDF at https://www․bellsalaska․com/maps/AlaskaHighwayMap․pdf, and explore additional detailed maps through their travel guides at https://www․bellsalaska․com/maps/AlaskaHighwayMaps․pdf․

Alaska Department of Transportation & Public Facilities (DOT&PF) Maps

The Alaska Department of Transportation & Public Facilities (DOT&PF) provides valuable PDF maps focused on the State’s National Highway System (NHS)․ These maps illustrate the interconnected network of routes crucial for security, commerce, and travel throughout Alaska․

The NHS maps detail routes serving important national functions, offering a broader perspective on Alaska’s transportation infrastructure․ While not solely focused on the Alaska Highway, they provide context for understanding how it integrates into the larger statewide system․

Access the 2006 final NHS MapSet PDF directly through the DOT&PF website at https://dot․alaska․gov/stwddes/gis/dataproducts/NHS_MapSet2006final․pdf․ These resources are particularly useful for understanding the classification and importance of various roadways within Alaska, complementing more detailed route-specific maps․

Alaska․org — The Ultimate Alaska Road Map Book

Alaska․org offers “The Ultimate Alaska Road Map Book” in PDF format, a comprehensive resource for planning your journey․ This detailed map book acknowledges the unique challenges of Alaskan roads, noting that Alaska is vastly larger than the Lower 48 states, yet possesses significantly less paved roadway․

The PDF highlights that most rental vehicles face restrictions on unpaved roads, a crucial consideration for travelers․ It’s a vital resource for understanding road accessibility and planning routes accordingly․ Download the complete book here․

This resource provides a realistic overview of Alaska’s road network, emphasizing the importance of careful planning and vehicle selection․ It’s an invaluable tool for anyone seeking a detailed understanding of Alaska’s road system before embarking on their adventure․

Alaska Highway Journey — Historical Route Maps

Alaska Highway Journey provides access to PDF versions of popular route maps, alongside a wealth of historical information about the ALCAN․ Their 2025 edition, available for download, offers a valuable resource for those interested in the highway’s past and present․

The website encourages users to explore additional maps online, specifically at alaskahighwayjourney․com/trip-planning/maps/, providing a centralized location for accessing various route visualizations․ This PDF resource is perfect for those wanting to understand the historical context of their journey․

These maps aren’t just navigational tools; they’re a window into the highway’s evolution․ Alaska Highway Journey offers a unique blend of practical route guidance and historical insight, enhancing the overall travel experience․

Navigating with Alaska Route PDFs

PDF maps enable convenient offline access, a vital benefit in Alaska’s remote areas․ They are easily used on mobile devices and printed for physical navigation․

Offline Map Access & Benefits

One of the most significant advantages of utilizing Alaska route maps in PDF format is the ability to access crucial navigational information completely offline․ Alaska’s vastness and remote locations often present challenges with consistent cellular service or reliable internet connectivity․ Relying solely on online maps can leave travelers stranded or disoriented when signal is lost․

PDF maps downloaded beforehand ensure continuous access to detailed route information, milepost markers, and important landmarks, regardless of connectivity․ This is particularly vital when traversing the Alaska Highway (ALCAN) or exploring areas within Denali National Park․ Having a readily available, digital copy of maps from sources like Bells Alaska Maps or the Alaska DOT&PF provides peace of mind and enhances safety․

Furthermore, offline access conserves mobile data, which can be expensive or limited in remote regions․ Travelers can confidently navigate without incurring roaming charges or worrying about data usage․ This feature is invaluable for extended road trips and backcountry adventures throughout Alaska’s diverse landscapes․

Using PDF Maps on Mobile Devices

Alaska route maps in PDF format are exceptionally versatile when utilized on smartphones and tablets․ Numerous mobile applications, readily available for both iOS and Android platforms, allow users to seamlessly view, zoom, and interact with these maps․ These apps often include features like bookmarking, annotation, and location tracking, enhancing the navigational experience․

Downloaded PDFs from sources like Alaska․org or the Alaska Highway Journey website can be easily opened within these apps, providing a convenient and portable mapping solution․ Utilizing the touchscreen interface allows for intuitive map manipulation, making it simple to pinpoint locations, measure distances, and plan routes on the go․

Mobile devices also offer the benefit of geotagging, enabling users to pinpoint their current location directly on the PDF map, even without an internet connection․ This feature, combined with the offline accessibility of PDF maps, makes mobile devices an indispensable tool for navigating Alaska’s challenging terrain․

Printing Alaska Route Maps for Physical Use

Despite the convenience of digital maps, printing Alaska route maps in PDF format remains a valuable backup and preferred method for some travelers․ Downloading PDFs from resources like Bells Alaska Maps or the Alaska DOT&PF allows for high-quality printing at a desired scale․ This is particularly useful for detailed route planning and annotation with handwritten notes․

Printed maps offer a reliable alternative when electronic devices fail due to battery depletion or lack of signal, common occurrences in remote Alaskan regions․ Larger format prints, such as those created from the Ultimate Alaska Road Map Book, provide a comprehensive overview of the entire route․

Consider printing key sections of the map, focusing on areas with complex road networks or limited services․ Laminating printed maps enhances durability and protects against moisture, ensuring they withstand the rigors of Alaskan travel․ A physical map provides peace of mind and a tangible connection to the journey․

Challenges & Considerations for Alaska Travel

Alaska’s vastness presents unique challenges․ PDF maps highlight unpaved roads, elevation changes, and seasonal closures, crucial for planning and vehicle suitability․

Unpaved Roads and Vehicle Restrictions

Navigating Alaska’s roadways requires careful consideration of surface conditions․ Many routes, particularly beyond the primary highways, feature significant stretches of gravel or unpaved surfaces․ PDF maps are invaluable in identifying these areas, allowing travelers to anticipate potential challenges and prepare accordingly․

Rental vehicle agreements often prohibit travel on unpaved roads, as damage from gravel and potholes is common․ Alaska․org’s road map book specifically notes this restriction․ Therefore, consulting a detailed PDF map before your trip is essential to determine if your chosen vehicle is suitable for the intended route․

Understanding these restrictions is vital to avoid voiding your rental agreement and incurring costly repairs․ Maps from sources like Bells Alaska and the DOT&PF can help pinpoint these sections, enabling informed decisions about vehicle choice or route adjustments․ Prior planning, aided by comprehensive PDF resources, ensures a smoother and more enjoyable Alaskan adventure․

Elevation Changes and Highway Width

Alaska’s terrain presents significant variations in elevation, directly impacting highway width and driving conditions․ Detailed PDF maps are crucial for visualizing these changes and anticipating potential challenges․ The Ultimate Guide to Traveling the Alaska Highway highlights how highway width varies based on elevation, ranging from 305 to 1299 meters․

Steep grades and winding roads are common, demanding careful driving and potentially reducing speed․ PDF maps, with their contour lines and elevation profiles, allow drivers to prepare for these sections․ Understanding these variations is particularly important for larger vehicles or those unfamiliar with mountainous terrain․

Narrow highway widths, especially on older sections, require increased vigilance and awareness of oncoming traffic․ Utilizing a PDF map to identify these areas beforehand allows for proactive planning and a safer, more comfortable journey through Alaska’s stunning, yet demanding, landscapes․

Seasonal Road Conditions and Closures

Alaska’s extreme climate significantly impacts road conditions throughout the year, necessitating careful planning and reliance on up-to-date information․ Comprehensive PDF maps, when combined with current road reports, are invaluable tools for navigating these challenges․

Winter brings snow, ice, and potential closures, particularly on higher elevation routes․ PDF maps help identify alternative routes and potential staging areas․ Spring thaw can lead to flooding and road damage, while autumn brings early snowfall․

Accessing current road closure information is vital, and many PDF map resources link to official Alaska DOT&PF websites providing real-time updates․ Proactive planning, utilizing these resources, ensures a safer and less stressful Alaskan adventure, despite the unpredictable seasonal conditions․

python for finance pdf

Python’s growing role in finance is highlighted by tutorials like DataCamp’s beginner guide, and resources such as awesome-quant on GitHub․
These materials offer a strong foundation for quantitative analysis and algorithmic trading․

Why Python is Preferred in Finance

Python has rapidly become the dominant language in the finance industry, eclipsing traditional tools like Excel and even older programming languages․ This preference stems from several key advantages․ Firstly, Python boasts a rich ecosystem of powerful libraries specifically designed for financial modeling and data analysis, including NumPy, Pandas, Matplotlib, and Seaborn – all crucial for quantitative work․

Secondly, its clear and readable syntax makes it easier to develop, maintain, and collaborate on complex financial models․ Resources like the DataCamp tutorial and the curated lists on awesome-quant demonstrate the accessibility of Python for both beginners and experienced professionals․ Furthermore, Python’s versatility extends to algorithmic trading, risk management, and derivative pricing, as evidenced by libraries like FinancePy․ Finally, the large and active Python community provides ample support and readily available solutions to common financial challenges․

The Rise of Python in Quantitative Analysis

Quantitative analysis in finance has undergone a significant transformation with the adoption of Python․ Historically reliant on specialized software and statistical packages, the field now leverages Python’s extensive libraries for data manipulation, statistical modeling, and visualization․ The availability of resources like the DataCamp tutorial and GitHub repositories, such as awesome-quant, has democratized access to these powerful tools․

Python’s NumPy and Pandas libraries provide the foundation for efficient numerical computation and data handling, essential for tasks like portfolio optimization and risk assessment․ Furthermore, its ability to integrate with other technologies and its open-source nature have fostered innovation; The increasing use of Python by major financial institutions like Blackrock and Goldman Sachs, building tools like InGen and Datagrid, underscores its growing importance in modern quantitative finance․ This shift is driven by Python’s flexibility and scalability for handling large datasets and complex models․

Essential Python Libraries for Finance

Key libraries like NumPy, Pandas, Matplotlib, and Seaborn are fundamental․ These tools, highlighted in beginner guides and quantitative resources, empower financial modeling and analysis․

NumPy: The Foundation for Numerical Computing

NumPy serves as the bedrock for numerical operations within Python, and is crucial for finance applications․ It provides support for large, multi-dimensional arrays and matrices, alongside a collection of high-performance mathematical functions․ These capabilities are essential for tasks like portfolio optimization, risk analysis, and derivative pricing․

Financial data often involves complex calculations and statistical modeling․ NumPy’s efficient array operations significantly accelerate these processes compared to standard Python lists․ Libraries like Pandas, built upon NumPy, leverage these optimized routines for data manipulation and analysis․

Furthermore, NumPy’s broadcasting features simplify operations on arrays of different shapes and sizes, streamlining code and improving readability․ Its integration with other scientific computing libraries makes it an indispensable tool for quantitative finance professionals and researchers alike, as noted in various online resources․

Pandas: Data Manipulation and Analysis

Pandas is a powerful Python library specifically designed for data manipulation and analysis, and is widely adopted in the finance industry․ It introduces DataFrames, tabular data structures with labeled axes, enabling efficient data handling and cleaning․ BlackRock’s use of Pandas to build InGen demonstrates its practical application in real-world financial software․

Pandas excels at handling time series data, a common requirement in financial modeling․ Its functionalities for data alignment, filtering, and transformation simplify complex data preparation tasks․ Combined with NumPy, Pandas provides a robust environment for statistical analysis and data visualization․

The library’s ability to read data from various sources (CSV, Excel, databases) and its intuitive API make it a favorite among financial analysts․ Resources like the DataCamp tutorial highlight Pandas’ role in stock and trading analysis, solidifying its importance in quantitative finance workflows․

Matplotlib & Seaborn: Data Visualization

Data visualization is crucial in finance for identifying trends and communicating insights, and Python offers excellent libraries for this purpose․ Matplotlib is a foundational library, providing a wide range of plotting options, from simple line charts to complex visualizations․ It allows for customization to meet specific analytical needs․

Seaborn builds on Matplotlib, offering a higher-level interface for creating statistically informative and aesthetically pleasing graphics․ It simplifies the creation of complex plots like heatmaps and distribution plots, valuable for analyzing financial data․

Effective visualization aids in understanding stock price movements, portfolio performance, and risk assessments․ These libraries are often used in conjunction with Pandas and NumPy to explore and present financial data effectively․ The DataCamp tutorial emphasizes the importance of visualizing financial data for informed decision-making․

Financial Applications with Python

Python facilitates diverse financial applications, including stock analysis, algorithmic trading, and time series modeling, as demonstrated in resources like the DataCamp tutorial and GitHub projects․

Stock and Trading Analysis

Python has become a cornerstone for stock and trading analysis due to its powerful libraries and ease of use․ Resources like the DataCamp tutorial provide a beginner-friendly introduction to applying Python in this domain․ A key aspect involves data acquisition, where Python scripts can efficiently retrieve stock prices from various sources․

Furthermore, technical indicator calculation is streamlined with libraries like Pandas and NumPy, allowing analysts to compute moving averages, RSI, and MACD with relative ease․ The availability of open-source projects on platforms like GitHub, such as algorithmic-trading-with-python, demonstrates the practical application of these tools․ These resources empower traders and analysts to develop and backtest trading strategies, ultimately enhancing decision-making processes in the financial markets․ Python’s flexibility allows for customization and integration with other analytical tools․

Data Acquisition for Stock Prices

Python excels at acquiring stock price data through various APIs and web scraping techniques․ Libraries like yfinance and requests facilitate seamless integration with financial data providers․ The DataCamp tutorial emphasizes getting started with this crucial step, enabling users to download historical and real-time stock data directly into Pandas DataFrames․

This acquired data forms the foundation for subsequent analysis․ Automated data pipelines can be constructed to regularly update datasets, ensuring analysts have access to the most current information․ GitHub resources, like those found within awesome-quant, often showcase examples of data acquisition scripts․ Efficient data handling is paramount, and Python’s capabilities in this area are a significant advantage for financial professionals․ Proper data cleaning and validation are also essential steps in this process․

Technical Indicator Calculation

Python, coupled with libraries like Pandas and NumPy, simplifies the calculation of technical indicators vital for stock and trading analysis․ Common indicators – Moving Averages, RSI, MACD, and Bollinger Bands – can be efficiently computed using vectorized operations․ The DataCamp tutorial for beginners likely demonstrates these calculations, providing a practical starting point․

These indicators provide insights into potential trading signals and market trends․ Automating their calculation allows for backtesting strategies and identifying patterns․ Resources on GitHub, such as those within awesome-quant, often contain pre-built functions or modules for calculating a wide range of indicators․ Furthermore, the ability to customize indicator parameters and combine them creates sophisticated analytical tools․ Accurate and reliable indicator calculations are crucial for informed decision-making in financial markets․

Time Series Data Analysis

Analyzing time series data is fundamental in finance, and Python, particularly with Pandas, excels in this domain․ Pandas provides powerful tools for handling and manipulating time-indexed data, making it ideal for stock prices, economic indicators, and other financial data․ The DataCamp tutorial emphasizes time series analysis as a core component of financial modeling․

Effective time series analysis involves cleaning, transforming, and visualizing data to identify trends, seasonality, and patterns․ Statistical methods, such as autocorrelation and stationarity tests, are crucial for understanding the underlying characteristics of the data․ Python’s statistical libraries facilitate these analyses․ Resources like those found on awesome-quant on GitHub offer advanced techniques and packages for sophisticated time series modeling and forecasting, enabling better predictions and risk assessment․

Working with Time Series Data in Pandas

Pandas provides dedicated functionalities for working with time series data, including specialized data structures like DatetimeIndex and PeriodIndex․ These indexes allow for efficient alignment and resampling of time-based data․ The DataCamp tutorial highlights Pandas as a key tool for manipulating financial time series, enabling tasks like calculating rolling statistics and handling missing values․

Essential Pandas methods for time series analysis include resample for frequency conversion, shift for lagging data, and rolling for calculating moving averages․ These functions are crucial for preparing data for statistical modeling and technical indicator calculations․ Furthermore, Pandas integrates seamlessly with other Python libraries like NumPy and Matplotlib, facilitating comprehensive data analysis and visualization workflows, as demonstrated in various resources available on platforms like GitHub․

Statistical Analysis of Time Series

Analyzing time series data requires robust statistical methods․ Python, with libraries like Pandas and Statsmodels, offers tools for performing these analyses․ Key techniques include autocorrelation and partial autocorrelation functions (ACF and PACF) to identify patterns and dependencies within the data․ Statistical tests, such as the Augmented Dickey-Fuller test, can determine stationarity – a crucial property for reliable forecasting․

Furthermore, models like ARIMA (AutoRegressive Integrated Moving Average) can be implemented using Statsmodels to predict future values based on historical data․ These models require careful parameter tuning and validation․ Resources like QuantFinance on GitHub provide tutorials and examples of applying these statistical methods in a financial context․ Understanding these techniques is vital for risk management, portfolio optimization, and algorithmic trading strategies, as highlighted in beginner guides and advanced quantitative finance resources․

Advanced Topics & Resources

Explore FinancePy for derivative pricing, algorithmic trading with Chris Conlan’s resources, and the curated ‘awesome-quant’ list on GitHub for further learning․

Pricing and Risk Management of Financial Derivatives (FinancePy)

FinancePy emerges as a specialized Python library dedicated to the intricate world of financial derivative pricing and risk management․ This powerful tool focuses on a broad spectrum of instruments, encompassing fixed-income securities, equities, foreign exchange (FX) derivatives, and credit derivatives․

Its core functionality allows practitioners to model and evaluate the value of these complex financial products, crucial for accurate portfolio assessment and hedging strategies; FinancePy isn’t just about pricing; it extends to comprehensive risk analysis, enabling users to quantify and manage potential losses associated with derivative positions․

Developed by domokane on GitHub, the library provides a robust framework for implementing sophisticated financial models․ It’s a valuable resource for quantitative analysts, risk managers, and anyone involved in the trading and valuation of derivatives, offering a Pythonic approach to these challenging tasks․

Algorithmic Trading with Python

Python has become a dominant force in algorithmic trading, fueled by its versatility and extensive libraries․ Resources like the “Algorithmic Trading with Python” book by Chris Conlan (source code available on GitHub) provide a practical pathway for developing automated trading strategies․

The appeal lies in Python’s ability to seamlessly integrate with data feeds, execute trades through APIs, and perform complex calculations – all essential components of a successful algorithmic trading system․ Libraries like Pandas and NumPy are instrumental in data manipulation and analysis, while backtesting frameworks allow for rigorous strategy evaluation․

GitHub repositories, such as those curated within awesome-quant, showcase numerous algorithmic trading projects and tools․ This collaborative environment fosters innovation and provides readily available resources for both beginners and experienced quants seeking to automate their trading processes․

Quantitative Finance Resources (Awesome-Quant)

Awesome-Quant, a curated list on GitHub, stands as a central repository for quantitative finance resources in Python․ It’s a treasure trove of libraries, packages, and tools essential for anyone working in the field, offering a significant advantage when learning or applying Python to finance․

This collection encompasses a wide range of areas, from pricing derivatives to portfolio optimization and machine learning applications․ It includes links to training materials like QuantFinance, which provides tutorials on topics such as pricing, xVAs, and hedging strategies․

Furthermore, Awesome-Quant highlights relevant repositories like IPythonScripts, offering practical examples and code snippets․ The resource’s comprehensive nature makes it an invaluable starting point for both newcomers and seasoned professionals seeking to expand their knowledge and toolkit within the quantitative finance domain․

test-driven development with php 8 pdf

This book guides PHP developers through building robust applications using TDD and BDD, focusing on practical exercises like a book registration application.

What is Test-Driven Development?

Test-Driven Development (TDD) is a software development process where tests are written before the code itself. This approach flips traditional development on its head, ensuring code is built to meet specific requirements. The core idea revolves around a short, iterative cycle: write a failing test, then write just enough code to pass it, and finally, refactor for clarity and efficiency;

Benefits of TDD in PHP 8

Employing TDD with PHP 8 yields numerous advantages, including improved code quality and reduced debugging time. It fosters a deeper understanding of requirements, leading to more maintainable and extensible applications. Automated tests act as living documentation, simplifying future modifications. Furthermore, TDD encourages cleaner design and promotes confidence in code changes, ultimately delivering reliable enterprise-level software solutions.

Technical Requirements and Development Environment

A functional PHP 8 installation, a suitable IDE (like PhpStorm), and the PHPUnit testing framework are essential for following this book’s practical examples.

PHP 8 Installation and Configuration

Before diving into TDD, ensure PHP 8 is correctly installed and configured on your system. This involves downloading the appropriate version for your operating system and setting up the necessary environment variables. Verify the installation by running php -v in your terminal, confirming the PHP 8 version is displayed.

Configure php.ini to enable extensions required for testing and database interactions, such as PDO and potentially others depending on your chosen database system (MySQL or MongoDB). Restart your web server after making any changes to the configuration file.

Setting up a Suitable IDE

A robust Integrated Development Environment (IDE) significantly enhances the TDD workflow. Popular choices include PhpStorm, Visual Studio Code with PHP extensions, or NetBeans. Ensure your IDE supports debugging, code completion, and integration with PHPUnit, the chosen testing framework.

Configure your IDE to recognize your project’s directory structure and automatically load necessary files. Proper IDE setup streamlines test execution and code navigation, boosting productivity during the Red-Green-Refactor cycle.

Choosing a Testing Framework (PHPUnit)

PHPUnit is the de facto standard testing framework for PHP, perfectly suited for TDD. It provides tools for creating and running tests, asserting expected outcomes, and mocking dependencies. Installation is typically done via Composer, PHP’s dependency manager.

PHPUnit’s features, like test suites and code coverage analysis, are invaluable for ensuring code quality and identifying areas needing improvement throughout the development process.

Understanding Behavior-Driven Development (BDD)

BDD extends TDD by focusing on describing application behavior in plain language, bridging the gap between developers, testers, and business stakeholders.

BDD vs. TDD: Key Differences

While both TDD and BDD aim for quality software, their approaches differ. TDD centers on verifying implementation details through unit tests, driven by a developer’s perspective. BDD, conversely, emphasizes verifying the behavior of the application from a user’s viewpoint, utilizing scenarios described in a natural language like Gherkin.

Essentially, TDD asks “Does this code work?”, while BDD asks “Does this application behave as expected?”. BDD fosters collaboration and clearer requirements.

Behat is a powerful BDD framework for PHP, enabling you to write tests in a human-readable format. It utilizes Gherkin, a Business Readable, Executable Specification Language. Gherkin allows stakeholders to define application behavior using scenarios structured with “Given-When-Then” steps.

This approach bridges the gap between business requirements and technical implementation, promoting collaboration and ensuring everyone understands the expected functionality.

Implementing TDD with PHP 8: The Red-Green-Refactor Cycle

The core of TDD involves writing a failing test (Red), implementing code to pass it (Green), and then improving the code’s design (Refactor).

Writing Failing Tests First (Red)

The initial step in TDD is writing a test before any implementation code. This test defines a desired behavior and, crucially, must fail initially. This “Red” phase confirms the test itself is correctly set up to detect the intended functionality.

By starting with a failing test, you avoid writing unnecessary code and ensure that every line of code is driven by a specific requirement, validated by a test. This approach fosters a focused and deliberate development process.

Writing Minimal Code to Pass Tests (Green)

Following the “Red” phase, the goal is to write the simplest possible code to make the failing test pass. Resist the urge to over-engineer or anticipate future requirements. Focus solely on satisfying the current test case. This “Green” phase validates the core functionality.

This minimal implementation ensures code clarity and avoids unnecessary complexity. It’s about achieving the quickest path to a passing test, establishing a foundation for subsequent refinement.

Refactoring for Clean Code and Design

Once the tests pass (“Green”), the “Refactor” phase begins. This involves improving the code’s internal structure – readability, maintainability, and design – without altering its external behavior. Existing tests act as a safety net, ensuring refactoring doesn’t introduce regressions.

Techniques include removing duplication, simplifying complex logic, and applying design patterns. This phase enhances code quality and long-term sustainability.

Applying BDD using Behat and Gherkin

Behat, utilizing Gherkin, enables collaboration by describing application behavior in plain language, bridging the gap between business stakeholders and developers.

What is Behat?

Behat is a Behavior-Driven Development (BDD) framework for PHP, designed to facilitate collaboration and ensure software meets defined business requirements. It allows you to write tests in a human-readable format using Gherkin, a plain-text language. These tests describe the expected behavior of your application from the user’s perspective.

Behat then executes these scenarios, interacting with your code to verify that it behaves as intended. This approach promotes a shared understanding of the software’s functionality among developers, testers, and stakeholders.

What is Gherkin?

Gherkin is a Business Readable, Plain-Text language used to define tests in a Behavior-Driven Development (BDD) process. It employs a simple structure using keywords like Given, When, Then, And, and But to describe scenarios in a clear, understandable manner for both technical and non-technical team members.

This allows for better collaboration and ensures everyone understands the expected behavior of the software being developed, bridging the gap between requirements and implementation.

Utilizing Mink for Browser Emulation

Mink serves as a powerful browser emulation tool within Behat, enabling automated testing of web applications without requiring a graphical user interface. It interacts with your application as a real user would, navigating pages, filling forms, and clicking buttons.

This allows for comprehensive testing of front-end functionality and user interactions, ensuring a seamless user experience and robust application behavior.

Building a Book Registration Application with TDD

This practical example demonstrates applying TDD principles, starting with Behat features and progressing to Symfony implementation for a book registration system.

Creating a Behat Feature Based on Requirements

The process begins by translating business requirements, often sourced from tools like Jira, into a Behat feature file. This file, written in Gherkin, clearly outlines the desired behavior of the book registration functionality.

Specifically, you’ll define scenarios detailing successful registration, handling invalid data, and ensuring proper error messages are displayed. This feature serves as a living documentation and drives the development process, ensuring alignment with stakeholder expectations and a focused testing strategy.

Writing Failing Controller Tests

Following the Behat feature definition, the next step involves crafting controller tests that initially fail. These tests directly correspond to the scenarios outlined in the Gherkin feature file.

The purpose is to verify that the tests accurately reflect the expected behavior before any implementation code is written. This ensures the tests are truly testing the requirements and not simply confirming existing functionality, adhering to the core TDD principle.

Implementing Registration Solution with Symfony

With failing controller tests established, the focus shifts to implementing the registration solution utilizing the Symfony framework. This involves creating the necessary controller actions, forms, and potentially entities to handle user registration.

The implementation should be minimal, solely aimed at passing the previously written failing tests, embodying the ‘Green’ phase of the TDD cycle. This ensures a focused and test-driven approach to development.

Database Interactions and TDD

Explore TDD strategies with both relational databases (MySQL via PDO) and document databases (MongoDB), building upon the book registration application’s functionality.

TDD with PDO for Relational Databases (MySQL)

Applying TDD with PHP 8 and MySQL involves writing tests before implementing database interactions using PDO. This approach ensures code quality and maintainability. The book demonstrates how to define tests that verify database queries, insertions, and updates.

You’ll learn to isolate database logic, making testing easier and more reliable. This method promotes a clear separation of concerns, leading to more robust and extensible applications. The practical example focuses on the book registration application, showcasing real-world implementation.

TDD with MongoDB for Document Databases

The book extends TDD principles to NoSQL databases, specifically MongoDB, demonstrating how to test interactions with document-oriented data. You’ll discover how to write tests that validate data storage, retrieval, and manipulation within MongoDB using PHP 8.

This approach ensures the integrity of your data and the reliability of your application. The book illustrates testing strategies tailored for MongoDB’s flexible schema, building upon the book registration application example for practical application.

Advanced TDD Concepts

Explore design patterns alongside TDD, and delve into crucial testing areas like security, authentication, and authorization within your PHP 8 applications.

Design Patterns and TDD

Integrating design patterns with Test-Driven Development enhances code quality and maintainability. This approach allows you to define interfaces and behaviors through tests before implementation. Patterns like Factory, Strategy, and Observer become easier to implement and verify when driven by tests.

TDD encourages loose coupling and high cohesion, core principles of good design patterns. By writing tests first, you naturally design for testability, leading to more flexible and robust applications. The book demonstrates how to effectively combine these powerful techniques.

Testing for Security, Authentication, and Authorization

Security testing is crucial in modern web applications, and TDD provides a structured approach. Write tests to verify authentication mechanisms, authorization rules, and protection against common vulnerabilities like SQL injection or cross-site scripting (XSS).

The book explores how to test these aspects effectively, ensuring your PHP 8 application is secure by design. Focus on testing edge cases and negative scenarios to build resilient and trustworthy systems.

Integrating TDD into a Continuous Integration/Continuous Deployment (CI/CD) Pipeline

Automated testing is key in CI/CD, and TDD’s comprehensive test suite ensures rapid feedback and reliable deployments for PHP 8 projects.

Automated Testing in CI/CD

Integrating TDD into a CI/CD pipeline necessitates automated testing at every stage. This includes unit, integration, and potentially end-to-end tests, all triggered by code commits. Frameworks like PHPUnit, coupled with CI/CD tools, execute tests automatically, providing immediate feedback on code quality. Successful test runs enable automated deployments, reducing manual intervention and accelerating release cycles. This approach ensures that only thoroughly tested code reaches production, minimizing risks and enhancing application stability, as highlighted in resources for mastering TDD with PHP 8.

Benefits of CI/CD with TDD

Combining TDD with CI/CD yields substantial benefits. Faster feedback loops, driven by automated tests, allow for quicker bug detection and resolution. Reduced risk of regressions is achieved through continuous testing. Increased developer productivity stems from automated deployments and fewer manual testing efforts. Ultimately, this synergy delivers higher quality software, faster release cycles, and improved overall efficiency, mirroring the practical application focus detailed in resources for mastering Test-Driven Development with PHP 8.

Resources for Further Learning

Explore online courses, tutorials, and books like “Mastering Test-Driven Development with PHP 8” by BPB Publications to deepen your TDD expertise.

Online Courses and Tutorials

Numerous platforms offer courses to enhance your TDD skills with PHP 8. Look for tutorials covering PHPUnit, Behat, and Gherkin integration. Resources often demonstrate building applications with TDD, mirroring the book’s approach. Explore platforms like Udemy, Laracasts, and dedicated PHP training sites. Focus on practical exercises and real-world examples to solidify your understanding of the Red-Green-Refactor cycle and BDD principles, ultimately improving your development workflow.

Relevant Books and Documentation

“Mastering Test-Driven Development with PHP 8” by BPB Publications provides a practical guide, building a book registration application. Rainier Sarabia and Ben Hansen’s “Test-Driven Development with PHP 8” at Barnes & Noble offers a developer’s practical approach. Supplement these with the official PHP documentation (php.net), PHPUnit documentation, and Behat’s official site for comprehensive details on frameworks and best practices. These resources will deepen your TDD knowledge.

Throughout this exploration of TDD and BDD with PHP 8, we’ve seen how automated tests drive development, enhancing reliability and maintainability. Resources like BPB Publications’ guide and Sarabia & Hansen’s book offer practical application, exemplified by building a book registration application. Embracing TDD fosters cleaner code, robust designs, and a streamlined CI/CD pipeline, ultimately delivering superior software.

indiana small estate affidavit pdf

Indiana Small Estate Affidavit PDF: A Comprehensive Guide

Indiana’s simplified small estate affidavit (Form 54985) streamlines asset transfer for estates under a specific value, avoiding formal probate procedures․

What is an Indiana Small Estate Affidavit?

An Indiana Small Estate Affidavit is a legally recognized document designed to simplify the process of transferring a deceased person’s assets to their rightful heirs․ It’s a streamlined alternative to the more complex and time-consuming formal probate process․ This affidavit allows inheritors to access funds and property without court intervention, provided the estate meets specific criteria․

Essentially, it’s a sworn statement confirming the estate’s value falls below the statutory limit and identifying the individuals legally entitled to inherit․ Utilizing Form 54985, it facilitates a quicker and more cost-effective transfer of assets like bank accounts, stocks, and personal property․ It’s a powerful tool for efficiently settling smaller estates in Indiana․

Eligibility Requirements for Using the Affidavit

To utilize the Indiana Small Estate Affidavit, several requirements must be met․ Firstly, the decedent must have died without a will (intestate) or, if a will exists, it doesn’t need to be probated․ Crucially, the total value of the estate’s assets must be below the current statutory limit․

Secondly, there must be no real estate involved, or if real estate is present, all heirs must agree on its distribution․ The affidavit requires a declaration from the heir or claimant, confirming their eligibility and the estate’s value; A 45-day waiting period post-death must also elapse before submitting the affidavit to relevant institutions․

Estate Value Limits (Updated to 2026)

As of July 1, 2022, Indiana significantly increased the threshold for utilizing the Small Estate Affidavit․ Currently, in 2026, the estate’s gross probate value can be up to $100,000 to qualify․ This means if the total value of all assets – including bank accounts, investments, and personal property – remains at or below this amount, the simplified affidavit process can be used․

Prior to this update, the limit was lower, making more estates eligible for the streamlined process․ This change aims to reduce the burden on the probate courts and provide a more efficient method for settling smaller estates․ It’s essential to confirm this limit remains current as of the affidavit’s completion․

Form Number and Accessing the PDF (Form 54985)

The official Indiana Small Estate Affidavit is designated as State Form 54985 (Revision R5 / 3-23)․ This document is readily available for download as a PDF from the Indiana Department of Workforce Development website․ You can easily locate it through a quick online search using the form number․

It’s crucial to ensure you are using the most current version of the form to avoid potential issues with acceptance by financial institutions․ The form is specifically intended for unemployment inquiries, but is also used for small estate purposes․ Always remove any instructional pages before submitting the completed affidavit․

Completing the Indiana Small Estate Affidavit

Form 54985 requires detailed information about the deceased, the claimant, asset specifics, and a formal declaration—all sections must be accurately completed․

Section 1: Decedent Information

Section 1 of the Indiana Small Estate Affidavit (Form 54985) meticulously gathers details about the deceased individual․ This includes the decedent’s full legal name, date of birth, and date of death – crucial for accurate identification․

You must also provide the decedent’s last known address and county of residence․ Furthermore, information regarding their social security number is typically required, though specific instructions on providing this may vary․

Accurate completion of this section is paramount, as it establishes the foundation for the entire affidavit process․ Any discrepancies could lead to delays or rejection of the claim․ Double-check all entered information against official documentation like a death certificate․

Section 2: Affiant Information (Heir/Claimant)

Section 2 of the Indiana Small Estate Affidavit (Form 54985) focuses on the individual completing the affidavit – the affiant, who is typically an heir or claimant to the estate’s assets․ This section requires the affiant’s complete legal name, address, phone number, and email address for contact purposes․

Crucially, you must clearly state your relationship to the decedent (e․g․, spouse, child, parent)․ The affiant must affirm their eligibility to receive assets from the estate․

Providing accurate contact information is vital for any communication regarding the affidavit․ The affiant’s signature, along with the date, formally attests to the truthfulness of the information provided within the document․

Section 3: Asset Details and Value

Section 3 of the Indiana Small Estate Affidavit (Form 54985) is dedicated to a detailed listing of the decedent’s assets․ Each asset must be individually identified, including the type of asset (e․g․, checking account, vehicle, stock)․

You’ll need to provide the financial institution or holding entity’s name and account/policy numbers․ Most importantly, accurately state the current fair market value of each asset․ This valuation is critical, as the total estate value must remain under the statutory limit․

Be thorough and include all assets, even those seemingly small․ Inaccurate or incomplete asset listings can cause delays or rejection of the affidavit․

Section 4: Declaration and Signature

Section 4 of the Indiana Small Estate Affidavit (Form 54985) contains a crucial declaration․ The affiant (the person completing the form) must attest, under penalty of perjury, that all information provided is true and accurate to the best of their knowledge․

This section includes a specific statement confirming the affiant’s legal right to receive the assets․ Carefully read and understand this declaration before signing․

The affidavit must be signed and dated by the affiant․ A notary public must then witness the signature and affix their official seal․ An improperly signed or notarized affidavit will be invalid and rejected by institutions․

Assets That Can Be Transferred Using the Affidavit

Indiana’s affidavit facilitates transfer of bank accounts, stocks, bonds, life insurance, personal property, and potentially real estate, depending on ownership details․

Bank Accounts and Savings

Utilizing the Indiana Small Estate Affidavit for bank accounts and savings is a common application․ After the 45-day waiting period post-death, the affidavit (Form 54985) can be presented to the financial institution holding the deceased’s funds․

Banks generally require this affidavit, alongside a copy of the death certificate, to release funds directly to the rightful heir or claimant․ Institutions have specific acceptance requirements, so contacting them beforehand is crucial․ The affidavit confirms heirship and the estate’s value falls within the legal limit․

Successfully submitting this document allows for a swift and uncomplicated transfer of savings and checking account balances, avoiding the complexities of formal probate․

Stocks and Bonds

Transferring stocks and bonds through the Indiana Small Estate Affidavit (Form 54985) follows a similar process to bank accounts․ After the mandatory 45-day period following the decedent’s passing, the affidavit, along with a death certificate, is submitted to the brokerage firm or institution holding the securities․

Brokerage firms will likely have their own specific forms and procedures in addition to the state affidavit․ Contacting the firm directly to understand their requirements is essential for a smooth transfer․

The affidavit serves as legal documentation confirming the heir’s right to claim these assets, provided the estate’s total value remains under the statutory limit․ This avoids the need for probate court intervention․

Life Insurance Policies (Payable to Beneficiary)

Life insurance policies with designated beneficiaries generally do not require the Indiana Small Estate Affidavit (Form 54985) for claim processing․ These assets are designed to pass directly to the named beneficiary upon the insured’s death, bypassing the probate process entirely․

However, if a beneficiary is deceased or the policy lacks a designated beneficiary, the proceeds may become part of the estate․ In such cases, the affidavit might be necessary to facilitate the transfer of funds to the appropriate heir(s)․

Insurance companies will have their own claim forms and documentation requirements, but the affidavit can assist in establishing heirship if needed․

Personal Property (Vehicles, Furniture, etc․)

The Indiana Small Estate Affidavit (Form 54985) is frequently used to transfer ownership of personal property like vehicles, furniture, and other belongings․ This simplifies the process compared to formal probate, allowing heirs to quickly access and utilize these assets․

For vehicles, presenting the affidavit, along with a death certificate and the completed title transfer application, to the Bureau of Motor Vehicles (BMV) is typically sufficient․ Similarly, for other personal property, the affidavit serves as proof of heirship to individuals or institutions holding the items․

Detailed inventories of the property, along with estimated values, should accompany the affidavit for transparency․

Real Estate

Transferring Indiana real estate using the Small Estate Affidavit (Form 54985) presents unique considerations․ While the affidavit can facilitate transfer, it’s not always straightforward and may require additional steps compared to other assets․

Typically, the affidavit, death certificate, and a properly prepared deed (like a Quitclaim or Warranty Deed) are submitted to the County Recorder’s office․ However, some title companies or institutions may require a court order, even if the estate qualifies for the affidavit process․

It’s crucial to verify local county requirements and potentially consult with a real estate attorney to ensure a smooth and legally sound transfer of property ownership․

Complex Investments

Utilizing the Indiana Small Estate Affidavit (Form 54985) for complex investments – such as trusts, limited partnerships, or certain brokerage accounts with intricate holdings – can be challenging․ These assets often have specific transfer requirements dictated by governing documents or the financial institution․

Direct transfer via affidavit may not be possible․ Instead, the institution holding the investment will likely require additional documentation, potentially including a copy of the trust agreement or partnership documents, alongside the affidavit and death certificate․

Consulting with a financial advisor or attorney specializing in estate administration is highly recommended to navigate these complexities and ensure proper asset distribution․

The 45-Day Waiting Period

Indiana law mandates a 45-day period following death before utilizing the Small Estate Affidavit (Form 54985) for asset transfer to heirs․

Calculating the 45-Day Period

Determining the start date for the 45-day waiting period is crucial when utilizing the Indiana Small Estate Affidavit (Form 54985)․ The clock begins ticking on the date of the decedent’s death, as officially documented on the death certificate․

Count each day consecutively, including weekends and holidays․ It’s not a business day calculation․ Therefore, if someone passed away on January 1st, the 45-day period concludes on February 15th․ Carefully track these dates to ensure compliance with Indiana law․ Submitting the affidavit prematurely could lead to rejection by institutions․

Maintaining accurate records of the death date and the subsequent 45-day count is highly recommended for a smooth asset transfer process․

What to Do If the 45-Day Period Has Not Passed

If the 45-day waiting period following the decedent’s death hasn’t elapsed, you cannot yet submit the Indiana Small Estate Affidavit (Form 54985)․ Institutions require this waiting period to confirm there are no unexpected claims against the estate․

During this time, gather all necessary documentation – the death certificate, asset details, and heir information – to prepare for submission․ Avoid contacting institutions before the 45 days are up, as they will likely refuse the affidavit․

Patience is key․ Once the period concludes, you can proceed with presenting the affidavit to banks and other holding institutions to access the deceased’s assets․

Submitting the Affidavit to Institutions

Indiana’s Form 54985, after the 45-day wait, is presented to banks and financial institutions to facilitate asset transfer to rightful heirs․

Providing the Affidavit to Banks and Financial Institutions

To access deceased funds, present Indiana’s completed Small Estate Affidavit (Form 54985) directly to the holding bank or financial institution․ Institutions require this affidavit to legally release assets to the designated inheritors․ Ensure the 45-day waiting period post-death has elapsed before submission․

Typically, institutions will request a copy for their records․ It’s crucial to confirm their specific acceptance requirements, as policies can vary․ Some may necessitate additional documentation, like a death certificate copy or proof of heirship․

Be prepared to provide identification for the affiant․ Prompt and accurate submission streamlines the process, allowing for quicker access to the deceased’s accounts and assets․

Requirements for Acceptance by Institutions

Financial institutions in Indiana generally accept the Small Estate Affidavit (Form 54985) when it’s fully completed and signed, demonstrating legal heirship․ A certified copy of the death certificate is almost always required as supporting documentation․ Institutions verify the 45-day waiting period has passed since the date of death․

Some banks may request additional proof of identity for the affiant, such as a government-issued photo ID․ They may also require a clear indication of the asset’s value, aligning with the estate’s overall limit․

Consistency and accuracy are key; discrepancies can cause delays․ It’s advisable to contact the specific institution beforehand to confirm their precise requirements for affidavit acceptance․

Potential Issues and Challenges

Disagreements among heirs or inaccurate asset valuations can complicate the affidavit process, potentially necessitating formal probate proceedings for estate settlement․

Disputes Among Heirs

When beneficiaries disagree on how assets should be distributed, utilizing the Indiana Small Estate Affidavit can become significantly more challenging․ A consensus among all heirs is crucial for a smooth process; otherwise, the affidavit may be rejected by institutions․

If disputes arise, mediation or legal counsel might be necessary to reach a resolution․ Failing to achieve agreement often compels the estate to proceed through the formal probate court system, incurring additional expenses and delays․

Clear communication and a thorough understanding of the decedent’s wishes, if documented, are vital to prevent conflicts․ Documenting any agreements reached amongst the heirs is also highly recommended to avoid future misunderstandings․

Incorrect Valuation of Assets

Accurate asset valuation is paramount when utilizing the Indiana Small Estate Affidavit․ Underestimating or overestimating the estate’s worth can lead to complications․ If the estate’s total value exceeds the legal limit (currently $100,000 as of July 1, 2022), the affidavit is invalid, necessitating formal probate․

Financial institutions may scrutinize valuations, potentially requesting supporting documentation like bank statements or appraisal reports․ Using fair market value – what an asset would sell for on the open market – is essential․

Erroneous valuations can also trigger legal challenges from disgruntled heirs, potentially invalidating the asset transfer and requiring court intervention․ Careful record-keeping and honest assessment are crucial․

Alternatives to the Small Estate Affidavit

If the estate doesn’t qualify, formal probate or summary administration are options․ These court-supervised processes offer legal guidance for asset distribution․

Formal Probate Process

The formal probate process in Indiana is a court-supervised legal proceeding required for estates exceeding the small estate affidavit’s value limit․ This involves filing a petition with the court, appointing a personal representative (executor), and providing detailed inventories of the estate’s assets and debts․

Creditors are notified, and claims are settled under court oversight․ A formal accounting of all transactions is presented to the court for approval before assets can be distributed to heirs․ While more complex and time-consuming than using an affidavit, formal probate provides a higher level of legal protection and is necessary when disputes arise or the estate’s value necessitates it․ It ensures all legal requirements are met and offers a clear record of the estate’s administration․

A petition is filed with the court, and a personal representative is appointed to manage the estate․ Notice is provided to heirs and creditors, and after a designated period, assets are distributed according to the will or Indiana’s intestacy laws․ Summary administration provides a balance between the simplicity of the affidavit and the legal safeguards of formal probate, offering a more efficient process for moderately complex estates․

Resources and Where to Find Help

The Indiana Department of Workforce Development and various legal aid organizations offer assistance navigating the affidavit process and related estate matters․

Indiana Department of Workforce Development

The Indiana Department of Workforce Development (DWD) plays a specific role concerning the Small Estate Affidavit, particularly regarding unemployment inquiries․ State Form 54985, the affidavit itself, is designated for unemployment-related submissions only when completed and sent via mail or fax to the DWD․

It’s crucial to understand that the DWD isn’t a general resource for all estate-related questions․ Their involvement is limited to situations where the affidavit pertains to unemployment benefits or inquiries․ For broader estate planning or legal advice, seeking guidance from an attorney or other legal resources is recommended․ The DWD’s website provides contact information and submission details for the completed Form 54985․

Legal Assistance Resources

Navigating the Indiana Small Estate Affidavit process can be complex, and legal assistance is readily available․ Several organizations offer support to individuals handling estate matters․ Local bar associations often provide lawyer referral services, connecting you with attorneys specializing in probate and estate law․

Additionally, legal aid societies throughout Indiana offer free or low-cost legal services to those who qualify based on income․ Online resources, such as the Indiana State Bar Association website, provide valuable information and directories of legal professionals․ Consider consulting with an attorney to ensure proper completion of Form 54985 and adherence to all applicable Indiana laws, especially if disputes arise or the estate is intricate․

Keeping a Copy for Your Records

Maintaining a meticulous record of the completed Indiana Small Estate Affidavit (Form 54985) and all supporting documentation is crucial․ This includes the affidavit itself, death certificate, asset valuation records, and any correspondence with financial institutions․

Retain these documents for a minimum of seven years, aligning with typical record-keeping recommendations for financial and legal matters․ Copies should be stored securely, both physically and digitally, to protect against loss or damage․ Having these records readily available can be invaluable if questions arise regarding the asset transfer process or if further verification is required by any involved party․ Proper documentation safeguards your interests and demonstrates due diligence․

36 yard zero target pdf

Understanding the 36-Yard Zero for 5․56 Rifles

Numerous online resources offer 36-yard zero target PDFs, including full-page and multi-circle options, aiding in accurate target shooting and accuracy charts․

What is a 36-Yard Zero?

A 36-yard zero represents the distance at which a rifle’s trajectory intersects with the line of sight․ Utilizing 36-yard zero target PDFs facilitates achieving this precise zeroing point․ This method aims for a relatively flat shooting curve within common engagement ranges, typically 50-300 yards, for 5․56 rifles․

Essentially, it minimizes the need for significant holdover or under adjustments at these distances․ While a 50-yard zero is also popular, the 36-yard zero offers a slightly extended range, potentially reaching out to 350 yards, though accuracy diminishes beyond 300․ Printable targets are crucial for confirming this zero․

Why Choose a 36-Yard Zero?

Selecting a 36-yard zero provides a balance between accuracy and extended range, particularly beneficial for 5․56 rifles․ Many shooters favor it for its effectiveness within typical engagement distances of 50-200 yards․ Utilizing 36-yard zero target PDFs streamlines the zeroing process, ensuring precision․

It simplifies shooting at smaller targets, like half-sized silhouettes in 2-gun competitions, reducing the need for substantial hold-under adjustments․ While personal preference plays a role, the 36-yard zero offers a practical advantage, especially when combined with optics featuring holdover markings, like the EXPS-4․

Ballistics and the 36-Yard Zero

Ballistic details significantly impact the 36-yard zero, varying with factors like bullet weight (55gr) and barrel length; utilize target PDFs for precision․

5․56 Ballistics Considerations

Understanding 5․56 ballistics is crucial when employing a 36-yard zero, as variations in ammunition and rifle configurations dramatically affect performance․ A 20-inch barrel will exhibit different ballistic characteristics compared to an 11․5-inch one․ Utilizing 36-yard zero target PDFs aids in establishing a baseline, but remember these are generalizations․

Always consult a ballistic calculator, inputting your specific load data to account for these differences․ The 5․56 round’s trajectory is influenced by factors like bullet weight, and achieving optimal accuracy requires precise adjustments․ Printable targets help visualize and refine your zero, ensuring consistent groupings at various distances․

Impact of Barrel Length on Zero

Barrel length significantly impacts the 5․56 ballistic trajectory, necessitating adjustments when using a 36-yard zero․ Shorter barrels, like 11;5 inches, yield lower velocities and a different point of impact compared to longer 20-inch barrels․ Therefore, a single 36-yard zero target PDF won’t universally apply․

Utilizing ballistic calculators is essential to compensate for these variations, inputting your specific barrel length and ammunition details․ Printable targets, like those found online, facilitate fine-tuning your zero for optimal accuracy at common engagement distances․ Remember, a precise zero is crucial for consistent groupings․

The Role of Bullet Weight (e․g․, 55gr)

Bullet weight profoundly influences 5․56 ballistics, directly affecting the 36-yard zero’s effectiveness․ A 55-grain bullet will exhibit a different trajectory than heavier or lighter projectiles․ Consequently, relying solely on a generic 36-yard zero target PDF is insufficient for optimal accuracy․

Ballistic calculations, tailored to your specific 55gr load, are vital․ These calculations account for bullet drop and wind drift, ensuring precise shot placement․ Printable targets aid in verifying your zero, but always prioritize data derived from a reliable ballistic calculator for consistent results at varying distances․

Maximum Point Blank Range (MBPR) & 36-Yard Zero

MBPR calculations, using a 36-yard zero, are crucial; a 55gr 5․56 with a 2․5” optic height yields over 300 yards, as shown in PDFs․

Calculating MBPR with a 36-Yard Zero

Determining the Maximum Point Blank Range (MBPR) with a 36-yard zero requires careful consideration of ballistic details․ Online resources, often linked within 36-yard zero target PDFs, demonstrate this process․ The MBPR isn’t a fixed number; it’s heavily influenced by factors like bullet weight (55gr is common), barrel length, and optic height above bore․

For example, a 5․56 round fired from a 20-inch barrel, paired with an Eotech optic at 2․5 inches above the bore, can achieve an MBPR exceeding 300 yards․ Utilizing ballistic calculators, often recommended alongside downloadable target PDFs, allows shooters to input specific load data and refine these calculations for personalized accuracy․

MBPR Differences Between Calibers (5․56 vs․ 300 BLK)

Significant differences exist in Maximum Point Blank Range (MBPR) between 5․56 and 300 Blackout (BLK) when utilizing a 36-yard zero․ Resources accompanying 36-yard zero target PDFs often highlight this․ The 5․56, generally flatter-shooting, will achieve a greater MBPR compared to the 300 BLK, which exhibits more parabolic trajectory․

Ballistic calculations, crucial for accurate shooting and often found alongside target PDFs, demonstrate this․ A 55gr 5․56 load will yield a different MBPR than a comparable 300 BLK load․ Details matter; precise load data is essential for accurate MBPR determination, emphasizing the need for ballistic calculators․

Importance of Ballistic Details

Precise ballistic details are paramount when employing a 36-yard zero, and understanding these nuances is often detailed alongside 36-yard zero target PDFs․ Factors like bullet weight (e․g․, 55gr), barrel length (20” vs․ 11․5”), and even optic height over bore (2․5 inches with an Eotech) drastically influence trajectory․

Ignoring these specifics leads to inaccurate holds and missed shots․ Ballistic calculators, frequently recommended with target PDFs, allow customization for specific loads․ A 5․56 load from a 20” barrel behaves differently than one from an 11․5” barrel, demanding individualized calculations for optimal results․

Practical Applications of the 36-Yard Zero

The 36-yard zero excels in 2-gun competitions and targeting at 100-200 yards, simplifying holds on half-sized silhouettes, as shown in target PDFs․

Use in 2-Gun Competitions

Utilizing a 36-yard zero proves advantageous in dynamic 2-gun scenarios, particularly when engaging smaller targets at intermediate ranges․ Competitors often face half-sized silhouettes and steel plates around the 200-yard mark, where precise holds are crucial․

The 36-yard zero minimizes the need for significant “hold under” adjustments, a common challenge with other zeroing distances․ Printable 36-yard zero target PDFs facilitate practice and familiarization with this hold, enhancing speed and accuracy during competition․

Furthermore, the zero’s inherent flatter trajectory within typical 2-gun engagement distances contributes to tighter groupings and faster target transitions, giving competitors a competitive edge․

Targeting at 100-200 Yards

When engaging targets between 100 and 200 yards with a 36-yard zero, shooters must anticipate a necessary “hold under” adjustment․ The degree of this adjustment varies based on specific ammunition and rifle configuration․

Practicing with downloadable 36-yard zero target PDFs is essential to internalize this hold and develop consistent accuracy at these common engagement distances․ Understanding the bullet drop within this range is paramount for effective shot placement․

Some shooters find it mentally simpler to hold high for longer shots, but mastering the hold-under with a 36-yard zero offers a quicker solution for targets within the 100-200 yard bracket․

Holding Over vs․ Holding Under

The 36-yard zero necessitates understanding both “holding over” and “holding under” techniques․ At closer ranges, a shooter might instinctively hold over the target, while beyond the zero distance, a hold under becomes crucial for accurate shot placement․

Utilizing 36-yard zero target PDFs during practice helps visualize and internalize these adjustments․ The specific amount of hold depends on the distance and the rifle’s ballistics․

For targets beyond 300 yards, holding over is generally preferred, while within 100-200 yards, a consistent hold under is often required, especially with a 5․56 platform․

36-Yard Zero Target PDFs & Resources

Abundant printable 36-yard zero target PDFs are readily available online, including full-page and multi-circle options for convenient shooting practice․

Finding Printable 36-Yard Zero Targets

Locating suitable 36-yard zero targets is surprisingly straightforward with a quick online search․ Many websites dedicated to firearms and shooting sports offer downloadable PDF versions, often free of charge․ These resources frequently categorize targets, making it easy to find options tailored to your specific needs․

You’ll discover options ranging from simple black bullseye targets to more complex designs incorporating multiple aiming points and scoring zones․ Several sites specialize in printable shooting range targets, and specifically highlight 36-yard zero options․ Remember to check the print settings to ensure accurate scaling for proper zeroing․

Full Page Printable Targets

When seeking full-page printable targets for a 36-yard zero, clarity and sufficient aiming points are crucial․ Many readily available PDFs are designed to fill an entire standard 8․5 x 11 inch sheet of paper, providing ample space for grouping assessment․ These targets often feature a prominent center bullseye, surrounded by concentric rings for precise shot placement evaluation․

Several websites offer dedicated collections of these full-page options, specifically geared towards zeroing rifles at the 36-yard distance․ Ensure your printer settings are configured for optimal quality and accurate scaling to maintain the target’s intended dimensions․

Multi-Circle Shooting Targets

Multi-circle shooting targets, often available as 36-yard zero PDFs, present a unique advantage for zeroing and practice․ These targets feature numerous bullseyes of varying sizes, arranged across the page․ This design allows for rapid assessment of group consistency and minimal wasted paper during the sighting-in process․

They’re particularly useful for evaluating how a rifle performs at different distances within the effective range․ Several online sources provide downloadable PDFs of these targets, catering to both casual shooters and competitive marksmen․ Remember to check print settings for accurate scaling․

Optics and the 36-Yard Zero

EXPS-4 range markings simplify holdovers, while Eotech’s 2․5-inch height over bore impacts ballistics; utilize PDFs for accurate optic-rifle pairing․

EXPS-4 Range Markings & Holdovers

The EXPS-4 holographic sight offers integrated range markings, significantly simplifying holdovers when utilizing a 36-yard zero․ These markings assist shooters in quickly adjusting for targets at varying distances, reducing the cognitive load during dynamic shooting scenarios․ Utilizing 36-yard zero target PDFs alongside the EXPS-4 allows for precise confirmation of holdover points․

Specifically, the markings can be used to compensate for bullet drop beyond the zero range, making engagements at 200-300 yards more intuitive․ This is particularly beneficial in 2-gun competitions where rapid target acquisition and accurate shooting are paramount․ The combination of a properly zeroed rifle and the EXPS-4’s markings enhances overall shooting performance․

Eotech Height Over Bore Considerations (2․5 inches)

The standard 2․5-inch height over bore common with Eotech optics significantly impacts ballistic calculations and zeroing procedures․ When employing a 36-yard zero, this height necessitates a greater understanding of bullet drop at extended ranges․ Utilizing 36-yard zero target PDFs becomes crucial for verifying point-of-impact adjustments․

Ballistic math, as demonstrated with a 55gr 5․56 round, reveals that even slight variations in height over bore can alter the maximum point blank range․ Accurate zeroing requires accounting for this factor, ensuring consistent groupings at desired distances․ Proper consideration of this height is vital for effective target acquisition․

Using Optics for Extended Range Shooting

Employing optics like the EXPS-4, with integrated range markings for holdovers, simplifies extended range shooting when utilizing a 36-yard zero․ These markings compensate for bullet drop beyond the initial zero distance, enhancing accuracy․ Utilizing 36-yard zero target PDFs aids in confirming holdover points at various distances․

However, remember that a 36-yard zero often requires holding under for targets within the 100-200 yard range․ Understanding this, and practicing with target PDFs, is key․ Ballistic calculators remain essential for customizing adjustments based on specific loads and environmental conditions․

Accuracy and Grouping with a 36-Yard Zero

A 36-yard zero promotes tighter groupings at common engagement distances (50-200 yards), but balancing range and accuracy requires utilizing 36-yard zero target PDFs․

Tighter Groupings at Common Engagement Distances (50-200 yards)

Utilizing a 36-yard zero demonstrably improves grouping, particularly within typical engagement ranges of 50 to 200 yards․ Many shooters find this zero provides a practical advantage for common scenarios․ Printable 36-yard zero target PDFs are essential for establishing this zero accurately;

Compared to other zeroing distances, the 36-yard setup minimizes holdover or hold-under requirements within this crucial range․ This translates to faster target acquisition and increased hit probability․ Accessing and employing these target PDFs ensures consistent and reliable results, enhancing overall shooting performance and confidence․

Balancing Range and Accuracy

Achieving an optimal balance between extended range capability and practical accuracy is key․ While a 36-yard zero extends effective range to approximately 350 yards, it necessitates hold-under adjustments for targets between 100-200 yards․ Utilizing 36-yard zero target PDFs facilitates precise zeroing, maximizing accuracy within common engagement distances․

Shooters prioritizing tighter groupings at closer ranges (50-200 yards) may prefer this zero․ Conversely, those anticipating longer shots might opt for a different zero․ Printable targets are crucial for verifying and refining this balance, tailoring the setup to individual needs and shooting styles;

Ballistic Calculators and Customization

Utilizing ballistic calculators is essential for refining a 36-yard zero, accounting for specific load data and rifle characteristics, beyond target PDFs․

Importance of Using a Ballistic Calculator

Employing a ballistic calculator transcends simply utilizing a 36-yard zero target PDF; it’s about precision․ These tools account for variables a static target cannot․ Factors like atmospheric conditions – temperature, humidity, and wind – significantly impact bullet trajectory․

Furthermore, a calculator allows input of specific ammunition details․ A 55-grain bullet will behave differently than a 62-grain one, even at the same velocity․ Your rifle’s barrel length is also crucial; a 20-inch barrel produces different results than an 11․5-inch one․

Ignoring these nuances leads to inaccurate holds and missed shots․ A calculator provides customized data, ensuring your 36-yard zero translates to effective shooting at various distances․

Inputting Specific Load Data

Accurate ballistic calculations, beyond a 36-yard zero target PDF, demand precise load data․ Don’t rely on generic figures․ Input the exact bullet weight – whether it’s 55 grains or another value – as this dramatically affects trajectory․

Crucially, record the specific ammunition manufacturer and lot number․ Variations exist even within the same bullet weight․ Note the muzzle velocity; ideally, measure it with a chronograph for utmost accuracy․

Your rifle’s barrel length is also vital․ A shorter barrel will yield lower velocities․ Inputting this data ensures the calculator provides a personalized ballistic profile, maximizing the effectiveness of your 36-yard zero․

Adjusting for Environmental Factors

Beyond simply using a 36-yard zero target PDF, real-world shooting requires accounting for environmental conditions․ Temperature significantly impacts muzzle velocity; colder temperatures generally decrease it․

Altitude plays a role too, with higher elevations experiencing reduced air density, extending bullet range․ Humidity, while less impactful, can subtly affect ballistic coefficient․

Wind is perhaps the most critical factor․ Even a slight breeze can deflect a bullet, especially at longer ranges․ Utilize a ballistic calculator that allows input for these variables to refine your holdovers and ensure accurate shot placement․

Alternatives to the 36-Yard Zero

Many shooters prefer a 50-yard zero for tighter groupings at common distances, while others tailor zeroing to their specific shooting style and needs․

Preference for a 50-Yard Zero

Some shooters demonstrate a clear preference for a 50-yard zero over the 36-yard option, primarily due to achieving significantly tighter groupings at frequently engaged distances, typically within the 50-200 yard range․ This preference is especially pronounced in competitive shooting scenarios, like 2-gun, where accuracy on smaller targets is paramount․

With a 50-yard zero, less holdover is required for targets between 100-200 yards, simplifying the aiming process․ While the 36-yard zero extends range slightly, the increased need to hold under at closer ranges can be a disadvantage․ Ultimately, the optimal zero distance is subjective and depends on individual shooting style and typical engagement distances․

Considerations for Different Shooting Styles

Shooting style significantly influences the ideal zero distance; a 36-yard zero isn’t universally superior․ For those prioritizing longer-range engagements, beyond 300 yards, the 36-yard zero offers a slight advantage, though holding high becomes necessary․ Conversely, competitors focusing on rapid target acquisition at closer ranges (50-200 yards) often favor a 50-yard zero for tighter groupings and reduced holdover․

Furthermore, optic choices, like an EXPS-4 with holdover markings, can mitigate the need for precise zeroing․ Personal preference and familiarity with holdover techniques also play crucial roles in determining the most effective zero for a given shooter․

Downloading and Printing 36-Yard Zero Targets

PDF files are the standard format for 36-yard zero targets, offering easy printing with adjustable settings to ensure accuracy for blank shooting options․

File Formats (PDF)

The predominant file format for readily available 36-yard zero targets is, without exception, PDF (Portable Document Format)․ This choice isn’t accidental; PDFs ensure consistent rendering across various operating systems and devices, preserving the target’s intended dimensions and clarity․

PDFs are universally supported, eliminating compatibility concerns, and they maintain the integrity of the target’s printed scale․ This is crucial for accurate zeroing․ Furthermore, PDFs are relatively small in file size, making them quick and easy to download․

Most websites offering these targets provide direct PDF downloads, streamlining the process for shooters seeking to prepare for range sessions․ The format’s stability guarantees a reliable print every time․

Print Settings for Accuracy

Achieving precise zeroing demands meticulous attention to print settings․ Always disable scaling options within your printer dialogue box; ensure the target prints at 100% of its original size․ Verify this by measuring key dimensions on the printed target against the PDF’s specified measurements․

Select the highest possible print quality setting for sharp, defined lines, crucial for accurate aiming point assessment․ Use standard, letter-sized paper (8․5 x 11 inches) for consistent results․

A test print is highly recommended before committing to a full sheet, confirming accurate scaling and clarity․ Proper print settings directly translate to a more reliable zeroing process․

Blank Shooting Target Options

Alongside pre-printed 36-yard zero targets, blank shooting target options provide versatility for customized practice․ These allow shooters to create their own aiming points or incorporate different drill formats․ Many PDF resources offer downloadable blank targets suitable for various calibers, including 5․56․

Utilizing blank targets encourages independent assessment of grouping and point-of-impact, fostering a deeper understanding of rifle performance․ They are ideal for dry-fire practice or live-fire sessions focused on fundamental marksmanship skills․

Remember to clearly mark the target with relevant details, such as date, range, and ammunition used․

The Evolution of Zeroing Techniques

Historically, zeroing distances varied, but modern ballistic optimization increasingly favors methods like the 36-yard zero, aided by readily available PDF targets․

Historical Context of Zeroing Distances

Early firearms and military doctrines often employed different zeroing standards, frequently based on anticipated engagement ranges of the time․ Traditional methods prioritized a single, fixed zero, often at 25 or 100 yards, relying on holdovers for varying distances․

The emergence of the 36-yard zero represents a shift towards optimizing for more common, closer-range engagements, particularly relevant in modern tactical scenarios and competitive shooting․ The availability of printable 36-yard zero target PDFs has facilitated wider adoption and ease of implementation․ This evolution reflects a growing understanding of ballistics and the practical needs of shooters․

Previously, standardized targets were less accessible, making precise zeroing more challenging․

Modern Approaches to Ballistic Optimization

Contemporary shooting emphasizes personalized ballistic solutions, moving beyond fixed zeros․ Utilizing ballistic calculators, shooters input specific load data – bullet weight (like 55gr), barrel length (20in vs․ 11․5in), and environmental factors – to refine accuracy․

The 36-yard zero, aided by readily available target PDFs, serves as a practical starting point for this optimization․ Modern optics, such as the EXPS-4 with holdover markings, further enhance long-range capabilities․ This approach acknowledges that “zeros aren’t one-size-fits-all,” demanding tailored adjustments for optimal performance․

Shooters now prioritize data-driven precision over generalized guidelines․

dr gundry meal plan pdf

Dr. Gundry Meal Plan PDF: A Comprehensive Overview (Updated 03/24/2026)

Discover a detailed exploration of Dr. Gundry’s dietary approach, including accessible PDF resources featuring 70 recipes, sample menus, and practical memory aids.

Explore how to navigate the initial 2-6 week protocol, focusing on lectin-avoidance strategies for optimal health and weight management, as outlined in his publications.

Find printable plans and recipes readily available on platforms like Amazon, alongside summaries accessible through libraries like Frisco Public Library’s digital collection.

Dr. Steven Gundry’s “Diet Evolution” represents a significant departure from conventional dietary wisdom, positing that many commonly consumed foods contain “lectins” – proteins that can trigger adverse health effects. This approach, detailed in his book and accompanying resources, including readily available PDF meal plans, isn’t simply about weight loss; it’s a holistic strategy aimed at “turning off the genes that are killing you and your waistline.”

The core philosophy centers around identifying and eliminating, or significantly reducing, lectin-rich foods. Gundry argues these lectins interfere with the body’s natural processes, contributing to inflammation, autoimmune responses, and a host of chronic conditions. The diet isn’t restrictive in a caloric sense, but rather in the types of foods permitted. PDF resources provide a structured framework for navigating this new way of eating.

“Diet Evolution” isn’t a static plan; it’s designed as a phased approach. The initial phase, often lasting 2-6 weeks, is the most restrictive, focusing on a foundation of lectin-safe foods. Subsequent phases involve carefully reintroducing certain foods to assess individual tolerance. Numerous PDF guides and recipe collections aim to simplify this process, offering practical support for those embarking on this dietary journey. The availability of these resources, including those found on Amazon, makes implementation more accessible.

The Core Principle: Lectin Avoidance

At the heart of Dr. Gundry’s “Diet Evolution” lies the principle of lectin avoidance. Lectins, naturally occurring proteins found in plants, grains, and even some animal products, are theorized to disrupt the human digestive system and contribute to systemic inflammation. Gundry’s research suggests these proteins act as “sticky” molecules, interfering with nutrient absorption and triggering immune responses.

The diet’s primary goal, detailed in accompanying PDF meal plans and recipe collections, is to minimize lectin intake. This isn’t about eliminating all carbohydrates or fats, but rather selecting varieties with lower lectin content. Resources emphasize focusing on non-hybridized vegetables and fruits, as lectin levels tend to increase through selective breeding.

PDF guides often categorize foods based on their lectin density, providing a clear framework for meal planning. Understanding which foods to avoid – and which to embrace – is crucial for success. The “Plant Paradox” diet, closely related to “Diet Evolution,” further elaborates on this principle, offering a comprehensive understanding of lectins and their potential impact. Accessible PDF versions of these resources are widely available, simplifying the implementation of this lectin-focused approach.

Understanding Lectins and Their Impact

Dr. Gundry’s work centers on the idea that lectins are “anti-nutrients” – compounds that interfere with the body’s ability to absorb essential nutrients. These proteins, present in many common foods, are believed to bind to the lining of the digestive tract, potentially causing inflammation and a range of chronic health issues. PDF resources accompanying his diet plans detail this complex interaction.

The impact of lectins, as outlined in “Diet Evolution” and “The Plant Paradox,” extends beyond digestive discomfort. Gundry proposes they can contribute to obesity, autoimmune diseases, and other inflammatory conditions. The diet aims to ‘turn off’ genes activated by lectin exposure, promoting overall wellness.

PDF meal plans and summaries available online emphasize identifying and minimizing lectin-rich foods. Understanding that lectin content varies significantly – even within the same food family – is key. Resources highlight how modern hybridization has often increased lectin levels in commonly consumed plants. By reducing lectin intake, the diet seeks to restore gut health and optimize bodily functions, as detailed in downloadable guides.

Phase 1: The Initial 2-6 Week Protocol

The foundational stage of Dr. Gundry’s diet, lasting 2-6 weeks, is a strict elimination phase designed to ‘reset’ the gut. PDF guides detail this initial protocol, emphasizing the removal of all high-lectin foods to reduce inflammation and assess individual sensitivities. This phase isn’t intended as a long-term solution, but rather a diagnostic and restorative period.

During Phase 1, the focus is on consuming foods deemed ‘safe’ – primarily leafy green vegetables, certain proteins, and healthy fats. Printable meal plans available online illustrate portion sizes (protein roughly the size of your palm) and acceptable combinations. The goal is to minimize gut irritation and allow the digestive system to heal.

PDF resources highlight the importance of consistency during this phase. Strict adherence is crucial for accurately gauging the body’s response to lectin removal. This initial period sets the stage for subsequent phases, where carefully selected foods are reintroduced to identify individual triggers, as detailed in downloadable diet plans.

Foods Allowed in Phase 1

Phase 1 of the Diet Evolution centers around a limited, yet nutrient-dense, selection of foods. PDF meal plans emphasize generous portions of leafy green vegetables as the cornerstone of each meal – think spinach, kale, and collard greens. These provide essential vitamins and minerals without the problematic lectins.

Protein sources permitted during this initial phase include smaller fish like sardines, and grass-fed meats, consumed in palm-sized portions. Poultry and pastured eggs are also acceptable. PDF guides often provide specific serving suggestions to ensure adequate protein intake without overconsumption.

Healthy fats are crucial for satiety and overall health. Avocado, olive oil, and coconut oil are staples. Seeds and nuts, in limited quantities (two snacks per day), offer additional healthy fats and nutrients. Detailed PDF resources outline acceptable types and portion sizes. Essentially, Phase 1 prioritizes foods that support gut healing and minimize inflammatory responses.

Foods to Avoid in Phase 1

Phase 1 of Dr. Gundry’s Diet Evolution necessitates strict avoidance of foods high in lectins, aiming to ‘turn off’ genes linked to inflammation and weight gain. This means eliminating all grains – wheat, rice, corn, and oats – as detailed in available PDF resources.

Nightshades, including tomatoes, peppers, eggplant, and potatoes, are also off-limits due to their lectin content. Legumes like beans, lentils, and peanuts must be avoided, alongside all dairy products. PDF meal plans clearly illustrate substitutions for these commonly consumed foods.

Furthermore, most fruits are restricted during this initial phase, with limited exceptions. Processed foods, sugars, and artificial sweeteners are strictly prohibited. The goal is to minimize gut irritation and allow the digestive system to heal. Comprehensive PDF guides provide extensive lists of foods to avoid, ensuring adherence to the protocol for optimal results.

Sample Phase 1 Meal Plan (Breakfast, Lunch, Dinner)

A typical Phase 1 day begins with a breakfast of scrambled eggs cooked in olive oil with spinach and a small portion of avocado. Lunch might consist of grilled salmon with a generous serving of mixed green leafy vegetables, dressed with olive oil and lemon juice – as detailed in PDF examples.

Dinner could feature pasture-raised chicken thighs with steamed broccoli and asparagus. Protein portions should be roughly the size of your palm. Snacks are limited to a small handful of macadamia nuts or pumpkin seeds, providing healthy fats and minimal lectins.

PDF meal plans emphasize prioritizing protein and non-starchy vegetables at each meal. Hydration is crucial, with water being the primary beverage. These sample menus, often found within downloadable PDF guides, serve as a starting point, encouraging customization based on individual preferences while adhering to the core principles of lectin avoidance.

Phase 2: Expanding the Diet

Phase 2 of Dr. Gundry’s diet, detailed in downloadable PDF resources, marks a cautious reintroduction of foods previously restricted during the initial 2-6 week protocol. This isn’t a free-for-all; it’s a carefully monitored process of experimentation to identify individual lectin sensitivities.

The key is to introduce one new food at a time, observing for any adverse reactions – digestive discomfort, skin issues, or inflammation. PDF guides often recommend starting with pressure-cooked white rice or certain fruits in limited quantities.

Success in Phase 2 hinges on mindful eating and detailed self-monitoring. The goal isn’t necessarily to permanently eliminate all previously avoided foods, but to understand which ones your body tolerates and in what amounts. Printable PDF checklists can aid in tracking reintroduction attempts and associated symptoms, ensuring a personalized dietary approach.

Reintroduction of Foods (Carefully)

The reintroduction phase, thoroughly explained in Dr. Gundry’s PDF meal plans, is paramount for personalized nutrition. It’s a deliberate, methodical process, not a rapid return to previous eating habits. Begin by selecting one food from the “avoid” list, ideally a commonly tolerated option like a specific type of squash.

Consume a small portion of the chosen food and meticulously monitor your body for 48-72 hours. PDF resources emphasize tracking any symptoms – bloating, fatigue, joint pain, skin reactions – as indicators of lectin sensitivity. Detailed symptom trackers are often included in printable PDF versions.

If no adverse effects are noted, gradually increase the portion size over subsequent days. However, any negative response necessitates immediate cessation and a return to the Phase 1 protocol. This careful approach, guided by the PDF materials, allows for identifying individual tolerances and crafting a sustainable, lectin-conscious diet.

Protein Sources Recommended by Dr. Gundry

Dr. Gundry’s meal plans, detailed in PDF format, prioritize protein sources low in lectins. These aren’t simply about quantity, but quality and minimizing inflammatory responses. Favored options include pastured poultry – chicken and turkey – and grass-fed, grass-finished beef and lamb. These animals, raised on natural diets, exhibit lower lectin levels.

Wild-caught fish, particularly smaller varieties like sardines and salmon, are also highly recommended, providing essential omega-3 fatty acids. The PDF guides emphasize avoiding conventionally farmed fish due to potential lectin concentrations in their feed. Pork, specifically heritage breeds, can be included cautiously.

Protein portion sizes, as illustrated in the PDF meal examples, should be roughly the size of the palm of your hand; The plans also suggest alternative protein sources, ensuring variety while adhering to the lectin-avoidance principles. Careful selection, guided by the PDF resources, is key to success.

Healthy Fats and Oils

Dr. Gundry’s diet, as detailed in the comprehensive PDF meal plans, places significant emphasis on incorporating healthy fats. These aren’t just for satiety; they’re crucial for cellular function and reducing inflammation – a core tenet of his approach. Avocado oil takes center stage, being a primary cooking oil due to its high smoke point and low lectin content.

Olive oil, specifically extra virgin, is recommended for dressings and finishing dishes, but not for high-heat cooking. Coconut oil, both refined and unrefined, is also permitted, offering medium-chain triglycerides for energy. Macadamia nut oil is another excellent choice, prized for its flavor and beneficial fat profile.

The PDF resources strongly advise against seed oils – soybean, corn, canola, and sunflower – due to their high lectin content and inflammatory potential. Prioritizing these specific fats, as outlined in the meal plans, is vital for maximizing the diet’s benefits and supporting overall well-being.

Vegetable Choices: Focus on Leafy Greens

The Dr. Gundry meal plan PDF prioritizes non-starchy vegetables, with a particularly strong emphasis on leafy greens. These are considered foundational to the diet due to their low lectin content and high nutrient density. Spinach, kale, collard greens, and romaine lettuce are staples, forming the bulk of vegetable intake at each meal.

Other permitted vegetables include celery, cucumbers, and lettuce varieties like butter lettuce and red leaf lettuce. These provide essential vitamins, minerals, and fiber without triggering the inflammatory responses associated with higher-lectin vegetables. The PDF resources consistently highlight the importance of generous portions of leafy greens.

Cruciferous vegetables like broccoli and cauliflower are allowed in later phases, but initially restricted. Root vegetables and nightshades are generally avoided due to their lectin content. Adhering to this vegetable selection, as detailed in the meal plans, is key to minimizing lectin exposure and maximizing health benefits.

Fruits: Limited and Specific Varieties

The Dr. Gundry meal plan PDF advocates for a highly selective approach to fruit consumption, recognizing that many fruits contain significant levels of lectins. Unlike vegetables, fruit intake is intentionally limited and restricted to specific varieties deemed lower in problematic lectins.

Avocados are a cornerstone of the fruit allowance, functioning more like a healthy fat source than a traditional fruit due to their low sugar and high healthy fat content. Berries, particularly blueberries and raspberries, are permitted in moderation, offering antioxidant benefits with relatively lower lectin loads.

Other fruits, such as apples, oranges, and bananas, are generally avoided, especially during the initial phases of the diet. The PDF meal plans emphasize portion control even with approved fruits, suggesting small servings to minimize potential lectin-related reactions. This careful selection is crucial for adhering to the diet’s core principles.

Snack Options: Seeds and Nuts

Dr. Gundry’s meal plan PDF highlights seeds and nuts as ideal snack choices, providing healthy fats, protein, and fiber while remaining relatively low in lectins – a cornerstone of the diet. These options help maintain stable blood sugar levels and curb cravings between meals, supporting weight management and overall health.

Recommended seeds include chia seeds, flaxseeds, pumpkin seeds, and sunflower seeds. These are often consumed in small portions, approximately two tablespoons, and can be added to smoothies or enjoyed on their own. Nuts, such as macadamia nuts, pecans, and walnuts, are also permitted, but portion control is vital.

The PDF emphasizes avoiding peanuts, which are technically legumes and contain high lectin levels. Cashews are also generally discouraged due to their lectin content. Choosing raw, unsalted varieties is crucial to avoid added sugars and unhealthy oils, aligning with the diet’s focus on whole, unprocessed foods.

Recipe Highlights from “Diet Evolution”

Dr. Gundry’s “Diet Evolution” PDF boasts a collection of 70 recipes designed to align with the lectin-avoidance principles. These aren’t simply restrictions; they’re flavorful alternatives crafted to nourish the body while minimizing inflammatory responses. The recipes emphasize fresh, whole ingredients and creative cooking techniques.

Expect to find dishes featuring ample leafy greens, healthy fats like olive oil and avocado oil, and protein sources like wild-caught fish and pasture-raised poultry. Many recipes incorporate spices and herbs for enhanced flavor and antioxidant benefits. The book provides detailed instructions and nutritional information for each dish.

Highlights include variations on classic comfort foods reimagined without lectin-rich ingredients. The PDF aims to demonstrate that a lectin-free diet doesn’t equate to bland or restrictive eating. It’s about making informed choices and enjoying delicious, health-promoting meals, supporting long-term dietary adherence.

Finding Printable PDF Meal Plans & Recipes

Accessing Dr. Gundry’s meal plans and recipes in PDF format is readily achievable through several avenues. Amazon.com offers “Dr. Gundry’s Diet Evolution,” which explicitly includes printable plans and recipes as a featured component of the book purchase. This provides a comprehensive, readily downloadable resource.

Alternatively, digital library collections, such as the Frisco Public Library’s OverDrive platform, may offer summaries or excerpts of the diet, potentially including recipe information accessible in digital formats. Searching online retailers and Dr. Gundry’s official website can also reveal additional PDF resources.

Furthermore, numerous websites and blogs dedicated to the Gundry diet often compile and share printable meal plans and recipe collections derived from his books. Always ensure the source is reputable to guarantee accuracy and adherence to the core principles of lectin avoidance. Careful searching yields abundant options.

Potential Benefits of the Diet

Proponents of Dr. Gundry’s diet suggest a range of potential health benefits stemming from lectin avoidance. Central to these claims is the idea of “turning off” genes linked to inflammation and weight gain, potentially leading to improved metabolic function and weight management. Many individuals report reduced bloating, improved digestion, and increased energy levels.

The diet’s emphasis on nutrient-dense foods – leafy greens, healthy fats, and specific protein sources – can contribute to overall well-being. By eliminating foods believed to trigger inflammatory responses, some experience relief from autoimmune symptoms and chronic conditions.

However, it’s crucial to acknowledge that these benefits are largely anecdotal and require further scientific validation. While the diet’s focus on whole foods is generally positive, the restrictive nature necessitates careful planning to ensure nutritional adequacy. Individual results may vary significantly.

Criticisms and Considerations

Despite its popularity, Dr. Gundry’s diet faces significant criticism from the scientific community. A primary concern revolves around the broad categorization of “lectins” as universally harmful. Many lectins are actually beneficial, acting as important prebiotics that support gut health. The diet’s restrictive nature can lead to unnecessary limitations and potential nutrient deficiencies if not carefully managed.

Furthermore, the claim that lectins are the root cause of many chronic diseases lacks robust scientific backing. Critics argue that the diet oversimplifies complex health issues and places undue emphasis on a single dietary component. The cost of adhering to the diet, particularly sourcing specific allowed foods, can also be a barrier for some.

It’s essential to approach the diet with a critical mindset, consulting with a healthcare professional before making significant dietary changes. A balanced and varied diet remains the cornerstone of optimal health.

Long-Term Sustainability

Maintaining Dr. Gundry’s diet long-term presents considerable challenges. The highly restrictive nature, particularly in the initial phases, can be socially isolating and difficult to adhere to consistently. Frequent meal planning and preparation are essential, demanding significant time and effort from individuals.

The diet’s emphasis on specific, often expensive, food choices can also create financial strain. While Phase 2 allows for some reintroduction of foods, the process requires careful monitoring and can be anxiety-inducing for some. Sustained adherence necessitates a deep understanding of lectin content and potential reactions.

For long-term success, a flexible approach is crucial. Focusing on whole, unprocessed foods and prioritizing gut health, rather than rigid lectin avoidance, may be a more sustainable strategy. Individual tolerance levels vary, and personalization is key to making the diet a viable lifestyle choice.

Resources and Further Reading

For a comprehensive understanding of Dr. Gundry’s approach, his book, “Dr. Gundry’s Diet Evolution: Turn Off the Genes That Are Killing You and Your Waistline,” is the foundational resource. Available on Amazon.com (978-1515919520), it details the principles and provides initial meal plans.

Digital access to summaries and overviews can be found through the Frisco Public Library’s digital collection via OverDrive. This offers a convenient way to explore the core concepts before committing to the full diet. Online communities and forums dedicated to the Plant Paradox and Diet Evolution provide support and shared experiences.

Additionally, searching for “Dr. Gundry meal plan PDF” yields numerous websites offering printable resources, recipes, and guides. However, exercise caution and verify the source’s credibility before relying on external materials. Dr. Gundry’s official website may also offer supplementary information and updates.

Where to Purchase Dr. Gundry’s Books (Including PDF Options)

The primary source for Dr. Gundry’s foundational work, “Dr. Gundry’s Diet Evolution: Turn Off the Genes That Are Killing You and Your Waistline,” is Amazon.com. The ISBN is 978-1515919520, ensuring you acquire the correct edition. Amazon offers both physical copies and, depending on availability, Kindle (digital) versions.

While a direct PDF download from Dr. Gundry’s official website isn’t consistently offered, exploring online booksellers like Barnes & Noble or Kobo may reveal eBook options compatible with PDF readers. Checking for authorized digital distributors is crucial to avoid pirated or unreliable sources.

Libraries, such as the Frisco Public Library, provide access to digital versions through platforms like OverDrive, offering summaries and potentially excerpts. Keep an eye out for promotional periods where eBook versions are discounted, providing a cost-effective way to access the information digitally;

conners adhd test pdf

Conners ADHD Test PDF: A Comprehensive Overview (Updated 03/13/2026)

Conners Rating Scales‚ available as printable PDFs‚ empower professionals and caregivers to effectively monitor ADHD symptoms and treatment progress‚ offering both original and English versions.

What are Conners Rating Scales?

Conners Rating Scales are a series of standardized questionnaires designed to assess behaviors related to Attention-Deficit/Hyperactivity Disorder (ADHD) and other behavioral issues. These scales are widely utilized by healthcare professionals‚ educators‚ and parents to gain a comprehensive understanding of an individual’s behavioral patterns.

Available in PDF format for convenient access‚ the scales consist of statements about common challenges‚ prompting raters to indicate the frequency or severity of these behaviors. Raters consider how much of a problem each behavior has been over a specified period‚ typically the last month‚ using a numerical scale – often 0 to 3 – to quantify the responses.

The scales aren’t diagnostic tools in themselves‚ but rather provide valuable data to support a thorough evaluation. They help identify areas of concern and track changes in behavior over time‚ aiding in treatment planning and monitoring effectiveness. Different versions cater to various perspectives‚ including parent‚ teacher‚ and self-report.

History and Development of the Conners Scales

The Conners Rating Scales originated with the work of Dr. C. Keith Conners‚ a pioneering figure in the field of ADHD research. Initially developed in the 1960s‚ the scales emerged from a need for standardized‚ objective measures to assess behavioral characteristics associated with hyperactivity and attention problems in children.

Early iterations focused primarily on identifying disruptive classroom behaviors. Over subsequent decades‚ the scales underwent several revisions and expansions‚ incorporating advancements in understanding ADHD and broadening their scope to encompass a wider range of behavioral and emotional difficulties.

These refinements led to the development of various versions‚ including the Conners 3 and the Conners Adult ADHD Rating Scales (CAARS)‚ each tailored to specific populations and assessment needs. The availability of these scales in PDF format has facilitated wider accessibility for professionals and caregivers.

Different Versions of the Conners ADHD Test

The Conners ADHD Test exists in several versions‚ designed to cater to diverse assessment requirements. Notably‚ the Conners 3 (Conners Comprehensive Behavior Rating Scales) represents the latest iteration‚ offering comprehensive evaluation for children and adolescents. It includes parent‚ teacher‚ and self-report forms‚ providing a multi-faceted perspective.

For adults‚ the Conners Adult ADHD Rating Scales (CAARS) are specifically designed. Within CAARS‚ two primary forms exist: the CAARS-S: Self-Report Long Version‚ allowing individuals to self-assess their symptoms‚ and the CAARS-O: Observer-Report Long Version‚ gathering insights from individuals who know the person well.

These PDF versions allow for convenient administration and scoring. Each version targets specific age groups and reporting sources‚ ensuring a tailored and accurate assessment of ADHD symptoms and related behaviors.

Conners 3 (Conners Comprehensive Behavior Rating Scales)

Conners 3‚ the latest iteration‚ is a comprehensive assessment tool available as a PDF for evaluating ADHD and behavioral issues in children and adolescents. It utilizes multiple reporting sources – parent‚ teacher‚ and self-report – to provide a holistic view of the individual’s behavior.

The scale consists of various subscales assessing inattention‚ hyperactivity/impulsivity‚ learning problems‚ executive functioning‚ aggression‚ and peer relations. Each item is rated on a scale‚ typically 0-3‚ reflecting the frequency or severity of the behavior.

The Conners 3 PDF format facilitates easy administration and scoring‚ allowing professionals to quickly gather and analyze data. It’s designed to be a valuable resource for diagnosis‚ treatment planning‚ and monitoring progress.

Conners Adult ADHD Rating Scales (CAARS)

Conners Adult ADHD Rating Scales (CAARS)‚ available as a PDF‚ are specifically designed to assess ADHD symptoms in adults. Recognizing that ADHD often persists into adulthood‚ CAARS provides a standardized method for evaluating these presentations. The scales are available in both self-report and observer-report formats‚ offering diverse perspectives.

The CAARS PDF includes questions about inattention‚ hyperactivity-impulsivity‚ and associated emotional and executive function difficulties experienced in daily life. Ratings typically range from 0 to 3‚ indicating the frequency of symptom presentation.

Professionals utilize CAARS to aid in diagnosis‚ treatment planning‚ and monitoring the effectiveness of interventions for adult ADHD; The structured format and clear scoring guidelines enhance reliability and validity.

CAARS-S: Self-Report Long Version

The CAARS-S: Self-Report Long Version‚ accessible as a PDF document‚ allows adults to directly evaluate their own experiences with ADHD symptoms. Developed by C. Keith Conners and colleagues‚ this version comprises a comprehensive set of questions designed to capture the nuances of adult ADHD presentation.

Individuals completing the CAARS-S PDF reflect on how frequently they experience symptoms like difficulty focusing‚ restlessness‚ impulsivity‚ and emotional dysregulation. Each item is rated on a scale‚ typically 0-3‚ reflecting symptom severity.

This self-assessment tool provides valuable insight into an individual’s subjective experience and can be used alongside observer reports for a more holistic evaluation. It’s a crucial component in a comprehensive ADHD assessment process.

CAARS-O: Observer-Report Long Version

The CAARS-O: Observer-Report Long Version‚ readily available as a PDF‚ offers a crucial perspective by gathering input from individuals who know the adult well – spouses‚ partners‚ or close family members. Also developed by Conners‚ Erhardt‚ and Sparrow‚ this version complements the self-report by providing an external viewpoint on ADHD symptoms.

Observers completing the CAARS-O PDF assess the frequency and severity of behaviors associated with inattention‚ hyperactivity-impulsivity‚ and associated emotional or cognitive difficulties. Like the self-report‚ it utilizes a rating scale‚ typically ranging from 0 to 3‚ to quantify symptom presentation.

This external perspective is invaluable‚ as individuals with ADHD may have limited insight into how their behaviors impact others. It contributes to a more comprehensive and accurate diagnostic picture.

Purpose of the Conners ADHD Test

The primary purpose of the Conners ADHD Test‚ accessible in PDF format‚ is to aid in the comprehensive assessment of Attention-Deficit/Hyperactivity Disorder (ADHD) across various age groups. These rating scales aren’t designed for standalone diagnosis‚ but rather to provide valuable information to qualified professionals.

Conners scales help identify the presence and severity of ADHD symptoms‚ differentiating them from typical behavioral variations. The PDF versions facilitate efficient data collection from multiple sources – parents‚ teachers‚ and the individuals themselves – offering a holistic view.

Furthermore‚ the test assists in monitoring treatment effectiveness over time‚ tracking symptom changes and informing adjustments to intervention strategies. It’s a tool for informed clinical decision-making.

Who Administers the Conners Test?

While the Conners ADHD Test‚ often utilized via PDF versions‚ involves input from parents and teachers‚ it’s crucial to understand that administration and interpretation require professional expertise. The scales themselves aren’t self-administered for diagnostic purposes.

Typically‚ qualified professionals such as psychologists‚ psychiatrists‚ pediatricians‚ and licensed counselors are responsible for overseeing the process. They determine the appropriate Conners scale version‚ collect completed questionnaires‚ and analyze the results.

These professionals possess the clinical training to contextualize the scores‚ considering other relevant information and conducting further evaluations if necessary. They are the key to translating the PDF data into meaningful insights.

How to Access Conners ADHD Test PDF Versions

Accessing Conners ADHD Test PDF versions requires careful consideration‚ as these are typically intended for licensed professionals. Direct downloads from unofficial sources may not be legitimate or current. Many resources emphasize that obtaining these scales necessitates a professional account or purchase.

While some sample forms or informational PDFs might be available online‚ complete‚ scorable versions are generally restricted. Professionals can acquire them through Conners’ official distributors or assessment platforms.

It’s vital to avoid using unauthorized PDF copies‚ as they may lack proper scoring keys or validation. Always prioritize legitimate sources to ensure accurate assessment and responsible use of these valuable tools.

Understanding the Scoring System

The Conners ADHD Test utilizes a straightforward scoring system‚ typically employing a 0-3 point rating scale for each item. This scale assesses the frequency or severity of observed behaviors over a specified period‚ usually the past month. A rating of 0 indicates the behavior is “not at all” problematic‚ while 3 signifies it’s “very much true” or occurs “very often.”

Ratings of 1 and 2 represent intermediate levels of severity. Caregivers or respondents are prompted to consider how much of a problem each behavior has been‚ circling the most appropriate number.

Total scores are calculated for different subscales‚ providing insights into inattention‚ hyperactivity‚ and impulsivity. Proper interpretation requires professional expertise and consideration of the individual’s age and context.

Rating Scale: 0-3 Points

The Conners Rating Scales employ a simple‚ yet nuanced‚ 0-3 point rating scale for each behavioral statement. This allows for a quantifiable assessment of symptom severity. A score of 0 signifies “none‚” “not at all‚” “seldom‚” or “very infrequently” – indicating the behavior is rarely observed. Conversely‚ a score of 3 represents “very much true‚” or that the behavior “occurs very often or frequently‚” highlighting a significant issue.

Intermediate scores of 1 and 2 capture varying degrees of behavioral presentation. Respondents are asked to reflect on the past month‚ determining the best fit for each statement. This structured approach facilitates a standardized evaluation of ADHD-related behaviors‚ providing valuable data for professionals;

Interpreting Conners Test Results

Interpreting Conners Test results requires professional expertise‚ as raw scores alone don’t provide a diagnosis. The scales offer valuable insights into the frequency and severity of behaviors associated with ADHD‚ but must be considered within the context of a comprehensive evaluation. It’s crucial to note whether the evaluation was completed while the child was on medication or not‚ as this impacts symptom presentation.

Scores are typically compared to normative data‚ identifying whether a child’s behaviors fall within the expected range for their age. Significant deviations suggest the need for further investigation. Remember each rating should be considered appropriate for the child’s age and developmental stage.

What Behaviors Does the Conners Test Assess?

Conners Rating Scales comprehensively assess behaviors linked to ADHD‚ examining a wide range of traits. The scales delve into difficulties with inattention‚ such as struggles with focus‚ organization‚ and following instructions. Hyperactivity symptoms‚ including excessive fidgeting‚ restlessness‚ and difficulty staying seated‚ are also evaluated.

Furthermore‚ the test assesses impulsivity‚ encompassing behaviors like interrupting others‚ acting without thinking‚ and difficulty waiting their turn. The Conners Scale contains statements about common problems and challenges children may experience‚ providing a detailed behavioral profile. It’s available in self-report and observer-rated formats.

Inattention Symptoms Assessed

Conners Rating Scales meticulously evaluate various inattention symptoms crucial for ADHD diagnosis. These include difficulties sustaining attention during tasks or play activities‚ appearing easily distracted by extraneous stimuli‚ and frequently making careless mistakes in schoolwork or other activities.

The assessment probes for challenges with organization‚ such as difficulty keeping track of belongings or managing time effectively. It also examines tendencies to avoid or dislike tasks requiring sustained mental effort‚ appearing forgetful in daily routines‚ and struggling to follow through on instructions. The Conners Scale aims to provide a detailed understanding of attentional deficits impacting daily functioning.

Hyperactivity Symptoms Assessed

Conners Rating Scales comprehensively assess hyperactivity‚ a core symptom of ADHD‚ through detailed questioning. The assessment investigates excessive fidgeting or squirming‚ difficulty remaining seated in situations where it’s expected‚ and running about or climbing excessively in inappropriate settings.

It also explores challenges with quiet play‚ being “on the go” as if “driven by a motor‚” and talking excessively. The Conners Scale probes for restlessness‚ difficulty waiting their turn‚ and blurting out answers before questions have been completed. These inquiries aim to quantify the degree to which hyperactivity impacts a child’s or adult’s daily life and overall functioning‚ providing valuable diagnostic insights.

Impulsivity Symptoms Assessed

Conners Rating Scales meticulously evaluate impulsivity‚ another key characteristic of ADHD‚ through a series of focused questions. The assessment investigates difficulties in inhibiting responses‚ such as blurting out answers before a question is finished‚ and interrupting or intruding on others.

It further explores challenges with waiting their turn‚ acting without thinking‚ and making hasty decisions without considering consequences. The Conners Scale also assesses a tendency to engage in risky behaviors and difficulty delaying gratification. These inquiries aim to determine the extent to which impulsive actions interfere with daily routines‚ social interactions‚ and overall well-being‚ contributing to a comprehensive understanding of the individual’s behavioral profile.

Conners Test vs. Vanderbilt Assessment Scale

Both the Conners Rating Scales and the Vanderbilt Assessment Scale are widely utilized tools for evaluating ADHD‚ yet they possess distinct characteristics. The Conners scales‚ available as PDF downloads‚ often provide a more in-depth and comprehensive assessment of behavioral issues‚ encompassing a broader range of symptoms.

Conversely‚ the Vanderbilt scale is frequently employed as a briefer screening tool‚ particularly within pediatric primary care settings. It directly addresses the diagnostic criteria outlined in the DSM‚ and includes sections for both parent and teacher input. While Conners offers multiple versions tailored to different age groups and perspectives‚ the Vanderbilt is often favored for its conciseness and focus on core ADHD symptoms.

Limitations of Using the Conners Test

Despite its widespread use‚ the Conners ADHD Test‚ even in PDF format‚ isn’t without limitations. The scales rely on subjective ratings‚ potentially introducing bias from the respondent – be it parent‚ teacher‚ or the individual themselves. Cultural factors and differing perceptions of behavior can also influence scoring.

Furthermore‚ the Conners scales are not diagnostic tools in isolation; they should always be interpreted by a qualified professional alongside other clinical information. A high score doesn’t automatically confirm ADHD. The PDF versions‚ while convenient‚ require careful handling to ensure data privacy and security. Finally‚ the scales assess behaviors‚ but don’t explain the cause of those behaviors.

The Role of a Professional in ADHD Diagnosis

While Conners ADHD Test PDF versions offer valuable insights‚ a formal ADHD diagnosis requires the expertise of a qualified healthcare professional. The scales are assessment tools‚ not definitive diagnostic instruments. A clinician considers the Conners results alongside a comprehensive evaluation‚ including medical history‚ behavioral observations‚ and potentially other psychological testing.

Professionals can accurately interpret the nuances of the scores‚ accounting for age-appropriateness and contextual factors. They differentiate ADHD from other conditions presenting similar symptoms. Utilizing the PDF results‚ they formulate a tailored treatment plan‚ which may include therapy‚ medication‚ or behavioral interventions. Self-diagnosis based solely on Conners scores is strongly discouraged.

Using the Conners Test for Treatment Monitoring

Conners ADHD Test PDF versions are incredibly useful for tracking treatment effectiveness over time. By administering the scales periodically – for example‚ before‚ during‚ and after interventions – professionals and caregivers can objectively measure symptom changes. This data informs adjustments to the treatment plan‚ ensuring it remains optimized for the individual’s needs.

Consistent use of the PDF allows for a quantifiable assessment of progress‚ moving beyond subjective impressions. Observing score reductions in areas like inattention or impulsivity indicates positive responses to therapy or medication. Conversely‚ stable or worsening scores signal a need for reevaluation. The Conners scales provide a valuable‚ data-driven component to ongoing care.

Where to Find Official Conners Rating Scales PDFs

Accessing official Conners ADHD Test PDF versions requires careful navigation‚ as unauthorized sources may offer outdated or inaccurate materials. Typically‚ these scales are not freely available for direct download due to copyright restrictions and the need for qualified administration.

Professionals generally obtain Conners Rating Scales through authorized distributors like Multi-Health Systems (MHS)‚ the official publisher. MHS provides access to the scales‚ scoring materials‚ and necessary training for proper implementation. While direct PDF downloads aren’t common for the full assessments‚ sample forms or informational brochures might be available on their website. Always prioritize purchasing from legitimate sources to ensure validity and reliability.

Cost of Conners Rating Scales

The cost of Conners Rating Scales varies significantly depending on the specific version‚ format (paper or digital)‚ and the number of assessments purchased. Generally‚ these scales are a considerable investment‚ reflecting their comprehensive nature and professional application. Expect to pay several hundred dollars for a complete kit‚ including manuals‚ assessment forms‚ and scoring software.

Conners 3‚ being the most comprehensive version‚ typically carries a higher price tag than the CAARS. Individual forms‚ like the self-report or observer-report versions‚ are less expensive but still require a professional account with MHS. Costs also factor in any required training or certification for administering and interpreting the tests. Budget accordingly‚ considering ongoing expenses for replacement forms if frequent assessments are needed.

Alternatives to the Conners ADHD Test

Several reliable alternatives to the Conners ADHD Test exist‚ offering different approaches to assessment. The Vanderbilt Assessment Scale is a frequently used option‚ providing both parent and teacher rating forms‚ and is often readily available; Other tools include the Behavior Assessment System for Children (BASC-3)‚ which offers a broader behavioral assessment‚ and the ADHD Rating Scale-IV (ADHD-RS-IV)‚ focused specifically on ADHD symptoms.

Choosing an alternative depends on the specific needs of the evaluation. Some scales are more suitable for younger children‚ while others are designed for adults. Cost‚ ease of administration‚ and the scope of assessment are also important considerations. A qualified professional can help determine the most appropriate assessment tool based on individual circumstances.

Legal and Ethical Considerations

When utilizing Conners ADHD Test PDFs‚ strict adherence to legal and ethical guidelines is paramount. These assessments are often considered psychological tests‚ requiring qualified professionals for administration and interpretation. Unauthorized use or distribution of the test materials violates copyright laws and professional ethics.

Maintaining client confidentiality is crucial; PDF versions must be securely stored and accessed only by authorized personnel. Informed consent should be obtained from parents or individuals before administering the test‚ explaining its purpose and how the results will be used. Professionals must avoid misrepresentation of qualifications and ensure culturally sensitive interpretation of results‚ recognizing potential biases.

Privacy Concerns When Using PDF Versions

Employing Conners ADHD Test PDFs introduces significant privacy concerns demanding careful attention. Digital files are vulnerable to unauthorized access‚ potentially exposing sensitive personal and behavioral data. Secure storage‚ password protection‚ and encryption are essential safeguards. Transmission via email or unsecured networks poses risks; utilizing secure file transfer protocols is recommended.

Professionals must comply with data protection regulations like HIPAA‚ ensuring responsible handling of client information. PDF documents should be stored on secure servers with restricted access. Regularly audit security measures and implement data breach response plans; Consider the risks of cloud storage and choose providers with robust security features. Maintaining client confidentiality is paramount when utilizing digital assessment tools.

conners adhd test pdf

Understanding the Conners ADHD Test PDF

The Conners ADHD Test PDF is a widely utilized assessment tool for evaluating ADHD and related behavioral concerns, offering a printable format for effective symptom monitoring.

What is the Conners ADHD Test?

The Conners ADHD Test, available as a PDF, is a comprehensive behavioral assessment tool designed to identify and quantify symptoms associated with Attention-Deficit/Hyperactivity Disorder (ADHD). It’s utilized by parents, teachers, and professionals to gain insights into a child’s or adult’s behavior.

The test consists of a series of statements about behaviors, and respondents rate how much of a problem each behavior represents – typically over the last month – using a 0-3 point scale. This scale ranges from “not at all” to “very much true”.

The Conners Scale helps assess inattention, hyperactivity, and impulsivity, providing valuable data for tracking symptom severity and treatment progress. It’s a crucial component in a broader evaluation process.

History and Development of the Conners Scales

The Conners Scales originated with the work of Dr. Keith Conners, a pioneering figure in ADHD research, beginning in the 1960s. Initially developed to address the need for a standardized method to assess hyperactive children, the scales have undergone several revisions and expansions over the decades.

Early versions focused primarily on hyperactivity, but subsequent iterations – like Conners 2 and Conners 3 – broadened the scope to include inattention and impulsivity, reflecting evolving understanding of ADHD.

These scales were designed to be practical and accessible, often available as PDF documents for easy administration and scoring. The ongoing development ensures the scales remain relevant and aligned with current diagnostic criteria.

Types of Conners Rating Scales Available as PDFs

Conners offers various PDF rating scales, including Conners 3, Conners 2, and CAARS (Adult versions), catering to diverse assessment needs and age groups.

Conners 3: A Comprehensive Assessment

Conners 3 represents the latest iteration of the Conners rating scales, providing a highly detailed and comprehensive evaluation of ADHD and associated behavioral issues; Available as a PDF, it’s designed for assessing children and adolescents, offering separate forms for parents, teachers, and self-report (for older children).

This version expands upon previous scales with updated norms and improved psychometric properties. It examines a broader range of behaviors, including inattention, hyperactivity/impulsivity, learning problems, executive functioning deficits, aggression, and peer relations. The Conners 3 utilizes a standardized rating system, typically a 0-3 point scale, allowing for quantifiable data collection.

Professionals utilize the resulting scores to gain a nuanced understanding of a child’s strengths and weaknesses, aiding in accurate diagnosis and the development of targeted intervention plans. The PDF format facilitates easy administration and scoring;

Conners 2: Older Version Still in Use

While Conners 3 is the current standard, the Conners 2 remains a frequently encountered assessment tool, often available as a PDF for download. It continues to be utilized in some settings due to its established history and familiarity among clinicians. Like its successor, Conners 2 employs rating scales completed by parents and teachers to evaluate a child’s behavior.

The scale focuses on identifying symptoms of ADHD, including inattention, hyperactivity, and impulsivity, as well as associated behavioral problems. Scoring involves a 0-3 point system, reflecting the severity of each symptom. Although older, it provides valuable comparative data when tracking a child’s progress over time, especially if previous assessments used Conners 2.

However, it’s crucial to acknowledge that Conners 2’s norms are outdated compared to Conners 3, potentially impacting the accuracy of interpretations.

Conners Adult ADHD Rating Scales (CAARS) ⎼ Self-Report & Observer Forms

The Conners Adult ADHD Rating Scales (CAARS), available as PDF downloads, are specifically designed to assess ADHD symptoms in adults. These scales come in two primary formats: a self-report version, where the individual evaluates their own behaviors, and an observer form, completed by someone who knows the adult well – a spouse, partner, or close friend.

The CAARS examines both current ADHD symptoms and recollections of childhood behaviors, providing a comprehensive picture. It assesses inattention, hyperactivity-impulsivity, and associated emotional and executive function difficulties. Utilizing a similar 0-3 rating system, the CAARS helps professionals differentiate between ADHD and other potential conditions.

Both forms are vital for a thorough evaluation, as discrepancies between self-perception and external observations can offer valuable insights.

Accessing and Downloading Conners ADHD Test PDFs

Conners ADHD Test PDFs are available through official sources and sometimes free online, though paid versions often include scoring sheets for professionals.

Official Sources for PDF Downloads

Obtaining Conners ADHD Test PDFs directly from official publishers ensures authenticity and access to the most current versions of the scales. Professionals typically purchase these through specialized psychological testing distributors like Multi-Health Systems (MHS) or Western Psychological Services (WPS).

These sources require account creation and often verification of professional credentials to ensure responsible use of the assessment tools. Direct downloads are usually restricted to licensed purchasers. Caregivers and educators should avoid unofficial sources, as these may contain outdated or inaccurate materials.

Always prioritize purchasing from reputable vendors to guarantee the validity and reliability of the Conners assessment, supporting accurate evaluations and informed decision-making regarding ADHD.

Free vs. Paid PDF Versions

Accessing Conners ADHD Test PDFs presents a crucial distinction between free and paid versions. While some websites offer downloadable PDFs, these are often incomplete samples or outdated forms, lacking the necessary scoring keys and normative data for accurate interpretation.

Paid versions, available through official publishers and authorized distributors, provide complete assessment packets, including detailed manuals, scoring sheets, and access to updated research. These are essential for professionals conducting comprehensive evaluations.

Using unofficial, free PDFs can lead to misinterpretations and inaccurate assessments. Investing in the official, paid versions ensures the validity and reliability of the test, supporting appropriate diagnoses and treatment plans.

Scoring and Interpretation of the Conners Test

Conners Test scoring utilizes a 0-3 point system per item, with higher scores indicating more frequent or severe behavioral problems, analyzed via T-scores.

The Rating Scale: 0-3 Point System

The Conners Rating Scale employs a straightforward 0-3 point system for each statement, designed to quantify the frequency and severity of observed behaviors. Respondents are prompted to consider how much of a problem a specific behavior has been within the past month. A score of ‘0’ signifies that the behavior is ‘none’ or ‘not at all’ present, indicating minimal concern. Conversely, a score of ‘3’ represents that the behavior is ‘very much true’ or occurs ‘very often/frequently’, suggesting a significant issue.

Intermediate scores of ‘1’ and ‘2’ capture varying degrees of behavioral presentation, allowing for nuanced assessment. This simple yet effective system enables parents, teachers, and clinicians to objectively rate behaviors and track changes over time. Accurate scoring is crucial for meaningful interpretation of the overall results and informed decision-making regarding potential interventions.

Understanding T-Scores and Percentiles

Conners ADHD Test results aren’t simply raw scores; they’re converted into T-scores and percentiles for standardized interpretation. T-scores have a mean of 50 and a standard deviation of 10, allowing comparison to a normative sample. A T-score of 60, for example, indicates a score one standard deviation above the average. Percentiles show the percentage of the normative sample scoring below a given individual.

Higher T-scores and percentiles suggest more pronounced behavioral characteristics. Clinicians use these metrics to determine if a child’s behaviors significantly deviate from typical development. It’s important to remember that these scores are just one piece of the puzzle, and clinical judgment is essential for accurate diagnosis and treatment planning.

Age-Related Considerations in Scoring

Conners ADHD Test scoring requires careful consideration of the child’s age. Behaviors considered typical for a younger child might be concerning in an older one, and vice versa. Each rating on the scale should be evaluated within the context of age-appropriate development. The normative data used to calculate T-scores and percentiles are stratified by age, ensuring accurate comparisons.

Furthermore, it’s crucial to note whether the evaluation was conducted while the child was on medication. Medication can influence behavior and potentially skew results. Parent and teacher input should reflect observations of the child’s behavior in various settings, accounting for any age-specific nuances or medication effects.

Using the Conners Test Results

Conners Test results aid parents, teachers, and professionals in tracking behavior, observing classroom dynamics, and supporting diagnostic evaluations for ADHD effectively.

For Parents: Tracking Child’s Behavior

For parents, the Conners ADHD Test PDF serves as a valuable tool for consistently monitoring their child’s behaviors over time. By utilizing the rating scales, parents can document the frequency and severity of specific ADHD-related challenges, such as inattention, impulsivity, and hyperactivity.

This ongoing record helps identify patterns and triggers, providing crucial insights for discussions with teachers and healthcare professionals. Regularly completed forms offer objective data, supplementing parental observations and contributing to a more comprehensive understanding of the child’s needs.

Remember to consider the child’s age and any medication status when completing the assessment, ensuring accurate and relevant information is provided. Tracking progress allows parents to evaluate the effectiveness of interventions and adjust strategies as needed.

For Teachers: Classroom Observations

For teachers, the Conners ADHD Test PDF provides a structured framework for documenting observed behaviors within the classroom setting. The rating scales allow educators to objectively assess a student’s attention span, impulsivity, and hyperactivity levels during academic tasks and social interactions.

Consistent observations, recorded using the PDF, can reveal patterns that might not be apparent during brief interactions. This information is invaluable when collaborating with parents and school psychologists to develop individualized education plans (IEPs) or behavior management strategies.

Teachers should focus on behaviors exhibited during school hours, noting any contextual factors that may influence the student’s performance. Accurate and detailed observations contribute significantly to a holistic understanding of the student’s needs.

For Professionals: Diagnostic Support

For professionals, the Conners ADHD Test PDF serves as a valuable component within a comprehensive diagnostic evaluation for Attention-Deficit/Hyperactivity Disorder (ADHD). While not a standalone diagnostic tool, the standardized rating scales offer quantifiable data regarding symptom presentation from multiple perspectives – parent, teacher, and self-report (where appropriate).

The PDF format facilitates easy administration and scoring, providing T-scores and percentiles to aid in comparing an individual’s results against normative data. Professionals utilize this information alongside clinical interviews, behavioral observations, and other assessments to formulate an accurate diagnosis and treatment plan.

It’s crucial to remember the Conners scales contribute to, but do not define, a diagnosis.

Limitations and Considerations

The Conners Test PDF isn’t a definitive diagnosis; a comprehensive evaluation is vital, considering context, age, and other factors for accurate assessment.

The Conners Test is Not a Diagnosis

It’s crucial to understand that completing a Conners ADHD Test PDF, or receiving a score, does not equate to an official ADHD diagnosis. The test serves as a valuable screening tool and provides insightful information regarding potential behavioral patterns. However, a diagnosis requires a thorough evaluation conducted by a qualified healthcare professional – such as a pediatrician, psychiatrist, or psychologist.

This professional assessment will incorporate multiple data points, including clinical interviews, behavioral observations, developmental history, and potentially input from teachers and family members. The Conners scale contributes to this broader picture, but it’s just one piece of the puzzle. Relying solely on the test results could lead to misinterpretations or inaccurate conclusions about an individual’s condition.

Importance of a Comprehensive Evaluation

While the Conners ADHD Test PDF offers valuable insights, a comprehensive evaluation is paramount for accurate assessment and appropriate support. This involves a multi-faceted approach, going beyond simply scoring the rating scale. A qualified professional will conduct detailed interviews with parents, teachers, and the individual themselves to gather a complete developmental history;

They will also observe behaviors in various settings, considering factors like academic performance, social interactions, and emotional regulation. Ruling out other potential causes for observed symptoms – such as anxiety, depression, or learning disabilities – is a critical component. A comprehensive evaluation ensures a nuanced understanding, leading to a tailored treatment plan if an ADHD diagnosis is confirmed.

Alternatives to the Conners ADHD Test

Several alternatives exist, including the Vanderbilt Assessment Scale and the ADHD Rating Scale-IV (ARS-IV), providing different perspectives for evaluating ADHD symptoms.

Vanderbilt Assessment Scale

The Vanderbilt Assessment Scale is a frequently used alternative to the Conners test, designed to assess ADHD symptoms in children and adolescents. It exists in both parent and teacher report forms, offering a comprehensive view of the child’s behavior across different settings.

This scale evaluates symptoms of inattention and hyperactivity-impulsivity, aligning with the diagnostic criteria for ADHD. Importantly, it also includes an assessment of associated emotional and behavioral problems, such as anxiety, depression, and oppositional defiant disorder.

Like the Conners, the Vanderbilt utilizes a rating scale format, allowing for quantifiable data. It’s readily available online, often as a downloadable PDF, making it a convenient option for initial screening and monitoring. However, it’s crucial to remember that, similar to the Conners, it’s not a diagnostic tool in itself.

ADHD Rating Scale-IV (ARS-IV)

The ADHD Rating Scale-IV (ARS-IV) presents another viable alternative when considering assessments alongside the Conners’ scales. This scale is designed for evaluating ADHD symptoms based on the DSM-IV criteria – though it remains relevant even with the DSM-5’s prevalence. It’s typically completed by parents or teachers, providing insights into the child’s behavior in various environments.

The ARS-IV focuses on both inattentive and hyperactive-impulsive symptoms, offering a structured way to quantify their severity. It’s often used as part of a broader diagnostic evaluation, helping clinicians gather comprehensive information.

While not as widely discussed as the Vanderbilt or Conners, the ARS-IV provides a valuable tool for those seeking a different perspective on a child’s potential ADHD presentation. Like other rating scales, it should be interpreted by a qualified professional.

tefilas haderech pdf

Tefilat Haderech PDF: A Comprehensive Guide

Tefilat Haderech, the Traveler’s Prayer, finds readily available printable PDF versions online, catering to diverse needs with varied formats and layouts for convenient access;

Numerous online resources offer the prayer text, ensuring accessibility for those seeking to incorporate this ancient practice into their journeys, wherever they may lead.

These PDFs facilitate easy recitation of the prayer, allowing individuals to maintain a spiritual connection during travel, reflecting its enduring significance within Jewish tradition.

What is Tefilat Haderech?

Tefilat Haderech, beautifully rendered in Hebrew as תפילת הדרך, translates to “The Prayer for the Way” or “Traveler’s Prayer” in English. It’s a deeply meaningful Jewish prayer traditionally recited by those embarking on a journey, offering a spiritual safeguard during travel.

This prayer isn’t merely a request for physical safety; it’s a profound expression of faith, acknowledging God’s presence and protection throughout one’s travels. Often found in easily accessible PDF formats online, it allows individuals to carry this ancient tradition with them.

The prayer’s core purpose is to beseech divine assistance, seeking protection from dangers inherent in travel – bandits, harsh weather, and unforeseen accidents. It’s a plea for a safe passage, a smooth journey, and a fortunate return. The availability of PDF versions ensures its accessibility for modern travelers.

While historically recited before setting out on long journeys, its relevance extends to contemporary travel, encompassing car rides, flights, and even daily commutes. The prayer’s enduring power lies in its ability to connect travelers to a higher power, fostering a sense of peace and security.

The Origins of the Prayer

The roots of Tefilat Haderech are firmly planted in the Talmud, tracing back to ancient Jewish practices concerning travel and personal safety. While not a single, authored composition, the prayer evolved organically over time, drawing from various biblical verses and rabbinic teachings.

Early iterations focused primarily on protection from physical dangers – robbers and wild animals – common threats faced by travelers in ancient times. As Jewish communities dispersed, the prayer adapted to encompass broader concerns related to journeying, reflecting the changing realities of travel.

The prayer’s textual components were gradually assembled and refined by generations of scholars, resulting in the version commonly recited today. Conveniently available as a PDF, it allows for easy access to this historical and spiritual practice.

Its enduring presence in Jewish liturgy speaks to the universal human need for protection and guidance during times of uncertainty. The PDF format ensures the prayer’s preservation and accessibility for future generations, maintaining a vital link to Jewish heritage.

Historical Development & Talmudic Roots

The Tefilat Haderech’s development is intricately linked to the Talmud, specifically discussions surrounding the dangers inherent in travel during the Mishnaic and Gemara periods. Early rabbinic sources detail concerns about bandits and arduous journeys, prompting the formulation of protective prayers.

While a formalized, singular prayer wasn’t immediately present, fragments of relevant verses and blessings began to coalesce. These elements, addressing divine protection and safe passage, gradually formed the core of what would become Tefilat Haderech.

The availability of the prayer as a PDF today represents a culmination of centuries of refinement and transmission. The Talmudic roots demonstrate a practical response to real-world dangers, evolving into a spiritual practice.

Over time, the prayer expanded beyond mere physical safety, incorporating requests for peace, good fortune, and a successful return. Modern PDF versions often include annotations and explanations, enriching understanding of its historical context and enduring relevance.

The Core Text of Tefilat Haderech

The central portion of Tefilat Haderech, readily accessible in numerous PDF formats, begins with the phrase “Yehi ratzon” – “May it be Your will.” This marks the commencement of the core plea for divine protection throughout the journey.

The text itself is a carefully constructed series of requests, beseeching God for safety from all harm, including robbers, wild beasts, and unexpected dangers. It asks for smooth roads, favorable winds, and a peaceful passage.

Many PDF versions highlight the prayer’s poetic structure and the use of evocative language, emphasizing the traveler’s vulnerability and reliance on divine grace. The prayer isn’t simply a recitation of needs, but a heartfelt expression of faith.

The availability of the prayer as a downloadable PDF allows for easy memorization and consistent recitation, reinforcing its protective power. It’s a tangible connection to centuries of Jewish tradition and a source of comfort for travelers everywhere.

Yehi Ratzon: The Central Plea

“Yehi Ratzon” – “May it be Your will” – forms the pivotal opening of the central plea within Tefilat Haderech, frequently found in accessible PDF versions. This phrase isn’t merely introductory; it establishes a profound submission to God’s providence.

The subsequent text, readily available for download as a PDF, expands upon this initial request, detailing specific protections sought during travel. It asks for deliverance from robbers, wild animals, and any form of peril encountered on the road.

The power of “Yehi Ratzon” lies in its acknowledgement of God’s sovereignty. It’s a humble request, recognizing that safety isn’t guaranteed but is contingent upon divine favor. Many PDFs emphasize this nuance.

This central plea, easily printed from PDF resources, isn’t a demand, but a heartfelt aspiration for a safe and peaceful journey, grounded in faith and a deep connection to the Divine. It’s a cornerstone of the prayer’s efficacy.

Shomeiah Tefilah: The Concluding Phrase

“Shomeiah Tefilah” – “He who hears prayer” – serves as the resonant concluding phrase of Tefilat Haderech, consistently present in PDF versions of the prayer. This affirmation underscores the belief in God’s attentiveness to the supplications of travelers.

The phrase isn’t simply a formulaic ending; it’s a powerful statement of faith, reinforcing the idea that prayers offered during journeys are not uttered into a void, but are received and considered by the Divine. Easily accessible in PDF format, it provides closure.

Many PDF resources highlight that reciting “Shomeiah Tefilah” acknowledges God’s constant presence and willingness to intervene in the lives of those who seek His protection. It’s a comforting reassurance during times of vulnerability.

This concluding declaration, readily available for printing from PDFs, solidifies the prayer’s intent, expressing trust in God’s compassionate nature and unwavering commitment to safeguarding those under His care throughout their travels.

When to Recite Tefilat Haderech

Tefilat Haderech, available in convenient PDF format, is recited upon leaving a city, town, or even home, particularly if residing in isolation, ensuring divine protection.

Leaving a City or Town

The traditional time to recite Tefilat Haderech, easily accessible through readily available PDF versions, is when departing from the confines of a settled city or town. This practice acknowledges the increased potential for dangers encountered outside familiar, protected environments.

Before embarking on a journey beyond the city limits, reciting the prayer—often found in printable PDFs—serves as a request for divine guardianship throughout the travels. It’s a moment to consciously invite God’s presence and protection on the road.

The PDF format allows travelers to carry the prayer with them, ensuring it’s accessible even without an internet connection. This ancient custom, now conveniently digitized, underscores the enduring importance of seeking divine favor during times of transition and potential risk, offering peace of mind.

Whether printed or viewed digitally from a PDF, the prayer marks a deliberate pause before venturing into the unknown, solidifying a spiritual connection during the journey.

Departing from Home

Reciting Tefilat Haderech, conveniently found in numerous PDF formats online, isn’t limited to leaving cities; it’s also customary to say the prayer when departing from one’s home, particularly if residing in a relatively isolated area. This extends the protection offered by the prayer to even everyday journeys.

The PDF versions of the prayer allow for easy printing and portability, ensuring travelers can readily access the text regardless of location. This is especially useful when leaving from a home that isn’t centrally located within a bustling community.

Essentially, any departure that introduces a degree of increased risk or isolation warrants the recitation of Tefilat Haderech, as detailed in the accessible PDF resources. It’s a proactive step towards invoking divine protection.

The prayer, easily downloaded as a PDF, serves as a reminder of God’s constant presence, offering comfort and security during travel, even from the familiar surroundings of home.

Defining a “Journey”, Distance & Isolation

Determining when to recite Tefilat Haderech, readily available as a PDF for convenient access, hinges on understanding what constitutes a “journey.” Traditionally, it wasn’t solely about distance, but also a degree of exposure to potential dangers and isolation. Modern interpretations, often detailed in PDF guides, acknowledge this nuance.

While specific distances were debated in Talmudic times, the core principle remains: a journey begins when one leaves a relatively safe and populated environment for a more vulnerable situation. Printable PDF versions often include discussions of these historical perspectives.

The availability of Tefilat Haderech in PDF format allows travelers to easily consult these guidelines and make informed decisions about when to recite the prayer, considering both the length of the trip and the level of risk involved.

Ultimately, the prayer is recited when one ventures beyond the security of their usual surroundings, seeking divine protection during a period of increased vulnerability, as outlined in accessible PDF resources.

Modern Interpretations of Travel

Contemporary understandings of travel, often explored in detailed Tefilat Haderech PDF guides, extend beyond physical journeys to encompass any significant transition or undertaking. This includes commutes, business trips, and even metaphorical “journeys” of life.

The prayer, easily accessible as a PDF, is increasingly recited not just for safety from physical harm, but also for guidance and protection during challenging endeavors. Many PDF resources highlight this broadened application.

Furthermore, modern adaptations, sometimes found within comprehensive Tefilat Haderech PDF collections, reflect a growing awareness of environmental concerns, incorporating eco-Torah principles and a reverence for the Earth.

These interpretations, readily available for download as a PDF, demonstrate the prayer’s enduring relevance in a changing world, adapting to contemporary values while maintaining its core message of seeking divine protection and gratitude.

Tefilat Haderech in English Translation

Tefilat Haderech PDF resources commonly include several English translations, allowing for comparative study and deeper understanding of the prayer’s nuanced meaning and intent.

Common English Translations Compared

Several English translations of Tefilat Haderech exist, each offering a slightly different interpretation of the original Hebrew. Many Tefilat Haderech PDF documents present multiple versions side-by-side, facilitating comparison.

One common translation emphasizes a direct plea to God for protection from dangers encountered on the journey – bandits, wild animals, and unforeseen accidents. Another focuses on the spiritual aspects, requesting a favorable reception in the heavenly realms upon arrival.

Variations often appear in rendering key phrases like “Yehi Ratzon” (May it be Your will), with some translations opting for a more literal rendering while others prioritize conveying the underlying sentiment of humble supplication. The phrase “Shomeiah Tefilah” (He who hears prayer) also exhibits slight differences in wording.

Comparing these translations reveals the challenges inherent in accurately conveying the depth and poetry of the Hebrew text. Accessing Tefilat Haderech PDF versions with multiple translations empowers individuals to choose the rendering that resonates most deeply with their personal understanding and spiritual connection.

Variations in English Rendering

Examining Tefilat Haderech PDF resources reveals notable variations in English rendering, extending beyond simple word choice. Some translations adopt a more formal, liturgical tone, mirroring traditional Jewish prayer language. Others employ contemporary phrasing, aiming for greater accessibility and emotional resonance.

Differences emerge in how abstract concepts are translated. For instance, the prayer’s request for “good tidings” can be rendered as “good news,” “blessings,” or “favorable outcomes,” each subtly altering the nuance. Similarly, descriptions of potential dangers vary – “robbers” versus “bandits,” “wild beasts” versus “predators.”

The inclusion or exclusion of explanatory notes also contributes to variations. Some Tefilat Haderech PDFs provide detailed commentaries on the prayer’s historical context and theological significance, while others offer a purely textual presentation.

These variations aren’t errors, but rather reflect the subjective nature of translation and the diverse preferences of different communities. Choosing a rendering that aligns with one’s personal understanding enhances the prayer experience.

Understanding the Nuances of Translation

When exploring Tefilat Haderech PDFs with English translations, appreciating the nuances is crucial. Direct, literal translations often fall short of capturing the prayer’s poetic depth and spiritual intent. Hebrew employs concise phrasing and layered meanings, challenging precise English equivalents.

The concept of “derech” (way/journey) extends beyond physical travel, encompassing life’s path. Translations must convey this broader implication. Similarly, phrases invoking divine attributes require careful consideration; simply naming God isn’t enough – the translation should evoke reverence and connection.

Examining multiple Tefilat Haderech PDF versions highlights these subtleties. Some translations prioritize accuracy, while others prioritize flow and readability. Understanding the translator’s choices—and potential biases—enhances comprehension.

Ultimately, the “best” translation is subjective. A nuanced rendering invites deeper reflection, fostering a more meaningful connection to the prayer’s ancient wisdom and enduring message of seeking divine protection on all journeys.

Tefilat Haderech PDF Resources

Tefilat Haderech PDFs are widely accessible online, offering convenient, printable versions of the prayer for travelers seeking spiritual protection on their journeys.

Various websites host the prayer text in PDF format, providing options for different layouts and aesthetic preferences to suit individual needs.

Availability of Printable PDFs

Tefilat Haderech, the Traveler’s Prayer, boasts a remarkable accessibility thanks to the proliferation of printable PDF resources available across the internet. A simple online search reveals numerous websites dedicated to providing this ancient prayer in a readily downloadable and usable format. These PDFs cater to a wide range of preferences, offering variations in font size, layout, and even transliteration for those less familiar with Hebrew reading.

Many Jewish organizations and religious institutions offer professionally designed PDFs, ensuring accuracy and aesthetic appeal. Individuals can easily find versions suitable for personal use, synagogue distribution, or inclusion in travel packets. The convenience of a PDF allows travelers to have the prayer readily available on their smartphones, tablets, or printed for offline access, ensuring they can recite it regardless of internet connectivity.

Furthermore, some PDFs include accompanying translations and explanations, enhancing understanding and deepening the spiritual connection to the prayer’s meaning. The widespread availability of these resources underscores the enduring importance of Tefilat Haderech within the Jewish community.

Online Resources for the Prayer Text

Beyond downloadable PDFs, a wealth of online resources provide the text of Tefilat Haderech directly accessible through web browsers. Numerous Jewish websites and online prayer books feature the prayer in both Hebrew and English, often with audio pronunciations to aid in recitation. These platforms allow users to copy and paste the prayer for personal use or share it with others electronically.

Websites dedicated to Jewish liturgy and practice frequently include Tefilat Haderech as part of their comprehensive collections. Interactive resources may offer explanations of the prayer’s meaning and historical context, enriching the user’s understanding. Mobile apps designed for Jewish prayer also commonly incorporate the Traveler’s Prayer, providing convenient access on smartphones and tablets.

These online resources ensure that the prayer is readily available to anyone with an internet connection, fostering a sense of community and facilitating the practice of this ancient tradition, regardless of location or circumstance. The digital accessibility promotes wider engagement with Tefilat Haderech.

Different Formats & Layouts of PDFs

Tefilat Haderech PDFs are available in a diverse range of formats and layouts to suit individual preferences and printing needs. Some PDFs present the prayer solely in Hebrew, while others offer side-by-side Hebrew and English transliterations, or English translations alone. Layouts vary from simple, text-focused documents to more visually appealing designs incorporating traditional Jewish motifs.

Certain PDFs are formatted for easy printing on standard letter-size paper, while others are optimized for smaller formats like wallet cards for convenient carry during travel. Some versions include explanatory notes or commentaries on the prayer’s meaning, enhancing understanding. Variations also exist in font size and style, catering to different visual needs.

The availability of these diverse PDF formats ensures that individuals can find a version of Tefilat Haderech that best aligns with their personal preferences and practical requirements, promoting wider accessibility and use of this meaningful prayer.

Beyond Safety: The Prayer’s Deeper Meaning

Tefilat Haderech transcends mere requests for safe passage, fostering gratitude, a divine connection during travel, and modern adaptations like eco-Torah perspectives.

Requesting Divine Protection

Tefilat Haderech fundamentally serves as a heartfelt petition for Divine protection throughout one’s travels, acknowledging God’s omnipresence and power over all circumstances. The prayer isn’t simply a passive hope, but an active engagement with the Divine, seeking guardianship against potential dangers encountered on the journey.

This request extends beyond physical safety, encompassing protection from bandits – a historical concern reflected in the prayer’s origins – and encompasses broader anxieties associated with unfamiliar environments and unforeseen events. The prayer’s language implicitly recognizes human vulnerability and the need for a higher power’s intervention.

By explicitly asking for shielding from “every fearful creature,” the prayer demonstrates a comprehensive desire for security, encompassing both tangible and intangible threats. The availability of Tefilat Haderech in PDF format allows travelers to readily access this powerful plea for Divine safeguarding, reinforcing a sense of spiritual security wherever their path may lead.

Expressing Gratitude for Safe Passage

While primarily a prayer for protection, Tefilat Haderech implicitly contains an element of gratitude, anticipating a safe return and acknowledging God’s benevolence even before the journey concludes. This forward-looking thankfulness is a core tenet of Jewish prayer, recognizing Divine providence in both present and future blessings.

Upon arriving at one’s destination, reciting the prayer again transforms it into an explicit expression of gratitude for a journey completed without incident. It’s a moment to reflect on God’s watchful care and to offer thanks for the privilege of safe passage;

Having a Tefilat Haderech PDF readily available facilitates this practice, allowing travelers to seamlessly transition from requesting protection to offering heartfelt thanks. This dual function – petition and gratitude – underscores the prayer’s holistic nature and its enduring relevance in modern life, fostering a continuous connection with the Divine.

Connection to God During Travel

Tefilat Haderech serves as a powerful conduit for maintaining a spiritual connection with God while physically removed from the familiar comforts of home and community. Travel, historically fraught with peril, necessitates reliance on Divine protection, making prayer a natural response.

The prayer’s text, easily accessible through Tefilat Haderech PDF resources, provides a structured means of acknowledging God’s presence and seeking guidance during times of vulnerability. It transforms potentially isolating journeys into opportunities for deepened faith.

Having a portable PDF allows for spontaneous recitation, fostering a continuous dialogue with the Divine, regardless of location. This practice reminds travelers that they are never truly alone, but are always accompanied by God’s unwavering presence and care, strengthening their spiritual resilience.

Eco-Torah and Modern Adaptations

Contemporary interpretations of Tefilat Haderech, often found within evolving Tefilat Haderech PDF documents, reflect a growing awareness of our interconnectedness with the natural world. This manifests in adaptations that honor our relationship with the Earth, extending the prayer’s protective scope beyond personal safety.

Modern versions may incorporate blessings for a sustainable journey, acknowledging the environmental impact of travel and promoting responsible stewardship. These adaptations align with the principles of Eco-Torah, integrating ecological consciousness into traditional Jewish practice.

Furthermore, some adaptations strive for gender parity in language, ensuring inclusivity and reflecting contemporary values. Accessing these updated versions through readily available PDFs allows individuals to engage with a prayer that resonates with their evolving worldview, bridging tradition and modernity.