Archive title

Autem vel eum iriure dolor in hendrerit in vulputate velit esse molestie consequat, vel illum dolore eu feugiat nulla facilisis at vero eros et dolore feugait.

Monthly Archive March 31, 2024

glo teeth whitening instructions

GLO Teeth Whitening is an innovative at-home system using patented heat and light technology with hydrogen peroxide gel for safe‚ effective‚ and professional-level results without trays or strips.

1.1 What is GLO Teeth Whitening?

GLO Teeth Whitening is an innovative at-home system combining patented heat and light technology with hydrogen peroxide gel for safe‚ effective results. Designed for professional-level whitening without trays or strips‚ it uses a thick‚ non-runny gel that stays in place. The system includes a mouthpiece‚ whitening gel‚ and induction charging case. Clinically proven to whiten teeth up to 8 shades‚ GLO offers noticeable results in just a few days. Its gentle‚ accelerated process ensures optimal outcomes with minimal sensitivity‚ making it a popular choice for achieving a brighter smile conveniently at home.

1.2 Importance of Proper Instructions for GLO Teeth Whitening

Following proper instructions for GLO Teeth Whitening is crucial for achieving optimal results and ensuring safety. The system relies on correct application of the hydrogen peroxide gel and proper use of the mouthpiece to avoid uneven whitening or sensitivity. Instructions guide users on timing‚ gel amount‚ and post-care routines‚ such as avoiding staining foods and drinks. Adhering to these steps maximizes effectiveness and maintains long-lasting results. Improper use can lead to suboptimal outcomes or discomfort‚ making it essential to follow the provided guidelines carefully.

Understanding GLO Teeth Whitening Technology

GLO combines patented heat and light technology with hydrogen peroxide gel to accelerate whitening‚ ensuring safe and effective results at home without trays or strips.

2.1 Patented Heat and Light Technology

GLO’s patented heat and light technology combines gentle heat and blue LED light to accelerate the whitening process. The mouthpiece traps whitening oxygens against the teeth‚ warming them to an optimal temperature for faster results. This innovative system ensures safe and effective whitening without the need for trays or strips. The technology is designed to provide professional-level results at home‚ achieving up to five shades lighter in five to seven days. The wireless PRO WHITE PLATINUM device enhances this experience with an app for monitoring progress and customizing treatments.

2.2 Role of Hydrogen Peroxide in Whitening

GLO Teeth Whitening uses a specially formulated 10% hydrogen peroxide gel to safely and effectively remove stains. The peroxide breaks down into oxygen bubbles that penetrate the tooth enamel‚ lifting discoloration and brightening the smile. The thick‚ non-runny gel stays in place‚ ensuring even coverage and preventing spreading. This formulation‚ combined with GLO’s heat and light technology‚ accelerates the whitening process‚ delivering professional-level results at home. The controlled release of hydrogen peroxide ensures a gentle yet effective treatment‚ making it suitable for most users.

2.3 How GLO Differs from Other Whitening Methods

GLO stands out with its patented heat and light technology‚ enhancing whitening efficiency without harsh chemicals. Unlike traditional strips or trays‚ GLO’s thick‚ non-runny gel stays in place‚ ensuring precise application; The system combines gentle heat and LED light to accelerate results‚ offering up to five shades whiter in just days. Its wireless design and app connectivity provide a modern‚ user-friendly experience. GLO’s innovative approach eliminates the need for messy strips or uncomfortable trays‚ delivering professional-level results at home with minimal effort and maximum comfort.

Components of the GLO Teeth Whitening Kit

The GLO kit includes a mouthpiece with heat and light technology‚ specially formulated whitening gel‚ an induction charging case‚ and a shade guide for tracking progress.

3.1 GLO Mouthpiece and Its Features

The GLO mouthpiece is a key component‚ utilizing patented heat and light technology to enhance whitening. It is designed to trap whitening gel against teeth‚ preventing escape and ensuring optimal results. The mouthpiece gently warms the gel to accelerate the whitening process. Its ergonomic design provides comfort during use‚ and it is wireless for hassle-free application. The mouthpiece is compatible with the GLO App‚ allowing users to monitor progress and customize treatments. This advanced technology ensures safe‚ effective‚ and professional-level teeth whitening from the comfort of home.

3.2 Whitening Gel Composition and Application

The GLO whitening gel is formulated with hydrogen peroxide‚ designed to effectively lift stains and brighten teeth. Its thick‚ non-runny texture ensures it stays in place without trays or strips. Application involves squeezing a pea-sized amount onto the brush tip and applying a thin layer directly to the front surfaces of the top and bottom teeth. Avoid eating or drinking for 20 minutes after application. For optimal results‚ use as directed‚ typically up to twice daily‚ and follow the recommended session duration for best outcomes. Proper application maximizes effectiveness and safety.

3.3 Induction Charging Case and Accessories

The GLO Teeth Whitening Kit includes an induction charging case‚ ensuring wireless charging for convenience. The case is zippered for easy travel and stores the mouthpiece and accessories. Additional items include lip care to prevent dryness‚ a shade guide for tracking progress‚ and a user manual for detailed instructions. The charging case requires approximately 5 hours for a full charge‚ making it ready for multiple sessions. Proper charging ensures optimal performance of the device‚ supporting the whitening process effectively. These accessories enhance the overall user experience and contribute to achieving desired results.

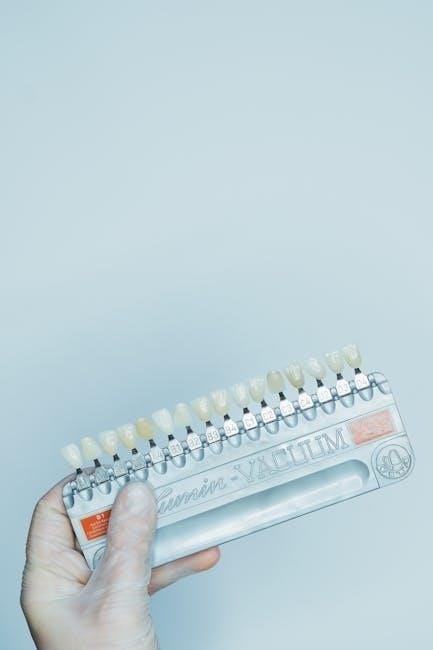
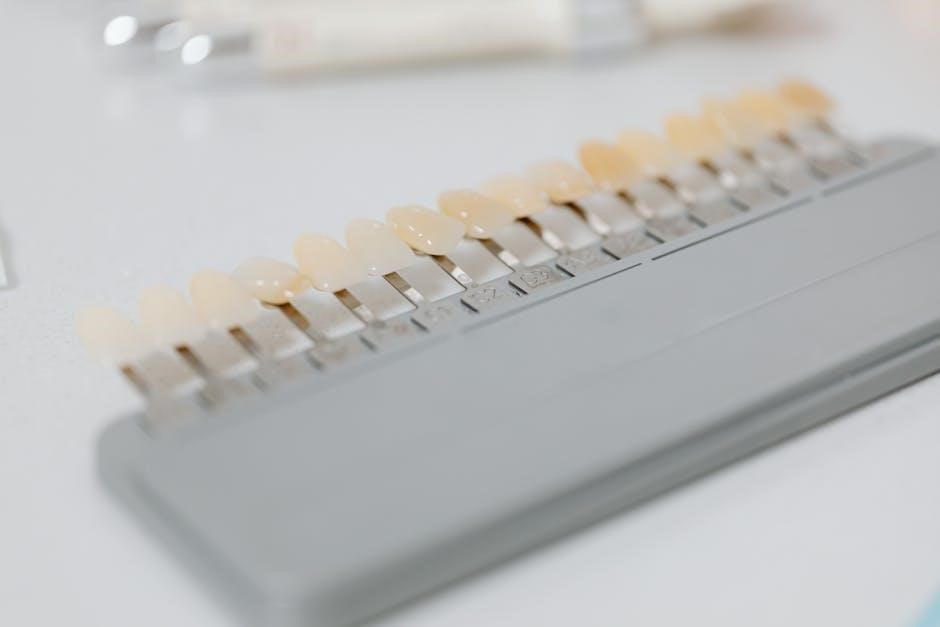
3.4 Shade Guide for Monitoring Progress

The GLO Teeth Whitening Kit includes a shade guide to help monitor progress. This tool allows users to track changes in tooth color before‚ during‚ and after treatment. By comparing results‚ individuals can visualize improvements and adjust sessions as needed. The shade guide is a practical accessory that ensures users stay motivated and informed throughout their whitening journey. It also serves as a useful reference for discussing results with dental professionals‚ making it an essential component of the GLO system for achieving optimal outcomes. Regular use of the shade guide helps maintain consistent and desired whitening results.

Pre-Whitening Preparation

Pre-whitening preparation involves consulting a dentist‚ especially for sensitive teeth or restorations. Avoid staining foods and drinks‚ and ensure teeth are clean before starting treatment for optimal results.

4.1 Importance of Dental Consultation

A dental consultation is crucial before starting GLO Teeth Whitening. A dentist ensures suitability‚ discusses expectations‚ and checks for conditions like sensitivity or restorations. They provide personalized advice‚ monitor progress‚ and help avoid complications. Consulting a dentist ensures safe and effective treatment‚ especially for sensitive teeth or existing dental work. Professional guidance maximizes results and minimizes risks‚ making it a key step in achieving a brighter‚ healthier smile with GLO.

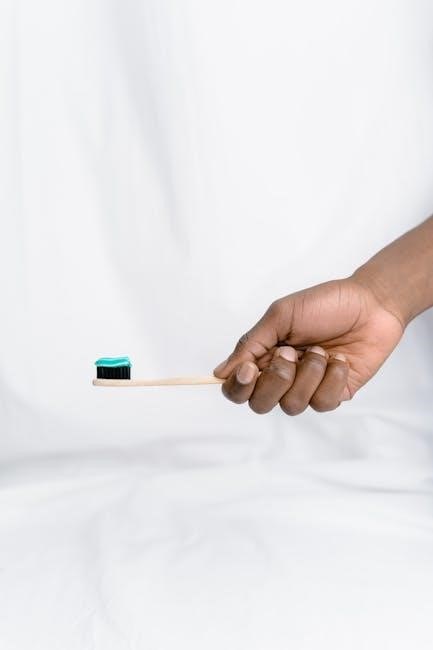
4.2 Preparing Your Teeth for Whitening

Before using GLO‚ ensure your teeth are clean and dry for optimal gel adhesion. Avoid eating or drinking for 30 minutes prior to application. Brush and floss thoroughly to remove plaque and stains‚ allowing the whitening gel to work effectively. If you have sensitivity‚ consider using a desensitizing toothpaste beforehand. Proper preparation enhances results and ensures the gel adheres evenly to the tooth surface‚ maximizing the whitening process.

4.3 Avoiding Staining Foods and Drinks Before Treatment

To achieve the best results with GLO Teeth Whitening‚ avoid consuming staining foods and drinks 24-48 hours before treatment. This includes coffee‚ tea‚ red wine‚ dark sodas‚ and deeply colored foods like berries or tomato sauce. These items can deposit pigments on your teeth‚ reducing the effectiveness of the whitening gel. By avoiding these‚ you ensure a cleaner surface for the gel to adhere and work optimally. This step is crucial for achieving a brighter‚ more even smile with your GLO treatment.

Step-by-Step Application Instructions

Apply a thin layer of GLO whitening gel to front teeth‚ insert the mouthpiece‚ and press the button for an 8-minute session. Repeat as directed for optimal results.

5.1 Applying the Whitening Gel Correctly

Apply a thin‚ even layer of GLO whitening gel directly to the front surfaces of your teeth using the provided brush. Use a pea-sized amount for both top and bottom teeth. Avoid applying gel to the gumline or backs of teeth. The gel is thick and stays in place‚ ensuring consistent coverage. Gently wipe any excess gel from the gumline with a clean finger or tissue. Proper application ensures optimal results and minimizes potential irritation. Follow the instructions carefully for the best outcome.

5.2 Using the GLO Mouthpiece

Insert the GLO mouthpiece gently into your mouth‚ ensuring it fits comfortably over your teeth. The mouthpiece uses patented heat and light technology to accelerate whitening. It is designed to trap oxygen from the gel against your teeth‚ enhancing effectiveness. The device is wireless and lightweight for ease of use. Press the button to start an 8-minute session. For optimal results‚ complete four consecutive sessions. Avoid moving the mouthpiece during use to maintain proper contact with your teeth. Ensure the mouthpiece is fully charged before each session for consistent performance.

5.3 Setting Up the Device for Optimal Results

Before use‚ ensure the GLO mouthpiece is fully charged using the induction charging case. Apply a thin‚ even layer of whitening gel to your teeth‚ focusing on the front surfaces. Connect the device via Bluetooth to the GLO Whitening App for personalized treatment plans and progress tracking. Press the button to activate the heat and light technology. For best results‚ complete four consecutive 8-minute sessions. Avoid interruptions during treatment to maintain consistent results. Keep the device clean and store it in the charging case after use to preserve functionality.

5.4 Timing and Session Duration

The GLO Teeth Whitening system is designed for 8-minute sessions. For optimal results‚ complete four consecutive sessions‚ allowing 20 minutes between each. Use the device up to twice daily‚ as needed. The GLO Whitening App helps track progress and customize treatment plans. Consistency is key for achieving up to 8 shades whiter in 7 days. Avoid eating or drinking for 20 minutes after treatment to prevent staining. Follow the app’s guidance for timing and session duration to ensure safe and effective whitening outcomes.

Post-Whitening Care

After whitening‚ avoid staining foods and drinks for 20 minutes. Maintain results with good oral hygiene‚ regular touch-ups‚ and avoiding staining agents for sustained brightness.

6.1 Immediate Aftercare Instructions

After completing your GLO Teeth Whitening session‚ avoid eating or drinking for at least 20 minutes to allow the whitening effects to set. Rinse your mouth with water if necessary‚ but refrain from using mouthwash. Avoid consuming staining foods and drinks‚ such as coffee‚ wine‚ or dark-colored sodas‚ for the next 24 hours. For optimal results‚ continue avoiding staining agents and tobacco products. If using a take-home whitening kit‚ follow the manufacturer’s instructions carefully. Proper immediate aftercare ensures long-lasting results and helps maintain your brighter‚ whiter smile.

6.2 Foods and Drinks to Avoid After Whitening

To maintain your whitening results‚ avoid staining foods and drinks for at least 24 hours after treatment. These include coffee‚ tea‚ red wine‚ dark sodas‚ and deeply colored fruits like berries. Avoid tobacco products and acidic foods that can weaken enamel. Use a straw for beverages to reduce contact with your teeth. Sticking to a white diet—such as water‚ milk‚ and white foods—helps preserve your smile. Consistency in avoiding stains ensures your teeth remain bright and white for a longer period.

6.3 Maintaining Whitening Results

To maintain your whitening results‚ avoid staining foods and drinks for at least 24 hours after treatment. Use the GLO device as needed for touch-ups to keep your teeth bright. For best results‚ avoid tobacco products and continue practicing good oral hygiene. Regularly using the GLO Whitening Gel and following the app’s guidance can help sustain your smile. Touch-up sessions every few months are recommended to maintain optimal whiteness and prevent stains from reappearing.

Tips for Best Results

For best results‚ use GLO consistently‚ avoid staining foods‚ and utilize the GLO app for monitoring. Touch-ups help maintain your bright smile.

7.1 Consistency in Treatment Sessions

Consistency is key to achieving optimal results with GLO Teeth Whitening. Apply a thin layer of whitening gel to your teeth‚ focusing on the front surfaces. Use the device as directed‚ completing the recommended number of sessions daily. For best outcomes‚ avoid interrupting the treatment schedule. Maintain good oral hygiene and avoid staining foods during your whitening program. Regular use ensures steady progress and helps you reach your desired shade faster. Stick to the routine for a brighter‚ more confident smile.

7.2 Avoiding Tobacco Products

Avoiding tobacco products is crucial for maintaining the effectiveness of GLO Teeth Whitening. Tobacco use can stain teeth and hinder the whitening process‚ reducing the desired results. Nicotine and tar in tobacco products can discolor teeth‚ making them appear yellow or brown. To achieve the best outcomes‚ refrain from using tobacco during your whitening program. This includes cigarettes‚ chewing tobacco‚ and other smokeless products. Quitting tobacco not only benefits your oral health but also helps preserve your whitening results for a longer period.

7.3 Using the GLO App for Monitoring

The GLO App is a powerful tool designed to enhance your teeth whitening experience. By connecting your GLO device via Bluetooth‚ you can preview results‚ customize treatment sessions‚ and track your progress. The app provides personalized recommendations to optimize your whitening routine. It also offers tips and reminders to ensure consistency‚ which is key to achieving the best results. Regular monitoring through the app helps you stay on track and maintain your desired smile. This innovative feature makes the GLO system both user-friendly and effective for long-lasting outcomes.

Safety and Precautions

GLO’s heat and light technology is safe and gentle‚ minimizing sensitivity. Always follow instructions to avoid allergic reactions and ensure proper use of hydrogen peroxide gel.

8.1 Safety of GLO Heat and Light Technology

GLO’s heat and light technology is designed for safety and comfort. The gentle warmth accelerates whitening without causing damage. Blue LED light enhances results while minimizing sensitivity. The system is FDA-cleared and suitable for at-home use. It avoids harsh chemicals‚ ensuring a safe experience. Proper use following instructions is essential to maintain safety and effectiveness.

8.2 Precautions for Sensitive Teeth

If you have sensitive teeth‚ start with shorter treatment sessions and gradually increase duration. Use a desensitizing toothpaste before and after treatment. Avoid applying excessive gel‚ as it may irritate gums or sensitive areas. If sensitivity persists‚ consult your dentist for recommendations. GLO’s gentle heat and light technology is designed to minimize discomfort‚ but individual sensitivity varies. Always follow instructions carefully to ensure a safe and effective experience.

8.4 Allergic Reactions and Sensitivity

Before using GLO‚ perform a patch test to check for allergic reactions. If you experience tingling‚ redness‚ or irritation‚ discontinue use and consult your dentist. For sensitive teeth‚ apply a desensitizing toothpaste 30 minutes before treatment. Start with shorter sessions and gradually increase duration. Avoid applying gel to sensitive areas or gums. If sensitivity persists‚ pause treatment and seek professional advice. GLO’s gentle technology minimizes discomfort‚ but individual reactions may vary. Always prioritize your oral health and safety.

Troubleshooting Common Issues

Address common issues like uneven results‚ gel application problems‚ or device malfunctions by checking the charge‚ ensuring proper gel application‚ and consulting the user manual for solutions.

9.1 Gel Application Problems

Common issues with gel application include using too much gel‚ which can cause sensitivity‚ or applying it incorrectly. Ensure a thin‚ even layer on front teeth only. Avoid getting gel on gums or using expired products‚ as this can reduce effectiveness. If gel is applied too generously‚ gently wipe excess with a clean cloth. Always follow the instructions for proper application to achieve optimal results and minimize discomfort. Proper technique ensures the gel adheres correctly‚ enhancing the whitening process and preventing waste.

9.2 Device Malfunction or Charging Issues

If the GLO device malfunctions or fails to charge‚ ensure the induction case is properly connected to power. Check for debris on the mouthpiece or charging contacts and clean them gently. Restart the device or allow it to charge for 30 minutes. If issues persist‚ refer to the user manual or contact customer support. Avoid using damaged cables‚ as this can prevent proper charging; Regularly updating the GLO app and ensuring the device is fully charged before use can help maintain optimal performance and prevent unexpected shutdowns during sessions.

9.3 Uneven Whitening Results

Uneven whitening can occur due to improper gel application or inconsistent treatment sessions. Ensure the whitening gel is applied evenly across all visible teeth. If results vary‚ reapply gel to lighter areas and complete an additional session. Avoid overlapping gel on gums or avoiding certain teeth‚ as this can cause unevenness. Use the shade guide to monitor progress and adjust treatments as needed. Consistency is key to achieving uniform results. For best outcomes‚ follow the recommended session times and avoid interrupting the process prematurely.

GLO Teeth Whitening offers effective‚ professional-level results at home. By following instructions and maintaining proper care‚ you can achieve a brighter‚ whiter smile that lasts longer.

10.1 Summary of GLO Teeth Whitening Benefits

GLO Teeth Whitening offers a convenient‚ at-home solution with professional results. Its patented heat and light technology‚ combined with hydrogen peroxide gel‚ ensures safe and effective whitening. The system is tray-free and user-friendly‚ providing up to five shades whiter teeth in minimal sessions. GLO’s unique design traps oxygen against teeth for optimal results. With proper care‚ including avoiding staining foods and drinks‚ users can maintain a brighter smile. The kit includes all necessary components‚ making it a comprehensive choice for achieving long-lasting‚ radiant teeth whitening outcomes.

10.2 Final Tips for Long-Lasting Results

For long-lasting results‚ avoid staining foods and drinks like coffee‚ wine‚ and dark sodas. Use the GLO app to monitor progress and maintain consistency. Touch-ups can be done as needed to preserve whiteness. Regular dental check-ups ensure overall oral health and help sustain results. Always follow the manufacturer’s instructions for optimal outcomes. By combining proper care and consistent use‚ GLO Teeth Whitening delivers a radiant‚ long-lasting smile.

dbz kakarot trophy guide

Welcome to the Dragon Ball Z: Kakarot Trophy Guide! This comprehensive guide helps you unlock all 42 trophies, including the coveted Platinum, by mastering story progression, post-game challenges, and hidden achievements. Explore strategies for defeating foes, completing sagas, and maximizing your gaming experience to become the ultimate Dragon Ball Master.

Overview of the Game and Trophy System

Dragon Ball Z: Kakarot is an open-world action role-playing game that immerses players in the iconic DBZ universe, spanning four major sagas; The trophy system includes 42 achievements: 1 Platinum, 4 Gold, 9 Silver, and 28 Bronze. These trophies are designed to reward story progression, combat mastery, exploration, and completion of challenging tasks. The Platinum trophy, “Dragon Ball Master,” requires unlocking all other trophies, showcasing full game completion. Bronze trophies focus on story milestones and basic achievements, while Silver and Gold trophies involve post-game challenges, such as defeating tough enemies or mastering advanced combat techniques. The system is balanced, offering a mix of straightforward and demanding objectives, with an estimated 30-40 hours needed for 100% completion. This guide provides a roadmap to navigate the trophy system efficiently, ensuring players can unlock every achievement seamlessly.

Trophy Overview in DBZ Kakarot

Dragon Ball Z: Kakarot features 42 trophies, including 28 Bronze, 9 Silver, 4 Gold, and 1 Platinum, each rewarding story progression, combat mastery, and exploration.

Types of Trophies and Their Distribution

Dragon Ball Z: Kakarot offers a diverse trophy system with 42 achievements, divided into four categories: Bronze, Silver, Gold, and Platinum. Bronze trophies (28 total) are primarily awarded for story progression, character development, and basic gameplay milestones, such as completing specific sagas or defeating enemies. Silver trophies (9 total) focus on post-story challenges, like defeating tough foes or completing specific tasks. Gold trophies (4 total) require more dedication, such as mastering advanced skills like Z Combos or completing high-level Training Grounds challenges. The Platinum trophy, Dragon Ball Master, is unlocked by obtaining all other trophies, marking 100% completion of the game. This balanced distribution ensures a rewarding experience, with most trophies achievable through natural gameplay and a bit of extra effort.

Story-Related Trophies

Story-related trophies are unlocked by completing specific sagas and defeating key bosses, such as Frieza, with achievements like Worse For Wear and Emperor No More.

Completing the Saiyan Saga

Completing the Saiyan Saga is a key milestone in Dragon Ball Z: Kakarot, unlocking the bronze trophy “Worse For Wear.” This achievement is tied to progressing through the story and defeating the saga’s final boss. To ensure a smooth experience, play on Easy difficulty, as there are no difficulty-related trophies. Focus on completing all main story missions and optional Substories to strengthen your characters. Explore the world, collect resources, and engage in optional battles to boost your power level. Defeating Nappa and Vegeta in the climactic battles will naturally unlock this trophy. Keep your characters well-leveled and equipped with powerful abilities to handle the challenges. This trophy marks your progress through one of DBZ’s most iconic story arcs, setting you up for the adventures ahead.

Post-Game Cleanup and Side Quests

Focus on completing side quests, defeating Villainous Parties, and collecting Dragon Balls post-story. Use wishes strategically and avoid missable trophies to ensure a smooth path to 100% completion.

Defeating Villainous Parties

Defeating Villainous Parties is a key post-game activity in Dragon Ball Z: Kakarot, tied to the Bronze trophy Purging the Plague. To unlock this trophy, you must defeat 30 Villainous Parties scattered across the game’s world. These groups of enemies are marked on the map and can be challenging, requiring well-leveled characters and effective combat strategies. Use the Dragon Radar to locate Villainous Parties and engage them in battle. Ensure your characters are properly trained, with high levels and powerful abilities, to handle these tough encounters. Defeating these foes not only contributes to trophy progression but also provides valuable experience and items for character growth. Focus on teamwork, use Z Combos wisely, and stay defensive against their strong attacks. This activity is essential for 100% completion and prepares you for other challenging post-game content.

Platinum Trophy: Dragon Ball Master

The Platinum Trophy, Dragon Ball Master, is awarded for unlocking all 42 trophies, signifying complete mastery of Dragon Ball Z: Kakarot. This prestigious achievement requires dedication and skill.

Unlocking the Prestigious Platinum Trophy

To unlock the Platinum Trophy, Dragon Ball Master, you must earn all 42 trophies in Dragon Ball Z: Kakarot. This includes 28 Bronze, 9 Silver, 4 Gold, and the Platinum trophy itself. The journey begins with the main story, where many trophies unlock naturally as you progress through iconic sagas like the Saiyan and Buu Sagas. Post-game, focus on defeating Villainous Parties, collecting Dragon Balls, and completing challenging Training Grounds. Ensure all characters are leveled up and their abilities are maxed out. Strategic use of Z Combos and transformations will aid in tough battles. With dedication and efficient gameplay, achieving this prestigious trophy is possible in about 30-35 hours, marking your mastery of the game and cementing your status as a true Dragon Ball Z champion.

Bronze Trophies

Bronze trophies in Dragon Ball Z: Kakarot are earned through story progression, character interactions, and basic achievements, such as completing specific sagas or defeating enemies.

Earning Purging the Plague

Earning the bronze trophy “Purging the Plague” requires defeating 30 Villainous Parties in Dragon Ball Z: Kakarot. These enemies are scattered across the game’s open world and can be identified by their red auras. To efficiently unlock this trophy, focus on exploring each area thoroughly, as Villainous Parties respawn after a certain period. Use high-level characters with strong attacks to defeat them quickly. Additionally, ensure your characters are well-leveled and equipped with powerful abilities, such as Kamehameha or Galick Gun, to make battles smoother. Tracking your progress via the in-game trophy tracker will help you stay motivated. This trophy is a great way to strengthen your team while working toward the Platinum trophy, Dragon Ball Master.

Silver Trophies

Silver Trophies in DBZ Kakarot consist of 9 achievements, focusing on post-story challenges like defeating tough foes and completing specific tasks to test your skills and dedication.

Achieving Tough Enough

The “Tough Enough” Silver Trophy is unlocked by completing a Level 10 Training Grounds challenge in Dragon Ball Z: Kakarot. This achievement tests your mastery of combat mechanics and character strength. To succeed, ensure your character is well-leveled and equipped with powerful abilities. Focus on upgrading your Z Combos and transformations, such as Super Saiyan or Super Saiyan 3, to enhance your combat efficiency. Practice timing your attacks and defensive maneuvers, as the challenge requires precise execution. Additionally, use support characters strategically to assist in battles. Completing this challenge not only earns you the trophy but also strengthens your skills for other in-game challenges. Dedication and consistent training are key to overcoming this tough but rewarding achievement.

Gold Trophies

Dragon Ball Z: Kakarot features four Gold Trophies, including “Emperor No More” for defeating Frieza and “Down with the Demon Realm!” for defeating Mira. These trophies require strategic gameplay, high-level character transformations, and mastery of advanced combat techniques. Earning them demonstrates exceptional skill and dedication, making them a highlight of your trophy collection.

Defeating Frieza for Emperor No More

Earning the “Emperor No More” Gold Trophy requires defeating Frieza in a challenging simulation battle. To succeed, ensure your characters, like Goku or Vegeta, are at high levels with maxed-out transformations, such as Super Saiyan. Equip powerful attacks like Kamehameha or Galick Gun to deal significant damage. Defense is crucial—block and dodge Frieza’s devastating moves, especially his Death Beam. Use support characters strategically to heal and assist during the fight. Practice timing your attacks and defensive maneuvers to whittle down Frieza’s health effectively. This battle tests your mastery of combat mechanics and character preparation, making it a rewarding achievement in your journey to unlock all trophies in Dragon Ball Z: Kakarot.

Exploration and Dragon Balls

Explore the vast world of Dragon Ball Z: Kakarot to collect all seven Dragon Balls, essential for wishes and specific trophies. Use wishes strategically to boost stats or revive tough enemies for practice, ensuring efficient progress toward 100% completion and unlocking key achievements.

Effective Strategies for Collecting Dragon Balls

Collecting Dragon Balls in Dragon Ball Z: Kakarot is crucial for unlocking wishes and specific trophies. To optimize your efforts, thoroughly explore the game’s vast world, completing mini-games and defeating enemies to gather the balls quickly. Once collected, use your wishes strategically—revive tough enemies for battle practice or boost stats to aid in challenging fights. Note that after each wish, there’s a 20-minute cooldown before the Dragon Balls respawn. Use this time to complete side quests, train your characters, or defeat Villainous Parties. Efficiently managing your Dragon Ball collection and wishes will streamline your progress toward 100% completion and earning key trophies like the Platinum Dragon Ball Master. Plan your wishes wisely to maximize their benefits and enhance your gameplay experience.

Mastering Z Combos

Mastering Z Combos enhances combat efficiency, allowing powerful finishing moves. Use support attacks until their icons glow, then unleash devastating strikes, especially with high-level transformations like SS3.

Enhancing Combat Efficiency with Z Combos

Mastering Z Combos is crucial for maximizing combat potential in Dragon Ball Z: Kakarot. These powerful moves are activated by using support attacks until their icons glow orange, signaling the perfect moment to unleash a devastating finishing strike. Z Combos are particularly effective in challenging battles, such as defeating Villainous Parties or tough boss simulations like Frieza and Mira. To enhance your combat efficiency, focus on leveling up key characters like Goku, Vegeta, and Gohan, and unlock their highest transformations, such as Super Saiyan 3. Regularly practicing Z Combos in Training Grounds challenges will improve your timing and execution, making them a vital tool for overcoming difficult enemies and earning trophies like Tough Enough. This skill is essential for both story progression and post-game challenges, ensuring you dominate every fight with precision and power;

Training Grounds Challenges

Training Grounds Challenges in DBZ Kakarot are essential for character growth, offering combat drills that boost stats and unlock powerful moves. Complete high-level challenges with well-leveled characters and transformations to dominate.

Completing Level 10 Training Grounds

Completing Level 10 Training Grounds in DBZ Kakarot is a challenging but rewarding achievement. To succeed, ensure your character is well-leveled, with high stats and transformations like Super Saiyan 3. Practice Z Combos and master defensive techniques to withstand intense attacks. Focus on characters like Goku or Vegeta, as they excel in high-damage output. Use support characters strategically to enhance your combat efficiency. The challenge tests your mastery of the game’s combat system, requiring precise timing and skill. Completing this unlocks the Tough Enough trophy, a significant milestone on your journey to the Platinum. Dedicate time to training and perfecting your skills to conquer this formidable test and prove your worth as a true Dragon Ball warrior.

Congratulations on completing the DBZ Kakarot Trophy Guide! Earning the Platinum trophy is a testament to your patience, skill, and dedication. Enjoy the glory and continue exploring the DBZ universe!

Final Tips for Achieving 100% Completion

To achieve 100% completion in Dragon Ball Z: Kakarot, focus on completing the main story, all side quests, and post-game challenges. Ensure you defeat 30 Villainous Parties for the Purging the Plague trophy and collect Dragon Balls multiple times for strategic wishes. Use Training Grounds to max out character levels and master Z Combos for tough battles. Track your progress with the in-game tracker to avoid missing any trophies. Defeating high-level enemies like Frieza and Mira requires well-prepared characters and strategic combat. Explore thoroughly, complete Substories, and practice battles to refine your skills. Stay patient, persistent, and enjoy the journey to becoming a true Dragon Ball Master!

Additional Resources

For further assistance, check out the PowerPyx Guide and community tips for detailed strategies; Engage with forums and YouTube tutorials for expert advice and hidden tricks to enhance your trophy hunt.

Recommended Guides and Community Tips

For a smoother journey to unlocking all trophies, consider consulting the PowerPyx Guide, a detailed roadmap for Dragon Ball Z: Kakarot. This guide offers step-by-step strategies for every achievement, ensuring no trophy is missed. Additionally, community forums like Reddit’s r/DragonBallZKakarot are treasure troves of tips and tricks shared by experienced players. Many users recommend focusing on post-game cleanup and leveraging Dragon Balls wisely. YouTube tutorials are also invaluable, providing visual guides for challenging battles and Training Grounds challenges. Engage with these resources to gain insights into optimizing your gameplay and overcoming difficult sections. By combining official guides with community advice, you’ll be well-equipped to tackle every trophy requirement efficiently and enjoy the game to its fullest potential.

behavior and medicine pdf

Behavioral medicine is an interdisciplinary field studying behavior’s role in health and disease, applying scientific principles to improve outcomes through psychological and behavioral interventions.

1.1 Definition and Scope of Behavioral Medicine

Behavioral medicine is an interdisciplinary field that studies the relationship between behavior, psychosocial processes, and health outcomes. It integrates knowledge from psychology, medicine, and social sciences to understand how behaviors influence disease prevention, diagnosis, and treatment. The scope includes addressing mental health, chronic diseases, and health promotion, aiming to improve overall well-being through evidence-based interventions.

1.2 Importance of Behavioral Medicine in Modern Healthcare

Behavioral medicine plays a crucial role in modern healthcare by addressing the psychological and social factors influencing health outcomes. It improves adherence to treatment plans, enhances disease management, and promotes overall well-being. By integrating behavioral interventions, healthcare systems can better address mental health issues, chronic diseases, and lifestyle-related conditions, ultimately reducing costs and improving patient outcomes.

History and Evolution of Behavioral Medicine

Behavioral medicine emerged as a recognized field, evolving from early studies of behavior’s impact on health. Its definition and scope have been refined to address global health challenges, emphasizing the role of biopsychosocial factors in disease and wellness.

2.1 Early Developments in the Field

The emergence of behavioral medicine can be traced to early studies exploring the interplay between behavior and health. Pioneers like Dekker, Stauder, and Penedo laid the groundwork by investigating how psychological and social factors influence disease. These foundational investigations emphasized the importance of understanding behavior in medical contexts, setting the stage for the field’s growth and recognition as a vital component of healthcare.

2.2 Key Milestones in the Recognition of Behavioral Medicine

The recognition of behavioral medicine as a distinct field was marked by the publication of the Handbook of Behavioral Medicine and the Encyclopedia of Behavioral Medicine. These resources highlighted its interdisciplinary approach, integrating psychology, sociology, and medicine. The establishment of the International Society of Behavioral Medicine further solidified its global impact, acknowledging its role in addressing chronic diseases and improving healthcare policies worldwide.

Applications of Behavioral Medicine

Behavioral medicine applies scientific principles to manage mental and behavioral issues, improve treatment adherence, and address chronic diseases, enhancing overall well-being and quality of life.

3.1 Managing Mental and Behavioral Issues in Medical Settings

Behavioral medicine plays a crucial role in addressing mental and behavioral challenges in healthcare settings. It employs evidence-based techniques, such as cognitive-behavioral therapy, to manage conditions like anxiety and depression. By integrating psychological interventions with medical care, it enhances patient outcomes, improves adherence to treatment plans, and supports overall well-being, particularly for those with chronic diseases.

3.2 Role of Behavioral Science in Preventing and Treating Chronic Diseases

Behavioral science is integral to preventing and managing chronic diseases by addressing lifestyle factors such as diet, exercise, and smoking. Interventions like motivational interviewing and behavioral counseling help modify risky behaviors, reducing disease progression. These approaches, rooted in psychological principles, empower individuals to adopt healthier habits, thereby improving long-term health outcomes and reducing the burden of chronic conditions.

Communication Strategies in Behavioral Medicine

Effective communication strategies in behavioral medicine involve active listening, empathy, and clear messaging to build trust and understanding between clients and healthcare providers, enhancing treatment outcomes.

4.1 Effective Client-Provider Communication

Effective client-provider communication involves active listening, empathy, and clear messaging to build trust and understanding. It ensures clients feel heard, fostering collaboration and adherence to treatment plans, improving health outcomes.

4.2 Transferring Communication Skills in Client Interviews

Transferring communication skills in client interviews involves applying learned techniques like active listening and empathy to build rapport. Providers use these skills to understand client needs, address concerns, and tailor interventions, ensuring effective collaboration and improved health outcomes through evidence-based, client-centered approaches.

The Role of Technology in Behavioral Medicine

Technology enhances behavioral health through digital interventions, wearable devices, and health monitoring, enabling personalized care and real-time data collection to improve treatment adherence and overall well-being.

5.1 Digital Interventions for Behavioral Change

Digital interventions leverage mobile apps, AI, and data analytics to monitor and modify behaviors, providing personalized feedback and real-time support. These tools enhance engagement, improve adherence, and promote sustainable behavior change, addressing mental health, chronic disease management, and lifestyle modifications. They offer scalable solutions, increasing accessibility to behavioral support and fostering better health outcomes globally.

5.2 Wearable Devices and Health Monitoring

Wearable devices track vital signs, physical activity, and sleep patterns, enabling continuous health monitoring. These devices empower individuals to make informed decisions, promoting proactive health management. By integrating behavioral data, they support early detection of health issues and tailored interventions, enhancing chronic disease management and overall well-being through real-time insights and personalized feedback.

Future Directions in Behavioral Medicine

Behavioral medicine is poised for growth, with a focus on integrating technology, addressing health disparities, and informing global health policies to enhance overall well-being and disease management.

6.1 Emerging Trends and Innovations

Emerging trends in behavioral medicine include the integration of digital interventions, wearable devices, and AI-driven tools to monitor and modify behaviors. Personalized medicine approaches are gaining traction, leveraging data to tailor interventions. Telehealth platforms are expanding access to behavioral care, while advancements in neuroscience and genomics offer new insights into behavior-health connections, paving the way for innovative, evidence-based solutions.

6.2 The Potential Impact on Global Health Policies

Behavioral medicine is poised to significantly influence global health policies by addressing lifestyle-related diseases and promoting preventive care. Its focus on behavior change can inform policy frameworks, reducing healthcare costs and improving population health. Collaborative efforts, such as those led by the ISBM, aim to integrate behavioral science into policy-making, ensuring culturally sensitive and evidence-based approaches are adopted worldwide to enhance public health outcomes.

Ethical Considerations in Behavioral Medicine

Ethical considerations in behavioral medicine focus on privacy, confidentiality, and cultural sensitivity. Ensuring informed consent and respecting patient autonomy are crucial for effective, respectful interventions.

7.1 Addressing Privacy and Confidentiality

Privacy and confidentiality are critical in behavioral medicine to protect sensitive patient information. Ensuring informed consent and adhering to data protection laws are essential. Health professionals must balance patient trust with legal obligations, safeguarding personal data while promoting open communication. This ethical foundation fosters a secure environment for effective treatment and research, respecting patient autonomy and dignity.

7.2 Ensuring Cultural Sensitivity in Behavioral Interventions

Cultural sensitivity is vital in behavioral interventions to address diverse patient needs. Understanding cultural beliefs, values, and practices ensures tailored approaches, enhancing effectiveness and patient engagement. Providers must recognize and respect these differences, adapting interventions to align with individual and community norms. This fosters trust, improves outcomes, and reduces disparities in healthcare delivery, promoting equitable and inclusive care for all populations.

Handbook of Behavioral Medicine

The Handbook of Behavioral Medicine provides a comprehensive overview of behavioral science techniques used in preventing, diagnosing, and treating health-related disorders, featuring contributions from global experts.

8.1 Overview of the Handbook’s Contributions

The Handbook of Behavioral Medicine offers a detailed exploration of how behavioral science techniques are applied in healthcare. It covers prevention strategies, diagnostic methods, and treatment approaches for various disorders. Contributions from experts in psychology, social work, and physical therapy provide a holistic view of the field, making it a valuable resource for both practitioners and researchers.

8;2 Key Insights from Internationally Recognized Experts

Internationally recognized experts in behavioral medicine provide cutting-edge insights into the field’s advancements. Their contributions highlight innovative approaches to integrating behavioral science into healthcare, emphasizing evidence-based practices and interdisciplinary collaboration. These insights address emerging trends, such as digital interventions and cultural sensitivity, offering a comprehensive understanding of the field’s evolution and future directions.

Encyclopedia of Behavioral Medicine

The second edition expands with over 450 new entries, updating the field’s terminology and concepts, reflecting its growth and relevance in modern healthcare.

9.1 Updates and New Entries in the Second Edition

The second edition of the Encyclopedia of Behavioral Medicine, published in 2020, includes over 450 new entries and significant updates to existing ones. It expands coverage of emerging topics like digital health, cultural diversity, and global health trends, providing a comprehensive resource for understanding the field’s evolution and current practices.

9.2 The Expansion of the Field’s Terminology and Concepts

The field of behavioral medicine has seen a significant expansion in its terminology and concepts, reflecting advancements in research and practice. New terms related to digital interventions, wearable devices, and cultural sensitivity have been introduced, broadening the scope of how behavior influences health and disease management. This evolution ensures the field remains relevant and comprehensive in addressing modern health challenges.

Case Studies in Behavioral Medicine

Case studies in behavioral medicine provide real-world examples of interventions improving health outcomes, offering insights into managing chronic diseases and enhancing treatment adherence through behavioral strategies.

10.1 Successful Interventions in Managing Chronic Diseases

Behavioral interventions have proven effective in managing chronic diseases like diabetes and hypertension. Techniques such as goal-setting, motivational interviewing, and lifestyle modifications improve adherence to treatment plans, enhancing overall health outcomes. These strategies empower patients to adopt healthier habits, demonstrating the critical role of behavioral medicine in chronic disease management and improving quality of life.

10.2 Improving Adherence to Treatment Plans

Behavioral techniques significantly enhance adherence to treatment plans by addressing barriers such as forgetfulness and lack of motivation. Strategies like motivational interviewing, reminders, and simplified regimens improve consistency. These approaches not only boost medication adherence but also promote healthier lifestyles, leading to better disease management and improved patient outcomes in chronic and acute conditions.

The Impact of Behavioral Medicine on Healthcare Policy

Behavioral medicine informs healthcare policies by addressing behavior’s role in health, fostering evidence-based strategies to improve global health outcomes and reduce disparities through targeted interventions.

11.1 Informing Future Health Care Policies

Behavioral medicine plays a crucial role in shaping healthcare policies by integrating behavioral science into health strategies. Its focus on understanding behavior’s impact on health enables the development of targeted interventions, particularly in chronic disease prevention and mental health. By addressing behavioral factors, it helps reduce health disparities and improve overall outcomes, aligning with global health goals and promoting sustainable healthcare systems worldwide.

11.2 Leadership Role of the International Society of Behavioral Medicine (ISBM)

The ISBM serves as a global leader in advancing behavioral medicine, fostering collaboration among researchers, clinicians, and policymakers. By promoting evidence-based practices and advocating for policy changes, ISBM addresses the growing need for comprehensive healthcare solutions. Its efforts ensure the integration of behavioral science into healthcare systems, enhancing global health outcomes and setting standards for future innovations in the field.

Education and Training in Behavioral Medicine

Behavioral medicine education integrates psychological, social, and biological sciences to train professionals in addressing health issues. Academic programs emphasize evidence-based practices, fostering skills in assessment, intervention, and research.

12.1 Academic Programs and Curricula

Academic programs in behavioral medicine offer interdisciplinary curricula, blending psychology, sociology, and biology. They focus on evidence-based practices, training students to address health issues through behavioral interventions. Courses often include biopsychosocial models, research methods, and clinical applications. Institutions like Morehouse School of Medicine and Butler University provide such programs, equipping graduates with skills to improve health outcomes and advance research in the field.

12.2 Integrating Behavioral Medicine into Medical Education

Integrating behavioral medicine into medical education bridges the gap between behavior and health, preparing future clinicians to address biopsychosocial factors. Programs like those at Morehouse School of Medicine emphasize interdisciplinary approaches, teaching students to understand how behavior impacts chronic diseases and treatment adherence. This integration fosters a holistic understanding of health, equipping graduates to address complex patient needs effectively.

Research Advances in Behavioral Medicine

Research in behavioral medicine focuses on experimental investigations of behavior in health and disease, advancing our understanding of how behavioral science impacts medical outcomes and treatments.

13.1 Experimental Investigations of Behavior in Health and Disease

Experimental investigations in behavioral medicine explore the relationship between behavior, psychosocial factors, and health outcomes. These studies use clinical trials and longitudinal designs to identify causal links, informing interventions that promote healthy behaviors and reduce disease risks. By understanding how behavior influences health, researchers develop evidence-based strategies to improve prevention and treatment approaches.

13.2 The Role of Behavioral Science in Medical Research

Behavioral science significantly contributes to medical research by identifying behavioral factors influencing health and disease. It develops interventions to modify harmful behaviors and promotes healthy practices. By integrating psychological, social, and biological data, behavioral science informs evidence-based policies and practices, enhancing prevention, treatment, and overall quality of life globally.

Global Reach and Recognition of Behavioral Medicine

Behavioral medicine has gained worldwide recognition, with the International Society of Behavioral Medicine leading global efforts in research, education, and practice, fostering collaboration across nations.

14.1 The Growing Importance of Behavioral Medicine Worldwide

Behavioral medicine’s global significance has surged as its applications in chronic disease management, mental health, and health policy gain recognition. Its interdisciplinary approach bridges gaps between psychology, sociology, and medicine, addressing diverse health challenges worldwide; This field’s expansion is driven by increasing awareness of the impact of behavior on health outcomes, fostering international collaboration and research initiatives.

14.2 Collaborative Efforts in International Research and Practice

Global partnerships in behavioral medicine research and practice are fostering innovation and standardization. Organizations like the International Society of Behavioral Medicine (ISBM) facilitate cross-border collaborations, enabling shared knowledge and best practices. These efforts address cultural and regional health challenges, ensuring tailored interventions and promoting equitable healthcare solutions worldwide through unified goals and diverse expertise.

Behavioral medicine’s bright future lies in its global impact, addressing health challenges through interdisciplinary approaches and fostering improved well-being worldwide.

15.1 The Bright Future of Behavioral Medicine

Behavioral medicine is poised for significant growth, driven by its global recognition and leadership in shaping healthcare policies. The field’s interdisciplinary approach, combined with emerging trends and innovations, promises enhanced interventions for chronic diseases and mental health. The International Society of Behavioral Medicine (ISBM) plays a pivotal role in advancing research and practice, ensuring a bright and impactful future for the discipline.

15.2 Final Thoughts on Its Role in Improving Global Health

Behavioral medicine plays a pivotal role in addressing global health challenges by integrating behavioral and psychosocial factors into medical care. Its focus on preventing chronic diseases, improving treatment adherence, and enhancing mental health underscores its potential to reduce health disparities. By fostering cultural sensitivity and advancing policy changes, behavioral medicine can significantly improve global health outcomes, ensuring a healthier future for all populations.

7 on 7 flag football defense playbook pdf

A well-structured 7 on 7 flag football defense playbook is essential for organizing strategies, improving teamwork, and outsmarting opponents․ It focuses on coverages, blitzing, and alignments to maximize defensive efficiency and adapt to various offensive schemes․

Overview of 7 on 7 Flag Football

7 on 7 flag football is a fast-paced, pass-focused variant of traditional football, played with 7 players per team․ It emphasizes speed, agility, and quick decision-making, making it ideal for skill development․ The game is played on a smaller field with no tackling, focusing on flag pulling instead․ Popular in youth leagues, it helps players master fundamental skills like route running, throwing, and defensive coverage․ The format accelerates gameplay, encouraging strategic thinking and teamwork․ Its simplicity and intensity make it a favorite for practices and competitions, bridging the gap between recreational and competitive football․

Importance of a Strong Defensive Playbook

A strong defensive playbook is crucial for success in 7 on 7 flag football․ It provides a structured approach to countering offensive strategies, ensuring players understand their roles and responsibilities․ A well-designed playbook enhances communication, reduces confusion, and allows for quick adjustments during games․ It also helps in identifying opponent weaknesses and exploiting them effectively․ By standardizing defensive schemes, a playbook fosters consistency and discipline, which are key to stopping high-powered offenses․ Ultimately, it serves as a blueprint for outsmarting opponents and securing victories, making it an indispensable tool for any competitive team․

Key Components of a Successful Defense

A successful 7 on 7 flag football defense relies on coordination, adaptability, and execution․ Essential components include well-defined coverages, such as Cover 2 and Cover 3, which balance zone and man-to-man strategies․ Blitzing adds pressure on the quarterback, while defensive alignments, like the 1-3-1, optimize player strengths․ Clear communication and disciplined execution ensure players anticipate and react to offensive plays effectively․ These elements, when combined, create a cohesive defensive system capable of shutting down opponents and securing victories․ A strong defense is the backbone of any competitive team, requiring precision and teamwork to thrive․

Defensive Coverages in 7 on 7 Flag Football

Defensive coverages are critical in 7 on 7 flag football, providing a balanced approach to zone and man-to-man strategies․ They pressure the quarterback and protect against deep passes․

Understanding Cover 2

Cover 2 is a fundamental zone defense in 7 on 7 flag football, dividing the field into two halves․ Each cornerback covers deep halves, while safeties provide support underneath․ This scheme balances pressure on the quarterback and protection against deep passes, making it versatile for various offensive threats․ It’s particularly effective in preventing long completions while allowing defenders to react quickly to underneath routes․ Proper communication and positioning are key to its success, ensuring gaps are covered and receivers are funneled to the sidelines․ Cover 2 is a cornerstone of many defensive playbooks due to its simplicity and effectiveness․

Implementing Cover 3

Cover 3 is a popular defensive scheme in 7 on 7 flag football that divides the field into three zones․ Cornerbacks and safeties each patrol a deep third, while linebackers cover underneath zones․ This setup excels at preventing deep completions and providing support against intermediate routes․ It requires precise communication and positioning to ensure seamless coverage transitions․ Cover 3 is particularly effective when combined with blitz packages, as it pressures the quarterback while maintaining defensive integrity․ Proper execution relies on defenders reading the quarterback’s eyes and reacting swiftly to the ball․ It’s a versatile strategy for controlling passing games effectively․

Tampa 2 Coverage

Tampa 2 is a variation of Cover 2 that emphasizes quick linebacker drops and aggressive safeties․ It’s highly effective in 7 on 7 flag football for pressuring quarterbacks and disrupting timing routes․ The middle linebacker assumes a deep zone, while safeties cover the outside thirds․ Corners play press coverage to funnel receivers inside․ This scheme thrives on speed and instincts, allowing defenders to read the offense and react swiftly․ Proper execution requires precise communication and disciplined drops․ Tampa 2 is ideal for teams seeking to balance pass coverage and quarterback pressure in dynamic offensive situations․

Man-to-Man Coverage Strategies

Man-to-man coverage demands precise technique and accountability, making it a cornerstone of competitive 7 on 7 flag football defense․ Each defender is assigned a specific receiver, requiring constant awareness and quick reactions․ Press coverage at the line disrupts timing, while off-man techniques allow for zone-like support․ Linebackers often cover tight ends or running backs, ensuring no mismatches․ Effective communication and trust among defenders are crucial․ This strategy excels in high-pressure situations, forcing quarterbacks to make quick decisions․ Proper execution can shut down even the most dynamic offenses, making man-to-man a versatile and powerful defensive tool in any playbook․

Blitzing in 7 on 7 Flag Football Defense

Blitzing is a critical component of 7 on 7 flag football defense, involving defensive players rushing the quarterback to disrupt plays․ Effective blitzing requires precise timing and execution, often targeting specific offensive weaknesses․ It can be executed in various forms, such as man blitzes or zone blitzes, to confuse the quarterback and create turnovers․ Properly timed blitzes can shut down an offense’s rhythm and are a dynamic way to apply pressure in key situations․

Types of Blitzes

In 7 on 7 flag football defense, blitzes are categorized into distinct types to disrupt offensive plays․ A man blitz involves defensive players targeting specific offensive players, creating immediate pressure․ A zone blitz combines pass rush with zone coverage, confusing the quarterback․ Delayed blitzes involve linebackers or defensive backs timing their rush after the snap, catching the offense off-guard․ Additionally, corner blitzes and safety blitzes utilize defensive backs to attack from unexpected angles․ Each blitz type requires precise execution and coordination to maximize effectiveness and force turnovers․

When to Blitz Effectively

Blitzing effectively in 7 on 7 flag football defense requires strategic timing and situational awareness․ Coaches should blitz on third downs or in long-yardage situations to pressure the quarterback into quick decisions․ Blitzing when the offense is in their own territory can lead to turnovers or sacks․ Additionally, identifying offensive tendencies, such as formation strengths or quarterback preferences, helps determine optimal blitz moments․ Timing the blitz with the snap count can also catch the offense off-guard, increasing the chances of a successful defensive play․ Proper execution ensures the blitz is both effective and disciplined․

Blitzing Techniques and Execution

Effective blitzing techniques in 7 on 7 flag football defense involve precise timing and coordination․ Players should time their blitz with the snap count to catch the offense off-guard․ Using fake blitzes can disguise defensive intentions and create confusion․ Defenders must attack at full speed but under control to avoid overcommitting․ Angles of pursuit are critical; blitzers should aim to pressure the quarterback while teammates cover receivers․ Proper communication and execution ensure the blitz disrupts the offense without leaving gaps in coverage․ These techniques, when mastered, can lead to sacks, interceptions, or turnovers, making the defense formidable․

Defensive Alignments and Formations

Defensive alignments in 7 on 7 flag football are crucial for balancing coverage and pressure․ The 1-3-1 and 2-2-2-1 formations are popular, offering flexibility and adaptability to counter various offensive strategies effectively․

Base 1-3-1 Alignment

The 1-3-1 alignment is a fundamental defensive setup in 7 on 7 flag football, emphasizing speed and agility․ It features one defensive lineman, three linebackers, and one defensive back․ This formation is ideal for pressuring the quarterback while maintaining coverage․ The linebackers act as the backbone, reading plays and disrupting offenses․ The single defensive back provides deep support, ensuring receivers are contained․ This alignment is versatile, allowing for both man-to-man and zone coverage strategies, making it a cornerstone of effective defensive playbooks․

2-2-2-1 Alignment

The 2-2-2-1 alignment is a balanced defensive formation in 7 on 7 flag football, featuring two defensive linemen, two linebackers, two cornerbacks, and one safety․ This setup provides strong pass rush potential while maintaining coverage․ The defensive linemen apply pressure, the linebackers read the quarterback, and the cornerbacks cover receivers․ The safety acts as the last line of defense, ensuring deep coverage․ This formation is versatile, allowing for both man-to-man and zone strategies, making it a reliable choice for adapting to various offensive plays․

Press Coverage and Zone Defense

Press coverage involves defensive backs playing tight on receivers to disrupt routes, while zone defense focuses on covering specific areas․ Both strategies enhance defensive flexibility and effectiveness․

Press Coverage Techniques

Press coverage requires defensive backs to disrupt receivers at the line of scrimmage, using physical play to alter their routes․ Proper footwork and hand placement are crucial for effective jams․ Players should stay in the receiver’s hip pocket, maintaining tight coverage to limit separation․ Coaches emphasize staying disciplined to avoid penalties while applying pressure․ This technique is particularly effective in slowing down receivers, allowing the rest of the defense to react․ Mastery of press coverage enhances overall defensive performance and creates opportunities for turnovers in 7-on-7 flag football․

Zone Defense Strategies

Zone defense in 7-on-7 flag football focuses on defenders covering specific areas rather than individual receivers․ This approach allows players to read the quarterback’s eyes and react to the ball․ Common zones include Cover 2 and Cover 3, which divide the field into halves or thirds․ Players must communicate and coordinate to ensure seamless coverage․ Zone defense is effective for preventing deep completions and forcing underneath throws․ It also enables defenders to anticipate routes and intercept passes․ Proper alignment and disciplined footwork are key to executing zone strategies successfully in 7-on-7 flag football․

Defensive Back Techniques

Defensive backs must master techniques like backpedaling, press coverage, and route anticipation․ These skills enhance their ability to disrupt passes and secure interceptions, strengthening the overall defense․

Cornerback Responsibilities

Cornerbacks play a pivotal role in both man-to-man and zone coverages; Their primary duties include press coverage, reading the quarterback’s eyes, and reacting to the ball․ In press coverage, they disrupt receivers’ routes, while in zone, they patrol assigned areas․ Cornerbacks must excel at backpedaling, staying in the receiver’s hip pocket, and anticipating routes․ They are also key in run support, containing edge plays․ Effective cornerbacks balance aggression with discipline, avoiding penalties while making plays on the ball․ Proper technique and anticipation drills enhance their performance, making them indispensable to the defense․

Safety Roles and Responsibilities

Safeties serve as the last line of defense, ensuring receivers do not get behind them․ They excel in deep coverage, reading the quarterback’s eyes, and reacting to the ball․ Safeties must communicate effectively, directing other defenders and filling gaps in coverage․ In run support, they contain edge plays and prevent big gains․ Their ability to anticipate routes and react quickly is crucial․ Safeties often act as ball hawks, intercepting passes and creating turnovers․ Proper positioning and instincts are vital, making them a cornerstone of the defense in both man-to-man and zone schemes․

Linebacker Play in 7 on 7 Defense

Linebackers are key to reading plays and covering underneath zones․ They align in a 1-3-1 setup, focusing on pass coverage and reacting to the quarterback’s throws․

Linebacker Alignment and Reads

In a 1-3-1 alignment, linebackers position themselves to read the quarterback and running backs․ They key on offensive movements to anticipate plays and fill gaps effectively․

Linebackers must quickly diagnose run or pass, then react accordingly․ Their ability to cover underneath zones and pressure the quarterback is vital for defensive success in 7 on 7 flag football․

Proper alignment ensures they can key on the quarterback’s eyes and react to the ball․ This technique helps linebackers anticipate routes and disrupt offensive timing․

Effective reads and reactions are critical for containing the quarterback and limiting big plays, making linebackers the backbone of the defense․

Pass Coverage by Linebackers

Linebackers play a crucial role in pass coverage, often responsible for covering underneath zones or specific receivers․ In 7 on 7 flag football, they must read the quarterback’s eyes and react quickly to receivers’ routes․

They should focus on staying in their assigned zones or mirroring receivers in man-to-man situations․ Proper footwork and body positioning are essential to stay in coverage and make plays on the ball․

Linebackers must also communicate with defensive backs to ensure seamless coverage․ Their ability to disrupt timing and intercept passes can significantly impact the game’s outcome․

Effective pass coverage by linebackers requires discipline, awareness, and quick decision-making to shut down offensive threats․

Defensive Line Strategies

The defensive line is crucial in 7 on 7 flag football, focusing on pressuring the quarterback and reading plays quickly․ Techniques like stunts and rushes can disrupt the offense, while containment strategies prevent the quarterback from escaping the pocket, forcing quick decisions and limiting scoring opportunities․

Pass Rush Techniques

Effective pass rush techniques in 7 on 7 flag football involve a combination of speed, agility, and strategy․ Defensive linemen should master moves like the speed rush, bull rush, and swim move to outmaneuver blockers․ Timing and coordination with linebackers are critical to create pressure and force quick decisions by the quarterback․ These techniques disrupt the offense’s rhythm, leading to sacks or interceptions․ Proper execution ensures the quarterback has limited time to react, making pass rush a cornerstone of a strong defensive strategy in 7 on 7 flag football․

Containing the Quarterback

Containing the quarterback is crucial in 7 on 7 flag football to limit their ability to extend plays․ Defensive linemen and linebackers must apply consistent pressure while maintaining discipline to prevent escape routes․ Press coverage on receivers forces the quarterback to make quick decisions, reducing their time to scramble․ The secondary should stay alert, providing deep support to prevent long completions․ By combining pass rush and coverage, the defense can effectively contain the quarterback, forcing errant throws or sacks and disrupting the offense’s rhythm․ This strategy is vital for a strong defensive performance in 7 on 7 flag football․

Special Situations and Adjustments

In 7 on 7 flag football, defensive success often hinges on adapting to key moments․ Red zone defense requires tight coverage and blitz packages to limit scoring opportunities․ On third down, defensive backs must anticipate routes, while linebackers provide underneath support․ Adjustments like switching from zone to man coverage or bringing extra pressure can disrupt the offense’s rhythm․ These strategic tweaks are vital for securing stops in critical situations and building a formidable defense․

Red Zone Defense

In the red zone, defensive strategies must be precise to prevent touchdowns․ Tight coverage and press techniques are crucial to limit receivers’ separation․ Switching to Cover 2 or Tampa 2 can provide deep support while linebackers and safeties focus on underneath routes․ Blitz packages, such as sending a cornerback or linebacker, can pressure the quarterback and disrupt timing․ Aligning in a 1-3-1 formation strengthens the middle, forcing the offense to the sidelines․ These adjustments aim to minimize scoring opportunities and force field goals or turnovers, making red zone defense a cornerstone of a winning strategy․

Third Down Situations

Third down defense is critical in 7 on 7 flag football, requiring precise execution to stop conversions․ Press coverage and zone defense strategies must be balanced to limit quarterback options․ Blitz packages, such as sending a cornerback or linebacker, can disrupt timing and force quick decisions․ Cover 2 and Tampa 2 coverages are effective in these situations, providing deep support while linebackers and safeties focus on underneath routes․ Aligning in a 2-2-2-1 formation can also create confusion and pressure․ The goal is to force incompletions or sacks, making third down defense a key factor in overall success․

Practice Drills for Defensive Improvement

Drills like coverage exercises, blitzing simulations, and reaction agility training enhance defensive skills․ These drills focus on improving speed, coordination, and decision-making, ensuring players are game-ready;

Coverage Drills

Coverage drills are essential for developing defensive skills in 7 on 7 flag football․ Start with the “W Drill” to improve defensive backs’ footwork and reaction time․ Players weave through cones, simulating game-like movements․ The “Zone Coverage Shuffle” helps defenders master lateral movement and staying in their assigned zones․ Incorporate the “Ball Reaction Drill” to enhance quick decision-making and interception skills․ These exercises focus on reading the quarterback, anticipating routes, and maintaining proper positioning․ Consistent practice ensures defenders are prepared to execute coverages effectively during games, making them a formidable opponent․

Blitzing Drills

Blitzing drills are crucial for refining defensive aggression in 7 on 7 flag football․ The “Blitz Reaction Drill” involves defenders reacting to a coach’s signal, sprinting to a designated spot, and simulating a blitz․ The “Pass Rush Drill” focuses on techniques like spin moves and swim moves to beat blockers․ Additionally, the “Zone Blitz Drill” teaches defenders to blitz from specific angles while others cover zones․ These exercises improve timing, speed, and coordination, ensuring defenders can effectively pressure the quarterback during games․ Regular practice enhances the team’s ability to disrupt offensive plays and create turnovers․

Reaction and Agility Drills

Reaction and agility drills are vital for enhancing defensive players’ quickness and responsiveness in 7 on 7 flag football․ The “Cone Drill” improves foot speed and agility by weaving through cones․ The “Reaction Ball Drill” sharpens reflexes, as players react to a coach’s toss or roll․ The “Ladder Drill” focuses on rapid directional changes, mimicking game scenarios․ These exercises boost defenders’ ability to mirror offensive players, change direction swiftly, and anticipate the quarterback’s moves․ Regular practice enhances overall athleticism, ensuring defenders can excel in dynamic, fast-paced games and make impactful plays consistently․

A strong 7 on 7 flag football defense playbook combines coverages, blitzing, and alignments to outsmart opponents․ Regular drills enhance player agility and reaction, ensuring a formidable defensive strategy for any game situation․

Summarizing Key Defensive Strategies

Effective 7 on 7 flag football defense relies on a mix of coverages, blitzing, and alignments․ Cover 2 and Cover 3 provide balanced protection, while Tampa 2 excels in press situations․ Blitzing disrupts offenses, but timing is crucial․ The 1-3-1 and 2-2-2-1 alignments offer flexibility, with linebackers and defensive backs playing key roles․ Press coverage forces quick decisions, and zone defense ensures area protection․ Linebackers must read plays quickly, while defensive backs maintain tight coverage․ Consistent execution and adaptability are vital for success, making practice drills essential for refining these strategies․

Final Thoughts on Building a Winning Defense

Constructing a dominant 7 on 7 flag football defense demands a blend of strategy, execution, and adaptability․ Mastering coverages like Cover 2 and Tampa 2, along with timely blitzing, creates confusion for offenses․ Alignments such as the 1-3-1 and 2-2-2-1 provide flexibility, while press and zone techniques keep opponents guessing․ Linebackers and defensive backs must excel in their roles, with safeties serving as the last line of defense․ Consistent practice and drills refine these skills, ensuring players react swiftly and effectively․ A well-prepared defense, combined with smart adjustments, is the cornerstone of a championship team․

shrimp care guide

Shrimp are captivating aquarium pets, offering unique charm and relatively low-maintenance care. Their sensitivity to water chemistry demands attention, but proper setup ensures thriving, healthy colonies that delight enthusiasts.

Why Shrimp Make Great Aquarium Pets

Shrimp are an excellent choice for aquarium enthusiasts due to their unique charm and relatively low-maintenance care. They are fascinating to observe, with their vibrant colors and intricate behaviors adding visual interest to any tank. Unlike fish, shrimp are social creatures that thrive in communities, creating a dynamic ecosystem. Their small size allows them to fit into various tank setups, making them ideal for both beginners and experienced hobbyists. Additionally, shrimp are eco-friendly, helping to clean the tank by consuming algae and organic matter. With proper care, they can breed successfully, offering a rewarding experience for those interested in propagation. Their sensitivity to water chemistry, while requiring attention, ensures that dedicated caretakers are richly rewarded with thriving, healthy colonies.

Overview of Shrimp Care Basics

Shrimp care involves understanding their unique needs, starting with stable water conditions. They thrive in tanks with consistent parameters, as sudden changes can be detrimental. Avoiding copper and excessive iron is crucial, as these can harm shrimp. A carpet of plants or substrate provides essential hiding places and foraging areas, enhancing their well-being. Regular maintenance, such as water changes and monitoring, is vital. Shrimp are social creatures and benefit from being kept in colonies. Breeding shrimp requires attention to genetics, as mixing color morphs can result in varied offspring. Proper care ensures healthy, vibrant shrimp that add beauty and life to aquariums. Their small size and fascinating behavior make them a rewarding choice for aquarists.

Tank Setup and Environment

A natural environment with live plants, substrate, and decorations is essential for shrimp. A carpet of plants and substrate provides foraging and breeding grounds, while decorations offer hiding places and protection from predators.

Choosing the Right Tank Size for Shrimp

Choosing the right tank size for shrimp is crucial for their health and well-being. A minimum tank size of 5 gallons is recommended, as smaller tanks are more prone to water parameter fluctuations. Larger tanks provide greater stability in water chemistry, which is essential for shrimp, as they are highly sensitive to changes. Overstocking should be avoided, with a general rule of 1-2 shrimp per gallon for most species. A larger tank also allows for better decoration and planting, which shrimp rely on for hiding and foraging. Properly sized tanks help maintain a balanced ecosystem, ensuring your shrimp thrive and remain healthy. Always prioritize quality over quantity when selecting tank size for your shrimp colony.

Optimal Water Parameters for Shrimp

Shrimp thrive in stable water conditions, requiring careful attention to key parameters. The ideal pH range is 6.2–7.8, with hardness (GH) between 4–6 dGH and carbonate hardness (KH) at 0–4 dKH. Ammonia and nitrite levels must remain at zero, while nitrates should stay below 10 ppm. Sudden changes in water chemistry can be deadly, so regular testing and gradual adjustments are essential. Additionally, shrimp are highly sensitive to metals like copper, making it crucial to avoid fertilizers or supplements containing copper. Maintaining these optimal parameters ensures a healthy environment for your shrimp, promoting their growth and well-being. Consistent water quality is the cornerstone of successful shrimp care.

Importance of Substrate and Decorations

A suitable substrate and decorations are vital for creating a natural environment that benefits shrimp health and behavior. Substrate provides a medium for burrowing and foraging, while decorations like plants, rocks, and driftwood offer hiding places, reducing stress and predation risks. These elements also enhance water quality by stabilizing parameters and promoting beneficial bacteria growth. Additionally, decorations create visual barriers, allowing shrimp to feel secure and thrive. For species like cherry shrimp, a carpet of plants or substrate adds a microcosm for feeding and breeding, fostering a balanced ecosystem. Proper substrate and decorations not only support shrimp well-being but also elevate the tank’s aesthetic appeal, making it a vibrant aquascaping showcase.

Creating Hiding Places and Foraging Areas

Creating hiding places and foraging areas is essential for shrimp well-being. Natural elements like plants, driftwood, and rocks provide shelter, reducing stress and offering protection from predators. These structures also create a sense of security, encouraging shrimp to explore and thrive.

A “carpet” of substrate or small plants allows shrimp to forage naturally, mimicking their wild behavior. This setup promotes healthy digestion and satisfies their instinct to search for food. Hiding places also give shrimp a sense of safety, which is crucial for their overall health and happiness in the aquarium.

Water Quality and Maintenance

Shrimp are highly sensitive to water chemistry changes, especially copper and metals. Regular testing and stable parameters are crucial for their health and survival in aquariums.

Understanding Water Chemistry for Shrimp

Water chemistry is critical for shrimp health, as they are highly sensitive to changes. pH, ammonia, nitrite, and nitrate levels must be closely monitored, with zero tolerance for ammonia and nitrite. Shrimp thrive in stable water conditions, and sudden shifts can lead to stress or death. Copper and excessive iron are particularly harmful, so avoid supplements containing these metals. Trace amounts of iron in plant fertilizers are safe but should be used sparingly. Regular water testing is essential to maintain optimal parameters, ensuring a healthy environment. Poor water chemistry can lead to disease susceptibility and stunted growth. Always aim for stability and balance to keep your shrimp thriving.

How to Cycle a Shrimp Tank

Cycling a shrimp tank is a critical process that establishes a healthy environment for your shrimp. It involves allowing beneficial bacteria to colonize and convert ammonia into nitrate, making the water safe. Start by setting up your tank with substrate, decorations, and water, then allow it to run for 4-6 weeks without shrimp. Monitor ammonia, nitrite, and nitrate levels to ensure the cycle completes. Avoid adding shrimp too soon, as they are highly sensitive to water chemistry. Patience is key, as rushing this process can lead to stress or death. Once cycled, maintain regular water changes to keep the environment stable and thriving for your shrimp.

Regular Water Maintenance Tips

Regular water maintenance is crucial for the health of your shrimp. Perform weekly water changes of 10-15% to remove waste and excess nutrients. Use a gravel vacuum to siphon debris from the substrate, ensuring a clean environment. Monitor key parameters like ammonia, nitrite, and nitrate levels, as shrimp are highly sensitive to water chemistry. Avoid over-fertilization, as this can lead to algae blooms and harm your shrimp. Maintain stable water conditions, as sudden changes can stress the colony. Regularly test water quality and adjust as needed to keep your shrimp thriving. Neglecting these steps can lead to disease and even death, making consistent maintenance essential for a healthy aquarium.

Common Water Quality Mistakes to Avoid

One of the most critical water quality mistakes is over-fertilization, which can lead to nutrient imbalances harmful to shrimp. Avoid using excessive iron supplements, as even trace amounts in plant fertilizers can be risky. Many shrimp keepers also neglect regular water changes, allowing toxins like ammonia and nitrites to accumulate. Inconsistent water parameters, such as sudden shifts in pH or temperature, can stress shrimp and lead to illness. Another common error is introducing contaminants like copper through supplements or equipment, which can cause rapid death. Lastly, failing to cycle the tank properly before adding shrimp often results in poor water chemistry. These mistakes can undermine even the best care routines, so attention to detail is crucial for maintaining a healthy environment.

Feeding Your Shrimp

A balanced diet is crucial for shrimp health. Use high-quality, nutrient-rich foods and avoid additives harmful to them. Providing a carpet promotes natural foraging behavior.

Best Foods for Shrimp Growth and Health

Providing high-quality food is essential for shrimp health and growth. A balanced diet includes high-protein commercial pellets or sticks, specifically formulated for freshwater shrimp. Supplement with algae wafers or calcium-rich foods to promote shell health. Fresh vegetables like zucchini or spinach can be added occasionally, ensuring they are free of pesticides. Live or frozen foods, such as brine shrimp or daphnia, offer variety and essential nutrients. Avoid foods containing copper or heavy metals, as these can be toxic. Rotate food sources to prevent nutritional deficiencies and maintain diversity. Overfeeding should be avoided to keep water quality stable. A natural carpet of plants or substrate allows shrimp to forage, mimicking their wild behavior and enhancing digestion. Proper feeding practices ensure vibrant, thriving shrimp populations in your aquarium.

How Often and How Much to Feed

Feeding shrimp requires balance to avoid overfeeding, which can harm water quality. Feed small amounts 1-2 times daily, only what they can consume within 2-3 minutes. Overfeeding leads to decay, poor water parameters, and increased disease risk. Use high-quality foods like algae wafers or commercial pellets, and vary the diet for optimal health. Avoid feeding during tank cycling or when shrimp are stressed. For smaller tanks, a pinch of food per feeding is sufficient. Monitor shrimp behavior; if they ignore food, reduce portions. A food dish can help contain waste and prevent overfeeding. Always remove uneaten food after 24 hours to maintain water stability and shrimp well-being.

Avoiding Overfeeding and Its Consequences

Overfeeding is a common mistake that can harm shrimp and degrade water quality. Excess food decomposes, releasing harmful toxins and depleting oxygen levels. This can stress shrimp, making them more susceptible to disease. Additionally, overfeeding disrupts the tank’s biological balance, leading to algae blooms and unstable water parameters. To avoid this, feed shrimp small, manageable portions that they can consume within a few minutes. Remove any uneaten food promptly to prevent decay. A good rule of thumb is to feed only what your shrimp can eat in one to two minutes, ensuring a clean and healthy environment. Proper feeding habits are essential for maintaining thriving, disease-free shrimp colonies.

Health and Disease Prevention

Shrimp are highly sensitive to water chemistry changes, making monitoring crucial. Avoid copper and excessive metals, as they can cause swift illness or death in colonies.

Recognizing Signs of Illness in Shrimp

Identifying illness in shrimp requires close observation of their behavior and physical condition. Lethargy, erratic movement, or hiding excessively can signal stress or sickness. Discoloration, such as faded or unusual colors, may indicate poor health. Labored breathing, visible injuries, or molting difficulties are additional red flags. Shrimp often stop eating when ill, so a sudden loss of appetite should be noted. Regular water parameter checks are essential, as sudden changes can stress shrimp and lead to disease. Early detection is critical, as shrimp can deteriorate quickly. Maintaining stable, optimal water conditions and avoiding harmful chemicals like copper is vital for preventing illness. Monitor your shrimp daily to ensure their well-being and address any issues promptly.

Common Diseases and How to Treat Them

Shrimp are prone to diseases such as bacterial infections, fungal growth, and parasitic infestations. Bacterial infections often manifest as visible sores or rapid decline in health, requiring immediate antibiotic treatment. Fungal issues, like cotton mouth, can be treated with antifungal medications. Parasites, such as planarians or Hydra, may infest shrimp and need specific remedies. Early detection is crucial for successful treatment. Maintaining optimal water quality, avoiding overcrowding, and providing a balanced diet are key to preventing diseases. Quarantining new shrimp and avoiding stress-inducing conditions also help reduce the risk of outbreaks. Regular monitoring and quick action are essential to keep your shrimp healthy and thriving.

Breeding Shrimp

Breeding shrimp requires a stable environment and careful attention to color genetics. Mixing morphs yields diverse offspring, with varied colors and patterns, enhancing the aquarium’s visual appeal.

Creating the Ideal Breeding Environment

Creating the ideal breeding environment for shrimp involves providing a natural, stable ecosystem. A carpet of plants or dense vegetation mimics their wild habitat, offering shelter and foraging areas. This setup encourages shrimp to thrive and breed naturally. Mixing different color morphs can result in varied offspring, with some retaining parental traits and others exhibiting new patterns or wild-type appearances. Ensuring optimal water parameters and minimizing stress is crucial for successful breeding. By replicating their natural environment and maintaining proper care practices, you can foster a healthy, productive shrimp colony that flourishes for generations.

Understanding the Breeding Process

Breeding shrimp involves creating an ideal environment that fosters healthy reproduction. Mixing different color morphs can result in varied offspring, with some retaining parental traits while others exhibit unique patterns or colors. A carpet of plants or substrate provides hiding places and foraging areas, which are crucial for both feeding and breeding. Shrimp are sensitive to water chemistry, so maintaining stable parameters is essential. Excessive iron or copper can be harmful, but trace amounts in plant fertilizers are safe. Regular water maintenance and a balanced diet support reproductive health. With proper care, shrimp colonies can thrive, offering a rewarding experience for aquarium enthusiasts; This process requires patience and attention to detail to ensure success.

Managing Color Morphs and Genetics

Managing color morphs and genetics in shrimp breeding requires careful planning and observation. When breeding Neocaridinas, mixing different color morphs can result in a variety of colors and patterns, as offspring often exhibit traits from both parents. This genetic diversity can be both exciting and challenging, as it may not produce shrimp identical to their parents. Some may retain specific colors, while others may display entirely new patterns or revert to wild-type appearances. For breeders aiming to maintain specific traits, starting with a single morph is recommended to ensure consistency. Understanding and documenting genetic outcomes helps in predicting future breeding results, making it a fascinating aspect of shrimp care and breeding. This balance of art and science adds depth to the hobby, appealing to enthusiasts who enjoy both observation and experimentation.

buyers guide stevens point wi

Stevens Point, WI, offers a charming blend of community, natural beauty, and economic opportunities, making it an attractive destination for residents and buyers alike.

1.1 Overview of the City

Stevens Point, WI, is a charming city nestled in central Wisconsin, offering a mix of small-town charm and modern amenities. Known for its scenic beauty, the city is surrounded by rivers and parks, making it a haven for outdoor enthusiasts. With a strong sense of community, Stevens Point hosts various cultural events and festivals. The city’s economy is diverse, supported by key industries like education, healthcare, and manufacturing. Its affordable housing options, excellent schools, and recreational activities make it an appealing choice for families and professionals alike.

1.2 Importance of a Buyer’s Guide

A buyer’s guide is essential for navigating Stevens Point’s market, offering insights into local products, services, and real estate. It simplifies the shopping experience by providing detailed information on available options, helping buyers make informed decisions. The Stevens Point Buyers Guide and The Portage County Gazette are trusted resources, covering community events, classifieds, and advertising opportunities. These guides help buyers identify quality products and services, ensuring they find the best value for their needs in the Stevens Point area.

Real Estate Market Overview

Stevens Point’s real estate market offers diverse options, including homes, condos, and land, with current trends favoring buyers seeking affordable and attractive properties in a growing community.

2.1 Current Market Trends

The Stevens Point real estate market is experiencing steady growth, with a focus on affordable housing options and increased demand for properties in desirable neighborhoods. Buyers are drawn to the area’s competitive pricing, making it an attractive option for first-time homeowners and investors alike. The market trends indicate a balance between supply and demand, with a variety of homes, condos, and land available to suit different preferences and budgets. This creates a favorable environment for those looking to purchase property in a growing and vibrant community.

2;2 Types of Properties Available

Stevens Point offers a diverse range of properties to suit various preferences and budgets. Buyers can choose from single-family homes, condos, townhouses, and vacant land for custom builds. The area features a mix of modern developments and historic homes, providing options for both first-time buyers and seasoned investors. With properties available in different sizes and styles, the market caters to families, professionals, and retirees alike. Additionally, the availability of rural and suburban properties allows for flexibility in lifestyle choices, making Stevens Point a versatile destination for real estate investment.

2.3 Tips for Prospective Buyers

Prospective buyers in Stevens Point should research neighborhoods thoroughly to align with their lifestyle and budget. Utilizing the Stevens Point Buyers Guide and local publications like The Portage County Gazette can provide valuable insights. Prioritize properties that meet long-term needs and consider working with local real estate agents for tailored guidance. Securing pre-approval for a mortgage and budgeting for additional costs are crucial steps. Buyers should also inspect properties meticulously and negotiate terms wisely to ensure a smooth transaction.

2.4 Desirable Neighborhoods

Stevens Point offers a variety of charming neighborhoods, each with unique character and amenities. Areas like downtown Stevens Point provide walkability and access to local shops and restaurants, while suburban neighborhoods offer quiet, family-friendly environments. Proximity to schools, parks, and waterways are key attractions for many buyers. Researching neighborhoods through the Stevens Point Buyers Guide and local publications can help identify the best fit for lifestyle and budget, ensuring a wise investment in a thriving community.

Local Economy and Job Market

Stevens Point’s economy thrives with diverse industries, including manufacturing, healthcare, and education. The Portage County Gazette highlights employment opportunities and growth, supported by local resources like the Stevens Point Buyers Guide.

3.1 Key Industries in Stevens Point

Stevens Point’s economy is driven by manufacturing, healthcare, and education. The city is known for its paper production and craft brewing industries. Healthcare providers, such as local hospitals, employ a significant workforce. Education is another major sector, with institutions like the University of Wisconsin-Stevens Point contributing to the local job market. Additionally, retail and tourism play a role, supported by resources like the Stevens Point Buyers Guide, which highlights local businesses and services, fostering economic growth and community development.

3.2 Employment Opportunities

Stevens Point offers diverse employment opportunities across various sectors. Major industries include manufacturing, healthcare, and education, with local hospitals and the University of Wisconsin-Stevens Point being key employers. Retail and tourism also provide jobs, supported by the city’s vibrant downtown area. The Stevens Point Buyers Guide and local publications like the Portage County Gazette often feature job listings and resources for job seekers. These opportunities make Stevens Point an attractive location for professionals and families looking to establish or advance their careers in a growing community.

3.3 Economic Growth Prospects

Stevens Point’s economy is thriving, driven by key industries like manufacturing, healthcare, and education. The city’s infrastructure development and strategic location attract businesses, fostering growth. Local publications, such as the Portage County Gazette and the Stevens Point Buyers Guide, highlight emerging opportunities. With a strong focus on community development and a growing University of Wisconsin-Stevens Point, the city is poised for sustained economic expansion, making it an ideal location for investors and families seeking a stable future.

Community Amenities

Stevens Point offers a variety of community amenities, including top-rated schools, quality healthcare facilities, and plenty of recreational activities. The city also boasts low crime rates, ensuring a safe and welcoming environment for residents.

4.1 Top-Rated Schools

Stevens Point is home to highly-rated schools, ensuring excellent education for families. The Stevens Point Area Public School District offers strong academic programs, while Pacelli Catholic Schools provide faith-based learning. Both districts boast dedicated staff, modern facilities, and a focus on student success. Parents can also explore private and charter options, catering to diverse educational needs. The community’s commitment to education makes it an ideal place for families to thrive and grow.

4.2 Healthcare Facilities

Stevens Point boasts a robust healthcare system, ensuring access to quality medical care for residents. The city is served by top-rated facilities like Aspirus Stevens Point Hospital, offering comprehensive services from primary care to specialized treatments. These institutions are staffed by skilled professionals dedicated to patient well-being. Additionally, clinics and urgent care centers provide convenient options for routine and emergency needs. The availability of advanced medical services makes Stevens Point an attractive choice for families and individuals seeking reliable healthcare options.

4.3 Recreational Activities

Stevens Point offers a wide range of recreational activities, making it an ideal location for outdoor enthusiasts. The city features numerous parks, trails, and waterways, including the Wisconsin River, perfect for boating, fishing, and kayaking. Residents can enjoy hiking at Standing Rocks Park or exploring the Green Circle Trail, which surrounds the city. Community events, such as festivals and farmers’ markets, add to the vibrant atmosphere. With its natural beauty and diverse recreational opportunities, Stevens Point provides a lifestyle that balances relaxation and adventure, appealing to families and individuals alike;

4.4 Crime Data and Safety

Stevens Point maintains a relatively low crime rate compared to similar-sized cities, making it a safe choice for residents. According to local reports, violent crime rates are notably low, and property crime rates are moderate. The city prioritizes community safety through proactive policing and neighborhood watch programs. Residents can access crime data and safety tips through the Portage County Gazette and the Stevens Point Buyers Guide, which provide updates and resources for maintaining a secure living environment. This focus on safety contributes to the city’s appealing quality of life.

Transportation and Infrastructure

Stevens Point features an efficient transportation network, including public transit options and well-connected roads. The city’s infrastructure supports easy commuting and access to local amenities, enhancing livability.

5.1 Public Transportation Options

Stevens Point offers a reliable public transportation system, including bus routes that cover key areas of the city. The transit system provides affordable and convenient options for residents, connecting them to major hubs, shopping centers, and employment zones. Additionally, the city is served by regional bus services, linking it to nearby communities and cities. This accessibility makes it easier for residents to commute without relying on personal vehicles. The public transportation network is continually improved to meet the growing needs of the community, ensuring efficient and sustainable travel solutions for everyone.

5.2 Road and Highway Connectivity

Stevens Point is well-connected by a network of highways and roads, ensuring easy access to nearby cities and regional destinations. Major routes like US-10 and I-39 provide direct links to Wausau, Marshfield, and beyond, while local roads offer convenient travel within the city. The proximity to these highways makes commuting and exploring central Wisconsin straightforward. Additionally, the city’s strategic location in central Wisconsin allows for efficient travel to larger cities like Madison and the Twin Cities, enhancing its appeal for both residents and visitors. The well-maintained road infrastructure supports a smooth and safe driving experience.

5.3 Local Infrastructure Development

Stevens Point is investing in infrastructure improvements to enhance connectivity and quality of life. Road upgrades and new public facilities are underway, supported by local initiatives. The city focuses on sustainable development, ensuring efficient transportation and utilities. These projects aim to attract businesses and residents, fostering growth. Buyers can rely on resources like the Stevens Point Buyers Guide to stay informed about these developments, making informed decisions about properties and investments in the area.

Local Shopping and Retail

Stevens Point offers diverse shopping experiences, from local boutiques to farmers markets, supported by resources like the Stevens Point Buyers Guide for informed retail decisions.

6.1 Popular Shopping Centers

Stevens Point features a variety of shopping centers that cater to diverse needs, from retail chains to local boutiques. These centers offer convenient access to essential goods, dining, and entertainment. The Stevens Point Buyers Guide highlights top destinations, ensuring shoppers can explore the best options. Whether seeking everyday items or unique finds, these hubs provide a blend of affordability and quality, supported by a strong community focus. They are ideal for residents and visitors alike, fostering a vibrant local economy.

6.2 Local Boutiques and Specialty Stores

Stevens Point is home to a variety of local boutiques and specialty stores, offering unique products that reflect the community’s charm. These shops provide everything from handmade crafts to artisanal goods, catering to diverse tastes. The Stevens Point Buyers Guide often features these hidden gems, making it easier for residents and visitors to discover them. By supporting local businesses, shoppers contribute to the area’s vibrant economy while finding one-of-a-kind items that showcase the region’s creativity and craftsmanship.

6.3 Farmers Markets and Local Produce

Stevens Point is renowned for its vibrant farmers markets, offering fresh, locally sourced produce. The Stevens Point Farmers Market is a hub for seasonal fruits, vegetables, and artisanal goods. Residents and visitors alike can enjoy handmade crafts, baked goods, and organic products. These markets not only provide high-quality items but also foster community connections. By supporting local farmers and artisans, shoppers contribute to the area’s sustainable economy while experiencing the best of Wisconsin’s agricultural heritage. This makes the markets a must-visit destination for anyone exploring Stevens Point.

Using Local Resources Effectively

Stevens Point’s local resources, like the Stevens Point Buyers Guide and The Portage County Gazette, provide valuable insights for shoppers, helping them make informed decisions and find quality products efficiently.

7.1 Navigating Classifieds

Navigating classifieds in Stevens Point is streamlined through resources like the Stevens Point Buyers Guide and local publications. These platforms offer organized listings for real estate, jobs, and local products, making it easy to find what you need. Users can filter by category, price, and location to narrow down options. Regular updates ensure listings are current, while clear descriptions provide essential details. Utilizing these tools effectively can save time and help buyers make informed decisions, whether searching for a home, employment, or goods and services in the area.

7.2 Utilizing the Stevens Point Buyers Guide

The Stevens Point Buyers Guide is a valuable resource for shoppers, offering ROP and insert advertising opportunities. It covers a wide range of products and services, from real estate to local goods. As part of the Wausau ⎯ Rhinelander DMA, it ensures broad reach and visibility. The guide is published weekly, providing up-to-date information to help buyers make informed decisions. Its user-friendly format and detailed listings make it an essential tool for anyone looking to purchase or explore options in Stevens Point, WI.

7.3 Role of Local Publications

Local publications like The Portage County Gazette and the Stevens Point Buyers Guide play a crucial role in connecting buyers with local businesses and services. These platforms provide detailed information on products, services, and real estate, helping buyers make informed decisions. They also offer advertising opportunities for businesses, ensuring visibility and reach within the community. By focusing on local needs and trends, these publications act as a bridge between buyers and sellers, fostering economic growth and community engagement in Stevens Point, WI.

Financial Considerations

Financial considerations in Stevens Point involve budgeting for purchases, understanding mortgage options, and navigating tax implications and insurance requirements to ensure informed and secure buying decisions.

8.1 Budgeting for Your Purchase

Budgeting for your purchase in Stevens Point involves assessing income, savings, and debt to determine affordable price ranges. Consider additional costs like inspections, closing fees, and potential renovations. Prioritize needs over wants to avoid financial strain. Utilize tools like mortgage calculators to estimate monthly payments and explore financing options. Stick to your budget to ensure long-term financial stability. Research local resources, such as the Stevens Point Buyers Guide, for tips on managing expenses and making informed decisions.

8.2 Understanding Mortgage Options

Understanding mortgage options is crucial for buyers in Stevens Point, WI. Options include fixed-rate, adjustable-rate, FHA, and USDA loans, each with varying terms and benefits. Researching these can help buyers choose the best fit for their financial situation. Factors like down payment requirements, interest rates, and repayment terms should be carefully considered. Consulting with lenders and financial advisors can provide clarity. Additionally, the Stevens Point Buyers Guide offers insights into local mortgage trends and resources, helping buyers make informed decisions tailored to their needs and budget.

8.3 Tax Implications and Benefits

Understanding tax implications is essential for buyers in Stevens Point, WI. Property taxes in the area are competitive, with potential exemptions for primary residences. Buyers should research state and local tax deductions, such as the Wisconsin Homestead Credit, to maximize savings. Additionally, mortgage interest and property tax deductions can provide significant benefits. Consulting with a tax professional or utilizing resources like the Stevens Point Buyers Guide can help buyers navigate these complexities and make informed decisions to optimize their financial situation.

8.4 Importance of Insurance

Insurance is a critical aspect of securing your investment in Stevens Point, WI. Homeowners’ insurance protects against damage, theft, and liability, while title insurance safeguards against ownership disputes. Flood insurance may be necessary due to the area’s proximity to waterways. Buyers should also consider additional coverage for specific risks, such as natural disasters. Consulting with local insurance providers and reviewing policies through resources like the Stevens Point Buyers Guide can help ensure comprehensive protection and peace of mind for new property owners.

Step-by-Step Buying Guide

Navigate the Stevens Point, WI market with confidence by researching, budgeting, and utilizing local resources like the Stevens Point Buyers Guide for informed decisions.

9.1 Researching the Market

Researching the market in Stevens Point, WI, involves understanding current trends, property values, and community dynamics. Utilize resources like the Stevens Point Buyers Guide and local publications such as The Portage County Gazette to stay informed. Analyze recent sales data and neighborhood comparisons to make educated decisions. Identify your budget and preferences to narrow down options. Stay updated on real estate listings and community events to gain insights into the local lifestyle. This thorough approach ensures you find the right property that aligns with your needs and goals in Stevens Point.

9.2 Conducting a Property Inspection

Conducting a property inspection is a critical step in the buying process. Hire a professional inspector to evaluate the condition of the property, focusing on structural integrity, plumbing, electrical systems, and potential environmental hazards. Review the inspection report thoroughly to identify any issues that may impact your decision. Use the findings to negotiate repairs or adjust the purchase price. The Stevens Point Buyers Guide recommends working with licensed inspectors to ensure a comprehensive assessment. This step ensures you make an informed decision and avoid costly surprises down the line.

9.3 Negotiation Strategies

Effective negotiation is key to securing a fair deal. Research the market value of the property to make informed offers. Consider the seller’s motivations and timing to leverage your position. Start with a competitive but realistic offer, leaving room for negotiation. Stay calm and patient during discussions, and be prepared to compromise. Utilize the Stevens Point Buyers Guide for tips on negotiation tactics. Working with a knowledgeable real estate agent can also provide valuable guidance. A well-strategized approach ensures both parties reach a satisfactory agreement.

9.4 Closing the Deal

Closing the deal involves finalizing paperwork, ensuring legal and financial checks are complete, and transferring ownership. Review all documents thoroughly, including the purchase agreement and title report. Ensure financing is secured and conduct a final walk-through of the property. Work with professionals, such as attorneys and real estate agents, to facilitate a smooth process. Once all conditions are met, sign the necessary documents and complete the transaction. The Stevens Point Buyers Guide provides resources to help navigate this critical step, ensuring a successful and stress-free closing experience for buyers.

The Stevens Point Buyers Guide simplifies shopping experiences, offering valuable insights and resources for quality purchases in the area, supported by local publications like the Portage County Gazette.

10.1 Final Tips for Buyers

When navigating the Stevens Point market, prioritize thorough research and planning. Set a clear budget and stick to it, ensuring flexibility for unexpected costs. Explore neighborhoods to find the best fit for your lifestyle. Consider working with a realtor for expert insights and guidance. Additionally, evaluate local amenities, schools, and services to ensure a high quality of life. Stay informed about market trends and be patient in your search. By following these steps, you can make an informed decision and secure a property that meets your needs and expectations in Stevens Point.

10.2 Looking Ahead

Stevens Point, WI, continues to evolve as a vibrant community, offering promising opportunities for buyers. With a growing economy and expanding local businesses, the area is poised for long-term growth. The city’s commitment to improving infrastructure and community amenities ensures a high quality of life. As the real estate market remains attractive, buyers can look forward to a stable and rewarding investment. Stay informed through resources like the Stevens Point Buyers Guide and local publications to make the most of future opportunities in this charming Wisconsin city.

transformation of quadratic functions worksheet answer key pdf

Quadratic functions are fundamental in algebra, represented as ( f(x) = a(x, h)^2 + k ). They form parabolas when graphed, essential for modeling real-world phenomena like projectile motion and financial trends.

1.1 Definition and Basic Form

A quadratic function is a polynomial function of degree two, expressed in the form ( f(x) = ax^2 + bx + c ), where ( a
eq 0 ). Its graph is a parabola, opening upward if ( a > 0 ) and downward if ( a < 0 ). The basic form can also be written in vertex form, ( f(x) = a(x ─ h)^2 + k ), where ( (h, k) ) is the vertex of the parabola. This form is essential for analyzing transformations, as it directly shows shifts and reflections. Understanding these forms is crucial for graphing and interpreting quadratic functions.

1.2 Importance of Quadratic Functions in Algebra

Quadratic functions are central to algebra, offering insights into real-world phenomena like projectile motion and financial trends. They are essential for solving optimization problems, such as maximizing area or minimizing cost. Understanding quadratics builds foundational skills for higher mathematics, including calculus and statistics. Their applications in physics, engineering, and economics highlight their practical relevance. Additionally, quadratic functions are frequently tested in standardized exams, making proficiency crucial for academic success. They also serve as a bridge to more complex mathematical concepts, reinforcing problem-solving abilities and analytical thinking.

Understanding Transformations of Quadratic Functions

Understanding quadratic transformations involves analyzing vertical shifts, horizontal shifts, reflections, and stretches/compressions. These changes alter the graph’s position, direction, and width, enhancing problem-solving skills in algebra and real-world applications.

2.1 Vertical Shifts (Up and Down)

A vertical shift moves the graph of a quadratic function up or down without changing its shape or direction. This transformation is represented by the constant ( k ) in the equation ( y = a(x — h)^2 + k ). If ( k > 0 ), the graph shifts upward by ( k ) units, while ( k < 0 ) shifts it downward. For example, ( y = x^2 + 3 ) shifts the basic parabola up by 3 units, and ( y = x^2 ─ 2 ) shifts it down by 2 units. This transformation affects the vertex but not the parabola's width or direction.

2.2 Horizontal Shifts (Left and Right)

A horizontal shift moves the graph of a quadratic function left or right without altering its shape or direction. This transformation is controlled by the ( h ) value in the equation ( y = a(x ─ h)^2 + k ). If ( h > 0 ), the graph shifts to the right by ( h ) units, while ( h < 0 ) shifts it to the left. For example, ( y = (x — 2)^2 ) shifts the parabola right by 2 units, and ( y = (x + 3)^2 ) shifts it left by 3 units. Horizontal shifts affect the vertex but not the parabola's width or direction.

2.3 Reflections (Over the x-axis and y-axis)

Reflections of quadratic functions flip the graph over an axis, altering its orientation. A reflection over the x-axis changes the equation from ( y = a(x — h)^2 + k ) to ( y = -a(x ─ h)^2 + k ), flipping the parabola upside down. A reflection over the y-axis transforms ( y = a(x — h)^2 + k ) to ( y = a(-x — h)^2 + k ), mirroring the graph vertically. These transformations do not affect the vertex’s position but change the parabola’s direction and opening side, providing symmetry across the specified axis.

2.4 Stretches and Compressions

Stretches and compressions modify the width of a parabola. A vertical stretch by a factor of |a| occurs when |a| > 1, narrowing the graph, while 0 < |a| < 1 causes a vertical compression, widening it. Horizontal stretches and compressions are applied by modifying the input variable. For example, y = a(x — h)^2 + k becomes y = a(x ─ h)^2 + k for vertical changes, and y = a((x ─ h)/b)^2 + k for horizontal adjustments. These transformations alter the graph's width without changing the vertex, providing flexibility in shaping quadratic functions to model various scenarios.

Identifying Transformations from the Equation

Transformations are identified by analyzing the equation’s standard form, y = a(x — h)^2 + k, where (h, k) is the vertex, and “a” determines direction and width.

3.1 Analyzing the Standard Form y = a(x ─ h)^2 + k

The standard form of a quadratic function is y = a(x, h)^2 + k, where (h, k) represents the vertex. The coefficient “a” determines the direction and width of the parabola. If “a” is positive, the parabola opens upward; if negative, it opens downward. The value of “a” also affects the width: a larger absolute value makes the parabola narrower, while a smaller value makes it wider. Horizontal shifts are identified by “h,” with positive values shifting the graph right and negative values shifting it left. Vertical shifts are determined by “k,” moving the graph up or down. By analyzing these components, transformations can be identified and applied to the basic quadratic function y = x^2. This form is essential for understanding how transformations alter the graph’s position and shape, making it a cornerstone in studying quadratic functions.

3.2 Determining the Direction and Width of the Parabola

The coefficient “a” in the standard form y = a(x — h)^2 + k determines the parabola’s direction and width. If “a” is positive, the parabola opens upward; if negative, it opens downward. The absolute value of “a” affects the width: a larger |a| makes the parabola narrower, while a smaller |a| makes it wider. For example, y = 2x^2 is narrower than y = x^2, and y = 0.5x^2 is wider. This understanding is crucial for graphing and interpreting quadratic transformations accurately.

Graphing Quadratic Functions with Transformations

Graphing quadratic functions involves identifying transformations from the standard form y = a(x — h)^2 + k. Determine the vertex (h, k), direction (up/down), and width (a).

4.1 Step-by-Step Process for Graphing

To graph a quadratic function with transformations, start by identifying the vertex (h, k) from the equation y = a(x, h)^2 + k. Determine if the parabola opens upward or downward based on the coefficient ‘a’. Calculate the width of the parabola using 1/|a|. Plot the vertex and additional points to the left and right of the vertex to shape the parabola. Connect these points smoothly to form the curve. Apply any horizontal or vertical shifts, reflections, or stretches as indicated by the equation. Ensure accuracy by labeling key points and verifying transformations.

4.2 Common Mistakes to Avoid

When graphing quadratic functions, common mistakes include forgetting to apply vertical shifts correctly and misidentifying the direction the parabola opens. Students often confuse the coefficient ‘a’ with the vertex form, leading to incorrect widths or directions. Another error is mislabeling the vertex (h, k) or miscalculating horizontal shifts. Additionally, some may overlook reflections over the x-axis or y-axis, resulting in mirrored graphs. To avoid these, carefully analyze each transformation step-by-step and verify each point plotted. Double-checking calculations and referring to the standard form y = a(x — h)^2 + k can help minimize errors and ensure accuracy.

Real-World Applications of Quadratic Transformations

Quadratic transformations model real-world phenomena like projectile motion and financial trends. They enable precise predictions and simulations by adjusting parabolic shapes to fit specific scenarios accurately.

5.1 Modeling Projectile Motion

Quadratic functions are essential for modeling projectile motion, where objects follow a parabolic trajectory under gravity. The equation ( y = a(x ─ h)^2 + k ) represents the path, with transformations like vertical shifts and reflections adjusting for initial velocity and launch angle. These models help predict landing points and maximum heights, crucial in engineering and sports for optimizing designs and performance. By analyzing quadratic transformations, professionals can simulate and refine trajectories accurately, ensuring safety and efficiency in real-world applications.

5.2 Representing Financial and Economic Scenarios

Quadratic functions are widely used in finance to model scenarios like profit maximization, cost structures, and market trends. The parabolic nature of these functions helps analyze revenue and expense relationships, identifying peak points such as maximum profit or minimum cost. Transformations like vertical shifts and reflections can represent changes in economic conditions or policy impacts. For instance, a quadratic model can show how pricing strategies affect demand, enabling businesses to make informed decisions. This application highlights the practical relevance of quadratic transformations in solving real-world financial and economic challenges.

Worksheet: Transformations of Quadratic Functions

This worksheet provides multiple choice, short answer, and challenge problems to practice graphing quadratic functions with transformations. Includes an answer key for self-assessment and teacher use.

6.1 Multiple Choice Questions

This section contains multiple choice questions designed to test understanding of quadratic function transformations. Questions focus on identifying transformations such as vertical shifts, horizontal shifts, reflections, stretches, and compressions. Students are asked to analyze equations and match them to their corresponding graphs or describe the transformations applied. The questions cover various aspects of quadratic transformations, ensuring a comprehensive assessment of the topic. The answer key is provided for each question, allowing students and teachers to track progress and understanding effectively.

6.2 Short Answer Problems

This section provides short answer problems that require students to describe and analyze transformations of quadratic functions. Questions ask students to identify transformations such as vertical shifts, horizontal shifts, reflections, stretches, and compressions from given equations. Additionally, students are prompted to graph functions and explain the effects of specific transformations. The problems are designed to assess understanding of how transformations alter the graph of a quadratic function. The answer key includes detailed explanations for each problem, helping students understand the correct methods and solutions.

6.3 Challenge Problems

The challenge problems section tests advanced understanding of quadratic transformations. Students are tasked with analyzing complex transformations, such as combining multiple shifts, reflections, and stretches. Problems may involve identifying transformations from graphs or equations and applying them to real-world scenarios. Additionally, students must critically think to solve multi-step transformation problems. The answer key provides detailed explanations, breaking down each step to ensure clarity. These problems prepare students for higher-level math by reinforcing their ability to apply quadratic transformations in diverse contexts.

Answer Key for the Worksheet

The answer key provides detailed solutions to all worksheet problems, including multiple-choice, short-answer, and challenge questions. It ensures clarity and understanding of quadratic transformations.

7.1 Solutions to Multiple Choice Questions

The answer key provides clear solutions to multiple-choice questions, ensuring students understand quadratic transformations. Each question is answered with detailed reasoning, covering vertical shifts, horizontal shifts, reflections, stretches, and compressions. For example, identifying whether a function opens up or down and determining the vertex after transformations. The solutions help students verify their answers and understand common mistakes. This section is designed to reinforce learning and provide quick reference for assessing understanding of quadratic function transformations.

7.2 Detailed Answers to Short Answer Problems

This section provides comprehensive explanations for short answer problems, breaking down each step logically. For example, identifying the vertex form of a quadratic function or describing transformations like vertical shifts and reflections. Each solution is explained in detail, ensuring clarity and understanding. Students can follow the reasoning to grasp how to approach similar problems independently. The answers cover topics like identifying the direction of openings, calculating stretches or compressions, and determining the correct order of transformations. This resource is invaluable for reinforcing problem-solving skills and understanding quadratic function transformations thoroughly.

7.3 Explanations for Challenge Problems

This section delves into complex quadratic transformation challenges, offering detailed step-by-step solutions. It addresses problems involving multiple transformations, such as combined horizontal and vertical shifts, reflections, and stretches. Each explanation breaks down the process, ensuring clarity and understanding. For instance, transforming ( y = 3(x ─ 2)^2 + 5 ) involves identifying the vertex, stretch factor, and direction. Tips for avoiding common errors, like misapplying transformation order, are also provided. These explanations empower students to tackle advanced problems confidently, reinforcing their mastery of quadratic function transformations through practical examples and clear reasoning.

Quadratic transformations are essential for understanding parabolas and their real-world applications. Mastering vertex form and transformation analysis is crucial. Regular practice with worksheets and online resources ensures proficiency.

8.1 Summary of Key Concepts

Quadratic functions are expressed in standard form ( y = a(x ─ h)^2 + k ), where ( (h, k) ) is the vertex. Transformations include vertical shifts (up/down), horizontal shifts (left/right), reflections (over axes), and stretches/compressions. The coefficient ( a ) determines the parabola’s direction and width. Graphing involves identifying the vertex and applying transformations step-by-step. Real-world applications include modeling projectile motion and financial scenarios. Understanding these concepts is essential for solving quadratic transformation problems and interpreting their graphical representations accurately.

8.2 Final Tips for Mastering Quadratic Transformations

To master quadratic transformations, start by understanding the standard form (y = a(x ─ h)^2 + k). Practice identifying transformations from equations and graphs. Regularly graph functions step-by-step to visualize changes. Analyze real-world applications, like projectile motion, to deepen understanding. Use online resources, such as worksheets and answer keys, for practice. Join study groups to discuss challenges and review common mistakes. Finally, consistently review key concepts to build confidence and fluency in solving transformation problems.

Additional Resources

Explore recommended websites, textbooks, and interactive tools for mastering quadratic transformations. Utilize worksheets with answer keys for practice and review. Ideal for students and educators alike.

9.1 Recommended Websites for Further Practice

Enhance your understanding of quadratic transformations with these trusted online resources. Websites like Khan Academy and Mathway offer interactive tools and video tutorials. Desmos provides a graphing calculator for visualizing transformations. CK-12 and Quizlet feature practice exercises and flashcards. For detailed worksheets, visit Teachers Pay Teachers or Math Open Reference. These platforms cater to both students and educators, ensuring comprehensive practice and review of quadratic function transformations.

9.2 Suggested Textbooks and Study Guides

For in-depth learning, consider textbooks like “Algebra and Trigonometry” by James Stewart and “Precalculus” by Michael Sullivan. These texts provide comprehensive coverage of quadratic functions and transformations. Additionally, study guides such as “CliffsNotes Workbook for Algebra I” and “Schaum’s Outline of Pre-Calculus” offer focused practice and step-by-step solutions. The “Quadratic Transformations Worksheet Answer Key PDF” is also an excellent resource, featuring detailed solutions to common transformation problems, ideal for self-study or classroom use.

honeywell activlink doorbell manual

The Honeywell ActivLink Doorbell is a wireless, convenient solution for home alert systems, offering reliable connectivity without complex wiring. Designed for easy installation, it provides customizable features and integrates seamlessly with other smart devices, enhancing home security and comfort.

Key Features and Benefits

The Honeywell ActivLink Doorbell offers a range of innovative features designed to enhance home security and convenience. With a maximum wireless range of up to 150 meters, it ensures reliable connectivity without the need for complex wiring. The doorbell operates on a secure 868 MHz frequency, providing interference-free performance. It features a high sound level of 84 dB, ensuring clear alerts even in noisy environments. The device is battery-powered, with long-lasting alkaline batteries that can last up to 5 years, depending on usage; Additionally, it supports customizable settings, such as adjustable volume and tones, allowing users to personalize their experience. Motion detection capabilities can be integrated for advanced alerts, and the system is compatible with up to 4 accessories, including additional push buttons and sensors. Its weather-resistant design ensures durability in various outdoor conditions, making it a robust solution for any home. These features combine to provide a user-friendly, reliable, and flexible doorbell system that meets modern smart home needs.

Technical Specifications

The Honeywell ActivLink Doorbell operates on a secure 868 MHz frequency, ensuring reliable and interference-free performance. It boasts a maximum wireless range of up to 150 meters in open fields, making it suitable for large properties. The device features a sound level of 84 dB, providing clear and audible alerts. It is powered by 4 C-cell alkaline batteries, which offer a long battery life of up to 5 years with average usage of 5 activations per day. The doorbell is designed to function in a wide temperature range, from -20°C to 50°C, ensuring durability in various environmental conditions. Additionally, it supports up to 4 accessories, including push buttons, motion sensors, and door or window sensors, enhancing its functionality. The ActivLink Doorbell is also weather-resistant, making it suitable for outdoor installation. These specifications ensure a robust, reliable, and versatile solution for home alert systems.

Installation and Setup

Install batteries in the doorbell and push button. Set preferences and mount the doorbell and button. Check for hidden cables using a locator. Operating temperature ranges from -20°C to 50°C. Ensure proper placement for optimal performance.

4.1 Pre-Installation Checks

Before installing the Honeywell ActivLink Doorbell, ensure a smooth process by conducting essential pre-installation checks. First, verify the operating temperature range of -20°C to 50°C to ensure the device functions optimally in your environment. Next, check for hidden electricity cables and water pipes in the walls where you plan to drill. Using a cable/pipe locator is highly recommended to avoid damage or safety hazards. Additionally, ensure the doorbell and push button are within the recommended range of 137 meters in an open field for reliable connectivity. Battery-operated models require installing the correct battery type, such as 3 AA alkaline batteries, before use. Finally, review the manual to confirm compatibility with your home’s infrastructure and ensure all components are included in the package. These checks will help prevent installation issues and ensure your doorbell operates efficiently from day one.

4.2 Step-by-Step Installation Guide

Installing the Honeywell ActivLink Doorbell is straightforward with these steps. First, insert the required batteries into the doorbell and push button units. For battery-operated models, use 3 AA alkaline batteries. Next, set up your preferences, such as volume and tones, before mounting the devices. Pair the push button with the doorbell by pressing and holding the settings button for three seconds until it beeps. Choose a suitable location for the doorbell, ensuring it is within range of the push button. Mount the push button near your door and the doorbell in a visible location. Use screws or adhesive strips provided for secure installation. Finally, test the setup by pressing the push button to ensure the doorbell rings and lights up. If pairing fails, refer to the manual for troubleshooting steps. Proper installation ensures reliable performance and connectivity for your Honeywell ActivLink Doorbell.

4.3 Common Installation Mistakes

When installing the Honeywell ActivLink Doorbell, several common mistakes can affect performance. One major error is not checking for hidden wires or pipes before drilling, which can cause damage. Another issue is improper battery installation, such as using weak or incorrect battery types, which reduces range and functionality. Additionally, some users fail to pair the push button correctly with the doorbell, leading to connectivity issues. Mounting the doorbell too far from the push button or in areas with obstacles can also weaken the signal. Ignoring operating temperature ranges (-5ºC to 40ºC) may affect battery life and performance. Lastly, not testing the setup after installation can leave undetected issues. Avoiding these mistakes ensures reliable operation and optimal functionality of your Honeywell ActivLink Doorbell.

Setup Process

Setting up the Honeywell ActivLink Doorbell is straightforward and requires minimal effort. Begin by installing the batteries in both the doorbell and the push button. Ensure the batteries are fresh and of the correct type (e.g., alkaline or lithium) to avoid weak signals. Next, pair the push button with the doorbell by pressing and holding the settings button for three seconds until the LED light flashes. This confirms the connection. Mount the doorbell and push button in desired locations, ensuring the doorbell is within range of the push button (up to 150 meters in open fields). Avoid placing the doorbell near metal objects or walls, as this can reduce signal strength. Finally, test the setup by pressing the push button to ensure the doorbell rings and lights up. If issues arise, refer to the troubleshooting section or the manual for guidance. Proper setup ensures reliable performance and seamless functionality of your Honeywell ActivLink Doorbell.

Customizing Your Doorbell

Customize your Honeywell ActivLink Doorbell by adjusting volume levels and selecting from various tones to suit your preferences. Additionally, you can fine-tune motion detection sensitivity and set up alerts for enhanced security and convenience.

6.1 Adjusting Volume and Tones

Customizing the volume and tones on your Honeywell ActivLink Doorbell is straightforward. The doorbell features adjustable volume levels, allowing you to set the sound to a comfortable range for your home environment. With typical sound levels of 84dBA to 90dB, you can ensure the doorbell is audible without being intrusive. To adjust the volume, press and hold the volume button on the doorbell unit until the desired level is reached. Additionally, the Honeywell ActivLink Doorbell offers multiple tone options, enabling you to choose a sound that suits your preferences. From classic chimes to modern melodies, you can select a tone that complements your home’s ambiance. To change the tone, navigate to the settings menu using the doorbell’s control panel and cycle through the available options until you find the one you prefer. This feature ensures your doorbell not only functions effectively but also aligns with your personal style, enhancing your overall user experience.

6.2 Setting Up Motion Detection

Setting up motion detection on your Honeywell ActivLink Doorbell enhances security by alerting you to movement near your door. Begin by ensuring your doorbell is equipped with a motion sensor, typically integrated into the device or available as an accessory. Install the sensor near the doorbell, positioning it to cover the desired area. Adjust the sensitivity settings via the doorbell’s control panel or through the Honeywell Home app to avoid false alerts from pets or weather. Once configured, the sensor will detect movement and trigger an alert, such as a chime or notification on your smartphone. For optimal performance, place the sensor 2-3 meters above ground level and away from direct sunlight or extreme weather conditions. Test the setup by walking in the detection zone to ensure it activates correctly. This feature adds an extra layer of security, providing peace of mind and real-time alerts for any activity around your home.

Accessories and Compatibility

The Honeywell ActivLink Doorbell supports a range of accessories, including additional push buttons, window/door sensors, and motion detectors. It is compatible with up to 6 devices, enhancing your home security and convenience; Ensure all accessories are Honeywell-approved for optimal performance.

7.1 Compatible Devices

The Honeywell ActivLink Doorbell is designed to work seamlessly with a variety of compatible devices, enhancing its functionality and versatility. These include additional push buttons, window and door opening sensors, and motion detectors. Up to 6 accessories can be connected to the doorbell, allowing for a comprehensive home security system. The doorbell is also compatible with other Honeywell Home products, ensuring a unified and integrated smart home experience. For optimal performance, it is recommended to use Honeywell-approved accessories, as they are specifically designed to work with the ActivLink system. This compatibility ensures reliable connectivity and consistent operation, providing homeowners with peace of mind. By expanding the system with compatible devices, users can customize their setup to meet their specific needs, whether it’s monitoring multiple entry points or adding motion detection for enhanced security.

Troubleshooting Common Issues

Common issues with the Honeywell ActivLink Doorbell include the doorbell not ringing, weak signal, or battery life concerns. Moving the doorbell closer to the push button can improve connectivity. Weak or cold batteries may reduce range. For assistance, refer to the manual or contact Honeywell support.

8.1 Doorbell Not Ringing

If your Honeywell ActivLink Doorbell is not ringing, several factors could be causing the issue. First, check the battery life, as weak or dead batteries are a common cause. Ensure batteries are fresh and properly installed. Next, verify the doorbell’s range from the push button. If the distance exceeds the recommended 150-200 meters, move the doorbell closer. Additionally, ensure there are no physical obstructions between the doorbell and the push button, as these can interfere with the signal. If the issue persists, check for proper pairing between the doorbell and the push button. Press and hold the settings button for three seconds to reset the connection. Finally, consult the manual or contact Honeywell support for further assistance if the problem remains unresolved.

8.2 Weak Signal or Connectivity Problems

Weak signal or connectivity issues with your Honeywell ActivLink Doorbell can disrupt its performance. To address this, ensure the doorbell and push button are within the recommended range of 150-200 meters. Physical obstructions, such as walls or metal objects, can weaken the signal, so consider relocating the doorbell to an area with fewer barriers. Additionally, interference from other electronic devices operating on similar frequencies (e.g., 868 MHz or 916.8 MHz) can impact connectivity. Move the doorbell away from such devices to minimize interference. Check for proper battery installation, as weak batteries can reduce signal strength. If the issue persists, use a cable/pipe locator to ensure no hidden wiring is interfering. Finally, reset the doorbell by pressing and holding the settings button for three seconds to re-establish the connection. If the problem remains unresolved, refer to the manual or contact Honeywell support for further assistance.

8.3 Battery Life Concerns

Battery life concerns for the Honeywell ActivLink Doorbell can arise due to various factors. The doorbell typically uses 3 AA alkaline batteries or 4 C cell alkaline batteries, with an expected lifespan of up to 5 years under normal usage (5 activations per day). However, cold temperatures (below 5ºC) can reduce battery performance, requiring more frequent replacements. To address battery life concerns, ensure batteries are installed correctly, with the positive terminal facing the correct direction. Avoid using weak or old batteries, as this can significantly reduce range and functionality. If battery life is shorter than expected, check for excessive activations or prolonged use in extreme temperatures. Replace batteries annually as a preventive measure, especially in regions with harsh winters. For optimal performance, use high-quality alkaline batteries and avoid mixing old and new ones. If issues persist, consult the manual or contact Honeywell support for further guidance.

Maintenance and Care

Regular maintenance is essential to ensure the Honeywell ActivLink Doorbell operates efficiently. Clean the doorbell and push button regularly with a soft cloth to remove dirt and debris that may interfere with functionality. Avoid using harsh chemicals or abrasive materials, as they may damage the surface. Check for obstructions between the doorbell and push button to maintain optimal range. Ensure batteries are replaced as needed, using high-quality alkaline batteries for prolonged life. Store spare batteries in a cool, dry place to prevent degradation. In extreme weather conditions, such as heavy rain or snow, ensure the doorbell is properly sealed to maintain its water-resistant properties. For models with motion detection, periodically inspect the sensor for dust or debris that may affect accuracy. Lastly, always refer to the manual for specific care instructions tailored to your model. Proper maintenance will extend the lifespan and performance of your Honeywell ActivLink Doorbell.

Advanced Features

The Honeywell ActivLink Doorbell offers a range of advanced features designed to enhance convenience and security. One notable feature is its motion detection capability, which alerts homeowners to movement near the door, even before the doorbell is pressed. This feature can be customized to adjust sensitivity levels, reducing false alerts. Additionally, the doorbell supports integration with other smart devices, such as motion sensors and door or window opening sensors, allowing for a comprehensive home security system. Users can also customize tones and volumes to suit their preferences, ensuring the doorbell is audible in larger homes. Furthermore, the ActivLink technology provides a reliable wireless connection with a range of up to 150 meters in open fields, eliminating the need for complex wiring. These advanced features make the Honeywell ActivLink Doorbell a versatile and user-friendly solution for modern homes, offering enhanced functionality beyond traditional doorbells.

Security Considerations

The Honeywell ActivLink Doorbell is designed with security in mind, offering features that protect your home and ensure reliable performance. The doorbell operates on a secure wireless frequency, minimizing interference and unauthorized access. Its motion detection feature enhances security by alerting you to unexpected movement near your door. Additionally, the doorbell’s wireless connectivity is encrypted, safeguarding your system from potential hacking threats. The device also supports integration with other security accessories, such as window and door sensors, creating a comprehensive security network. Battery-powered models eliminate the risk of power outages disrupting your doorbell’s functionality. Regular firmware updates are recommended to maintain the latest security patches and features. By prioritizing your home’s safety and convenience, the Honeywell ActivLink Doorbell provides a robust security solution for modern households.

Warranty and Support

The Honeywell ActivLink Doorbell is backed by a comprehensive warranty and dedicated customer support, ensuring peace of mind for users. The device typically comes with a limited warranty covering manufacturing defects for a specified period. For detailed warranty terms, users can refer to the official Honeywell website or the product manual. Honeywell also provides extensive support resources, including online troubleshooting guides, FAQs, and downloadable manuals. Customers can visit honeywellhome.com for assistance or contact the support team directly at 1-800-633-3991. Additionally, the doorbell’s design and construction are built to last, with durable materials and reliable performance. Regular firmware updates are available to enhance functionality and security. With Honeywell’s commitment to quality and customer satisfaction, users can trust their ActivLink Doorbell to perform optimally for years to come.

The Honeywell ActivLink Doorbell is a reliable and feature-rich solution for modern homeowners seeking a convenient and secure way to monitor visitors. With its wireless design, long-range connectivity, and customizable settings, it offers a seamless experience for enhancing home security. The doorbell’s compatibility with various accessories, such as motion sensors and additional push buttons, allows for tailored functionality to meet individual needs. Its durable construction and user-friendly interface make it a practical choice for any household. Additionally, Honeywell’s commitment to customer support, including comprehensive manuals and troubleshooting resources, ensures that users can easily resolve any issues. Whether you’re looking to upgrade your current doorbell or install a new one, the Honeywell ActivLink Doorbell is a smart and efficient option that delivers both convenience and peace of mind.

honeywell th8320u1008 user manual

The Honeywell TH8320U1008 is a VisionPRO 8000 Series touchscreen programmable thermostat‚ offering intuitive controls‚ 7-day scheduling‚ and compatibility with various heating and cooling systems for optimal comfort and energy efficiency․

1․1 Overview of the VisionPRO 8000 Series

The VisionPRO 8000 Series by Honeywell represents a line of advanced‚ touchscreen programmable thermostats designed for ease of use and energy efficiency․ The TH8320U1008 model‚ part of this series‚ offers a 7-day programmable schedule‚ compatibility with various heating and cooling systems‚ and a user-friendly interface․ It supports up to 3 Heat/2 Cool systems‚ making it versatile for different home setups․ The series is known for its intuitive menu-driven programming‚ which simplifies setup and operation‚ ensuring optimal comfort and energy savings․ The manual provides detailed guidance for installation‚ programming‚ and troubleshooting․

1․2 Key Features of the TH8320U1008 Model

The Honeywell TH8320U1008 features a high-resolution touchscreen interface‚ 7-day programmable scheduling‚ and compatibility with gas‚ oil‚ or electric heating systems․ It supports up to 3 Heat/2 Cool stages‚ ensuring precise temperature control․ The thermostat also includes humidity control‚ dehumidification options‚ and smart response technology for efficient system operation․ Its advanced installer settings and remote access capabilities enhance flexibility‚ while energy-saving features help reduce utility bills․ The manual provides detailed instructions for leveraging these features to maximize comfort and efficiency․

1․3 Compatibility and System Types

The Honeywell TH8320U1008 is compatible with a wide range of heating and cooling systems‚ including gas‚ oil‚ and electric configurations․ It supports up to 3 Heat/2 Cool stages‚ making it suitable for multi-stage systems․ The thermostat also works with heat pumps and dual fuel systems‚ offering flexibility for various home setups․ Its universal design ensures compatibility with 24V AC or 750mV heating systems‚ providing reliable control for different installations․ This versatility makes it a practical choice for diverse HVAC needs‚ as outlined in the user manual․

Installation Guide for Honeywell TH8320U1008

The Honeywell TH8320U1008 installation involves turning off power‚ removing the old thermostat‚ connecting wires‚ and mounting the new device․ Follow the manual for precise steps and system testing․

2․1 Pre-Installation Checklist

  • Turn off power to the HVAC system at the circuit breaker or fuse box․
  • Gather necessary tools‚ including a screwdriver‚ wire strippers‚ and a ladder․
  • Verify system compatibility (gas‚ oil‚ electric‚ or heat pump)․
  • Check thermostat wiring matches the TH8320U1008 terminal requirements․
  • Ensure the wallplate is properly mounted and level․
  • Review the installation manual for specific instructions․
  • Prepare a safe workspace to avoid damage or injury․

Following this checklist ensures a smooth and safe installation process․

2․2 Step-by-Step Installation Instructions

  1. Remove the old thermostat and label the wires according to their functions․
  2. Install the wallplate on the back box‚ ensuring it is level and secure․
  3. Connect the wires to the appropriate terminals on the wallplate․
  4. Mount the thermostat onto the wallplate‚ ensuring a snug fit․
  5. Restore power to the HVAC system and test the thermostat․
  6. Configure basic settings like the real-time clock and system type․

Follow these steps carefully to ensure proper installation and functionality of the Honeywell TH8320U1008 thermostat․

2․3 Wiring Diagram and Connections

The Honeywell TH8320U1008 requires precise wiring connections to ensure proper functionality․ Refer to the wiring diagram in the manual for specific terminal assignments․ Typically‚ wires are color-coded as follows:
– R (red) for 24V power‚
– W (white) for heating‚
– Y (yellow) for cooling‚
– G (green) for fan‚ and
– C (common) for the neutral connection․
Ensure all wires are securely connected to the correct terminals to avoid malfunctions․ If unsure‚ consult the user manual or a licensed professional for assistance․

2․4 System Setup and Configuration

After installation‚ configure the Honeywell TH8320U1008 by setting the date‚ time‚ and system type․ Navigate through the touchscreen menu to select options like heat‚ cool‚ or heat pump systems․ Choose the appropriate equipment type (e․g․‚ gas‚ oil‚ or electric) and configure stages for heating and cooling․ Set the temperature range and differential to optimize performance․ Ensure all settings match your HVAC system specifications․ Save changes to complete the setup․ Refer to the manual for detailed configuration options to tailor the thermostat to your specific needs and preferences․

Programming the Thermostat

Program the Honeywell TH8320U1008 with a 7-day schedule‚ adjusting temperature settings and enabling energy-saving features through its intuitive touchscreen interface for optimal comfort and efficiency․

3․1 Understanding the Touchscreen Interface

The Honeywell TH8320U1008 features an intuitive touchscreen interface designed for easy navigation․ The menu-driven system simplifies programming and adjustments‚ with clear options for scheduling‚ temperature control‚ and energy-saving settings․ Users can effortlessly access features like the real-time clock‚ programmable schedules‚ and system settings through the responsive touchscreen․ The interface is user-friendly‚ ensuring seamless interaction and optimal comfort management․ Its logical layout and straightforward menus make it accessible for both beginners and advanced users to customize their heating and cooling preferences efficiently․

3․2 Setting Up the Real-Time Clock

Setting up the real-time clock on the Honeywell TH8320U1008 is essential for accurate temperature scheduling․ Upon initial setup‚ navigate to the clock settings menu to select your time zone and choose between 12-hour or 24-hour format․ Enter the current date and time using the touchscreen interface․ The thermostat will automatically update the time‚ ensuring your programmed schedules run correctly․ This feature is crucial for maintaining consistent heating and cooling cycles‚ and it simplifies the overall operation of your HVAC system․

3․3 Creating a 7-Day Programmable Schedule

The Honeywell TH8320U1008 allows you to create a 7-day programmable schedule‚ enabling customized temperature settings for each day of the week․ Using the touchscreen interface‚ you can set specific times and temperatures for morning‚ afternoon‚ evening‚ and night․ This feature helps optimize energy usage by adjusting temperatures when you’re away or sleeping․ Program each day independently or copy settings to multiple days for convenience․ The schedule ensures consistent comfort while reducing energy waste‚ making it ideal for busy households with varying routines․

3․4 Adjusting Temperature Settings

The Honeywell TH8320U1008 allows easy adjustment of temperature settings using its intuitive touchscreen interface․ Users can manually increase or decrease the setpoint temperature by touching the screen and selecting the desired temperature․ The thermostat also supports temporary overrides‚ enabling quick adjustments without altering the programmed schedule․ Additionally‚ the system provides visual feedback‚ ensuring precise control․ This feature enhances comfort and energy efficiency by allowing users to fine-tune their settings based on personal preferences or changing conditions throughout the day․

3․5 Energy-Saving Features and Tips

The Honeywell TH8320U1008 offers advanced energy-saving features‚ including Smart Response Technology‚ which learns your system’s response to temperature changes for optimal efficiency․ The 7-day programmable schedule allows you to customize settings for different days‚ reducing energy waste․ Tips include adjusting temperatures by 1-2 degrees when unoccupied or sleeping‚ using the energy-saving mode‚ and leveraging the thermostat’s geofencing capabilities if integrated with smart home systems․ Regularly updating schedules and maintaining consistent temperatures can further enhance energy savings and lower utility bills․

Advanced Features of the TH8320U1008

The Honeywell TH8320U1008 features Smart Response Technology for optimal temperature control‚ humidity management‚ and remote access via smart home integration‚ enhancing comfort and efficiency seamlessly․

4․1 Smart Response Technology

The Honeywell TH8320U1008 features Smart Response Technology‚ which learns the heating and cooling system’s performance to optimize temperature control․ It pre-cools or heats the home before scheduled times‚ ensuring consistent comfort․ This advanced feature integrates with humidity control‚ reducing moisture levels during cooling cycles․ Smart Response Technology also enhances energy efficiency by minimizing temperature swings and adapting to the system’s capabilities․ Users can enjoy seamless comfort while saving energy‚ with remote adjustments available through the Total Connect Comfort app for added convenience․

4․2 Humidity Control and Dehumidification

The Honeywell TH8320U1008 offers advanced humidity control‚ working seamlessly with compatible systems to maintain optimal moisture levels․ It prevents excessive humidity‚ reducing mold growth and improving indoor air quality․ The thermostat allows manual or automatic dehumidification settings‚ ensuring comfort and energy efficiency․ By integrating with the system’s capabilities‚ it optimizes cooling cycles to remove excess moisture without overcooling․ This feature enhances overall comfort while protecting the home from humidity-related issues‚ making it ideal for climates with high moisture levels․

4․3 Remote Access and Smart Home Integration

The Honeywell TH8320U1008 supports remote access through compatible smart home systems‚ enabling users to control their thermostat via smartphone apps or voice commands with Amazon Alexa or Google Assistant․ This integration allows for seamless temperature adjustments‚ scheduling‚ and energy monitoring from anywhere․ Geofencing capabilities automatically adjust settings based on your location‚ optimizing energy use․ The thermostat also integrates with other smart devices‚ creating a unified home automation experience․ This feature enhances convenience‚ energy efficiency‚ and overall comfort by allowing users to manage their environment remotely․

4․4 Advanced Installer Settings

The Honeywell TH8320U1008 offers advanced installer settings for precise system configuration․ These settings allow professionals to customize parameters such as heating and cooling stages‚ dehumidification controls‚ and system type compatibility․ Installers can adjust temperature differentials‚ cycle rates‚ and fan operation to optimize performance․ The thermostat also supports dual-fuel systems and geothermal configurations‚ ensuring flexibility for various HVAC setups․ These advanced settings enable tailored solutions for specific installations‚ enhancing overall system efficiency and user comfort while maintaining compatibility with a wide range of heating and cooling systems․

Troubleshooting Common Issues

The Honeywell TH8320U1008 user manual provides solutions for common issues like error codes‚ display problems‚ and connectivity․ It guides users through diagnostic steps and system resets effectively․

5․1 Common Error Codes and Solutions

The Honeywell TH8320U1008 user manual lists common error codes like E1‚ E2‚ and E30‚ which indicate issues such as temperature differences‚ sensor problems‚ or communication faults․ Solutions include checking wiring connections‚ ensuring proper system setup‚ and resetting the thermostat․ For E30‚ restarting the system or verifying dehumidification settings often resolves the issue․ Refer to the manual for detailed troubleshooting steps and explanations to address these codes effectively and restore optimal functionality․

5․2 Resetting the Thermostat to Factory Settings

To reset the Honeywell TH8320U1008 to factory settings‚ navigate to the installer menu by pressing and holding the Menu button․ Select Factory Reset and confirm․ This process restores default settings but retains the programmed schedule․ Ensure the thermostat is powered on during the reset․ After completion‚ the device will reboot‚ and you can reconfigure settings as needed․ Refer to the user manual for detailed steps to avoid data loss and ensure proper system operation․ This reset is ideal for resolving persistent issues or preparing for a new installation․ Always power cycle the thermostat after resetting for optimal performance․

5․3 Diagnosing and Resolving Connectivity Issues

Connectivity issues with the Honeywell TH8320U1008 can often be resolved by checking the Wi-Fi network connection․ Ensure the thermostat is connected to the correct network and that the signal strength is adequate․ Restart the router and thermostat to refresh the connection․ If issues persist‚ verify that the thermostat’s firmware is up-to-date․ Consult the user manual for troubleshooting steps or reset the device to factory settings if necessary․ For advanced connectivity problems‚ contact Honeywell’s customer support for assistance․ Regularly updating the thermostat’s software helps maintain stable connectivity and optimal performance․ Always refer to the official manual for detailed guidance․

5․4 Addressing Heating and Cooling System Problems

If the heating or cooling system isn’t responding‚ check for error codes on the thermostat display․ Perform a system check to ensure all components are functioning properly․ Verify that the system switch is set correctly (heat‚ cool‚ or auto)․ Power cycle the system by turning it off at the circuit breaker‚ then back on․ Ensure wiring connections are secure and correct․ If issues persist‚ consult the user manual for troubleshooting steps or contact a professional․ Regular maintenance and system checks can help prevent these issues and ensure optimal performance․ Always refer to the official manual for detailed guidance․

Maintenance and Care

Regularly clean the touchscreen and thermostat to ensure proper functionality․ Replace batteries as needed and update software for optimal performance․ Schedule annual maintenance checks for reliability․

6․1 Cleaning the Touchscreen and Thermostat

Regular cleaning ensures optimal performance and longevity of the Honeywell TH8320U1008 thermostat․ Use a soft‚ dry cloth to wipe the touchscreen and exterior․ For stubborn marks‚ lightly dampen the cloth with water‚ avoiding harsh chemicals or excessive moisture․ Turn off power before cleaning to prevent damage․ Avoid touching the screen with dirty or wet hands‚ as this can leave residue․ Cleaning helps maintain responsiveness and clarity‚ ensuring precise temperature control and energy efficiency․ Schedule this maintenance every 2-3 months for best results․

6․2 Replacing Batteries

To replace the batteries in your Honeywell TH8320U1008 thermostat‚ first ensure the system is powered off․ Locate the battery compartment‚ typically found on the rear or side of the unit․ Open it by sliding or lifting the cover‚ depending on the model․ Remove the old batteries and insert new ones‚ ensuring correct polarity․ Use high-quality‚ alkaline batteries (AA or AAA‚ as specified) to maintain performance․ Close the compartment securely and restore power․ Replace batteries annually or when the thermostat indicates low battery levels to prevent system interruptions․

6․3 Updating Software and Firmware

Regular software and firmware updates ensure your Honeywell TH8320U1008 thermostat operates at peak performance․ To update‚ first‚ check if your thermostat is connected to Wi-Fi․ Navigate to the settings menu and select “Update” or “Firmware Update․” Follow on-screen instructions to download and install the latest version․ If no Wi-Fi connection is available‚ download the update from Honeywell’s official website to a USB drive and transfer it to the thermostat․ Always reboot the device after an update to apply changes․ Regular updates enhance functionality and security․

6․4 Annual Maintenance Checks

Performing annual maintenance checks on your Honeywell TH8320U1008 thermostat ensures optimal performance and extends its lifespan․ Clean the touchscreen regularly to maintain responsiveness․ Inspect wiring connections for any signs of wear or damage․ Check battery levels if applicable and replace them as needed․ Verify that the thermostat is properly mounted and level․ Ensure all system settings align with your heating and cooling needs․ Refer to the user manual for detailed steps and recommendations․ Regular maintenance helps prevent issues and ensures your system runs efficiently year-round․

User Manual and Additional Resources

The official Honeywell TH8320U1008 user manual is available in English‚ French‚ and Spanish‚ providing detailed installation‚ programming‚ and troubleshooting guidance․ Download the PDF from Honeywell’s website or authorized sources for comprehensive instructions and optimal thermostat operation․

7․1 Navigating the Official Honeywell TH8320U1008 Manual

The official Honeywell TH8320U1008 manual is a comprehensive guide designed to help users understand and operate their thermostat effectively․ The manual is divided into clear sections‚ including installation‚ programming‚ and troubleshooting․ It features a detailed table of contents and index for easy navigation․ Available in multiple languages‚ the manual covers everything from basic setup to advanced features․ Users can download the PDF version from Honeywell’s website or authorized sources‚ ensuring access to the most up-to-date information․ The manual also includes visual aids and step-by-step instructions for clarity․

7․2 Accessing Installation and Programming Guides

The Honeywell TH8320U1008 installation and programming guides are readily available on Honeywell’s official website and authorized dealer portals․ These guides provide detailed step-by-step instructions for installing the thermostat‚ configuring system settings‚ and programming schedules․ The installation guide includes wiring diagrams and compatibility information‚ while the programming guide offers tips for optimizing energy usage․ Both documents are available in PDF format‚ making them easy to download and print․ They are essential resources for ensuring proper setup and maximizing the thermostat’s functionality․

7․3 Online Support and Customer Service

Honeywell offers comprehensive online support for the TH8320U1008 thermostat‚ including access to user manuals‚ installation guides‚ and troubleshooting resources․ The official Honeywell website provides downloadable PDF manuals‚ while authorized dealers like SupplyHouse․com offer additional support materials․ Customers can also access FAQs‚ video tutorials‚ and dedicated customer service through Honeywell’s support portal․ For direct assistance‚ users can contact Honeywell’s customer service team via phone‚ email‚ or live chat․ These resources ensure seamless troubleshooting and optimal use of the thermostat․ Visit https://s3․amazonaws․com/s3․supplyhouse;com/product_files/TH8320U1008-User․pdf for detailed support․

7․4 Downloading the PDF Manual

The Honeywell TH8320U1008 user manual is readily available for download as a PDF from Honeywell’s official website and authorized distributors like SupplyHouse․com․ The manual provides detailed instructions for installation‚ programming‚ and troubleshooting․ Users can access the PDF by visiting https://s3․amazonaws․com/s3․supplyhouse․com/product_files/TH8320U1008-User․pdf․ This downloadable version ensures easy access and printing‚ allowing users to reference the guide anytime․ The PDF format is compatible with most devices‚ making it convenient for homeowners and installers to navigate and use the thermostat effectively․

The Honeywell TH8320U1008 user manual provides comprehensive guidance‚ ensuring optimal use of the thermostat’s advanced features‚ programmable scheduling‚ and energy-saving capabilities for enhanced home comfort and efficiency․

8․1 Summary of Key Features and Benefits

The Honeywell TH8320U1008 offers a touchscreen interface‚ 7-day programmable scheduling‚ and compatibility with various HVAC systems․ It features smart response technology for optimal temperature control‚ humidity management‚ and energy-saving modes․ Remote access via smart home integration enhances convenience․ The thermostat supports up to 3 heat/2 cool stages and is suitable for gas‚ oil‚ or electric systems․ Its intuitive design and advanced settings ensure comfort and efficiency‚ making it a versatile choice for modern homes․ The user manual provides detailed guidance for installation‚ programming‚ and troubleshooting․

8․2 Final Tips for Optimal Performance

For optimal performance‚ regularly clean the touchscreen and ensure proper wiring connections․ Update the thermostat’s software to access the latest features․ Use the programmable schedule to align temperature settings with your daily routine․ Adjust humidity levels to maintain comfort and prevent moisture issues․ Utilize energy-saving modes to reduce consumption․ Check and replace batteries as needed to avoid interruptions․ Refer to the user manual for advanced settings and troubleshooting guidance to ensure your Honeywell TH8320U1008 operates efficiently and effectively year-round․

bunn vpr series manual

Welcome to the Bunn VPR Series Manual. This guide provides essential information for setting up, operating, and maintaining your coffee maker. Visit Bunn’s website for the latest updates and support resources to ensure optimal performance.

Overview of the Bunn VPR Series

The Bunn VPR Series is a line of high-quality coffee makers designed for both home and commercial use. Known for their durability and ease of operation, these machines are popular among coffee enthusiasts. The series includes models like the VPR and VPS, which offer features such as thermal carafes, warmers, and advanced brewing technology. The Bunn VPR Series is praised for its stainless steel construction, which ensures long-lasting performance. These coffee makers are ideal for those who value simplicity and consistency in their brewing process. Whether for personal use or in a professional setting, the Bunn VPR Series delivers reliable results. For more detailed information, users can refer to the official Bunn website, which provides comprehensive resources and guides.

Importance of the Manual for Users

The Bunn VPR Series Manual is an essential resource for users to maximize the performance and longevity of their coffee maker. It provides detailed instructions for installation, operation, and maintenance, ensuring safe and efficient use. The manual also includes troubleshooting guides to address common issues, helping users resolve problems quickly. By following the manual’s recommendations, users can maintain optimal brewing quality and extend the lifespan of their machine. Additionally, the manual outlines warranty conditions and maintenance schedules, which are critical for preserving the manufacturer’s guarantee. Regular updates to the manual are available on Bunn’s official website, ensuring users always have access to the most current information. Referencing the manual is the best way to unlock the full potential of the Bunn VPR Series and enjoy a superior coffee-making experience.

Where to Find the Latest Manual Updates

To ensure you have the most up-to-date information for your Bunn VPR Series, visit the official Bunn-O-Matic website at www;bunn.com. This platform offers free access to the latest versions of the Operating Manual, Service Manual, and Illustrated Parts Catalog. Regularly checking for updates ensures you have the most accurate instructions for installation, operation, and maintenance. Additionally, the website provides quick downloads of PDF manuals for easy reference. For models like the VPR and VPS Series, these resources are indispensable for troubleshooting and optimizing performance. By accessing the latest manual updates, you can ensure your coffee maker operates efficiently and maintains its longevity. The Bunn website is the most reliable source for all your manual needs, offering convenience and reliability.

Installation and Setup

Welcome to the Bunn VPR Series Manual. This section guides you through the installation and setup process, ensuring your coffee maker is ready for optimal performance. Refer to the latest manual updates on Bunn’s official website for detailed instructions and troubleshooting tips specific to your model.

Pre-Installation Requirements

Before installing your Bunn VPR Series coffee maker, ensure you meet all pre-installation requirements. Review the latest manual from Bunn’s official website for specific guidelines. Verify the power supply matches the machine’s specifications and ensure access to a water supply. Allocate sufficient space for the unit, considering ventilation and ease of use. Familiarize yourself with the warranty terms and registration process. Check for any updates or additional resources, such as video tutorials, to aid in the setup. Proper preparation ensures a smooth installation and optimal performance of your coffee maker.

Step-by-Step Installation Guide

Begin by carefully unboxing and inspecting the Bunn VPR Series coffee maker for any damage. Place the machine on a stable, level surface, ensuring proper ventilation. Connect the water supply line according to the manual’s instructions, and plug in the power cord. Refer to the latest manual from Bunn’s website for specific installation steps. Once installed, test the machine by running a few cycles to ensure proper function. For detailed guidance, visit Bunn-O-Matic’s official site or consult the Illustrated Parts Catalog. Proper installation ensures safety and optimal performance of your coffee maker.

Initial Setup and Configuration

After installation, plug in the Bunn VPR Series coffee maker and allow it to power up. Set the digital clock by pressing and holding the SET button, then adjust the time using the arrow keys. Next, ensure the machine is filled with fresh, filtered water. Refer to the manual for specific water quality recommendations. Adjust the temperature settings if desired, typically between 195°F and 205°F for optimal brewing. Run a few test cycles without coffee to ensure proper water flow and heating. For further guidance, download the latest manual from Bunn’s website. This initial setup ensures your machine is ready for brewing and maintains its performance over time.

Operating Instructions

Operating the Bunn VPR Series involves inserting a Bunn filter, adding coffee grounds, and brewing. Refer to the manual for detailed steps and customization options.

Basic Brewing Instructions

Start by inserting a Bunn filter into the funnel. Add fresh coffee grounds according to your preference. Pour water into the tank, ensuring it reaches the recommended level. Place the decanter under the funnel and turn on the brew switch. The machine will heat the water and dispense it evenly over the grounds. Allow the brewing cycle to complete, which typically takes 3-4 minutes. Once done, remove the decanter and serve. For optimal flavor, use filtered water and the correct coffee-to-water ratio. Regularly clean and descale the machine to maintain performance. Refer to the manual for detailed steps and customization options to enhance your brewing experience.

Advanced Features and Customization

The Bunn VPR Series offers advanced features to enhance your brewing experience. Adjust the temperature to suit your preference, ensuring optimal extraction. Utilize the pre-infusion feature for a more balanced flavor by allowing the coffee grounds to bloom before full brewing begins. Customize the brew volume and strength to match your needs, whether you prefer a single cup or a full decanter. For added convenience, program the machine to start brewing at a specific time, ensuring fresh coffee is ready when you need it. Explore these settings through the intuitive controls to tailor your coffee experience. Refer to the manual for detailed instructions on activating and adjusting these features to maximize your machine’s potential.

Regular Maintenance Tips

Regular maintenance is crucial to ensure your Bunn VPR Series coffee maker performs optimally; Clean the machine daily by wiping down surfaces and emptying the brew basket. Descale every 3-6 months to prevent mineral buildup, following the instructions in the manual. Check and replace the water filter as recommended to maintain water quality. Run a cleaning cycle weekly to remove any residue and bacteria. Lubricate moving parts periodically to ensure smooth operation. Refer to the manual for specific guidance on these procedures. Proper care will extend the lifespan of your machine and ensure consistent brewing results. By following these tips, you can keep your Bunn VPR Series in excellent condition and enjoy perfect coffee every time.

Maintenance and Troubleshooting

Regular cleaning, descaling, and troubleshooting ensure optimal performance. Refer to the manual for detailed instructions on maintaining and resolving common issues with your Bunn VPR Series coffee maker.

Cleaning and Sanitizing the Machine

Regular cleaning and sanitizing are crucial for maintaining the performance and longevity of your Bunn VPR Series coffee maker. Start by turning off and unplugging the machine for safety. Remove any used coffee grounds and filters, and wipe down the exterior with a damp cloth. For internal cleaning, insert a Bunn filter into the funnel and pour fresh water into the tank. Run a brewing cycle to rinse the system. For deeper sanitizing, mix a solution of water and vinegar or baking soda, pour it into the tank, and run another cycle. After cleaning, dry all surfaces thoroughly to prevent mineral buildup. Regular sanitizing helps eliminate bacteria and odors, ensuring a fresh taste in every brew. Refer to the manual for detailed instructions and recommendations for cleaning products. Consistent maintenance will keep your coffee maker functioning optimally and delivering great results.

Troubleshooting Common Issues

Troubleshooting your Bunn VPR Series coffee maker is essential for resolving common issues quickly. If the machine doesn’t power on, check the electrical connection and ensure it’s properly plugged in. For water flow problems, descale the machine to remove mineral buildup. If brewing stops mid-cycle, inspect the water tank for low levels or blockages. Excessive noise may indicate worn or misaligned parts, which can be replaced. Refer to the manual for specific error codes and solutions. Regular maintenance, such as cleaning and descaling, can prevent many issues. If problems persist, contact Bunn Customer Support for assistance. Always follow the manufacturer’s guidelines to ensure safety and optimal performance. By addressing issues promptly, you can extend the lifespan of your coffee maker and enjoy consistent brewing results.

Descaling and Water Treatment

Descaling and proper water treatment are crucial for maintaining your Bunn VPR Series coffee maker. Mineral buildup from water can cause machine malfunction and affect brew quality. Regular descaling removes these deposits, ensuring optimal performance. Use a Bunn-approved descaling solution and follow the manual’s instructions for the process. The frequency of descaling depends on water hardness and usage. Neglecting this step can lead to scaling issues, which may require professional servicing. Always use filtered or softened water to minimize mineral content. For best results, refer to the manual for specific guidelines on water treatment and descaling procedures. Proper maintenance ensures your coffee maker operates efficiently and delivers consistent results. If unsure, contact Bunn Customer Support for assistance.

Warranty and Support

The Bunn VPR Series is backed by a one-year warranty covering defects in material and workmanship. Extended warranties apply to electronic components. Contact Bunn Customer Support for assistance or to register your product for warranty coverage.

Understanding the Bunn Warranty

The Bunn VPR Series is covered by a comprehensive warranty ensuring protection against defects in material and workmanship. The standard warranty period is one year from the date of installation, during which Bunn will address any issues arising from faulty manufacturing. Additionally, electronic circuit and control boards are warranted for three years, providing extended coverage for critical components. To maintain warranty validity, users must adhere to specific conditions, such as promptly notifying Bunn of any issues and, if required, shipping defective parts to an authorized service location. This warranty underscores Bunn’s commitment to quality and customer satisfaction. For detailed terms and conditions, refer to the official Bunn VPR Series Manual or contact Bunn Customer Support.

How to Register Your Product

Registering your Bunn VPR Series coffee maker is a straightforward process that ensures warranty validation and access to exclusive support resources. To register, visit the official Bunn-O-Matic website at www.bunn.com. Navigate to the product registration section, where you will be prompted to create an account or log in if you already have one. Fill out the registration form with your personal details, product serial number, and purchase information. Once submitted, your product will be officially registered, and you will receive confirmation via email. Registration is essential for activating your warranty and staying updated on product support, maintenance tips, and potential updates. For assistance, contact Bunn Customer Support at (217) 529-6601 or visit their website for additional guidance.

Contacting Bunn Customer Support

For any inquiries or issues with your Bunn VPR Series coffee maker, Bunn Customer Support is available to assist. You can reach them by phone at (217) 529-6601 or by visiting their official website at www.bunn.com. The website provides a comprehensive support section with resources, FAQs, and contact forms. For warranty-related matters, ensure to have your product serial number and purchase details ready. If requested, you may need to ship defective equipment to an authorized service location, with prior authorization from Bunn. Their team is dedicated to resolving issues promptly and ensuring your coffee maker operates at its best. For additional support, explore the online manuals, troubleshooting guides, and video tutorials available on their website.

Parts and Accessories

Explore the Bunn VPR Series parts diagram and compatible accessories to enhance your coffee maker’s performance. Visit Bunn’s website for detailed guides and support resources to ensure optimal functioning.

Identifying Machine Parts

Welcome to the Bunn VPR Series Manual section on identifying machine parts. This guide helps you familiarize yourself with the components of your coffee maker. The Bunn VPR Series includes key parts like the brew funnel, thermal carafe, and control panel. Refer to the Illustrated Parts Catalog available on Bunn’s website for detailed diagrams and descriptions. Understanding each part ensures proper usage and maintenance. For example, the brew funnel is essential for holding coffee grounds, while the thermal carafe keeps coffee warm. Visit Bunn-O-Matic at www.bunn.com for the latest manuals and resources to help you identify and maintain your machine effectively. This section is designed to provide a clear overview of the VPR Series components, ensuring you get the most out of your coffee maker.

Ordering Replacement Parts

Ordering replacement parts for your Bunn VPR Series is a straightforward process. Visit the official Bunn-O-Matic website at www.bunn.com to access the Illustrated Parts Catalog. This resource provides detailed diagrams and descriptions of all machine components, making it easy to identify the specific part you need. You can also refer to the Operating Manual or Service Manual for part numbers. Once identified, parts can be purchased directly through Bunn’s online store or authorized distributors. Ensure to use genuine Bunn parts to maintain your machine’s performance and warranty validity. For assistance, contact Bunn Customer Support at (217) 529-6601 or visit their support page for guidance. Regularly updating your parts ensures optimal brewing and longevity of your VPR Series coffee maker.

Compatible Accessories

The Bunn VPR Series offers a range of compatible accessories to enhance your coffee-making experience. These include glass decanters, thermal carafes, and optional warming stations. Visit the Bunn-O-Matic website to explore these accessories, designed to fit seamlessly with your machine. Genuine Bunn parts ensure optimal performance and maintain your warranty. Accessories like additional funnels, filters, and cleaning supplies are also available. For convenience, you can purchase these items directly from Bunn’s online store or authorized retailers; Regularly updating your accessories ensures your VPR Series remains in top condition. Always choose genuine Bunn products to guarantee compatibility and quality. These accessories are designed to complement your coffee maker, providing years of reliable service and superior brewing results.

Additional Resources

Visit the Bunn-O-Matic website for online manuals, video tutorials, and community forums. These resources provide comprehensive support for your Bunn VPR Series coffee maker, ensuring optimal use and troubleshooting.

Online Manuals and Guides

The Bunn-O-Matic website offers a wealth of resources, including the latest Operating Manual, Service Manual, and Illustrated Parts Catalog for the VPR Series. These documents are available for free online viewing or downloading in PDF format, ensuring you always have access to the most up-to-date information. Additionally, video tutorials and demos provide visual guidance for setup, operation, and troubleshooting. The website also features a searchable database of manuals, making it easy to find specific guides for your coffee maker. For further assistance, community forums and support groups are available, where users can share experiences and solutions. By utilizing these online resources, you can maximize the performance and longevity of your Bunn VPR Series coffee maker.

Video Tutorials and Demos

Video tutorials and demos are excellent resources for understanding and mastering your Bunn VPR Series coffee maker. These visual guides are available on the Bunn-O-Matic website and platforms like YouTube, offering step-by-step instructions for installation, brewing, and troubleshooting. For example, a video explaining how to operate the VP-17 coffee brewer provides insights applicable to the VPR Series. Another tutorial on GoldRoast’s website demonstrates the features of the Bunn VPR Coffee Maker, covering its capabilities in detail. These videos are particularly helpful for visual learners, ensuring a smooth and efficient setup process. By watching these demos, users can explore advanced features and maintenance tips, enhancing their overall experience with the Bunn VPR Series. Accessing these resources is free and convenient, making them a valuable addition to your user manual.

Community Forums and Support Groups

Community forums and support groups are invaluable resources for Bunn VPR Series users. These platforms allow you to connect with other owners, share experiences, and gain insights into optimizing your coffee maker’s performance. Websites like Parts Town and Bunn’s official forums offer discussions on troubleshooting, maintenance, and customization. Users often post tips on resolving common issues, such as descaling or brew temperature adjustments. Additionally, these communities provide access to peer-to-peer support, where experienced users can guide newcomers through setup and operation. For parts and repairs, forums like Parts Town host detailed threads on identifying and ordering replacement components. Engaging with these communities ensures you stay informed and empowered to make the most of your Bunn VPR Series coffee maker.