Archive title

Autem vel eum iriure dolor in hendrerit in vulputate velit esse molestie consequat, vel illum dolore eu feugiat nulla facilisis at vero eros et dolore feugait.

Monthly Archive June 9, 2024

overdrive manual transmission

Overdrive is a gear ratio higher than 1:1, allowing the driveshaft to spin faster than the engine, reducing engine RPM and improving fuel efficiency at high speeds. It enhances performance, lowers engine stress, and is commonly used in both classic and modern vehicles, becoming increasingly popular during the 1970s oil crisis as a fuel-saving solution. While often integrated into modern transmissions, overdrive in manuals is typically the highest gear, providing smoother cruising and better mileage.

1.1 Definition and Purpose of Overdrive

Overdrive is a gear ratio greater than 1:1, allowing the driveshaft to spin faster than the engine. This reduces engine RPM at high speeds, improving fuel efficiency and lowering wear. Its primary purpose is to enhance performance during cruising, enabling smoother operation and better mileage. Overdrive is particularly beneficial for highway driving, where maintaining lower engine speeds reduces friction and pumping losses, thereby conserving fuel and minimizing mechanical stress.

1.2 Brief History of Overdrive in Manual Transmissions

Overdrive emerged in the 1930s as a separate module for three-speed transmissions, becoming popular in the 1960s and 1970s. Initially, it was a bolt-on option, especially in European cars, to improve fuel efficiency and sporty driving. By the late 1970s, overdrive became integrated into standard transmissions, with modern designs incorporating it as the highest gear. This evolution reflects its growing importance in optimizing performance and efficiency, transitioning from an optional feature to a standard component in manual transmissions.

Benefits of Overdrive in Manual Transmissions

Overdrive enhances fuel efficiency, reduces engine wear, and provides smoother high-speed cruising by lowering RPMs. It optimizes performance, minimizes mechanical stress, and improves driving comfort, making it a valuable feature for both classic and modern vehicles.

2.1 Improved Fuel Efficiency

Overdrive significantly enhances fuel efficiency by reducing engine RPM at high speeds. Lower engine speed decreases internal friction and pumping losses, which consume fuel. With overdrive, the engine operates more efficiently, especially on highways, leading to better mileage. This feature is particularly beneficial for long-distance driving, where sustained high speeds would otherwise increase fuel consumption. By maintaining optimal engine performance, overdrive helps drivers save on fuel costs while reducing environmental impact.

2.2 Reduced Engine Wear and Tear

Overdrive reduces engine wear by lowering RPM at high speeds, minimizing mechanical stress. Prolonged high RPM operation can lead to increased friction and heat, accelerating component wear. By allowing the engine to run at a slower, more efficient pace, overdrive extends the lifespan of critical parts like piston rings and cylinders. This reduction in wear also contributes to lower maintenance costs over time, making overdrive a practical choice for both performance and longevity.

2.3 Smoother High-Speed Cruising

Overdrive enables smoother high-speed cruising by reducing engine RPM and vibrations at higher speeds. This results in a quieter and more comfortable driving experience. By allowing the engine to operate within a more efficient RPM range, overdrive minimizes mechanical stress and noise, making long-distance driving more enjoyable. The reduced engine speed also contributes to better stability and control, ensuring a refined ride even at elevated velocities.

How Overdrive Works in Manual Transmissions

Overdrive in manual transmissions operates by providing a higher gear ratio, allowing the driveshaft to spin faster than the engine RPM. This reduces engine speed and enhances fuel efficiency, particularly at high speeds. The driver manually engages overdrive, typically by shifting into the highest gear, to optimize performance and comfort during cruising conditions.

3.1 Gear Ratios and Their Impact on Performance

Gear ratios in overdrive manual transmissions significantly influence performance. Lower ratios (e.g., 4:1) provide high torque for acceleration, while higher ratios (e.g., 1:2) reduce engine RPM at high speeds, improving fuel efficiency. Overdrive gears, typically above 1:1, allow the driveshaft to spin faster than the engine, optimizing cruising efficiency. This balance between torque and speed ensures enhanced performance across various driving conditions, from low-speed maneuvering to high-speed cruising, making overdrive a versatile feature for drivers seeking both power and economy.

3.2 Engagement Methods: Manual vs. Automatic

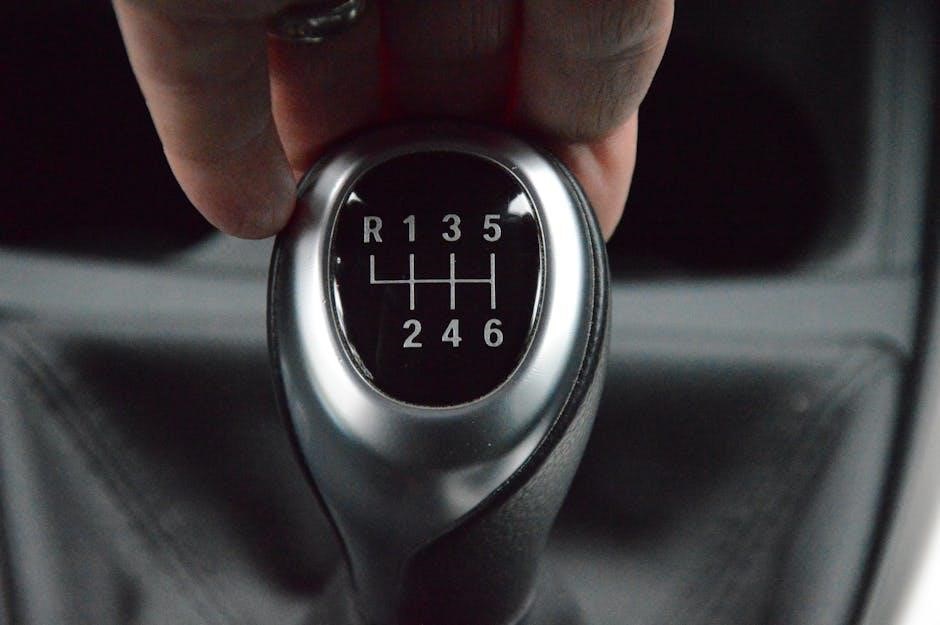
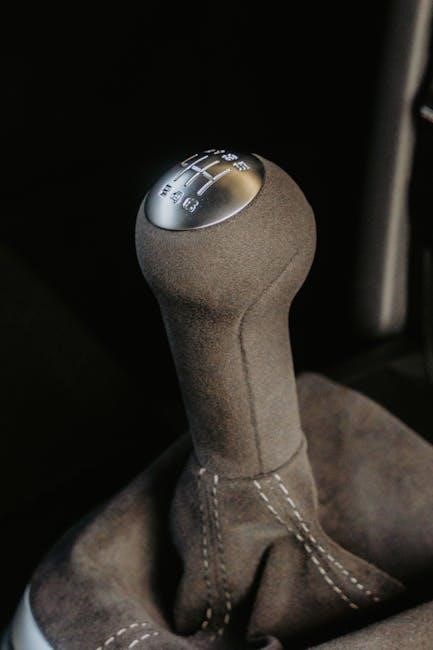
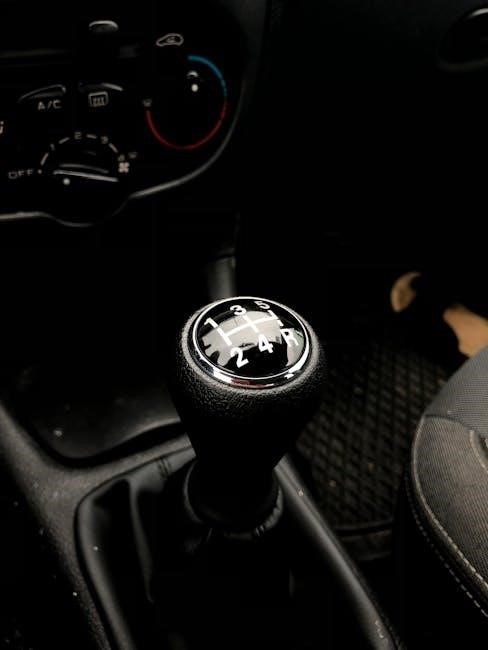
In manual transmissions, overdrive is engaged by shifting into the highest gear, typically fifth or sixth, which drivers must do manually. This requires active participation, as the driver must feel the need to reduce engine RPM for efficiency. In contrast, automatic transmissions often engage overdrive automatically at higher speeds, though some systems allow manual override. Both methods aim to reduce engine RPM during cruising, enhancing fuel efficiency and reducing wear, but manual control offers more driver precision and awareness of gear changes.

3.3 The Role of the Driver in Utilizing Overdrive

The driver plays a crucial role in effectively using overdrive in manual transmissions. They must recognize when to shift into overdrive, typically at high speeds, to lower engine RPM and improve fuel efficiency. Proper engagement requires understanding road conditions and vehicle load. Drivers should avoid overdrive during towing or heavy strain to prevent torque loss. Awareness and skill in gear shifting ensure optimal performance, making the driver’s involvement essential for maximizing the benefits of overdrive in manual transmissions.

Types of Overdrive Systems

Overdrive systems include built-in gears, bolt-on units, and electric/hydraulic systems, each offering distinct advantages for fuel efficiency, performance, and integration into manual transmissions.

4.1 Built-In Overdrive Gears

Built-in overdrive gears are integrated directly into the transmission, offering seamless operation without additional components. They provide higher gear ratios, reducing engine RPM at high speeds for improved fuel efficiency and smoother cruising. Modern transmissions often feature these gears as standard, especially in five-speed and six-speed setups. This design eliminates the need for external units, enhancing durability and simplifying maintenance. Built-in overdrive gears are a common feature in contemporary vehicles, optimizing performance and driver comfort.

4.2 Bolt-On Overdrive Units

Bolt-on overdrive units are external components installed behind the main transmission, offering additional gear ratios for improved fuel efficiency. These units are popular for classic cars, providing overdrive functionality without modifying the existing transmission. They are typically stronger than built-in systems and can be engaged manually or automatically. Bolt-on units are ideal for drivers seeking enhanced performance and mileage without the cost of a full transmission swap, making them a practical upgrade for vintage and high-performance vehicles.

4.3 Electric and Hydraulic Overdrive Systems

Electric and hydraulic overdrive systems utilize advanced technology for seamless gear engagement. These systems automatically adjust gear ratios based on driving conditions, optimizing fuel efficiency and performance. Hydraulic systems rely on fluid pressure for smooth transitions, while electric systems use sensors and actuators for precise control. Both offer superior convenience and adaptability, making them ideal for modern vehicles. They minimize driver intervention, ensuring optimal gear selection without manual shifting, thus enhancing the overall driving experience and vehicle efficiency.

Driving Techniques with Overdrive

Driving techniques with overdrive involve using high gears for fuel efficiency at high speeds, avoiding overdrive during heavy loads, and smartly shifting before inclines for optimal performance.

5.1 When to Use Overdrive

Use overdrive during steady, high-speed cruising on flat roads to maximize fuel efficiency and reduce engine wear. It is ideal for highway driving where maintaining consistent speeds benefits from lower RPMs. Overdrive should be engaged when the vehicle is at a stable speed, typically above 30 mph, to ensure smooth operation and optimal performance. Avoid using overdrive during heavy loads or steep inclines to prevent strain on the engine and transmission.

5.2 When Not to Use Overdrive

Avoid using overdrive during heavy loads, towing, or steep inclines, as it reduces torque and can strain the engine. Overdrive should not be engaged in low-speed situations or when additional control is needed, such as in city traffic or hilly terrain. Disengaging overdrive ensures better engine braking and prevents potential damage to the transmission. It is also advisable to deactivate overdrive when driving in conditions that require more power or control, such as construction zones or uneven roads.

5.3 Shifting Strategies for Optimal Performance

For optimal performance, engage overdrive at high speeds on flat terrain to reduce engine strain and improve fuel efficiency. Avoid sudden shifts into overdrive; instead, use smooth transitions to maintain control. Downshift before steep inclines or when towing to maintain torque and engine braking. Monitor RPM levels to ensure the engine stays within an efficient range. Proper shifting strategies enhance both performance and longevity of the transmission, ensuring a balanced driving experience.

Fuel Efficiency and Overdrive

Overdrive enhances fuel efficiency by reducing engine RPM at high speeds, lowering friction and pumping losses. This allows the engine to operate more efficiently, conserving fuel and minimizing wear.

6.1 The Relationship Between RPM and Fuel Consumption

Higher engine RPM increases fuel consumption due to greater internal friction and pumping losses. Overdrive reduces RPM by allowing the driveshaft to spin faster than the engine, lowering friction and improving efficiency. This relationship highlights how overdrive optimizes fuel use by maintaining lower engine speeds during high-speed cruising, thus reducing the energy wasted on internal losses and promoting better mileage.

6.2 Real-World Fuel Economy Improvements

Overdrive significantly enhances fuel economy by reducing engine RPM at high speeds. For example, shifting into overdrive can improve mileage from 16 mpg to 25 mpg, as seen in some manual transmission upgrades. This reduction in engine speed lowers fuel consumption, especially during highway driving. Overdrive’s ability to maintain optimal engine RPM reduces wear and tear, further contributing to long-term fuel efficiency and cost savings for drivers.

6.3 Comparing Overdrive to Other Fuel-Saving Technologies

Overdrive stands out as a cost-effective fuel-saving solution compared to other technologies. Unlike expensive modifications like gear ratio changes or aftermarket clutch systems, overdrive integrates seamlessly into existing transmissions. It offers similar benefits to automatic transmissions but with manual control, providing drivers with both efficiency and performance. Overdrive’s simplicity and proven results make it a preferred choice over complex systems, delivering tangible fuel economy improvements without compromising driving experience or incurring high costs.

Limitations and Drawbacks of Overdrive

Overdrive reduces torque, potentially hindering performance in low-speed or towing situations. It can also cause increased wear on components if misused, especially under heavy strain.

7.1 Reduced Torque in Overdrive

Overdrive reduces engine torque due to higher gear ratios, which can limit acceleration and performance in low-speed or heavy-load conditions. This makes it less ideal for towing or hauling, where higher torque is needed. Drivers may notice reduced responsiveness when climbing steep inclines or merging into traffic. However, the trade-off is improved fuel efficiency and lower engine wear at cruising speeds, making overdrive a compromise between performance and economy.

7.2 Potential for Increased Wear on Components

Overdrive can lead to increased wear on transmission components if misused, particularly in high-stress situations like towing or hauling heavy loads. The overdrive gear, often weaker than other gears, may endure additional strain, leading to premature wear. Proper usage and regular maintenance are essential to mitigate this risk and extend the lifespan of the transmission. Drivers should avoid overdrive in low-speed or heavy-duty conditions to prevent unnecessary component stress and potential damage.

7.3 Limitations in Low-Speed or Towing Situations

Overdrive can be less effective in low-speed or towing situations due to reduced torque. Engaging overdrive in these conditions may lead to increased engine wear and decreased control. Drivers should deactivate overdrive when towing or climbing steep inclines to maintain necessary torque and engine performance. This helps prevent strain on the transmission and ensures optimal vehicle control under heavy loads.

Maintenance and Troubleshooting

Regular fluid checks and gear inspections are crucial for overdrive longevity. Worn gears or low fluid levels can cause engagement issues. Addressing clutch problems early prevents further damage.

8.1 Common Issues with Overdrive Gears

Overdrive gears often face issues like worn teeth, which can cause slipping or failure to engage. Low transmission fluid levels or contamination may also lead to poor performance. Additionally, excessive heat from heavy use can damage gear components. In older models, weak transmission cases, such as those made of aluminum, are prone to cracking under stress. Regular maintenance, including fluid changes and inspections, is essential to prevent these problems and ensure smooth operation.

8.2 Maintenance Tips for Longevity

Regular fluid changes are crucial for overdrive gears, as clean lubrication prevents wear and heat buildup. Inspect the transmission case for cracks and ensure all mounts are secure. Avoid extreme loads and towing without proper setup, as this can strain the overdrive. Keep the engine in good tune to maintain optimal RPM ranges. Replace worn synchronizers and bearings promptly to prevent further damage. Consistent maintenance ensures smooth operation and extends the life of the overdrive system.

8.3 Troubleshooting Overdrive Engagement Problems

Diagnosing overdrive issues starts with checking the gear engagement. If overdrive doesn’t activate, inspect the linkage or electrical connections for damage or wear. Low transmission fluid levels or dirty fluid can prevent proper engagement. Listen for unusual noises during shifting, as they may indicate worn components. If the overdrive disengages unexpectedly, check for faulty solenoids or sensors. In manual systems, ensure the clutch is fully disengaged before shifting. Addressing these issues promptly prevents further damage and ensures reliable overdrive performance.

Historical Development of Overdrive

Overdrive emerged in the 1930s as a separate module for three-speed transmissions, enhancing fuel efficiency. By the 1960s and 1970s, it became integral to manual transmissions, especially in European cars, improving mileage and performance. The 1980s saw overdrive as a standard feature, reducing engine wear and optimizing high-speed driving, marking its evolution into modern transmissions.

9.1 Early Implementations in the 1930s

Overdrive first appeared in the 1930s as a separate module for three-speed transmissions, offering a higher gear ratio to reduce engine RPM at high speeds. This innovation improved fuel efficiency and cruising comfort, becoming a precursor to modern multi-speed transmissions. Early systems were often mechanical and optional, paving the way for future integration into standard transmission designs. These early implementations laid the groundwork for overdrive’s widespread adoption in later decades.

9.2 Evolution Through the 1960s and 1970s

Overdrive became more widespread in the 1960s and 1970s, particularly in European cars, as a bolt-on option to enhance fuel efficiency and sporty driving. By the 1970s, it was increasingly integrated into standard transmissions, driven by the oil crisis and stricter fuel economy regulations. This era saw overdrive transition from an optional feature to a standard component, reducing engine wear and improving high-speed cruising efficiency. Its adoption marked a significant step in transmission technology advancement.

9.3 Modern Integration into Manual Transmissions

Today, overdrive is seamlessly integrated into modern manual transmissions, often as the highest gear. This allows drivers to engage overdrive naturally during high-speed driving without additional controls. Advances in materials and technology have made overdrive gears more durable and efficient, reducing engine wear and improving fuel economy. Modern systems also offer smoother transitions and quieter operation, enhancing overall driving comfort and performance. This integration reflects ongoing innovations in transmission design, catering to both efficiency and driver experience.

Overdrive in Modern Manual Transmissions

Modern manual transmissions often feature overdrive as the highest gear, enhancing fuel efficiency and reducing engine wear at high speeds. Advances in technology and materials have improved durability and smoothness, making overdrive a standard feature for optimal performance and efficiency in contemporary vehicles.

10.1 Current Applications and Designs

Modern manual transmissions widely incorporate overdrive as the top gear, optimizing fuel efficiency and reducing engine strain during high-speed driving. Contemporary designs often feature built-in overdrive gears, eliminating the need for bolt-on units. These systems are seamlessly integrated, allowing drivers to engage overdrive without additional controls, thus enhancing both performance and driver convenience. The trend continues to focus on lightweight materials and advanced gear ratios to maximize efficiency and durability.

10.2 Advances in Technology and Materials

Modern overdrive manual transmissions benefit from lightweight materials like aluminum and carbon fiber, reducing weight while maintaining strength. Advanced gear-cutting technologies ensure precise ratios and smoother engagement. Surface coatings and lubrication improvements minimize wear and friction, enhancing durability. Electronic integration, such as adaptive shift algorithms, optimizes gear changes for driving conditions. These innovations improve fuel efficiency, reduce noise, and provide a more refined driving experience, making overdrive systems more reliable and efficient than ever before.

10.3 Future Trends in Overdrive Development

Future overdrive systems will likely integrate advanced materials like carbon fiber and lightweight alloys to enhance durability while reducing weight. Electronic controls and adaptive gear ratios may become standard, optimizing performance for varying driving conditions. Hybrid overdrive systems, combining manual and automatic features, could emerge to improve efficiency. Additionally, advancements in lubrication and gear design will further reduce friction and wear, ensuring smoother operation. These innovations will make overdrive transmissions more efficient, sustainable, and driver-friendly in the coming years.

Frequently Asked Questions

Is overdrive worth it for my vehicle? How does it compare to other gears? Can I install an aftermarket overdrive system? These questions are commonly asked by drivers seeking to enhance their driving experience and improve fuel efficiency with overdrive manual transmissions.

11.1 Is Overdrive Worth It for My Vehicle?

Overdrive is highly beneficial for vehicles, especially during highway driving, as it reduces engine RPM and enhances fuel efficiency. For drivers prioritizing mileage and lower engine wear, overdrive is a valuable feature. However, for those towing heavy loads or needing maximum torque, overdrive may not be ideal. Assessing your driving habits and needs will help determine if overdrive is worth considering for your vehicle.

11.2 How Does Overdrive Compare to Other Gears?

Overdrive differs from standard gears by providing a higher ratio than 1:1, allowing the driveshaft to spin faster than the engine. Unlike lower gears optimized for torque and acceleration, overdrive prioritizes efficiency at high speeds. It reduces engine RPM, lowering fuel consumption and wear. While other gears focus on performance or towing, overdrive excels in cruising conditions, making it a specialized yet valuable addition to a transmission system.

11.3 Can I Install an Aftermarket Overdrive System?

Installing an aftermarket overdrive system is possible, offering benefits like improved fuel efficiency and reduced engine wear. Options include bolt-on units or electronic systems, which can be added to existing transmissions. However, costs can be high, and compatibility must be checked. For instance, the GearVendors overdrive is a popular choice, though it may require significant investment. Ensure the system suits your vehicle’s make and model for optimal performance and durability.

Overdrive manual transmissions offer enhanced fuel efficiency, reduced engine wear, and smoother high-speed performance, making them a valuable feature for drivers seeking optimal vehicle performance and longevity.

12.1 Summary of Key Points

Overdrive manual transmissions reduce engine RPM at high speeds, enhancing fuel efficiency and lowering wear. They provide smoother cruising and are typically the highest gear, offering better mileage. Historically, overdrive was a bolt-on option but is now integrated. It’s beneficial for highway driving but less so for towing or low-speed situations. Proper use and maintenance are crucial for longevity, making overdrive a valuable feature for optimal performance and efficiency in modern vehicles.

12.2 Final Thoughts on Overdrive Manual Transmissions

Overdrive manual transmissions offer a balance of efficiency and performance, making them a practical choice for drivers seeking improved fuel economy and reduced engine strain. While they excel in high-speed conditions, their limitations in low-speed or towing scenarios should be considered. With proper maintenance and mindful usage, overdrive transmissions remain a valuable enhancement for modern and classic vehicles, providing a smooth and efficient driving experience for years to come.

singer patchwork 7285q manual

Welcome to the Singer Patchwork 7285Q Manual, your comprehensive guide to understanding and using your sewing machine. This manual covers setup, operation, and maintenance, ensuring optimal performance.

Overview of the Singer Patchwork 7285Q Sewing Machine

The Singer Patchwork 7285Q is a versatile sewing machine designed for quilting and patchwork projects. It offers a wide range of stitch options and advanced features, making it ideal for both beginners and experienced sewists. The machine is known for its durability and ease of use, providing precise stitching and consistent performance. With its user-friendly interface and comprehensive manual, the Singer 7285Q is a popular choice for crafting intricate designs and heavy-duty sewing tasks. Its portability and ergonomic design further enhance the sewing experience, allowing users to create professional-quality projects with ease. This machine is a reliable tool for anyone looking to elevate their sewing skills and bring their creative ideas to life.

Importance of Reading the Manual

Reading the Singer Patchwork 7285Q manual is essential for safe and effective use of the sewing machine. It provides detailed instructions for setup, operation, and troubleshooting, ensuring users understand all features and functions. The manual highlights critical safety precautions to prevent accidents and damage. By following the guidelines, users can optimize performance, maintain the machine properly, and resolve common issues quickly. The manual also serves as a reference for advanced techniques, helping users unlock the machine’s full potential. Whether you’re a beginner or an experienced sewist, the manual is a vital resource for achieving professional-quality results and extending the lifespan of your Singer Patchwork 7285Q.

Safety Precautions

Always follow safety guidelines to prevent accidents. Avoid electric shock by keeping the machine dry and using it in well-ventilated areas. Ensure proper handling and maintenance.

Understanding Safety Symbols

The Singer Patchwork 7285Q manual includes essential safety symbols to guide users. These symbols are designed to alert you to potential hazards and ensure safe operation. The danger symbol indicates an immediate risk of injury or death, while the warning symbol highlights potential harm. The caution symbol alerts users to less severe risks, such as damage to the machine. Additionally, information symbols provide important operational guidance. These symbols are universally recognized and appear throughout the manual and on the machine itself. Understanding these symbols is crucial for preventing accidents and ensuring proper usage. Always refer to the manual for detailed explanations of each symbol and its meaning. Safety should never be overlooked when working with electrical appliances like the Singer Patchwork 7285Q.

General Safety Guidelines

Adhering to general safety guidelines is essential when using the Singer Patchwork 7285Q sewing machine. Always read the manual thoroughly before operation to understand proper usage and precautions. Keep children and pets away while sewing, as they may accidentally activate the machine. Avoid wearing loose clothing or jewelry that could get caught in moving parts. Ensure the machine is placed on a stable, flat surface and keep the work area clean and well-lit. Never touch electrical components with wet hands, and avoid using the machine near water or in humid environments. Use only genuine Singer parts and accessories to maintain safety and performance. Failure to follow these guidelines may result in injury, damage to the machine, or void the warranty. Safety should always be your top priority when operating the Singer Patchwork 7285Q.

Features and Benefits of the Singer Patchwork 7285Q

The Singer Patchwork 7285Q offers advanced features like 100 built-in stitches, automatic threading, and a large sewing space, making it ideal for quilting and patchwork projects. Its user-friendly design and comprehensive manual ensure easy setup and operation, while its durability and versatility provide long-term value for sewists of all skill levels.

Key Features of the Sewing Machine

The Singer Patchwork 7285Q boasts an impressive array of features designed to enhance your sewing experience. With 100 built-in stitches, including decorative, utility, and quilting options, this machine offers versatility for various projects. The automatic needle threader simplifies setup, while the large, illuminated sewing surface provides ample space for quilting and patchwork. Additional features include adjustable stitch length and width, a free-arm option for intricate sewing, and a robust metal frame for durability. The machine also comes with multiple presser feet, catering to different sewing needs. These features, combined with its user-friendly interface, make the Singer 7285Q an ideal choice for both beginners and experienced sewists looking to tackle complex projects with ease.

Benefits for Quilting and Patchwork

The Singer Patchwork 7285Q is specifically designed to cater to the needs of quilters and patchwork enthusiasts. With its 100 built-in stitches, including dedicated quilting stitches, this machine offers unparalleled versatility for intricate designs. The large, illuminated sewing surface provides ample space for managing large quilts, while the automatic needle threader saves time and reduces eye strain. Adjustable stitch length and width allow for precise control, essential for patchwork accuracy. The machine also features a variety of presser feet, including a walking foot and a quilting foot, which are ideal for handling thick fabrics and multiple layers. These features make the Singer 7285Q an excellent choice for both beginners and experienced quilters, ensuring professional-quality results with ease.

Setting Up Your Singer Patchwork 7285Q

Setting up your Singer Patchwork 7285Q involves unpacking, initial inspection, and following step-by-step instructions to ensure proper assembly and functionality for optimal sewing performance.

Unpacking and Initial Inspection

Unpacking your Singer Patchwork 7285Q is an exciting first step. Carefully remove the machine from its box and inspect for any visible damage. Ensure all accessories, such as the power cord, foot pedal, and sewing feet, are included. Check the machine for loose parts or scratches. Review the manual to familiarize yourself with the components and their locations. Before powering on, verify that all packaging materials are removed and the machine is clean. This initial inspection ensures a smooth setup process and helps prevent future issues. Take your time to ensure everything is in order before proceeding to the next steps.

Step-by-Step Setup Instructions

Setting up your Singer Patchwork 7285Q is straightforward. Begin by placing the machine on a stable, flat surface. Plug in the power cord, ensuring it is securely connected to both the machine and a nearby outlet. Next, install the sewing foot by aligning the shank with the machine’s presser foot holder and turning the screw to secure it. Thread the machine according to the manual’s guidelines, starting from the spool pin to the take-up lever. Wind the bobbin and insert it into the bobbin case, ensuring it is properly seated. Finally, select your desired stitch and test the machine on a scrap piece of fabric. Refer to the manual for specific settings and adjustments to ensure optimal performance. Proper setup ensures smooth operation and prevents potential issues.

Operating the Singer Patchwork 7285Q

Operating the Singer Patchwork 7285Q is user-friendly, with clear controls for stitch selection, tension adjustment, and presser foot operation, ensuring smooth and precise sewing performance.

Basic Operation and Controls

Mastering the basic operation and controls of the Singer Patchwork 7285Q is essential for a seamless sewing experience. The machine features an intuitive control panel with clear stitch selection buttons, allowing you to choose from various stitches and patterns. The stitch length and width can be easily adjusted using the dial or digital controls, depending on your fabric type. The presser foot lever enables quick and easy fabric handling, while the reverse stitch button ensures secure seam finishing. Additionally, the machine includes a free arm for sewing cuffs and sleeves, and a built-in needle threader for convenience. Understanding these controls will help you navigate the machine confidently and achieve professional results in your sewing projects.

Advanced Sewing Techniques

The Singer Patchwork 7285Q supports advanced sewing techniques, making it ideal for experienced sewists. With 100 built-in stitches, including decorative and quilting options, you can create intricate designs and patterns. The machine’s large sewing space accommodates bulky fabrics, perfect for quilting and patchwork projects. Advanced features like automatic thread cutting and a precision tension system ensure professional-grade results. For custom embroidery, the machine allows for adjustable stitch length and width, enabling intricate detailing. Additionally, the free-arm design simplifies sewing hard-to-reach areas, such as cuffs and sleeves. By mastering these advanced techniques, you can unlock the full potential of your Singer Patchwork 7285Q, creating complex and beautiful sewing projects with ease and precision.

Maintenance and Care

Regular maintenance ensures optimal performance of your Singer Patchwork 7285Q. Clean the bobbin area, lubricate moving parts, and check for wear. Refer to the manual for detailed guidance.

Routine Maintenance Tips

Regular maintenance is crucial to ensure the Singer Patchwork 7285Q operates smoothly. Clean the bobbin area and feed dogs regularly to remove lint and debris. Lubricate moving parts as specified in the manual to prevent friction and wear. Check the needle and hook for damage, replacing them when necessary. Store the machine in a dry, cool place to avoid rust. After each use, wipe down the exterior with a soft cloth. Refer to the manual for detailed maintenance schedules and procedures to extend the life of your sewing machine and maintain its performance.

Deep Cleaning and Lubrication

Deep cleaning and lubrication are essential for maintaining the Singer Patchwork 7285Q’s performance and longevity. Start by turning off and unplugging the machine. Remove the bobbin, stitch plate, and any other detachable parts to access the interior. Use a small brush or compressed air to thoroughly clean out lint and debris from the bobbin area and feed dogs. Dampen a soft cloth with water or a mild detergent to wipe down surfaces, avoiding electrical components. Apply a few drops of Singer-recommended sewing machine oil to moving parts, such as the hook race and take-up lever, to ensure smooth operation. Avoid over-lubrication, as it can attract dust and cause issues. Allow the machine to dry completely before use.

Troubleshooting Common Issues

Troubleshooting common issues with your Singer Patchwork 7285Q is made easy with the manual’s detailed guide on error codes and solutions for common problems.

Identifying and Solving Common Problems

The Singer Patchwork 7285Q manual provides clear guidance on identifying and solving common issues. It includes a list of error codes and their meanings, helping users diagnose problems quickly. Common issues like thread breakage, uneven stitching, or machine jamming are addressed with step-by-step solutions. The manual also offers tips for troubleshooting mechanical and electrical faults, ensuring smooth operation. By following the manual’s instructions, users can resolve most issues independently, minimizing downtime and extending the machine’s lifespan. Regular maintenance, as outlined in the manual, can prevent many of these problems from occurring in the first place.

Understanding Error Codes

The Singer Patchwork 7285Q manual includes a detailed section on understanding error codes, helping users identify and resolve issues efficiently. These codes, often displayed on the machine’s screen, indicate specific problems such as thread breakage, bobbin issues, or mechanical malfunctions. The manual provides a list of common error codes, their meanings, and step-by-step solutions to address them. For example, an “E1” error might indicate a jammed needle, while an “E3” could signal a bobbin tension problem. By referencing the manual, users can quickly diagnose and fix issues, ensuring uninterrupted sewing sessions. This feature is particularly useful for beginners, as it simplifies troubleshooting and enhances the overall sewing experience.

Advanced Sewing Techniques

The Singer Patchwork 7285Q manual explores advanced sewing techniques, including custom stitching, precision quilting, and decorative patterns, helping users elevate their sewing projects to professional levels.

Mastering Patchwork and Quilting

The Singer Patchwork 7285Q manual provides detailed guidance for mastering patchwork and quilting techniques. With its comprehensive instructions, users can explore various stitching patterns and fabric manipulation methods. The manual emphasizes the importance of precision and creativity, offering tips for aligning fabrics, sewing straight lines, and achieving professional-grade results. It also covers advanced features like adjustable stitch length and width, enabling users to customize their quilting projects. Whether you’re a beginner or an experienced sewer, the manual’s step-by-step approach ensures you can tackle complex designs with confidence. By following the manual’s expert advice, you’ll unlock the full potential of your Singer Patchwork 7285Q for creating stunning quilts and patchwork masterpieces.

Customizing Your Sewing Projects

The Singer Patchwork 7285Q manual offers extensive guidance on customizing your sewing projects. With its adjustable stitch length and width, you can tailor your stitches to suit various fabrics and designs. The machine also features a variety of decorative stitches, allowing you to add unique touches to your creations. Additionally, the manual provides tips for using optional feet, such as the quilting foot or zipper foot, to enhance your projects. Learn how to customize thread colors, fabric combinations, and embroidery patterns to create personalized designs. The manual’s detailed instructions empower you to experiment with different techniques, ensuring your sewing projects reflect your personal style and creativity. This versatility makes the Singer Patchwork 7285Q ideal for both beginners and experienced sewers.

Accessories and Compatible Parts

The Singer Patchwork 7285Q manual lists essential accessories, including quilting feet, zipper feet, and buttonhole feet, ensuring compatibility and enhancing your sewing experience with specialized tools.

Essential Accessories for the Singer 7285Q

The Singer Patchwork 7285Q manual highlights several essential accessories to enhance your sewing experience. These include a variety of presser feet, such as the quilting foot, zipper foot, and buttonhole foot, which are designed for specific tasks. Additional accessories like extension tables, bobbin cases, and needles ensure versatility for different fabrics and projects. The manual also recommends maintenance tools, such as lint brushes and oil, to keep the machine in optimal condition. These accessories are compatible with the Singer 7285Q and are readily available, allowing you to customize your sewing setup for quilting, patchwork, and other creative endeavors. They are designed to maximize the machine’s performance and durability.

User Reviews and Feedback

Users praise the Singer Patchwork 7285Q for its ease of use and versatility in quilting. Many highlight its stitch variety and durability, though some note room for improvement in bobbin handling.

What Users Are Saying About the Singer 7285Q

Users widely praise the Singer Patchwork 7285Q for its user-friendly design and versatility, especially for quilting projects. Many highlight its extensive stitch options and durability, making it ideal for both beginners and experienced sewists. Several reviewers appreciate its affordability and suitability for patchwork, while others commend its smooth operation and ease of setup. However, some users note minor drawbacks, such as occasional issues with bobbin handling and a steeper learning curve for advanced features. Overall, the Singer 7285Q is well-regarded for its performance and value, with many recommending it for those seeking a reliable sewing machine for quilting and general sewing tasks.

Pros and Cons from Real Users

Real users highlight the Singer Patchwork 7285Q’s portability, large workspace, and variety of built-in stitches as significant advantages. Many appreciate its ease of use for patchwork and quilting, while others praise the clear instructions in the manual. However, some users mention challenges with the bobbin system and occasional tension issues. A few note that advanced features may require more time to master. Overall, the machine is well-regarded for its value, durability, and suitability for both beginners and experienced sewists, though minor drawbacks like bobbin handling and tension adjustments are noted by a few users.

Frequently Asked Questions (FAQs)

  • Where can I download the Singer Patchwork 7285Q manual?
  • What safety precautions should I follow while using the machine?
  • How do I set up the Singer 7285Q for the first time?
  • What are the basic maintenance tips for optimal performance?

Common Questions About the Singer 7285Q

Users often inquire about the Singer Patchwork 7285Q manual, seeking guidance on setup, operation, and troubleshooting. Common questions include:

  • Where can I download the Singer 7285Q manual for free?
  • How do I properly set up the machine for the first time?
  • What are the best maintenance practices to ensure longevity?
  • How can I resolve common issues like thread jamming or error codes?
  • Is the Singer 7285Q compatible with other Singer accessories?

The manual provides detailed answers to these questions, ensuring users can optimize their sewing experience.

Comparing the Singer 7285Q to Other Models

The Singer 7285Q stands out for its versatility and comprehensive manual, making it a top choice for quilting and patchwork, especially for beginners and budget-conscious users.

How the 7285Q Stands Out in the Market

The Singer Patchwork 7285Q distinguishes itself as a versatile and user-friendly sewing machine, particularly favored for quilting and patchwork. Its comprehensive manual, available in multiple languages, provides detailed guidance, ensuring ease of use for both beginners and experienced sewists. The machine’s affordability, coupled with its robust features, makes it a standout choice in its category. Unlike many competitors, the 7285Q offers a perfect balance of functionality and cost, catering to hobbyists and professionals alike. Its popularity is further enhanced by positive user reviews, highlighting its reliability and performance in handling complex sewing projects. This makes the Singer 7285Q a top recommendation for those seeking a dependable and feature-rich sewing machine.

Conclusion

The Singer Patchwork 7285Q manual is an essential resource for maximizing your sewing experience. It provides clear guidance, ensuring you get the most from your machine.

Final Thoughts on the Singer Patchwork 7285Q Manual

The Singer Patchwork 7285Q manual is a comprehensive guide designed to help users maximize their sewing experience. It covers everything from initial setup to advanced techniques, ensuring seamless operation. With detailed instructions and diagrams, the manual caters to both beginners and experienced sewers. Available in multiple languages, it offers accessibility and convenience. Users have praised its clarity and thoroughness, making it an indispensable resource for quilting and patchwork projects. Whether troubleshooting or exploring new features, the manual provides the necessary tools to enhance creativity and productivity. By following its guidelines, users can maintain their machine effectively and achieve professional-quality results. This manual truly serves as the ultimate companion for the Singer Patchwork 7285Q sewing machine.

taa lease agreement pdf

The Texas Apartment Association (TAA) Lease Agreement is a legally binding contract outlining rental terms between landlords and tenants. Provided by the TAA‚ it ensures compliance with state laws and protects both parties. Updated in February 2022‚ it includes essential provisions for liability protection and rental policies. Available as a PDF‚ it simplifies the rental process for landlords and tenants statewide.

1.1 Overview of the TAA Lease Agreement

The TAA Lease Agreement is a comprehensive‚ legally binding contract designed for residential rentals in Texas. Updated in February 2022‚ it outlines terms such as rent‚ lease duration‚ and responsibilities of both landlords and tenants. The agreement is provided by the Texas Apartment Association to ensure compliance with state laws and protect all parties involved. It is typically used for multifamily dwellings and is available as a downloadable PDF‚ making it easy to customize and execute. The document is structured to be clear and enforceable‚ covering all essential aspects of a rental relationship.

1.2 Importance of the TAA Lease Agreement for Landlords and Tenants

The TAA Lease Agreement is crucial for both landlords and tenants as it provides a clear‚ legally binding framework for rental relationships. For landlords‚ it protects their rights‚ limits liability‚ and ensures compliance with Texas laws. Tenants benefit from transparency regarding their responsibilities‚ rent terms‚ and property use. The agreement also includes essential provisions like security deposits and dispute resolution‚ ensuring fairness and clarity for all parties involved. Its standardized format helps prevent misunderstandings and promotes a smooth rental experience.

Key Components of the TAA Lease Agreement

The TAA Lease Agreement includes tenant and landlord information‚ property details‚ lease terms‚ rent and payment terms‚ security deposits‚ and responsibilities of both parties‚ ensuring clarity and compliance.

2.1 Tenant and Landlord Information

The TAA Lease Agreement requires detailed information about both the tenant and landlord‚ ensuring clarity and accountability. This includes full names‚ addresses‚ and contact details for all parties involved. Accurate identification of both the tenant(s) and landlord is crucial for legal compliance and dispute resolution. The agreement clearly defines the roles and responsibilities of each party‚ providing a transparent foundation for the rental relationship. Inaccuracies in this section can lead to legal issues‚ making it essential to verify all details before signing. Proper documentation ensures both parties are held accountable under Texas law.

2.2 Property Description and Lease Term

The TAA Lease Agreement includes a detailed property description‚ specifying the address‚ type‚ and condition of the rental unit. It outlines the lease term‚ including start and end dates‚ and whether the agreement is for a fixed period or month-to-month. The lease term section ensures clarity on the duration of the tenancy and any automatic renewal provisions. Accurate property details and lease duration are essential for avoiding disputes and ensuring both parties understand their obligations. This section is critical for establishing the foundation of the rental agreement under Texas law.

2.3 Rent and Payment Terms

The TAA Lease Agreement clearly outlines the rent amount‚ payment methods‚ and due dates. It specifies acceptable payment forms‚ such as checks or electronic transfers‚ and late fee policies. Tenants are required to pay rent on or before the due date‚ typically the first of the month. The agreement may also include terms for prorated rent if the lease starts mid-month. Proper documentation of payment terms ensures clarity and prevents disputes‚ aligning with Texas rental laws and protecting both parties’ financial interests. This section is vital for maintaining a smooth landlord-tenant relationship.

2.4 Security Deposits and Fees

The TAA Lease Agreement details security deposit requirements‚ including maximum amounts and conditions for return. It outlines permissible fees‚ such as late charges or pet deposits‚ ensuring compliance with Texas law. The agreement specifies how deposits are held and returned‚ typically within 30 days of move-out. Tenants must understand these terms to avoid disputes. Clear documentation of fees and deposits protects both parties and ensures a transparent rental process‚ aligning with state regulations and promoting fair housing practices. Proper handling of deposits is crucial for maintaining legal compliance.

2.5 Responsibilities of Tenants and Landlords

The TAA Lease Agreement clearly outlines the responsibilities of tenants and landlords. Tenants are required to maintain the property‚ adhere to lease terms‚ and comply with community rules. Landlords must ensure the property is habitable‚ address maintenance issues‚ and handle security deposits appropriately. Both parties must fulfill their obligations to avoid disputes. The agreement emphasizes mutual accountability‚ ensuring a fair and lawful rental relationship. Clear definitions of duties promote a harmonious living environment and protect the rights of both tenants and landlords. Proper communication is key to upholding these responsibilities.

Legal Requirements and Compliance

The TAA Lease Agreement ensures compliance with Texas state laws and federal regulations. It includes mandatory disclosures and adheres to fair housing laws‚ protecting both landlords and tenants legally.

3.1 Texas State Laws Governing Lease Agreements

The TAA Lease Agreement complies with Texas state laws‚ ensuring landlords and tenants adhere to legal requirements. It includes provisions for security deposits‚ lease termination‚ and property maintenance‚ aligning with Texas statutes. The agreement is updated regularly‚ such as in February 2022‚ to reflect changes in state laws. By using the TAA Lease Agreement‚ landlords ensure compliance with Texas legal standards‚ protecting their rights and obligations under state law.

3.2 Mandatory Disclosures and Provisions

The TAA Lease Agreement includes mandatory disclosures to ensure transparency and compliance. Landlords must disclose information about security deposits‚ lease termination clauses‚ and property conditions. The agreement also outlines tenant responsibilities‚ such as liability insurance requirements and subrogation rights. Specific provisions address repairs‚ maintenance‚ and notice periods for lease changes. These disclosures protect both parties by clearly defining expectations and legal obligations‚ ensuring the lease complies with Texas state laws and regulations.

3.3 Compliance with Fair Housing Laws

The TAA Lease Agreement ensures compliance with Fair Housing Laws‚ prohibiting discrimination based on race‚ color‚ religion‚ sex‚ national origin‚ disability‚ or familial status. The agreement includes specific clauses to prevent unfair practices and promote equal housing opportunities. Landlords must adhere to these provisions to avoid legal consequences. Tenants are also informed of their rights under these laws‚ ensuring a fair and lawful rental process for all parties involved in Texas.

Benefits of Using the TAA Lease Agreement

The TAA Lease Agreement offers comprehensive protection for landlords‚ clarity for tenants‚ and ensures compliance with state and federal regulations. It’s a standardized‚ updated solution for Texas rentals.

4.1 Protection for Landlords

The TAA Lease Agreement provides robust legal protection for landlords by clearly outlining tenant responsibilities and liability. It includes provisions that safeguard against property damage and unpaid rent‚ ensuring landlords have recourse in case of breaches. The agreement also specifies terms for lease termination and eviction processes‚ offering a structured framework to minimize disputes. This comprehensive coverage helps landlords maintain control over their properties and financial interests‚ ensuring a secure rental experience in Texas.

4.2 Clarity and Transparency for Tenants

The TAA Lease Agreement ensures clarity and transparency for tenants by clearly outlining their responsibilities‚ payment terms‚ and property rules. Tenants are entitled to a signed copy of the lease‚ which they should review carefully before signing. This structured format helps tenants understand their obligations and rights‚ preventing misunderstandings. The agreement also requires landlords to disclose essential information‚ ensuring tenants are fully informed about the rental terms and conditions. This transparency fosters a fair and respectful rental relationship in Texas.

4.3 Compliance with State and Federal Regulations

The TAA Lease Agreement ensures full compliance with Texas state laws and federal regulations. Updated in February 2022‚ it includes all necessary provisions required by state statutes‚ protecting landlords from liability. The agreement aligns with legal requirements‚ ensuring a fair and lawful rental process. By using the TAA Lease Agreement‚ landlords and tenants can trust that their contract meets all regulatory standards‚ providing a reliable framework for rental transactions in Texas.

How to Obtain and Use the TAA Lease Agreement

The TAA Lease Agreement can be downloaded as a PDF from the Texas Apartment Association website. It is designed for use in Texas rentals‚ ensuring compliance with state laws and providing a legally binding contract for both landlords and tenants. The agreement is regularly updated to reflect current legal requirements and industry standards‚ making it a reliable tool for managing rental properties effectively.

5;1 Downloading the TAA Lease Agreement PDF

The TAA Lease Agreement PDF is available for download on the Texas Apartment Association website. This 8-page document includes 43 sections‚ providing a comprehensive and legally binding contract for residential rentals. Updated in February 2022‚ it ensures compliance with Texas state laws and industry standards. Members can access the PDF directly‚ while non-members may need to join or purchase it separately. The agreement is designed to protect both landlords and tenants‚ making it a reliable tool for managing rental properties effectively.

5.2 Filling Out the Lease Agreement

Filling out the TAA Lease Agreement requires careful attention to detail. Start by entering tenant and landlord information‚ followed by property details‚ lease term‚ and rent specifics. Ensure all fields‚ such as security deposits and fees‚ are accurately completed. Review the document to confirm all provisions are included and properly tailored to the rental arrangement. Both parties should verify the information for accuracy before signing. This step ensures clarity and legal compliance‚ protecting both landlords and tenants under Texas state laws.

5.3 Signing and Executing the Agreement

Once the TAA Lease Agreement is filled out‚ both the tenant and landlord must sign and date it. Ensure all parties review the document thoroughly before signing. The agreement becomes a legally binding contract upon execution. Keep a signed copy for your records‚ as it serves as proof of the rental terms. Electronic signatures are also valid if both parties agree. Proper execution ensures clarity and mutual understanding‚ protecting both parties under Texas law.

Common Mistakes to Avoid

Common mistakes include omissions in tenant or landlord information‚ incorrect or missing dates‚ and failure to include required provisions‚ which can lead to legal disputes.

6.1 Omissions in Tenant or Landlord Information

Omissions in tenant or landlord information are critical mistakes that can lead to disputes. Ensure all parties’ names‚ addresses‚ and contact details are accurately included. Missing or incorrect information‚ such as signatures or dates‚ can render the agreement unenforceable. Always double-check the completeness and accuracy of personal details to avoid legal complications. Proper documentation is essential for maintaining a valid and binding contract under Texas law.

6.2 Incorrect or Missing Dates

Incorrect or missing dates in the TAA lease agreement can lead to legal disputes and complications. Ensure the lease term start and end dates are accurately specified. Missing or erroneous dates‚ such as the lease signing date or rent due dates‚ can invalidate the agreement. Always verify the accuracy of all dates before finalizing the contract. Proper documentation of dates is crucial for maintaining a legally binding and enforceable agreement under Texas state law.

6.3 Failure to Include Required Provisions

Omitting essential clauses in the TAA lease agreement can lead to legal disputes and invalidate the contract. Required provisions include security deposit terms‚ rent payment details‚ and termination clauses. Failure to address these can result in misunderstandings and potential lawsuits. Always ensure all mandatory sections are included and clearly defined. Reviewing the lease thoroughly before signing is crucial to avoid legal risks and ensure compliance with Texas state laws and regulations governing rental agreements.

Dispute Resolution and Legal Remedies

The TAA lease agreement outlines methods for resolving disputes‚ including mediation‚ arbitration‚ and court intervention. It ensures both parties understand their rights and legal recourse options‚ providing clarity and protection under Texas law.

7.1 Handling Disputes Between Tenants and Landlords

The TAA lease agreement provides a clear framework for resolving disputes between tenants and landlords. It outlines mediation‚ arbitration‚ and court intervention as potential methods. Tenants and landlords are encouraged to communicate openly and document issues. The agreement ensures both parties understand their rights and responsibilities‚ reducing misunderstandings. Dispute resolution processes are designed to be fair and efficient‚ protecting both sides under Texas law. The TAA lease agreement PDF includes specific clauses detailing these procedures‚ ensuring clarity and legal compliance;

7.2 Legal Recourse for Breach of Contract

The TAA lease agreement is a binding contract‚ providing legal recourse for breaches. If either party violates the terms‚ the agreement outlines consequences and potential legal actions. Tenants and landlords can seek remedies such as damages‚ eviction‚ or court intervention. The agreement ensures clarity on breach procedures‚ protecting both parties’ rights. It aligns with Texas state laws‚ offering a fair framework for resolving breaches and maintaining legal compliance. This ensures accountability and fairness for all involved. Proper documentation is key to enforcing these provisions effectively.

Amendments and Renewals

The TAA lease agreement allows for amendments and renewals with mutual consent. Both parties must agree in writing to any changes or extensions of the lease term.

8.1 How to Amend the Lease Agreement

Amending the TAA lease agreement requires mutual consent from both the landlord and tenant. Changes must be made in writing and signed by all parties involved. The original lease should be referenced‚ and the amendment should clearly outline the specific terms being modified. Both parties should retain a copy of the updated agreement for their records. The TAA form provides a structured format to ensure clarity and legal compliance when making amendments.

8.2 Renewal Process and Terms

The renewal process for a TAA lease agreement typically involves a written agreement between the landlord and tenant. Terms may include rent adjustments‚ lease duration‚ and any changes to the original agreement. Both parties must sign the renewal‚ ensuring clarity and mutual understanding. The TAA lease form provides a structured format for renewals‚ maintaining compliance with Texas state laws. It’s essential to reference the original lease and ensure all terms are agreed upon before finalizing the renewal.

Termination of the Lease Agreement

The TAA lease agreement outlines termination conditions‚ ensuring compliance with Texas law. Proper notice and legal procedures are required to protect both landlord and tenant rights.

9.1 Grounds for Termination

The TAA lease agreement specifies valid reasons for termination‚ ensuring clarity for both landlords and tenants. Common grounds include breach of contract‚ such as non-payment of rent‚ violation of lease terms‚ or illegal activities on the property. Proper notice must be provided‚ adhering to Texas state laws. Termination procedures are designed to protect both parties’ rights‚ ensuring fair and legal resolution. Understanding these terms is crucial for maintaining a balanced rental relationship.

9.2 Proper Notice and Procedures

The TAA lease agreement outlines specific notice requirements for termination‚ ensuring both landlords and tenants follow legal protocols. Proper written notice must be provided‚ detailing the reason for termination and the effective date. Tenants and landlords must adhere to Texas state laws regarding notice periods‚ which vary based on the lease terms and nature of the breach. Compliance with these procedures is essential to avoid disputes and ensure a lawful termination process. Proper documentation is key to protecting both parties’ rights.

The TAA Lease Agreement is a comprehensive tool ensuring compliance with Texas laws and protecting both landlords and tenants. Its structured format promotes clarity and fairness‚ making it an essential resource for secure and successful rental experiences statewide.

10.1 Final Thoughts on the TAA Lease Agreement

The TAA Lease Agreement is a robust‚ legally binding document designed to streamline rental processes while ensuring compliance with Texas state laws. Its structured format provides clarity and fairness‚ protecting both landlords and tenants. Regular updates‚ such as the February 2022 revision‚ ensure it remains relevant and comprehensive. By using the TAA Lease Agreement PDF‚ landlords and tenants can confidently establish clear expectations‚ reducing disputes and fostering a positive rental experience. It is an indispensable tool for anyone involved in Texas rental properties.

10.2 Encouragement to Use the TAA Lease Agreement

Using the TAA Lease Agreement is highly recommended for landlords and tenants in Texas. It provides a clear‚ legally binding framework that protects both parties and ensures compliance with state laws. The agreement is regularly updated to reflect current legal requirements‚ offering peace of mind. By utilizing the TAA Lease Agreement PDF‚ landlords can streamline their rental processes while maintaining fairness and transparency. It is a valuable resource for fostering positive landlord-tenant relationships and avoiding potential disputes.

pdf identification electronic components

Identifying electronic components is essential for understanding circuit functionality․ PDF guides provide detailed visuals and specifications, enabling precise recognition of components like resistors, capacitors, and ICs for efficient troubleshooting and design․

Overview of Electronic Components

Electronic components form the building blocks of modern devices, ranging from simple resistors and capacitors to complex integrated circuits․ Each component has unique characteristics, such as resistors with color-coded bands, capacitors with marked values, and diodes with distinct symbols․ These elements are represented in circuit diagrams using standardized symbols, enabling engineers to understand their roles in a system․ PDF guides often include detailed images, descriptions, and specifications, making it easier to identify and classify components․ This knowledge is vital for designing, troubleshooting, and maintaining electronic systems, bridging the gap between theoretical understanding and practical application in various engineering fields․

The Importance of Component Identification in Electronics

Accurate component identification is critical for ensuring the proper functioning of electronic devices and systems․ Misidentification can lead to circuit malfunctions, safety hazards, and costly repairs․ By using PDF guides, engineers and technicians can verify component specifications, ensuring compatibility and performance․ This process is vital for quality control, troubleshooting, and maintaining reliability in electronics manufacturing․ Proper identification also enhances safety by preventing incorrect voltage or current ratings, which could damage equipment or pose risks․ Thus, precise component recognition is foundational to efficient design, assembly, and maintenance across all electronic applications, making it an indispensable skill in the field of electronics engineering․

Role of PDF Guides in Component Identification

PDF guides play a vital role in electronic component identification by providing detailed visuals, specifications, and markings․ They enable precise recognition of components like capacitors and diodes, streamlining electronics projects and manufacturing processes․

Visual Cues and OCR Tools in PDFs

PDF guides utilize visual cues like color codes, symbols, and markings to help identify components such as resistors, capacitors, and diodes․ OCR tools enhance this by extracting text from images, enabling precise recognition of component values and specifications․ These tools are invaluable for electronics engineers and hobbyists, streamlining the identification process and reducing errors․ By combining visual inspection with advanced OCR technology, PDFs provide a comprehensive solution for identifying and verifying components, ensuring accuracy in circuit design, troubleshooting, and manufacturing processes․

Common Components Identified Through PDF Guides

PDF guides are instrumental in identifying essential electronic components such as resistors, capacitors, diodes, transistors, and integrated circuits․ These documents provide detailed information, including color codes for resistors, capacitance values for capacitors, and symbols for diodes․ They also cover transistor functions and IC specifications, enabling precise identification․ By offering clear visuals and descriptions, PDFs help engineers and hobbyists recognize components efficiently․ This resource is crucial for understanding circuit functionality and ensuring accurate component selection, making it a cornerstone for both educational and professional applications in electronics․

Common Electronic Components Found in PDF Guides

PDF guides detail resistors, capacitors, diodes, transistors, and integrated circuits, providing visual cues and specifications for accurate identification and application in electronic circuits and designs․

Resistors and Their Color Codes

Resistors are fundamental electronic components used to control current flow․ Their values are identified using a standardized color code system, with bands indicating resistance, tolerance, and temperature coefficients․ Each color represents a specific digit or multiplier, allowing precise value determination․ For example, a resistor with bands of red (2), violet (7), and orange (1,000) has a resistance of 2,700 ohms․ Additional bands denote tolerance (e․g․, silver for 10%) and reliability․ PDF guides often include detailed charts for decoding these codes, making them indispensable for engineers and hobbyists․ Variable resistors, like potentiometers, also use similar coding systems for easy identification and application in circuits․

Capacitors and Their Markings

Capacitors store electrical energy and are identified through specific markings on their bodies or in PDF guides․ These markings indicate capacitance (in microfarads, µF), voltage ratings, and tolerance․ For example, “10µF/50V” denotes a 10-microfarad capacitor rated for 50 volts․ Some capacitors use color codes or symbols for polarity, especially electrolytic types, which have distinct positive and negative terminals․ PDF guides often include charts to decode these markings, ensuring accurate identification․ Additional markings may indicate temperature coefficients or certifications, such as “105°C” for high-temperature stability or “X7R” for dielectric characteristics․ Proper identification is crucial for safe and effective circuit design and troubleshooting․

Diodes and Their Symbols

Diodes are essential electronic components that control the flow of current in one direction․ Their symbol in circuit diagrams is an arrow pointing towards a vertical line, representing the direction of conventional current flow․ The arrow signifies the anode (positive terminal), while the vertical line represents the cathode (negative terminal)․ PDF guides often include detailed diagrams of diode symbols and their variations, such as Zener or Schottky diodes․ Understanding these symbols is crucial for interpreting circuit diagrams and identifying diodes in real-world applications․ Proper identification ensures correct functionality and prevents circuit damage, making it a key skill for engineers and technicians․

Integrated Circuits and Their Specifications

Integrated Circuits (ICs) are complex electronic components containing multiple miniaturized electronic circuits on a single semiconductor material․ Their specifications, such as voltage ratings, current capacity, and pin configurations, are critical for proper functionality․ PDF guides provide detailed datasheets that outline these specifications, enabling engineers to identify and select the correct IC for their applications․ By referencing these documents, users can decode part numbers, understand package types, and ensure compatibility with circuit designs․ Accurate identification of ICs is vital for maintaining circuit performance and preventing malfunctions, making PDF guides indispensable tools in electronics engineering and manufacturing․

Transistors and Their Functions

Transistors are fundamental electronic components that amplify or switch electronic signals․ They consist of three layers of semiconductor material, acting as a control valve for current flow․ PDF guides provide detailed specifications, enabling identification of transistor types, such as Bipolar Junction Transistors (BJTs) and Field-Effect Transistors (FETs)․ These documents outline voltage ratings, current capacity, and pin configurations, essential for selecting the right transistor for specific applications․ By referencing these guides, engineers can decode part numbers, understand transistor functionality, and ensure proper integration into circuits․ Accurate transistor identification is crucial for maintaining circuit performance and reliability in electronic systems․

Visual Inspection of Electronic Components

Visual inspection involves examining a component’s shape, size, color, and labeling to identify its type and value․ This method is crucial for recognizing resistors, capacitors, and other parts without advanced tools․

Physical Characteristics of Components

Physical characteristics are vital for identifying electronic components․ Resistors are recognized by their color-coded bands, while capacitors often have their values printed on their bodies․ Transistors and ICs are identified by their pin configurations and packaging․ The shape, size, and material of components provide immediate clues about their function․ For example, inductors are typically cylindrical with wire windings, whereas diodes have distinct polarity markings․ These visual cues, combined with reference guides, enable quick and accurate identification, making physical inspection a cornerstone of electronics troubleshooting and design․

Color Codes and Labeling

Color codes and labeling are critical for identifying electronic components․ Resistors use color bands to denote resistance values, while capacitors often have their capacitance printed directly․ Diodes are marked with polarity symbols, and transistors may have part numbers or labels indicating their type․ These visual markers, combined with reference charts in PDF guides, enable quick identification․ Labeling standards vary, but they consistently provide essential information about a component’s specifications and functionality․ Understanding these codes is fundamental for accurate component recognition, ensuring proper circuit design and troubleshooting in electronics engineering and DIY projects․

Component Documentation and Datasheets

Component documentation and datasheets provide detailed specifications, functionalities, and applications of electronic parts․ They are essential for understanding component behavior and ensuring proper integration into circuit designs․

Understanding Datasheets for Component Identification

Datasheets are critical documents providing detailed specifications of electronic components․ They include product overviews, electrical characteristics, and packaging information, enabling precise identification and selection․ By analyzing datasheets, engineers can determine a component’s ratings, tolerances, and operational limits․ This information is vital for ensuring components function correctly in a circuit․ Datasheets also aid in troubleshooting by offering reference values for voltage, current, and resistance․ Understanding these documents is essential for designing and manufacturing reliable electronic systems, as they bridge the gap between theoretical component behavior and practical application․ Accurate interpretation of datasheets ensures components are used within their specified limits, optimizing performance and reliability․

Specifications and Functionalities in Datasheets

Datasheets provide detailed specifications and functionalities of electronic components, ensuring proper selection and usage․ They include parameters like voltage, current, resistance, and package type, helping engineers match components to project requirements․ Functional descriptions outline the component’s purpose, such as filtering, amplification, or storage․ Tolerance levels and operating conditions are also specified to ensure reliability․ For example, a capacitor’s datasheet lists its capacitance, voltage rating, and leakage current, while a transistor’s datasheet includes gain and power ratings․ These details are crucial for designing circuits that meet performance and safety standards, making datasheets indispensable for accurate component identification and application․

Specialized Testing Equipment for Component Identification

Tools like multimeters, oscilloscopes, and signal generators are used to verify component specifications and functionality․ They measure resistance, voltage, and signals, ensuring accurate identification and performance validation in circuits․

Using Multimeters for Component Verification

A multimeter is an essential tool for verifying electronic components․ It measures resistance, voltage, and current, helping to confirm the specifications of resistors, capacitors, and diodes․ By connecting the multimeter to a component, technicians can quickly determine if it functions within its rated specifications․ This process is crucial for identifying faulty or damaged components, ensuring reliability in circuit design and repair․ Multimeters are particularly useful when visual inspection or PDF guides are insufficient․ They provide precise, measurable data, enabling accurate troubleshooting and component validation, which is vital for maintaining the integrity of electronic systems and ensuring optimal performance․

Oscilloscopes and Signal Generators in Testing

Oscilloscopes and signal generators are advanced tools for testing electronic components․ An oscilloscope displays waveform patterns, helping analyze signal behavior, while a signal generator produces test signals to simulate real-world conditions․ Together, they enable precise verification of components like integrated circuits and transistors․ These tools are invaluable for diagnosing issues in complex circuits and ensuring components function as specified․ By analyzing waveforms and signal responses, technicians can identify faults or deviations, ensuring reliable performance․ This method complements PDF guides by providing dynamic insights into component behavior, critical for advanced troubleshooting and validation in electronics engineering and manufacturing environments․

Chemical Testing for Component Materials

Chemical testing identifies component materials through reactions and spectroscopy, crucial for advanced engineering applications, ensuring material composition accuracy despite requiring specialized facilities․

Material Composition Analysis

Material composition analysis involves identifying the physical and chemical properties of components using techniques like spectroscopy and X-ray fluorescence․ This process ensures components meet design specifications and reliability standards․ By analyzing materials, engineers can verify durability, conductivity, and thermal resistance, critical for high-performance applications․ Advanced tools like SEM (Scanning Electron Microscopy) provide detailed insights into material structures․ This method is vital in aerospace and biomedical engineering, where material integrity is paramount․ PDF guides often document these analyses, offering a reference for material identification and selection, ensuring components function as intended in complex systems and harsh environments․

Applications in Advanced Engineering Fields

In advanced engineering, identifying components via PDF guides is crucial for aerospace, automotive, and medical applications․ These guides provide detailed specifications for components like ICs, capacitors, and resistors, ensuring compliance with strict industry standards․ Material composition analysis, as documented in PDFs, aids in verifying components’ suitability for extreme environments․ This process is vital for designing high-reliability systems, where failure can have severe consequences․ By leveraging PDF resources, engineers ensure components meet performance and safety requirements, driving innovation and maintaining operational excellence across critical sectors․

Barcode Scanning and Inventory Management

Barcode scanning streamlines electronic component identification, enabling quick access to part details․ PDF guides enhance this process, ensuring accurate inventory tracking and efficient management in electronics manufacturing and DIY projects․

Barcode Labeling for Component Identification

Barcode labeling is a critical tool for efficient electronic component identification․ By scanning barcodes, engineers and technicians can quickly access detailed information about components, such as part numbers, specifications, and manufacturer details․ This method is particularly useful in conjunction with PDF guides, which often include barcode references for easy cross-referencing․ Barcode labeling enhances inventory management, reduces errors, and streamlines the identification process in both industrial and DIY settings․ It ensures that components are accurately tracked and utilized, making it an indispensable practice in modern electronics manufacturing and design․ This approach promotes efficiency and accuracy across various applications․

Streamlining Inventory Processes

Streamlining inventory processes is vital for efficient electronic component identification․ By integrating PDF guides with inventory management systems, components can be tracked and organized seamlessly․ Barcode scanning and automated systems reduce manual errors, ensuring accurate stock levels and quick access to component information․ This approach minimizes downtime in production and repair workflows, enabling faster identification and retrieval of parts․ Additionally, digital catalogs and real-time updates help maintain up-to-date records, making it easier to locate and manage components․ This streamlined process enhances productivity and reduces operational costs, making it essential for modern electronics manufacturing and DIY projects alike․

Efficient electronic component identification using PDF guides enhances troubleshooting, manufacturing, and DIY projects․ These resources provide clear visuals and specifications, ensuring accurate recognition of components like resistors and capacitors․

Efficient Component Identification Across Industries

PDF guides play a pivotal role in streamlining electronic component identification across industries․ By providing detailed visuals, specifications, and OCR tools, these resources enable precise recognition of components like resistors, capacitors, and ICs․ This efficiency is crucial for manufacturing, DIY projects, and troubleshooting, ensuring accurate and timely identification․ Industries benefit from reduced errors and enhanced productivity, as PDF guides serve as comprehensive references for engineers and technicians․ The ability to quickly identify components using these tools fosters innovation and reliability in electronics engineering and beyond, making them indispensable in modern workflows․

church new member packet pdf

A church new member packet is a thoughtful resource that welcomes individuals, providing essential information about the church’s mission, beliefs, and community. It serves as a first impression, helping new members feel connected and informed. Whether digital or physical, these packets are tailored to reflect the church’s unique identity and values, ensuring a warm and inclusive experience for all newcomers.

Importance of Creating a Comprehensive New Member Packet

A well-crafted new member packet is vital for creating a positive first impression and fostering engagement. It provides clarity on the church’s mission, values, and opportunities, helping newcomers feel welcomed and informed. A comprehensive packet ensures consistency in communication, builds trust, and guides new members in their spiritual journey. It also serves as a valuable resource for answering questions and encouraging active participation in the church community. Investing time in its creation reflects care for newcomers and sets the tone for their involvement.

Overview of What a New Member Packet Should Include

A new member packet should include essential items that provide a warm welcome and clear guidance. It typically features a welcome letter, statement of faith, overview of ministries, next steps, small groups, volunteering opportunities, a church calendar, contact information, and a gift. These elements help new members feel connected, informed, and valued, while also encouraging their active participation in the church community. A well-organized packet ensures newcomers have everything they need to engage meaningfully with the church.

Essential Items to Include in a Church New Member Packet

A church new member packet should include a welcome letter, statement of faith, ministries overview, next steps, small groups info, volunteering opportunities, and a church calendar.

Welcome Letter from the Pastor or Church Leadership

A welcome letter from the pastor or church leadership is a heartfelt way to greet new members. It expresses joy in their decision to join the church, outlines the church’s mission and values, and provides a personal touch. This letter often includes a brief introduction to the church’s culture, encouragement to get involved, and a call to action for next steps. It’s a vital component that sets the tone for their journey within the church community, fostering connection and belonging.

Statement of Faith and Church Beliefs

A statement of faith and church beliefs is a foundational element in a new member packet. It clearly outlines the church’s core doctrines, mission, and values, ensuring alignment with its teachings. This section helps new members understand the church’s spiritual identity and what it stands for. It often includes key beliefs about God, scripture, and the church’s purpose, providing a clear framework for spiritual growth and community involvement. This transparency fosters trust and helps newcomers feel confident in their decision to join the church family.

Overview of Church Ministries and Programs

An overview of church ministries and programs provides new members with a snapshot of the church’s offerings. This section highlights various ministries, such as worship, education, outreach, and fellowship, showcasing how members can engage. It includes descriptions of programs like youth activities, Bible studies, and community service initiatives. This information helps new members identify areas of interest and opportunities to get involved, fostering a sense of belonging and purpose within the church community.

Next Steps for New Members

Next steps for new members are designed to help them integrate into the church community. This section often includes attending a new member orientation, joining a small group, or participating in a volunteer opportunity. It may also suggest meeting with a mentor or completing a spiritual growth plan. Providing clear, actionable steps helps new members feel guided and supported as they begin their journey with the church. This section ensures they know how to get involved and grow in their faith;

Information on Small Groups and Bible Studies

Small groups and Bible studies are vital for fostering community and spiritual growth. The packet should list available groups, meeting times, and study topics. This helps new members connect with others who share similar interests or life stages. Providing details on how to join and what to expect ensures they feel comfortable participating. Highlighting the benefits, such as deeper Bible understanding and meaningful relationships, encourages engagement. This section equips new members to grow in their faith and build lasting connections within the church family.

Ways to Get Involved in Volunteering

Volunteering is a great way for new members to connect and contribute to the church community. The packet should highlight various opportunities, such as serving in worship, youth programs, or community outreach. Providing a list of ministries and contact information helps new members find roles that match their skills and interests. Encouraging participation in events or ongoing projects fosters a sense of belonging and purpose. Clear instructions on how to sign up or express interest make it easy for new members to get involved and start making a difference.

Church Calendar of Events

A church calendar of events is a valuable resource for new members to stay informed about upcoming activities, services, and community engagements. It should include key dates, such as worship services, Bible studies, outreach programs, and special events. Highlighting recurring events, like weekly prayer meetings or monthly fellowship dinners, helps new members establish a routine. Including a QR code or link to a digital calendar ensures easy access and updates. This section fosters connection and encourages participation in the church’s vibrant community life;

Contact Information for Church Staff and Volunteers

Providing clear contact information for church staff and volunteers is essential for new members to connect and seek support. Include names, titles, phone numbers, and email addresses for key leaders, such as pastors, ministry directors, and administrative staff. Also, list office hours and location for in-person visits. Consider adding a general church email and phone number for inquiries. This section ensures new members can easily reach out for questions, guidance, or to get involved in ministries. Clear communication fosters a sense of community and accessibility.

Gift for New Members (e.g., a Book or Devotional)

A thoughtful gift, such as a book or devotional, is a meaningful way to welcome new members. It reflects the church’s care and desire to help them grow spiritually. Choose items that align with the church’s values, such as a Bible study guide or a book by a respected Christian author. This gesture creates a positive first impression and encourages deeper engagement with the church community. It also serves as a reminder of the church’s commitment to nurturing their faith journey.

Design and Layout Tips for an Effective Packet

A professional, visually appealing design is crucial. Ensure branding consistency with the church’s logo and colors. Use clear, concise writing and organize content logically for easy readability.

Branding Consistency with Church Logo and Colors

Branding consistency is vital for a professional look. Ensure the church’s logo and colors are prominently featured throughout the packet. This creates a cohesive identity and reinforces the church’s values. Use high-quality images and fonts that align with the church’s style. Consistent branding helps new members recognize and connect with the church’s mission. For example, Hillside Church’s non-creedal approach is reflected in their minimalistic design. This uniformity makes the packet visually appealing and strengthens the church’s brand, ensuring a lasting impression on new members.

Professional and Visually Appealing Design

A professional and visually appealing design is crucial for engaging new members. Use high-quality images, readable fonts, and strategic white space to create a polished look. Ensure the layout is clean and organized, making it easy to navigate. Incorporate vibrant colors that align with the church’s brand, but avoid overwhelming the reader. A well-designed packet reflects the church’s values and creates a positive first impression. This attention to detail shows care and thoughtfulness, helping new members feel welcomed and valued from the start.

Clear and Concise Writing

Clear and concise writing is essential for ensuring new members easily understand the information provided. Avoid overly complex language or jargon, and focus on simplicity. Use bullet points or numbered lists for key details, making the content easy to scan; Ensure the tone is warm and welcoming, reflecting the church’s values. By keeping the writing straightforward, you help new members feel informed and engaged without feeling overwhelmed. This approach fosters a sense of clarity and connection, making the packet a valuable resource for their spiritual journey.

Digital vs. Physical Packets

Digital packets offer convenience and cost savings, while physical packets provide a tangible, personal touch. Both formats have unique benefits, catering to different preferences and needs effectively.

Pros and Cons of Digital Packets (PDF)

Digital packets (PDF) are cost-effective, easily distributable via email or church websites, and environmentally friendly. They allow for quick updates and can include interactive elements like links. However, some members may prefer physical copies for a personal touch. Additionally, digital packets require internet access, which not all members may have, and can be easily overlooked in crowded inboxes. Despite these drawbacks, digital packets remain a versatile and efficient option for churches aiming to engage modern audiences while maintaining convenience and accessibility.

Pros and Cons of Physical Packets

Physical packets offer a tangible, personal touch, making new members feel welcomed with a thoughtful, professionally designed resource. They can include gifts like books or devotionals, enhancing the first impression. However, physical packets are costlier to produce and distribute, requiring printing and mailing resources. Updates are less flexible, as changes demand reprints. Additionally, they may be less accessible for remote members and have environmental impacts. Despite these drawbacks, physical packets remain a meaningful way to connect with new members, providing a lasting keepsake that reflects the church’s care and commitment.

How to Create a Digital Version (PDF)

To create a digital church new member packet, start by gathering all necessary content, such as welcome letters, belief statements, and ministry overviews. Use design tools like Canva or Adobe to layout the PDF, ensuring consistency with your church’s branding. Include interactive elements like clickable links for easy navigation. Convert the final design to a PDF format and optimize it for both digital viewing and printing. Distribute the PDF via email, your church website, or online platforms, making it easily accessible to new members while reducing costs and environmental impact.

Step-by-Step Guide to Creating a New Member Packet

Create a new member packet by gathering content, designing layouts, and reviewing for accuracy. Ensure it is clear, organized, and reflects your church’s mission to welcome and inform newcomers effectively.

Gathering Content and Materials

Gathering content and materials is the first step in creating a new member packet. Start by collecting essential documents like a welcome letter, statement of faith, and church beliefs. Include information about ministries, programs, and upcoming events. Add details on small groups, volunteering opportunities, and contact information for staff and volunteers. Consider including a church calendar and a gift, such as a devotional or book. Organize materials logically, ensuring clarity and relevance. This step lays the foundation for a comprehensive and welcoming packet that reflects your church’s identity and mission.

Designing the Packet

Designing the packet involves creating a visually appealing and professional layout. Use your church’s branding, including the logo and color scheme, to maintain consistency. Incorporate high-quality images and graphics to enhance readability. Ensure the text is clear, concise, and easy to navigate. Organize sections logically, starting with a welcome letter and progressing through beliefs, ministries, and next steps. Consider adding a table of contents for easy navigation. Use bullet points and headings to break up text, making the packet user-friendly. Finally, include a personal touch, such as a gift or note, to make new members feel valued.

Reviewing and Finalizing the Packet

Reviewing and finalizing the packet ensures accuracy and clarity. Gather feedback from church leaders and volunteers to refine content. Proofread for typos and factual errors. Ensure all sections align with the church’s mission and values. Once approved, create a digital or physical version. For digital packets, save as a PDF for easy sharing. Include a personal touch, like a handwritten note, in physical copies. This step ensures the packet is professional, welcoming, and ready to make a lasting first impression on new members.

Distributing the Packet to New Members

Distributing the packet to new members ensures they receive a warm welcome. Digital packets can be emailed as PDFs or shared via the church website or app. Physical packets can be handed out during services, at welcome centers, or mailed to new members. Consider including a personal note or gift to make it special. Ensure distribution is timely, ideally within a week of membership, to help new members feel connected and informed about their next steps in the church community.

Examples of Successful Church New Member Packets

Successful church new member packets, like Hillside Church’s, emphasize a non-creedal approach, while others focus on personalized gifts and clear next steps, ensuring a welcoming experience.

Case Study: Hillside Church’s New Member Packet

Hillside Church’s new member packet stands out for its non-creedal approach, emphasizing inclusivity and community. It includes a warm welcome letter, a clear statement of faith, and an overview of ministries. The packet also outlines next steps for integration, such as joining small groups or volunteering. A thoughtful gift, like a devotional, is often included to make newcomers feel valued. This structured yet personal approach ensures new members feel connected and informed, fostering a sense of belonging from day one.

Case Study: Other Churches’ Approaches

Other churches have adopted innovative strategies for their new member packets, blending tradition with modern elements. Some include video testimonials from members, while others focus on interactive content like QR codes linking to sermon series or volunteer sign-ups. Personalized gifts, such as custom-designed Bibles or church-branded items, are also popular. These approaches emphasize creating a sense of community and belonging, ensuring new members feel valued and connected from their first interaction. Each church tailors its packet to reflect its unique culture and mission, making the experience both meaningful and memorable.

Best Practices for Updating and Maintaining the Packet

Regularly update the packet to reflect changes in church leadership, ministries, or events. Review and refresh content annually to ensure accuracy and relevance for new members.

Regularly Updating Information

Regularly updating the new member packet ensures accuracy and relevance. Schedule annual reviews to reflect changes in leadership, ministries, or events. Incorporate feedback from members to improve content. Use digital tools for easy updates and version control. Maintain consistency in branding and design. Ensure all contact information and calendars are current; Update statements of faith or beliefs as needed. Keep ministry overviews aligned with current programs. This proactive approach helps new members stay informed and engaged, fostering a positive experience from the start.

Gathering Feedback from New Members

Gathering feedback from new members is crucial for refining the church new member packet. Use surveys, follow-up emails, or suggestion cards to collect insights. Ask about clarity, relevance, and overall impression. Inquire if the packet helped them feel welcomed and informed. Use this feedback to identify areas for improvement, such as adding more details on ministries or simplifying language. Regular feedback ensures the packet remains effective and meaningful, enhancing the onboarding experience for future members while fostering a sense of connection and community.

A well-crafted church new member packet is a vital tool for fostering connection and belonging, ensuring newcomers feel valued and informed about their spiritual journey ahead.

Final Thoughts on the Importance of a Well-Crafted New Member Packet

A well-designed new member packet is more than just paperwork—it’s a meaningful first impression that sets the tone for a newcomer’s journey. By including essential items like a welcome letter, statement of faith, and next steps, churches can create a sense of belonging and clarity. Thoughtful gifts, like devotionals, add a personal touch, while digital options ensure accessibility. Regular updates and feedback ensure relevance. Ultimately, a well-crafted packet reflects a church’s commitment to connecting with its community and fostering spiritual growth.

orbit 6 station timer manual pdf

Welcome to the Orbit 6 Station Timer, a versatile and user-friendly irrigation controller designed for efficient watering management. Combining simplicity with advanced digital features, this timer offers automatic, semi-automatic, and manual modes to suit your needs. Perfect for homeowners seeking convenience and flexibility, it ensures optimal water usage while maintaining healthy landscapes.

Overview of the Orbit 6 Station Timer

The Orbit 6 Station Timer is a versatile irrigation controller designed for efficient water management. It features 6 independent stations, allowing you to control multiple sprinkler zones. With Easy-Set Logic programming, it simplifies scheduling and adjustments. The timer supports automatic, semi-automatic, and manual modes, offering flexibility for various watering needs. Compatible with wireless sensors, it adapts to weather conditions, ensuring optimal water usage. Built for durability, it can be mounted indoors or outdoors, making it a practical solution for homeowners seeking precise irrigation control.

Importance of the Orbit 6 Station Timer Manual

The Orbit 6 Station Timer Manual is essential for optimizing your irrigation system. It provides step-by-step guidance for installation, programming, and troubleshooting, ensuring proper setup and operation. The manual explains how to use advanced features like water budgeting and weather adjustments. It also covers manual mode operations and error code solutions, helping you resolve issues quickly. By following the manual, you can maximize water efficiency and customize your watering schedules. Downloading the official PDF ensures you have accurate instructions tailored to your timer model.

Key Features of the Orbit 6 Station Timer

The Orbit 6 Station Timer offers a 6-station sprinkler controller, Easy-Set Logic programming, and multiple operation modes. It supports wireless sensors and provides flexible watering options for efficient irrigation management.

6-Station Sprinkler Controller

The Orbit 6 Station Timer is a robust irrigation controller designed to manage up to six independent sprinkler zones. It allows for precise control over watering schedules, ensuring each station operates efficiently. With support for automatic, semi-automatic, and manual modes, this controller offers flexibility for various watering needs. Its compact design and compatibility with wireless sensors make it ideal for both indoor and outdoor installations, providing a reliable solution for maintaining lush landscapes while conserving water.

Easy-Set Logic Programming

The Orbit 6 Station Timer features Easy-Set Logic Programming, a user-friendly system designed to simplify scheduling. This intuitive feature allows you to quickly set watering programs by selecting days, start times, and durations. With a focus on efficiency, it streamlines the setup process, making it easy to customize watering plans for your lawn or garden. The Easy-Set Logic ensures that even those new to irrigation systems can program the timer effortlessly, while still offering flexibility for more experienced users to tailor settings to specific needs.

Automatic, Semi-Automatic, and Manual Modes

The Orbit 6 Station Timer offers three operating modes to cater to different watering needs. In Automatic Mode, the timer follows a preset schedule, ensuring consistent watering. Semi-Automatic Mode allows for temporary adjustments without altering the main program. Manual Mode enables on-demand watering, giving you control to water specific stations as needed. These modes provide flexibility, allowing you to adapt watering schedules based on weather conditions or seasonal changes, ensuring efficient water use and healthy plant growth.

Compatibility with Wireless Sensors

The Orbit 6 Station Timer is designed to work seamlessly with wireless sensors, enhancing its functionality and adaptability. By integrating with rain, soil, or weather sensors, the timer can automatically adjust watering schedules based on real-time conditions. This compatibility ensures water conservation and prevents overwatering. The system can pause irrigation during rain or high moisture levels, optimizing water usage. This feature-rich capability makes the timer a smart choice for modern irrigation needs, offering both convenience and efficiency for homeowners.

Installation and Setup

Unpack and prepare the timer, then wire it to the valves using appropriate gauge wire. Mount indoors or outdoors, ensuring protection from the elements. Connect to power and sensors for optimal functionality;

Unpacking and Preparing the Timer

Begin by carefully unpacking the Orbit 6 Station Timer from its box. Inspect the device for any visible damage or defects. Install the included battery to ensure the timer retains its settings during power outages. Familiarize yourself with the control panel and buttons, noting their functions for programming and operation. Before mounting, ensure all components, such as wires and sensors, are accounted for and ready for installation. This step ensures a smooth setup process and proper functionality of the timer.

Wiring the Timer to Valves

Connect the Orbit 6 Station Timer to your irrigation valves using high-quality, 20-gauge wire or Orbit-approved sprinkler wire. Ensure the distance between the timer and valves does not exceed 700 feet (210 meters) for optimal performance. Carefully match the wires to the correct terminals on both the timer and valves, following the color-coded guide in the manual. Proper wiring ensures accurate communication between the timer and valves, allowing for seamless operation of your irrigation system. Double-check all connections before powering on the timer to avoid malfunctions.

Mounting the Timer Indoors or Outdoors

The Orbit 6 Station Timer can be mounted indoors or outdoors, offering flexible installation options. For indoor use, choose a dry, protected location near the water source. Outdoors, use the included wall bracket to secure the timer, ensuring it remains weather-resistant. Avoid direct sunlight and moisture exposure. Follow the manual’s guidelines for flush-mounting or surface installation; Proper mounting ensures durability and reliable performance, whether indoors or outdoors. Always check local regulations and safety standards before installation.

Connecting to Power and Sensors

Connect the Orbit 6 Station Timer to a reliable power source using the provided adapter. Ensure the timer is plugged into a live wall outlet for consistent operation. For outdoor installations, use weather-resistant connectors to protect against moisture. The timer is compatible with wireless sensors, such as rain or soil moisture sensors, which enhance water conservation. Follow the manual’s wiring diagram to connect sensors correctly. Test the connections to ensure proper communication between the timer and sensors. This setup ensures efficient irrigation management and adaptability to weather conditions.

Programming the Orbit 6 Station Timer

Program your Orbit 6 Station Timer with ease. Set schedules, start times, and durations. Use manual mode for quick adjustments. Customize watering plans efficiently with this versatile controller.

Setting the Clock and Date

To ensure accurate watering schedules, set the clock and date on your Orbit 6 Station Timer; Use the dial to navigate to the time settings, then press ENTER. Adjust the hours and minutes using the + or ౼ buttons. Once set, confirm by pressing ENTER again. The timer will now automatically align your watering programs with the correct time, ensuring your irrigation system operates efficiently and on schedule. Accurate timekeeping is essential for reliable performance.

Creating Watering Schedules

Creating watering schedules with the Orbit 6 Station Timer is straightforward. Choose the desired frequency, such as daily, every 2 days, or specific days of the week. Select the start time for each watering cycle and set the duration for each station. Use the water budget feature to adjust watering times based on weather conditions. You can also program multiple start times for stations that require more frequent watering. This ensures your lawn and plants receive the right amount of water without overwatering; Customizable schedules make it easy to adapt to changing needs.

Setting Start Times and Durations

Setting start times and durations on the Orbit 6 Station Timer is a breeze. Simply navigate to the programming menu and select the desired station. Choose a start time, such as 6:00 AM or 5:00 PM, and set the duration in minutes. You can program multiple start times for the same station if needed. For example, water your lawn in the morning and again in the evening. The timer also allows you to adjust durations based on weather conditions using the water budget feature. This ensures efficient watering tailored to your landscape’s needs.

How to Use Manual Mode

Using Manual Mode on the Orbit 6 Station Timer allows you to water specific stations without altering your programmed schedule. Press the Manual button to activate this mode. Select the desired station and set the watering duration using the arrow keys. Press Enter to start watering. To move to the next station, press Next. Press Cancel to stop watering. Manual mode is ideal for quick, one-time waterings or testing your system. It does not override your programmed watering schedules, ensuring your automatic settings remain intact. This feature provides flexibility for unexpected watering needs.

Troubleshooting Common Issues

Troubleshooting the Orbit 6 Station Timer involves identifying issues like error codes, wiring problems, or sensor malfunctions. Refer to the manual for specific solutions and reset options.

Identifying and Solving Common Problems

Common issues with the Orbit 6 Station Timer include error codes, wiring problems, or sensor malfunctions. Check connections, ensure proper power supply, and verify sensor functionality. If issues persist, consult the manual for specific error code solutions or perform a factory reset to restore default settings. Regularly cleaning the timer and updating firmware can prevent many problems. For detailed troubleshooting, refer to the official Orbit 6 Station Timer Manual, which provides step-by-step guidance for resolving common issues efficiently.

Understanding Error Codes and Solutions

The Orbit 6 Station Timer displays error codes to indicate specific issues, such as faulty sensors or wiring problems. Refer to the manual for a list of codes and their meanings. Common solutions include checking wire connections, ensuring proper power supply, and resetting the timer. For sensor-related errors, verify that sensors are clean and properly connected. If issues persist, consult the troubleshooting section in the manual or perform a factory reset. Regular maintenance and updates can help prevent errors and ensure smooth operation.

Resetting the Timer to Factory Settings

To reset the Orbit 6 Station Timer to factory settings, press and hold the RESET button with a small tool while powering on the timer. This will erase all custom settings, returning the device to its default state. Resetting is useful for troubleshooting or starting fresh. Note that all programmed schedules and preferences will be lost, so ensure you have backups before proceeding. Refer to the manual for detailed steps and precautions to avoid data loss. This process ensures the timer operates as intended, free from prior configurations.

Downloading the Orbit 6 Station Timer Manual

The Orbit 6 Station Timer Manual is available for free download as a PDF from official sources. It provides comprehensive guidance on installation, programming, and troubleshooting.

Where to Find the Official Manual PDF

The official Orbit 6 Station Timer Manual can be downloaded for free from Orbit’s official website or trusted sources like ManualsLib, ManualsFile, or OrbitOnline. Ensure authenticity by verifying the Orbit logo and publication date. The manual is available in PDF format, offering detailed instructions for installation, programming, and troubleshooting. It’s essential to download from reputable sites to avoid unauthorized versions. Always check for the latest updates to ensure you have the most accurate information for your timer.

How to Download the Manual for Free

To download the Orbit 6 Station Timer Manual for free, visit Orbit’s official website or trusted platforms like ManualsLib or ManualsFile. Search for the model number (e.g., 57896 or 57946) and select the PDF option. Ensure the source is reputable to avoid unauthorized versions. Once found, click the download link to access the manual instantly. This guide provides step-by-step instructions for installation, programming, and troubleshooting, helping you maximize your timer’s functionality. Always verify the manual’s authenticity and check for the latest version.

Verifying the Authenticity of the Manual

To ensure the Orbit 6 Station Timer Manual is authentic, download it from Orbit’s official website or trusted sources like ManualsLib. Verify the model number (e.g., 57896 or 57946) matches your timer. Check for Orbit’s official watermark or logo within the document. Cross-reference the content with Orbit’s customer support or official product pages to confirm accuracy. Avoid third-party sites offering free downloads without verification. Ensure the file is in PDF format and free from unauthorized modifications for a genuine guide.

Advanced Features and Customization

The Orbit 6 Station Timer offers advanced features like water budget adjustment, weather condition customization, and smart home integration. These options allow personalized irrigation control for optimal efficiency.

Using the Water Budget Feature

The Orbit 6 Station Timer includes a Water Budget Feature that allows you to adjust watering durations based on specific needs. By setting a percentage (e.g., 50% to 150%), you can increase or decrease the programmed watering time. This feature is ideal for adapting to weather conditions or soil types, ensuring water conservation while maintaining plant health. For example, setting the budget to 150% extends the duration, while 50% reduces it, providing flexibility for customized irrigation management.

Adjusting the Timer for Specific Weather Conditions

The Orbit 6 Station Timer allows you to adapt watering schedules to varying weather conditions. During hot, dry periods, increase the watering duration, while during cool or rainy weather, reduce it to conserve water. Use the Water Budget Feature to adjust the percentage of water applied, ensuring optimal irrigation without overwatering. Additionally, the timer can be integrated with wireless weather sensors to automatically modify watering schedules based on real-time conditions, enhancing efficiency and water savings.

Integrating with Smart Home Systems

The Orbit 6 Station Timer can seamlessly integrate with popular smart home systems like Amazon Alexa and Google Home. This integration allows for voice control and remote management of your irrigation system. By connecting the timer to your smart home network, you can easily adjust watering schedules, monitor system status, and receive notifications through your smart devices. This feature enhances convenience and ensures your lawn receives the right amount of water, even when you’re not physically present to manage it.

Maintenance and Care

Regularly clean the timer and its components to ensure optimal performance. Check for damage or wear on wires and connections. Update firmware and software as needed to maintain functionality and security. Seasonal maintenance, like preparing for winter, is crucial to prevent damage and ensure longevity. Always follow the manual’s guidelines for proper care and troubleshooting.

Cleaning the Timer and Its Components

Regular cleaning of the Orbit 6 Station Timer and its components is essential for maintaining optimal performance. Use a soft, dry cloth to wipe down the timer’s exterior and display screen. Avoid harsh chemicals or abrasive materials, as they may damage the surface. For internal components, gently remove dust with compressed air. Inspect wires and connections for signs of wear or corrosion and clean them with a soft brush. Cleaning ensures proper functionality and prevents dust buildup that could interfere with operations. Refer to the manual for specific cleaning instructions tailored to your timer model.

Updating Firmware and Software

Keeping your Orbit 6 Station Timer updated with the latest firmware and software ensures optimal performance and security. Regular updates may add new features, improve functionality, and fix potential issues. To update, visit the official Orbit website and download the latest version compatible with your timer model. Follow the manual’s instructions for installation, typically involving a direct connection to a computer or wireless update. Always back up your settings before updating to prevent data loss. This ensures your timer remains efficient and up-to-date with the latest advancements.

Seasonal Maintenance Tips

Regular seasonal maintenance ensures your Orbit 6 Station Timer operates efficiently year-round. In winter, winterize the system by draining water and protecting outdoor components from freezing. Spring is ideal for inspecting wires, cleaning sensors, and testing valves. During summer, monitor watering schedules to avoid overwatering and adjust settings based on weather. In fall, clear debris from sensors and prepare the timer for colder months. Proper seasonal care extends the lifespan of your timer and ensures consistent performance throughout the year.

Additional Resources and Support

Explore Orbit’s customer service for expert assistance, join online forums for user discussions, and watch video tutorials for hands-on guidance to maximize your timer’s potential.

Orbit Customer Service and Support

Orbit offers dedicated customer service to assist with any questions or issues regarding your 6 Station Timer. Their support team provides expert guidance, ensuring optimal use of your irrigation system. Additionally, Orbit hosts online forums where users can share experiences, ask questions, and access tips from both professionals and fellow customers. For visual learners, video tutorials and detailed guides are available on the Orbit website, covering setup, programming, and troubleshooting. These resources empower users to maximize their timer’s functionality and resolve issues efficiently.

Online Communities and Forums

Active online communities and forums dedicated to the Orbit 6 Station Timer provide valuable resources for users. These platforms allow homeowners and professionals to share experiences, ask questions, and receive expert advice. Users can find troubleshooting tips, setup guidance, and best practices for optimizing their irrigation system. Many forums also feature user-generated content, such as tutorials and hacks, to enhance the timer’s functionality. Engaging with these communities ensures users stay informed about the latest features and updates, fostering a supportive environment for maximizing their Orbit 6 Station Timer’s potential.

Video Tutorials and Guides

Video tutorials and guides for the Orbit 6 Station Timer are excellent resources for visual learners. Platforms like YouTube and the official Orbit website offer step-by-step instructions for programming, troubleshooting, and maximizing the timer’s features. These videos cover topics such as setting up automatic schedules, using manual mode, and integrating wireless sensors. They also provide demonstrations for advanced features like water budgeting and weather adjustments. Watching these guides helps users quickly resolve issues and optimize their irrigation system for efficient water management and healthy landscaping.

The Orbit 6 Station Timer is a versatile, efficient, and user-friendly irrigation controller. Its comprehensive manual ensures easy setup and optimal water management for a healthy landscape;

Final Thoughts on the Orbit 6 Station Timer

The Orbit 6 Station Timer is a top-tier irrigation controller that combines ease of use with advanced features. Its Easy-Set Logic programming and compatibility with wireless sensors make it ideal for modern landscaping needs. Whether you’re a homeowner or a professional, this timer offers flexibility and efficiency, ensuring optimal water usage. With its comprehensive manual and troubleshooting guides, you can easily navigate setup, programming, and maintenance. The timer’s ability to integrate with smart home systems further enhances its versatility, making it a standout choice for anyone seeking a reliable and customizable irrigation solution.

Encouragement to Explore More Features

Take full advantage of the Orbit 6 Station Timer by exploring its advanced features. Discover how the water budget tool helps optimize water usage, and learn to adjust settings based on weather conditions for smarter irrigation. Experiment with smart home integration to control your system remotely. Don’t hesitate to use the manual as a guide to unlock these capabilities. By diving deeper into the timer’s customization options, you’ll maximize efficiency and tailor your watering system to your specific needs, ensuring the best results for your lawn and garden.

About Orbit and Their Products

Orbit is a leader in innovative irrigation solutions, offering a wide range of timers and controllers designed for efficiency and ease of use. Their products, like the 6 Station Timer, reflect a commitment to helping users manage water resources effectively while maintaining healthy landscapes.

Orbit’s Commitment to Innovation

Orbit has consistently demonstrated a strong commitment to innovation, delivering cutting-edge irrigation solutions that simplify water management. By combining intuitive designs with advanced features like the Easy-Set Logic, Orbit ensures users can efficiently control their watering systems. Their focus on innovation has led to the development of timers like the 6 Station Timer, which offers flexible programming and compatibility with wireless sensors. This dedication to improving user experience and water conservation solidifies Orbit’s reputation as a leader in the irrigation industry.

Other Orbit Sprinkler Timer Models

Orbit offers a range of sprinkler timers to meet different needs. Models like the 57894 and 57896 provide similar functionality to the 6-station timer, with slight variations in features. The 28568 model is another popular choice, known for its ease of use and reliability. Additionally, Orbit offers smart timers and hose-end controllers, expanding their product line to cater to various irrigation requirements. These models share Orbit’s commitment to innovation, ensuring efficient water management for any landscape, whether residential or commercial.

men are from mars women from venus pdf

John Gray’s iconic book explores gender differences‚ offering insights into communication and emotional needs․ Available as a free PDF‚ it remains a timeless guide for relationships․

1․1 Overview of the Book

John Gray’s Men Are from Mars‚ Women Are from Venus is a guide to understanding relationships through the metaphor of men and women originating from different planets․ The book explores how gender differences influence communication‚ emotional needs‚ and conflict resolution․ It provides practical advice for improving connections‚ emphasizing mutual understanding and respect․ Available as a free PDF‚ the book remains a popular resource for fostering loving and fulfilling relationships by addressing common challenges faced by couples․ Its insights have made it a timeless manual for relationship success․

1․2 Importance of Understanding Gender Differences

Understanding gender differences is crucial for fostering harmony in relationships․ By recognizing how men and women think‚ communicate‚ and emotionally respond differently‚ couples can avoid misunderstandings and conflicts․ This awareness helps in addressing each partner’s unique needs‚ leading to deeper emotional fulfillment and mutual respect․ The insights from Men Are from Mars‚ Women Are from Venus provide a foundation for improving communication and conflict resolution‚ ultimately strengthening the bond between partners and creating a more loving and supportive relationship dynamic․

1․3 Brief Biography of Author John Gray

John Gray‚ born in 1951‚ is a renowned American author and relationship counselor․ He holds a Ph․D․ in Psychology and has dedicated his career to understanding gender differences and improving relationships․ His book‚ Men Are from Mars‚ Women Are from Venus‚ became a global phenomenon‚ offering practical advice for communication and emotional fulfillment․ Gray’s work has been widely acclaimed‚ making him a leading voice in relationship dynamics․ His insights continue to resonate‚ providing a foundation for healthier partnerships worldwide․

Core Concept of the Book

The book uses the metaphor of Mars and Venus to illustrate inherent differences between men and women‚ emphasizing communication and emotional needs for harmonious relationships․

2․1 The Metaphor of Mars and Venus

The metaphor of Mars and Venus‚ introduced by John Gray‚ symbolizes the inherent differences between men and women․ By portraying men as logical and independent like Martians‚ and women as emotional and nurturing like Venusians‚ Gray provides a relatable framework to understand relationship dynamics․ This metaphor helps bridge communication gaps‚ offering insights into how each gender approaches love‚ conflict‚ and emotional expression․ It emphasizes that recognizing these differences is key to fostering mutual understanding and harmony in relationships․

2․2 Key Differences Between Men and Women

John Gray highlights that men and women exhibit distinct approaches to communication‚ emotions‚ and problem-solving․ Men often prioritize logic and independence‚ while women tend to focus on emotions and connections․ These differences stem from biological and psychological traits‚ shaping their behaviors in relationships․ Understanding these distinctions helps bridge gaps in communication and fosters mutual respect․ By recognizing these inherent differences‚ couples can better navigate conflicts and build stronger‚ more harmonious relationships․

2․3 The Purpose of the Metaphor in Relationships

The metaphor of Mars and Venus serves to illustrate the fundamental differences between men and women‚ helping couples understand each other better․ By framing men and women as beings from different planets‚ Gray emphasizes that their behaviors‚ needs‚ and communication styles are inherently distinct․ This metaphor encourages empathy and reduces misunderstandings‚ fostering healthier relationships․ It also highlights the importance of adapting to these differences to create mutual respect and harmony․ The metaphor simplifies complex gender dynamics‚ making it easier for individuals to navigate their partnerships effectively․

Communication Styles

The book highlights how men and women communicate differently‚ emphasizing the need to understand these differences to improve relationships and connection․

3․1 How Men Communicate

Men tend to communicate in a straightforward‚ logical manner‚ often focusing on problem-solving․ They may express thoughts without emotional detail‚ seeking solutions rather than emotional support․ This style‚ rooted in their practical nature‚ can sometimes be misunderstood․ Gray emphasizes that men’s communication is often action-oriented‚ aiming to fix issues rather than dwell on feelings․ Understanding this approach helps in bridging the gap between genders‚ fostering more effective and empathetic interactions in relationships․

3․2 How Women Communicate

Women tend to communicate more emotionally and in detail‚ often seeking connection and understanding․ They may express feelings openly‚ valuing emotional support and empathy․ Gray highlights that women’s communication style is relational‚ focusing on sharing experiences and building intimacy․ This approach can sometimes be at odds with men’s problem-solving orientation․ Recognizing these differences is key to fostering mutual understanding and improving relationship dynamics‚ as emphasized in the book․

3․3 The Role of Listening in Relationships

Listening is a cornerstone of effective communication‚ helping to bridge the gap between men and women․ Gray emphasizes that truly hearing your partner fosters empathy and understanding․ Women often value emotional connection‚ while men may focus on problem-solving․ Active listening allows both partners to feel validated‚ reducing misunderstandings․ By prioritizing listening‚ couples can build trust and strengthen their bond‚ creating a foundation for mutual respect and deeper intimacy in their relationship․

3․4 Common Misunderstandings in Communication

Communication misunderstandings often arise from differing styles; Men may interpret women’s expressive nature as needing solutions‚ while women might view men’s directness as insensitive․ These misinterpretations can escalate conflicts․ Gray highlights how men tend to withdraw when stressed‚ while women seek connection‚ leading to frustration․ By recognizing these patterns‚ couples can avoid assumptions and work toward clearer‚ more empathetic dialogue‚ fostering mutual understanding and reducing unnecessary tension in their relationships․

Emotional Needs and Responses

John Gray’s book highlights the differing emotional needs of men and women‚ providing insights into how these differences impact relationships and offering strategies for emotional fulfillment․

4․1 Emotional Needs of Men

Men‚ according to John Gray‚ often prioritize independence and autonomy in their emotional landscape․ They seek validation through achievements and solutions‚ reflecting their Martian upbringing․

The book emphasizes that men need respect and trust to feel emotionally fulfilled‚ aligning with their inherent desire to provide and protect in relationships․

4․2 Emotional Needs of Women

Women‚ as per John Gray’s insights‚ thrive on emotional connection and support․ Their Venusian nature seeks understanding‚ empathy‚ and open communication in relationships․

The book highlights that women need to feel heard and valued‚ with their emotional well-being tied to mutual respect and intimacy‚ fostering a sense of unity and partnership․

4․3 How Emotions Impact Relationships

Emotions play a crucial role in shaping interactions between men and women․ Unmet emotional needs can lead to misunderstandings and conflict‚ while fulfilled emotions foster harmony and connection․

John Gray emphasizes that understanding these emotional dynamics is essential for building mutual respect and trust‚ ultimately leading to more fulfilling and balanced relationships․

4․4 Strategies for Emotional Fulfillment

John Gray provides practical strategies for emotional fulfillment‚ emphasizing the importance of understanding and addressing the unique needs of both partners․ Men are encouraged to support women emotionally‚ while women are advised to appreciate men’s efforts and independence․

By fostering open communication‚ active listening‚ and mutual respect‚ couples can create a balanced relationship where both partners feel valued and fulfilled‚ leading to deeper emotional connection and harmony․

Conflict Resolution

John Gray’s book offers insights into resolving conflicts by understanding gender differences‚ using the Mars-Venus metaphor to illustrate how men and women approach disagreements differently․

5․1 How Men Handle Conflicts

Men often approach conflicts with a problem-solving mindset‚ focusing on finding solutions quickly․ They may withdraw to analyze the issue before returning with a clear plan․ This reflects their tendency to prioritize action over emotional expression‚ aiming to restore balance and resolve disagreements efficiently․ Gray’s insights highlight how men’s conflict resolution strategies stem from their inherent desire to fix problems‚ which can sometimes clash with women’s need for emotional connection during disputes․

5․2 How Women Handle Conflicts

Women typically approach conflicts with an emphasis on emotional connection and collaboration․ They often seek to understand and express feelings‚ valuing empathy and mutual understanding․ Gray explains that women may prioritize harmony and connection during disputes‚ aiming to strengthen the relationship through open communication․ This approach contrasts with men’s problem-solving focus‚ as women often want to feel heard and validated before resolving the issue‚ fostering a deeper emotional bond in the process․

5․3 Effective Strategies for Resolving Disagreements

Effective conflict resolution involves understanding and respecting gender differences․ Active listening‚ empathy‚ and patience are key․ Men should focus on emotional validation‚ while women should avoid overwhelming with details․ Taking breaks when emotions rise can prevent escalation․ Balancing independence and interdependence fosters mutual respect․ Compromise and appreciation help rebuild connection․ Gray emphasizes that acknowledging each other’s needs creates a foundation for resolution‚ ensuring both partners feel valued and heard in the relationship․

5․4 The Importance of Compromise

Compromise is essential for harmonious relationships‚ as it bridges the gap between men’s independence and women’s need for connection․ By understanding each other’s priorities‚ partners can find mutually satisfying solutions․ Gray emphasizes that compromise isn’t about winning but about valuing the relationship․ It fosters trust‚ respect‚ and intimacy‚ allowing both individuals to feel heard and appreciated․ Regular compromise strengthens the bond‚ ensuring long-term fulfillment and happiness in the relationship․

Intimacy and Love

Men often view intimacy as a way to connect and show love‚ while women see it as an emotional expression․ Understanding these differences helps create balance․

6․1 Men’s Perception of Intimacy

Men often view intimacy as a way to connect and show love through action and physical closeness․ They may prioritize problem-solving and providing solutions to demonstrate care․ This approach can sometimes lead to misunderstandings‚ as men may not always express emotions openly․ Intimacy for men is often about feeling needed and appreciated‚ which strengthens their emotional bond․ Understanding this perspective helps bridge gaps in relationships‚ fostering mutual fulfillment and connection․

6․2 Women’s Perception of Intimacy

Women often view intimacy as an emotional connection‚ emphasizing openness‚ vulnerability‚ and shared feelings․ They may seek deep conversations and mutual understanding to feel close․ This approach sometimes leads to misunderstandings‚ as women may prioritize emotional bonding over physical expressions․ Intimacy for women is about feeling heard and valued‚ which deepens trust and connection․ Recognizing this perspective helps partners align their expressions of love‚ fostering a more harmonious and fulfilling relationship dynamic․

6․3 Balancing Intimacy and Independence

Striking a balance between intimacy and independence is crucial for healthy relationships․ Men often prioritize independence to maintain their sense of self‚ while women may seek closeness․ Understanding these needs helps partners respect each other’s boundaries․ By fostering mutual respect and communication‚ couples can create a harmonious blend of togetherness and personal space․ This balance strengthens trust and allows both individuals to grow‚ ensuring a fulfilling and lasting connection․

6․4 Nurturing Love in Relationships

Nurturing love requires effort and understanding from both partners․ Men and women have different ways of expressing affection‚ but mutual respect and trust form the foundation․ By acknowledging each other’s emotional needs and fostering open communication‚ couples can deepen their connection․ Small gestures‚ like men showing appreciation and women offering support‚ can strengthen bonds․ Regular date nights and shared activities also help reignite passion․ Ultimately‚ love grows when both partners feel valued and prioritized‚ creating a lasting and fulfilling relationship․

Independence vs․ Interdependence

The book highlights the balance between men’s need for independence and women’s desire for interdependence‚ emphasizing how understanding these differences fosters harmony in relationships․

7․1 The Need for Independence in Men

Men often prioritize independence‚ valuing autonomy and self-reliance․ Gray explains this as a natural trait‚ stemming from their “Martian” upbringing‚ where independence is crucial for survival․ This need is deeply rooted in their emotional makeup‚ as men may withdraw to recharge‚ often misinterpreted by women․ Understanding this difference helps bridge gaps in relationships‚ allowing men to feel respected in their need for space while maintaining emotional connection․ This balance is key to fostering mutual respect and harmony in partnerships․

7․2 The Need for Interdependence in Women

Women naturally seek interdependence‚ valuing emotional connection and collaboration․ Gray highlights this as a core aspect of their “Venusian” nature‚ where relationships and mutual support are essential․ This need for closeness often leads women to prioritize harmony and communication in partnerships․ Understanding this difference helps men appreciate their role in fostering emotional intimacy․ By acknowledging and supporting women’s need for interdependence‚ relationships can thrive‚ creating a balanced dynamic that honors both connection and individuality․ This interplay is vital for lasting harmony and mutual fulfillment․

7․3 Finding a Healthy Balance

Finding a healthy balance between independence and interdependence is crucial for harmonious relationships․ Gray emphasizes that while men thrive on autonomy‚ women seek connection‚ and both needs must be respected․ By understanding these differences‚ couples can create a dynamic where personal space and togetherness coexist․ This balance fosters mutual growth‚ allowing individuals to maintain their identities while nurturing the relationship․ Trust and respect are key to achieving this equilibrium‚ ensuring both partners feel valued and fulfilled in their unique ways․

7․4 The Role of Trust in Relationships

Trust is the foundation of any thriving relationship‚ as highlighted in “Men Are from Mars‚ Women Are from Venus․” It fosters emotional security and strengthens bonds․ Men often build trust through actions and reliability‚ while women value emotional connection and vulnerability․ Gray emphasizes that understanding each other’s needs is key to nurturing trust․ By fostering open communication and mutual respect‚ couples can create a supportive environment where trust flourishes‚ enabling them to navigate challenges together and deepen their connection․

Practical Advice for Relationships

John Gray’s book offers strategies for men and women to bridge gaps‚ emphasizing empathy and understanding․ It guides improving communication and emotional fulfillment in partnerships effectively․

8;1 Tips for Men to Understand Women Better

Understanding women better involves empathy and effective communication․ Men should practice active listening‚ show genuine interest in their partner’s feelings‚ and validate their emotions․ Offering support without trying to fix everything can build trust․ Recognizing that women often seek emotional connection‚ men can adapt their approach to foster deeper intimacy․ By embracing these strategies‚ men can bridge the communication gap‚ leading to more harmonious and fulfilling relationships․

8․2 Tips for Women to Understand Men Better

Women can better understand men by recognizing their need for independence and validation․ Encourage open communication by creating a safe space for expression․ Acknowledge their achievements and show appreciation‚ as men often seek recognition․ Be patient with their problem-solving approach‚ as they may focus on solutions rather than emotions․ Understanding these traits can help women connect more effectively‚ fostering mutual respect and stronger relationships․

8․3 The Importance of Patience and Empathy

Patience and empathy are crucial for bridging the gap between men and women․ By understanding each other’s emotional worlds‚ partners can navigate conflicts with compassion․ Men often need space to process emotions‚ while women may seek immediate connection․ Practicing patience allows time for mutual understanding‚ while empathy fosters a deeper connection․ These qualities help create a safe environment for open communication‚ enabling both partners to feel valued and heard․ Cultivating patience and empathy strengthens relationships‚ promoting harmony and emotional fulfillment․

8․4 Building a Strong Foundation for Relationships

Building a strong foundation requires trust‚ communication‚ and mutual respect․ Understanding the Mars-Venus metaphor helps partners appreciate their differences․ By fostering open dialogue and empathy‚ relationships become resilient․ Men and women can learn to fulfill each other’s emotional needs‚ creating a bond rooted in trust․ Regular connection and shared goals strengthen the foundation‚ ensuring longevity․ This approach‚ as outlined in the book‚ guides couples toward harmonious and fulfilling partnerships‚ emphasizing the importance of effort and dedication in nurturing love and understanding․

The Impact of the Book

John Gray’s book revolutionized relationship dynamics‚ becoming a bestseller․ Its popularity endures‚ offering insights into gender differences․ Available as a free PDF‚ it continues to empower understanding and connection․

9․1 Popularity and Reception of the Book

John Gray’s “Men Are from Mars‚ Women Are from Venus” became a cultural phenomenon‚ topping bestseller lists globally․ Its relatable metaphor resonated widely‚ making it a go-to guide for relationship advice․ The book’s popularity led to various adaptations‚ including a successful theater production․ Available as a free PDF‚ it continues to be widely downloaded‚ ensuring its timeless wisdom reaches new generations․ Its enduring success highlights its relevance in understanding gender differences and fostering harmonious relationships․

9․2 How the Book Changed Relationship Dynamics

John Gray’s book revolutionized relationship dynamics by simplifying complex gender differences․ Its metaphor of Mars and Venus became a cultural phenomenon‚ helping millions understand communication styles and emotional needs․ By highlighting these distinctions‚ the book empowered individuals to approach relationships with empathy and awareness․ The free PDF availability ensured its widespread reach‚ making it a go-to guide for improving connections․ Its impact lies in fostering mutual understanding‚ enabling partners to bridge gaps and build stronger‚ more harmonious relationships․

9․3 Criticisms and Controversies Surrounding the Book

Despite its popularity‚ “Men Are from Mars‚ Women Are from Venus” has faced criticism for oversimplifying gender differences․ Some argue it reinforces stereotypes‚ potentially hindering deeper understanding․ Critics also point out the lack of scientific evidence supporting its claims․ Additionally‚ the book’s broad generalizations about men and women have been accused of ignoring individual and cultural variations․ While it remains a widely read relationship guide‚ these criticisms highlight the need for a more nuanced approach to understanding gender dynamics in relationships․

9․4 The Book’s Legacy in Modern Relationships

John Gray’s “Men Are from Mars‚ Women Are from Venus” has left a lasting impact on modern relationships․ Its metaphorical approach to gender differences continues to influence how people understand and navigate love and communication․ Despite criticisms‚ the book remains a foundational text for many seeking to improve their relationships․ Its availability in formats like PDF ensures its ideas remain accessible‚ making it a timeless resource for fostering understanding and connection between partners in an ever-evolving world․

John Gray’s book remains a timeless guide for understanding relationships․ Its insights into gender differences continue to resonate‚ offering practical advice for fostering love and communication‚ now accessible as a free PDF․

10․1 Summary of Key Takeaways

John Gray’s book emphasizes understanding gender differences to improve relationships․ It highlights distinct communication styles‚ emotional needs‚ and conflict resolution strategies․ Men often seek independence‚ while women value connection․ The metaphor of Mars and Venus illustrates these contrasts‚ offering practical advice for fostering mutual understanding․ By recognizing these differences‚ couples can build stronger‚ more fulfilling relationships․ The book’s insights remain relevant‚ providing a foundation for effective communication and emotional fulfillment‚ now accessible as a free PDF for wider readership and application in modern relationships․

10․2 The Relevance of the Book in Today’s World

John Gray’s book remains highly relevant‚ offering timeless insights into relationship dynamics․ Its core themes of communication‚ emotional needs‚ and conflict resolution continue to resonate․ The metaphor of Mars and Venus provides a simple yet profound framework for understanding gender differences․ As a free PDF‚ it’s accessible to a new generation‚ ensuring its advice on fostering mutual understanding and emotional fulfillment stays pertinent in modern relationships‚ helping couples navigate today’s challenges with empathy and awareness․

10․3 Final Thoughts on Improving Relationships

Improving relationships requires embracing the metaphor of Mars and Venus‚ fostering mutual understanding․ By recognizing gender differences in communication and emotional needs‚ couples can build stronger connections․ The book’s insights remain timeless‚ offering practical strategies for conflict resolution and emotional fulfillment․ As a free PDF‚ it continues to empower individuals to nurture love and respect in their relationships‚ ensuring lasting harmony and mutual growth in today’s fast-paced world․

denture repair kit instructions

Denture repair kits offer an easy‚ cost-effective solution for fixing broken or loose dentures at home․ They provide durable materials and clear instructions for quick fixes․

What is a Denture Repair Kit?

A denture repair kit is a DIY solution designed to fix broken‚ cracked‚ or loose dentures at home․ These kits typically include adhesive materials‚ acrylic resins‚ and step-by-step instructions to help users repair their dentures quickly and effectively․ They are ideal for addressing minor damage‚ such as reattaching loose teeth or mending small cracks‚ and are suitable for both partial and complete dentures․ The kits are cost-effective and convenient‚ allowing users to avoid the immediate need for a dental appointment․ However‚ they are not a permanent solution for severely damaged dentures and should only be used for temporary fixes until professional care can be sought․

Why Choose a DIY Denture Repair?

Choosing a DIY denture repair offers convenience‚ cost savings‚ and quick results․ These kits provide an affordable alternative to professional dental visits‚ allowing you to fix minor issues like loose teeth or small cracks at home․ They are designed with easy-to-follow instructions‚ making the process accessible even for those without technical expertise․ DIY repairs save time and money‚ enabling you to restore your dentures’ functionality and comfort promptly․ However‚ it’s important to note that DIY fixes are temporary solutions and may not address severe damage․ For more complex problems‚ consulting a dentist or dental technician is recommended to ensure proper alignment and long-term durability․

Tools and Materials for DIY Denture Repair

A typical denture repair kit includes adhesive‚ acrylic resin‚ and instructions․ Additional tools like a clamp or applicator may be needed for precise application and alignment․

Essential Items in a Denture Repair Kit

A denture repair kit typically includes a strong adhesive‚ acrylic resin‚ and an applicator․ These materials ensure durable‚ long-lasting fixes for cracked or broken dentures․ The adhesive bonds pieces securely‚ while the resin fills gaps and reinforces the structure․ Some kits also include a mixing tool and instructions for proper application․ These items are designed to handle both partial and complete dentures‚ providing a reliable solution for common issues like loose teeth or fractures․ By using these components‚ users can achieve professional-quality results at home‚ minimizing the need for frequent dental visits․ Always follow the instructions carefully to ensure the best outcome․

Additional Tools You May Need

Beyond the kit‚ you may need a clean cloth to wipe away excess adhesive and a soft brush to remove debris․ A small container for mixing materials is also helpful․ Ensure all tools are clean to avoid contamination; These items aid in achieving a smooth‚ professional finish and prevent further damage․ Proper preparation and cleanup are key to successful repairs․ Always refer to the kit’s instructions for specific recommendations on additional tools․ This ensures the repair process is efficient and effective‚ helping you maintain your dentures’ functionality and appearance․

Step-by-Step Guide to Using a Denture Repair Kit

Follow the kit’s instructions to clean‚ dry‚ and prepare your dentures․ Apply adhesive‚ reattach broken pieces‚ and allow proper drying time for a secure‚ lasting fix․

Step 1: Clean Your Dentures

Cleaning your dentures is the first and most crucial step in any repair process․ Start by rinsing your dentures under warm water to remove loose debris․ Use a mild soap or denture cleaner and a soft-bristle toothbrush to gently scrub all surfaces‚ paying special attention to areas around cracks or broken pieces․ Avoid using harsh chemicals‚ abrasive materials‚ or hot water‚ as these can damage the denture material․ Once cleaned‚ rinse thoroughly to remove any soap residue․ This step ensures a clean surface for the adhesive to bond properly‚ which is essential for a successful repair․ Proper cleaning also helps prevent bacteria or debris from interfering with the repair process․

Step 2: Dry Your Dentures Completely

Drying your dentures is essential after cleaning to ensure proper adhesion of the repair material․ Use a soft‚ lint-free cloth to gently pat the dentures dry‚ paying extra attention to cracks or broken areas․ Allow them to air dry for a few minutes to remove any remaining moisture․ Avoid using heat‚ as it can warp the denture material․ Proper drying ensures the adhesive bonds effectively‚ preventing weak repairs․ If the dentures are not completely dry‚ the repair may fail or lead to further issues․ This step is critical for achieving a strong and durable fix․

Step 3: Prepare the Repair Area

After cleaning and drying‚ inspect the damaged area to ensure it’s free from debris․ Use a soft cloth to gently remove any remaining particles or residue․ If necessary‚ lightly sand the repair area with fine-grit sandpaper to create a smooth surface for better adhesion․ This step ensures the adhesive bonds securely to the denture material․ Proper preparation prevents weak repairs and extends the lifespan of your dentures․ Make sure the area is clear of any obstructions and align the broken pieces precisely before applying the adhesive․ Following these steps carefully will help achieve a strong and durable repair․

Step 4: Apply the Adhesive

Once the repair area is prepared‚ carefully open the adhesive from the denture repair kit․ Follow the instructions to mix the components if required․ Using the applicator or a small brush‚ apply a thin‚ even layer of adhesive to the damaged area․ Ensure complete coverage without over-application‚ as excess adhesive can lead to uneven results․ Gently press the broken pieces together‚ maintaining proper alignment․ Hold the pieces firmly for a few seconds to secure them in place․ Allow the adhesive to dry for the recommended time‚ usually a few minutes‚ before handling the dentures․ Avoid disturbing the area during the drying process to ensure a strong bond․

Step 5: Reattach Broken Pieces

After applying the adhesive‚ carefully align the broken pieces to their original position‚ ensuring they fit perfectly․ Press the pieces together firmly but gently to avoid creating new cracks․ Hold the pieces in place for 10-15 seconds to secure the bond․ Once aligned‚ release the pressure and allow the adhesive to set undisturbed․ Handle the dentures with care to prevent dislodging the pieces during the curing process․ If the kit includes additional materials‚ such as reinforcing strips‚ apply them as instructed․ Proper alignment is crucial for both functionality and aesthetics․ Follow the kit’s guidelines for any final adjustments before allowing the repair to fully cure․

Step 6: Allow Proper Drying Time

Once the adhesive is applied and the pieces are securely in place‚ it’s essential to let the repair dry completely․ Follow the instructions provided in the kit for the recommended drying time‚ typically ranging from 30 minutes to an hour․ Avoid using the dentures during this period‚ as premature use can weaken the bond․ After the specified time‚ gently check the repair to ensure it’s set properly․ For optimal results‚ allow the dentures to rest for 24 hours before wearing them regularly; This step ensures the adhesive fully cures‚ providing a strong and durable repair․ Proper drying time is crucial for the longevity of the fix․

Safety Precautions and Tips

Always follow kit instructions carefully․ Use medical-grade adhesives to avoid harmful chemicals․ Avoid using Super Glue‚ as it can damage dentures․ Ensure proper alignment before applying adhesive․

When Not to Attempt a DIY Fix

If your dentures are extensively damaged‚ cracked‚ or misaligned‚ a DIY repair may not be suitable․ Avoid attempting repairs if the damage affects the structural integrity or fit of the denture․ If the break is near attachment points or if you’re unsure about the process‚ consult a professional․ DIY kits are not recommended for complex issues like multiple breaks or missing parts․ Always prioritize proper alignment and fit to avoid further damage or discomfort․ If the repair fails to restore functionality‚ seek assistance from a dentist or certified dental technician for a permanent solution․

Are Denture Repair Kits Safe?

Denture repair kits are generally safe when used as directed․ They include medical-grade adhesives and materials designed for dental use․ However‚ improper application or ignoring instructions can lead to poor results or discomfort․ Ensure the kit is suitable for your type of denture and follow all safety guidelines․ Avoid using household glues‚ as they are not safe for dental repairs․ If you experience any issues after using a kit‚ consult a dentist promptly․ While these kits are convenient‚ they are not a substitute for professional care‚ especially for complex repairs or long-term solutions․

Common Mistakes to Avoid

Avoid using super glue‚ as it can damage dentures․ Ensure proper alignment before applying adhesive to prevent uneven bonding․ Always follow kit instructions carefully․

Why Super Glue is Not Recommended

Super Glue is not recommended for denture repair as it creates a permanent‚ rigid bond that can damage the denture material․ Unlike dental adhesives‚ Super Glue lacks flexibility‚ which is essential for dentures that need to adapt to jaw movements․ Additionally‚ it contains harmful chemicals that are not safe for oral use․ Using Super Glue can also make professional repairs more difficult‚ as it creates a bond that is hard to remove without further damaging the denture․ Always use the adhesive provided in denture repair kits‚ as they are specifically designed for safe and effective dental use․ This ensures a proper fit and avoids potential health risks․

Importance of Proper Alignment

Proper alignment is crucial when repairing dentures to ensure they fit and function correctly․ Misaligned pieces can lead to discomfort‚ uneven wear‚ and further damage․ If the denture doesn’t align properly after a repair‚ it may not sit securely in the mouth‚ affecting chewing and speaking abilities․ Additionally‚ improper alignment can cause excessive stress on certain areas‚ leading to more breaks or cracks․ Always follow the repair kit instructions carefully to ensure pieces are correctly positioned․ If alignment issues persist‚ it’s best to consult a dental professional‚ as improper alignment can render the repair ineffective and potentially harm your oral health․ Proper alignment ensures durability and comfort‚ making it a critical step in the repair process․

Aftercare and Maintenance

Proper cleaning and drying after repairs prevent bacteria buildup․ Regular dental check-ups ensure long-term functionality and detect potential issues early‚ maintaining your dentures’ optimal condition and fit․

How to Prevent Future Breakage

To prevent future breakage‚ use high-quality denture repair kits and follow instructions carefully․ Handle dentures with care‚ avoiding drops or excessive force․ Store them in a protective case when not in use to minimize accidental damage․ Regularly inspect for signs of wear or cracks and address them promptly․ Avoid using harsh chemicals or abrasive cleaners‚ as they can weaken the material․ Ensure proper alignment during repairs to maintain stability․ By taking these precautions‚ you can extend the lifespan of your dentures and reduce the need for frequent repairs․ Regular dental check-ups are also crucial for early detection of potential issues․

Regular Dental Check-Ups

Regular dental check-ups are essential for maintaining the health and functionality of your dentures․ Even if you successfully use a denture repair kit‚ professional care ensures proper fit and alignment․ Dentists can identify early signs of wear or damage that DIY repairs might miss․ During check-ups‚ your dentist will inspect for cracks‚ loose teeth‚ or uneven surfaces and provide personalized advice for long-term care․ Regular visits help prevent major issues and extend the lifespan of your dentures․ While repair kits are convenient‚ they are not a substitute for professional dental care․ Schedule appointments every 6-12 months to keep your dentures in optimal condition and ensure your oral health remains a priority․

Additional Resources

Online Tutorials and Video Guides

Online tutorials and video guides provide step-by-step instructions for using denture repair kits․ Platforms like YouTube offer demonstrations on applying adhesives and fixing cracks effectively․

Online tutorials and video guides are excellent resources for mastering the use of denture repair kits․ Websites like YouTube offer detailed step-by-step instructions‚ demonstrating how to apply adhesives‚ reattach broken teeth‚ and fix cracks․ These videos often feature expert tips and tricks to ensure a professional-quality repair․ Many tutorials are specifically designed for DIY enthusiasts‚ providing clear visual guidance to help users achieve long-lasting results․ Additionally‚ some repair kits‚ like Repair-It‚ include links to instructional videos that walk users through the entire process․ These resources are invaluable for those looking to repair their dentures confidently and effectively at home‚ saving time and money while maintaining proper dental care․

Recommended Repair Kits

Several high-quality denture repair kits are available‚ designed for effective and long-lasting results․ Kits like Repair-It are highly recommended for their ease of use and durability․ They often include strong bonding agents and acrylic resins‚ suitable for both complete and partial dentures․ These kits are ideal for fixing cracks‚ reattaching broken pieces‚ and ensuring proper alignment․ Many come with clear instructions and are available at local drug stores‚ specialty shops‚ and online retailers․ Customer satisfaction and positive reviews make these kits a reliable choice for DIY denture repairs․ By selecting a well-reviewed kit‚ users can achieve professional-quality fixes at home‚ minimizing the need for frequent dental visits and maintaining their dentures effectively․

Denture repair kits offer a quick‚ affordable solution for fixing broken or loose dentures at home‚ restoring comfort and confidence with easy-to-follow instructions and durable results․

Final Thoughts on Denture Repair Kits

Denture repair kits are a convenient and cost-effective solution for minor fixes‚ offering easy-to-follow instructions and durable materials․ They empower users to restore their dentures at home‚ saving time and money․ However‚ while these kits are excellent for temporary fixes or minor damage‚ they are not a substitute for professional dental care․ For severe damage or improper alignment‚ consulting a dentist is essential․ By following the kit’s instructions carefully and understanding their limitations‚ users can enjoy a confident smile while maintaining their oral health․ These kits are a practical tool for extending the life of dentures and preventing future breakage with proper care․

905 bus timetable st neots to bedford pdf

Overview of the 905 Bus Route

The 905 bus route connects St Neots, Bedford, and Cambridge, operated by Stagecoach East, with 18 stops and a journey time of approximately one hour, depending on traffic conditions.

Operator Information

Stagecoach East operates the 905 route, part of the Stagecoach Group, a leading UK transport provider since 1981. They manage 6,400 buses across England, Scotland, and Wales, offering reliable, eco-friendly services with digital tools for passengers.

2.1 About Stagecoach East

Stagecoach East, part of the Stagecoach Group, is a leading UK transport provider since 1981. It operates over 6,400 buses across England, Scotland, and Wales, serving 40 major towns and cities. Known for reliability and safety, Stagecoach East employs experienced drivers and maintains high punctuality standards. The company is committed to sustainability, using eco-friendly buses to reduce environmental impact. It also offers digital tools like real-time tracking and mobile apps, enhancing the passenger experience; Stagecoach East manages routes like the 905 bus, connecting key locations such as Bedford, St Neots, and Cambridge. With a customer-focused approach, the company ensures efficient and comfortable travel, supporting both commuters and leisure travelers. Its extensive network and frequent services make it a vital part of the local transport system, fostering connectivity and convenience for thousands of passengers daily.

2.2 Fleet and Amenities

Stagecoach East operates a modern fleet of buses, including eco-friendly vehicles designed to reduce environmental impact. The 905 route features buses equipped with amenities such as Wi-Fi, ensuring passengers stay connected during their journey. Accessible seating and priority areas accommodate passengers with disabilities, promoting inclusivity. The buses are maintained to high standards, ensuring comfort and reliability. Real-time tracking systems are installed, allowing passengers to monitor their journey progress. Cleanliness and safety are prioritized, with regular maintenance checks and a focus on passenger well-being. The fleet’s modernization efforts reflect Stagecoach East’s commitment to providing a superior travel experience, aligning with their goal of sustainable and efficient public transport. These amenities enhance the overall quality of service, making the 905 route a preferred choice for commuters and travelers in the region.

Key Stops on the Route

The 905 bus route includes key stops at Bedford Bus Station, St Neots Bus Station, and Cambridge Drummer Street, serving as essential hubs for commuters and travelers in the region.

3.1 Bedford Bus Station

Bedford Bus Station is a key terminus for the 905 bus route, offering essential links to St Neots and Cambridge. Located in the heart of Bedford, the station provides convenient access for commuters and travelers. It is equipped with modern amenities, including seating areas, ticket machines, and real-time departure boards, ensuring a smooth travel experience. Buses depart regularly from Stop O, with frequent services throughout the day. The station’s central location makes it easily accessible on foot or by other transport modes. Bedford Bus Station serves as a vital hub, connecting passengers to employment, education, and leisure destinations across the region. Its regular services and amenities make it a cornerstone of the local transport network, catering to both daily commuters and occasional travelers.

3.2 St Neots Bus Station

St Neots Bus Station is a central hub for the 905 bus route, providing vital connections to Bedford and Cambridge. The station is well-equipped with modern facilities, including shelters and real-time information displays, ensuring a seamless travel experience. Major stops in St Neots include Loves Farm and Market Square, offering easy access for local residents and commuters. Buses operate regularly throughout the day, with departures at intervals designed to accommodate diverse travel needs. The station’s central location makes it an ideal starting point for journeys to Bedford and Cambridge, catering to both daily commuters and occasional travelers. St Neots Bus Station plays a crucial role in linking residential areas with key employment and educational hubs, making it a vital part of the region’s transport network. Its frequent services and convenient amenities ensure that passengers can plan their journeys efficiently and comfortably.

3.3 Cambridge Drummer Street

Cambridge Drummer Street serves as a key stop on the 905 bus route, providing essential connections to St Neots and Bedford. Located in the heart of Cambridge, Drummer Street is a major transport hub, offering convenient access to the city center and its attractions. The 905 bus terminates at Drummer Street Bay 7, with regular departures and arrivals throughout the day. The station is equipped with modern amenities, including real-time information displays and seating areas, ensuring a comfortable waiting experience for passengers. Drummer Street is also a central location for connecting to other bus routes and transport services, making it a vital link for commuters and travelers. Its proximity to Cambridge’s main attractions and universities makes it a popular stop for students and visitors alike. With its frequent services and strategic location, Cambridge Drummer Street plays a crucial role in the 905 route’s effectiveness and connectivity within the region.

Timetable Details

The 905 bus timetable operates from early morning to late evening, with frequent departures every 30 minutes during peak hours. It connects St Neots, Bedford, and Cambridge, ensuring reliable service throughout the day.

4.1 Peak and Off-Peak Schedules

The 905 bus route operates with distinct peak and off-peak schedules to accommodate varying commuter demands. During peak hours, typically on weekdays, buses run every 30 minutes, ensuring frequent service for busy travel times. This schedule is designed to handle the increased number of passengers traveling to and from work or educational institutions. Off-peak schedules maintain regular intervals, though less frequent, to support those traveling outside rush hours. The peak service usually starts early in the morning, around 5:00 AM, and continues until late evening, with the last departures around 11:00 PM. This structure allows commuters to plan their journeys efficiently, with minimal waiting times and reliable service throughout the operating day. The balance between peak and off-peak schedules ensures that the 905 route remains a convenient option for both daily commuters and occasional travelers.

4.2 Seasonal Variations

The 905 bus timetable may experience seasonal variations, particularly during school holidays, bank holidays, and peak summer months. These changes reflect shifts in passenger demand, with additional services often introduced during summer to accommodate tourists and holidaymakers. Conversely, reduced frequencies might occur during winter months due to lower demand. Roadworks or special events can also lead to temporary adjustments in the schedule. Stagecoach East typically updates the timetable in advance of these changes, ensuring minimal disruption to passengers. It is advisable to check the latest PDF timetable on the Stagecoach website or mobile app for the most accurate and up-to-date information before planning journeys. This proactive approach helps maintain reliable service while adapting to seasonal needs, ensuring the 905 route remains a dependable option for travelers throughout the year.

4.3 How to Read the Timetable

The 905 bus timetable is structured to display service numbers, departure times, and arrival times across key stops like Drummer Street Bay 7 and Bedford Bus Station. Each row represents a specific journey, with columns indicating the service number, departure times from major stops, and arrival times at destinations. Passengers can trace their route by matching their starting point and destination. The timetable also highlights peak and off-peak schedules, ensuring clarity for commuters. For example, the 05:55 departure from Cambridge reaches Bedford at 07:20, while the 05:20 from Bedford arrives in Cambridge at 07:15. This layout helps users plan their journeys efficiently. Specific symbols and codes guide passengers, with arrows indicating direction of travel and circles marking timing points. Letters or numbers next to service numbers denote special conditions, such as S for school days or X for express routes. Understanding these symbols enhances navigation of the timetable for seamless commuting.

Accessing the Timetable

The 905 bus timetable is available as a downloadable PDF on the Stagecoach East website and mobile app, offering easy access to schedules, stops, and route details for efficient journey planning.

5.1 Downloading the PDF

The 905 bus timetable is readily available for download as a PDF from the Stagecoach East website and mobile app. This convenient format allows passengers to access detailed schedules, stops, and route maps offline. To download, visit the Stagecoach East website, navigate to the “Timetables” section, and select the 905 route. The PDF includes comprehensive information about departure times, arrival points, and service frequencies, making it an essential tool for planning journeys. The downloadable nature of the timetable ensures that passengers can refer to it even without internet access, providing flexibility and ease of use. Additionally, the PDF is formatted for easy printing, enabling commuters to carry a physical copy if preferred. This feature is particularly useful for those who rely on hard copies for quick reference. By downloading the PDF, passengers can efficiently plan their travel between St Neots, Bedford, and Cambridge, ensuring a smooth and stress-free experience.

5.2 Mobile App Features

The Stagecoach Bus app offers a comprehensive suite of features to enhance the travel experience for 905 bus route passengers. Users can download the app to access real-time timetables, track their journey, and receive live updates on service disruptions. The app provides an interactive map view, allowing passengers to monitor the exact location of their bus as it travels along the route. Additionally, the app enables users to plan their journeys with precision, offering step-by-step directions and alternative route suggestions. A key feature is the ability to download the 905 timetable as a PDF directly through the app, ensuring offline access to schedules and route details. The app also includes a journey planner, which helps users navigate seamlessly between stops such as Bedford Bus Station, St Neots, and Cambridge Drummer Street. With regular updates and a user-friendly interface, the Stagecoach Bus app is an indispensable tool for commuters and occasional travelers alike, making it easier to stay informed and on track throughout their journey.

5.3 Printing the Timetable

The 905 bus timetable can be easily printed from the downloadable PDF available on the Stagecoach East website or mobile app. The PDF is specifically formatted for clear readability when printed, ensuring that departure times, arrival times, and key stops are easily visible. Passengers can print the entire timetable or select specific sections relevant to their journey. For those without access to a printer, physical copies of the timetable are often available at major bus stations, including Bedford Bus Station and St Neots Bus Station. This feature ensures that all passengers, regardless of their access to digital devices, can plan their journeys effectively. The printed timetable includes all essential details, such as service numbers, departure times, and stops, making it a convenient option for those who prefer a physical copy. This accessibility ensures that the 905 bus route remains user-friendly for everyone.

Special Services and Features

The 905 bus route offers real-time tracking, allowing passengers to monitor their journey via the Stagecoach app. Service alerts and updates are also provided, ensuring riders stay informed about any disruptions or changes to the schedule.

6.1 Real-Time Tracking

Passengers on the 905 bus route can benefit from real-time tracking, enabling them to monitor their journey accurately. This feature is accessible through the Stagecoach Bus app, which provides live updates on bus locations and estimated arrival times. By using GPS technology, the app offers a map view where users can watch their bus move in real-time, helping them plan their commute more efficiently. Real-time tracking also sends push notifications for service alerts, such as delays or diversions, ensuring passengers are always informed. This feature is particularly useful during peak hours or unexpected disruptions, allowing commuters to adjust their plans accordingly. With real-time tracking, the 905 route enhances the overall travel experience by reducing wait times and improving reliability for its users.

6.2 Service Alerts and Updates

Service alerts and updates for the 905 bus route are essential for keeping passengers informed about disruptions or changes. Stagecoach East provides real-time updates through their website, mobile app, and social media platforms. These alerts include information about delays, diversions, or cancellations due to roadworks, weather conditions, or special events. Passengers can also sign up for email notifications or follow Stagecoach East on social media to receive the latest updates directly. Additionally, the Stagecoach Bus app offers push notifications for service disruptions specific to the 905 route, ensuring users are always aware of any changes to their journey. This feature is particularly useful for commuters who rely on the 905 bus for daily travel, as it helps them plan alternative routes or adjust their schedules accordingly. By staying connected, passengers can minimize delays and enjoy a smoother travel experience.

Integration with Other Transport Services

The 905 bus route seamlessly integrates with other transport services, enhancing connectivity for passengers. At key stops like Bedford Bus Station and Cambridge Drummer Street, passengers can transfer to other bus routes, such as the X5, which connects to Oxford and Milton Keynes. This integration allows for efficient travel across the region. Additionally, the 905 route complements local train services, providing access to broader rail networks. Stagecoach East collaborates with other transport providers to ensure smooth transitions between bus and rail services. The Moovit app and Stagecoach website offer journey planning tools, enabling passengers to combine bus and train travel effortlessly. This interconnected network supports commuters and travelers, making it easier to reach destinations beyond the 905 route. By linking with other transport services, the 905 bus route plays a vital role in the regional transport network, fostering convenience and accessibility for all passengers.

basketball strength training program pdf

Basketball strength training is essential for enhancing performance‚ preventing injuries‚ and building a solid foundation for success on the court. A well-structured program combines strength‚ power‚ and conditioning to improve overall athleticism and durability‚ ensuring players can meet the demands of the game at their best.

Importance of Strength Training for Basketball Players

Strength training is the foundation for basketball success‚ enhancing speed‚ power‚ and endurance while reducing injury risk. It builds the muscular and mental resilience needed to excel in a physically demanding sport. By targeting key areas like the lower body‚ core‚ and upper body‚ players improve explosiveness for jumps‚ stability for sharp cuts‚ and strength for rebounding. A well-structured program also addresses common injuries‚ such as ankle sprains and knee issues‚ by strengthening stabilizing muscles. Strength training is non-negotiable for competing at higher levels‚ as it directly translates to better performance on the court. Investing time in the weight room ensures players can withstand the season’s demands and maintain peak condition throughout. Ultimately‚ strength training is essential for unlocking a player’s full potential and achieving long-term success in basketball.

Overview of a Comprehensive Training Program

A comprehensive basketball strength training program is designed to address all aspects of athletic development‚ ensuring players are well-rounded and prepared for the demands of the game. The program typically includes a combination of strength exercises‚ power development‚ conditioning‚ and skill-specific drills. It begins with foundational movements like squats‚ deadlifts‚ and bench presses to build overall strength. Progression incorporates plyometrics and explosive training to enhance power‚ while conditioning focuses on both aerobic and anaerobic endurance. The program is periodized‚ meaning it is divided into phases that target specific goals‚ such as building a base of strength in the off-season and maintaining it during the competitive phase. Additionally‚ injury prevention is integrated through mobility and stability work. The program is tailored to the player’s needs‚ ensuring continuous improvement and adaptation throughout the training cycle. This structured approach ensures athletes are physically and mentally prepared to perform at their best.

Structure of a Basketball Strength Training Program

A well-structured program includes periodization‚ dividing training into phases like off-season‚ pre-season‚ and in-season‚ focusing on strength‚ power‚ and conditioning to optimize performance and prevent overtraining.

Periodization and Phases of Training

Periodization divides the training year into specific phases‚ each with distinct goals. The off-season focuses on building strength and power through high-intensity workouts‚ while the pre-season shifts to enhancing endurance and agility. In-season training maintains strength and addresses sport-specific needs‚ ensuring players stay competitive without overtraining. Post-season recovery prioritizes injury rehabilitation and active rest. This structured approach prevents plateaus‚ optimizes performance‚ and reduces injury risks‚ aligning with the sport’s demands and the athlete’s long-term development.

Components of the Program: Strength‚ Power‚ Conditioning‚ and Skill-Specific Drills

A comprehensive basketball strength training program integrates four key components: strength‚ power‚ conditioning‚ and skill-specific drills. Strength training focuses on building muscle and endurance through exercises like squats and deadlifts. Power training enhances explosiveness with plyometrics and jump exercises. Conditioning improves cardiovascular fitness and stamina‚ essential for sustained performance. Skill-specific drills‚ such as shooting and dribbling‚ bridge the gap between physical training and on-court execution. This holistic approach ensures athletes develop the physical and technical abilities needed to excel in basketball‚ making the program both effective and sport-specific.

Key Exercises for Basketball Strength Training

Essential exercises include squats‚ deadlifts‚ bench presses‚ pull-ups‚ and core work like planks. These build strength‚ power‚ and stability‚ crucial for basketball performance and injury prevention.

Lower Body Exercises: Squats‚ Deadlifts‚ and Lunges

Squats‚ deadlifts‚ and lunges are foundational lower body exercises in basketball strength training. Squats build leg and core strength‚ essential for explosive jumps and stability. Deadlifts target multiple muscle groups‚ improving power and overall athleticism. Lunges enhance balance‚ unilateral strength‚ and agility‚ crucial for quick directional changes on the court. These exercises should be progressed from bodyweight to weighted variations‚ ensuring proper form to prevent injuries. Incorporating these into a structured program helps basketball players develop the strength and explosiveness needed for optimal performance. Consistency and focus on technique are key to maximizing results and reducing injury risk. These exercises form the backbone of a comprehensive lower body training plan tailored for basketball demands.

Upper Body Exercises: Bench Press‚ Pull-Ups‚ and Rows

Upper body strength is crucial for basketball‚ enhancing shooting‚ rebounding‚ and overall durability. The bench press targets the chest‚ shoulders‚ and triceps‚ improving pushing power and stability. Pull-ups build a strong back and grip‚ essential for rebounding and defensive maneuvers. Rows‚ such as barbell or dumbbell variations‚ strengthen the latissimus dorsi and rhomboids‚ key for maintaining proper posture and generating force. These exercises should be incorporated progressively‚ starting with bodyweight or lighter weights and increasing intensity as strength improves. Proper form is vital to avoid injury and maximize results. Balancing pushing and pulling exercises ensures well-rounded development. For basketball players‚ these exercises not only enhance performance but also reduce the risk of shoulder and upper body injuries‚ making them a cornerstone of any effective strength training program.

Core Strength: Planks‚ Russian Twists‚ and Leg Raises

Core strength is vital for basketball‚ as it enhances stability‚ balance‚ and overall power. Planks are foundational‚ improving core stability and reducing the risk of lower back injuries. Russian twists target the obliques‚ building rotational strength essential for quick movements and pivoting on the court. Leg raises focus on the lower abs and hip flexors‚ crucial for explosive jumps and fast breaks. These exercises should be performed with proper form to maximize effectiveness and prevent strain. Incorporating variations‚ such as weighted planks or medicine ball twists‚ can increase difficulty as strength improves. Consistent core training not only boosts athletic performance but also helps maintain proper posture and reduces fatigue during games. A strong core is the backbone of a basketball player’s physique‚ enabling better execution of skills and endurance throughout the season.

Injury Prevention and Recovery

Injury prevention and recovery are crucial for basketball players. Techniques like foam rolling‚ stretching‚ and ice baths help reduce muscle soreness and improve flexibility‚ ensuring optimal performance.

Common Injuries in Basketball and Their Prevention

Basketball players often suffer from injuries like ankle sprains‚ knee ligament tears‚ and shoulder dislocations due to the sport’s high demands. Strengthening the muscles around these joints through exercises such as squats‚ lunges‚ and plyometrics can significantly reduce the risk of injury. Proper warm-ups‚ including dynamic stretching and light cardio‚ are essential before practices and games. Additionally‚ incorporating balance and stability training helps improve proprioception‚ which can prevent ankle injuries. Wearing supportive footwear and using braces when necessary also play a role in injury prevention. Addressing muscle imbalances and ensuring proper recovery through techniques like foam rolling and ice baths further contribute to overall resilience. A well-rounded strength training program tailored to basketball-specific movements is key to keeping players healthy and performing at their best.

Recovery Techniques: Foam Rolling‚ Stretching‚ and Ice Baths

Effective recovery is crucial for basketball players to maintain performance and prevent overtraining. Foam rolling helps reduce muscle soreness by improving blood flow and breaking down adhesions in the muscle tissue. Stretching‚ both dynamic and static‚ enhances flexibility and range of motion‚ which is vital for explosive movements on the court. Ice baths‚ or cold water immersion‚ are widely used to reduce inflammation and muscle spasms after intense workouts or games. These techniques‚ when combined with adequate rest and nutrition‚ promote faster recovery and support long-term athletic development. Incorporating these practices into a daily routine ensures players can train consistently and maintain peak performance throughout the season.

Nutrition and Hydration

A balanced diet rich in protein‚ carbohydrates‚ and healthy fats fuels muscle growth and recovery. Proper hydration with water and electrolytes is essential for optimal performance and health.

Importance of Proper Nutrition for Muscle Growth and Recovery

Proper nutrition is the cornerstone of muscle growth and recovery in basketball strength training. A balanced diet provides the necessary fuel for intense workouts and aids in repairing muscle tissue. Protein is essential for building and repairing muscles‚ with recommendations of 1.2-2.2 grams per kilogram of body weight daily. Carbohydrates replenish energy stores‚ while healthy fats support overall health and hormone production. Hydration is equally critical‚ as even mild dehydration can impair performance. Timing of meals‚ particularly post-workout nutrition‚ plays a significant role in recovery‚ with a mix of protein and carbohydrates consumed within 30-60 minutes after training. A well-planned diet ensures players can train consistently‚ recover efficiently‚ and perform at their best on the court.

Hydration Strategies for Optimal Performance

Hydration is crucial for basketball players to maintain peak performance and prevent fatigue; Proper fluid intake ensures optimal bodily functions‚ including energy production and muscle recovery. Players should drink 17-20 ounces of water 2-3 hours before training or games and 8-10 ounces every 10-15 minutes during activity. Sports drinks can be beneficial during intense or prolonged sessions to replenish lost electrolytes. Monitoring urine color is a simple way to assess hydration levels—pale yellow indicates proper hydration. Avoiding excessive caffeine and sugary beverages is also recommended‚ as they can dehydrate the body. Consistent hydration habits help players maintain focus‚ endurance‚ and overall performance throughout the game‚ making it a key component of their training regimen.

Progression and Adaptation

Progression and adaptation are key to maximizing gains in a basketball strength program. Periodization ensures training phases align with seasonal demands‚ while adjusting exercises and intensity keeps players challenged and avoids plateaus.

Adjusting Training Based on Player Progress and Goals

Adjusting training based on player progress and goals ensures a personalized and effective approach. Coaches monitor improvements in strength‚ speed‚ and skill‚ tailoring workouts to address weaknesses and build on successes. For example‚ a player focusing on power may shift to explosive lifts‚ while another prioritizing endurance might incorporate more conditioning drills. Periodization is crucial‚ with training phases varying by season to balance intensity and recovery. Setting specific‚ measurable objectives helps guide program modifications‚ ensuring each athlete is challenged appropriately. Regular assessments and feedback loops allow for timely adjustments‚ keeping players on track to achieve their goals while staying injury-free and motivated throughout the season.

Ensuring Continuous Improvement and Avoiding Plateaus

Continuous improvement in basketball strength training requires consistent progression and variation. Coaches implement periodized programs‚ cycling through different training phases to avoid plateaus. This includes altering rep ranges‚ intensities‚ and exercise selections. For instance‚ transitioning from hypertrophy-focused higher reps to strength-focused lower reps keeps the body adapting. Incorporating plyometrics and explosive movements enhances power without stagnation. Additionally‚ introducing new exercises or modifying existing ones challenges athletes in fresh ways. Monitoring progress through regular testing ensures adjustments are data-driven. Nutritional and recovery strategies are also refined to support increased demands. By maintaining a dynamic and adaptive approach‚ players stay motivated and continue advancing their performance‚ avoiding the mental and physical plateaus that can hinder success.

A well-structured basketball strength training program enhances performance‚ prevents injuries‚ and builds athleticism. Consistent effort and dedication are crucial for achieving long-term success and peak physical conditioning.

Summarizing the Key Elements of a Successful Program

A successful basketball strength training program incorporates periodization‚ balancing strength‚ power‚ and conditioning. It begins with identifying common injuries and performance needs‚ ensuring exercises like squats‚ deadlifts‚ and plyometrics are included. The program progresses through phases‚ starting with foundational strength and moving to explosive power. Proper progression‚ recovery techniques‚ and nutrition are emphasized to optimize results. Tailoring the program to individual player goals and team style ensures relevance and effectiveness. Consistency‚ dedication‚ and a focus on long-term development are key to achieving peak performance and maintaining health throughout the season.

Motivation and Commitment to Long-Term Success

Motivation and unwavering commitment are the cornerstones of a successful basketball strength training journey. Players must embrace the process‚ understanding that progress takes time and consistency. Setting clear‚ achievable goals helps maintain focus and drive; Surrounding oneself with supportive coaches‚ teammates‚ and mentors fosters a positive environment for growth. Celebrating small victories along the way boosts morale and reinforces the importance of hard work. Additionally‚ adopting a growth mindset allows players to view challenges as opportunities for improvement rather than obstacles. Long-term success requires not just physical dedication but also mental resilience and a passion for continuous development. By staying committed and motivated‚ players can unlock their full potential and achieve lasting success on and off the court.