Archive title

Autem vel eum iriure dolor in hendrerit in vulputate velit esse molestie consequat, vel illum dolore eu feugiat nulla facilisis at vero eros et dolore feugait.

Monthly Archive February 28, 2025

neurographic art step by step pdf

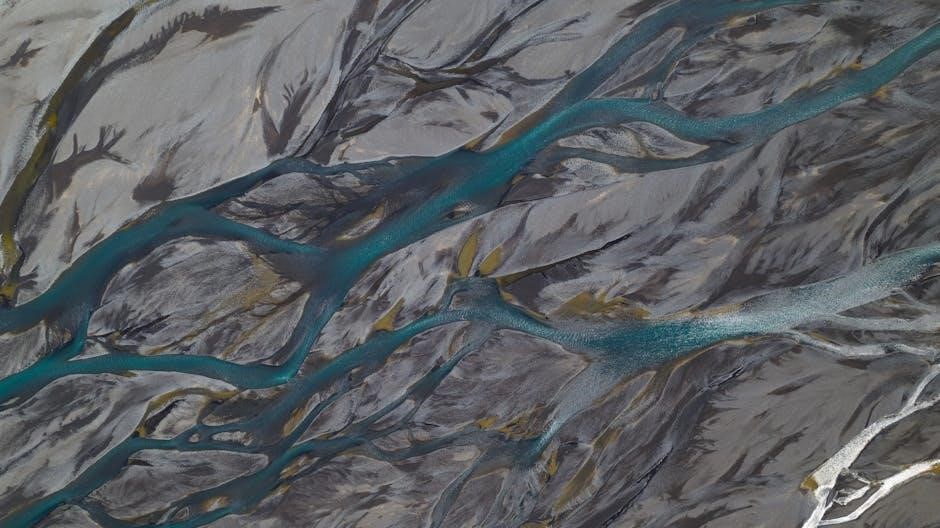
Neurographic Art is a meditative drawing technique inspired by brain structures, promoting relaxation and mental clarity. It combines creativity with neuroscience, fostering a calming, focused state. Perfect for all skill levels, it blends art and self-discovery.

What is Neurographic Art?

Neurographic Art is a unique, meditative drawing technique inspired by the structure of the human brain. It involves creating intricate, flowing designs that mimic neural networks, using lines, shapes, and intersections. This art form encourages a state of focus and relaxation, blending creativity with elements of neuroscience. By following a step-by-step process, artists can craft designs that resemble brain cells and their connections, fostering a sense of calm and mental clarity. Neurographic Art is not only visually striking but also therapeutic, as it helps individuals unwind and explore their creative potential. It is accessible to all skill levels, making it a popular choice for both beginners and experienced artists seeking a mindful creative outlet.

The Origin and Evolution of Neurographic Art

Neurographic Art traces its origins to the intersection of neuroscience and artistic expression, emerging as a unique form of meditative drawing. Inspired by the intricate structures of the human brain, this art form began to gain popularity as a therapeutic practice. Over time, it evolved into a structured technique, blending creativity with mindfulness. The process involves creating flowing designs that mimic neural networks, fostering relaxation and focus. Educators and artists have adapted Neurographic Art into step-by-step guides, making it accessible to all skill levels. Its evolution is marked by the integration of various materials, from traditional drawing tools to digital software, allowing for diverse interpretations. Today, Neurographic Art is celebrated for its calming effects and its ability to bridge art and science, offering a creative outlet for mental well-being. Its growth continues, with communities sharing their work and techniques online, further enriching its artistic and therapeutic potential.

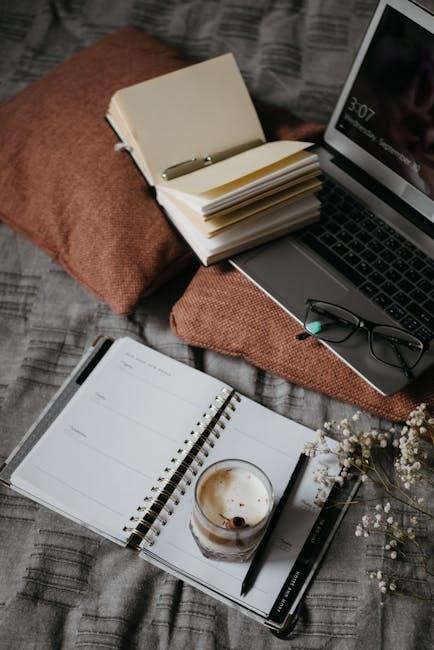
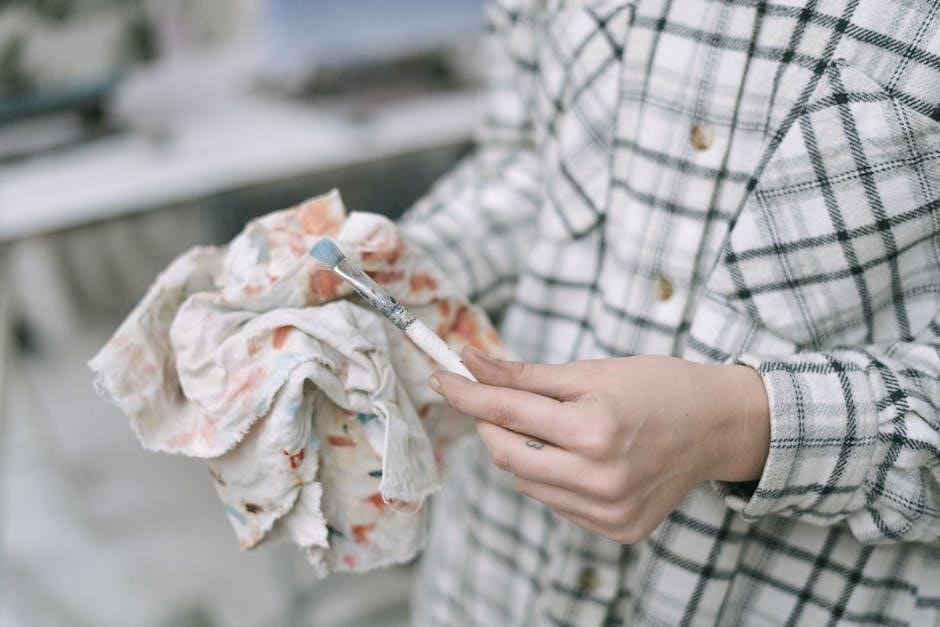
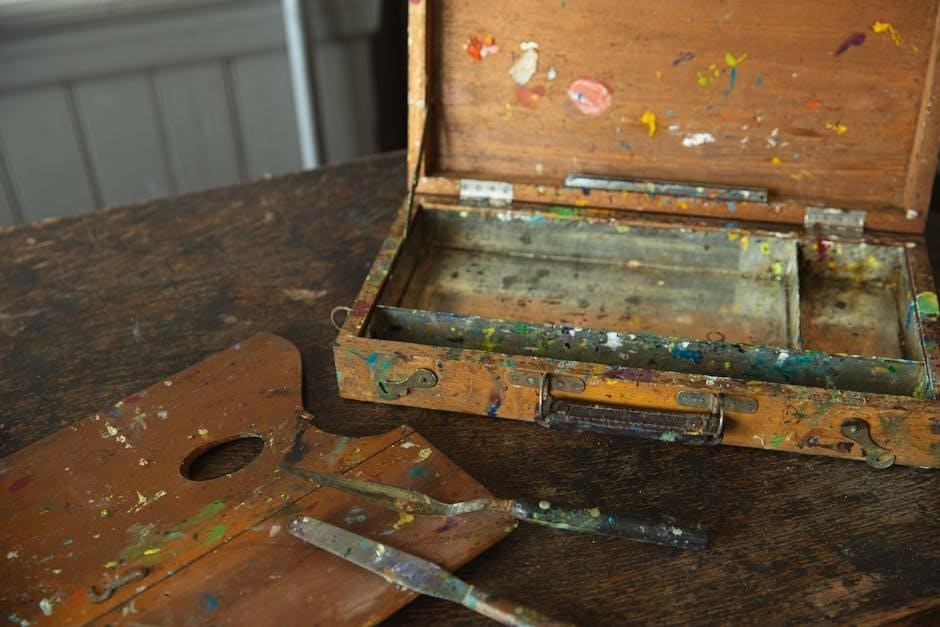
Materials Needed for Neurographic Art

Essential supplies include paper, pens, markers, and colored pencils. Alcohol markers and watercolors are popular for vibrant results. Optional materials like Posca paint pens and thin Sharpies can enhance creativity and detail in your designs.

Essential Supplies for Creating Neurographic Art

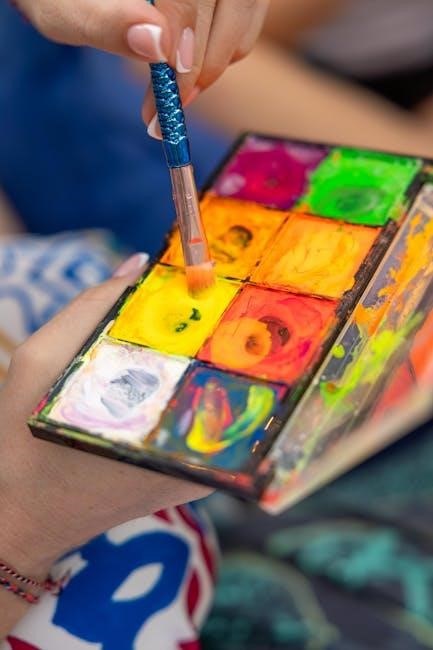
To begin your Neurographic Art journey, you’ll need a few basic supplies. Start with high-quality paper, preferably smooth and thick enough to handle layers of color. A set of fine-tip pens or markers is essential for creating intricate lines and details. Colored pencils are also a must, as they allow for subtle shading and texture. For coloring, alcohol-based markers or watercolors are highly recommended due to their blendability and vibrant results. These tools are versatile and easy to use, making them perfect for both beginners and experienced artists. Additionally, a sharp eraser and a pencil for initial sketches can be helpful. While these are the core materials, feel free to experiment with other mediums as you progress. The key is to have fun and let your creativity flow while exploring the meditative process of Neurographic Art.

Optional Materials for Enhanced Creativity

While essential supplies form the foundation of Neurographic Art, optional materials can elevate your creativity and add unique dimensions to your work. Consider incorporating Posca paint pens for vibrant, opaque colors or thin Sharpies for finer details. Watercolors are another excellent choice, offering soft blends and a more fluid aesthetic. For added texture, experiment with colored pencils or metallic markers to introduce shimmer and depth. Some artists also enjoy using pastels for a softer, more ethereal effect. Additionally, digital tools like drawing tablets or art software can provide endless possibilities for refining and enhancing your designs. These materials allow you to explore different styles and techniques, making your Neurographic Art truly personal. Whether you prefer traditional mediums or digital innovation, the flexibility of these optional supplies ensures your artwork remains fresh and exciting. Embrace experimentation to uncover new ways of expressing your creativity through Neurographic Art.

A Step-by-Step Guide to Creating Neurographic Art

Discover a comprehensive tutorial on crafting Neurographic Art, from basic shapes to intricate neuron-like designs. Follow easy steps to transform simple lines into a meditative, brain-inspired masterpiece, perfect for relaxation and creativity.

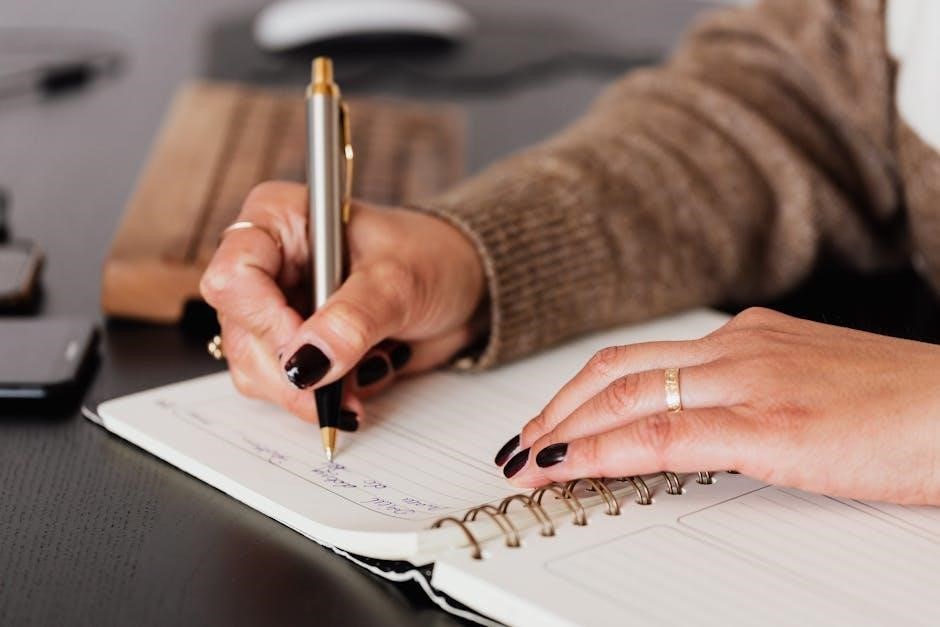
Step 1: Starting with a Central Shape

Begin your Neurographic Art journey by drawing a central shape, such as a circle, square, or organic form, using a fine-tip marker or pencil. This shape serves as the foundation of your design, representing the core of your creation. Keep it simple and symmetrical to maintain balance. The central shape acts as a focal point, allowing your mind to relax and focus. Choose a shape that resonates with you personally, as this will enhance the meditative experience. Once your central shape is complete, you’ll have a clear starting point for adding lines and intersections in the next step. This initial step is crucial for setting the tone and structure of your artwork, making it easier to build upon in subsequent stages. Allow yourself to experiment and embrace the simplicity of this foundational step.

Step 2: Adding Lines and Intersections

Once your central shape is complete, begin adding lines that radiate outward from it. These lines should intersect with each other, creating a web-like structure that resembles the connections in the brain. Use a fine-tip marker or pen to draw smooth, flowing lines, allowing your hand to move freely without overthinking. The intersections of these lines will form smaller shapes and patterns, adding complexity to your design; Experiment with varying line thickness and spacing to create visual interest. This step encourages creativity and focus, as you build upon the foundation established in Step 1. The process of drawing lines and intersections is meditative, helping you relax and immerse yourself in the artistic flow. Remember, there’s no right or wrong way to add lines—let your intuition guide you. This step is all about embracing spontaneity and enjoying the therapeutic process of creating.

Step 3: Creating Neuron-Like Branches

Now, transform your intersections into neuron-like branches by extending lines from each connection point. Use a fine-tip marker or pen to draw smaller, curved lines that branch out from the main intersections. These branches should resemble the dendrites of neurons, creating a sense of organic growth. Vary the length and thickness of the lines to add depth and visual interest. As you work, focus on the meditative rhythm of drawing, allowing your hand to move freely. This step encourages creativity and relaxation, as you build upon the structure established in the previous steps. Experiment with different patterns and directions for the branches, ensuring they flow naturally from the central shape. The goal is to create a harmonious, interconnected design that reflects the beauty of neural networks. This process not only enhances your artistic skills but also deepens the therapeutic benefits of Neurographic Art.

Step 4: Decorating Your Design

Enhance your Neurographic Art by adding color and intricate details. Start by blocking in shapes with alcohol markers or watercolors for vibrant, even coverage. Experiment with Posca paint pens for bold lines or colored pencils for softer tones. Thin Sharpies can add fine details and textures. Consider creating simple, repetitive patterns within your design to foster relaxation. This step allows for personal expression, as you can choose colors and styles that resonate with your mood or theme. Decorating not only beautifies your artwork but also deepens the meditative experience. Let your creativity flow by layering colors or blending materials. The process of decorating encourages focus and calm, making it a therapeutic part of the Neurographic Art journey. As you refine your design, remember to enjoy the process and let your unique style shine through. This step is where your artwork truly comes to life, reflecting your inner creativity and emotional state.

Step 5: Refining and Smoothing Edges

Refining and smoothing edges is a crucial step in perfecting your Neurographic Art. Gently round off sharp corners where lines and shapes intersect to create a more organic, brain-like appearance. Use a fine-tip marker or colored pencil to soften harsh lines, blending them seamlessly into the design. This step allows you to transform angular intersections into smooth, flowing curves, enhancing the overall aesthetic. As you work, you may find yourself entering a meditative state, fully immersed in the process. Pay attention to balance and harmony, ensuring no area feels overly busy or cluttered. For finer details, use tools like thin Sharpies or erasers to erase any unwanted marks. Smoothing edges not only polishes your artwork but also deepens the therapeutic experience, fostering calm and focus; This step prepares your piece for its final touches, making it ready for completion and display. The result is a serene, visually appealing design that reflects your creative journey.

Step 6: Finalizing Your Artwork

Finalizing your Neurographic Art is the last step in bringing your creation to life. Once you’ve refined the edges and smoothed out the design, it’s time to add the final touches. Use your preferred medium, such as alcohol markers, watercolors, or colored pencils, to enhance the colors and ensure balance in your composition. Pay attention to any remaining details, like filling in gaps or adding subtle patterns. As you complete your artwork, you may find yourself in a meditative state, fully absorbed in the process. Once satisfied, take a step back to admire your work. Consider sealing it with a fixative if using mediums like colored pencils to prevent smudging. Finally, your Neurographic Art is ready to be displayed, shared, or gifted. This step marks the culmination of your creative journey, leaving you with a sense of accomplishment and a beautiful piece of art that reflects your inner world. The process not only creates art but also fosters mental clarity and relaxation. Your artwork is now complete and ready to inspire others.

Benefits of Neurographic Art

Neurographic Art offers mental relaxation, enhances creativity, and improves focus. It serves as a therapeutic tool for mental health, reducing stress and fostering self-expression. The meditative process promotes emotional well-being and calmness of mind.

Mental Relaxation and Meditation

Neurographic Art is a powerful tool for mental relaxation and meditation. The repetitive, flowing motions involved in creating neurographic designs help calm the mind, reducing stress and anxiety. As you focus on drawing lines and shapes, you enter a meditative state, allowing your thoughts to unwind. The process encourages mindfulness, helping you stay present and fully engaged in the creative journey; Many practitioners find that the act of transforming chaos into organized patterns is deeply therapeutic, fostering a sense of control and calm. The gentle, rhythmic strokes and the gradual evolution of the artwork create a soothing experience, making it an excellent practice for mental well-being. Over time, this art form can become a sanctuary for relaxation, offering a healthy escape from daily pressures and nurturing emotional balance.

Enhancing Creativity and Focus

Neurographic Art is a powerful tool for enhancing creativity and focus. The structured yet flexible process allows the mind to explore freely while maintaining direction, fostering innovation and imagination. As you progress through the steps—starting with a central shape, adding lines, and creating neuron-like branches—you develop concentration and attention to detail. The act of transforming chaos into organized patterns stimulates the brain, encouraging creative thinking and problem-solving skills. The repetitive motions and gradual evolution of the artwork help maintain focus, making it an excellent practice for improving mental clarity. Over time, Neurographic Art trains the mind to think creatively while staying disciplined, enhancing overall cognitive function. This art form not only sparks imagination but also builds confidence in one’s ability to create something unique and meaningful.

Therapeutic Benefits for Mental Health

Neurographic Art offers profound therapeutic benefits for mental health by providing a calming, meditative experience. The process of transforming chaotic lines into organized patterns mirrors the mind’s ability to create order from confusion, fostering emotional balance. The repetitive, flowing motions involved in drawing neuron-like branches and decorating designs can reduce stress and anxiety, promoting a sense of control and clarity. This art form encourages self-expression, allowing individuals to process emotions visually and gain insight into their inner thoughts. The act of creating something meaningful can boost self-esteem and provide a sense of accomplishment. Neurographic Art is particularly beneficial for those dealing with anxiety, depression, or PTSD, as it offers a healthy outlet for emotions and helps quiet the mind. By focusing on the creative process, individuals can achieve a state of mindfulness, leading to improved mental well-being and emotional resilience.

Sharing Your Neurographic Art

Sharing your Neurographic Art allows you to inspire others and connect through your creative journey. Showcase your designs digitally or display them physically, spreading the calming beauty of your unique neural-inspired creations.

How to Digitally Showcase Your Art

Digitally showcasing your Neurographic Art is a great way to share your creative journey and connect with like-minded individuals. Start by capturing high-quality images of your artwork using a camera or scanner. Ensure proper lighting to highlight the intricate details and colors of your design. Once you have your images, you can upload them to social media platforms like Instagram or Pinterest, where visual art thrives. Use relevant hashtags such as #NeurographicArt or #MeditativeDrawing to increase visibility and reach a broader audience.

Consider creating a portfolio or blog to display your Neurographic Art collection. This allows you to tell the story behind each piece and share the meditative process. You can also join online art communities or forums to engage with others who practice this technique. Additionally, platforms like Etsy or Redbubble enable you to sell your art or offer it as digital downloads; Sharing your Neurographic Art digitally not only showcases your talent but also inspires others to explore this transformative practice.

Physical Display and Gifting Options

Physical display and gifting of Neurographic Art allow you to share its beauty and meaning in tangible ways. Framing your artwork is a popular choice, as it enhances the visual appeal and protects the piece. Choose frames that complement the colors and patterns in your design, ensuring it becomes a focal point in any room. For gifting, consider presenting your art in a portfolio or mounted on canvas for a professional finish.

Another creative option is to transform your Neurographic Art into functional items, such as greeting cards, journals, or even fabric prints. This makes it easy to share your work with others while adding a personal touch. Additionally, offering prints of your art allows others to enjoy your creations without the cost of the original piece. Whether displayed in a home or given as a thoughtful gift, Neurographic Art serves as a reminder of the calming, meditative process behind its creation.

Advanced Techniques in Neurographic Art

Explore layering, blending colors, and creating 3D effects to elevate your Neurographic Art. Incorporate AI-generated elements for unique designs, expanding your creative possibilities and adding depth to your artwork.

Layering and Blending Colors

Layering and blending colors are essential advanced techniques in Neurographic Art, allowing artists to add depth and dimension to their designs. Start by using alcohol markers or watercolors to block in shapes with vibrant hues. Gradually build layers, ensuring each color complements the previous one. Blending can be achieved by softly merging edges with brushes or blending stumps, creating smooth transitions. Experiment with contrasting colors to enhance visual interest. For intricate details, incorporate Posca paint pens or thin Sharpies to refine lines and patterns. Colored pencils can also be used for subtle shading and texture. This process not only elevates the artwork but also deepens the meditative experience, as the focus on color and technique fosters creativity and calm. By mastering layering and blending, artists can transform their Neurographic Art into stunning, intricate pieces that reflect their unique vision and emotional expression.

Creating 3D Effects

Creating 3D effects in Neurographic Art adds depth and dimensionality to your designs, making them visually striking. Achieve this by using shading techniques, such as gradating colors from light to dark, to create the illusion of volume. Perspective can also be incorporated by layering lines and shapes to suggest distance. Experiment with contrasting colors to enhance the perception of depth. Tools like colored pencils or Posca paint pens can add fine details, while markers can blend colors seamlessly. To emphasize 3D elements, focus on rounding corners and softening edges where lines intersect. This technique not only enhances the artwork but also engages the mind, fostering a meditative state as you concentrate on creating dimension. By mastering 3D effects, you can transform your Neurographic Art into dynamic, visually captivating pieces that draw the viewer into the intricate world of your design.

Incorporating AI-Generated Elements

Incorporating AI-generated elements into Neurographic Art offers a modern twist, blending traditional techniques with digital innovation. AI tools can create intricate patterns, shapes, and designs that inspire new ideas for your artwork. By using AI-generated prompts or images, you can explore unique neural-like structures and incorporate them into your designs. This fusion allows for endless creativity, as AI can suggest complex forms and connections that might be challenging to envision manually. Artists can then refine these elements by hand, adding personal touches and emotional depth. AI-generated elements not only enhance the visual appeal of Neurographic Art but also introduce a futuristic dimension, making the process more dynamic and engaging. This approach encourages experimentation and pushes the boundaries of traditional Neurographic techniques, inviting artists to explore new frontiers in their creative journey.

Neurographic Art offers a transformative creative experience, blending art and mental well-being. Its meditative process fosters relaxation, focus, and self-expression. Embrace this journey to unlock your artistic potential and inner calm through its unique, neuron-inspired designs.

Final Thoughts on Neurographic Art

Neurographic Art is a captivating blend of creativity and neuroscience, offering a meditative escape while fostering artistic expression. Its unique approach, inspired by brain structures, allows individuals to explore their imagination and achieve a state of mental clarity. The process is both therapeutic and rewarding, making it accessible to artists of all levels. By following a step-by-step guide, anyone can create intricate, neuron-like designs that reflect their inner thoughts and emotions. The use of various materials, from markers to watercolors, adds versatility to the art form. As you complete each piece, you’ll not only develop your artistic skills but also experience the calming benefits associated with this practice. Neurographic Art is more than just a creative outlet; it’s a journey toward self-discovery and mental well-being.

Encouragement to Continue Exploring

Embrace the journey of Neurographic Art as a lifelong creative adventure. Each piece you create is a reflection of your growth and unique perspective. Experiment with new materials and techniques to keep your practice fresh and exciting. Share your work with others to inspire and be inspired, fostering a sense of community. Remember, Neurographic Art is not just about the final product but the meditative process itself; Allow yourself to explore freely, embracing mistakes as opportunities for innovation. The more you practice, the more you’ll discover the therapeutic benefits and artistic fulfillment it offers. Keep pushing your boundaries, and let your creativity flourish through this captivating art form.

partitura river flows in you pdf

The River Flows in You sheet music by Yiruma is a timeless piano composition, offering emotional depth and versatility for pianists of all skill levels. Its popularity stems from its soothing melody and accessibility, making it a favorite among music enthusiasts worldwide. The PDF format ensures high-quality notation, perfect for practice and performance, while its widespread availability across platforms caters to both beginners and seasoned musicians.

1.1 Overview of the Composition

River Flows in You is a captivating piano solo by Yiruma, known for its flowing, emotive melody. The composition’s structure is simple yet powerful, making it accessible to pianists of all levels. Available in PDF format, the sheet music is widely popular among music enthusiasts, offering a clean and organized layout for easy learning and performance. Its beauty and simplicity have made it a favorite in various musical settings.

1.2 Importance of Sheet Music for Musicians

Sheet music is essential for musicians, offering a standardized way to learn and perform compositions like River Flows in You. It provides precise notation, enabling accurate interpretation and skill enhancement. For pianists, having PDF sheet music ensures accessibility and convenience, making it a vital tool for both practice and performance, fostering musical growth and artistry.

1.3 Why “River Flows in You” is a Popular Choice

River Flows in You is a beloved choice due to its soothing melody and emotional depth. Its accessibility across skill levels makes it a favorite for both beginners and advanced pianists. The availability of PDF sheet music, MIDI, and arrangements for various instruments further enhances its appeal, allowing musicians worldwide to connect with its timeless beauty and versatility.

Yiruma and His Musical Legacy

Yiruma, a South Korean composer and pianist, has left an indelible mark on contemporary music. His works, like River Flows in You, resonate globally, blending simplicity with profound emotion.

2.1 Biography of Yiruma

Yiruma, born Lee Ru-ma in 1978, is a South Korean composer and pianist. He began playing piano at two and studied in England. Known for contemporary piano music, his pieces like River Flows in You have gained global acclaim, reflecting his unique emotional and technical style.

2.2 His Contribution to Contemporary Piano Music

Yiruma has revolutionized contemporary piano music with his emotive and accessible compositions. His works, such as River Flows in You, blend technical simplicity with profound emotional depth, resonating with diverse audiences. By creating music that transcends cultural boundaries, Yiruma has inspired countless pianists and helped popularize instrumental music globally, leaving a lasting legacy in modern piano repertoire.

2.3 Other Notable Works by Yiruma

Beyond River Flows in You, Yiruma has composed numerous impactful pieces that showcase his mastery of emotional expression. Works like May Be and Wait There highlight his ability to craft melodies that resonate deeply with listeners. His music often blends simplicity with profound feeling, making it accessible to a wide audience and solidifying his reputation as a leading figure in contemporary instrumental music.

Structure and Composition of “River Flows in You”

The PDF sheet music for River Flows in You is typically 3-4 pages, written in standard musical notation with a clean, organized layout, ensuring clarity and ease of interpretation for pianists.

3.1 Musical Elements and Techniques

The PDF sheet music for River Flows in You features arpeggios, chord progressions, and a flowing tempo, creating a soothing yet dynamic melody. The composition relies on expressive dynamics and rhythmic variations, allowing pianists to convey deep emotion through nuanced playing. Its structure includes repeating motifs and harmonic shifts, making it both technically challenging and artistically rewarding to perform.

3.2 Key Signatures and Tempo

The PDF sheet music for River Flows in You is written in the key of A major, with a moderate tempo that supports its flowing rhythm. The composition primarily follows a 4/4 time signature, allowing for a steady yet expressive pace. This key and tempo combination creates a balance between simplicity and emotional depth, making it accessible while maintaining its artistic complexity.

3.3 Emotional Depth and Interpretation

The PDF sheet music for River Flows in You captures the emotional essence of Yiruma’s composition, guiding pianists through dynamics and expressions that evoke serenity and passion. The piece’s flowing melody and nuanced harmonies allow for personal interpretation, making it a powerful tool for conveying emotion. Its universal appeal lies in its ability to resonate deeply with listeners, transcending cultural and linguistic barriers through music alone.

Popularity and Cultural Impact

River Flows in You has become a global phenomenon, featured in media and beloved by fans worldwide. Its emotional resonance and versatility make it a timeless favorite, inspiring countless covers and fostering a vibrant community of musicians and enthusiasts who connect through its universal appeal and beauty.

4.1 Usage in Media and Popular Culture

River Flows in You has been widely featured in media, including TV shows, movies, and commercials, enhancing its global appeal. Its emotional melody has been used in romantic scenes, such as in the Twilight series, and performed by celebrities like Mira Rajput. This versatility has cemented its place in popular culture, making it a favorite for various artistic and emotional expressions across different platforms and audiences worldwide.

4.2 Covers and Arrangements by Other Artists

River Flows in You has inspired numerous covers and arrangements, showcasing its universal appeal. Musicians worldwide have reimagined the piece for instruments like guitar, flute, and more. Arrangements by artists such as emmy langevin highlight its versatility, while enthusiasts and professionals alike continue to create unique interpretations. This diversity has expanded its reach, making it a beloved piece across musical communities and genres.

4.3 Fan Receptions and Community Engagement

Fans worldwide have embraced River Flows in You, sharing their performances on social media and engaging in vibrant music communities. The piece fosters a sense of connection, with enthusiasts collaborating on covers and participating in forums. Its emotional resonance inspires personal interpretations, creating a supportive environment where musicians and fans alike celebrate their shared passion for Yiruma’s timeless composition.

Where to Find “River Flows in You” Sheet Music

The River Flows in You sheet music is widely available on platforms like sheetdownload.com and other digital libraries, offering high-quality PDF downloads for instant access.

5.1 Popular Platforms for Sheet Music Downloads

Popular platforms like sheetdownload.com, Musicnotes, and Sheet Music Plus offer high-quality PDF downloads of River Flows in You; These sites provide easy access to Yiruma’s composition, ensuring accurate notation and instant delivery. Many platforms also offer free previews, enabling users to review the sheet music before purchasing. This convenience makes it simple for pianists worldwide to acquire and enjoy playing this beloved piece.

5.2 Free vs. Paid Sheet Music Options

Free sheet music options for River Flows in You are available online, though they may lack quality or include ads. Paid versions offer higher accuracy, cleaner layouts, and ad-free experiences. Platforms like Musicnotes and Sheet Music Plus provide reliable paid downloads, ensuring professional notation. For serious musicians, paid options are recommended for the best learning experience, while free versions suffice for casual use.

5.3 Ensuring Quality and Accuracy in Downloads

To ensure quality and accuracy when downloading River Flows in You sheet music, opt for reputable platforms like Musicnotes or Sheet Music Plus. These sites offer high-quality PDF formats with clean layouts and accurate notation. Avoid unreliable sources that may provide incorrect or incomplete scores. Always check for user reviews or ratings to confirm the quality before downloading.

Formats and Versions of the Sheet Music

River Flows in You is available in PDF, MIDI, and other digital formats, ensuring compatibility with various instruments like piano, guitar, and flute. The PDF version is clean and organized, spanning 3 to 4 pages for easy readability and practice.

6.1 PDF Format and Its Advantages

The PDF format of River Flows in You offers a clean, organized layout, typically spanning 3 to 4 pages. It provides high-quality notation, ensuring clarity and ease of use for pianists. The PDF version is widely available, making it accessible for musicians to download, print, and practice seamlessly. Its standard musical notation is perfect for both beginners and advanced players.

6.2 MIDI and Other Digital Formats

Beyond PDF, River Flows in You is available in MIDI and other digital formats, offering flexibility for musicians. MIDI files allow editing and customization, while formats like guitar pro, musescore, and png cater to diverse needs; These formats enable easy sharing, practice, and performance, making the piece accessible to a broader audience, including guitarists and other instrumentalists seeking to adapt the composition.

6.4 Arrangements for Different Instruments

River Flows in You is not just for pianists; it’s adapted for various instruments like guitar, flute, and acoustic grand piano. These arrangements allow musicians to explore the piece in different ways, making it accessible to a wide range of instrumentalists. Whether for solo performances or ensemble plays, the composition’s versatility shines, offering a universal appeal that transcends traditional piano solo limits.

Difficulty Level and Learning Tips

River Flows in You is moderately challenging, ideal for intermediate pianists. Practice arpeggios and dynamics to master its flowing melody and emotional expression, enhancing your skill set gradually.

7.1 Assessing the Difficulty for Pianists

River Flows in You is moderately challenging, suitable for intermediate pianists. It requires arpeggio techniques, dynamic control, and a flowing touch. The piece demands practice to master its emotional depth and intricate fingerwork, making it an excellent choice for refining skills and expression. Its accessible structure allows pianists to gradually build proficiency while connecting with its beautiful melody.

7.2 Tips for Beginners to Master the Piece

Beginners can master River Flows in You by breaking it into sections and practicing slowly. Start with a metronome to maintain tempo, then gradually increase speed. Focus on finger placement and arpeggio patterns. Use PDF sheet music for clarity and consider MIDI files for visual learning. Online tutorials and video lessons can also provide guidance, helping you refine technique and emotional expression effectively.

7.3 Advanced Techniques for Seasoned Players

Seasoned pianists can enhance River Flows in You by refining dynamics, pedaling, and nuanced expressions. Experiment with rubato for emotional depth and subtle tempo variations. Advanced players can explore complex harmonies or reharmonization. Utilize MIDI files for precise practice and consider video lessons for mastering intricate techniques. These methods elevate the piece’s emotional impact, showcasing the pianist’s skill and artistry effectively.

Tools and Resources for Learning

Utilize PDF sheet music, MIDI files, and software like MuseScore or Synthesia for practice. Online tutorials and video lessons provide step-by-step guidance, while communities offer support and feedback, enhancing learning efficiency.

8.1 Software for Practicing and Editing Sheet Music

Software like MuseScore, Synthesia, and Finale allows musicians to practice and edit River Flows in You sheet music. These tools offer features such as tempo adjustment, MIDI playback, and notation editing, enabling precise practice and customization. They support PDF imports and exports, making it easy to work with digital sheet music. Such software enhances learning and performance, catering to both beginners and advanced pianists.

8.2 Online Tutorials and Video Lessons

Online tutorials and video lessons for River Flows in You are widely available on platforms like YouTube and dedicated music learning websites. These resources provide step-by-step guides, making it easier for pianists to master the piece. Beginners can learn basic techniques, while advanced players can refine their interpretations. Such tutorials not only enhance technical skills but also deepen the emotional connection to the music, making them invaluable for perfecting Yiruma’s beloved composition.

8.3 Communities and Forums for Support

Online communities and forums dedicated to River Flows in You offer invaluable support for musicians. Platforms like YouTube, Reddit, and specialized music forums provide spaces to share tips, seek feedback, and connect with fellow pianists. These communities often feature discussions on techniques, interpretations, and resources, fostering collaboration and motivation. They also host a wealth of shared experiences, making learning and mastering the piece a collective and enriching journey for all participants.

The Role of Sheet Music in Music Education

Sheet music plays a vital role in music education by providing a visual guide for learning and teaching. It enhances musical understanding, develops technical skills, and serves as a valuable tool for both students and educators, fostering appreciation and mastery of compositions like River Flows in You.

9.1 Benefits for Students and Teachers

Sheet music, like River Flows in You, offers students a clear guide for learning complex compositions, improving sight-reading, and mastering techniques. For teachers, it provides structured lesson plans, enabling effective instruction and progress tracking. The availability of PDF formats ensures accessibility, making it easier for both students and educators to practice and perform, fostering musical growth and appreciation in a structured environment.

9.2 Enhancing Musical Understanding and Skills

Sheet music like River Flows in You provides a visual guide, helping musicians grasp dynamics, tempo, and rhythm. It enhances sight-reading abilities and technical proficiency, while fostering emotional expression. For students, it clarifies complex compositions, making learning structured and effective. Teachers benefit by using it to demonstrate techniques, ensuring comprehensive musical development and skill refinement through precise notation and accessible formats like PDF.

9.3 Sheet Music as a Learning Tool

Sheet music serves as an essential learning tool, offering a structured approach to mastering compositions like River Flows in You. It provides clear notation, enabling precise practice and performance. The availability of PDF formats ensures accessibility, while platforms hosting this music foster a community of learners. This resource bridges theory and application, making it invaluable for both self-study and guided instruction, enhancing overall musical proficiency and artistry.

Legal and Ethical Considerations

Respecting copyright laws is crucial when accessing River Flows in You sheet music. Purchasing from authorized sources supports artists and ensures ethical distribution, promoting fair use and creativity.

10.1 Copyright Laws and Fair Use

The sheet music for River Flows in You is protected under copyright laws, requiring proper licensing for use. Downloading or sharing without authorization violates these laws, potentially leading to legal consequences.

Fair use exceptions may apply for educational purposes, but distribution or commercial use without permission remains illegal. Always purchase from authorized platforms to support the artist and respect their rights.

10.2 Supporting Artists Through Purchases

Purchasing sheet music for River Flows in You directly supports Yiruma and other artists, ensuring they receive fair compensation for their work. Buying from authorized platforms guarantees high-quality music while contributing to the sustainability of the music industry. This practice not only rewards creators but also fosters continued production of beautiful compositions like River Flows in You.

10.3 Ethical Sharing and Distribution

Sharing River Flows in You sheet music ethically involves respecting copyright laws and using authorized platforms. Downloading from reputable sources ensures quality and supports the artist. Refraining from unauthorized distribution preserves the value of the work and maintains trust within the music community. Ethical practices promote fairness and uphold the integrity of artistic creation.

The Future of Sheet Music in the Digital Age

The digital age has transformed sheet music accessibility, with PDF downloads like River Flows in You becoming instant and convenient. Platforms now offer high-quality, printable formats, reducing the need for physical copies and making music more environmentally friendly while preserving its artistic value for future generations.

11.1 Trends in Digital Sheet Music

Digital sheet music is thriving, with PDF downloads like River Flows in You leading the trend. Platforms now offer instant access to high-quality scores, reducing reliance on physical copies. This shift enhances accessibility, enabling musicians worldwide to download and print music effortlessly. Interactive tools and apps further enrich the experience, making digital sheet music a cornerstone of modern musical practice and education.

11.2 Impact of Technology on Music Distribution

Technology has revolutionized music distribution, making River Flows in You and other compositions instantly accessible. Digital platforms now offer PDF downloads, enabling global reach and convenience. This shift from physical to digital reduces costs and environmental impact, while also empowering creators to share their work directly with audiences, fostering a more connected and efficient musical ecosystem for both artists and enthusiasts alike.

11.3 Preserving Classical Music in Modern Times

Digital formats like PDF have become essential in preserving classical music, ensuring timeless pieces like River Flows in You remain accessible. Online libraries and platforms host these works, safeguarding their legacy for future generations. This digital preservation not only maintains the integrity of compositions but also introduces them to new audiences, fostering a blend of tradition and innovation in the ever-evolving musical landscape.

River Flows in You remains a timeless piece, resonating emotionally with pianists and music lovers alike. Its accessibility and enduring appeal ensure its legacy, while sheet music preservation guarantees its continued enjoyment for future generations, bridging tradition and modernity seamlessly.

12.1 Summary of Key Points

River Flows in You, composed by Yiruma, is a beloved piano piece known for its emotional depth and simplicity. Its sheet music, widely available in PDF and other formats, caters to pianists of all levels. The composition’s popularity spans global audiences, with covers and arrangements by various artists. Its accessibility and timeless appeal make it a cherished piece in contemporary piano repertoire, ensuring its enduring legacy in music.

12.2 Final Thoughts on “River Flows in You”

River Flows in You remains a timeless and evocative piece, resonating deeply with listeners and pianists alike. Its simplicity and emotional richness make it accessible to all skill levels, while its versatility ensures it continues to inspire new interpretations; As a modern classic, it bridges generations, offering solace, joy, and artistic expression, cementing its place as a cherished piece in contemporary piano music.

12.3 Encouragement for Aspiring Musicians

Aspiring musicians, embrace the journey of mastering River Flows in You. This piece, with its emotional depth and accessibility, is a perfect gateway to refining your skills. Whether you’re a beginner or advancing, Yiruma’s composition offers a timeless challenge and inspiration. Remember, consistent practice and passion will unlock its beauty. Join the global community of pianists who have found joy and growth through this beloved work.

24 bus schedule pdf

The 24 Bus Schedule PDF is a comprehensive guide offering route details, timetables, and maps. It helps commuters plan trips efficiently with real-time tracking and offline access features.

1.1 Overview of the 24 Bus Route

The 24 bus route connects key destinations, including Frankford Transit Center, Bustleton, Meadowbrook, and Bethayres. It operates across multiple regions, such as Philadelphia, Boston, and Novosibirsk, with varying stops and schedules. The route is essential for commuters, offering frequent service and connections to other transit lines. A new bus tracking system is being introduced to enhance passenger experience. The schedule PDF provides detailed timetables, maps, and real-time updates, ensuring a seamless travel experience for daily commuters and occasional riders alike.

1.2 Importance of the Schedule PDF

The 24 bus schedule PDF is a vital resource for commuters, offering real-time tracking, offline access, and detailed timetables. It helps plan trips efficiently, reducing wait times and ensuring timely arrivals. The PDF includes maps, stops, and service alerts, making it indispensable for navigating the route. Whether for daily commutes or occasional travel, the schedule PDF provides essential information, enabling passengers to make informed decisions and avoid delays. Its convenience and accessibility make it a must-have tool for anyone relying on the 24 bus route.

1.3 How to Download the 24 Bus Schedule PDF

To download the 24 bus schedule PDF, visit the official transit website or platforms like Moovit. Search for “24 bus schedule PDF” and select the route. Click the download link to access the PDF, which includes timetables, maps, and stops. The PDF is free and available for offline use, ensuring convenience for planning trips without internet access. This resource is essential for staying informed about service updates and route details.

Understanding the 24 Bus Schedule Details

The 24 bus schedule PDF outlines route maps, stops, and connections, including Frankford Transit Center, Bustleton, and Meadowbrook, ensuring easy trip planning and navigation.

2.1 Route Map and Stops

The 24 bus route spans from Frankford Transit Center to Bustleton and Meadowbrook, covering key stops like Bethayres, Huntingdon Valley, and Bryn Athyn. The map outlines the entire journey, highlighting major intersections such as Pine Rd, Oxford Ave, and Rhawn St. Passengers can identify stops like Welsh Rd, Krewstown Rd, and Susquehanna Rd, ensuring easy navigation. Connections at Frankford Transit Center include lines L, 3, 5, 8, 14, 19, 20, 24, 25, 26, 50, 58, 66, 67, 73, 82, 84, and 88, making it a hub for transfers. A new bus tracking system is set to enhance stop-to-stop accuracy this fall.

2.2 Timetable and Frequency

The 24 bus timetable provides detailed departure times for weekdays, weekends, and holidays, ensuring consistent service. Buses run frequently, with intervals of 15-30 minutes during peak hours and 30-60 minutes off-peak. The schedule is designed to accommodate commuters, with increased frequency during rush hours. Holiday schedules may vary, so checking the PDF is essential. Real-time tracking features in the PDF help passengers plan accurately. Additionally, a new bus tracking system is being introduced to enhance schedule accuracy and improve the overall travel experience for riders.

2.3 Weekday vs. Weekend Schedules

The 24 bus schedule PDF distinguishes between weekday and weekend services, adapting to varying passenger demands. Weekday schedules typically operate with higher frequency, especially during peak hours, to accommodate commuters. Weekend schedules may have reduced frequency, with longer intervals between buses. The PDF provides clear timetables for both, ensuring passengers can plan accordingly. Holiday schedules, while similar to weekends, may have further adjustments. Real-time tracking features in the PDF help riders adjust to any unexpected changes, making the schedule a reliable tool for daily travel planning.

2.4 Holiday Schedules

The 24 bus schedule PDF includes detailed holiday schedules, ensuring seamless travel during festive periods. On holidays, routes often operate on reduced timetables, similar to weekend schedules. The PDF highlights specific stops like Takoma Station and Northwest Park, which remain active during holidays. Service alerts within the PDF notify passengers of any temporary changes or detours. Additionally, the new bus tracking system, set to launch soon, will enhance real-time updates during holidays. This feature-rich PDF ensures travelers stay informed and connected, making holiday commuting stress-free and efficient.

Key Features of the 24 Bus Schedule PDF

The 24 Bus Schedule PDF offers real-time tracking, offline access, interactive maps, and service alerts, ensuring passengers stay informed and navigate efficiently.

3.1 Real-Time Tracking Information

The 24 Bus Schedule PDF includes real-time tracking features, enabling passengers to monitor bus locations and arrival times. This feature helps reduce wait times and improves travel planning efficiency.

By integrating live updates, commuters can access accurate information about delays or service changes. The PDF often includes QR codes or links to apps for seamless real-time tracking, enhancing the overall travel experience.

3.2 Offline Access for Convenience

The 24 Bus Schedule PDF offers offline access, enabling users to view timetables and route maps without internet. This feature is especially useful in areas with limited connectivity, ensuring uninterrupted access to essential travel information. By downloading the PDF, commuters can plan trips, identify stops, and navigate routes seamlessly, even without a stable internet connection. This convenience makes the PDF a reliable tool for daily commuting, reducing reliance on mobile data and enhancing overall travel efficiency.

3.3 Interactive Maps and Directions

The 24 Bus Schedule PDF includes interactive maps and directions, enhancing navigation for commuters. These maps allow users to zoom in/out and view detailed route paths. Real-time tracking links provide updates on bus locations, ensuring accurate trip planning. The PDF also offers step-by-step directions between stops, making it easier to transfer or reach destinations. This feature is particularly useful for new riders or those unfamiliar with the route, streamlining their travel experience and reducing confusion. Interactive elements simplify commuting, making the PDF a valuable resource for daily travel needs.

3.4 Service Alerts and Updates

The 24 Bus Schedule PDF includes service alerts and updates, keeping commuters informed about disruptions. It highlights detours, schedule changes, and special events impacting service. Riders can view real-time notifications for severe weather or unexpected issues. The PDF also outlines holiday schedules and temporary route adjustments. This feature ensures passengers stay updated, allowing them to adjust travel plans accordingly. By providing timely and accurate information, the PDF enhances the overall commuting experience, helping users navigate smoothly even when unexpected changes occur.

How to Use the 24 Bus Schedule PDF

Plan your trip by reviewing the timetable and route map. Identify stops and connections, and use real-time tracking for accurate travel planning. Stay informed with updates.

4.1 Planning Your Trip

Planning your trip with the 24 Bus Schedule PDF is straightforward. Identify your starting and ending points, then use the route map to determine the best stops. Check the timetable for departure times and plan accordingly. Real-time tracking helps adjust for delays. Offline access ensures you can plan even without internet. Review weekday, weekend, and holiday schedules to avoid surprises. Use the PDF to identify connections and transfers, making your journey seamless. This tool simplifies commuting, ensuring you arrive on time every day.

4.2 Reading the Timetable

Reading the 24 Bus Schedule PDF timetable involves understanding the structured layout. Each row represents a specific timepoint, with columns indicating stops and arrival times. Destination signs are shown above the timetable for clarity. Use the legend to distinguish between weekday, weekend, and holiday schedules. Look for special notes like service alerts or detours. Color-coding or symbols may highlight specific trips. Plan your trip by matching your departure time with the nearest stop. Ensure to check for real-time updates or downloaded versions for the most accurate information.

4.3 Identifying Bus Stops

The 24 Bus Schedule PDF clearly lists all bus stops along the route, making it easy to identify your destination. Major stops like Frankford Transit Center, Bustleton, and Meadowbrook are highlighted for quick reference. Use the route map to visualize the sequence of stops and plan your journey. Transfer points are also indicated, helping you connect to other routes seamlessly. The PDF includes street names and landmarks, ensuring accurate stop identification. Offline access allows you to review stops even without internet, making trip planning convenient and stress-free.

4.4 Understanding Route Connections

Understanding route connections is crucial for seamless travel. The 24 Bus Schedule PDF highlights key transfer points, such as Frankford Transit Center, where you can connect to routes like L, 3, 5, 8, 14, 19, 20, 24, 25, 26, 50, 58, 66, 67, 73, 82, 84, and 88. These connections allow easy transitions to other lines, expanding your travel options. The PDF provides a clear overview of where and how to transfer, ensuring efficient navigation across the network. This feature is especially helpful for commuters needing to reach destinations beyond the 24 bus route.

Major Stops and Connections

The 24 bus route includes major stops like Frankford Transit Center, Bustleton, Meadowbrook, Bethayres, and Huntingdon Valley. These stops provide connections to other routes and transit hubs.

5.1 Frankford Transit Center

The Frankford Transit Center is a major hub for the 24 bus route, offering connections to multiple lines, including L, 3, 5, 8, 14, 19, 20, 24, 25, 26, 50, 58, 66, 67, 73, 82, 84, and 88. It serves as a key transfer point for commuters, providing easy access to various parts of the city. The center is equipped with amenities like real-time tracking and customer service support, making it a convenient stop for passengers. Its strategic location ensures efficient travel, connecting riders to destinations across the region.

5.2 Bustleton and Meadowbrook

Bustleton and Meadowbrook are key stops on the 24 bus route, offering convenient connections to nearby neighborhoods and transit hubs. These stops provide easy access to local amenities and are well-served by the 24 bus, ensuring reliable transportation for commuters. The Bustleton stop is particularly notable for its proximity to major shopping centers, while Meadowbrook offers a quieter, residential transit point. Both stops are equipped with real-time tracking, making it easier for passengers to plan their journeys efficiently. These stops are essential for travelers navigating the northern parts of the route.

5.3 Bethayres and Huntingdon Valley

Bethayres and Huntingdon Valley are significant stops on the 24 bus route, serving residential and commercial areas. These stops provide essential connections for local commuters, with buses running frequently throughout the day. Bethayres is known for its proximity to shopping centers and community hubs, while Huntingdon Valley offers access to parks and residential neighborhoods. Both stops are well-integrated into the route, ensuring seamless travel for passengers. The 24 bus schedule PDF highlights these stops as key points for those traveling in the northern sections of the route.

5.4 Bryn Athyn and Southampton

Bryn Athyn and Southampton are key stops on the 24 bus route, offering convenient access to residential areas and local attractions. These stops are popular for commuters traveling to and from nearby neighborhoods, with regular service throughout the day. Bryn Athyn is known for its historic charm, while Southampton provides connections to shopping and community centers. The 24 bus schedule PDF details departure times and connections, making it easier for passengers to plan their journeys through these areas efficiently.

5.5 Pine Rd and Oxford Ave

Pine Rd and Oxford Ave are key stops on the 24 bus route, serving as vital connections for commuters in bustling areas. These stops provide easy access to shopping centers, residential neighborhoods, and local amenities. The 24 bus schedule PDF includes detailed departure times for Pine Rd and Oxford Ave, ensuring passengers can plan their trips with precision. Real-time tracking and offline access features of the PDF make it convenient for travelers to navigate these busy stops efficiently, even without internet connectivity.

5.6 Rhawn St and Susquehanna Rd

Rhawn St and Susquehanna Rd are significant stops on the 24 bus route, offering convenient connections for commuters. These stops are near residential areas, shops, and community centers, making them hubs for local travel. The 24 bus schedule PDF provides precise timetables for these locations, ensuring passengers can plan their journeys seamlessly. With real-time tracking and offline access, the PDF enhances the travel experience, allowing riders to navigate these stops efficiently, even without internet access.

5.7 Welsh Rd and Krewstown Rd

Welsh Rd and Krewstown Rd are key stops on the 24 bus route, serving as vital transit points for local commuters. These stops connect residential neighborhoods to major hubs, making them essential for daily travel. The 24 bus schedule PDF provides detailed arrival and departure times, ensuring passengers can plan their journeys accurately. With real-time tracking and offline access, the PDF simplifies commuting through these stops. Additionally, upcoming improvements, like the new bus tracking system, will further enhance the travel experience for riders using these locations.

Special Services and Alerts

The 24 bus schedule PDF includes alerts for school trips, special events, and detours. It provides real-time updates and service change notifications, ensuring passengers stay informed.

6.1 School Trips and Special Events

The 24 bus schedule PDF includes dedicated sections for school trips and special events, ensuring seamless travel for students and event-goers. It outlines adjusted routes, additional stops, and frequency changes during peak times. The PDF also provides real-time updates for event-related detours, helping passengers plan accordingly. This feature is particularly useful for schools organizing field trips and commuters attending festivals or sports games, offering a reliable and efficient travel solution tailored to their needs.

6.2 Detours and Service Changes

The 24 bus schedule PDF includes detailed information on detours and service changes, ensuring passengers are informed of any disruptions. It provides alternative routes and stop adjustments due to construction, events, or unforeseen circumstances. The PDF is regularly updated to reflect the latest changes, helping commuters adjust their travel plans accordingly. Real-time alerts and service notifications are also accessible, making it easier for riders to navigate seamlessly even when unexpected changes occur.

6.3 Severe Weather Impact

The 24 bus schedule PDF includes updates on severe weather impacts, ensuring commuters are prepared for disruptions; It details route adjustments, delayed services, and alternative stops during harsh conditions. Real-time alerts and service notifications are provided to keep passengers informed. The PDF is regularly updated to reflect weather-related changes, helping riders plan accordingly. It serves as a reliable resource for navigating public transit during snowstorms, heavy rain, or other severe weather events that may affect bus operations.

6.4 New Bus Tracking System

A new bus tracking system is being introduced to enhance the 24 bus schedule experience. This system will provide real-time updates, improving route monitoring and passenger notifications. Commuters can expect better accuracy in arrival times and service alerts. The system aims to streamline operations and improve customer satisfaction. Implementation is scheduled to begin in mid-October, with full rollout by January 1, 2026. This upgrade will offer a more efficient and reliable way to track buses, ensuring smoother travel experiences for all users of the 24 bus route.

Accessibility and Amenities

The 24 bus schedule PDF highlights wheelchair-accessible buses, bike racks, and Wi-Fi availability. It also provides customer service contact information for assistance, ensuring a convenient travel experience.

7.1 Wheelchair Accessibility

The 24 bus schedule PDF highlights wheelchair accessibility features, ensuring inclusive travel. All buses are equipped with ramps or lifts, and priority seating areas are designated for passengers with disabilities. Securement systems are available to safely accommodate wheelchairs during transit. Accessible stops and stations are clearly marked in the PDF, providing ease of navigation. Customers can also contact customer service for assistance with accessible travel planning. This commitment to accessibility ensures that everyone can use the service comfortably and independently.

7.2 Bike Racks and Storage

The 24 bus schedule PDF includes details on bike racks and storage options. Most buses are equipped with front-mounted racks that can hold up to two bicycles. The PDF guide provides information on how to securely fasten bikes and which routes offer this feature. Additionally, some buses have interior storage areas for folding bikes. The schedule PDF helps cyclists plan their trips by identifying bike-friendly routes and ensuring convenient storage solutions. This feature enhances the overall commuting experience for cyclists who combine biking with bus travel.

7.3 Wi-Fi and Charging Stations

The 24 bus schedule PDF highlights the availability of Wi-Fi and charging stations on select routes. Many buses are equipped with free Wi-Fi, allowing passengers to stay connected during their journey. Additionally, some vehicles feature USB ports and electrical outlets for charging devices. The PDF guide provides details on which routes offer these amenities, ensuring commuters can plan their trips with convenience. This feature is particularly useful for long commutes, enabling passengers to stay productive or entertained while traveling.

7.4 Customer Service Contact

The 24 bus schedule PDF provides essential customer service contact information for assistance. Commuters can reach SEPTA customer service at 215-580-7800 or TDD/TTY at 215-580-7853. Additionally, the PDF guide includes a link to SEPTA’s official website, www.septa.org, where passengers can find more details or submit inquiries. This ensures that riders can easily access support for any questions or concerns regarding the 24 bus route, schedules, or services. The PDF serves as a one-stop resource for a seamless travel experience.

Regional Variations

The 24 bus schedule PDF varies by region, with SEPTA (Philadelphia), MBTA (Boston), and NJ Transit offering distinct route details and timetables tailored to local needs.

8.1 SEPTA Route 24 (Philadelphia)

SEPTA Route 24 operates in Philadelphia, connecting key locations like Frankford Transit Center, Bustleton, and Meadowbrook. It offers frequent service with connections to routes L, 3, 5, 8, 14, 19, 20, 24, 25, 26, 50, 58, 66, 67, 73, 82, 84, and 88. The schedule is available in PDF format, providing detailed timetables and maps. Commuters can plan trips efficiently, with real-time tracking and offline access. SEPTA’s Route 24 is a vital link for residents and visitors, ensuring reliable transportation across Philadelphia. For more information, contact SEPTA Customer Service at 215-580-7800.

8.2 MBTA Route 24 (Boston)

MBTA Route 24 in Boston connects Anderson Town Center to Northside Transit Center, offering reliable service. The route includes stops at MLK — Beechmont and provides real-time updates. The PDF schedule is available for download, featuring detailed timetables and maps. Commuters can plan trips efficiently, with offline access for convenience. Route 24 integrates with other MBTA services, ensuring seamless travel across Boston. For more information, visit the MBTA website or use their customer service resources. The schedule is designed to meet the needs of daily commuters and visitors alike.

8.3 NJ Transit Route 24

NJ Transit Route 24 operates between Hillandale-Powder Mill Rd and Takoma Station, serving key stops like New Hampshire Ave and Northwest Park. The PDF schedule provides detailed timetables, maps, and real-time tracking. Commuters can download the PDF for offline access, ensuring convenient trip planning. Destination signs on buses display route endpoints for clarity. The schedule is designed to meet the needs of daily travelers, offering reliable service across its route. For more information, visit the NJ Transit website or contact their customer service team.

8.4 Route 24 in Novosibirsk

Route 24 in Novosibirsk is operated by ООО Автоальянс and provides essential transportation services across the city; The PDF schedule for Route 24 includes detailed timetables, maps, and stop information, making it easier for passengers to plan their journeys. Commuters can access the schedule on platforms like busmaps.com, which offers route planning tools and real-time updates. The PDF is particularly useful for travelers unfamiliar with the area, ensuring a smooth and convenient travel experience in Novosibirsk.

Future Updates and Improvements

A new bus tracking system is coming this fall, enhancing customer tools and efficiency. Installation starts mid-October 2025, with completion by January 1, 2026, promising improved tracking and updates.

9.1 Upcoming Schedule Changes

Upcoming adjustments to the 24 bus schedule include enhanced frequency during peak hours and extended weekend services. A new bus tracking system will launch soon, improving real-time updates. Holiday schedules will be revised for better coverage, and temporary route changes due to construction will be detailed in the PDF. Commuters are advised to check the latest version of the schedule for these updates, ensuring seamless travel planning. These changes aim to improve efficiency and accommodate growing passenger needs.

9.2 Technology Enhancements

The 24 bus schedule PDF will soon integrate advanced technology features, including a new real-time tracking system. This upgrade will provide passengers with live updates on bus locations and arrival times. Additionally, the PDF will feature interactive maps, allowing users to navigate routes more easily. Service alerts and updates will be delivered directly through the document, ensuring commuters stay informed. These enhancements aim to improve the overall travel experience by making information more accessible and user-friendly, even without internet connectivity.

9.3 Passenger Feedback Integration

The 24 bus schedule PDF will incorporate passenger feedback to enhance user experience. Surveys and direct input from commuters will shape future updates, ensuring the document meets traveler needs. Feedback will focus on improving route accuracy, timetable clarity, and accessibility features. By prioritizing passenger insights, the PDF aims to deliver a more intuitive and reliable tool for planning journeys. This collaborative approach ensures continuous improvement, making the 24 bus schedule PDF a dynamic resource that evolves with community input and technological advancements.

The 24 Bus Schedule PDF is an essential tool for efficient travel planning, offering real-time tracking, offline access, and interactive maps to enhance your commuting experience.

10;1 Summary of Key Points

The 24 Bus Schedule PDF provides essential route details, timetables, and maps for efficient trip planning. It includes real-time tracking, offline access, and service alerts. Major stops like Frankford Transit Center and Bustleton are highlighted, along with holiday schedules and regional variations. The PDF is available for SEPTA, MBTA, and NJ Transit routes, ensuring commuters have accurate and up-to-date information. Downloading the PDF offers a convenient way to navigate without internet, making it a vital resource for daily travel.

10.2 Final Tips for Using the Schedule

Plan your trip in advance using the PDF for accurate timings and stops. Check for real-time updates and service alerts before traveling. Download the PDF offline for convenience. Identify major stops and connections to navigate seamlessly. Understand the symbols and legends in the schedule for clarity. Stay informed about holiday schedules and special events that may affect service. Use the route map to visualize your journey and plan connections. By following these tips, you can maximize the benefits of the 24 Bus Schedule PDF for a smooth and efficient travel experience.

manual sander

A manual sander is a handheld tool designed to smooth surfaces using sandpaper, offering precision and control․ Essential in woodworking, crafts, and DIY projects, it ensures flawless finishes․

1․1 What is a Manual Sander?

A manual sander is a handheld tool designed to smooth surfaces by abrasion, typically using sandpaper․ It is an essential tool in woodworking, crafts, and DIY projects, offering precise control․ Available in types like hand sanding blocks and palm sanders, it allows for detailed work on corners, rough surfaces, and tight spaces․ Its versatility makes it ideal for tasks ranging from furniture restoration to drywall smoothing, ensuring a flawless finish for various materials, including wood, metal, and drywall․

1․2 Importance of Manual Sanders in Woodworking and Crafts

Manual sanders are indispensable in woodworking and crafts, offering precise control for smoothing surfaces․ They are ideal for detailed work, allowing craftsmen to achieve high-quality finishes․ Unlike power tools, manual sanders provide a delicate touch, making them essential for intricate tasks․ Professionals and DIYers rely on them for preparing surfaces, ensuring flawless results․ Their versatility and ability to work in tight spaces make them a must-have tool for projects requiring attention to detail and a professional finish․

Types of Manual Sanders

Manual sanders include hand sanding blocks, palm sanders, and specialty tools like mini disk sanders․ Each type offers unique features for specific tasks, ensuring versatility in various projects․

2․1 Hand Sanding Blocks

Hand sanding blocks are essential tools for smoothing surfaces, offering versatility and control․ They are widely used in woodworking, furniture restoration, and home improvement projects․ These blocks typically feature an ergonomic design for comfortable grip and precise sanding․ By attaching standard sandpaper, users can adjust the intensity of sanding to suit their needs․ Ideal for detailed work, hand sanding blocks are perfect for smoothing corners, edges, and tight spaces, ensuring a professional finish․ Their simplicity makes them a must-have for both professionals and DIY enthusiasts․

2․2 Palm Sanders

Palm sanders are versatile tools designed for smoothing surfaces with ease․ They feature an ergonomic grip and a rubber pad to securely hold sandpaper, ensuring precise control․ Ideal for woodworking, furniture restoration, and home improvement projects, palm sanders are lightweight and balanced for comfortable use․ Their compact design allows for detailed work on small areas, while adjustable sandpaper options enable users to tailor the sanding intensity․ Whether for professional tasks or DIY endeavors, palm sanders deliver smooth finishes with minimal effort, making them a must-have in every toolkit․

2․3 Specialty Manual Sanders (e․g․, Mini Disk Sanders)

Specialty manual sanders, like mini disk sanders, are designed for precision and detail-oriented tasks․ These tools are ideal for tight spaces, intricate carvings, and small-scale projects․ The mini disk sander, for instance, is manually crank-powered, making it perfect for scale model-making and delicate work․ Its compact size and gentle abrasion ensure minimal material removal, preserving fine details․ Often used in tool and die machine shops or guitar crafting, these sanders offer unmatched control for intricate surfaces, combining durability with finesse for professional and hobbyist applications alike․

Components of a Manual Sander

A manual sander consists of a durable frame, sandpaper attachment mechanisms, and ergonomic handles․ These components ensure secure sandpaper placement and comfortable, controlled sanding operations for precise results․

3;1 Sandpaper Attachment Methods

Manual sanders feature various sandpaper attachment methods, including clamp-on systems, adhesive-backed sandpaper, and rubber pads․ These methods ensure secure sandpaper placement, preventing slippage during use․ The Guyker Handheld Manual Sanding Tool uses a durable aluminum alloy shaft for precise sandpaper attachment, while the 3M Drywall Hand Sander employs a quick clip system for easy sandpaper changes․ These designs enhance sanding efficiency and provide consistent results across different surfaces, making manual sanders versatile tools for woodworking, drywall, and metalworking projects․

3․2 Ergonomic Design and Comfort Features

Manual sanders often feature ergonomic designs to reduce fatigue and improve comfort during extended use․ Tools like the Guyker Handheld Manual Sanding Tool boast lightweight constructions and cushioned grips, ensuring ease of handling․ The 3M Drywall Hand Sander includes a contoured handle for better control, while others, like the Allway Palm Sander, offer ribbed rubber pads to enhance grip and protect surfaces; These designs prioritize user comfort, making manual sanders ideal for detailed and precise sanding tasks in woodworking, metalworking, and home improvement projects․

Sandpaper and Abrasives

Manual sanders rely on sandpaper, available in various grits for smoothing surfaces․ From coarse to fine, the right abrasive ensures optimal results for woodworking, metal, and drywall projects․

4․1 Types of Sandpaper Grit

Sandpaper grit refers to the size of abrasive particles, ranging from coarse to fine․ Coarse grit (e․g․, 60-80) removes material quickly, while medium grit (120-150) smooths surfaces․ Fine grit (220-240) creates polished finishes․ Extra-fine grit (320 and above) is ideal for final touches․ The right grit selection ensures efficient sanding and desired results for woodworking, metal, or drywall projects․ Proper grit progression is key to achieving smooth, blemish-free surfaces․

4․2 Choosing the Right Sandpaper for Your Project

Selecting the right sandpaper grit is crucial for achieving desired results․ Coarser grits (60-80) are ideal for removing old finishes or smoothing rough surfaces, while medium grits (120-150) prepare surfaces for finishing․ Fine grits (220-240) create polished finishes, and extra-fine grits (320+) are perfect for final touches․ Always progress through grits to avoid scratches․ Consider the material—wood, metal, or drywall—and the project’s goal when choosing sandpaper․ Proper selection ensures efficiency and a professional-quality finish․

Applications of Manual Sanders

Manual sanders are versatile tools used in woodworking, furniture restoration, drywall smoothing, metalworking, and home improvement projects, offering precision for various surface-smoothing tasks․

5․1 Woodworking and Furniture Restoration

Manual sanders are indispensable in woodworking and furniture restoration, offering precise control for smoothing wood surfaces․ They are ideal for refining intricate details, removing old finishes, and preparing surfaces for staining or painting․ With adjustable sandpaper grit, craftsmen can achieve the desired smoothness, from rough shaping to fine polishing․ Their portability and ease of use make them essential for restoring antique pieces and creating custom furniture, ensuring professional-grade results in various woodworking projects․

5․2 Drywall and Wall Surface Smoothing

Manual sanders are crucial for smoothing drywall and wall surfaces, ensuring a flawless finish before painting; They effectively remove imperfections like joint compound residue or minor scratches․ The 3M Drywall Hand Sander, with its quick clip system, is ideal for this task․ These tools allow for precise control, making them essential for home improvement projects․ By using the right grit sandpaper, manual sanders help achieve smooth, even surfaces, preparing walls perfectly for painting and enhancing the overall appearance of any room․

5․3 Metalworking and Guitar Crafting

Manual sanders play a vital role in metalworking and guitar crafting, offering precision for intricate details․ Tools like the Guyker Handheld Manual Sanding Tool, with its aluminum alloy shaft, are ideal for shaping and finishing metal and guitar parts․ They allow for precise control, enabling craftsmen to achieve smooth, polished surfaces․ In metalworking, manual sanders are used to smooth edges and remove imperfections, while in guitar crafting, they help refine necks and bodies for a professional finish, ensuring both functionality and aesthetic appeal․

5․4 Home Improvement and DIY Projects

Manual sanders are indispensable for home improvement and DIY projects, offering precision and control․ They are ideal for smoothing drywall, sanding down holes, and creating dimension on wall panels․ With adjustable sandpaper intensity, they help refine rough edges and surfaces․ Whether preparing walls for painting or tackling detailed work, manual sanders provide the finesse needed for professional-looking results; Their versatility makes them a must-have tool for any DIY enthusiast, ensuring smooth finishes and precise detailing in various home improvement tasks․

Sanding Techniques

Mastering sanding techniques with manual sanders involves using the right grit, applying even pressure, and working in consistent strokes․ Adjust sandpaper for surface needs to achieve smooth finishes and precision․

6․1 Basic Hand Sanding Techniques

Mastering basic hand sanding involves using the right grit sandpaper, applying even pressure, and working in consistent strokes․ Start with coarse grit for rough surfaces, then progress to finer grits for smoothing․ Always sand in the direction of the wood grain to avoid scratches․ Use light pressure for delicate areas and firmer pressure for heavy-duty smoothing․ Flip sandpaper occasionally to maximize its effectiveness․ Practice these techniques to achieve a professional, polished finish on various materials, from wood to drywall․

6․2 Advanced Sanding Methods for Smooth Finishes

For a flawless finish, advanced sanding techniques involve using progressively finer grits and feathering edges to blend surfaces seamlessly․ Apply circular motions for large areas and light pressure for final passes․ This method ensures minimal scratches and a polished look․ Use these techniques on wood, metal, or drywall for professional results․ Patience and attention to detail are key to achieving a smooth, blemish-free surface with manual sanders․

6․3 Sanding in Tight Spaces and Detailed Areas

Manual sanders are ideal for sanding tight spaces and detailed areas where power tools cannot reach․ Use a mini disk sander or a hand sanding block for intricate surfaces․ For small details, attach fine-grit sandpaper to a stick or use a sanding sponge․ Work slowly, applying light pressure to avoid scratches․ These tools are perfect for model-making, guitar crafting, or furniture restoration, ensuring smooth finishes in hard-to-reach areas․

Safety Precautions

When using a manual sander, always wear protective gloves and goggles to prevent injuries․ Ensure proper handling and use appropriate sandpaper grit to avoid accidents and maintain control․

7․1 Protective Gear for Sanding

Protective gear is essential when using a manual sander to prevent injuries․ Wear safety goggles to shield your eyes from dust and debris․ Use gloves to maintain a firm grip and protect your hands from abrasions․ A dust mask is recommended to avoid inhaling sanding particles․ Additionally, ensure loose clothing or long hair is tied back to prevent entanglement․ Proper protective equipment ensures a safe and controlled sanding experience, especially when working on detailed or intricate projects․

7․2 Avoiding Common Injuries

Avoiding common injuries while using a manual sander requires attention to technique and safety practices․ Always maintain a firm grip to prevent slipping, and avoid applying excessive pressure, which can lead to hand strain․ Keep loose clothing and long hair tied back to avoid accidental entanglement․ Use the correct sanding tool for the task to minimize the risk of accidents․ Regularly inspect the sandpaper for wear and tear to prevent sharp edges from causing cuts․ Proper posture and controlled movements ensure a safer sanding experience․

Product Reviews and Recommendations

Top-rated manual sanders like the Guyker Handheld Tool and 3M Drywall Sander are praised for their ergonomic design, durability, and precision, making them ideal for various projects․

8․1 Top-Rated Manual Sanders for Woodworking

Top-rated manual sanders for woodworking include the Guyker Handheld Manual Sanding Tool, known for its durable aluminum alloy shaft and precision in shaping wood and guitar parts․ The 3M Drywall Hand Sander is another favorite, offering a quick clip system for efficient sanding․ These tools are praised for their ergonomic design, lightweight construction, and ability to deliver smooth finishes․ They are ideal for detailed woodworking tasks, such as furniture restoration and custom projects, ensuring professionals and DIYers achieve professional-grade results with ease․

8․2 Best Hand Sanders for Home Improvement

The 3M Drywall Hand Sander is a top choice for home improvement, offering a quick clip system for efficient drywall smoothing․ The Allway Palm Sander is another excellent option, featuring an ergonomic grip and rubber edges to protect surfaces․ These tools are ideal for tasks like preparing walls for painting, sanding rough edges, and removing old paint․ Their versatility and ease of use make them essential for DIY projects, ensuring smooth results and enhancing the overall quality of home improvement tasks․

User Guides and Manuals

Access and download comprehensive manuals for manual sanders online․ These guides provide detailed specifications, usage tips, and troubleshooting, helping users master their tools for optimal performance and safety․

9․1 Accessing Sander Manuals Online

Manual sander manuals are readily available online, offering detailed guides for operation, maintenance, and troubleshooting․ Brands like Guyker and 3M provide downloadable PDF versions․ These resources often include step-by-step instructions, safety tips, and specifications to ensure optimal tool performance․ Users can visit official manufacturer websites or product pages to access these manuals․ Additionally, many retailers offer quick links to download manuals, making it easy to find the information needed for specific models․ This ensures users can master their sanders efficiently and safely․

9․2 Understanding Sander Specifications

Manual sander specifications vary by model, but key features include sandpaper attachment methods, ergonomic design, and material compatibility․ The Guyker Handheld Manual Sanding Tool boasts a durable aluminum alloy shaft, while the 3M Drywall Hand Sander offers a quick-clip system․ Understanding these details helps users choose the right tool for their project, ensuring efficiency and precision․ Always review specifications to match the sander’s capabilities with your task requirements, whether for woodworking, drywall, or metalwork․

Tips and Tricks

For optimal results with a manual sander, always use the right sandpaper grit and work with the wood grain․ Regularly clean and maintain your tool for consistent performance․

10․1 Maximizing Sanding Efficiency

To maximize sanding efficiency with a manual sander, always use the correct sandpaper grit for your project․ Start with coarse grit for rough surfaces and progress to finer grits for smoothing․ Apply consistent, firm pressure but avoid over-sanding, which can damage the material․ Keep the sandpaper clean and replace it when worn․ Utilize ergonomic handles to reduce fatigue and maintain control․ Practice proper sanding techniques, such as working with the wood grain, to achieve faster and better results․ Regular tool maintenance also ensures optimal performance․

10․2 Maintaining Your Manual Sander

Regular maintenance ensures your manual sander performs optimally․ Clean the sanding pad after each use to remove dust and debris․ Inspect the tool for wear and tear, replacing worn-out parts promptly․ Store the sander in a dry place to prevent rust or damage․ Lubricate moving parts if recommended by the manufacturer․ Always ensure the sandpaper is securely attached to avoid slippage during use․ Proper care extends the tool’s lifespan and maintains its efficiency for future projects․

DIY Projects Using Manual Sanders

Manual sanders are versatile tools for DIY projects, from restoring furniture to smoothing drywall․ They offer precision and control, making them ideal for various home improvement and crafting tasks․

11․1 Restoring Antique Furniture

Manual sanders are indispensable for restoring antique furniture, offering precise control to remove old finishes and smooth intricate surfaces․ Using a hand sanding block or palm sander, you can gently restore wood without damaging its integrity․ Start with coarse-grit sandpaper to remove layers of varnish or paint, then progress to finer grits for a polished finish․ Ergonomic designs ensure comfort during extended use, making manual sanders ideal for detailed, labor-intensive projects like bringing antique pieces back to their original glory․

11․2 Smoothing Drywall for Painting

Manual sanders are ideal for smoothing drywall surfaces before painting, ensuring a professional finish․ Use a drywall hand sander with a quick-clip system for easy sandpaper changes․ Start with medium-grit sandpaper to remove imperfections like joint compound residue or nail holes, then switch to fine-grit for a smooth finish․ The ergonomic design reduces fatigue, while the precision of manual sanders allows for detailed work in tight spaces․ This method minimizes dust and ensures surfaces are ready for painting, achieving a flawless, even coat․

Manual sanders are essential tools for achieving smooth, precise finishes in woodworking, drywall, and DIY projects, offering versatility and control for various surface-smoothing tasks with ease․

12․1 Final Thoughts on Manual Sanders

Manual sanders are indispensable tools for achieving precise and smooth finishes across various projects․ Their versatility in woodworking, drywall, and DIY tasks makes them a must-have for craftsmen and enthusiasts․ Whether restoring furniture or smoothing walls, these tools offer unmatched control and efficiency․ By selecting the right sandpaper and techniques, users can unlock their full potential, ensuring professional-grade results․ Their ergonomic designs and ease of use further enhance their appeal, making them a cornerstone in any workshop or home improvement arsenal․

12․2 Encouragement to Explore Further

Exploring the world of manual sanders opens up endless possibilities for creativity and precision․ With a wide range of tools and techniques available, enthusiasts can continually refine their skills․ From restoring antique furniture to crafting custom guitar parts, the versatility of manual sanders invites experimentation․ Dive into online communities, tutorials, and product reviews to discover new methods and tools․ Embrace the journey of mastering manual sanding, as it promises to elevate your projects and inspire new creations, ensuring every surface is flawlessly finished;

Additional Resources

Explore recommended reading and online communities for sander enthusiasts․ Discover detailed manuals, tutorials, and forums to enhance your sanding skills and stay updated on the latest tools․

13․1 Recommended Reading

For in-depth knowledge, explore books like “The Complete Book of Sanding” and “Woodworking: The Basics of Craftsmanship”․ These resources offer expert techniques and project guides․ Online, visit platforms like Amazon or official tool websites for detailed manuals and tutorials․ Check out forums and blogs dedicated to woodworking and DIY projects for real-world insights and tips․ These materials will help you master manual sanders and enhance your crafting skills, ensuring professional-grade results in your projects․

13․2 Online Communities for Sander Enthusiasts

Join online forums like Reddit’s r/woodworking and r/DIY, where enthusiasts share tips and reviews․ Facebook Groups like Woodworking Community and Hand Tool Enthusiasts offer valuable insights․ YouTube channels such as Essential Craftsman and DIY Projects provide tutorials and project ideas․ Specialized platforms like Woodworking Talk and ToolGuyd discuss manual sanders in detail․ These communities are perfect for learning, troubleshooting, and connecting with fellow craftsmen, ensuring you get the most out of your manual sander․

mm to inches conversion chart pdf

A mm to inch conversion chart PDF is a quick reference guide for accurate measurements, ideal for DIY projects, engineering, and crafting. It includes fractional and decimal equivalents, ensuring precise conversions with the standard factor of 1 mm = 0.0393701 inches.

What is a Millimeter to Inch Conversion Chart?

A millimeter to inch conversion chart is a visual guide that provides equivalent measurements between millimeters (mm) and inches (in). It is designed to simplify the process of converting metric measurements to imperial units, offering a quick and easy reference for accurate conversions. The chart typically includes both fractional and decimal inch equivalents for various millimeter measurements, ensuring precision for different applications. Whether for DIY projects, engineering, or crafting, this chart serves as an essential tool for anyone needing to switch between metric and imperial systems. It eliminates the need for complex calculations, saving time and reducing errors in measurements.

Importance of Using a Conversion Chart

Using a millimeter to inch conversion chart is essential for ensuring accuracy and efficiency in measurements. It eliminates the need for manual calculations, reducing the risk of errors and saving time. This tool is particularly valuable in fields like engineering, manufacturing, and DIY projects, where precise measurements are critical. The chart provides a quick reference for converting metric to imperial units, making it ideal for professionals and hobbyists alike. By standardizing the conversion process, it helps maintain consistency across projects and ensures that measurements are reliable. Additionally, having a printable chart allows for easy access, making it a practical resource for everyday use.

Standard Conversion Factor: 1 mm = 0.0393701 inches

The standard conversion factor of 1 mm = 0.0393701 inches is the foundation for accurate measurements between metric and imperial systems. This precise factor ensures that conversions are consistent and reliable, eliminating rounding errors. Derived from the exact relationship of 1 inch = 25.4 mm, it is widely used in engineering, manufacturing, and DIY projects. The chart simplifies conversions by providing pre-calculated values, making it easier to switch between units. This factor is essential for maintaining precision in technical applications, ensuring that measurements remain accurate and reproducible. By using this standardized conversion, users can avoid errors and achieve consistent results in their work.

Structure of the MM to Inches Conversion Chart

The chart provides a comprehensive guide, listing millimeter to inch equivalents, fractional and decimal conversions, and a range of measurements from 0.1 mm to 2540 mm for precision.

Millimeter to Inch Equivalents

The chart provides a detailed list of millimeter measurements alongside their exact inch equivalents, including both fractional and decimal conversions. It covers a wide range of measurements, from 0.1 mm to 2540 mm, ensuring precision for various applications. Each millimeter value is paired with its corresponding inch measurement, calculated using the standard conversion factor of 1 mm = 0.0393701 inches. This allows users to quickly reference and convert measurements without the need for complex calculations. The chart is organized in a clear, easy-to-read table format, making it a practical tool for accurate and efficient conversions. Whether for small-scale crafting or large-scale engineering, the chart ensures precise measurements every time.

Fractional and Decimal Inch Conversions

The chart includes both fractional and decimal inch equivalents for millimeter measurements, providing flexibility for different user preferences. This dual representation ensures accuracy for precise applications, such as engineering or crafting. The fractional conversions are particularly useful for those accustomed to traditional measurements, while decimal conversions offer simplicity for quick calculations. Each millimeter value is paired with its corresponding inch measurement, calculated using the standard factor of 1 mm = 0.0393701 inches. This comprehensive approach allows users to easily switch between systems without confusion. The chart’s clear organization makes it a reliable tool for ensuring accurate and efficient conversions in various projects.

Range of Measurements (0.1 mm to 2540 mm)

The mm to inches conversion chart PDF covers an extensive range of measurements, from 0.1 mm to 2540 mm, ensuring versatility for various applications. This broad spectrum accommodates both small-scale projects, such as crafting or precision work, and large-scale tasks in engineering or manufacturing. The chart’s wide range makes it a valuable resource for professionals and hobbyists alike, providing accurate conversions for any measurement within this span. Whether you’re working with tiny components or large structures, the chart’s comprehensive coverage guarantees precise and reliable results. This extensive range ensures that users can easily convert measurements for any project, eliminating the need for multiple reference tools.

Applications of the Conversion Chart

The mm to inches conversion chart PDF is essential for DIY projects, engineering, manufacturing, crafting, and education, providing accurate measurements for diverse tasks and ensuring precision in every application.

DIY Projects and Home Improvement

A mm to inches conversion chart PDF is invaluable for DIY projects and home improvement, offering precise measurement conversions for woodworking, furniture assembly, and renovations. Whether you’re working with small hardware or large materials, the chart ensures accurate conversions from millimeters to inches, eliminating guesswork. It’s particularly useful for projects requiring exact fits, such as cutting lumber or installing fixtures. The chart covers a wide range of measurements, from 0.1 mm to 2540 mm, making it a versatile tool for any DIY task. By having this guide handy, you can quickly convert measurements and complete projects efficiently, ensuring professional-grade results without the need for complex calculations.

Engineering and Manufacturing

In engineering and manufacturing, precise measurements are critical, making a mm to inches conversion chart PDF an essential tool. It provides accurate conversions for technical drawings, machinery specifications, and component tolerances. Engineers often work with both metric and imperial systems, and this chart ensures seamless transitions between them. The chart covers a wide range of measurements, from 0.1 mm to 2540 mm, making it suitable for large-scale production and intricate designs. By using the standardized conversion factor of 1 mm = 0.0393701 inches, professionals can maintain consistency and accuracy in their work. This resource is particularly valuable in industries like aerospace, automotive, and precision machining, where even minor errors can lead to significant issues.

Crafting and Precision Work

A mm to inches conversion chart PDF is invaluable for crafting and precision work, where accuracy is paramount. Crafters often need to convert measurements between metric and imperial systems, especially when working with materials like fabric, wood, or metal. The chart provides fractional and decimal equivalents, making it easier to achieve precise cuts and measurements. For example, jewelers, model builders, and DIY enthusiasts can quickly reference the chart to ensure their projects meet exact specifications. The standardized conversion factor of 1 mm = 0.0393701 inches guarantees consistency, minimizing errors in intricate designs. This tool is particularly useful for scaling patterns, fitting components, and ensuring compatibility across different measurement systems.

Education and Research

In education and research, a mm to inches conversion chart PDF serves as an essential tool for students, teachers, and researchers. It simplifies the process of understanding and converting measurements between metric and imperial systems, which is often required in scientific studies and experiments. The chart’s fractional and decimal equivalents help learners grasp complex conversions, making it easier to interpret data and results. For instance, students working on projects involving international standards can quickly reference the chart to ensure accuracy. Researchers also benefit from its precision, particularly in fields like physics, engineering, and materials science, where exact measurements are critical. This resource fosters a deeper understanding of measurement systems and enhances the accuracy of academic and scientific work.

How to Use the Conversion Chart

Match the millimeter measurement to its corresponding inch equivalent using the chart. Switch between fractional and decimal measurements for precise conversions. Print the chart for easy reference.

Step-by-Step Guide to Convert MM to Inches

To convert millimeters to inches using the chart, locate the millimeter measurement on the left side of the table. Find the corresponding inch equivalent next to it, which may be listed as a fractional or decimal value. For precise conversions, refer to both columns to understand the measurement in different formats. If the exact millimeter value isn’t listed, use the closest match or calculate it using the formula: inches = millimeters × 0.0393701. Always verify the conversion with a calculator for accuracy, especially in technical applications. Practical examples provided in the chart can help familiarize you with common conversions, ensuring quick and accurate results.

Understanding Fractional and Decimal Measurements

Understanding fractional and decimal measurements is essential for accurate conversions. Fractional inches represent measurements in parts of an inch, such as 1/2, 1/4, or 3/8, while decimal inches are expressed as numerical values, like 0.5 or 0.375. The chart provides both formats to cater to different needs. For example, 10 mm converts to approximately 0.3937 inches (decimal) or 1/4 inch (fractional). This dual representation allows users to choose the format that best suits their application, whether for crafting, engineering, or DIY projects. Familiarizing yourself with both systems ensures flexibility and precision in your work.

Practical Examples for Accurate Conversions

Practical examples are crucial for mastering mm to inches conversions. For instance, 10 mm equals approximately 0.3937 inches (or 1/4 inch), while 25.4 mm exactly equals 1 inch. These examples help users understand how to apply the conversion factor in real-world scenarios. Another example: 50 mm converts to 1.9685 inches (or 1 31/32 inches), which is useful for projects requiring precise measurements. By using the chart, users can quickly reference these conversions, ensuring accuracy in their work. Whether for DIY projects, engineering, or crafting, these examples simplify the process and help avoid measurement errors.

  • 10 mm = 0.3937 inches (1/4 inch)
  • 25.4 mm = 1 inch
  • 50 mm = 1.9685 inches (1 31/32 inches)

These examples demonstrate how the chart provides clear, actionable data for everyday use.

Downloading and Printing the Chart

Download a free MM to Inches conversion chart PDF from reliable sources like metric-conversions.org. Print it on standard paper for easy reference and precise measurements anytime.

Where to Find Free MM to Inches PDF Charts

Free MM to Inches conversion chart PDFs are readily available online from trusted sources like metric-conversions.org and aspenfasteners.com. These websites offer downloadable charts in PDF format, designed for easy printing and reference. The charts typically include both fractional and decimal conversions, covering a wide range of measurements from 0.1 mm to 2540 mm. They are ideal for DIY projects, engineering, and crafting. Simply visit the site, locate the conversion chart, and download it instantly. Many charts are also available in PNG format for added convenience. These resources ensure accurate and quick measurements, making them essential tools for professionals and hobbyists alike.

How to Print the Chart for Easy Reference

Printing the MM to Inches conversion chart PDF is straightforward for easy access. Ensure your printer is set to the correct paper size, typically A4 or Letter, and select the highest quality setting for clarity. Most charts are designed with a clean layout, making them easy to read when printed. For durability, consider laminating the chart or placing it in a protective sleeve. You can also adjust the scaling options in your printer settings to fit the chart to your preferred size. Print multiple copies if needed for different workstations or projects. This ensures the chart is always handy, providing quick and accurate conversions whenever required.

Customizing the Chart for Specific Needs

Customizing the MM to Inches conversion chart PDF allows users to tailor it for specific tasks. You can edit the chart using PDF editing software to highlight frequently used conversions or add notes for clarity. For instance, if you work with small measurements, you can enlarge the sections covering 0.1 mm to 10 mm for better readability. Additionally, some charts enable users to input custom ranges or create bookmarks for quick navigation. This feature is particularly useful for professionals who need precise measurements in their field. By personalizing the chart, you can streamline your workflow and ensure it meets your exact requirements, making it a more efficient tool for your projects or studies.

Conversion Formula and Accuracy

The formula ensures accurate conversions using the exact factor of 1 mm = 0.0393701 inches, crucial for precise measurements in engineering and manufacturing, ensuring reliability and accuracy.

Mathematical Formula for MM to Inches Conversion

The conversion from millimeters to inches is based on the precise formula: inches = millimeters × 0.0393701. This formula ensures accurate results for any measurement. For example, to convert 10 mm to inches, multiply 10 by 0.0393701, resulting in 0.393701 inches. This mathematical relationship is fundamental for precise measurements in engineering, manufacturing, and crafting. The formula is derived from the standard conversion factor, where 1 inch = 25.4 mm, making it reliable for all applications. By using this formula, users can easily convert measurements without errors, ensuring consistency and accuracy in their work.

Ensuring Precision in Measurements

Ensuring precision in measurements is crucial when using a mm to inches conversion chart PDF. The chart provides exact conversions, but accuracy depends on proper use. Always use the standard conversion factor of 1 mm = 0.0393701 inches to maintain consistency. For precise results, avoid rounding off values prematurely, as this can lead to errors in critical applications like engineering or manufacturing. When converting, use decimal or fractional equivalents as needed, ensuring the measurement aligns with the required format. Double-checking calculations and cross-referencing with the chart can help minimize mistakes. By adhering to these practices, users can achieve highly accurate conversions, making the chart an indispensable tool for precise measurements in various fields.

Common Mistakes to Avoid

When using a mm to inches conversion chart PDF, several common mistakes can lead to inaccuracies. One of the most frequent errors is rounding off values too early, which can result in significant discrepancies in precise applications. Another mistake is using an incorrect conversion factor; always ensure the standard factor of 1 mm = 0.0393701 inches is applied. Additionally, mixing decimal and fractional measurements without proper alignment can cause confusion. Users should also avoid relying solely on mental calculations and instead double-check conversions using the chart. Finally, neglecting to verify the chart’s accuracy or using an outdated version can lead to errors. By being mindful of these pitfalls, users can ensure reliable and accurate conversions.

Conclusion

A mm to inches conversion chart PDF is an essential tool for precise measurements, saving time and ensuring accuracy in various projects and applications.

Benefits of Using a Conversion Chart

Using a mm to inches conversion chart PDF offers numerous benefits, including time savings and accuracy in measurements. It provides a quick reference guide for converting millimeters to inches, eliminating the need for complex calculations. This tool is particularly useful for DIY projects, engineering, and crafting, where precise measurements are critical. The chart includes fractional and decimal equivalents, ensuring versatility for different applications. By having a printable and easily accessible format, it becomes an indispensable resource for professionals and hobbyists alike. The standardized conversion factor of 1 mm = 0.0393701 inches guarantees consistency and reliability. Overall, a conversion chart simplifies workflows and enhances productivity across various industries and personal projects.

Final Tips for Effective Use

To maximize the benefits of an mm to inches conversion chart PDF, consider the following tips. First, print the chart in color to enhance readability and differentiate between fractional and decimal measurements. Second, laminate the chart to protect it from wear and tear, especially in busy work environments. Third, keep it in a visible location, such as on a workshop wall or near your toolbox, for quick access. Additionally, cross-reference measurements with digital tools to ensure accuracy. Finally, update the chart periodically to incorporate any new standards or improvements. By following these tips, you can ensure efficient and precise conversions, making your projects and tasks more streamlined and professional.

six pillars of self esteem pdf

Nathaniel Branden’s framework outlines six essential practices for building self-esteem, emphasizing behavior, self-awareness, and personal growth. This guide offers practical tools for fostering a strong sense of self-worth.

Understanding the Concept of Self-Esteem

Self-esteem is the experience of being competent to cope with life’s challenges and feeling worthy of happiness. Nathaniel Branden defines it as comprising two key elements: self-efficacy (trust in your ability to handle life) and self-respect (believing you deserve happiness). It is not merely confidence but a fundamental need for healthy functioning. High self-esteem fosters resilience, enabling individuals to recover quickly from setbacks, while low self-esteem can hinder success and well-being; Branden emphasizes that self-esteem is a dynamic cycle driven by behavior, influencing and being influenced by your choices. Understanding this concept is crucial for personal growth and developing the six pillars outlined in his approach.

The Importance of Self-Esteem in Personal Growth

Self-esteem is a fundamental human need, essential for healthy functioning and effective living. It serves as the foundation for personal growth, enabling individuals to navigate life’s challenges with confidence and resilience. High self-esteem fosters the ability to make choices that align with one’s values, promoting well-being and success. It empowers individuals to pursue meaningful goals, build strong relationships, and recover from setbacks. Without self-esteem, personal growth is hindered, as self-doubt and fear of failure can dominate. Branden emphasizes that self-esteem is not just a feeling but a capacity that drives personal evolution, making it indispensable for a fulfilling and purposeful life.

Overview of Nathaniel Branden’s Approach

Nathaniel Branden’s approach to self-esteem focuses on six core pillars: living consciously, self-acceptance, self-responsibility, self-assertiveness, living purposefully, and personal integrity. He emphasizes that self-esteem is not merely a feeling but a capacity developed through specific behaviors and practices. Branden argues that self-esteem is built by aligning actions with values and taking ownership of choices. His method includes practical exercises, such as sentence completion, to help individuals cultivate self-awareness and responsibility. By addressing both the internal and external factors influencing self-esteem, Branden provides a holistic framework for achieving lasting personal growth and a fulfilling life.

The First Pillar: Living Consciously

Living consciously involves being fully aware of your thoughts, feelings, and actions, enabling intentional decisions aligned with your values and goals.

What Does It Mean to Live Consciously?

Living consciously means being fully aware of your thoughts, feelings, and actions in the present moment. It involves observing your experiences without judgment, allowing you to make intentional decisions aligned with your values and goals. This practice fosters self-awareness, enabling you to recognize patterns and habits that may hinder personal growth. By cultivating mindfulness and reflection, you can better understand your motivations and take ownership of your choices. Conscious living is the foundation for building self-esteem, as it empowers you to act authentically and responsibly, leading to greater self-trust and confidence in your ability to navigate life’s challenges effectively.

Practical Steps to Cultivate Awareness

Cultivating awareness begins with mindfulness practices, such as meditation or deep breathing, to stay present and observe thoughts without judgment. Journaling daily helps identify patterns and emotions, fostering self-reflection. Engaging in sentence completion exercises, as suggested by Branden, encourages honest self-examination. Setting aside time for introspection allows you to evaluate choices and align them with your values. Practicing gratitude by acknowledging positive experiences enhances self-awareness and shifts focus to what truly matters. These steps promote clarity, enabling you to make intentional decisions and live authentically, which are essential for building self-esteem and personal growth.

The Role of Mindfulness in Conscious Living

Mindfulness is a cornerstone of conscious living, enabling individuals to engage fully with the present moment. By cultivating mindfulness, one can observe thoughts, emotions, and actions without judgment, fostering clarity and self-awareness. Techniques like meditation and deep breathing help quiet the mind, allowing for intentional decision-making. Mindfulness practices, such as guided meditations from apps like Calm, enhance self-regulation and emotional resilience. This heightened awareness promotes authenticity, empowering individuals to align their choices with their values. Through mindfulness, individuals can break reactive patterns and embrace a more purposeful, self-directed way of living, which is vital for nurturing self-esteem and personal growth.

The Second Pillar: Self-Acceptance

Self-acceptance involves embracing your true self, including strengths and weaknesses, and moving beyond self-criticism. It is a foundation for building self-esteem, enabling authentic and confident living.

Embracing Your True Self

Embracing your true self is a core aspect of self-acceptance, involving the recognition and appreciation of both your strengths and vulnerabilities. It requires letting go of self-criticism and fostering a compassionate relationship with yourself. By acknowledging your authentic nature, you cultivate a deeper sense of self-awareness and reduce the need for external validation. This acceptance is not about perfection but about being honest with who you are, flaws included. When you embrace your true self, you create a foundation for genuine self-esteem, allowing you to live more authentically and confidently. This pillar encourages self-compassion and the understanding that your worth is inherent, not conditional.

Overcoming Self-Criticism and Negative Self-Talk

Overcoming self-criticism and negative self-talk is essential for building healthy self-esteem. These patterns often stem from past experiences and can deeply undermine confidence. Recognizing and challenging distorted or unkind self-statements is crucial. Branden suggests practicing self-compassion and reframing negative thoughts into constructive ones. For instance, instead of self-blame, focus on understanding and growth. Mindfulness can help you observe these thoughts without judgment. Additionally, engaging in exercises like sentence completion can rewire your mindset. By addressing these internal dialogues, you create space for self-acceptance and empowerment. This pillar emphasizes the importance of treating yourself with kindness and respect, fostering a more positive and supportive relationship with yourself.

Exercises for Enhancing Self-Acceptance

Enhancing self-acceptance involves intentional practices that foster a positive relationship with oneself. Nathaniel Branden recommends exercises like sentence completion, where individuals write statements starting with phrases like “I am” or “I appreciate,” to cultivate self-awareness and kindness. Journaling about personal strengths and accomplishments can also reinforce self-worth. Another powerful exercise is practicing self-compassion by acknowledging and accepting imperfections without judgment. These activities help individuals move beyond self-criticism and embrace their authentic selves. Regular reflection and mindfulness further support this process, encouraging a deeper understanding and acceptance of one’s true nature. Over time, these exercises can transform self-perception and build a foundation for lasting self-esteem.

The Third Pillar: Self-Responsibility

Self-responsibility involves taking ownership of your life, choices, and actions, empowering you to shape your destiny and foster personal growth, which significantly enhances self-esteem and accountability.

Taking Ownership of Your Life and Choices

Taking ownership of your life and choices is a cornerstone of self-responsibility, empowering individuals to acknowledge their agency in shaping their experiences. By accepting accountability, one fosters a mindset of control and purpose, which is vital for building self-esteem. This pillar emphasizes that true growth stems from recognizing that your decisions, actions, and attitudes are your responsibility, rather than blaming external circumstances. When you embrace this ownership, you cultivate resilience, integrity, and the ability to learn from mistakes, all of which are essential for personal development and a healthy sense of self-worth.

How Self-Responsibility Impacts Self-Esteem

Self-responsibility significantly influences self-esteem by fostering a sense of control and competence. When individuals take ownership of their choices and actions, they build confidence in their ability to navigate life’s challenges. This mindset cultivates self-efficacy, a key component of self-esteem, as it reinforces the belief in one’s capability to achieve goals and overcome obstacles. Conversely, avoiding responsibility can lead to feelings of powerlessness and low self-worth. By embracing accountability, individuals develop resilience and integrity, which are essential for maintaining a healthy and positive self-image. Self-responsibility thus acts as a foundation for nurturing and sustaining high self-esteem.

Strategies for Developing a Responsible Mindset

Cultivating a responsible mindset involves intentional practices that promote accountability and self-awareness. Setting clear, achievable goals helps individuals focus on what they can control, fostering a sense of agency. Engaging in regular self-reflection, such as journaling, allows for honest assessment of actions and their consequences. Additionally, practicing mindfulness can enhance awareness of thoughts and behaviors, encouraging deliberate decision-making. Taking ownership of mistakes and learning from them, rather than deflecting blame, builds integrity and resilience. Finally, aligning actions with personal values ensures consistency and purpose, reinforcing a responsible and empowered mindset that supports overall self-esteem.

The Fourth Pillar: Self-Assertiveness

Self-assertiveness involves expressing needs and standing up for oneself respectfully, fostering confidence and healthy communication. It empowers individuals to set boundaries and advocate for their rights effectively.

Understanding the Difference Between Assertiveness and Aggression

Assertiveness is about expressing needs and feelings respectfully, while aggression involves hostility or harm to others. Assertiveness fosters healthy communication and mutual respect, whereas aggression often leads to conflict. It’s important to distinguish between standing up for oneself and violating others’ boundaries. Assertive behavior promotes clarity and understanding, while aggressive behavior can damage relationships and self-esteem. By practicing assertiveness, individuals can advocate for their rights without diminishing others, creating a balanced and respectful interaction. This pillar emphasizes the value of clear, direct communication in building confidence and fostering positive connections.

Practicing Healthy Communication

Healthy communication is vital for building strong relationships and self-esteem. It involves expressing thoughts and feelings clearly, while actively listening to others. Using “I” statements helps take ownership of emotions without blaming others. Practicing empathy and maintaining eye contact fosters trust and understanding. Healthy communication also means setting boundaries respectfully and being open to feedback. By avoiding defensiveness and focusing on solutions, individuals can resolve conflicts constructively. Effective communication strengthens personal connections and enhances self-confidence, aligning with the principles of self-assertiveness and mutual respect. It’s a cornerstone of emotional intelligence and a key component in Nathaniel Branden’s approach to self-esteem development.

Building Confidence in Expressing Your Needs

Building confidence in expressing your needs involves clarity, respect, and self-awareness. It requires identifying your desires and communicating them without aggression or passivity. Practicing mindfulness helps you stay present and articulate your feelings effectively. Using “I” statements, such as “I feel overwhelmed when…” instead of “You never…,” fosters healthy communication. Active listening and empathy also play crucial roles in ensuring mutual understanding. Over time, this practice strengthens relationships and enhances personal empowerment. By expressing needs confidently, individuals align with the principles of self-assertiveness and integrity, fostering a stronger sense of self-worth. This skill is essential for Nathaniel Branden’s framework of self-esteem development.

The Fifth Pillar: Living Purposefully

Living purposefully involves aligning actions with personal values, setting meaningful goals, and creating a life of direction and fulfillment, enhancing self-esteem and overall well-being.

The Importance of Having a Sense of Purpose

A sense of purpose is vital for self-esteem as it provides direction and meaning to life. It helps individuals feel competent and worthy by aligning their actions with personal values and goals. Purpose fosters resilience, enabling people to navigate challenges with confidence. Without purpose, life can feel aimless, undermining self-worth. Branden emphasizes that living purposefully enhances self-esteem by creating a sense of control and fulfillment. It encourages individuals to pursue meaningful objectives, contributing to overall well-being and a positive self-image.

Setting and Achieving Meaningful Goals

Setting and achieving meaningful goals is crucial for self-esteem as it fosters a sense of accomplishment and competence. Goals provide direction, helping individuals align their actions with their values and aspirations. Branden suggests breaking goals into manageable steps, creating clear plans, and tracking progress. Achieving goals reinforces self-efficacy, the belief in one’s ability to succeed, which is central to self-esteem. This process builds confidence and resilience, enabling individuals to tackle future challenges with greater assurance. By setting and attaining meaningful objectives, people cultivate a positive self-image and strengthen their belief in their ability to shape their lives purposefully.

Aligning Your Actions with Your Values

Aligning your actions with your values is essential for living purposefully and building self-esteem. When your behavior reflects what you stand for, you cultivate integrity and self-respect. This alignment involves making intentional decisions that honor your core beliefs, ensuring consistency between your values and actions. By doing so, you create a sense of authenticity and direction, which strengthens your self-image. Practical steps include identifying your values, evaluating choices, and committing to actions that resonate with them. This process fosters a deeper connection to your purpose and enhances self-esteem by reinforcing your ability to live in harmony with what truly matters to you.

The Sixth Pillar: Personal Integrity

Personal integrity involves living by your values and being honest with yourself and others. It fosters trust, self-respect, and consistency in your words and actions, vital for self-esteem.

Defining and Living by Your Personal Values

Personal values are the core principles that guide your actions and decisions, reflecting what you stand for and believe in. Living by these values is essential for integrity, as it creates consistency between your beliefs and behavior. When you align your actions with your values, you build trust in yourself and others, fostering a strong sense of self-respect. Identifying and living by your values requires self-awareness and commitment, enabling you to stay true to who you are. This alignment strengthens your self-esteem, as it reinforces a sense of authenticity and moral grounding in your daily life and long-term goals.

The Role of Integrity in Building Trust

Integrity is the foundation of trust, both in oneself and in relationships with others. When you consistently act according to your values and principles, you demonstrate reliability and honesty. This consistency fosters trust, as others can depend on your word and actions. Trust is crucial for healthy relationships and personal growth, as it creates a safe environment for open communication and mutual respect. By maintaining integrity, you not only build trust with others but also strengthen your self-esteem, as you uphold your moral standards and stay true to your commitments. This alignment with your values reinforces a sense of self-respect and authenticity.

Cultivating Integrity in Daily Life

Cultivating integrity involves aligning your actions with your values consistently. Start by identifying your core values and reflecting on how they guide your decisions. Practice honesty in all interactions, even when it’s challenging. Take responsibility for your mistakes and commit to learning from them. Small, everyday choices, such as keeping promises or speaking truthfully, reinforce integrity. Mindfulness and self-awareness help you stay aligned with your principles. Over time, these practices become habits, fostering a strong moral compass and enhancing your self-esteem. Living with integrity creates a sense of authenticity and trustworthiness, both inwardly and outwardly.

External Factors Influencing Self-Esteem

Culture, society, and relationships significantly impact self-esteem. Social media, cultural norms, and interpersonal dynamics can either nurture or undermine an individual’s sense of self-worth and identity.

The Impact of Culture and Society

Cultural and societal norms profoundly influence self-esteem by shaping perceptions of worthiness and competence. Societal expectations often dictate standards of success, appearance, and behavior, which can either bolster or undermine self-esteem. For instance, individualistic cultures may emphasize personal achievement, while collectivist cultures focus on group harmony. Media and societal pressures can create unrealistic comparisons, fostering feelings of inadequacy. Additionally, cultural values may either encourage or discourage self-expression and assertiveness, impacting how individuals view themselves. Understanding these influences is crucial for developing a healthy sense of self-worth, as they often operate subtly yet powerfully in shaping self-perception and identity.

How Relationships Shape Self-Esteem

Relationships play a pivotal role in shaping self-esteem, as they provide feedback about our worthiness and competence. Positive interactions with others, especially in early life, foster a sense of security and validation, which strengthens self-esteem. Supportive relationships encourage self-expression and resilience, while negative or abusive ones can lead to self-doubt and low self-worth. The opinions and behaviors of significant others often influence how we perceive ourselves, making interpersonal dynamics a powerful force in self-esteem development. Healthy relationships promote emotional growth, while toxic ones can undermine confidence, highlighting the importance of nurturing positive connections in building and maintaining a strong sense of self-worth.

The Role of Social Media in Modern Self-Esteem

Social media significantly influences modern self-esteem, often creating a dual impact. While it can foster connection and validation, it also encourages unrealistic comparisons and self-criticism. Platforms showcase curated highlights, leading users to measure their worth against idealized images, fostering feelings of inadequacy. Cyberbullying and negative feedback further exacerbate self-doubt. However, social media can also provide supportive communities and resources for self-improvement. Balancing its use and focusing on authentic interactions are crucial to protecting self-esteem in the digital age. Mindful consumption and critical evaluation of content help mitigate harmful effects, promoting healthier self-perceptions and resilience against external pressures.

Nurturing Self-Esteem in Others

Supporting others’ self-esteem involves fostering a positive environment, encouraging self-reflection, and promoting healthy communication. Empowering individuals to embrace their strengths and take ownership of their growth is essential.

Guiding Children to Build Healthy Self-Esteem

Guiding children to build healthy self-esteem involves fostering an environment of acceptance and encouragement. Parents and caregivers should model the six pillars, teaching children to live consciously, embrace self-acceptance, and take responsibility for their actions. Encouraging open communication and praising efforts rather than just achievements helps children develop a positive self-image. Providing opportunities for goal-setting and celebrating progress cultivates purpose and confidence. Teaching integrity by modeling honest behavior and promoting empathy helps children understand the value of aligning actions with values. By nurturing these practices, adults empower children to grow into resilient, self-assured individuals capable of thriving in life.

Supporting Partners and Colleagues

Supporting partners and colleagues in building self-esteem involves fostering a positive and encouraging environment. Active listening, acknowledgment of their efforts, and constructive feedback can enhance their confidence. Encouraging them to take ownership of their goals and decisions aligns with the pillar of self-responsibility. Celebrating their achievements and offering support during challenges reinforces their sense of worth. Modeling healthy communication and assertiveness helps them express their needs effectively. By promoting a culture of mutual respect and empathy, you empower others to grow personally and professionally, creating stronger, more resilient relationships and a collaborative atmosphere where everyone thrives.

The Six Pillars of Self-Esteem offers a transformative guide to building self-worth through conscious living, self-acceptance, and personal integrity, empowering individuals for lifelong growth and fulfillment.

Summarizing the Six Pillars

The Six Pillars of Self-Esteem, as outlined by Nathaniel Branden, provide a comprehensive framework for building and maintaining healthy self-esteem. The pillars—Living Consciously, Self-Acceptance, Self-Responsibility, Self-Assertiveness, Living Purposefully, and Personal Integrity—each address a critical aspect of personal growth. Living Consciously involves awareness and mindfulness, while Self-Acceptance encourages embracing one’s true self. Self-Responsibility emphasizes taking ownership of choices and actions. Self-Assertiveness promotes healthy communication and boundary-setting. Living Purposefully focuses on aligning actions with values and goals, and Personal Integrity highlights the importance of living by one’s principles. Together, these pillars offer practical tools for fostering self-worth, resilience, and a fulfilling life. By integrating these practices, individuals can cultivate lasting self-esteem and personal empowerment.

Encouragement for Continuous Growth

Cultivating self-esteem is a lifelong journey that requires persistence, self-compassion, and a commitment to growth. Embrace challenges as opportunities to learn and evolve, and remember that setbacks are part of the process. Celebrate small victories and reflect on progress, as this fosters resilience and confidence. By aligning your actions with your values and maintaining personal integrity, you create a foundation for sustained growth. Set realistic goals, practice mindfulness, and be patient with yourself. The effort to grow is as valuable as the outcomes, and every step forward strengthens your self-esteem. Keep striving, and trust in your ability to become the best version of yourself.

sex guide medellin

Medellín’s dating scene is vibrant, blending local and tourist cultures. Locals embrace casual encounters, while tourists find opportunities in areas like El Poblado and Park Lleras.

1.1 Overview of Medellin’s Social Scene

Medellín’s social scene is a blend of vibrant culture and modern nightlife, attracting both locals and tourists. The city, once known for its troubled past, has transformed into a hotspot for socializing. Locals embrace casual encounters, with a strong emphasis on enjoyment without commitment. Tourists often find opportunities in areas like El Poblado and Park Lleras, where nightlife thrives. The social dynamic is lively, with a mix of traditional Colombian hospitality and a growing expat influence. This unique blend creates a dynamic environment for both casual and meaningful connections, making Medellín a standout destination for those exploring its social and romantic possibilities.

1.2 Differences Between Tourist and Local Hookup Cultures

Medellín’s hookup culture varies significantly between locals and tourists. Locals often embrace casual encounters as a natural part of socializing, with a focus on enjoyment without expectations. Tourists, however, may approach hookups with more caution, influenced by guidebooks and safety concerns. While locals tend to keep things simple and fun, tourists might face challenges like language barriers or navigating cultural norms. Despite these differences, both groups find opportunities in Medellín’s vibrant nightlife, though tourists are encouraged to understand local customs to integrate smoothly into the social scene.

1.3 Prevalence of Casual Sex in Medellin

Casual sex is prevalent in Medellín, particularly among locals, who view it as a natural part of socializing. Many locals embrace casual encounters without expectations, seeing them as a fun and enjoyable experience. This attitude is reflected in the city’s vibrant nightlife, where opportunities for casual sex are plentiful. Tourists also find Medellín’s hookup culture accessible, though safety and cultural awareness are important. The city’s social dynamics create an environment where casual sex is widely accepted and practiced, making it a key aspect of Medellín’s dating and hookup culture.

Cultural Context and Social Norms

Medellín’s culture embraces casual encounters, with locals viewing sex as a natural part of socializing; Gender roles are traditional, and social etiquette emphasizes respect and confidence.

2.1 Local Attitudes Towards Casual Encounters

Locals in Medellín generally embrace casual encounters, viewing them as a natural part of socializing. Many Paisas openly engage in hookup culture, especially in areas like El Poblado and Park Lleras. The attitude is relaxed, with sex often seen as a fun, no-strings-attached experience. This contrasts with the more reserved interactions between locals and tourists. While casual sex is prevalent, safety and discretion are advised, particularly in well-lit, safe zones. The local mindset emphasizes enjoying the moment without expectations of commitment.

2.2 The Role of Gender in Dating

In Medellín, traditional gender roles often influence dating dynamics. Men are typically expected to take the lead, initiating conversations and paying for drinks or meals. Women, while valued for their confidence, may face societal pressures to maintain a certain level of reserve. These norms are deeply rooted in Colombian culture, though younger generations are increasingly embracing more modern attitudes. Understanding these dynamics is key to navigating the dating scene effectively, as locals tend to appreciate respect for these cultural expectations while also welcoming open communication and mutual respect.

2.3 Social Etiquette and Expectations

Social etiquette in Medellín emphasizes respect and politeness. Punctuality is valued, and dressing appropriately for social events is expected. Public displays of affection are common, but discretion is appreciated in more conservative settings. Learning basic Spanish phrases can significantly improve interactions, as locals appreciate the effort to connect. When meeting someone, a handshake or a kiss on the cheek is customary. In nightlife, buying drinks for someone can signal interest, but it’s important to maintain respectful boundaries. Understanding these norms helps navigate social situations smoothly and fosters positive connections.

Safety and Precautions

Medellín requires caution, especially at night. Avoid the city center and stick to well-lit areas like El Poblado. Be mindful of alcohol and drug use, as they can increase risks. Stay informed about local conditions and trust your instincts to ensure a safe experience.

3.1 Areas to Avoid for Safety

Medellín’s city center, particularly at night, is considered unsafe due to higher crime rates and the presence of sex workers and drug activity. Areas like Park Lleras, while popular, require caution as they can be risky after dark. Stick to well-lit, tourist-friendly zones such as El Poblado, which is known for its safety and vibrant nightlife. Avoid displaying signs of wealth and stay sober to minimize risks. Trust local advice and avoid wandering alone in unfamiliar neighborhoods to ensure a secure experience.

3.2 Personal Safety Tips for Nightlife

When exploring Medellín’s nightlife, prioritize personal safety. Stick to well-lit, tourist-friendly areas like El Poblado and Park Lleras, and avoid walking alone at night. Keep valuables secure and avoid displaying signs of wealth. Stay sober and aware of your surroundings, as petty theft and scams can occur. Use reputable taxi services or ride-sharing apps instead of hailing cabs on the street. Trust local advice and avoid risky situations. Stay in groups and keep an eye on your drinks to prevent tampering. These precautions will help ensure a safe and enjoyable experience in Medellín’s vibrant nightlife scene.

3.3 Avoiding Scams and Fraud

Medellín’s nightlife and dating scenes can be risky due to scams. Be cautious of unverified online services and individuals promising companionship. Avoid sharing personal or financial details with strangers. Some scams involve fake profiles on dating apps or fraudulent offers for accommodations. Stick to reputable platforms and verify identities before committing. Be wary of overly aggressive solicitations, especially in areas like Centro. Never leave drinks unattended, as drugging incidents have been reported. Stay in well-lit, tourist-friendly zones and avoid mixing drugs or alcohol with strangers. Research accommodations thoroughly to avoid unsafe or fraudulent rentals.

Legal Considerations

Sex work is legal in Medellín but restricted to specific zones. Engaging with sex workers carries risks, and drug use is illegal, with strict penalties enforced.

4.1 Legal Status of Sex Work in Medellin

Sex work in Medellín is legal but regulated, confined to designated areas like the “tolerance zones.” These zones are monitored to ensure safety and compliance with local laws. However, despite legalization, risks persist, including potential scams and health concerns. Authorities enforce strict penalties for illegal activities, such as underage prostitution or unlicensed operations. Tourists engaging with sex workers should be aware of these regulations to avoid legal complications. Additionally, online platforms have emerged as safer alternatives for both clients and workers, offering a more discreet and regulated environment.

4;2 Laws Regarding Public Intoxication

Public intoxication in Medellín is illegal and can result in fines or detention. Authorities enforce strict laws to maintain public order, especially in tourist-heavy areas like El Poblado. Visitors are advised to avoid excessive drinking in public spaces, as it may attract unwanted attention or legal consequences. Moderation is key to enjoying the city’s vibrant nightlife safely. Additionally, local officials often patrol popular nightlife zones to ensure compliance with these regulations, making it important for tourists to be mindful of their behavior to avoid legal issues.

4.3 Drug Laws and Their Implications

Colombia’s drug laws are strict, with severe penalties for possession or use. Medellín enforces these laws rigorously, and even small amounts can lead to legal consequences. Tourists engaging in drug-related activities risk arrest, fines, or imprisonment. The city’s nightlife areas, while vibrant, are closely monitored, and any involvement with drugs can quickly escalate into serious trouble. It’s crucial for visitors to avoid drugs entirely to ensure a safe and enjoyable experience without legal repercussions.

Where to Meet People

Medellín’s vibrant nightlife in El Poblado and Park Lleras offers ample opportunities to connect. Online dating platforms also provide safe, convenient ways to meet locals and tourists alike.

5.1 Popular Areas for Socializing

Medellín’s social hotspots include El Poblado, known for its trendy bars and clubs, and Park Lleras, a vibrant nightlife hub. These areas attract both locals and tourists, offering a mix of casual and upscale venues. La Llanura and Parque Bicentenario are also popular for daytime socializing. Safety is key, so stick to well-lit, tourist-friendly zones; Online dating apps are widely used, making it easy to connect with others. Exploring these areas provides ample opportunities to meet people and experience the city’s dynamic social scene firsthand.

5.2 Online Dating Platforms

Online dating is a popular way to meet people in Medellín, with apps like Tinder, Bumble, and Colombian Cupid widely used. Tinder is especially popular among tourists and locals alike, particularly in areas like El Poblado. Bumble is favored for its focus on meaningful connections, while Colombian Cupid caters to those seeking relationships with locals. Grindr is also widely used within the LGBTQ+ community. These platforms provide a safe and convenient way to connect, allowing users to filter preferences and interests. Safety is key, so always share plans with friends and meet in public places.

5.3 Social Events and Gatherings

Medellín’s social events and gatherings are vibrant, offering ample opportunities to meet people. Festivals like Feria de las Flores and cultural events in El Poblado attract both locals and tourists. Nightlife in areas like Park Lleras is lively, with bars and clubs hosting themed parties. Social gatherings often revolve around music, dancing, and casual interactions. Attend local events to immerse yourself in the culture and connect with like-minded individuals. Safety is key, so stick to well-lit, popular areas and avoid walking alone late at night. Engaging in these events can enhance your social experience in Medellín.

Nightlife in Medellin

Medellín’s nightlife is vibrant, with hotspots like El Poblado and Park Lleras offering bars, clubs, and casual encounters. A mix of locals and tourists creates a lively atmosphere.

6.1 Recommended Bars and Clubs

Medellín’s nightlife thrives in areas like El Poblado and Park Lleras, where bars and clubs cater to diverse tastes. Popular spots include trendy cocktail bars and lively dance venues. Many establishments offer a mix of local and international music, creating a vibrant atmosphere for socializing. Visitors often recommend exploring rooftop bars for stunning city views. Safety and dress codes vary by location, so it’s wise to research beforehand. These venues are great for meeting locals and tourists alike, making them ideal for those seeking casual encounters or just a fun night out in the city.

6.2 The Nightlife Scene in El Poblado

El Poblado is Medellín’s premier nightlife district, offering a mix of upscale bars, lounges, and clubs. The area is known for its safety and vibrant atmosphere, attracting both locals and tourists. Visitors can enjoy everything from craft cocktails to energetic dance floors. Many venues feature live music or DJs, catering to diverse tastes. The crowd is often a blend of young professionals and travelers, creating a dynamic social environment. Dress codes vary, but trendy attire is generally recommended. El Poblado’s nightlife is a must-experience for anyone exploring Medellín’s entertainment scene.

6.3 Park Lleras as a Hotspot

Park Lleras is a central hotspot in Medellín’s nightlife, known for its vibrant atmosphere and casual encounters. The area is filled with women, many of whom are sex workers, making it a hub for those seeking adult experiences. Located in El Poblado, it offers a mix of bars, clubs, and street activity. While it’s a popular spot for nightlife, visitors are advised to remain cautious and aware of their surroundings to ensure a safe and enjoyable experience in this lively yet potentially risky environment.

LGBTQ+ Scene

Medellín’s LGBTQ+ scene is growing, with a supportive community and vibrant nightlife. Chapinero is a hotspot for gay tourists, offering a welcoming environment. Caution is still advised.

7.1 LGBTQ+ Friendly Venues

Medellín’s LGBTQ+ scene thrives in areas like Chapinero, known for its gay-friendly bars and clubs. Popular spots include Mamba and La Casa, offering vibrant nightlife. These venues provide a safe space for self-expression, attracting both locals and tourists. Events often feature drag shows and themed parties, fostering a sense of community. While the city has made strides in inclusivity, visitors are advised to remain cautious, especially in less familiar neighborhoods, to ensure a safe and enjoyable experience.

7.2 Community Events and Tips

Medellín’s LGBTQ+ community hosts vibrant events, including Pride parades and drag shows. Attendees can connect at local gatherings, fostering inclusivity and fun. For tips, engage with local groups on social media to discover events. Use dating apps like Grindr or Tinder to meet others. Stay informed about safe areas and respect local norms to avoid misunderstandings. These events and tips help visitors navigate the scene confidently and enjoyably.

7.3 Safety Within the LGBTQ+ Community

Medellín’s LGBTQ+ community is generally welcoming, but safety remains a priority. Avoid less-lit areas at night and stick to well-known spots like El Poblado and Park Lleras. When meeting new contacts, use reputable dating apps and share plans with friends. Be cautious of scams or fraud, especially in nightlife settings. Respecting local norms and avoiding public displays of affection in conservative areas can help prevent issues. Stay informed about safe zones and trust local advice to ensure a secure and enjoyable experience.

Personal Experiences and Anecdotes

Travelers share tales of Medellín’s vibrant social scene, emphasizing casual encounters and nightlife. Many highlight the city’s charm but caution against risks like scams and petty theft.

8.1 Stories from Experienced Travelers

Experienced travelers recount Medellín’s vibrant social scene, highlighting casual encounters and lively nightlife. Many share stories of meeting locals and tourists alike in areas like El Poblado and Park Lleras. While some emphasize the city’s charm and openness, others caution about safety, citing personal experiences with theft or scams. LGBTQ+ travelers also note the city’s growing inclusive venues, offering a mix of adventure and cautionary tales for those exploring Medellín’s dating and hookup culture.

8.2 Lessons Learned

Experienced travelers emphasize the importance of caution and awareness in Medellín’s dating and hookup culture. Many highlight the need to avoid risky areas, especially at night, and to be cautious with new acquaintances. Trusting instincts and prioritizing personal safety are key lessons. While the city offers exciting opportunities, balancing enjoyment with vigilance is crucial. Building genuine connections with locals and understanding cultural nuances can enhance experiences. These lessons underscore the importance of being informed and prepared when navigating Medellín’s vibrant social and nightlife scenes.

8.3 Cultural Misunderstandings

Cultural misunderstandings often arise when tourists misinterpret Medellín’s direct communication style as overly forward. Locals value honesty and may view casual sex as a natural part of socializing, while tourists might expect more emotional involvement. Additionally, the city’s vibrant nightlife can create false impressions about relationships, leading to confusion. Understanding these nuances helps bridge cultural gaps and fosters more meaningful connections. Respecting local customs and communication styles is essential to navigating Medellín’s social scene effectively and avoiding unintended misunderstandings.

Tips for Successful Hookups

Respect local customs, learn basic Spanish, and explore popular areas like El Poblado. Knowing the right spots and being mindful of safety can enhance your experiences.

9.1 Communication and Language Tips

Learning basic Spanish phrases can significantly enhance your interactions in Medellín. Many locals speak limited English, so effort to communicate in their language is appreciated. Understanding local slang and cultural nuances helps build rapport. Be clear about your intentions and respect boundaries. Avoid relying solely on translation apps, as they may miss contextual meanings. Engaging genuinely and respectfully fosters trust, which is key to successful connections. Additionally, being aware of non-verbal cues can prevent misunderstandings and ensure smoother interactions during social encounters.

9.2 Dress Code and Appearance

Dressing well is key in Medellín’s social scenes, especially in areas like El Poblado and Park Lleras. Opt for casual yet stylish outfits during the day, and more polished attire for nights out. Grooming is highly valued, as locals take pride in their appearance. While fashion trends vary, fitting in requires a balance of modern style and cultural appropriateness. Dressing according to the venue—whether a bar, club, or social event—shows respect and increases approachability. Remember, confidence and presentation go hand in hand in making meaningful connections.

9.3 Building Rapport with Locals

Building rapport with locals in Medellín requires genuine interest and respect for their culture. Learning basic Spanish phrases and showing curiosity about their customs fosters trust. Smiling, maintaining eye contact, and being approachable are key. Locals appreciate when visitors embrace their way of life, from enjoying local cuisine to participating in social activities. Patience and humility go a long way, as Colombians value sincerity. Avoid rushing interactions, as building connections takes time. By blending in and showing respect, visitors can create meaningful bonds and enhance their social experiences in the city.

Medellín offers a vibrant, transformative experience for visitors. While safety and caution are essential, the city’s charm and opportunities for connection make it a memorable destination.

10.1 Summarizing the Medellin Experience

Medellín’s dating and hookup culture is a blend of local vibrancy and tourist allure. The city, once notorious, now thrives as a hotspot for both casual encounters and meaningful connections. Areas like El Poblado and Park Lleras are central to the nightlife, offering a mix of bars, clubs, and social gatherings. While locals embrace a straightforward approach to casual sex, tourists often find the scene accessible yet require caution. Safety remains a priority, with areas like the city center advisable to avoid. Overall, Medellín’s dynamic social landscape offers unforgettable experiences for those who navigate it wisely.

10.2 Final Safety Reminders

Medellín, while transformed, still requires caution. Avoid risky areas like the city center at night and stick to well-lit, tourist-friendly zones such as El Poblado. Always use reputable transportation services and be mindful of your surroundings in crowded nightlife spots. Keep valuables secure and avoid displaying signs of wealth. Refrain from engaging in illegal activities, as drug laws are strict. Trust your instincts and avoid situations that feel unsafe. By taking these precautions, you can enjoy Medellín’s vibrant culture while minimizing risks.

10.3 Encouragement for Future Visitors

Medellín offers a unique blend of culture, nightlife, and natural beauty, making it a must-visit destination. While safety precautions are essential, the city’s transformation into a vibrant, welcoming place is undeniable. Engage with locals, explore areas like El Poblado, and immerse yourself in the city’s energetic atmosphere. For those interested in dating or hookups, Medellín’s social scene is lively, with opportunities to connect in bars, clubs, and social events. Approach with respect, learn basic Spanish, and embrace the city’s “City of Eternal Spring” charm. Medellín promises unforgettable experiences for open-minded travelers.

volo’s guide to monsters pdf free

Volo’s Guide to Monsters is a comprehensive supplement for Dungeons & Dragons, offering deep dives into monster lore, new creatures, and insights from Volo and Elminster. Available as a free PDF, it enhances gameplay for both players and DMs, providing rich content beyond the Monster Manual.

Overview of the Guide

Volo’s Guide to Monsters is a detailed supplement for Dungeons & Dragons, offering a deep exploration of iconic creatures and introducing new monsters for 5th Edition. This guide provides rich lore, character race insights, and encounter ideas, making it a valuable resource for both players and Dungeon Masters. Available as a free PDF, it enhances gameplay by expanding the monster compendium with fresh content and archival material. The guide goes beyond the Monster Manual, featuring Volo’s research and Elminster’s commentary, ensuring a unique and immersive experience for all D&D enthusiasts.

Importance of Monster Lore in D&D

Monster lore is a cornerstone of Dungeons & Dragons, enriching the game with depth and immersion. Volo’s Guide to Monsters emphasizes the significance of understanding creatures’ origins, behaviors, and roles in the world. This knowledge enhances storytelling, allowing DMs to craft compelling narratives and players to engage meaningfully with enemies. Monster lore also provides tactical insights, helping adventurers anticipate and prepare for encounters. By delving into the stories behind iconic monsters, the guide elevates gameplay, making it more than just combat—transforming it into a rich, immersive experience that brings the D&D world to life.

Free PDF Availability and Download Options

The free PDF version of Volo’s Guide to Monsters is widely available for download, offering easy access to its rich content. Players and DMs can find it on platforms like Scribd, GitHub, and other online repositories. This convenient format allows users to explore monster lore, stat blocks, and character races without cost. The PDF is fully searchable and compatible with digital devices, making it a versatile resource for enhancing D&D adventures. Its free availability has made it a popular choice among the D&D community, ensuring everyone can benefit from its detailed insights and gameplay enhancements.

Key Features of Volo’s Guide to Monsters

Volo’s Guide to Monsters offers deep dives into iconic monsters, new 5th Edition creatures, character races, monster lairs, encounters, and legacy content, enriching D&D experiences for all.

Deep Dive into Iconic Monsters

Volo’s Guide to Monsters delves into the lore of iconic creatures like giants, mind flayers, orcs, and goblinoids, offering detailed insights into their origins, behaviors, and lairs. This section provides rich narratives and stats, enhancing encounters and world-building for DMs. Players gain a deeper understanding of these legendary foes, making battles more immersive. The guide also includes Volo’s controversial research, with Elminster’s corrections, adding layers of storytelling. Available as a free PDF, this resource is indispensable for anyone seeking to elevate their D&D experience with authentic monster lore and engaging gameplay content.

New Monsters for 5th Edition

Volo’s Guide to Monsters introduces dozens of new creatures tailored for 5th Edition play, enriching encounters and adventures. From fearsome goblinoids to cunning orcs, these additions expand the D&D bestiary. Each monster comes with detailed stat blocks, ensuring seamless integration into campaigns. The guide also offers fresh lore, making these creatures more than just enemies—they’re integral to the game’s world-building. Available in the free PDF, this section is a must-have for DMs seeking to diversify and enhance their monster roster with unique and balanced options for any adventure.

Character Races and Lore

Volo’s Guide to Monsters delves into the lore of iconic D&D races, offering rich backgrounds and unique traits. Players and DMs gain insights into goblinoids, orcs, and more, with detailed racial histories. The guide provides lore-driven character options, enhancing roleplay and world-building. Available in the free PDF, this section bridges storytelling and gameplay, giving depth to both monsters and playable races. It’s a valuable resource for crafting immersive characters and understanding their place in the D&D universe, making it essential for fans of lore and character customization.

Monster Lairs and Encounters

Volo’s Guide to Monsters includes detailed sections on monster lairs, providing DMs with rich environmental descriptions and encounter ideas. From the lairs of giants to the hidden strongholds of mind flayers, the guide offers immersive setups for epic adventures. Maps and illustrations enhance these sections, helping DMs visualize and execute dynamic encounters. The free PDF version ensures easy access to these resources, making it a invaluable tool for creating memorable and engaging experiences for players. This section bridges storytelling and gameplay, offering inspiration for crafting unique and thrilling monster encounters.

Legacy Content and Archival Material

Volo’s Guide to Monsters incorporates legacy content, offering a nostalgic journey through classic D&D material. The guide includes archival insights from iconic contributors like Volo and Elminster, blending timeless lore with modern gameplay. This section highlights the evolution of monsters and their roles in D&D history, making it a treasure trove for veteran players and DMs. The free PDF version ensures accessibility, allowing fans to explore these archival treasures seamlessly. This blend of old and new enriches the game, providing depth and inspiration for crafting unique adventures.

Content Structure of the Guide

Volo’s Guide to Monsters is organized into chapters on monster lore, a bestiary with stat blocks, appendices, and indexes. It also includes maps and illustrations, enhancing accessibility in the free PDF format.

Chapters on Monster Lore

The guide dedicates extensive chapters to exploring the lore of iconic monsters such as giants, mind flayers, orcs, and goblinoids. These sections delve into their origins, habitats, and societal structures, offering rich narrative content for DMs. Each chapter provides detailed insights into the behaviors, motivations, and cultural nuances of these creatures, enhancing storytelling potential.

The lore is presented thematically, making it easy for Dungeon Masters to craft immersive encounters. Additionally, the chapters include Volo’s personal insights and Elminster’s commentary, adding unique perspectives to the narrative.

Bestiary Section with Stat Blocks

The bestiary section in Volo’s Guide to Monsters features over 200 detailed monster stat blocks, organized by lore and category. Each entry includes comprehensive stats, abilities, and tactics, making it a invaluable resource for DMs. The section covers iconic creatures like giants and mind flayers, as well as new additions to 5th Edition. The stat blocks are designed to enhance gameplay, providing balanced and engaging encounters. This section is a cornerstone of the guide, offering practical content for both new and experienced Dungeon Masters to integrate into their campaigns. The free PDF version ensures easy access to this essential content.

Appendices and Index of Monsters

The appendices in Volo’s Guide to Monsters provide invaluable resources for DMs and players, including lists of monsters, crafting guides, and organizational tools. The index offers a comprehensive catalog of all monsters, making it easy to navigate the guide. These sections enhance usability, allowing quick access to specific creatures or rules. The appendices also include legacy content and archival material, ensuring a rich reference for both new and veteran players. The free PDF version ensures these tools are readily accessible, making the guide a must-have for any D&D enthusiast. The index and appendices are designed to streamline gameplay preparation and inspiration.

Maps and Illustrations

Volo’s Guide to Monsters is enriched with detailed maps and vibrant illustrations that bring the world of D&D to life. These visuals showcase monster lairs, iconic creatures, and their habitats, offering a deeper immersion into the game. The maps provide tactical layouts for encounters, while the illustrations highlight the unique features of each monster. Available in the free PDF, these visuals are a valuable resource for DMs and players alike, enhancing storytelling and world-building. From mind flayer cities to giant strongholds, the art and cartography in the guide are indispensable for crafting unforgettable adventures.

Author and Contributors

Volo’s Guide to Monsters is authored by the Wizards RPG Team, with contributions from Volo and Elminster, blending their research and insights into D&D’s iconic creatures.

Wizards RPG Team and Their Role

The Wizards RPG Team played a pivotal role in crafting Volo’s Guide to Monsters, ensuring it aligns with D&D’s 5th Edition rules. They meticulously compiled lore, designed new monsters, and organized content for clarity. Their expertise in balancing gameplay and storytelling shines through, making the guide indispensable for both players and DMs. The team’s dedication to quality and creativity is evident in every section, from iconic monsters to fresh encounters, enriching the D&D experience.

Volo’s Research and Elminster’s Insights

Volo’s meticulous research and Elminster’s sage insights bring depth to the guide, offering unique perspectives on iconic monsters. Volo’s bold investigations, though sometimes questioned by Elminster, provide rich lore on giants, mind flayers, and more. Elminster’s commentary adds historical context and balance, ensuring accuracy. Their collaborative effort enhances the guide’s value, blending Volo’s daring discoveries with Elminster’s wisdom to create a compelling resource for D&D enthusiasts.

Collaborative Efforts in Content Creation

The creation of Volo’s Guide to Monsters involved a collaborative effort between the Wizards RPG Team, Volo, and Elminster. Volo’s daring research and Elminster’s wise insights were combined with the team’s expertise to craft a comprehensive guide. This teamwork ensured a blend of lore, new monsters, and balanced gameplay content. The guide reflects the shared passion of its creators, offering something exciting for both players and DMs. Their collaboration resulted in a resource that expands D&D’s monster lore while maintaining the game’s core spirit.

Compatibility with D&D 5th Edition

Volo’s Guide to Monsters is fully compatible with D&D 5th Edition, seamlessly integrating with the Monster Manual and other official sourcebooks. It’s widely used in Adventurers League campaigns, ensuring balanced and engaging gameplay for players and DMs alike.

Integration with Monster Manual

Volo’s Guide to Monsters complements the Monster Manual by expanding on iconic creatures and introducing new ones, ensuring a seamless integration with existing 5th Edition content. The guide enhances gameplay by providing fresh lore and stat blocks that align with the Monster Manual’s structure. This allows Dungeon Masters to effortlessly incorporate new monsters into their campaigns without disrupting balance. Players also benefit from the enriched world-building, making encounters more dynamic and immersive. The free PDF version ensures accessibility, making it a popular choice among D&D enthusiasts looking to expand their monster compendium.

Use in Adventurers League

Volo’s Guide to Monsters is a valuable resource for the D&D Adventurers League, offering new monsters, lore, and encounters that enhance organized play. The free PDF version ensures accessibility for players and DMs alike, making it easy to integrate into league campaigns. Its content aligns with official 5th Edition standards, providing fresh challenges and story hooks. Many of its monsters and lairs are designed to fit seamlessly into the league’s structured adventures, enriching the gameplay experience. This makes it a popular choice for league participants seeking to expand their monster roster and deepen their immersion in the game.

Compatibility with Other Sourcebooks

Volo’s Guide to Monsters seamlessly integrates with other D&D 5th Edition sourcebooks, enhancing gameplay without overlapping content. The free PDF version works alongside the Monster Manual and other official materials, offering fresh monsters, lore, and encounters. Its design ensures compatibility with existing campaigns, allowing DMs to mix and match content effortlessly. This versatility makes it a valuable addition to any player’s or DM’s library, enriching adventures while maintaining balance with other sourcebooks. The guide’s content is crafted to complement, not conflict, ensuring a cohesive experience for all.

Community Reception and Reviews

Volo’s Guide to Monsters has received widespread acclaim for its depth and creativity. Players and DMs alike praise its fresh lore and exciting new monsters, with the free PDF version being particularly popular among the D&D community.

Player and DM Feedback

Volo’s Guide to Monsters has been enthusiastically embraced by both players and Dungeon Masters. Many praise its rich lore and creative monster designs, which add depth to campaigns. The free PDF version has been particularly well-received, making it accessible to a wide audience. Players appreciate the new character races and lore, while DMs value the fresh monsters and encounter ideas. The guide’s insights from Volo and Elminster are also highlighted as a unique feature, offering a blend of humor and expertise. Overall, it’s celebrated as an essential resource for enhancing D&D adventures.

Popularity of the Free PDF Version

The free PDF version of Volo’s Guide to Monsters has gained immense popularity among D&D enthusiasts. Its accessibility has made it a go-to resource for players and DMs alike. The guide’s comprehensive content, including monster lore and new creatures, has been widely praised. Many appreciate the convenience of the digital format, allowing easy access during gameplay. The free PDF has been downloaded thousands of times, showcasing its demand and value within the D&D community. It remains a must-have supplement for anyone looking to enhance their adventures with rich monster content.

Critical Acclaim and Ratings

Volo’s Guide to Monsters has received widespread critical acclaim for its depth and creativity. Fans and critics praise its rich monster lore, new creatures, and engaging insights from Volo and Elminster. The guide holds an average rating of 4.5 stars on platforms like D&D Beyond and Reddit, with many hailing it as a must-have supplement. Players and DMs alike appreciate its ability to enhance gameplay and storytelling. The free PDF version has further boosted its popularity, making it accessible to a broader audience and solidifying its place as a beloved D&D resource.

Downloading and Accessing the Guide

Access Volo’s Guide to Monsters as a free PDF through platforms like Scribd, D&D Beyond, or Reddit. Easily download or read online to enhance your D&D adventures.

Free PDF Download Options

Volo’s Guide to Monsters is widely available as a free PDF for download. Platforms like Scribd, Reddit, and GitHub offer direct links to the guide. Players and DMs can access it without registration, ensuring easy and quick download. The PDF includes lore, stat blocks, and archival content, making it a valuable resource for D&D 5th Edition. Additionally, it can be read online or downloaded as a text file for convenience. This free version is perfect for enhancing your D&D adventures with new monsters, races, and encounters, all while staying compatible with existing 5th Edition rules and content.

Platforms for Access

The free PDF of Volo’s Guide to Monsters is accessible across multiple platforms. Scribd, Reddit, and GitHub are popular sources, offering direct download links. These platforms provide easy access without registration, ensuring quick retrieval for D&D enthusiasts. Additionally, the guide can be found on community forums and archival websites, making it widely available. Players and DMs can download or read it online, with options to save as a text file for offline use. This accessibility ensures that the content reaches a broad audience, enhancing D&D 5th Edition adventures with its rich monster lore and gameplay resources.

Legal and Ethical Considerations

Accessing Volo’s Guide to Monsters as a free PDF requires adherence to copyright laws. While the guide is widely available, it is essential to ensure downloads are from authorized sources to avoid legal issues. Wizards of the Coast retains ownership, and users must respect intellectual property rights. Ethical usage involves refraining from unauthorized distribution or modification. Always verify the source’s legitimacy to support the creators and maintain compliance with legal standards. This ensures fair use and continued availability of such resources for the D&D community.

Volo’s Guide to Monsters is a must-have resource for D&D enthusiasts, offering rich lore and gameplay enhancements. Its free PDF availability makes it accessible to all, ensuring endless adventure possibilities for players and DMs alike.

Final Thoughts on the Guide

Volo’s Guide to Monsters stands as an indispensable resource for D&D enthusiasts, blending rich lore, new creatures, and practical tools for DMs. Its free PDF availability ensures accessibility, making it a cornerstone for enhancing campaigns. The guide’s depth, from iconic monsters to fresh content, offers something for everyone. Whether you’re a seasoned DM or a curious player, this supplement promises to elevate your understanding and enjoyment of D&D’s vast array of creatures. Embrace the lore, explore new possibilities, and let Volo’s Guide inspire your next adventure.

Encouragement to Explore Monster Lore

Embark on a journey to uncover the fascinating world of monster lore with Volo’s Guide to Monsters. This free PDF offers a treasure trove of insights, from iconic creatures to fresh additions, enriching your D&D experience. Dive into the stories behind giants, mind flayers, and more, and discover how these beings shape the game’s universe. Whether you’re a player seeking inspiration or a DM crafting adventures, this guide invites you to explore the depth and richness of D&D’s monsters. Download the free PDF today and unlock a world of endless possibilities for your campaigns.

she used to be mine pdf

“She Used to Be Mine‚” from the musical Waitress‚ is a powerful ballad by Sara Bareilles. Its emotional depth resonates widely‚ making it a favorite. The sheet music is accessible for various instruments‚ allowing musicians to perform and connect with its heartfelt melody.

1.1 Overview of the Song

“She Used to Be Mine” is a poignant ballad from the musical Waitress‚ written by Sara Bareilles. The song captures emotional depth‚ resonating with themes of self-discovery and transformation. Its melody‚ in F Major‚ is arranged for piano‚ guitar‚ and flute‚ with sheet music available in PDF format. The 8-page score includes lyrics‚ making it accessible for performers. Free downloads are offered on platforms like Musicnotes‚ while paid options provide high-quality versions. The song’s versatility allows for various interpretations‚ from solo piano to vocal arrangements. Its popularity has led to numerous covers and adaptations‚ solidifying its place in modern musical repertoire. The sheet music is widely sought after by musicians and fans alike‚ offering a way to connect with its powerful message.

1.2 Significance in Popular Culture

“She Used to Be Mine” has become an anthem for self-discovery and empowerment‚ resonating deeply with audiences worldwide. Its emotional lyrics and soaring melody‚ crafted by Sara Bareilles for Waitress‚ have made it a cultural phenomenon. The song’s relatability transcends the musical‚ connecting with listeners on a personal level. Its popularity has inspired countless covers and adaptations‚ further cementing its place in modern music. The availability of sheet music in PDF format has democratized access‚ allowing performers of all levels to interpret and share the song. This widespread engagement has fostered a sense of community among musicians and fans‚ solidifying its impact on popular culture. The song’s enduring appeal lies in its ability to evoke emotion and inspire reflection‚ making it a timeless piece in contemporary music.

The Musical Context

“She Used to Be Mine” is the emotional centerpiece of the musical Waitress‚ composed by Sara Bareilles. It captures the protagonist’s journey of self-discovery and resilience‚ resonating deeply with audiences.

2.1 Origin in the Musical “Waitress”

“She Used to Be Mine” is the emotional centerpiece of the musical Waitress‚ composed by Sara Bareilles. The song was written specifically for the show‚ reflecting the protagonist Jenna’s journey of self-discovery and resilience. It captures her inner turmoil and longing for a better life‚ resonating deeply with audiences. The song’s raw emotion and relatable lyrics have made it a standout piece in the musical‚ showcasing Bareilles’ ability to craft meaningful and impactful music. Its popularity extends beyond the stage‚ with fans and musicians alike drawn to its heartfelt melody and poignant message. The sheet music for “She Used to Be Mine” is widely available‚ allowing performers to bring this powerful song to life in their own interpretations.

2.2 Role of the Song in the Storyline

“She Used to Be Mine” is the emotional heartbeat of the musical Waitress‚ serving as a pivotal moment in the protagonist Jenna’s journey. The song captures her inner conflict‚ longing‚ and resilience as she navigates an unplanned pregnancy and an unfulfilling marriage. It reflects her deep desire for a better life and the struggle to reconcile her past and present selves. The song’s raw emotion and vulnerability make it a turning point in the story‚ resonating deeply with audiences. Its placement in the musical underscores Jenna’s growing self-awareness and her ultimate decision to take control of her life. The sheet music for “She Used to Be Mine” is widely available‚ allowing musicians to connect with its powerful melody and poignant lyrics‚ making it a favorite among performers and fans alike.

Sheet Music Availability

“She Used to Be Mine” sheet music is widely available in PDF format for piano‚ voice‚ and other instruments. Free downloads are offered on platforms like Musicnotes‚ with options for high-quality paid versions. Users can access previews and full downloads by joining platforms or purchasing directly‚ ensuring easy access for musicians worldwide.

3.1 Platforms Offering Free Downloads

Several platforms offer free downloads of “She Used to Be Mine” sheet music in PDF format. Musicnotes provides a preview‚ requiring users to join for full access. SheetMusic-Free.com and other community-driven sites offer free arrangements for piano‚ guitar‚ and flute. These platforms cater to musicians‚ students‚ and enthusiasts‚ enabling them to practice and perform the song. While some sites may require registration‚ they provide high-quality sheet music for personal use. Additionally‚ user-generated arrangements are available‚ offering diverse interpretations of the song. These free resources make “She Used to Be Mine” accessible to a wide audience‚ fostering creativity and musical engagement;

3.2 Paid Options for High-Quality PDFs

For those seeking high-quality sheet music‚ paid options are available through platforms like Musicnotes and Sheet Music Direct. These sites offer “She Used to Be Mine” in PDF format‚ featuring professional arrangements. Musicnotes provides the song in the original key of F Major‚ with scoring for Piano/Vocal/Guitar‚ making it ideal for performers. The sheet music includes lyrics and guitar chords‚ ensuring a comprehensive experience. Sheet Music Direct also offers a detailed version‚ perfect for musicians aiming for accuracy. These paid resources are reliable and ensure clarity‚ making them ideal for serious practice or performance. Purchasing from these platforms supports copyright holders and guarantees access to authentic‚ high-quality materials.

Key Features of the Sheet Music

The sheet music for “She Used to Be Mine” is in F Major‚ transposable‚ and includes lyrics. It features Piano/Vocal/Guitar arrangements‚ suitable for various instruments and performances.

4.1 Musical Key and Structure

The sheet music for “She Used to Be Mine” is written in the key of F Major‚ with a metronome marking of 130‚ creating a moderately slow tempo. The song follows a verse-chorus structure‚ with a bridge and outro‚ allowing for emotional build-up. The arrangement is designed for Piano/Vocal/Guitar‚ making it versatile for solo or accompanied performances. The melody flows naturally‚ with chord progressions that enhance the song’s introspective and heartfelt nature. This structure supports the lyrical themes of self-reflection and personal growth‚ making it a popular choice for both professional and amateur musicians. The consistent key and tempo ensure a cohesive performance‚ whether played on piano‚ guitar‚ or other instruments.

4;2 Instrumentation Options

The sheet music for “She Used to Be Mine” offers versatile instrumentation options‚ catering to a wide range of musicians. The primary arrangement is for Piano/Vocal/Guitar‚ providing a foundational structure for solo or accompanied performances. Additionally‚ versions for flute and alto instruments are available‚ allowing for instrumental interpretations. The music is transposable‚ enabling adaptation to different keys for various vocal ranges or instrumental preferences. Many arrangements include chord charts‚ making it accessible for guitarists and bands. Some versions also feature MIDI files‚ which can be used for practice or performance. This flexibility ensures that musicians of all levels and preferences can engage with the song‚ whether performing solo or with an ensemble. The diverse instrumentation options enhance the song’s emotional impact and accessibility.

4.3 Vocal Arrangements

The vocal arrangements for “She Used to Be Mine” are crafted to highlight emotional expression‚ with the original key in F Major. The sheet music includes lyrics‚ making it easy for vocalists to follow the melody. Transposable versions allow singers to adjust the key to suit their vocal range‚ ensuring accessibility for both beginners and experienced performers. The arrangement often features a solo vocal line‚ but some versions include harmonies or duet options for collaborative performances. The song’s vocal structure is straightforward yet powerful‚ emphasizing storytelling through melody. Many user-generated arrangements also offer unique vocal interpretations‚ adding diversity to how the song can be performed. This versatility makes the song a popular choice for vocalists seeking to connect with its emotional depth.

Downloading and Printing

Download “She Used to Be Mine” PDF from platforms like Musicnotes.com or Sheet Music Direct. Join for free to access full sheet music and print instantly.

5.1 Steps to Access the PDF

To access the PDF of “She Used to Be Mine‚” visit platforms like Musicnotes.com or Sheet Music Direct. Search for the song‚ preview the sheet music‚ and create an account or log in if required. For free versions‚ join the platform or subscribe to their service. Some sites offer free downloads after signing up‚ while others may require a one-time payment for high-quality PDFs. Once purchased or downloaded‚ the file is ready to print. Ensure your device has a PDF viewer installed to open and print the sheet music. Previewing before downloading is recommended to confirm the arrangement meets your needs. This process is straightforward‚ making the sheet music accessible to musicians worldwide.

5.2 Tools for Editing and Customization

Several tools enable users to edit and customize “She Used to Be Mine” sheet music. Platforms like Musicnotes.com and Sheet Music Direct offer digital tools to transpose keys or adjust arrangements; For advanced customization‚ software like Adobe Acrobat or MuseScore allows users to modify PDFs or notation. Additionally‚ apps like Skoove provide interactive practice features‚ while websites like Phianonize offer MIDI files for further customization. These tools cater to both professionals and hobbyists‚ ensuring the sheet music can be tailored to individual needs. Whether adjusting tempos or rearranging parts‚ these resources empower musicians to personalize their performance of the song.

Learning Resources

Piano tutorials and MIDI files for “She Used to Be Mine” are available online‚ aiding musicians in mastering the piece. Apps like Skoove offer interactive practice tools‚ while websites provide sheet music and guides for vocal and instrumental learning‚ enhancing performance skills effectively.

6.1 Piano Tutorials and Guides

Piano tutorials for “She Used to Be Mine” are widely available‚ offering step-by-step guidance for musicians of all skill levels. Many websites provide MIDI files and sheet music arrangements‚ such as those by moonumbreon and Muser24675‚ which cater to pianists and vocalists. Platforms like Skoove offer interactive lessons‚ while YouTube channels and blogs share detailed breakdowns of the song’s melody and chord progressions. These resources emphasize the song’s emotional depth‚ helping pianists capture its heartfelt essence. Additionally‚ some tutorials include tips for improvisation and personalization‚ allowing artists to add their unique touch. With these tools‚ pianists can master the piece and deliver powerful performances‚ whether for personal enjoyment or public audiences.

6.2 Vocal Coaching Tips

Vocal coaching tips for “She Used to Be Mine” focus on capturing the song’s emotional depth and nuanced delivery. Many online guides emphasize the importance of connecting with the lyrics‚ as the song’s power lies in its storytelling. Coaches recommend starting with the melody‚ ensuring precise pitch control‚ and gradually incorporating dynamics to reflect the emotional journey; Breath control is crucial‚ especially for sustained notes in the chorus. Vocalists are encouraged to practice phrasing and diction to maintain clarity while conveying raw emotion; Additionally‚ resources like vocal warm-ups and practice tracks are available to help singers master the song’s range and expression. These tips help performers deliver a heartfelt and impactful rendition of this beloved ballad.

Community Contributions

The community contributes through user-generated arrangements and collaborative platforms‚ fostering creativity and sharing among musicians‚ enhancing the song’s reach and emotional impact globally.

7.1 User-Generated Arrangements

Users worldwide have created diverse arrangements of “She Used to Be Mine‚” showcasing creativity and adaptability. These include piano‚ vocal‚ and instrumental versions‚ such as those by moonumbreon‚ Muser24675‚ and issyb2401. Platforms like Musicnotes.com and SheetMusic-Free.com host these works‚ allowing musicians to explore different interpretations. The arrangements cater to various skill levels‚ from beginners to advanced players‚ making the song accessible to a broad audience. This collaborative spirit highlights the song’s emotional resonance and its ability to inspire artistic expression. While these arrangements enrich the musical landscape‚ they often require copyright permission for duplication or adaptation‚ ensuring respect for the original composition’s rights.

7.2 Collaborative Platforms for Musicians

Collaborative platforms have become hubs for musicians to share and discover arrangements of “She Used to Be Mine.” Websites like Musicnotes.com and SheetMusic-Free.com offer spaces for creators to upload their versions‚ fostering a sense of community. These platforms allow users to share sheet music‚ connect with fellow musicians‚ and gain inspiration from diverse interpretations. Tools for collaboration enable artists to work together remotely‚ blending ideas and styles. Such platforms not only promote creativity but also provide valuable resources for learning and performance. They serve as vital networks for musicians to grow and share their passion for music‚ ensuring that “She Used to Be Mine” continues to inspire new adaptations and connections worldwide.

Legal Considerations

Using “She Used to Be Mine” requires respecting copyright laws. Unauthorized duplication or adaptation without permission is prohibited. Proper licensing is essential for legal performances or adaptations.

8.1 Copyright and Usage Rights

The sheet music for “She Used to Be Mine” is protected under copyright law‚ with rights held by Sara Bareilles and associated publishers. Distribution‚ duplication‚ or adaptation requires explicit permission from the copyright owners. Platforms like Musicnotes.com offer licensed versions‚ ensuring legal access. Users must adhere to these terms to avoid infringement. Free previews are available‚ but full access typically requires purchase or subscription. Proper licensing is mandatory for public performances or modifications‚ respecting the creators’ rights. Always verify the source’s legitimacy to ensure compliance with copyright regulations.

8.2 Licensing for Performances

Performing “She Used to Be Mine” publicly requires obtaining proper licensing; Licenses can be secured through organizations like ASCAP or BMI‚ which manage performance rights. Theatrical productions or concerts must acquire specific permits‚ ensuring compliance with copyright laws. Fees may apply‚ depending on the event’s scale and type. Platforms like Musicnotes offer performance licenses for digital sheet music‚ simplifying the process. Always verify licensing requirements to avoid legal issues and ensure fair compensation for the creators. Proper licensing respects intellectual property rights and supports artists and publishers. It’s essential for musicians and organizers to obtain the necessary permissions before performing this piece publicly.

Cultural Impact

“She Used to Be Mine” has resonated deeply with audiences‚ becoming a cultural phenomenon. Its emotional lyrics and relatable themes have inspired countless covers and performances worldwide‚ fostering a sense of connection among listeners and artists alike.

9.1 Reception by Audiences

“She Used to Be Mine” has captivated audiences with its raw emotion and relatable lyrics. The song’s heartfelt melody and Sara Bareilles’ powerful vocals resonate deeply‚ creating a strong emotional connection. Its popularity extends across various platforms‚ with millions of downloads and streams. Fans praise its authenticity‚ making it a favorite for personal reflection and performance. The sheet music’s accessibility has further amplified its reach‚ allowing musicians of all levels to engage with the piece. This widespread acclaim highlights the song’s universal appeal and its ability to evoke profound emotions in listeners worldwide.

9.2 Influence on Cover Versions

“She Used to Be Mine” has inspired countless cover versions‚ showcasing its universal appeal. Musicians worldwide have adapted the song to various styles‚ from piano solos to guitar renditions‚ sharing their interpretations online. The emotional depth of the lyrics and melody has made it a favorite for vocal and instrumental covers. Many artists have uploaded their versions to platforms like YouTube and SoundCloud‚ further amplifying its reach. Additionally‚ user-generated arrangements‚ such as those for alto and piano‚ demonstrate the song’s versatility. This widespread creativity highlights its impact on the music community‚ encouraging collaboration and artistic expression. The song’s ability to resonate with diverse audiences ensures its continued influence on new interpretations and performances.

“She Used to Be Mine” remains a timeless piece‚ inspiring musicians and resonating emotionally. Its legacy continues to grow‚ motivating aspiring artists to explore its depth and beauty.

10.1 Final Thoughts on the Song’s Legacy

“She Used to Be Mine” has left an indelible mark on music and theater. Its emotional resonance and relatable themes have made it a beloved anthem for many. The song’s ability to connect with listeners on a personal level has cemented its place in contemporary musical history. As a pivotal piece from Waitress‚ it continues to inspire both professional musicians and aspiring artists. The availability of its sheet music in various formats ensures its reach and adaptability‚ allowing it to be performed and enjoyed by a diverse audience. Its legacy is a testament to Sara Bareilles’ storytelling prowess and the enduring power of musical theater.

10.2 Encouragement for Aspiring Musicians

“She Used to Be Mine” serves as a powerful inspiration for aspiring musicians‚ showcasing the impact of raw emotion and storytelling in music. The song’s accessibility through sheet music encourages performers to explore its depths‚ whether through piano‚ vocal‚ or instrumental arrangements. For those learning‚ the availability of free and paid resources provides ample opportunities to practice and refine their skills. The song’s success highlights the importance of authenticity and connection in music‚ urging aspiring artists to embrace their unique voices. By studying and performing “She Used to Be Mine‚” musicians can gain insights into crafting meaningful compositions and delivering heartfelt performances‚ ultimately fostering their own artistic growth and confidence.

Additional Resources

Explore recommended websites like Musicnotes.com and Sheet Music Direct for “She Used to Be Mine” PDFs. Utilize apps like Skoove for practice and performance tools to enhance your musical journey.

11.1 Recommended Websites for Sheet Music

For “She Used to Be Mine” sheet music‚ visit Musicnotes.com and Sheet Music Direct‚ offering high-quality PDFs. SheetMusic-Free.com provides free arrangements‚ while MuseScore and Musicnotes offer user-generated versions. These platforms ensure access to accurate and diverse sheet music‚ catering to pianists‚ vocalists‚ and instrumentalists. They also provide tools for transposition and customization‚ making them ideal for both professionals and beginners. Explore these sites to find the perfect arrangement for your performance or practice needs.

11.2 Apps for Practice and Performance

Enhance your practice and performance of “She Used to Be Mine” with apps like Musicnotes‚ offering powerful playback tools. Skoove provides interactive piano lessons‚ while MuseScore allows you to practice with MIDI files. These apps offer features like tempo adjustment‚ metronomes‚ and interactive sheet music‚ helping musicians refine their skills. Additionally‚ apps like Transcribe! and AmazingMIDI aid in learning complex sections. For vocalists‚ Vanido and Erol Singer provide pitch-perfect training. These tools cater to both beginners and professionals‚ ensuring a polished performance. Download these apps to elevate your practice and deliver a captivating rendition of the song.

signature guide

Digital signatures are encrypted electronic stamps used to authenticate document origins, ensuring security and integrity. They rely on public key infrastructure, offering a reliable method for verifying authenticity and protecting sensitive information.

1.1 What is a Digital Signature?

A digital signature is an encrypted electronic stamp used to authenticate the origin and integrity of a digital document or message. It relies on public key infrastructure (PKI) to ensure security and verify the signer’s identity. Unlike handwritten signatures, digital signatures are tamper-evident and legally binding, making them a secure method for validating electronic transactions and agreements.

1.2 Importance of Digital Signatures in the Modern World

Digital signatures have become essential in the modern world, offering enhanced security, efficiency, and legal validity for electronic transactions. They reduce paper usage, streamline workflows, and ensure document integrity. By providing a secure method for authenticating identities and agreements, digital signatures are indispensable in business, governance, and legal processes, fostering trust and compliance in an increasingly digital landscape.

Steps to Create a Digital Signature

Creating a digital signature involves selecting a platform, setting up an account, uploading documents, and choosing a method to generate or upload your signature securely.

2.1 Choosing the Right eSignature Platform

Selecting a reliable eSignature platform is crucial for security and efficiency. Look for platforms like Adobe Acrobat Sign or Certinal eSign, which offer robust security, compliance with global standards, and user-friendly interfaces. Ensure the platform supports essential features such as document upload, signature customization, and audit trails. Enterprise-grade security and AI-driven automation are additional benefits to streamline your workflow and enhance productivity.

2.2 Creating an Account and Setting Up Your Profile

Registering on an eSignature platform like Certinal eSign or Adobe Acrobat Sign is straightforward. Start by providing essential details and authenticating your identity. Create a strong, unique password to ensure security. Once logged in, customize your profile with personal information and preferences to streamline future transactions. This step ensures a seamless and secure experience for all your digital signing needs.

2.3 Uploading Your Document for Signing

After creating your account, upload your document to the eSignature platform. Most platforms support formats like PDF, DOCX, and PPTX. Ensure the document is complete and ready for signing. Once uploaded, select the document from your dashboard to proceed. The platform will guide you through the next steps, ensuring compatibility and preparing it for digital signatures. This step is crucial for a smooth signing process.

2.4 Methods to Create Your Digital Signature

There are several methods to create a digital signature. You can type your name, which is then styled into a professional font. Alternatively, draw your signature using a mouse or touchscreen, mimicking your handwritten style. Uploading a scanned image of your signature is another option. Platforms like Certinal eSign offer these options, ensuring your signature is secure, legally binding, and visually consistent. Choose the method that best suits your needs for a professional appearance.

2.5 Placing and Adjusting Your Signature

Once your digital signature is created, drag and drop it into the designated area in your document. Resize it to fit the space perfectly, ensuring clarity and proportion. Platforms like Certinal eSign allow easy placement and adjustment, guaranteeing your signature looks professional. Proper positioning ensures the document remains visually appealing and your signature is clearly visible, maintaining its intended impact and authenticity.

2.6 Finalizing and Verifying Your Signature

After placing your signature, click “Apply” or “Insert” to finalize it. The platform uses cryptography to create a unique digital fingerprint, binding your signature to the document. Most eSignature tools offer built-in verification features to ensure authenticity. Review the document to confirm all details are accurate before finalizing. Once complete, the signature is legally binding and tamper-evident, providing a secure and reliable way to authenticate your documents digitally.

Designing a Stylish and Professional Signature

Designing a stylish and professional signature involves choosing the right fonts, incorporating subtle graphics, and ensuring compatibility across platforms. It reflects your identity and purpose effectively.

3.1 Tips for Crafting a Visually Appealing Signature

To craft a visually appealing signature, balance simplicity with style. Choose a clean, readable font that aligns with your brand or personality. Incorporate subtle graphics or colors to enhance visual interest without overwhelming the design. Ensure your signature is scalable and compatible across platforms. Maintain professionalism by avoiding overly elaborate designs. Consistency is key, so use the same style across all platforms. Add a personal touch, but keep it clutter-free for a polished look.

3.2 Using Fonts and Graphics Effectively

Choose fonts that are clean and professional, ensuring readability across devices. Use graphics sparingly to avoid clutter, opting for subtle icons or logos that complement your signature. Balance font sizes and colors to maintain visual harmony. Avoid overly decorative fonts that may distract from your name or title. Ensure graphics are high-resolution and scalable for consistency across platforms. Test your signature on different screens to confirm clarity and professionalism.

3.3 Ensuring Compatibility Across Different Platforms

To ensure your digital signature looks consistent across platforms, test it on various devices and email clients. Use scalable graphics and standard fonts for uniformity. Convert signatures to widely supported formats like PNG or JPG. Ensure compatibility with popular document types such as PDFs, Microsoft Word, and Apple Pages. This ensures your signature remains professional and intact, regardless of the platform or software used to view it.

Email Signature Best Practices

A professional email signature should include your name, title, contact info, and social links. Keep it clean, avoid clutter, and ensure compatibility across platforms for a polished look.

4.1 Elements to Include in Your Email Signature

Your email signature should include essential elements like your full name, job title, contact information (email and phone), and social media links. Adding a professional photo can enhance credibility. Include a call-to-action or link to your website for convenience. Keep it concise and avoid clutter. Use a consistent format across all platforms to maintain professionalism and ensure readability on both desktop and mobile devices.

4.2 Customizing Your Email Signature for Different Platforms

4.3 Maintaining Professionalism in Email Signatures

To maintain professionalism, ensure your email signature is clean and concise. Include your name, title, contact information, and company logo if applicable. Use a simple, readable font and consistent colors that align with your brand. Avoid overly casual language or excessive graphics. Keep animations minimal and ensure compatibility across email clients. Regularly update your signature to reflect current information and maintain a polished appearance.

Tools and Platforms for Creating Digital Signatures

Popular platforms like Adobe Acrobat Sign and Certinal eSign offer robust tools for creating secure digital signatures. These platforms provide customization options, enterprise-grade security, and compliance with global standards.

5.1 Overview of Popular eSignature Platforms

Popular eSignature platforms like Adobe Acrobat Sign and Certinal eSign offer user-friendly interfaces and advanced security features. These tools provide options to draw, type, or upload signatures, ensuring compatibility with various document formats. They also support customization, audit trails, and compliance with global standards, making them ideal for both personal and professional use. These platforms streamline workflows, enhance productivity, and provide secure solutions for digital document signing.

5.2 Features to Look for in a Digital Signature Tool

When selecting a digital signature tool, look for features like multi-signature support, customization options, and audit trails. Ensure the tool offers secure encryption and compliance with global standards. Ease of use, compatibility with various document formats, and integration with productivity tools are essential. Additionally, check for two-factor authentication and centralized management to enhance security and streamline workflows effectively.

5.3 Free vs. Paid Options: Which is Right for You?

Free digital signature tools are ideal for basic tasks, offering features like limited templates and document signing. Paid options provide advanced features such as multi-signature support, audit trails, and enhanced security. Choose free for personal use or small-scale needs, and paid for enterprise-grade solutions, ensuring scalability, compliance, and robust functionality tailored to your requirements.

Legal Aspects of Digital Signatures

Digital signatures are legally recognized in many countries, ensuring document authenticity and integrity. They comply with global standards like eIDAS and ESIGN Act, providing enforceable legal protection.

6.1 Understanding the Legality of Digital Signatures

Digital signatures are legally recognized in many countries, ensuring document authenticity and integrity. They comply with global standards like eIDAS and ESIGN Act, providing enforceable legal protection. Platforms like Certinal eSign ensure compliance, offering secure and legally binding solutions. Understanding these legal frameworks is crucial for maintaining trust and validity in digital transactions, ensuring your signatures hold up in court and meet international regulations.

6.2 Ensuring Compliance with Global Standards

Compliance with global standards like eIDAS and ESIGN Act is essential for digital signatures. Platforms such as Certinal eSign ensure adherence to these regulations, providing secure and legally binding solutions. Features like encrypted workflows and audit trails maintain compliance, offering legal protection and streamlined document processes. Adhering to these standards ensures your digital signatures are recognized and valid across international borders, safeguarding your transactions and maintaining trust.

6.3 Security Measures to Protect Your Digital Signature

Protecting your digital signature requires robust security measures. Use encryption to safeguard your signature and ensure it’s stored securely. Enable multi-factor authentication for access and regularly update your software. Avoid using public devices and ensure your network is secure. Platforms like Certinal eSign offer enterprise-grade security, including audit trails and compliance with global standards, ensuring your signature remains protected and tamper-proof.

Best Practices for Using Digital Signatures

Best practices for digital signatures emphasize security, efficiency, and compliance. Use platforms like Certinal eSign for enterprise-grade protection, ensuring authenticity and streamlining workflows securely.

7.1 When to Use Digital Signatures

Digital signatures are ideal for contracts, legal documents, and financial agreements, ensuring authenticity and security. Use them for NDAs, loan contracts, and formal communications. They enhance efficiency in workflows, reduce paper use, and comply with global standards. Suitable for personal and professional needs, digital signatures are perfect for emails, business transactions, and formal authorizations, providing a reliable and legally binding method for document verification.

7.2 Avoiding Common Mistakes in Digital Signing

Common mistakes in digital signing include using unverified platforms, ignoring compliance standards, and neglecting to validate signatures. Ensure your platform meets legal requirements and supports global standards. Always verify recipient identities and double-check document accuracy before signing. Avoid using low-quality images for signatures and ensure proper placement within documents. Regularly update security settings and educate users on best practices to maintain integrity and avoid potential legal issues.

7.3 Managing Multiple Signatures for Different Purposes

Effectively managing multiple signatures requires organization and clarity. Use platforms like Certinal eSign to create and store distinct signatures for personal, professional, or brand-specific use. Label each signature clearly to avoid confusion. Ensure compatibility across platforms and maintain security by storing them in encrypted files or password-protected accounts. Regularly review and update signatures to reflect changes in identity or branding, ensuring they remain relevant and compliant with legal standards.

The Future of Digital Signatures

The future of digital signatures lies in advanced technologies like AI and blockchain, enhancing security, efficiency, and accessibility. These innovations will streamline processes and expand global adoption.

8.1 Emerging Trends in Digital Signature Technology

Emerging trends include AI-driven automation, blockchain integration, and biometric signatures. These technologies enhance security, streamline workflows, and ensure compliance. AI improves signature verification and analytics, while blockchain provides tamper-proof records. Biometric signatures, like fingerprint and facial recognition, offer advanced authentication. These innovations are reshaping digital signature processes, making them more efficient and secure for future applications.

8.2 How AI is Impacting Digital Signature Processes

AI is revolutionizing digital signature processes through automation, enhanced security, and personalized experiences. It enables intelligent signature verification, reducing fraud by analyzing patterns and detecting anomalies. AI-driven tools also streamline workflows, automating document routing and reminders. Additionally, AI powers biometric signature recognition and adaptive authentication, ensuring seamless and secure signing experiences. These advancements are making digital signatures more efficient, reliable, and user-friendly, driving adoption across industries.

8.3 The Role of Blockchain in Enhancing Security

Blockchain technology significantly enhances the security of digital signatures by utilizing decentralized ledgers and cryptographic techniques. Each signature is encrypted and linked to a unique blockchain record, ensuring tamper-proof authentication. This decentralized approach prevents unauthorized modifications, as altering one signature would disrupt the entire chain. Blockchain’s transparency and immutability provide unparalleled data integrity, making it a robust solution for securing digital signatures and maintaining trust in transactions.

Adding Signatures to Specific Document Types

Adding signatures to specific document types enhances authenticity and streamlines workflows; Learn how to seamlessly integrate digital signatures into PDFs, Word documents, and Apple Pages for professional results.

9.1 Adding Signatures to PDFs

Adding signatures to PDFs is straightforward with tools like Adobe Acrobat Sign or Certinal eSign. Upload your PDF, select the signature area, and choose from options like typing, drawing, or uploading an image. Ensure the signature fits the allocated space by resizing it. Once placed, verify the document for accuracy. Most platforms offer built-in verification to ensure the signature’s authenticity and integrity, making it a secure and efficient process for legal and professional documents.

9.2 Inserting Signatures in Microsoft Word Documents

Inserting signatures in Microsoft Word is a seamless process. Use the built-in “Insert Signature” feature or draw your signature with the pen tool. Alternatively, insert an image of your signature by navigating to “Insert > Picture.” Adjust the size and position to fit the document. For electronic signatures, use add-ins like DocuSign or Adobe Sign, which integrate with Word for secure and efficient signing. Ensure compatibility and authenticity by verifying the signature’s placement and format.

9.3 Adding Signatures to Apple Pages Documents

To add a signature in Apple Pages, use the “Insert” menu and select “Signature.” Draw your signature using a trackpad or upload an image file (PNG, JPG, or BMP). Adjust the size and position to fit your document. For a handwritten look, draw directly on the document. Ensure compatibility and clarity by saving your signature for future use, making it easy to insert into other Apple Pages files when needed.

Digital signatures have revolutionized modern documentation, offering efficiency, security, and convenience. Their versatility ensures seamless integration across platforms, making them indispensable for personal and professional use, now and in the future.

10.1 Summary of Key Points

Digital signatures streamline document workflows, enhancing security and efficiency. They ensure authenticity, integrity, and compliance with legal standards. Key steps include selecting platforms, creating accounts, uploading documents, and generating signatures. Methods like typing, drawing, or uploading images offer flexibility. Legal compliance and security measures protect documents, ensuring reliability. By mastering these processes, users can confidently adopt digital signatures for personal and professional needs, fostering a seamless and secure digital transformation.

10.2 Final Thoughts on Mastering Digital Signatures

Mastering digital signatures is a vital skill in today’s digital-first world, offering efficiency, security, and professionalism. By leveraging reliable platforms and understanding legal standards, users can confidently adopt this technology. Whether for personal or professional use, digital signatures simplify workflows, reduce paper waste, and enhance productivity. Embrace this transformative tool to streamline document management and stay ahead in an increasingly digital landscape.