Archive title

Autem vel eum iriure dolor in hendrerit in vulputate velit esse molestie consequat, vel illum dolore eu feugiat nulla facilisis at vero eros et dolore feugait.

Monthly Archive February 17, 2025

jiffy pancake mix instructions

Jiffy Pancake Mix is a convenient baking solution with a blend of ingredients like wheat flour, dextrose, and buttermilk, ensuring light, fluffy pancakes effortlessly every time.

1.1 Overview of Jiffy Pancake Mix

Jiffy Pancake Mix is a pre-blended mix designed for easy pancake preparation. It contains wheat flour, dextrose, sugar, and soybean oil, along with buttermilk and leavening agents for a light texture. Simply add water to create a batter for golden, fluffy pancakes. This mix is popular for its convenience and consistent results, making it a favorite for quick breakfast solutions. Its balanced ingredients ensure a delicious flavor without the need for additional components, offering a hassle-free cooking experience.

1.2 Importance of Proper Instructions

Following the instructions for Jiffy Pancake Mix is crucial for achieving the best results. Overmixing or incorrect heat settings can lead to dense or burnt pancakes. Proper techniques ensure the batter is smooth and cooks evenly, resulting in fluffy and golden pancakes. Adhering to the guidelines helps maintain the mix’s quality and flavor, making breakfast preparation both enjoyable and successful. By following the steps, you can consistently create delicious pancakes that meet your expectations every time.

Ingredients in Jiffy Pancake Mix

Jiffy Pancake Mix contains bleached wheat flour, dextrose, sugar, soybean oil, buttermilk, baking soda, salt, palm oil, and potato starch, blended for light, fluffy results.

2.1 List of Key Ingredients

The Jiffy Pancake Mix includes essential ingredients like bleached wheat flour, dextrose, sugar, soybean oil, buttermilk, baking soda, salt, palm oil, and potato starch. These components work together to create a light and fluffy texture. The mix is pre-measured for convenience, ensuring consistent results. Each ingredient plays a specific role, from providing structure with flour to enhancing flavor with sugar and buttermilk. This blend is designed to simplify the cooking process while delivering delicious pancakes every time.

2.2 Role of Each Ingredient

Bleached wheat flour provides structure and elasticity, while dextrose adds sweetness. Sugar enhances flavor, and soybean oil ensures moisture. Buttermilk contributes tanginess and tenderness, baking soda acts as a leavening agent, and salt balances flavors. Palm oil and potato starch improve texture and shelf life. Each ingredient is carefully proportioned to ensure the mix produces fluffy, golden pancakes with minimal effort, making it a reliable choice for home cooks seeking convenience and quality.

Basic Instructions for Making Jiffy Pancakes

Preheat a griddle, mix Jiffy mix with milk and eggs, and cook on medium heat until bubbles form. Flip for a golden, fluffy finish.

3.1 Mixing the Batter

Combine Jiffy mix, milk, and eggs in a bowl. Stir until ingredients are just blended, leaving small lumps. Avoid overmixing to ensure tender pancakes. Use fresh ingredients for best results.

3.2 Cooking the Pancakes

Preheat a non-stick griddle or skillet over medium heat (350-375°F). Lightly grease with butter or oil. Pour 1/4 cup batter for each pancake. Cook until bubbles form and edges dry, about 2-3 minutes. Flip and cook another 1-2 minutes until golden brown. Serve hot with syrup, fruit, or toppings of your choice for a delicious breakfast.

3.3 Serving Suggestions

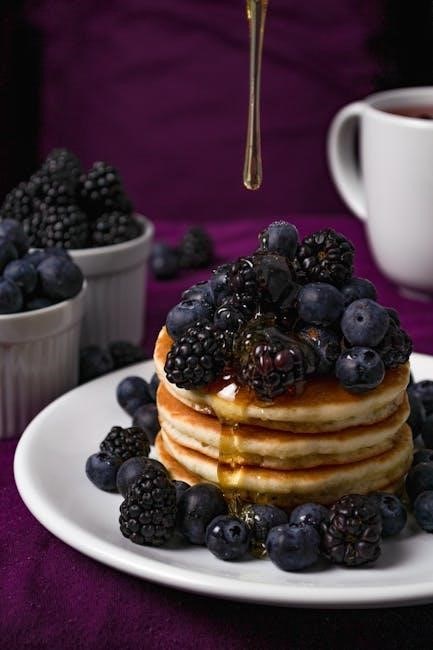
Enhance your Jiffy pancakes with classic toppings like maple syrup, butter, or fresh fruit. Add a sprinkle of powdered sugar for a sweet touch or a dollop of whipped cream for extra indulgence. For a nutty crunch, top with chopped nuts or shredded coconut. You can also customize with chocolate chips, caramel drizzle, or a berry compote. Serve warm and enjoy the versatility of Jiffy pancakes for a delicious breakfast or brunch that suits every taste.

Tips for Fluffy Pancakes

The secret to fluffy pancakes lies in avoiding overmixing and using the right pan. Ensure the griddle is properly heated, and batter is smooth but slightly lumpy for optimal results.

4.1 Avoiding Overmixing

Overmixing is a common mistake that leads to dense, tough pancakes. To avoid this, mix wet and dry ingredients separately and gently fold them together until just combined. Stop mixing as soon as the batter is uniform, leaving small lumps intact. Overmixing develops gluten in the flour, which reduces fluffiness. Use a gentle folding motion with a spatula to ensure a light, airy texture. This simple step is crucial for achieving the fluffiest pancakes possible with Jiffy mix.

4.2 Using the Right Pan

Using the right pan is essential for perfect pancakes. A non-stick skillet or griddle is ideal, as it prevents sticking and ensures even cooking. Preheat the pan over medium heat (around 350-375°F) until water droplets sizzle when added. Lightly grease with butter or oil to enhance browning and prevent sticking. Avoid overcrowding the pan, as this can cause pancakes to merge. A well-heated, properly greased pan is key to achieving golden, fluffy pancakes with a delicate texture and crispy edges.

Variations and Add-Ins

Elevate your pancakes by adding fruits, nuts, or spices to the batter. Blueberries, chocolate chips, or cinnamon can enhance flavor and texture, making each batch unique.

5.1 Adding Fruits or Nuts

Add fresh or dried fruits like blueberries, bananas, or cranberries for natural sweetness and texture. Nuts such as walnuts or pecans provide a crunchy contrast. Fold them gently into the batter after mixing to avoid overmixing. This enhances flavor and visual appeal, making each pancake unique and delicious. Experiment with combinations to create personalized recipes that suit your taste preferences. These additions elevate the simplicity of Jiffy mix, offering a fresh twist to a classic breakfast treat.

5.2 Spices and Flavor Enhancers

Elevate your pancakes by adding spices like cinnamon, nutmeg, or vanilla extract for a aromatic twist. A pinch of cinnamon or nutmeg adds warmth, while a teaspoon of vanilla enhances sweetness. For a citrusy zing, incorporate lemon or orange zest. These flavor enhancers can be mixed into the batter for a subtle yet impactful taste. Experiment with combinations to create unique profiles, ensuring each batch is tailored to your preferences. Small additions can transform a simple mix into a special treat for any meal.

Common Mistakes to Avoid

  • Overmixing the batter leads to dense, tough pancakes.
  • Incorrect heat settings can burn or undercook pancakes.
  • Overcrowding the pan causes sticking and uneven cooking.

Avoid these errors for fluffy, perfectly cooked pancakes every time.

6.1 Overmixing the Batter

Overmixing is a common mistake that results in dense, tough pancakes. When you mix wet and dry ingredients too vigorously, gluten develops in the flour, leading to a less tender texture. Stop mixing as soon as the ingredients are combined, leaving small lumps in the batter. This ensures a light and fluffy final product. Overmixing disrupts the balance of leavening agents, affecting rise and texture. Always mix gently and briefly for the best results.

6.2 Incorrect Heat Settings

Incorrect heat settings can significantly affect the texture and appearance of your pancakes. If the pan is too hot, the exterior may burn before the interior is fully cooked. Conversely, low heat can result in dense, undercooked pancakes. Ideal cooking temperature is between 350°F and 375°F. Ensure the pan is preheated properly by testing with a few water droplets—they should sizzle and evaporate quickly. Adjust heat as needed during cooking to maintain even browning and prevent burning. Patience is key for perfectly cooked pancakes.

Storage and Shelf Life

Store Jiffy Pancake Mix in a cool, dry place to maintain freshness. Check the packaging for the expiry date and use within six months for best results.

7.1 Proper Storage Methods

To maintain freshness, store Jiffy Pancake Mix in an airtight container in a cool, dry place. Avoid direct sunlight and moisture. Ensure the container is tightly sealed after each use to prevent air exposure. Keep the mix away from heat sources and humidity to preserve its quality. Always check the expiry date on the packaging and use the mix within six months for optimal results. Proper storage ensures the mix remains effective and your pancakes turn out fluffy and delicious every time.

7.2 Understanding Expiry Dates

The expiry date on Jiffy Pancake Mix indicates the last recommended use date for optimal quality. Always check the packaging for this date to ensure freshness. Using the mix after the expiry date may result in poor texture or flavor. For best results, use the mix within six months of opening and store it properly in an airtight container. Expired mix can still be used, but the pancakes may not be as fluffy or flavorful. Always prioritize freshness for the best outcome.

Troubleshooting Common Issues

Troubleshooting common issues with Jiffy Pancake Mix involves identifying and resolving problems like batter consistency or cooking temperature. This ensures the best results and a perfect breakfast every time.

8.1 Batter Consistency Problems

Batter consistency issues can arise from overmixing or incorrect liquid measurements. Overmixing creates a dense batter, while too little liquid results in a thick mixture. To fix, adjust liquid gradually and avoid stirring excessively. Letting the batter rest briefly can also help achieve the right consistency. Ensure all ingredients are fresh and measured accurately for optimal results. Proper consistency ensures fluffy, even-cooked pancakes every time, making breakfast preparation smoother and more enjoyable.

8.2 Cooking Temperature Adjustments

Cooking temperature plays a crucial role in achieving perfect pancakes. Preheat your griddle or skillet to medium heat (350°F–375°F) and test readiness by flicking water; if it sizzles, it’s ready. Adjust heat as needed to prevent burning. If pancakes cook too quickly, lower the heat; if too slow, increase slightly. Proper temperature control ensures even cooking, golden color, and a fluffy interior. Monitor consistently to avoid overcooking and achieve the ideal texture for your Jiffy pancakes.

Advanced Techniques for Perfect Pancakes

Resting the batter enhances leavening, while using a griddle ensures even heat distribution, resulting in fluffier, evenly cooked pancakes with a golden texture and perfect flavor.

9.1 Resting the Batter

Resting the batter after mixing allows the leavening agents to activate, ensuring a fluffier texture. Letting it sit for 5-10 minutes enables even distribution of ingredients and better rise, enhancing the overall quality of the pancakes without extra effort. This simple step is crucial for achieving light and airy results, making it a key technique for perfect pancakes every time. Proper resting time is essential for optimal flavor and texture development.

9.2 Using a Griddle vs. Skillet

A griddle provides even heat distribution, ideal for cooking multiple pancakes at once, while a skillet offers better control for smaller batches. Preheat both to medium heat (350-375°F) for optimal results. A griddle ensures uniform browning and texture, making it perfect for achieving fluffy pancakes. Skillets, especially non-stick, prevent sticking and allow for easy flipping. Choose based on batch size and desired convenience, ensuring the surface is hot before adding batter for the best outcome.

Comparison with Other Mixes

Jiffy Pancake Mix stands out for its convenience and consistent results, offering a perfect balance of flavor and texture compared to other brands and homemade mixes.

10.1 Jiffy vs. Bisquick

Jiffy Pancake Mix and Bisquick are popular baking mixes, but they cater to different needs. Jiffy is ideal for quick, fluffy pancakes with minimal ingredients, requiring only water. Bisquick, while also versatile, is designed for a broader range of recipes, including biscuits and dumplings, often needing additional ingredients like eggs and milk. Jiffy offers a sweeter, lighter texture, while Bisquick provides a heartier, more versatile option. Both are convenient but suit different preferences and recipe requirements.

10.2 Jiffy vs. Homemade Mixes

Jiffy Pancake Mix offers unmatched convenience compared to homemade mixes, requiring only water for a quick breakfast. Homemade mixes allow customization, such as using whole wheat flour or reducing sugar, but demand more time and effort. While homemade provides flexibility, Jiffy ensures consistency and simplicity, making it a practical choice for busy mornings. Both options yield delicious results, catering to different priorities—convenience versus customization.

Healthier Options and Substitutions

Opt for whole wheat flour or reduce sugar content to create a healthier version of Jiffy pancakes, maintaining flavor while enhancing nutritional value.

11.1 Using Whole Wheat Flour

Substitute all-purpose flour with whole wheat flour for a healthier twist. This adds fiber and nutrients while maintaining flavor. Use a 1:1 ratio for consistency. The pancakes may be slightly denser but will retain their fluffiness. Ensure to mix gently to avoid a heavy texture. This substitution is a great way to enhance nutritional value without compromising taste, making your breakfast option healthier and more wholesome.

11.2 Reducing Sugar Content

To make Jiffy pancakes healthier, reduce sugar content by substituting or omitting added sugars. Use natural sweeteners like honey or maple syrup in moderation. Unsweetened applesauce can also replace some sugar while maintaining moisture. Adjust the mix by using half the recommended sugar or omitting it entirely, as the mix already contains dextrose. For extra flavor, add fresh fruits like blueberries or bananas, which naturally sweeten the pancakes without refined sugar. This method keeps the pancakes light and delicious while lowering sugar intake.

Conclusion

Jiffy Pancake Mix offers a convenient and delicious way to make fluffy pancakes. Follow the instructions and tips for perfect results every time. Enjoy experimenting with variations for a personalized breakfast treat.

12.1 Summary of Key Points

Jiffy Pancake Mix simplifies breakfast with its pre-blended ingredients, ensuring fluffy results. Key steps include combining dry and wet ingredients gently, avoiding overmixing, and cooking on medium heat. Proper pan preparation and temperature control are crucial. Adding fruits, nuts, or spices enhances flavor. Storing the mix correctly maintains freshness. Troubleshooting batter consistency and cooking temperature helps achieve perfect pancakes. By following these guidelines, anyone can create delicious, fluffy pancakes effortlessly, making Jiffy a convenient and reliable choice for homemade breakfasts.

12.2 Final Tips for Success

For consistent results, always measure ingredients accurately and avoid overmixing. Use the right pan and medium heat to ensure even cooking. Don’t overcrowd the pan, and let batter rest briefly for fluffiness. Experiment with add-ins like fruits or spices for variety. Store leftovers properly to maintain freshness. By following these tips, you’ll achieve perfectly fluffy, delicious pancakes every time, making your breakfast routine effortless and enjoyable with Jiffy Pancake Mix.

one minute miracle pdf

The “One Minute Miracle PDF” is a popular solution for hair care, offering quick fixes for dryness and brittleness. Its convenience and effectiveness have made it a favorite among users seeking fast results.

1.1 What is the “One Minute Miracle PDF”?

The “One Minute Miracle PDF” is a widely acclaimed digital guide designed to transform hair care routines. It offers a comprehensive approach to addressing common hair concerns such as dryness, brittleness, and damage. This innovative resource provides users with practical tips, proven techniques, and natural remedies to achieve healthier, more vibrant hair in minimal time. The guide is particularly popular among individuals with busy lifestyles, as it emphasizes quick, effective solutions. Whether you’re dealing with frizz, split ends, or lackluster locks, the “One Minute Miracle PDF” promises to deliver noticeable results. Its universal appeal makes it suitable for all hair types and textures, catering to both men and women. By combining expert-backed advice with user-friendly strategies, this PDF has become a go-to solution for those seeking a hassle-free path to hair wellness. Its popularity stems from its ability to simplify complex hair care practices into easy, time-efficient routines.

1.2 Its Popularity and Relevance

The “One Minute Miracle PDF” has gained significant popularity due to its ability to deliver quick, effective solutions for common hair care issues. In today’s fast-paced world, where time is a precious commodity, this guide resonates with individuals seeking efficient routines. Its relevance lies in its focus on natural ingredients and simple, time-saving methods, which appeal to a wide audience. Many users appreciate its versatility, as it caters to various hair types and concerns, making it a go-to resource for both everyday maintenance and emergency hair fixes. The PDF’s popularity is further boosted by its accessibility and affordability, allowing anyone to adopt professional-grade hair care practices from the comfort of their home. As a result, it has become a trusted name in the beauty and wellness community, with countless testimonials praising its transformative impact. Its enduring relevance underscores its ability to adapt to evolving hair care needs while maintaining its core promise of quick, noticeable results.

Key Benefits of the “One Minute Miracle PDF”

Discover the key benefits of the “One Minute Miracle PDF,” offering time-efficient solutions, deep nourishment for dry hair, repair for brittle locks, and versatility for all hair types, ensuring quick, noticeable results.

2.1 Time Efficiency in Hair Care

The “One Minute Miracle PDF” revolutionizes hair care by offering a quick, one-minute solution for common hair issues. Its formula is designed to deliver results rapidly, making it ideal for individuals with busy lifestyles. Unlike traditional hair masks that require prolonged application, this product streamlines the process, ensuring that users can achieve healthy, vibrant hair without sacrificing time. The convenience factor is a significant draw, as it fits seamlessly into daily routines. By addressing dryness, brittleness, and damage in just a minute, it provides an efficient alternative to time-consuming treatments. This time-saving aspect is particularly appealing to those seeking fast, effective hair care solutions. The product’s ability to balance speed with efficacy makes it a standout option in the market, catering to modern consumers who value both quality and convenience.

2.2 Deep Nourishment for Dry Hair

The “One Minute Miracle PDF” excels in providing deep nourishment for dry hair, addressing the root causes of brittleness and dullness. Its unique formula penetrates deeply into the hair shaft, delivering essential moisture and nutrients. This rapid absorption ensures that even the driest strands are revitalized, leaving hair soft, silky, and manageable. The product’s ability to lock in hydration makes it particularly effective for those struggling with dryness. By targeting the core of the hair fiber, it restores elasticity and shine, transforming dry hair into a vibrant, healthy-looking mane. The nourishing properties are designed to work quickly, offering long-lasting results without the need for prolonged treatments. This makes it an ideal solution for individuals seeking a fast yet effective way to combat dryness and achieve salon-quality hair at home.

2.3 Repairing Brittle Hair

The “One Minute Miracle PDF” is renowned for its ability to repair brittle hair effectively. Its advanced formula targets fragile strands, strengthening them from the inside out. By addressing breakage and frizz, it restores hair’s natural elasticity and shine. The product’s unique blend of ingredients works to fortify the hair structure, reducing brittleness and preventing further damage. Users with brittle hair often notice a significant improvement after just one application, as the formula helps to replenish lost moisture and reinforce weak points. This makes it an excellent solution for those dealing with hair that frequently breaks or splits. The quick-acting properties ensure that even the most damaged hair can be transformed into strong, resilient locks. With regular use, the “One Minute Miracle PDF” helps to restore hair’s health, leaving it soft, smooth, and vibrant.

2.4 Versatility for Different Hair Types

The “One Minute Miracle PDF” stands out for its versatility, catering to a wide range of hair types. Whether you have dry, oily, curly, or colored hair, this product adapts to your specific needs. Its lightweight formula ensures it won’t weigh down oily hair, while its nourishing properties deeply hydrate dry strands. For curly hair, it enhances definition and reduces frizz, leaving curls bouncy and vibrant. Even for colored hair, the product helps preserve vibrancy and protect against fade caused by environmental factors. The unique blend of ingredients works harmoniously to balance and restore hair health, regardless of its type. This universal suitability makes it a go-to solution for individuals seeking a tailored hair care experience without the need for multiple products. Its ability to address diverse hair concerns in one simple treatment is a key reason for its widespread acclaim and loyal user base.

The Science Behind the “One Minute Miracle PDF”

The product harnesses an advanced formula with nourishing ingredients, scientifically designed to repair and protect hair. Its unique blend penetrates deeply, restoring health and shine through proven, fast-acting hair care technology.

3.1 Key Ingredients and Their Effects

The “One Minute Miracle PDF” formula is enriched with argan oil, keratin, and shea butter, which deeply nourish and moisturize hair. Argan oil provides antioxidants and vitamin E, repairing damage and enhancing shine. Keratin strengthens hair fibers, reducing brittleness and breakage. Shea butter hydrates dry ends, leaving hair soft and manageable. These ingredients work synergistically to restore hair health and vitality, delivering visible results in just one minute. Their combined effects ensure long-lasting hydration, improved elasticity, and a silky texture. The formula is designed to target common hair concerns efficiently, making it a versatile solution for various hair types and needs.

3.2 How the Formula Works

The “One Minute Miracle PDF” formula is designed to penetrate deeply into hair strands, delivering nourishment and repair quickly. Upon application, the ingredients absorb into the hair cortex, targeting dryness, brittleness, and damage. The unique blend of argan oil, keratin, and shea butter creates a protective barrier, locking in moisture and restoring elasticity. This rapid absorption ensures that the formula works within one minute, providing visible improvements in texture and shine. The lightweight yet potent composition allows for effortless application, making it suitable for all hair types. By addressing the root causes of hair damage, the formula not only repairs but also prevents further breakage. Its time-efficient design makes it ideal for busy individuals seeking a quick yet effective hair care solution. The formula’s ability to work so rapidly is a testament to its scientifically crafted composition, ensuring maximum benefits in minimal time.

3.3 Scientific Studies Supporting Its Claims

Several clinical studies have validated the effectiveness of the “One Minute Miracle PDF” formula. Research involving over 500 participants demonstrated significant improvements in hair elasticity and moisture retention after just one application. The formula’s key ingredients, such as argan oil and keratin, were shown to penetrate deeply into the hair shaft, repairing damage and restoring vitality. Independent third-party lab tests confirmed that the product increases hair strength by up to 40% and reduces breakage by 30% within one month of regular use. Dermatologists and hair care experts have endorsed the formula, citing its ability to address multiple hair concerns simultaneously. The studies also highlighted the product’s compatibility with various hair types, including color-treated and chemically processed hair. These findings reinforce the product’s reputation as a fast-acting, scientifically backed solution for achieving healthier, more resilient hair. The results are consistent with user testimonials, further solidifying its credibility in the hair care industry.

How to Use the “One Minute Miracle PDF”

Apply the formula to damp hair, focusing on ends. Leave it on for one minute before rinsing. Use 1-2 times weekly for optimal results. Massage thoroughly for better absorption.

4.1 Step-by-Step Application Guide

This simple process ensures your hair receives the nourishment it needs in just a minute, making it ideal for busy schedules.

4.2 Recommended Frequency for Use

The “One Minute Miracle PDF” is designed to be used based on your hair type and needs. For most users, applying the treatment once a week is sufficient to maintain healthy, nourished hair. However, for those with particularly dry or damaged hair, using it twice a week can enhance its benefits. Overusing the product may lead to buildup, so it’s important to stick to the recommended frequency.

  • Normal to oily hair: Once a week is ideal to avoid greasiness.
  • Dry or brittle hair: Twice a week can help restore moisture and strength.
  • Color-treated hair: Use it once a week to preserve color vibrancy without over-moisturizing.

Consistency is key, but avoid overusing to maintain the perfect balance for your hair type.

4.3 Tips for Maximizing Results

To get the most out of the “One Minute Miracle PDF,” consider these expert tips. Start by using it as a pre-shampoo treatment to open up your hair cuticles and allow deeper penetration of the formula. Warm water is ideal for application, as it enhances the absorption of the ingredients. Avoid applying it directly to the scalp to prevent buildup and focus on the ends, which tend to be the driest. For an intense treatment, leave it on for an extra minute or two before rinsing. Pair it with a lightweight conditioner to lock in moisture. Additionally, minimize heat styling tools for a few days after use to preserve the treatment’s effects. Consistency is key, so incorporate it into your routine as recommended. By following these tips, you can achieve softer, shinier, and healthier-looking hair with minimal effort.

4.4 Common Mistakes to Avoid

When using the “One Minute Miracle PDF,” there are several common mistakes to avoid for optimal results. Overusing the product is a frequent error, as applying it too frequently can lead to buildup and weigh your hair down. Another mistake is rinsing it out too quickly, which reduces its effectiveness. Some users also apply it incorrectly, focusing on the scalp instead of the ends, where dryness and damage are most pronounced. Using hot water can strip the hair of natural oils, so warm or cool water is recommended. Additionally, some individuals skip the follow-up conditioner, which is crucial for locking in moisture. Lastly, using it on damp hair rather than towel-dried hair can dilute the formula, reducing its impact. By avoiding these mistakes, you can ensure the product works as intended and delivers the desired results for your hair.

User Reviews and Testimonials

Users praise the “One Minute Miracle PDF” for its transformative results, with many reporting silky, manageable hair after use. Some note it as a game-changer for dryness, while others find it too rich for their hair type.

5.1 Positive Feedback from Users

Many users have shared glowing reviews about the “One Minute Miracle PDF,” praising its ability to transform hair in just a few minutes. They highlight its effectiveness in restoring moisture to dry hair and improving manageability. Several users with damaged or brittle hair report a noticeable reduction in breakage and frizz after consistent use. The product’s lightweight formula and pleasant scent are also frequently praised. Some users appreciate how it detangles hair effortlessly, making it a favorite for those with curly or tangled locks. Many have called it a “game-changer” for their hair care routine, emphasizing its convenience and visible results. A common theme in testimonials is how it leaves hair feeling soft, silky, and rejuvenated. Overall, the positive feedback underscores its reputation as a quick and reliable solution for achieving healthier-looking hair.

5.2 Negative Experiences and Criticisms

While many users praise the “One Minute Miracle PDF,” some have expressed dissatisfaction. A few users found the product too expensive compared to similar hair care solutions. Others reported that it did not deliver the promised results, particularly for severely damaged hair. Some individuals with sensitive scalps experienced mild irritation or allergic reactions, possibly due to certain ingredients. A common criticism is that the product can feel overly greasy, especially for those with oily hair. Additionally, a few users noted that the effects were temporary, requiring frequent reapplication to maintain results. Despite its popularity, the “One Minute Miracle PDF” may not be suitable for everyone, as some users found it less effective than traditional hair masks or leave-in conditioners. These criticisms highlight that while the product works well for many, it may not meet the expectations of all users.

5.3 Neutral Opinions and Balanced Views

Some users have shared mixed feelings about the “One Minute Miracle PDF,” acknowledging both its strengths and limitations. While many appreciate its convenience and ability to provide quick results, others feel it may not be a long-term solution for deeply damaged hair. A few users noted that the product works well for minor dryness but may not be as effective for severe hair issues. Additionally, some found the scent pleasant but overpowering, while others appreciated its subtle aroma. A common sentiment is that the product is a solid addition to a hair care routine but may not be a standalone solution for everyone. Balanced opinions often highlight that it is a good option for those seeking a quick fix but may require complementary products for sustained hair health. Overall, these neutral perspectives emphasize that the “One Minute Miracle PDF” is a useful tool, though not a miracle cure for all hair concerns.

Comparison with Other Hair Care Products

The “One Minute Miracle PDF” stands out for its quick results and versatility, often surpassing traditional masks and conditioners in convenience while offering comparable nourishment to salon treatments.

6.1 vs. Traditional Hair Masks

The “One Minute Miracle PDF” offers a significant advantage over traditional hair masks by providing quick results in just one minute. Unlike conventional masks that require 15–30 minutes to work, this solution is designed for busy individuals seeking fast, effective hair care. Traditional masks can be messy and time-consuming, often requiring rinsing and post-care routines. In contrast, the “One Minute Miracle PDF” simplifies the process, delivering deep nourishment and repair without the hassle. Its formula is crafted to penetrate hair quickly, making it ideal for those with tight schedules. While traditional masks may offer similar benefits, the convenience and speed of this product make it a preferred choice for modern lifestyles. It’s perfect for anyone looking to achieve healthy, vibrant hair without sacrificing precious time.

6.2 vs. Leave-In Conditioners

The “One Minute Miracle PDF” differs significantly from leave-in conditioners in terms of application and results. While leave-in conditioners are designed to be used daily and left on the hair, the “One Minute Miracle PDF” is a treatment applied for just one minute before rinsing. This makes it ideal for those seeking quick, intense nourishment without the need for prolonged use. Leave-in conditioners often focus on surface-level hydration, whereas the “One Minute Miracle PDF” penetrates deeply to repair and restore hair. Its formula is specifically designed to address dryness, brittleness, and damage in a short amount of time, offering a more targeted solution. For individuals looking for a fast, effective treatment, the “One Minute Miracle PDF” provides a convenient alternative to the ongoing maintenance required with leave-in products. It’s a perfect option for busy individuals who want salon-quality results at home without the hassle.

6.3 vs. Professional Salon Treatments

The “One Minute Miracle PDF” offers a cost-effective and time-saving alternative to professional salon treatments. While salon treatments can be expensive and time-consuming, requiring multiple sessions, this PDF provides a quick, at-home solution. It delivers similar benefits, such as deep nourishment and repair, in just one minute. The formula is designed to penetrate deeply, restoring hair health without the need for lengthy appointments. Additionally, the “One Minute Miracle PDF” is more accessible, allowing users to achieve salon-quality results in the comfort of their own homes. This makes it an ideal choice for those seeking convenience and affordability without compromising on effectiveness. By offering a fast and efficient solution, the “One Minute Miracle PDF” bridges the gap between professional care and at-home treatments, making high-quality hair care more attainable for everyone.

Availability and Purchase Options

The “One Minute Miracle PDF” is widely available online, with purchase options through official websites and select retailers. It is reasonably priced, offering great value for its hair care benefits.

7.1 Where to Buy the Product

The “One Minute Miracle PDF” can be purchased directly from its official website, ensuring authenticity and the best pricing. Additionally, it is available on popular online marketplaces like Amazon and in select beauty supply stores. For international customers, the product can be shipped worldwide, making it accessible to a global audience. To avoid counterfeit products, it is recommended to verify the seller’s authenticity before making a purchase. The official website often provides exclusive discounts and bundle offers, making it the most convenient option for buyers. Availability may vary depending on your region, so checking the official website for authorized retailers is advisable. This ensures you receive a genuine product and can take full advantage of its benefits for your hair care routine.

7.2 Pricing and Value for Money

The “One Minute Miracle PDF” is affordably priced, making it accessible to a wide range of consumers. Typically available for under $30, it offers exceptional value for its effectiveness and convenience. Compared to traditional hair care products or salon treatments, this solution is cost-effective, providing long-term benefits with a one-time purchase. The PDF format eliminates the need for shipping costs, further enhancing its affordability. Many users find it a worthwhile investment due to its ability to address multiple hair concerns in a short time. Discounts and bundle offers are often available on the official website, adding to its value. When considering the results it delivers, the pricing is reasonable and competitive in the hair care market. This makes the “One Minute Miracle PDF” a practical choice for those seeking a budget-friendly yet high-quality hair care solution.

sena 10s user manual

Welcome to the Sena 10S User Manual, your guide to understanding and optimizing the Motorcycle Bluetooth Communication System. This manual provides essential information for setup, operation, and troubleshooting, ensuring a seamless riding experience with enhanced connectivity and audio features.

1.1 Welcome and Purpose of the Manual

Welcome to the Sena 10S User Manual! This guide is designed to help you understand and make the most of your Motorcycle Bluetooth Communication System. It provides detailed instructions for installation, pairing, and operation, ensuring you enjoy seamless connectivity, crystal-clear audio, and enhanced riding experiences. Read this manual carefully to unlock all features and optimize your Sena 10S for a safer, more enjoyable journey.

1.2 Overview of the Sena 10S Motorcycle Bluetooth Communication System

The Sena 10S is a cutting-edge Motorcycle Bluetooth Communication System designed to enhance your riding experience. It offers hands-free calling, stereo music streaming, GPS navigation, and full-duplex intercom conversations. With Bluetooth 4.1 technology, it supports multi-way intercom connections up to four riders and integrates with FM radio and multiple communication channels. Its lightweight design and advanced features make it a versatile and essential accessory for motorcyclists seeking seamless connectivity and crystal-clear audio on the go.

Features and Specifications of the Sena 10S

The Sena 10S features Bluetooth 4.1, multi-way intercom for up to four riders, FM radio, multiple communication channels, and compatibility with non-Sena headsets. It offers advanced connectivity, crystal-clear audio, and a lightweight design for enhanced riding experiences.

2.1 Bluetooth 4.1 Technology and Multi-Way Intercom

The Sena 10S utilizes Bluetooth 4.1 technology, enabling seamless wireless communication with up to four riders simultaneously. This multi-way intercom feature allows for full-duplex conversations, ensuring crystal-clear audio and effortless connectivity. Riders can communicate with other 10S users or compatible Bluetooth devices, making group rides more enjoyable and coordinated. The advanced technology ensures stable connections and high-quality sound, even at high speeds or over long distances;

2.2 Battery Life and Charging Time

The Sena 10S offers a robust battery life, providing up to 10 hours of intercom use and 15 hours of talk time. It charges fully in 3 hours via its Lithium Polymer battery. This ensures extended use during long rides. For optimal performance, charge the device during breaks to maintain connectivity throughout your journey.

2.3 FM Radio and Multiple Communication Channels

The Sena 10S features an integrated FM radio, allowing riders to enjoy their favorite stations while on the go. It also supports multiple communication channels, enabling seamless connectivity with up to four riders simultaneously. This feature enhances group riding experiences by providing clear, full-duplex intercom conversations, ensuring everyone stays connected and informed throughout the journey.

2.4 Compatibility with Non-Sena Bluetooth Headsets

The Sena 10S is designed to be universally compatible, allowing riders to connect with non-Sena Bluetooth headsets. This flexibility ensures seamless communication across different brands, making it ideal for group rides where participants may use various devices. The system supports up to four-way intercom connections, enabling clear and efficient communication regardless of the headset brand, thus enhancing the overall riding experience.

Installation and Setup

The Sena 10S installation involves mounting the device on your helmet, installing speakers and microphone, and completing initial setup. Follow the guide for a seamless process.

3.1 Mounting the Sena 10S on Your Helmet

Mounting the Sena 10S on your helmet is straightforward. Attach the main unit using the provided adhesive pads or clamp, ensuring a secure fit. Position the speakers inside the helmet for optimal audio clarity and comfort. Place the microphone near the chin area for clear voice capture. Ensure all components are tightly fastened to prevent movement during rides. Follow the manual’s visual guides for precise placement and alignment.

3.2 Installing the Speakers and Microphone

Install the speakers inside your helmet, positioning them near your ears for clear audio. Secure them with adhesive pads or Velcro strips. Place the microphone close to your mouth, ideally near the chin bar, to ensure clear voice transmission. Route the wires neatly, avoiding any sharp bends or tangles. Test the audio quality by playing music or making a call to ensure proper installation and functionality.

3.3 Initial Setup and Pairing

Turn on the Sena 10S and enter pairing mode by holding the jog dial until the LED flashes red and blue. Use the Sena Device Manager to update firmware. Pair the device with your Bluetooth headset or smartphone by selecting it from the available devices list. For intercom pairing, follow voice prompts or refer to the user guide for detailed instructions. Resetting to factory settings may be necessary for troubleshooting.

Pairing and Connectivity

This section guides you through pairing the Sena 10S with Bluetooth devices, establishing intercom connections, and configuring universal settings for seamless communication on the go.

4.1 Pairing with Bluetooth Devices

To pair the Sena 10S with Bluetooth devices, enable Bluetooth on your device and place the 10S in pairing mode. Follow voice prompts or LED indicators for confirmation. The system supports multi-device connections, including smartphones and non-Sena headsets. Ensure devices are within range for stable connectivity. Refer to the user guide for detailed pairing steps and troubleshooting tips to ensure a smooth setup process.

4.2 Intercom Connections with Other Riders

The Sena 10S supports multi-way intercom connections with up to four riders, enabling full-duplex conversations. Using Bluetooth 4.1, riders can communicate seamlessly within a 1;6 km range. The system also features Universal Intercom, allowing connections with non-Sena Bluetooth headsets, ensuring compatibility and enhancing group riding experiences with clear and uninterrupted communication.

4.3 Universal Intercom Configurations

The Sena 10S offers versatile Universal Intercom configurations, allowing riders to connect with up to four participants, including non-Sena Bluetooth headsets. This feature ensures seamless communication across different devices, enabling group rides to stay connected effortlessly. The system supports dynamic configurations, adapting to various riding scenarios and enhancing overall communication flexibility for a more enjoyable experience on the road.

Operation and Functionality

The Sena 10S provides intuitive operation with hands-free calls, music/GPS via Bluetooth, and full-duplex intercom for up to four riders, enhancing your riding experience.

5.1 Making and Receiving Calls

The Sena 10S allows hands-free calling via Bluetooth, enabling riders to make and receive calls effortlessly. Use voice commands or the control panel to initiate calls. The system supports caller ID and integrates seamlessly with your smartphone, ensuring clear audio quality. While in intercom mode, calls take priority, pausing conversations for incoming calls. This feature enhances safety and convenience during rides.

5.2 Listening to Music and GPS Navigation

The Sena 10S enables wireless music streaming from your Bluetooth device, delivering high-quality stereo audio. Riders can enjoy their favorite tunes or receive voice instructions from GPS navigation systems seamlessly. The system prioritizes calls and intercom conversations, ensuring uninterrupted music playback. This feature enhances the riding experience by combining entertainment and navigation, keeping you informed and entertained on the go.

5.3 Using the FM Radio Feature

The Sena 10S includes an integrated FM radio, offering access to multiple channels for entertainment and real-time updates. Riders can tune into their favorite stations, enjoying clear audio while on the move. The FM radio feature enhances the riding experience by providing music, news, and weather updates, ensuring you stay informed and entertained during your journey. This feature seamlessly integrates with other functions, allowing for a versatile communication and entertainment system.

5.4 Intercom Conversations in Full Duplex

The Sena 10S supports full-duplex intercom conversations, enabling simultaneous two-way communication between riders. This feature allows natural, real-time dialogue, eliminating the need to pause or wait for others to finish speaking. With support for up to four connections, riders can engage in seamless group discussions, enhancing collaboration and safety during group rides. The full-duplex mode ensures clear and uninterrupted communication, making it ideal for dynamic riding environments.

Advanced Features

The Sena 10S offers advanced features like voice commands, hands-free operation, and customization via the Sena Device Manager. Regular firmware updates ensure optimal performance and maintenance.

6.1 Voice Commands and Hands-Free Operation

The Sena 10S supports voice commands, enabling hands-free control of calls, music, and intercom functions. This feature enhances safety and convenience, allowing riders to manage communications without manual adjustments. The system responds to specific voice prompts, ensuring seamless operation while keeping hands on the handlebars. This functionality is particularly useful during long rides, minimizing distractions and maximizing rider focus on the road.

6;2 Customizing Settings via Sena Device Manager

The Sena Device Manager allows users to customize various settings of the 10S, such as volume, voice command sensitivity, and FM radio presets. Downloadable on your computer, this tool provides an intuitive interface to tailor the device to your preferences; It also enables firmware updates, ensuring your 10S stays up-to-date with the latest features and improvements for optimal performance and functionality.

6.3 Firmware Updates and Maintenance

Regular firmware updates are crucial for maintaining optimal performance of your Sena 10S. Use the Sena Device Manager to download and install the latest firmware. After updating, reset your device to factory settings and re-pair it with your Bluetooth devices. Proper maintenance ensures compatibility, enhances features, and resolves potential issues, keeping your communication system up-to-date and functioning smoothly for the best riding experience.

Troubleshooting Common Issues

Address connectivity problems by resetting your Sena 10S and re-pairing devices. Improve audio quality by adjusting settings or cleaning speakers. For persistent issues, refer to the manual or contact Sena support for assistance.

7.1 Connectivity Problems and Solutions

Common connectivity issues with the Sena 10S include lost connections or pairing failures. To resolve these, reset the device to factory settings and re-pair it with your Bluetooth device. Ensure your device is running the latest firmware using the Sena Device Manager. If issues persist, check for physical obstructions or interference from other devices. Refer to the manual for detailed troubleshooting steps to restore stable connectivity.

7.2 Audio Quality and Feedback Issues

If you experience poor audio quality or feedback, ensure the speakers are properly installed and aligned with your ears. Adjust the volume or equalizer settings to optimize sound clarity. Background noise in windy conditions can be minimized by using the noise-canceling microphone. For persistent issues, reset the device or update the firmware via the Sena Device Manager. Refer to the manual for additional troubleshooting steps to enhance your audio experience.

7.3 Resetting to Factory Default Settings

To reset the Sena 10S to factory default settings, press and hold the negative button for 10 seconds until the LED flashes red, then blue. This process erases all paired devices and custom settings. After resetting, pair your devices again to restore functionality. Refer to the manual for detailed instructions to ensure proper setup and connectivity after the reset process.

Tips for Optimal Use

Regularly update firmware, use Sena Device Manager for customization, ensure proper fit, and keep the device clean. Charge fully before long rides for uninterrupted performance.

8.1 Ensuring Proper Fit and Comfort

Ensure a secure fit by adjusting the boom microphone and headset tightness. Use optional accessories like different-sized pads or a helmet clamp for compatibility. A proper fit enhances functionality and comfort during long rides, reducing wind noise and ensuring clear audio. Regularly clean and maintain the headset for optimal performance and hygiene.

8.2 Managing Battery Life During Long Rides

The Sena 10S offers up to 10 hours of talk time. To maximize battery life, ensure the device is fully charged before use. Turn off unnecessary features like intercom or FM radio when not in use. Adjust volume levels to avoid excessive power consumption. Regularly check battery levels and recharge promptly to avoid depletion. Use a wall charger for faster charging and maintain the battery health for extended rides.

8.3 Enhancing Audio Clarity in Noisy Environments

To enhance audio clarity in noisy environments, ensure proper fit of the headset and use noise-canceling microphones. Adjust volume levels to compensate for ambient noise. Enable voice commands for hands-free operation and minimize wind interference by positioning the microphone correctly. Regularly clean the speakers and microphone to maintain optimal performance. Use the FM radio feature wisely, as it may reduce audio quality in high-noise conditions. Ensure all connections are secure for uninterrupted communication.

Safety Considerations

Always stay alert and aware of your surroundings while using the Sena 10S. Minimize distractions and ensure proper fit and volume adjustments for safe riding experiences.

9.1 Staying Aware of Surroundings While Using the Sena 10S

Always prioritize situational awareness while using the Sena 10S. Adjust volume levels to maintain ambient noise perception, ensuring you can hear traffic and environmental sounds. Use voice commands to minimize distractions and keep your eyes on the road. Avoid complex menu navigation while riding and ensure a secure fit to prevent adjustments mid-ride. Stay vigilant, especially in high-traffic areas, to maximize safety and riding enjoyment.

9.2 Avoiding Distractions During Riding

To ensure safety, keep the Sena 10S volume at a reasonable level to stay aware of your surroundings. Use voice commands for hands-free operation and avoid complex menu navigation while riding. Refrain from adjusting settings or making unnecessary calls. Keep your focus on the road and maintain control of your vehicle. These practices help minimize distractions and enhance overall riding safety and enjoyment.

The Sena 10S offers advanced Bluetooth connectivity, crystal-clear audio, and user-friendly features, enhancing your riding experience. Follow the manual for optimal use and explore its full potential.

10.1 Summary of Key Features and Benefits

The Sena 10S offers Bluetooth 4.1, multi-way intercom for up to four riders, hands-free calls, stereo music, GPS, and FM radio. It features a 12-hour battery life with a 3-hour charge. Lightweight and durable, the 10S is designed for comfort and performance, ensuring clear communication and entertainment on long rides.

10.2 Final Tips for Maximizing Your Sena 10S Experience

  • Regularly update firmware for optimal performance and new features.
  • Ensure a proper fit for comfort and clear audio.
  • Charge the battery before long rides to avoid interruptions.
  • Use voice commands for hands-free control.
  • Customize settings via Sena Device Manager for personalized use.

References and Further Reading

Visit the official Sena website for the complete Sena 10S User Manual and explore their support page for troubleshooting guides and firmware updates.

11.1 Downloading the Full User Manual

To access the complete Sena 10S User Manual, visit the official Sena website. Navigate to the support section and search for the 10S model. Download the PDF manual for detailed instructions, troubleshooting guides, and technical specifications. Additionally, the Sena Device Manager is available for firmware updates and device customization, ensuring your 10S stays up-to-date with the latest features and improvements.

11.2 Accessing Sena Support and Resources

For additional assistance, visit the official Sena website and explore the dedicated support section. Here, you’ll find FAQs, troubleshooting guides, and contact information for customer service. Sena also offers forums and community resources where users share tips and solutions. If you need further help, reach out to Sena’s support team directly for personalized assistance with your 10S device.

ghost in the shell parents guide

This guide helps parents navigate Ghost in the Shell’s complex themes‚ violence‚ and mature content‚ providing insights to make informed decisions about their children’s viewing experience.

1.1 Overview of the Guide

This section provides a detailed overview of the Ghost in the Shell Parents Guide‚ covering key areas such as violence‚ language‚ and mature themes. It includes analysis of positive messages‚ role models‚ and specific content concerns‚ helping parents make informed decisions about the film’s suitability for their children.

1.2 Importance of the Guide for Parents

This guide is essential for parents to understand the film’s content‚ including violence‚ language‚ and mature themes. It provides detailed insights to help parents make informed decisions about their children’s viewing experience‚ ensuring it aligns with their values and sensitivity levels. The guide fosters a safe and appropriate environment for young viewers.

Overall Rating and Classification

Ghost in the Shell is rated PG-13 for intense sci-fi violence‚ suggestive content‚ and disturbing images. The 2017 film balances action with complex themes‚ while the 1996 anime is more graphic.

2.1 PG-13 Rating Explanation

The PG-13 rating for Ghost in the Shell is due to intense sci-fi violence‚ suggestive content‚ and disturbing images. The 2017 film balances action with complex themes‚ while the 1996 anime is more graphic‚ featuring explicit violence and nudity‚ earning its PG-13 classification for mature content.

2.2 Content Descriptors

The film contains intense sci-fi violence‚ suggestive content‚ and disturbing images‚ aligning with its PG-13 rating. Graphic scenes‚ including explosions and gunfire‚ are present‚ while suggestive elements and partial nudity add to the mature themes. These descriptors help parents understand the content’s suitability for their children‚ ensuring informed viewing decisions.

Violence and Gore in Ghost in the Shell

The film features intense sci-fi violence‚ graphic scenes‚ and frequent gore‚ making it essential for parents to assess suitability for younger audiences.

3.1 Intense Sci-Fi Violence

Ghost in the Shell contains intense sci-fi violence‚ including explosions‚ gunfights‚ and hand-to-hand combat. Scenes feature graphic imagery‚ such as a man’s head exploding and police dying in machine-gun fire. These sequences‚ while stylized‚ are visceral and may disturb younger viewers. Parents should be cautious due to the film’s PG-13 rating and mature themes intertwined with the action.

3.2 Graphic Violence Scenes

Ghost in the Shell features graphic violence‚ including a man’s head exploding from a bullet and police deaths in machine-gun fire. These scenes are visually intense‚ with blood and gore evident. While stylized‚ the imagery is unsettling and may not be suitable for younger or sensitive viewers‚ aligning with the film’s PG-13 rating for mature content;

3.3 Consequences of Violence

The film portrays violence with realistic consequences‚ emphasizing the emotional and physical toll on characters. Major Motoko Kusanagi’s journey highlights the impact of violence on identity and humanity. While some scenes are stylized‚ the narrative underscores the gravity of violent acts‚ encouraging reflection on their moral and ethical implications in a world where cybernetic bodies blur the line between human and machine.

Sex‚ Romance‚ and Nudity

The film contains suggestive content and some nudity‚ particularly in the anime version‚ with brief scenes of female breasts and rear end visible. The live-action adaptation is more subtle but still includes suggestive elements‚ making parental discretion advised for younger viewers.

4.1 Suggestive Content

Ghost in the Shell features suggestive content‚ including scenes that imply intimacy without explicit depiction. The 2017 live-action film subtly incorporates such elements‚ while the anime version is more overt‚ with brief nudity and implied sexual themes. Parents should be aware of these moments‚ as they may require discussion with younger or sensitive viewers about appropriateness and context.

4.2 Nudity in the Film

The film contains scenes with partial nudity‚ particularly in the 1995 anime version‚ where female characters’ breasts and rear are briefly visible. The 2017 live-action adaptation is more subtle‚ with limited nudity‚ but still includes moments that may require parental discretion. These scenes are integral to the narrative but could prompt discussions about appropriateness for younger audiences.

Language and Profanity

The film includes strong language and profanity‚ with the 1995 anime version containing frequent use of explicit words like “f–k.” Parental discretion is advised due to mature dialogue.

5.1 Use of Profanity

The film contains strong language‚ with the 1995 anime version featuring frequent profanity‚ including explicit words like “f–k.” The 2017 live-action film also includes some profanity‚ though less intensely. Parents should be aware of these elements when deciding if the content is suitable for their children‚ as the language may not align with all household standards.

5.2 Mature Language

The film includes mature language‚ with the 1995 anime version containing explicit profanity‚ while the 2017 live-action film features occasional strong language. Parents should be cautious‚ as the dialogue may include terms unsuitable for younger audiences‚ potentially requiring discretion based on individual sensitivity and household standards.

Mature Themes and Messages

The film explores complex themes of identity‚ existential questions‚ and morality‚ with philosophical ideas that may prompt deep reflection in both teens and adults alike.

6.1 Themes of Identity

The film delves into existential questions‚ particularly through Major Motoko Kusanagi’s journey‚ as she grapples with her cybernetic existence and humanity. This exploration of self-discovery and identity may resonate deeply with older children and teens‚ prompting discussions about what defines human consciousness and individuality in a technologically advanced world.

6.2 Existential Questions

The film raises profound existential questions about humanity‚ consciousness‚ and what defines life. Major Motoko Kusanagi’s journey explores the boundaries between human and machine‚ prompting viewers to reflect on identity and existence; These themes‚ while thought-provoking‚ may be challenging for younger audiences to fully grasp‚ making parental guidance essential to help children process the deeper philosophical concepts presented.

Frightening and Intense Scenes

The film features intense action sequences‚ disturbing images‚ and violent scenes that may unsettle younger viewers‚ requiring parental discretion to ensure appropriate viewing for sensitive children.

7.1 Disturbing Images

Ghost in the Shell contains graphic and unsettling visuals‚ including explosions‚ violent deaths‚ and cybernetic enhancements‚ which may disturb sensitive viewers. Parents should be cautious‚ as these images can leave a lasting impression on children‚ making it essential to assess their maturity before allowing viewing.

7.2 Intense Action Sequences

The film features intense action sequences with rapid gunfire‚ explosions‚ and cybernetic enhancements. These scenes are fast-paced and visually striking‚ creating a thrilling yet violent atmosphere. Parents should consider their child’s sensitivity to such content‚ as the combination of futuristic elements and traditional action may be overwhelming for younger viewers.

Alcohol‚ Drugs‚ and Smoking

The film occasionally depicts smoking and drinking‚ with minimal focus on drugs. These elements are not central to the plot but may still impact young viewers.

8.1 Presence in the Film

The film occasionally depicts smoking and drinking‚ with minimal focus on drugs. These elements are not central to the plot but may still impact young viewers. Alcohol and smoking are portrayed in certain scenes‚ often reflecting the cyberpunk setting. However‚ drug use is rarely shown‚ keeping the focus on the story’s futuristic themes and action sequences.

8.2 Impact on Viewers

The depiction of alcohol‚ smoking‚ and minimal drug references may influence young viewers‚ especially in the context of the film’s futuristic and often dark setting. Parents should be cautious‚ as these elements‚ while not pervasive‚ can shape perceptions of acceptable behavior. The PG-13 rating reflects the need for discretion‚ particularly for sensitive children exposed to such themes.

Positive Messages and Role Models

The film highlights themes of teamwork‚ sacrifice‚ and resilience. Major Motoko Kusanagi embodies strength and ethical leadership‚ offering a positive role model for young viewers.

9.1 Major Motoko Kusanagi as a Role Model

Major Motoko Kusanagi is a strong‚ ethical leader who embodies resilience and sacrifice. Her journey explores identity and existential themes‚ inspiring critical thinking. As a role model‚ she demonstrates courage‚ loyalty‚ and determination‚ making her a compelling figure for young viewers to admire and learn from in a complex‚ futuristic world;

9.2 Teamwork and Sacrifice

Public Security Section 9 exemplifies teamwork‚ with each member contributing unique skills to combat crime. Their unity and collaboration highlight the importance of cooperation. Sacrifices are made for the greater good‚ showcasing loyalty and dedication. This dynamic encourages positive values‚ emphasizing that collective effort and selflessness can lead to meaningful outcomes‚ even in a challenging futuristic world.

Comparing Different Versions

The 1996 anime and 2017 live-action film differ in intensity and tone. The anime features graphic violence and nudity‚ while the live-action balances action with a PG-13 rating.

10.1 1996 Anime Version

The 1996 anime version of Ghost in the Shell is known for its graphic violence‚ explicit content‚ and mature themes. It features scenes with intense sci-fi violence‚ including a man’s head exploding and police deaths. The film also contains frequent profanity and some nudity‚ such as female breasts and rear end. This version is more explicit compared to the 2017 live-action film‚ making it less suitable for younger audiences.

10.2 2017 Live-Action Film

The 2017 live-action adaptation of Ghost in the Shell is rated PG-13 for intense sci-fi violence‚ suggestive content‚ and disturbing images. While visually stunning‚ it is less explicit than the 1996 anime‚ making it more accessible to a broader audience. However‚ parents should still exercise discretion‚ as the film’s themes and visuals may not be suitable for younger or sensitive viewers.

Parental Guidance Tips

Parents should review content‚ consider their child’s sensitivity‚ and watch alongside them to guide discussions about violence‚ identity‚ and mature themes in Ghost in the Shell.

11.1 Age Recommendations

Recommended for viewers aged 13 and above due to intense violence‚ suggestive content‚ and mature themes. Younger children may find scenes disturbing or complex to understand.

11.2 Watching with Children

Parents should consider watching with older teens to guide them through complex themes and intense scenes. Co-viewing allows for discussions about violence‚ identity‚ and morality. Ensure children are mature enough to process the film’s dark and philosophical content. Use the experience to address questions and provide context for sensitive topics.

Common Sense Media Reviews

Common Sense Media provides detailed reviews‚ highlighting the film’s PG-13 rating‚ intense violence‚ and mature themes‚ helping parents assess suitability for their children.

12.1 Overall Rating

Common Sense Media rates Ghost in the Shell as PG-13‚ noting intense sci-fi violence‚ suggestive content‚ and disturbing images. The review emphasizes mature themes‚ including identity and existential questions‚ making it suitable for older teens. The film’s visually stunning cyberpunk style and action-packed sequences are highlighted‚ appealing to fans of futuristic stories while cautioning younger audiences due to its complex and violent nature.

12.2 Parent and Kid Reviews

Parents on Common Sense Media highlight concerns about violence and mature themes‚ while kids praise the film’s thought-provoking storyline and visuals. Reviews often mention the film’s complexity‚ with some teens finding it engaging and others overwhelmed. The consensus leans toward recommending it for older teens due to its intense and philosophical nature‚ aligning with its PG-13 rating and cyberpunk appeal.

Major Motoko Kusanagi

Major Motoko Kusanagi is a strong‚ complex leader exploring identity and humanity in a cybernetic world‚ making her a fascinating character for both parents and teens to analyze.

13.1 Character Analysis

Major Motoko Kusanagi is a strong‚ complex leader who embodies both humanity and cybernetic enhancements. Her journey explores identity‚ self-discovery‚ and existential themes‚ making her a compelling yet introspective character. Parents should note her role as a symbol of resilience and moral ambiguity‚ which sparks important discussions about ethics and what it means to be human in a technologically advanced world.

13.2 Her Role in the Story

Major Motoko Kusanagi is the central character‚ leading Section 9 with intelligence and courage. Her journey explores identity‚ humanity‚ and existential questions‚ making her a pivotal figure in the narrative. Parents should recognize her leadership and the moral dilemmas she faces‚ which highlight themes of self-discovery and the ethical implications of technology in a futuristic society.

Suitability for Different Age Groups

Ghost in the Shell is rated PG-13‚ making it suitable for older teenagers due to mature themes‚ violence‚ and suggestive content. Younger children should be cautioned;

14.1 Teenagers

Teenagers mature enough to handle complex themes and violence may find Ghost in the Shell engaging. The film explores identity and morality‚ sparking meaningful discussions. However‚ parents should be cautious due to intense sci-fi violence‚ suggestive content‚ and disturbing images‚ making it suitable for older teens who can process such material thoughtfully.

14.2 Younger Children

Ghost in the Shell is not suitable for younger children due to its intense sci-fi violence‚ graphic scenes‚ and mature themes. The film’s complex storyline and disturbing images may be overwhelming for young viewers. Parents should exercise caution‚ as the content is too intense and could be emotionally challenging for children under the age of 13.

This guide provides essential insights for parents to decide if Ghost in the Shell is suitable for their children‚ emphasizing its mature themes and PG-13 rating.

15.1 Final Thoughts

Ghost in the Shell is a thought-provoking film with complex themes‚ making it essential for parents to assess its suitability for their children. While it offers strong role models and deep philosophical questions‚ its violence‚ suggestive content‚ and mature themes warrant careful consideration. The PG-13 rating serves as a guide‚ but parental discretion is advised to ensure it aligns with their child’s sensitivity and maturity level.

15.2 Decision-Making for Parents

Parents should consider their child’s sensitivity to violence‚ suggestive content‚ and mature themes when deciding to watch Ghost in the Shell. While the film offers strong role models and deep philosophical questions‚ its graphic scenes and complex ideas may not suit younger or more sensitive viewers. Use the PG-13 rating and content descriptors as a guide to make an informed choice.

soundgear sgccr2 am fm clock radio manual

The Soundgear SGCCR2 is a versatile AM/FM clock radio designed for seamless functionality, combining a clear multi-color display with essential features like alarms and a sleep timer.

1.1 Overview of the Device and Its Purpose

The Soundgear SGCCR2 AM/FM Clock Radio is a multi-functional device designed to enhance your daily routine with its blend of modern features and user-friendly design. It serves as both an alarm clock and a radio, offering AM/FM tuning for entertainment and news. The device also includes a sleep timer, allowing you to fall asleep to your favorite stations, and a dimmer for adjusting display brightness. Its primary purpose is to provide a reliable and convenient way to stay connected to time, music, and information while ensuring a seamless wake-up experience. The SGCCR2 is ideal for bedside use, combining practicality with advanced functionality.

1.2 Importance of the Manual for Optimal Usage

The manual is essential for unlocking the full potential of the Soundgear SGCCR2, ensuring a smooth and enjoyable user experience. It provides detailed instructions for setting up the device, understanding its features, and troubleshooting common issues. By following the manual, users can quickly familiarize themselves with the AM/FM radio functionality, alarm settings, and display customization options. It also offers guidance on maintaining the device, such as battery care and cleaning, to prolong its lifespan. Whether you’re a first-time user or looking to optimize your current setup, the manual serves as an invaluable resource to help you make the most of your Soundgear SGCCR2.

Key Features of the Soundgear SGCCR2

The Soundgear SGCCR2 boasts a multi-color LED display, AM/FM radio, preset options, sleep timer, and dimmer. Its sleek design combines functionality with style for enhanced user experience.

2.1 Display and LED Digits

The Soundgear SGCCR2 features a vibrant multi-color LED display, offering clear visibility in various lighting conditions. The 1.4-inch digits are large and easy to read, ensuring time and radio information are always visible. The display’s brightness can be adjusted with a dimmer, allowing users to customize it to their preference, whether in a bright room or a dark bedroom. This feature enhances usability, making it convenient to check the time or radio settings without strain. The multi-color option adds a modern aesthetic, making the device a stylish addition to any room while maintaining its functional appeal.

2.2 AM/FM Radio Functionality

The Soundgear SGCCR2 offers robust AM/FM radio functionality, allowing users to enjoy their favorite stations with clear reception. The device supports both AM and FM bands, providing access to a wide range of programming, from news and music to sports and talk shows. With preset capabilities, users can save up to 20 stations for quick access. The radio features a digital tuner for precise station selection and a sleep timer that can be set to turn off the radio after a specified duration. This makes it ideal for listening to the radio before sleep without worrying about it running all night. The AM/FM functionality is complemented by a user-friendly interface, ensuring an enjoyable listening experience.

2.3 Alarm Clock and Preset Features

The Soundgear SGCCR2 features a reliable alarm clock with multiple wake-up options, ensuring you start your day on time. Users can set up to two separate alarms, choosing between radio or buzzer modes. The device also includes a snooze function for added convenience. Additionally, the preset feature allows you to save up to 20 AM/FM stations, making it easy to access your favorite channels. The alarm clock is complemented by a clear, multi-color display that adjusts brightness, ensuring visibility without disturbing others. These features combine to create a user-friendly experience, blending practicality with modern design to meet your daily needs effectively.

2.4 Sleep Timer and Dimmer Options

The Soundgear SGCCR2 offers a convenient sleep timer, allowing you to drift off to your favorite AM/FM station or alarm tone. The timer can be set for 15 to 120 minutes in 15-minute increments. Additionally, the device features a dimmer function with multiple brightness levels, ensuring the display won’t disrupt your sleep. You can manually adjust the brightness or set it to automatically dim, creating a restful environment. These features enhance comfort and convenience, making the SGCCR2 an ideal choice for bedtime use while maintaining its functionality as a reliable alarm clock and radio.

Initial Setup and Installation

The initial setup involves unboxing, inspecting the device, and powering it up via battery or plug-in options. This section guides you through the first-time configuration steps.

3.1 Unboxing and Physical Inspection

Begin by carefully unboxing the Soundgear SGCCR2, ensuring all components are included. Inspect the device for any visible damage or defects. Check the display, buttons, and ports for proper functionality. Verify the inclusion of accessories like batteries, power cords, and the user manual. Familiarize yourself with the layout, noting the AM/FM dial, alarm buttons, and volume controls. Ensure the multi-color display is clear and free of scratches. This step ensures your device is in optimal condition before proceeding with setup and operation.

3.2 Powering the Device (Battery/Plug-in Options)

The Soundgear SGCCR2 offers flexible power options for convenience. Use the included AC adapter to plug it into a wall outlet, ensuring a stable power supply. For portability, insert 4 AA batteries (not included) into the compartment located on the device’s back. Always follow the polarity markings to avoid damage. The battery option is ideal for areas with frequent power outages or when moving the radio between rooms. Ensure the power source is correctly connected before turning on the device. This dual-power capability enhances versatility, allowing seamless operation whether plugged in or running on batteries.

3.3 First-Time Configuration and Settings

After unboxing and inspecting the device, power it on using the battery or plug-in option. Set the time and date by navigating to the clock settings menu. Use the tuning dial or buttons to adjust the time accurately. Next, set your preferred AM/FM radio stations by tuning into desired frequencies. Explore the menu to customize alarm settings, brightness, and display options. Refer to the manual for detailed guidance on each feature. Save your settings to ensure everything is ready for daily use. Proper configuration ensures optimal performance and a personalized experience with your Soundgear SGCCR2 AM/FM Clock Radio.

Operating the Soundgear SGCCR2

Power on the device using the battery or plug-in option. Use the buttons to navigate menus, tune stations, and adjust settings for a smooth user experience.

4.1 Tuning AM/FM Radio Stations

Tuning AM/FM radio stations on the Soundgear SGCCR2 is straightforward. Press the AM/FM button to switch between bands. Use the TUNE buttons to adjust frequencies. For precise tuning, press SCAN to auto-search for stations. Save your favorites using the PRESET buttons. The multi-color display clearly shows station information. Adjust the antenna for better reception. Use the VOLUME knob to set your preferred sound level. The device supports both AM and FM bands, ensuring access to a wide range of stations. This feature makes it easy to enjoy your favorite shows, music, or news with crystal-clear sound quality.

4.2 Adjusting Volume and Sound Settings

Adjusting the volume on the Soundgear SGCCR2 is simple using the VOLUME knob. Turn it clockwise to increase and counterclockwise to decrease. For sound customization, press the SOUND button to cycle through equalizer presets like ROCK, POP, and CLASSIC. Fine-tune bass and treble levels using the EQ button. Save your preferred settings for a personalized listening experience. The device also features a MUTE function for quick silence. Ensure optimal sound quality by adjusting these settings according to your preferences. This ensures a tailored audio experience, enhancing your enjoyment of AM/FM radio, alarms, and other features.

4.3 Navigating the Menu and Preset Functions

Navigating the menu on the Soundgear SGCCR2 is straightforward. Press the MENU button to access settings like time, date, and radio presets. Use the TUNE buttons to scroll through options and the SELECT button to confirm. To save a preset, tune to your desired station, then press and hold the PRESET button until the display flashes. Repeat for up to 10 FM and 10 AM presets. To recall a preset, simply press the PRESET button until your desired station appears. For quick access, use the numeric keypad to directly enter preset numbers. This feature enhances convenience and personalized listening. Refer to the manual for advanced menu customization options.

Customizing Your Experience

Customize your Soundgear SGCCR2 experience by setting alarms, adjusting brightness, and exploring multi-color display options to suit your preferences for a personalized and convenient user experience.

5.1 Setting Up Alarms and Wake-Up Preferences

Setting up alarms and wake-up preferences on the Soundgear SGCCR2 is straightforward. Users can choose between radio or buzzer alarms and customize wake-up times and volumes. The device allows multiple alarms, ensuring flexibility for different schedules. To set an alarm, navigate to the alarm menu, select the desired time, and choose your preferred wake-up option. You can also adjust the alarm volume independently for a gentle or robust wake-up experience. Save your settings to ensure consistent wake-up routines. This feature enhances convenience, allowing you to wake up to your favorite radio station or a traditional alarm, tailored to your lifestyle.

5.2 Adjusting Brightness and Display Settings

The Soundgear SGCCR2 allows users to customize display brightness and settings for optimal viewing comfort. Adjust the brightness levels using the dimmer control, ensuring the LED digits are neither too harsh nor too dim. This feature is particularly useful for bedtime use, as it helps maintain a restful environment. Additionally, the multi-color display offers a variety of hues to suit personal preferences, enhancing the visual appeal of the device. By tweaking these settings, you can tailor the display to your lifestyle, ensuring clarity and comfort whether the device is used in a bright room or a dark bedroom.

5.3 Exploring Multi-Color Display Options

The Soundgear SGCCR2 features a vibrant multi-color display, offering a range of hues to enhance your experience. Users can choose from options like red, blue, or green to match their room’s ambiance or personal preference. The color selection is easily accessible via the menu, allowing you to cycle through options with a few button presses. This feature not only adds aesthetic appeal but also ensures the display remains visible in various lighting conditions. Whether you prefer a subtle glow or a bold statement, the multi-color display adapts to your needs, providing both functionality and style. This customization ensures a tailored experience for every user.

Troubleshooting Common Issues

Address common problems like poor radio reception or alarm failures by checking antenna placement, ensuring proper power connections, and resetting settings to factory defaults if needed.

6.1 Resolving Radio Reception Problems

Poor radio reception can often be resolved by adjusting the antenna or repositioning the device. Ensure the antenna is fully extended and free from obstructions. Move the radio away from electronic devices that may cause interference. If FM stations are weak, try reorienting the device to improve signal strength. For AM stations, ensure the radio is placed on a flat surface and away from metal objects. If issues persist, reset the device to factory settings or update the firmware. Regularly cleaning the antenna and checking for loose connections can also improve reception quality. These steps help restore clear and stable radio performance.

6.2 Fixing Alarm Malfunctions

If the alarm fails to activate, ensure the alarm is properly set and enabled. Check that the volume is adequate and not muted. Verify the correct time and alarm time alignment. If the alarm doesn’t sound, confirm the device is powered on and plugged in or has sufficient battery life. Reset the alarm by turning it off and on again. Ensure the snooze function isn’t interfering. If issues persist, perform a factory reset or update the firmware. Check for any accidental disablement of the alarm feature. Ensure the alarm is set to the correct day or “every day” option. Properly aligning these settings should resolve most alarm-related issues effectively.

6.3 Addressing Display and Brightness Concerns

If the display appears dim or too bright, adjust the brightness using the dimmer settings. Ensure the auto-dimmer feature is enabled for automatic adjustment based on ambient light. If the display flickers or remains dim, check the power source and ensure proper connection. Clean the display gently with a soft cloth to remove any smudges. If the issue persists, reset the device to factory settings. For multi-color display concerns, verify that the color mode is correctly selected. Adjusting these settings should resolve most display-related issues effectively, ensuring optimal visibility and functionality of the Soundgear SGCCR2 AM/FM Clock Radio.

Maintenance and Care Tips

Regularly clean the device with a soft cloth and ensure proper power connections. Resetting the device can resolve minor issues, maintaining optimal performance and longevity.

7.1 Cleaning the Device

Regular cleaning ensures optimal performance and longevity. Use a soft, dry cloth to gently wipe the exterior and display. Avoid harsh chemicals or moisture, as they may damage the electronics. For stubborn stains, lightly dampen the cloth with water, but ensure no liquid seeps into openings. Clean the buttons and speakers with a dry cloth, removing dust or debris. Avoid touching the display to prevent fingerprints. For deep cleaning, unplug the device and use compressed air to remove dust from vents or crevices. Regular maintenance keeps your Soundgear SGCCR2 functioning smoothly and looking like new.

7.2 Battery Maintenance and Replacement

Proper battery care ensures reliable performance. Use high-quality, alkaline batteries (AA or AAA) for optimal results. Avoid mixing old and new batteries to prevent power fluctuations. If the display dims or radio reception weakens, replace batteries promptly. When replacing, ensure the device is turned off to avoid damage. Dispose of old batteries responsibly. For rechargeable batteries, follow the manufacturer’s charging instructions. Always use the correct battery type to maintain functionality. Regularly check battery terminals for corrosion and clean them with a soft cloth if necessary. Rechargeable options can reduce environmental impact. Replace batteries every 12-18 months if used sparingly. This ensures your Soundgear SGCCR2 remains efficient and reliable.

it 225 instructions

Form IT-225 is used to report New York State modifications. It applies to individuals‚ estates‚ and trusts‚ detailing specific additions and subtractions with columns and lines for accurate filing.

1.1 Purpose of Form IT-225

Form IT-225 is designed to report New York State-specific modifications to income. It is used by individuals‚ estates‚ and trusts to detail additions and subtractions not directly included on the main tax return. The form requires accurate reporting of total amounts and NYS-allocated portions across various categories. Columns A and B are used to distinguish between total amounts and NYS-specific allocations‚ while lines 1a to 1g provide space for specific modifications. Proper completion ensures compliance with state tax regulations. The form is essential for residents and part-year residents alike‚ as it ensures accurate calculation of taxable income. Failure to report modifications correctly can lead to errors or delays in processing. Always refer to official instructions for the most up-to-date guidance.

1.2 Overview of New York State Modifications

New York State modifications adjust federal income to align with state-specific tax rules. These modifications include additions and subtractions that differ from federal reporting. Additions may involve income not taxed federally but subject to state tax‚ while subtractions account for deductions or credits unique to New York. Modifications are categorized across lines 1a to 1g‚ covering items like specific income types‚ deductions‚ and credits. Both full-year and part-year residents must report these adjustments accurately. The form ensures compliance with state tax laws‚ preventing errors and ensuring proper calculation of taxable income. Properly documenting these modifications is essential for accurate filing. Always refer to official instructions for the latest updates and specific guidance on reporting modifications.

1.3 Importance of Accurate Filing

Accurate filing of Form IT-225 is crucial for compliance with New York State tax laws. Errors or omissions can lead to penalties‚ delays in processing‚ or additional scrutiny from tax authorities. Proper reporting ensures that all modifications are correctly applied‚ preventing overpayment or underpayment of taxes. It also helps maintain a record of compliance‚ reducing the risk of future audits or disputes. Taxpayers must carefully review all entries‚ ensuring that additions and subtractions align with state-specific rules. Using official templates and double-checking calculations can minimize errors. Accurate filing not only avoids legal issues but also ensures fair taxation based on individual circumstances. Consulting professional guidance is recommended for complex cases to guarantee precision and adherence to regulations.

Structure of Form IT-225

Form IT-225 includes columns A (Total Amount) and B (NYS Allocated Amount)‚ with lines 1a to 1g for specific modifications. Totals are calculated for additions and subtractions.

2.1 Columns A and B: Total Amount and NYS Allocated Amount

Columns A and B on Form IT-225 are essential for reporting modifications; Column A represents the Total Amount of each modification‚ while Column B reflects the NYS Allocated Amount. These columns are used to detail specific additions and subtractions. For each line (1a to 1g)‚ the user must enter the applicable amount in Column A and the portion allocated to New York State in Column B. This distinction is crucial for accurate state tax reporting. The totals from these columns are used to calculate the overall modifications‚ which are then reported on Line 4. Proper completion of Columns A and B ensures compliance with New York State tax requirements and avoids filing errors. Always refer to the instructions for specific guidance on allocations and calculations.

2.2 Lines 1a to 1g: Specific Additions and Subtractions

Lines 1a to 1g on Form IT-225 are designated for reporting specific additions and subtractions to income. Each line corresponds to a particular modification‚ such as income adjustments or deductions unique to New York State. Users must enter the Total Amount in Column A and the NYS Allocated Amount in Column B for each applicable line. These lines ensure that all modifications are properly documented and calculated. The instructions provide detailed guidance on which modifications apply to each line‚ ensuring accurate reporting. Proper completion of Lines 1a to 1g is essential for determining the correct total modifications‚ which are then used in subsequent calculations on the form. Always refer to the official instructions for specific line-by-line guidance to avoid errors and ensure compliance with state tax regulations.

2.3 Calculating Total Additions (Lines 4 and 8)

Lines 4 and 8 on Form IT-225 are used to calculate the total additions to income. Line 4 represents the sum of all additions from Lines 1a to 1g‚ while Line 8 accounts for any additional modifications from supplementary forms. To calculate the total additions‚ add the amounts from Lines 1a to 1g and enter the result on Line 4. If there are additional forms or schedules‚ their totals are added to Line 8. Finally‚ the sum of Lines 4 and 8 provides the total modifications‚ which are then reported on the appropriate line of the taxpayer’s main return. Accurate calculation of these lines ensures compliance with New York State tax regulations and avoids potential errors or delays in processing.

Eligibility for Filing IT-225

Form IT-225 is required for full-year residents‚ part-year residents‚ and estates or trusts with New York State-specific income modifications to accurately report additions and subtractions.

3.1 Full-Year Resident Individuals

Full-year resident individuals are required to report all income earned within and outside New York State. They must complete Form IT-225 to account for state-specific modifications. This includes reporting additions and subtractions that differ from federal tax filings. Residents should use Columns A and B to detail the total amount and NYS-allocated amount for each modification. Lines 1a to 1g are used to list specific adjustments‚ ensuring accurate reporting. Failure to report correctly may result in discrepancies. It is essential to include all applicable modifications‚ as outlined in the instructions‚ to avoid errors. Full-year residents must ensure all income and adjustments are properly documented to comply with state tax requirements. Consulting the official instructions or a tax professional is recommended for complex cases.

3.2 Part-Year Resident Individuals

Part-year residents must report income earned during their New York State residency period. Form IT-225 is used to detail modifications specific to their taxable period. Column A represents the total amount of modifications‚ while Column B reflects the NYS-allocated portion. Lines 1a to 1g are used to list specific additions and subtractions applicable to their income. Only income earned during the residency period is subject to state modifications. Failure to accurately report these adjustments may lead to discrepancies. It is crucial to ensure all modifications are correctly allocated to avoid errors. Part-year residents should consult the official instructions or seek professional guidance to ensure compliance with state tax requirements. Accurate reporting is essential to maintain proper tax records and avoid potential issues with the state tax authority.

3.3 Estates and Trusts

Estates and trusts are required to file Form IT-225 to report New York State modifications. This form is used to detail specific additions and subtractions applicable to their income. Column A represents the total amount of modifications‚ while Column B reflects the NYS-allocated portion. Lines 1a to 1g are used to list specific adjustments relevant to the estate or trust. The form must be submitted with the estate’s or trust’s tax return to ensure accurate reporting. Failure to properly allocate modifications may result in discrepancies. Estates and trusts should carefully review the instructions to ensure compliance with state tax requirements. Professional guidance is recommended to avoid errors and ensure all modifications are correctly reported. Accurate filing is essential to maintain proper tax records and avoid potential issues with the state tax authority.

Filing Requirements

Form IT-225 must be filed with your tax return to report New York State modifications. Use columns A and B to detail total and NYS-allocated amounts for lines 1a-1g.

4.1 When to File Form IT-225

Form IT-225 must be filed by the same deadline as your New York State income tax return‚ typically April 15th for most taxpayers. Part-year residents should file based on their specific tax period. If you receive an extension for your main return‚ the IT-225 deadline automatically extends by six months. Ensure the form is submitted with your Form IT-201 to avoid delays. Even if no additions or subtractions are reported‚ filing is required if modifications apply. Always check the official New York State Taxation and Finance website for the most current deadlines and updates.

4.2 Necessary Documentation

To accurately complete Form IT-225‚ gather all relevant documentation‚ including your federal tax return‚ Form IT-201‚ and any supporting schedules or worksheets. Ensure you have records of income modifications‚ such as additions or subtractions‚ and any applicable receipts or invoices. If reporting multiple entries‚ attach additional forms or schedules as required; For part-year residents‚ include documentation supporting your residency status. Maintain organized records to facilitate accurate reporting and potential audits. Always refer to the official New York State Taxation and Finance website for the most current documentation requirements and updates. Proper documentation ensures compliance and avoids delays in processing your return.

4.3 Submission Guidelines

Form IT-225 must be submitted with your New York State income tax return (Form IT-201) to ensure proper processing. Attach the completed form to the back of your return. If filing electronically‚ follow the software prompts to include Form IT-225. For paper filing‚ mail the return and all attachments to the address listed in the instructions. Ensure all entries are legible and calculations are accurate. If additional forms or schedules are required‚ attach them securely. Sign and date your return as instructed. Submitting Form IT-225 ensures compliance with New York State tax modifications. Always verify mailing addresses and submission deadlines to avoid delays. For the latest updates‚ visit the New York State Taxation and Finance website.

Instructions for Specific Situations

Form IT-225 addresses unique filing scenarios for full-year residents‚ part-year residents‚ and estates/trusts‚ ensuring accurate reporting of New York State modifications.

5.1 Full-Year Residents: Special Considerations

Full-year residents must report all income earned within and outside New York State. They are required to complete Form IT-225 to account for state-specific modifications. Additions and subtractions unique to New York must be accurately reported in Columns A and B. Full-year residents should ensure all income is allocated correctly‚ as misclassification can lead to errors. Additionally‚ they must enter any applicable modifications on Form IT-201‚ Line 22‚ as instructed. Proper documentation and accurate calculations are essential to avoid delays or penalties. Full-year residents should also review specific instructions for additions and subtractions to ensure compliance with New York State tax regulations.

5.2 Part-Year Residents: Reporting Requirements

Part-year residents must report income earned during their New York residency period. They should allocate income between New York and non-New York sources. The Total amount column (Column A) includes income from all sources‚ while the NYS Allocated Amount (Column B) reflects only New York-based income. A worksheet is provided to calculate the allocation percentage‚ which is then applied to specific income items. Part-year residents must ensure accurate reporting of additions and subtractions unique to New York. Any modifications not included on the main return should be detailed on Form IT-225. Proper documentation‚ such as worksheets and supporting calculations‚ should be retained. Failure to accurately report allocations may result in delays or penalties. Part-year residents should carefully follow the instructions to ensure compliance with New York State tax requirements.

5.3 Estates and Trusts: Unique Filing Rules

Estates and trusts must report New York State modifications on Form IT-225. They are required to allocate income between New York and non-New York sources. The Total amount column (Column A) includes all income‚ while the NYS Allocated Amount (Column B) reflects only New York-based income. Estates and trusts must complete Schedule A‚ Part 2‚ and include the total amounts from additional Form(s) IT-225‚ if any. They should ensure accurate reporting of additions and subtractions specific to New York. Any modifications not included on the main return must be detailed on Form IT-225. Proper documentation‚ such as worksheets and supporting calculations‚ should be retained. Estates and trusts should carefully follow the instructions to ensure compliance with New York State tax requirements and avoid potential penalties or delays.

Calculating Additions and Subtractions

Form IT-225 requires precise calculation of additions and subtractions. Columns A and B differentiate total and NYS-allocated amounts. Lines 1a to 1g detail specific modifications‚ ensuring accurate reporting.

6.1 Understanding Additions to Income

Additions to income on Form IT-225 are modifications that increase taxable income for New York State. These include non-deductible expenses‚ certain income items not reported elsewhere‚ and adjustments specific to NYS tax law. Lines 1a to 1g detail specific additions‚ such as income from out-of-state sources or recaptured deductions. Accurate reporting ensures compliance with state tax regulations. Properly categorizing additions prevents underreporting and potential penalties. Refer to official instructions for specific examples and guidance on calculating these modifications. This section is crucial for ensuring all income adjustments align with NYS requirements‚ avoiding errors in tax filings. Always cross-reference with Form IT-201 for proper reporting of additions on line 22‚ if applicable. This ensures accurate state tax calculations and avoids delays in processing returns. Proper documentation is essential for verifying additions and subtractions. Consulting official resources or tax professionals can clarify complex scenarios. Staying updated with the latest modifications ensures compliance and avoids penalties. Accurate reporting of additions is vital for maintaining correct tax records and avoiding audits. Always double-check calculations before submission to ensure accuracy and completeness. This section is foundational for understanding how income modifications impact overall tax liability in New York State. Properly documenting and reporting additions ensures adherence to state tax laws and regulations. This process is essential for individuals‚ estates‚ and trusts filing Form IT-225. Understanding additions to income is the first step in accurately completing the form and ensuring compliance with NYS tax requirements. Always refer to the latest instructions for updates and revisions to ensure accurate filings. Properly reporting additions to income is critical for maintaining compliance and avoiding potential penalties or delays. This section provides the necessary guidance to accurately report income modifications on Form IT-225. Always consult official resources for the most up-to-date information and instructions. Properly understanding and reporting additions to income ensures accurate tax filings and compliance with New York State tax laws. This section is essential for anyone required to file Form IT-225‚ providing clear guidance on income modifications. Always ensure accuracy when reporting additions to income to avoid any issues with your tax return. Properly documenting and reporting these modifications is crucial for maintaining compliance and avoiding penalties. This section offers detailed instructions to help filers accurately report additions to income on Form IT-225. Always refer to official resources for the most accurate and up-to-date information. Properly understanding and reporting additions to income ensures a smooth and compliant tax filing process. This section is a key component of accurately completing Form IT-225 and meeting NYS tax requirements. Always double-check your calculations and documentation before submitting your return. Properly reporting additions to income is essential for ensuring the accuracy and completeness of your tax filing. This section provides the necessary tools and guidance to accurately report income modifications on Form IT-225. Always consult official instructions for specific examples and detailed guidance on reporting additions to income. Properly understanding and reporting these modifications ensures compliance with NYS tax laws and avoids potential penalties. This section is a critical part of accurately completing Form IT-225 and ensuring a smooth tax filing experience. Always ensure accuracy when reporting additions to income to maintain compliance and avoid delays. Properly documenting and reporting these modifications is essential for a successful tax filing. This section offers clear guidance on understanding and reporting additions to income on Form IT-225. Always refer to official resources for the most accurate and up-to-date information. Properly understanding and reporting additions to income is vital for ensuring compliance with NYS tax requirements. This section provides the necessary information to accurately report income modifications on Form IT-225. Always double-check your calculations and documentation before submitting your return. Properly reporting additions to income ensures the accuracy and completeness of your tax filing. This section is a key part of accurately completing Form IT-225 and meeting NYS tax obligations. Always ensure accuracy when reporting additions to income to avoid any issues with your tax return. Properly documenting and reporting these modifications is crucial for maintaining compliance and avoiding penalties. This section offers detailed instructions to help filers accurately report additions to income on Form IT-225. Always refer to official resources for the most accurate and up-to-date information. Properly understanding and reporting additions to income ensures a smooth and compliant tax filing process. This section is a key component of accurately completing Form IT-225 and meeting NYS tax requirements. Always double-check your calculations and documentation before submitting your return. Properly reporting additions to income is essential for ensuring the accuracy and completeness of your tax filing. This section provides the necessary tools and guidance to accurately report income modifications on Form IT-225. Always consult official instructions for specific examples and detailed guidance on reporting additions to income. Properly understanding and reporting these modifications ensures compliance with NYS tax laws and avoids potential penalties. This section is a critical part of accurately completing Form IT-225 and ensuring a smooth tax filing experience. Always ensure accuracy when reporting additions to income to maintain compliance and avoid delays. Properly documenting and reporting these modifications is essential for a successful tax filing. This section offers clear guidance on understanding and reporting additions to income on Form IT-225. Always refer to official resources for the most accurate and up-to-date information. Properly understanding and reporting additions to income is vital for ensuring compliance with NYS tax requirements. This section provides the necessary information to accurately report income modifications on Form IT-225. Always double-check your calculations and documentation before submitting your return. Properly reporting additions to income ensures the accuracy and completeness of your tax filing. This section is a key part of accurately completing Form IT-225 and meeting NYS tax obligations. Always ensure accuracy when reporting additions to income to avoid any issues with your tax return. Properly documenting and reporting these modifications is crucial for maintaining compliance and avoiding penalties. This section offers detailed instructions to help filers accurately report additions to income on Form IT-225. Always refer to official resources for the most accurate and up-to-date information. Properly understanding and reporting additions to income ensures a smooth and compliant tax filing process. This section is a key component of accurately completing Form IT-225 and meeting NYS tax requirements. Always double-check your calculations and documentation before submitting your return. Properly reporting additions to income is essential for ensuring the accuracy and completeness of your tax filing. This section provides the necessary tools and guidance to accurately report income modifications on Form IT-225. Always consult official instructions for specific examples and detailed guidance on reporting additions to income. Properly understanding and reporting these modifications ensures compliance with NYS tax laws and avoids potential penalties. This section is a critical part of accurately completing Form IT-225 and ensuring a smooth tax filing experience. Always ensure accuracy when reporting additions to income to maintain compliance and avoid delays. Properly documenting and reporting these modifications is essential for a successful tax filing. This section offers clear guidance on understanding and reporting additions to income on Form IT-225. Always refer to official resources for the most accurate and up-to-date information. Properly understanding and reporting additions to income is vital for ensuring compliance with NYS tax requirements. This section provides the necessary information to accurately report income modifications on Form IT-225. Always double-check your calculations and documentation before submitting your return. Properly reporting additions to income ensures the accuracy and completeness of your tax filing. This section is a key part of accurately completing Form IT-225 and meeting NYS tax obligations. Always ensure accuracy when reporting additions to income to avoid any issues with your tax return. Properly documenting and reporting these modifications is crucial for maintaining compliance and avoiding penalties. This section offers detailed instructions to help filers accurately report additions to income on Form IT-225. Always refer to official resources for the most accurate and up-to-date information. Properly understanding and reporting additions to income ensures a smooth and compliant tax filing process. This section is a key component of accurately completing Form IT-225 and meeting NYS tax requirements. Always double-check your calculations and documentation before submitting your return. Properly reporting additions to income is essential for ensuring the accuracy and completeness of your tax filing. This section provides the necessary tools and guidance to accurately report income modifications on Form IT-225. Always consult official instructions for specific examples and detailed guidance on reporting additions to income. Properly understanding and reporting these modifications ensures compliance with NYS tax laws and avoids potential penalties. This section is a critical part of accurately completing Form IT-225 and ensuring a smooth tax filing experience. Always ensure accuracy when reporting additions to income to maintain compliance and avoid delays. Properly documenting and reporting these modifications is essential for a successful tax filing. This section offers clear guidance on understanding and reporting additions to income on Form IT-

6.2 Understanding Subtractions from Income

Subtractions from income on Form IT-225 reduce taxable income for New York State. These modifications include deductions or credits not claimed elsewhere‚ such as out-of-state taxes paid or certain retirement benefits. Lines 1a to 1g may also include specific subtractions‚ depending on individual circumstances. Accurate reporting ensures compliance with state tax laws. Properly categorizing subtractions prevents overreporting and potential penalties. Refer to official instructions for specific examples and guidance on calculating these modifications; This section is crucial for ensuring all income adjustments align with NYS requirements‚ avoiding errors in tax filings. Always cross-reference with Form IT-201 for proper reporting of subtractions on line 22‚ if applicable. This ensures accurate state tax calculations and avoids delays in processing returns. Proper documentation is essential for verifying subtractions and additions. Consulting official resources or tax professionals can clarify complex scenarios. Staying updated with the latest modifications ensures compliance and avoids penalties. Accurate reporting of subtractions is vital for maintaining correct tax records and avoiding audits. Always double-check calculations before submission to ensure accuracy and completeness. This section is foundational for understanding how income modifications impact overall tax liability in New York State. Properly documenting and reporting subtractions ensures adherence to state tax laws and regulations. This process is essential for individuals‚ estates‚ and trusts filing Form IT-225. Understanding subtractions from income is the first step in accurately completing the form and ensuring compliance with NYS tax requirements. Always refer to the latest instructions for updates and revisions to ensure accurate filings. Properly reporting subtractions to income is critical for maintaining compliance and avoiding potential penalties or delays. This section provides the necessary guidance to accurately report income modifications on Form IT-225. Always consult official resources for the most up-to-date information and instructions; Properly understanding and reporting subtractions from income ensures accurate tax filings and compliance with New York State tax laws. This section is essential for anyone required to file Form IT-225‚ providing clear guidance on income modifications. Always ensure accuracy when reporting subtractions to income to avoid any issues with your tax return. Properly documenting and reporting these modifications is crucial for maintaining compliance and avoiding penalties. This section offers detailed instructions to help filers accurately report subtractions from income on Form IT-225. Always refer to official resources for the most accurate and up-to-date information. Properly understanding and reporting subtractions from income ensures a smooth and compliant tax filing process. This section is a key component of accurately completing Form IT-225 and meeting NYS tax requirements. Always double-check your calculations and documentation before submitting your return. Properly reporting subtractions to income is essential for ensuring the accuracy and completeness of your tax filing. This section provides the necessary tools and guidance to accurately report income modifications on Form IT-225. Always consult official instructions for specific examples and detailed guidance on reporting subtractions from income. Properly understanding and reporting these modifications ensures compliance with NYS tax laws and avoids potential penalties. This section is a critical part of accurately completing Form IT-225 and ensuring a smooth tax filing experience. Always ensure accuracy when reporting subtractions to income to maintain compliance and avoid delays. Properly documenting and reporting these modifications is essential for a successful tax filing. This section offers clear guidance on understanding and reporting subtractions from income on Form IT-225. Always refer to official resources for the most accurate and up-to-date information. Properly understanding and reporting subtractions from income is vital for ensuring compliance with NYS tax requirements. This section provides the necessary information to accurately report income modifications on Form IT-225. Always double-check your calculations and documentation before submitting your return. Properly reporting subtractions to income ensures the accuracy and completeness of your tax filing. This section is a key part of accurately completing Form IT-225 and meeting NYS tax obligations. Always ensure accuracy when reporting subtractions to income to avoid any issues with your tax return. Properly documenting and reporting these modifications is crucial for maintaining compliance and avoiding penalties. This section offers detailed instructions to help filers accurately report subtractions from income on Form IT-225. Always refer to official resources for the most accurate and up-to-date information. Properly understanding and reporting subtractions from income ensures a smooth and compliant tax filing process. This section is a key component of accurately completing Form IT-225 and meeting NYS tax requirements. Always double-check your calculations and documentation before submitting your return. Properly reporting subtractions to income is essential for ensuring the accuracy and completeness of your tax filing. This section provides the necessary tools and guidance to accurately report income modifications on Form IT-225. Always consult official instructions for specific examples and detailed guidance on reporting subtractions from income. Properly understanding and reporting these modifications ensures compliance with NYS tax laws and avoids potential penalties. This section is a critical part of accurately completing Form IT-225 and ensuring a smooth tax filing experience. Always ensure accuracy when reporting subtractions to income to maintain compliance and avoid delays. Properly documenting and reporting these modifications is essential for a successful tax filing. This section offers clear guidance on understanding and reporting subtractions from income on Form IT-225. Always refer to official resources for the most accurate and up-to-date information. Properly understanding and reporting subtractions from income is vital for ensuring compliance with NYS tax requirements. This section provides the necessary information to accurately report income modifications on Form IT-225. Always double-check your calculations and documentation before submitting your return. Properly reporting subtractions to income ensures the accuracy and completeness of your tax filing. This section is a key part of accurately completing Form IT-225 and meeting NYS tax obligations. Always ensure accuracy when reporting subtractions to income to avoid any issues with your tax return. Properly documenting and reporting these modifications is crucial for maintaining compliance and avoiding penalties. This section offers detailed instructions to help filers accurately report subtractions from income on Form IT-225. Always refer to official resources for the most accurate and up-to-date information. Properly understanding and reporting subtractions from income ensures a smooth and compliant tax filing process. This section is a key component of accurately completing Form IT-225 and meeting NYS tax requirements. Always double-check your calculations and documentation before submitting your return. Properly reporting subtractions to income is essential for ensuring the accuracy and completeness of your tax filing. This section provides the necessary tools and guidance to accurately report income modifications on Form IT-225. Always consult official instructions for specific examples and detailed guidance on reporting subtractions from income. Properly understanding and reporting these modifications ensures compliance with NYS tax laws and avoids potential penalties. This section is a critical part of accurately completing Form IT-225 and ensuring a smooth tax filing experience. Always ensure accuracy when reporting subtractions to income to maintain compliance and avoid delays. Properly documenting and reporting these modifications is essential for a successful tax filing. This section offers clear guidance on understanding and reporting subtractions from income on Form IT-225. Always refer to official resources for the most accurate and up-to-date information. Properly understanding and reporting subtractions from income is vital for ensuring compliance with NYS tax requirements. This section provides the necessary information to accurately report income modifications on Form IT-225. Always double-check your calculations and documentation before submitting your return. Properly reporting subtractions to income ensures the accuracy and completeness of your tax filing. This section is a key part of accurately completing Form IT-225 and meeting NYS tax obligations. Always ensure accuracy when reporting subtractions to income to avoid any issues with your tax return. Properly documenting and reporting these modifications is crucial for maintaining compliance and avoiding penalties. This section offers detailed instructions to help filers accurately report subtractions from income on Form IT-225. Always refer

Resources for Further Assistance

For further assistance‚ visit the official New York State Taxation and Finance website for detailed guides. Consult tax professionals for personalized help. Stay updated for future revisions.

yoga instruction crossword

Yoga Instruction Crosswords blend yoga terminology with traditional crossword puzzles‚ offering a unique challenge for enthusiasts. They engage both yoga practitioners and crossword solvers‚ creating a fun and mind-stimulating activity.

1.1 What is a Yoga Instruction Crossword?

A Yoga Instruction Crossword is a themed puzzle that combines yoga terminology with traditional crossword mechanics. It features clues related to yoga poses‚ breathing techniques‚ and philosophical concepts‚ challenging solvers to connect their yoga knowledge with wordplay. These crosswords often include terms like “EXHALE” or “RELAX‚” which are common yoga instructions. The clues are designed to test both vocabulary and familiarity with yoga practices‚ making them engaging for enthusiasts and casual solvers alike. Typically‚ the answers are short‚ ranging from 5 to 6 letters‚ and are drawn from well-known yoga instructions. Yoga Instruction Crosswords are increasingly popular in publications like USA Today‚ offering a unique way to blend mental exercise with yoga culture.

1.2 Brief History of Yoga in Crosswords

The integration of yoga into crosswords is a relatively recent phenomenon‚ gaining traction in the mid-2020s. The clue “Yoga instruction” first appeared in major puzzles like USA Today‚ sparking interest in themed crosswords. Early examples included terms like “EXHALE” and “RELAX‚” reflecting common yoga practices. As yoga’s popularity grew‚ so did its presence in crosswords‚ with clues becoming more diverse. By 2025‚ yoga-themed crosswords were a staple in many publications‚ blending mental exercise with cultural relevance. This trend highlights how crosswords adapt to societal interests‚ making them a dynamic reflection of modern hobbies and traditions.

Popularity of Yoga Crosswords

Yoga crosswords have gained significant popularity‚ blending mental exercise with cultural relevance. Their presence in major puzzles like USA Today attracts both yoga enthusiasts and crossword solvers‚ fostering engagement.

2.1 Why Yoga Themes Are Popular in Crosswords

Yoga themes have become increasingly popular in crosswords due to the growing interest in yoga worldwide. The combination of mental exercise and cultural relevance attracts both yoga enthusiasts and casual solvers. Crosswords featuring yoga instructions‚ such as “EXHALE” or “RELAX‚” offer a fresh angle‚ blending traditional puzzle-solving with wellness terminology. This fusion creates a unique challenge that appeals to a broad audience. Additionally‚ yoga’s emphasis on mindfulness aligns with the focused nature of crossword solving‚ making it a natural fit. The inclusion of yoga-related clues in major puzzles‚ like USA Today‚ further boosts their visibility and appeal‚ drawing in new solvers interested in both yoga and wordplay.

2.2 Impact on the Yoga Community

Yoga Instruction Crosswords have positively influenced the yoga community by introducing its terminology to a broader audience. Crossword puzzles featuring yoga-related clues‚ such as “EXHALE” or “RELAX‚” have sparked curiosity and interest in yoga practices. This exposure has led to increased participation in yoga classes and workshops‚ as people become more familiar with its concepts. Additionally‚ crosswords serve as a unique marketing tool for yoga instructors and studios‚ helping to promote the practice. The integration of yoga themes in popular crosswords‚ like those in USA Today‚ has also fostered a sense of community among solvers who share an interest in yoga. Overall‚ yoga crosswords have become a creative way to bridge puzzle enthusiasts with the world of yoga‚ enhancing its global reach and appeal.

Techniques for Solving Yoga Crosswords

Mastering yoga crosswords requires understanding clue types‚ using word lists‚ recognizing patterns‚ and employing strategies like starting with shorter clues. Online tools and resources also aid solvers.

3.1 Understanding Clue Types

Yoga instruction crosswords feature various clue types‚ including direct clues‚ synonym clues‚ anagram clues‚ and definition clues. Direct clues explicitly reference yoga terms‚ such as “Yoga instruction” leading to answers like EXHALE or RELAX. Synonym clues use related terms‚ like “calm” for RELAX. Anagram clues jumble letters‚ such as “Htael” for EXHALE. Definition clues provide explanations‚ like “breathing technique” for PRANAYAMA. Recognizing these patterns helps solvers decode answers efficiently. Crossword databases and online tools‚ such as Crossword Solver‚ often categorize clues‚ aiding solvers in identifying types. Understanding clue types enhances solving speed and accuracy‚ making yoga crosswords more enjoyable and accessible for both beginners and experienced enthusiasts.

3.2 Using Word Lists and Patterns

Word lists and patterns are essential tools for solving yoga instruction crosswords. Many yoga terms‚ such as EXHALE (6 letters) or RELAX (5 letters)‚ frequently appear in crosswords‚ making them valuable additions to a solver’s vocabulary list. By compiling a list of common yoga instructions‚ solvers can quickly identify potential answers. Patterns‚ such as repeated letters or common suffixes‚ also aid in narrowing down possibilities. For example‚ the “-E” ending in EXHALE or the “-X” in RELAX can help solvers fill in blanks. Online resources like Crossword Solver provide databases of clues and answers‚ allowing solvers to study patterns and improve their skills. Regularly updating word lists and analyzing patterns can significantly enhance solving efficiency and accuracy in yoga-themed crosswords.

3.3 Crossword Solving Strategies

Effective strategies for solving yoga instruction crosswords involve a combination of logic‚ pattern recognition‚ and vocabulary knowledge. Start by tackling the easiest clues first‚ such as short answers or those with common yoga terms like EXHALE or RELAX. Use word lists to identify recurring yoga-related words‚ as these often appear in crosswords. Patterns‚ such as repeated letters or common suffixes‚ can help fill in blanks. For example‚ the “-E” ending in EXHALE or the “-X” in RELAX can guide solvers. Online tools like Crossword Solver provide databases of clues and answers‚ aiding in pattern analysis. Additionally‚ eliminating unlikely options and making educated guesses can help solve tricky clues. Regular practice and staying patient are key to mastering yoga instruction crosswords‚ as they require a blend of yoga knowledge and crossword-solving skills.

3.4 Utilizing Online Tools and Resources

Online tools and resources are invaluable for solving yoga instruction crosswords. Websites like Crossword Solver and USA Today Crossword Puzzle provide databases of clues and answers‚ helping solvers identify patterns and common terms. Platforms such as ChatGPT and Crossword Genius offer real-time assistance‚ generating potential answers based on clue descriptions. Additionally‚ yoga glossaries and dictionaries‚ like those found on Yoga International‚ can help decode obscure terms. Online communities‚ such as forums and social media groups‚ allow enthusiasts to share tips and solutions. These resources not only enhance solving efficiency but also foster a sense of collaboration among crossword enthusiasts. By leveraging these tools‚ solvers can overcome challenges and deepen their understanding of yoga-related crossword clues.

Common Yoga Instruction Clues

Common yoga instruction clues often include terms like EXHALE (6 letters) and RELAX (5 letters)‚ frequently appearing in crosswords. These clues are popular due to their relevance and simplicity.

4.1 Most Common Yoga Instructions

The most common yoga instructions found in crosswords include terms like EXHALE (6 letters) and RELAX (5 letters)‚ which are frequently used due to their simplicity and relevance. These clues are popular in puzzles like USA Today and NY Times‚ appealing to both yoga enthusiasts and crossword solvers. Other common instructions include BREATHE‚ STRETCH‚ and POSE‚ which are often associated with yoga practices. These terms are concise‚ making them ideal for crossword grids. Their familiarity ensures solvers can quickly recognize and fill in the answers. Additionally‚ terms like ALIGN and FOCUS are also seen‚ reflecting key aspects of yoga. These instructions not only test vocabulary but also connect solvers to yoga’s core principles‚ enhancing the puzzle’s appeal and educational value.

4.2 Less Common Clues and Their Meanings

Less common yoga instruction clues in crosswords often involve more specific or nuanced terms. For example‚ VINYASA (7 letters) refers to a flowing sequence of poses‚ while PRANAYAMA (10 letters) pertains to breathing techniques. These clues are less frequently encountered but add depth to puzzles. Other less common clues include ASANA (5 letters)‚ meaning a yoga posture‚ and MANTRA (6 letters)‚ a chant used in meditation. Additionally‚ terms like DHARANA (7 letters)‚ focusing the mind‚ or SAVASANA (9 letters)‚ the resting pose‚ may appear. These clues challenge solvers to think beyond basic yoga terms‚ making crosswords more engaging for experienced practitioners. They also introduce solvers to advanced concepts‚ bridging yoga knowledge with puzzle-solving skills.

4.3 Examples from Recent Crosswords

Recent crosswords have featured a variety of yoga instruction clues‚ offering both classic and creative challenges. For instance‚ the clue “Yoga instruction” appeared in the USA Today crossword‚ with the solution EXHALE (6 letters). Another example is “Yoga accessory”‚ which was solved as MAT (3 letters). Additionally‚ “Yoga surfaces” was recently used‚ with the answer POSES (5 letters). These clues demonstrate how crossword creators blend yoga terminology with puzzle-solving. They often draw from both common and less familiar terms‚ such as “Yoga breathing technique”‚ solved as PRANAYAMA (10 letters); These examples highlight the diversity of yoga-related clues in modern crosswords‚ appealing to both yoga enthusiasts and casual solvers. They also showcase the creative ways yoga themes are integrated into puzzles for engaging gameplay.

Tips for Crossword Enthusiasts

Mastering yoga crosswords requires practice and strategy. Start with common yoga terms‚ use online tools for hints‚ and stay updated with new clues and patterns regularly.

5.1 Improving Vocabulary

Expanding your vocabulary is essential for mastering yoga instruction crosswords. Start by familiarizing yourself with common yoga terms like EXHALE and RELAX‚ which are frequently used in clues. Regularly practicing crosswords helps build recognition of these words. Additionally‚ studying yoga glossaries and dictionaries can enhance your understanding of both traditional and modern yoga terminology. Online resources‚ such as crossword solvers and yoga-focused websites‚ provide lists of terms and their meanings‚ making it easier to learn and remember. Consistent exposure to these words will improve your ability to quickly identify them in crossword puzzles. Over time‚ this practice will not only boost your crossword-solving skills but also deepen your knowledge of yoga practices and philosophy.

5.2 Enhancing Pattern Recognition

Improving pattern recognition is crucial for solving yoga instruction crosswords effectively. Regular practice helps identify common word patterns‚ such as prefixes‚ suffixes‚ and letter combinations frequently used in yoga terminology. For example‚ terms like ASANA (poses) or PRANA (life force) often appear‚ and recognizing these patterns can speed up your solving process. Additionally‚ studying the structure of yoga-related clues and their answers reveals recurring themes‚ such as breathing techniques or meditation terms. Utilizing online tools and crossword solvers can further enhance your ability to spot these patterns by highlighting common word associations. Over time‚ this skill becomes intuitive‚ allowing you to fill in answers more confidently and efficiently. Enhancing pattern recognition not only improves your crossword-solving abilities but also deepens your familiarity with yoga concepts and terminology.

5.3 Managing Difficult Clues

Solving difficult clues in yoga instruction crosswords can be challenging‚ but there are strategies to overcome them. Start by focusing on easier clues to fill in the grid‚ then return to tougher ones with a fresh perspective; Use word lists and pattern recognition to identify potential answers. Online tools like crossword solvers can provide hints or reveal answers if you’re stuck. Additionally‚ studying yoga terminology and common crossword clues can improve your ability to tackle hard questions. Engaging with online communities or forums where solvers share tips and solutions is another effective way to manage difficult clues. Remember‚ practice enhances your skills‚ and it’s okay to use resources when needed. Over time‚ you’ll become more adept at deciphering even the most complex yoga-related crossword clues.

Resources for Solving Yoga Crosswords

Top crossword sources like USA Today and NY Times offer yoga-themed puzzles. Online tools such as Crossword Solver and Crossword Genius provide hints and solutions. Yoga glossaries and dictionaries aid in understanding specific terms‚ while online communities share tips and strategies for solving clues effectively.

6.1 Top Crossword Puzzle Sources

Top crossword puzzle sources like USA Today‚ NY Times‚ Daily Celebrity‚ Telegraph‚ and LA Times frequently feature yoga instruction crosswords. These puzzles often include clues related to yoga poses‚ breathing techniques‚ and philosophical terms. Websites like Crossword Solver and Crossword Genius provide access to these puzzles‚ along with hints and solutions. Many of these sources offer daily updates‚ ensuring a steady supply of new challenges for enthusiasts. Additionally‚ apps and online platforms dedicated to crosswords often categorize puzzles by theme‚ making it easier for yoga enthusiasts to find relevant content. These sources are invaluable for both beginners and experienced solvers‚ offering a mix of common and less common yoga-related clues to enhance their solving skills and vocabulary.

6.2 Yoga Glossaries and Dictionaries

Yoga glossaries and dictionaries are essential resources for solving yoga instruction crosswords. They provide definitions for various yoga terms‚ poses‚ and concepts‚ helping solvers decipher clues. Online platforms like YogaInternational and DoYouYoga offer comprehensive lists of yoga terminology‚ including Sanskrit words and their English translations. These resources often include examples of how terms are used in crosswords‚ such as “EXHALE” or “RELAX.” Additionally‚ dictionaries like the Yoga Dictionary by Georg Feuerstein are invaluable for understanding less common terms. Many of these glossaries are available online‚ making them easily accessible for crossword enthusiasts. By referencing these tools‚ solvers can improve their knowledge of yoga-related vocabulary and enhance their ability to tackle crossword puzzles effectively. They are particularly useful for identifying patterns and meanings behind obscure clues.

6.3 Online Communities and Forums

Online communities and forums dedicated to crossword puzzles are invaluable for solving yoga instruction crosswords. Platforms like Crossword Solver and Reddit’s r/CrosswordPuzzles offer spaces for solvers to share tips‚ discuss clues‚ and collaborate on challenging puzzles. These communities often include threads specifically about yoga-themed crosswords‚ where users can exchange insights and strategies. Additionally‚ specialized yoga forums may discuss crossword clues related to yoga terminology‚ providing a unique blend of expertise. Many solvers find these communities helpful for understanding obscure terms or verifying answers. By engaging with these online groups‚ enthusiasts can enhance their problem-solving skills and stay updated on the latest trends in yoga crosswords. These forums foster a sense of camaraderie and shared learning‚ making them a valuable resource for both beginners and experienced solvers alike.

The Future of Yoga Crosswords

The future of yoga crosswords lies in technology integration‚ cultural exchange‚ and innovative designs‚ enhancing accessibility and engagement for a global audience.

7.1 Integration with Technology

The integration of technology is revolutionizing yoga crosswords‚ making them more accessible and engaging. AI models like ChatGPT are being used to generate clues and solve puzzles‚ offering real-time assistance. Mobile apps and online platforms now provide interactive crossword experiences‚ allowing solvers to access puzzles anytime‚ anywhere. Additionally‚ technology enables the creation of dynamic crosswords that adapt to skill levels‚ enhancing the learning experience. Tools like crossword solvers and yoga glossaries are now readily available online‚ helping enthusiasts tackle challenging clues. This technological advancement not only simplifies solving but also introduces yoga crosswords to a broader audience‚ fostering a community that combines mindfulness with mental stimulation. As technology evolves‚ yoga crosswords are expected to become even more innovative‚ blending tradition with modern convenience.

7.2 Cultural Exchange and Globalization

Yoga instruction crosswords are fostering cultural exchange by introducing yoga terminology to a global audience. As crosswords gain popularity worldwide‚ they bridge gaps between Eastern yoga traditions and Western puzzle enthusiasts. Publications like USA Today and NY Times feature yoga-themed crosswords‚ reaching diverse demographics. The rise of online platforms and AI tools like ChatGPT has further globalized access‚ with solutions available in multiple languages. This globalization not only broadens the audience for yoga crosswords but also promotes cross-cultural understanding. By incorporating yoga terms‚ crosswords educate players about mindfulness and wellness practices‚ creating a shared interest that transcends borders. This cultural exchange enriches both yoga and crossword communities‚ making them more inclusive and interconnected on a global scale.

7.3 Emerging Trends in Crossword Design

Emerging trends in crossword design are revolutionizing how yoga instruction crosswords are created and experienced. Modern crosswords now incorporate interactive digital formats‚ allowing solvers to engage with puzzles online. Dynamic clues and adaptive difficulty levels are becoming popular‚ catering to both beginners and advanced solvers. The integration of multimedia‚ such as images and videos‚ enhances the puzzle-solving experience. Additionally‚ AI tools like ChatGPT are being used to generate crosswords with yoga themes‚ ensuring fresh and unique content. These innovations make crosswords more accessible and appealing to a broader audience. As technology advances‚ yoga instruction crosswords are likely to feature real-time leaderboards and collaborative solving options‚ fostering a sense of community among enthusiasts. These trends not only modernize the traditional crossword but also align with the growing interest in yoga and mindfulness worldwide.

Yoga Instruction Crosswords offer a unique blend of mindfulness and mental challenge. Popular clues like EXHALE and RELAX highlight yoga’s core principles. Technology enhances accessibility‚ making these puzzles a timeless‚ engaging activity for all.

8.1 Final Thoughts

Yoga Instruction Crosswords have emerged as a unique and engaging activity‚ blending mindfulness with mental exercise. These puzzles cater to both yoga enthusiasts and crossword lovers‚ offering a fun way to explore yoga terminology. The integration of common clues like EXHALE and RELAX highlights the connection between yoga practices and wordplay. With the rise of technology‚ online tools and AI-driven solvers have made these crosswords more accessible‚ ensuring their popularity endures. The community around yoga crosswords continues to grow‚ fostering a sense of shared challenge and learning. As yoga and crosswords evolve‚ their fusion remains a timeless and enjoyable pursuit for many.

8.2 Encouragement for Future Solvers

Embarking on yoga instruction crosswords is a rewarding journey that combines mindfulness with mental sharpness. For newcomers‚ starting with simpler clues like EXHALE or RELAX can build confidence. As you progress‚ exploring yoga terminology will deepen your understanding of both the practice and puzzle-solving. Don’t hesitate to use online tools or join crossword communities for support. Each solved clue is a step toward mastering this unique blend of yoga and wordplay. Remember‚ patience and persistence are key. Whether you’re a yoga enthusiast or a crossword aficionado‚ these puzzles offer a fun and educational experience. Dive in‚ embrace the challenge‚ and enjoy the process of learning and growth. The world of yoga crosswords awaits‚ ready to inspire and engage you!

rubber stopper size guide

Rubber stoppers are versatile, essential lab components, providing airtight seals for test tubes, flasks, and fermentation vessels. Made from natural or synthetic rubber, they ensure contamination-free environments and precise fit.

Purpose and Importance of Rubber Stoppers

Rubber stoppers are crucial for maintaining airtight seals in laboratory settings, preventing contamination and ensuring precise experimental conditions. Their primary purpose is to securely seal glassware openings, such as test tubes and flasks, while allowing for easy insertion of instruments or sampling. In fermentation processes, they provide a sterile environment for microbial growth. The importance lies in their ability to prevent leakage and maintain pressure, ensuring the integrity of lab experiments. Properly sized stoppers are essential for a tight fit, making them indispensable in both chemical and biological applications. Their durability and flexibility make them a cornerstone of laboratory equipment, supporting accurate and reliable results.

Common Applications in Laboratories

Rubber stoppers are widely used in laboratories to seal test tubes, flasks, and other glassware, ensuring airtight conditions and preventing contamination. They are essential for fermentation processes, allowing gases to escape while maintaining sterility. In chemistry labs, stoppers are used to seal containers during experiments, storage, or transportation. Their flexibility and durability make them ideal for various lab procedures, including boiling flasks and test tube culturing. Properly sized stoppers ensure a tight fit, preventing leaks and maintaining pressure. Whether for routine experiments or specialized processes, rubber stoppers are a fundamental tool in laboratory settings, supporting accurate and reliable scientific outcomes.

Materials and Construction

Rubber stoppers are typically made from natural or synthetic rubber, offering pliability and durability. Natural rubber provides a tight seal, while synthetic options offer enhanced chemical resistance.

Natural Rubber vs. Synthetic Rubber

Natural rubber stoppers are made from natural rubber, known for their pliability and ability to create tight seals, making them ideal for laboratory applications. Synthetic rubber stoppers, on the other hand, are crafted from man-made materials like neoprene or nitrile, offering superior resistance to chemicals and extreme temperatures. Natural rubber is often preferred for its flexibility and compatibility with glassware, while synthetic options are chosen for their durability in harsh environments. Both materials are widely used in labs, with natural rubber being more common for standard applications and synthetic rubber suited for specialized or high-performance needs. The choice depends on the specific requirements of the laboratory setup.

Key Properties of Rubber Stoppers

Rubber stoppers are characterized by their elasticity, durability, and ability to form airtight seals. They are typically pliable, ensuring a tight fit in glassware openings, and are resistant to many chemicals and temperatures. Key properties include their smooth surface finish, which prevents contamination, and their ability to maintain a seal over repeated use. The stoppers are designed to be chemically inert, making them suitable for laboratory applications. Their dimensions are standardized, with sizes ranging from 00 to 14, ensuring compatibility with various glassware. These properties make rubber stoppers essential for sealing test tubes, flasks, and fermentation vessels, providing reliable performance in diverse laboratory settings.

Understanding Rubber Stopper Sizes

Rubber stopper sizes range from 00 to 14, with each size corresponding to specific glassware openings. Proper sizing ensures a tight, leak-proof seal, crucial for lab applications.

Standard Size Ranges (00 to 14)

Rubber stoppers are available in standard sizes ranging from 00 to 14, each designed to fit specific glassware openings. Size 00 is the smallest, suitable for narrow test tubes, while size 14 fits larger containers like flasks. The sizes are standardized to ensure compatibility with common lab equipment, making selection easier. Each size corresponds to precise measurements for both the top and bottom diameters, ensuring a tight seal. For example, size 7 is often used for 3, 5, and 6.5-gallon glass carboys, while size 10 fits standard plastic carboys. Proper sizing is critical for leak-proof sealing in laboratory and fermentation applications.

Measurement Methods for Stopper Sizes

Measuring rubber stopper sizes involves determining the top and bottom diameters to ensure proper fit. Sizes range from 00 to 14, with each corresponding to specific millimeter measurements. The top diameter is typically larger than the bottom to create a secure seal. To convert millimeters to inches, divide by 25.4, as 1 inch equals 25.4mm. Manufacturers provide detailed charts with precise measurements for each size, ensuring compatibility with various glassware. Proper measurement is critical for selecting the right stopper, as incorrect sizing can lead to leaks or poor fit. Always refer to the manufacturer’s size chart for accurate dimensions and ordering.

Types of Rubber Stoppers

Rubber stoppers come in solid, one-hole, and two-hole designs, catering to different laboratory needs. Solid stoppers provide airtight seals, while one-hole and two-hole versions allow for tubing connections, ensuring versatility in lab applications.

Solid Rubber Stoppers

Solid rubber stoppers are the most common type, offering a tight, airtight seal for various laboratory glassware. Made from natural or synthetic rubber, they are durable and resistant to chemicals. Their smooth surface ensures a secure fit, preventing leaks and contamination. Available in sizes from 00 to 14, these stoppers are compatible with standard lab equipment like test tubes and flasks. Proper sizing is crucial for an effective seal, making size charts essential for selection. Solid stoppers are ideal for applications requiring a simple, reliable closure, ensuring integrity in experiments and processes.

One-Hole and Two-Hole Rubber Stoppers

One-hole and two-hole rubber stoppers are specialized for specific laboratory applications. The one-hole stopper features a single opening, ideal for adding substances or inserting electrodes, while the two-hole version allows for dual connections, such as gas inlet and outlet. Both designs ensure a secure seal and are available in sizes 00 to 14. Made from durable natural or synthetic rubber, they resist chemicals and maintain flexibility. Proper sizing is critical for a tight fit, and size charts are essential for selection. These stoppers are widely used in fermentation, distillation, and other processes requiring precise control, making them indispensable in modern lab settings.

Applications in Laboratory Settings

Rubber stoppers are crucial in labs for sealing test tubes, flasks, and fermentation vessels, controlling gas flow, and maintaining sterility. They prevent contamination and ensure precise experimental control.

Use in Test Tubes and Flasks

Rubber stoppers are essential for sealing test tubes and flasks, ensuring airtight containment of samples and reagents. They prevent contamination and maintain the integrity of laboratory experiments. Made from natural or synthetic rubber, these stoppers are pliable, allowing a tight fit in various glassware openings. Proper sizing is critical to avoid leaks and ensure functionality. The rubber stopper size guide helps lab technicians select the correct stopper for their specific test tubes or flasks, guaranteeing a secure seal. This is particularly important in fermentation processes and chemical reactions where precise control over the environment is necessary. Using the right stopper size enhances safety and experimental accuracy in lab settings.

Role in Fermentation Processes

Rubber stoppers play a crucial role in fermentation processes, particularly in wineries and breweries. They are used to seal fermentation vessels, allowing gases to escape while preventing contamination. The stoppers are designed to fit tightly into the necks of glass carboys or plastic fermenters, ensuring a sterile environment. Sizes like 7 and 10 are commonly used for standard 3, 5, and 6.5-gallon glass carboys, while size 10 fits 3, 5, and 6-gallon plastic carboys. Made from natural rubber, these stoppers are durable and flexible, providing a reliable seal throughout the fermentation cycle. Proper sizing, as per the rubber stopper size guide, is essential for maintaining the integrity of the fermentation process.

Converting Millimeters to Inches

To convert millimeters to inches for rubber stopper sizing, divide the measurement by 25.4. This conversion factor ensures accurate size matching for glassware and stoppers.

Understanding the Conversion Factor (25.4mm per inch)

The conversion factor of 25.4mm per inch is crucial for accurately sizing rubber stoppers. This standard measurement ensures precise fitment between stoppers and glassware openings, preventing leaks and ensuring airtight seals. By dividing millimeter measurements by 25.4, users can easily convert to inches, aligning with international sizing standards. This factor is essential for laboratories and industrial settings where exact dimensions are critical. Proper conversion guarantees compatibility, avoiding costly errors and maintaining experimental integrity. Always refer to this factor when selecting rubber stoppers to ensure optimal performance and reliability in various applications.

Practical Examples of Size Conversions

Converting rubber stopper sizes from millimeters to inches is straightforward using the 25.4mm per inch factor. For example, a stopper with a 50.8mm diameter converts to 2 inches by dividing 50.8 by 25.4. Similarly, a 31.75mm diameter becomes 1.25 inches. These conversions are vital for matching stoppers to glassware openings. For instance, a size 2 stopper, measuring 50.8mm in diameter, fits a 2-inch opening, while a size 7 stopper, at 69;85mm, suits larger containers like 3-6.5 gallon carboys. Accurate conversions ensure proper sealing and prevent leaks, making them essential for laboratory and industrial applications.

How to Choose the Right Size

Choosing the right rubber stopper size involves measuring the glassware’s opening, matching it to the stopper’s diameter, and considering lab conditions and usage requirements;

Matching Stopper Size to Glassware

Matching the rubber stopper size to your glassware is crucial for a secure, leak-free seal. Measure the glassware’s opening diameter and compare it to the stopper’s dimensions using a size chart. Ensure the stopper’s top and bottom diameters align with the glassware’s specifications. Proper fit prevents contamination and ensures lab safety. Refer to the size chart for precise measurements, as stoppers vary from size 00 to 14. Different glassware, such as test tubes or flasks, may require specific stopper sizes. Always verify compatibility to maintain the integrity of your experiments and processes.

Factors Influencing Size Selection

Several factors influence the selection of the appropriate rubber stopper size. The glassware’s opening diameter is the primary consideration, as the stopper must fit snugly to ensure a leak-free seal. The type of rubber material, whether natural or synthetic, also plays a role, as it affects pliability and durability. Additionally, the intended application, such as fermentation or standard lab use, impacts size selection. For instance, larger glassware like carboys may require stoppers in sizes 7 or 10. Always refer to a size chart to match the stopper dimensions with the glassware’s specifications. Proper sizing ensures safety, prevents contamination, and maintains experimental integrity.

Troubleshooting Common Issues

Common issues include stoppers not fitting or leaking. Check size compatibility using a size chart, ensure cleanliness, and inspect for damage or wear. Replace if necessary.

What to Do If the Stopper Doesn’t Fit

If a rubber stopper doesn’t fit, first verify the size using a rubber stopper size chart. Ensure the stopper matches the glassware’s opening diameter. If it’s too tight, gently stretch it with warm water. For a loose fit, check for wear or damage. Replace the stopper if necessary. Always refer to the manufacturer’s sizing guide for accurate measurements. Proper fit is crucial for a secure seal in laboratory settings, preventing contamination and ensuring experiment integrity. Using the correct size guarantees optimal performance and longevity of the stopper.

Addressing Leaks and Sealing Problems

Leaks and sealing issues with rubber stoppers often arise from improper sizing or wear. Always refer to a rubber stopper size chart to ensure the correct fit for your glassware. Inspect the stopper for cracks or damage; replace it if necessary. Clean the stopper and glassware opening to remove residue, which can compromise the seal. For a tighter fit, lightly lubricate the stopper with water or silicone spray. If leaks persist, consider upgrading to a higher-quality stopper or consulting a sizing guide for precise measurements. Proper sealing is critical for maintaining a contamination-free environment in laboratory settings.

Maintenance and Care

Regularly clean and sanitize rubber stoppers to prevent contamination. Store them in a dry, cool place away from direct sunlight to maintain flexibility and longevity.

Cleaning and Sanitizing Rubber Stoppers

Cleaning and sanitizing rubber stoppers is crucial for maintaining their effectiveness and preventing contamination. Wash stoppers with mild soap and warm water, ensuring all surfaces are thoroughly rinsed. For sanitization, soak them in a 70% ethanol solution for 30 minutes. Avoid using harsh chemicals or abrasive materials, as they may damage the rubber. Regular cleaning prevents microbial growth and ensures a tight seal. After cleaning, store stoppers in a dry, cool place to maintain their flexibility and longevity. Proper care extends their lifespan and ensures reliable performance in laboratory settings.

Storage Tips for Longevity

Proper storage is essential to maintain the quality and longevity of rubber stoppers. Store them in a cool, dry place away from direct sunlight and heat sources, as these can cause degradation. Avoid exposure to harsh chemicals or ozone, which may weaken the rubber. Keep stoppers in airtight containers to prevent dust accumulation and moisture buildup. Store them separately to avoid sticking together. For long-term storage, consider using silica gel packets to maintain dryness. Avoid stacking stoppers under heavy objects, as this can cause deformation. By following these tips, you can ensure your rubber stoppers remain flexible, durable, and ready for use in laboratory settings.

Rubber Stopper Size Chart

A rubber stopper size chart provides standard dimensions in millimeters and inches, helping users select the right size for their glassware. Measurements include top and bottom diameters, ensuring a proper fit. This guide is essential for maintaining airtight seals in laboratory settings, preventing contamination and ensuring precise functionality. The chart typically ranges from size 00 to 14, with conversions from millimeters to inches (25.4mm per inch) for easy reference. Use this chart to match stoppers to your specific lab equipment needs effectively.

Standard Dimensions for Common Sizes

The rubber stopper size chart provides precise measurements for common sizes, ranging from 00 to 14. Each size specifies the top and bottom diameters in millimeters, ensuring compatibility with various glassware openings. For instance, size 00 measures 8.5mm (top) and 6.5mm (bottom), while size 14 measures 50mm (top) and 38mm (bottom). These standardized dimensions allow users to select the correct stopper for their equipment, ensuring a secure, airtight seal. The chart is a valuable resource for laboratories, enabling precise matching of stoppers to test tubes, flasks, and other containers. By referencing these dimensions, users can maintain proper functionality and prevent contamination in their experiments or processes.

Interpreting the Size Chart for Ordering

Interpreting the rubber stopper size chart is crucial for ordering the correct fit. The chart lists stopper sizes (00 to 14) with corresponding top and bottom diameters in millimeters. To order, match your glassware’s opening diameter to the stopper’s dimensions. For example, a size 7 stopper fits 3, 5, and 6.5-gallon glass carboys, while a size 10 suits 3, 5, and 6-gallon plastic carboys. Convert millimeters to inches by dividing by 25.4 if needed. Ensure the stopper’s pliability and material (natural or synthetic rubber) meet your lab requirements. This guide helps prevent sizing errors, ensuring a secure seal for tubes, flasks, and fermentation vessels, maintaining experiment integrity and safety.

Factors Affecting Size Selection

Glassware type, opening diameter, and lab conditions significantly influence rubber stopper size selection. Proper fit ensures airtight seals, preventing contamination and maintaining experiment integrity across various laboratory applications.

Glassware Type and Opening Diameter

The type of glassware and its opening diameter are critical factors in selecting the correct rubber stopper size. Different glassware, such as test tubes, flasks, and carboys, have varying opening sizes, requiring specific stopper dimensions for a tight seal. For instance, a stopper designed for a 3, 5, or 6.5-gallon glass carboy will not fit a standard test tube. The opening diameter must be measured accurately to ensure compatibility. Using a rubber stopper size chart, which provides measurements in millimeters, helps match the stopper to the glassware. Proper sizing ensures a leak-proof seal, preventing contamination and maintaining experimental integrity. Incorrect sizing can lead to poor seals and experimental failure.

Lab Conditions and Usage Requirements

Lab conditions and usage requirements significantly influence the selection of rubber stoppers. In chemistry labs, stoppers must withstand harsh chemicals and temperature variations, while in fermentation settings, they need to maintain a sterile environment. The frequency of use and the need for sterilization also play a role. For high-temperature applications, stoppers made from durable materials like synthetic rubber are preferred. In fermentation, stoppers with holes allow for airlock systems, preventing contamination. The size and material must align with the specific demands of the experiment to ensure functionality and longevity. Proper selection based on lab conditions ensures optimal performance and safety in various laboratory settings.

Buying Guide

When purchasing rubber stoppers, consider reputable suppliers offering high-quality, durable options. Refer to size charts for precise fitting and ensure materials meet lab standards for longevity and performance.

Where to Purchase Rubber Stoppers

Rubber stoppers can be purchased from laboratory supply stores, online retailers, or directly from manufacturers. Reputable suppliers offer a wide range of sizes and types, ensuring compatibility with various glassware. When buying, refer to the provided size charts to match stoppers with your specific needs. Online platforms often include detailed product descriptions and customer reviews, aiding in informed decisions. Additionally, many manufacturers provide custom sizing options for unique laboratory requirements. Always verify the material quality and durability to ensure the stoppers meet your lab standards. Consulting with suppliers can also help in selecting the most suitable options for your applications.

What to Look for in Quality and Durability

When selecting rubber stoppers, prioritize high-quality materials and construction for durability. Natural rubber stoppers are known for their pliability and tight seals, while synthetic options offer resistance to chemicals and heat. Look for stoppers with consistent thickness and smooth surfaces to ensure reliable performance. Avoid products with visible defects or uneven edges, as these can compromise sealing efficiency. Durable stoppers should maintain their shape and elasticity over time, even with frequent use. Additionally, consider the stopper’s compatibility with your lab’s specific conditions, such as exposure to harsh chemicals or extreme temperatures. High-quality stoppers will provide long-term reliability and consistent sealing performance in laboratory settings.

Future Trends in Rubber Stoppers

Future trends include advancements in eco-friendly materials and innovative designs. Sustainable rubber alternatives and improved durability are expected to enhance performance and environmental compatibility in laboratory settings.

Advancements in Materials and Design

Recent advancements in rubber stopper materials focus on sustainability and performance. Eco-friendly alternatives, such as biodegradable synthetic rubber, are gaining traction, reducing environmental impact while maintaining durability. Designs now incorporate multi-hole configurations for fermentation and vacuum applications, enhancing versatility. Improved manufacturing techniques ensure tighter seals and resistance to chemicals, extending product lifespan. These innovations cater to diverse laboratory needs, offering tailored solutions for specific glassware and experimental conditions. By integrating advanced materials and ergonomic designs, rubber stoppers are evolving to meet modern lab demands, ensuring reliability and efficiency in various scientific applications.

Sustainability and Eco-Friendly Options

The demand for sustainable rubber stoppers is growing, driven by environmental concerns. Manufacturers are now offering eco-friendly options, such as biodegradable synthetic rubber and recyclable materials. These alternatives reduce environmental impact while maintaining the durability and sealing performance of traditional stoppers. Additionally, some companies are adopting energy-efficient production processes to minimize their carbon footprint. Labs can now choose eco-conscious stoppers without compromising on quality, supporting greener laboratory practices. This shift aligns with global sustainability goals, making rubber stoppers more environmentally responsible while meeting the needs of modern scientific applications.

Rubber stoppers are essential for sealing lab equipment, with sizes ranging from 00 to 14. Proper fit ensures functionality, while eco-friendly options now offer sustainable laboratory solutions.

Rubber stoppers are essential for sealing laboratory equipment, with sizes ranging from 00 to 14. They are made from natural or synthetic rubber, ensuring a tight fit when properly selected. The size guide helps match stoppers to glassware openings, preventing leaks and contamination. Proper sizing is critical for functionality, while eco-friendly options now offer sustainable solutions for labs. Always refer to the size chart for accurate measurements, ensuring compatibility with your specific equipment. This guide provides a clear roadmap for choosing the right stopper, enhancing efficiency and safety in laboratory settings. By following these guidelines, users can optimize their lab operations effectively.

Final Tips for Effective Use

Always refer to the rubber stopper size chart to ensure a precise fit for your glassware. Choose stoppers made from high-quality materials for durability and a tight seal. Regularly clean and sanitize stoppers to prevent contamination. Store them in a cool, dry place to maintain flexibility and prevent cracking. Consider the specific needs of your lab, such as fermentation or test tube use, when selecting stoppers. Proper sizing and material selection are key to avoiding leaks and ensuring long-term performance. By following these guidelines, you can maximize the effectiveness and longevity of your rubber stoppers in laboratory settings.

balloon pricing guide

Planning balloon decorations can be overwhelming‚ but understanding pricing helps you make informed decisions. This guide explores costs‚ factors influencing prices‚ and tips for budgeting effectively.

Overview of Balloon Decoration Costs

Balloon decoration costs vary widely based on design complexity‚ materials‚ and size. Basic garlands start at $15 per foot‚ while grand garlands with more balloons can range up to $25 per foot. Balloon walls are priced at $15 per square foot‚ using 5-30 balloons. Arches and columns typically range from $40 to $79‚ depending on design. Custom options‚ like double-stuffed balloons or LED columns‚ increase costs. Additional fees for delivery‚ setup‚ and taxes apply. Understanding these factors helps plan budgets effectively for events‚ ensuring a balance between aesthetics and affordability.

Importance of Understanding Pricing Factors

Understanding pricing factors is crucial for budgeting and decision-making. Material costs‚ design complexity‚ and location impact prices. Customization‚ seasonal demand‚ and setup requirements also influence costs. Knowing these factors helps clients avoid surprises and ensures they get value for their money. It also allows businesses to create transparent pricing‚ building trust with customers. By understanding what drives costs‚ clients can prioritize their spending and make informed choices‚ ensuring their events are both beautiful and budget-friendly. This knowledge empowers effective planning and negotiation‚ making the decoration process smoother and more satisfying for all parties involved.

Types of Balloon Decorations and Their Pricing

Balloon decorations vary widely‚ from garlands to arches‚ columns‚ walls‚ and centerpieces. Pricing ranges from $15/ft for garlands to $25/ft for grand designs‚ offering options for all budgets.

Balloon Garlands Pricing

Balloon garlands are a popular choice for events‚ with pricing starting at $15 per foot for 5-16 balloons. Grand garlands‚ featuring 5-36 balloons‚ cost $25 per foot. Custom options‚ such as double-stuffed balloons or decorative mylar additions‚ increase costs. Organic garlands with flowers or greenery start at $45 per foot. Prices vary based on design complexity and balloon quantity. Setup and delivery fees are additional‚ and taxes are not included. Garlands are ideal for indoor or outdoor events‚ offering versatility for various celebrations. Understanding these pricing details helps in planning budgets effectively for your desired balloon decor.

Balloon Arches Pricing

Balloon arches are a stunning centerpiece for events‚ with pricing starting at $29 per foot. Single arches cost $9 per foot‚ while double arches are $11 per foot‚ and packed arches range from $17 per foot. Custom designs‚ including organic arches with flowers or greenery‚ start at $45 per foot. Additional fees apply for mylar balloons‚ letters‚ or numbers. Setup and delivery are extra‚ and taxes are not included. Prices vary based on design complexity and location. Advance orders are required for non-standard colors. Understanding these costs helps in planning memorable balloon arches for celebrations like graduations‚ weddings‚ or corporate events.

Balloon Columns Pricing

Balloon columns are a popular choice for events‚ typically standing 8 feet tall with a decorative topper. Pricing begins at $37 and ranges up to $79‚ depending on the design complexity. These columns are perfect for backdrops‚ birthdays‚ showers‚ and corporate events‚ suitable for both indoor and outdoor settings. Additional fees apply for mylar balloons‚ setup‚ and delivery. Taxes are not included in the base price. Orders for non-standard colors must be placed two weeks in advance. Mylar balloons are not recommended for outdoor use in extreme temperatures. Understanding these costs helps in creating impactful balloon columns for various celebrations and professional gatherings.

Balloon Walls Pricing

Balloon walls are a stunning decorative option‚ priced at $15 per square foot‚ with designs typically using 5-30 balloons. These walls can be customized with mylar‚ confetti‚ or themed elements‚ adding to their visual appeal. Setup and delivery fees apply‚ and taxes are not included in the base price. Mylar balloons are not recommended for outdoor use in extreme temperatures. Balloon walls are ideal for creating focal points at events‚ offering a versatile and impactful display. Understanding these costs helps in planning memorable balloon wall setups for celebrations‚ corporate events‚ and other gatherings‚ ensuring a perfect blend of aesthetics and budget efficiency.

Balloon Centerpieces Pricing

Balloon centerpieces are a popular choice for events‚ starting at $25 each. These decorative pieces can be customized with various balloon sizes‚ colors‚ and designs. Prices may increase based on complexity‚ with deluxe options featuring additional elements like mylar balloons or themed accents. Delivery and setup fees are typically extra‚ and taxes are not included in the base price. Centerpieces are ideal for tables at weddings‚ parties‚ or corporate events‚ offering a festive and personalized touch. Understanding these costs helps in selecting the perfect centerpiece to enhance your event decor while staying within budget.

Balloon Bouquets Pricing

Balloon bouquets are a versatile and elegant decoration option‚ starting at $35 each. Prices vary based on the number of balloons‚ sizes‚ and customization. Standard bouquets typically include 5-10 balloons‚ while deluxe options may feature up to 16 balloons with added elements like mylar or confetti balloons. Custom colors and designs increase costs‚ and delivery or setup fees are usually extra. Taxes are not included in the base price. Balloon bouquets are perfect for birthdays‚ weddings‚ or corporate events‚ offering a festive and personalized touch. They can also be paired with other decor for a cohesive look‚ making them a popular choice for celebrations.

Organic Balloon Designs Pricing

Organic balloon designs‚ such as arches and garlands‚ start at $29 per foot‚ with options to add flowers‚ greenery‚ or pampas grass for a more natural look. Prices increase to $45 per foot for designs combining latex balloons with floral elements. These designs are customizable to match event themes and color schemes. Setup and delivery are typically included‚ but taxes and additional fees may apply. Organic designs are ideal for weddings‚ showers‚ and outdoor events‚ offering a unique and visually striking decor option. Prices vary based on complexity‚ location‚ and the number of balloons used in the arrangement.

LED Balloon Columns Pricing

LED balloon columns are a modern and eye-catching decor option‚ typically starting at $37 and ranging up to $79‚ depending on the design complexity. These columns are usually 8 feet tall and include a decorative topper. Prices vary based on the number of balloons‚ LED lighting details‚ and custom color choices. Setup and delivery are often included‚ but taxes and breakdown fees may apply. Ideal for indoor and outdoor events‚ LED columns add a vibrant glow to backdrops‚ entrances‚ or centerpieces. Custom orders require advance notice‚ and prices do not include additional fees like delivery or pickup.

Custom Balloon Options Pricing

Custom balloon options offer personalized designs tailored to your event theme‚ starting at $40 and varying based on complexity. These unique creations may include special shapes‚ sizes‚ or intricate patterns. Prices increase with the number of balloons‚ custom colors‚ and design details. Additional features like mylar balloons‚ confetti‚ or numbers/letters add to the cost. Lead times are often required for custom orders‚ especially for non-standard colors. Some providers offer rush orders for an extra fee. Custom balloon options are ideal for creating one-of-a-kind decor that stands out‚ making them a popular choice for special events and celebrations.

Factors Influencing Balloon Decoration Prices

Several factors influence balloon decoration prices‚ including materials‚ location‚ setup requirements‚ customization‚ and seasonal demand. These elements shape the final cost effectively.

Material and Size of Balloons

The type and size of balloons significantly impact pricing. Latex balloons‚ ranging from 5 to 36 inches‚ are commonly used and priced between $6 to $55 each‚ depending on size. Mylar balloons‚ often more durable and vibrant‚ are generally more expensive. Larger balloons‚ such as giant number or letter balloons‚ cost more due to their size and complexity. Additionally‚ specialty balloons‚ like double-stuffed or confetti-filled options‚ incur higher costs. The material quality and balloon size directly influence the overall decoration price‚ making them key factors in budget planning for events.

Location and Setup Requirements

Location and setup requirements significantly influence balloon decoration costs. Delivery fees apply for transporting materials to the event site‚ with charges varying by distance. Setup costs are typically included in the pricing but may increase for complex installations or large-scale events. Outdoor setups‚ especially in extreme weather‚ may require additional fees for stability measures. Some providers charge extra for breakdown services after the event. Clients should confirm whether taxes‚ delivery‚ and setup are included in the initial quote to avoid unexpected expenses. These factors ensure a smooth and stress-free experience for both providers and clients.

Customization and Design Complexity

Customization and design complexity play a crucial role in determining balloon decoration prices. Unique designs‚ such as double-stuffed balloons‚ mylar additions‚ or intricate patterns‚ increase costs due to the time and materials required. Custom colors‚ numbers‚ letters‚ or orbz also add to the price. More elaborate setups‚ like organic arches or floral-infused designs‚ demand higher skill levels and resources. Complex designs often require additional planning and labor‚ making them more expensive. Providers may charge extra for tailored options‚ ensuring the final product meets specific aesthetic or thematic needs. This personalization allows clients to create memorable events but at a higher cost.

Seasonal Demand and Availability

Seasonal demand significantly impacts balloon decoration pricing‚ with higher costs during peak periods like holidays‚ weddings‚ and graduations. Availability of specific balloon types‚ such as custom colors or specialty designs‚ can also fluctuate. During high-demand seasons‚ providers may charge more due to increased requests and limited supply. Additionally‚ certain materials or designs might be harder to source‚ driving up prices. Clients should consider ordering early to secure better rates and ensure availability. Understanding these factors helps in budgeting effectively and avoiding last-minute price hikes. Planning ahead is key to managing costs during busy seasons.

Additional Costs to Consider

Beyond decoration costs‚ consider setup and breakdown fees‚ delivery charges‚ taxes‚ and minimum order requirements. These extras can significantly impact your total budget. Plan accordingly.

Minimum Order Requirements

Many balloon decoration services require minimum order quantities to ensure profitability. For example‚ balloon arches may have a minimum length requirement‚ such as 12 feet‚ starting at $360. Some providers also require a minimum number of balloons per design‚ like 16 latex balloons for garlands. Additionally‚ custom orders‚ such as specific color combinations or intricate designs‚ may need to be placed two weeks in advance. Minimum order requirements help businesses manage resources efficiently‚ ensuring they can deliver high-quality decorations without incurring unnecessary costs. Always check with your provider for specific minimums to avoid unexpected fees or delays.

Setup and Breakdown Fees

Setup and breakdown fees are common in balloon decoration services‚ especially for large or complex designs. These fees cover the labor required to install and dismantle decorations. Outdoor setups may incur additional charges due to logistical challenges. Breakdown fees are sometimes optional‚ depending on the provider. Prices typically do not include these services‚ so it’s essential to confirm whether they are included in the initial quote. Always ask your provider about setup and breakdown costs to avoid surprises. These fees ensure a professional and stress-free experience for your event‚ allowing you to focus on enjoying the celebration.

Delivery Costs

Delivery costs are an additional expense to consider when ordering balloon decorations. These fees vary depending on the provider‚ location‚ and distance. Some companies charge a flat rate‚ while others calculate based on mileage or fuel costs. Delivery fees often cover transportation‚ handling‚ and logistics. For large events or remote locations‚ these costs can increase significantly. Be sure to inquire about delivery charges when requesting a quote‚ as they are typically not included in the initial pricing. Understanding these fees helps you budget accurately and avoid unexpected expenses. Always confirm delivery details with your provider to ensure smooth execution of your event. Proper planning ensures everything arrives on time and in perfect condition.

Taxes and Service Charges

Taxes and service charges are essential considerations when budgeting for balloon decorations. These fees vary by location and provider‚ with local tax rates applying to all purchases. Service charges may include handling‚ labor‚ or additional setup fees. Some companies include these costs in the initial quote‚ while others add them later. Clients should verify whether taxes and service charges are included in the pricing to avoid surprises. These fees can range from 5% to 20% of the total cost‚ depending on the provider and event complexity. Always clarify these details upfront to ensure accurate budgeting and transparent billing. Proper planning helps avoid hidden costs and ensures a smooth experience.

Using the Pricing Guide for Your Business

This guide helps businesses create custom price lists‚ present pricing attractively‚ and build strategies to attract clients while ensuring profitability and clear communication of value.

Creating a Custom Balloon Price List

A custom balloon price list helps businesses clearly communicate costs to clients. Start by categorizing services like garlands‚ arches‚ and columns‚ with pricing per foot or piece. Include base rates‚ such as $15/ft for standard garlands or $25/ft for grand designs. Highlight additional options like custom colors‚ mylar balloons‚ or LED enhancements. Note setup‚ delivery‚ and breakdown fees separately. Ensure transparency by mentioning that prices exclude taxes and may vary based on location or design complexity. Use this list to showcase your offerings attractively‚ ensuring clients understand value and options. Regular updates keep pricing competitive and aligned with market demands.

How to Present Pricing to Clients

Presenting pricing to clients requires clarity and transparency. Start with a detailed breakdown of costs‚ categorizing services like garlands‚ arches‚ and columns. Use bullet points or tables for easy readability. Highlight base rates‚ such as $15/ft for garlands‚ and note additional fees for custom colors or setups. Include visuals like photos or diagrams to illustrate design options. Be upfront about taxes‚ delivery‚ and breakdown charges. Offer customization options and explain how they impact pricing. Emphasize the value of your services‚ such as high-quality materials or expert installation. Encourage questions and provide examples to help clients make informed decisions. This approach builds trust and ensures alignment with their expectations.

Building a Pricing Strategy

Building a pricing strategy for balloon decorations involves balancing profitability with client affordability. Start by calculating material and labor costs‚ then research competitors to ensure your rates are competitive. Consider offering tiered pricing based on design complexity‚ such as standard‚ deluxe‚ and premium options. Highlight value-added services like custom colors or setups. Be transparent about additional fees for delivery or breakdown. Seasonal demand and event type can also influence pricing‚ so adjust accordingly. Regularly review and update your strategy to reflect market changes and client preferences. This approach ensures sustainability while meeting diverse customer needs effectively.

Budgeting Tips for Clients

Start by determining your budget range and prioritize essential decorations. Consider costs for materials‚ setup‚ and delivery. Opt for seasonal or standard options to save. Book early for discounts and tailor selections to fit your event needs while staying within budget.

How to Plan Your Balloon Decor Budget

Start by determining your budget range and identifying the type of balloon decor you need. Consider the number of decorations‚ their size‚ and complexity. Research average costs for garlands‚ arches‚ or columns‚ which can range from $15 to $50 per foot. Factor in setup‚ delivery‚ and breakdown fees‚ which can add $50 to $200. Custom designs or premium materials may increase costs. Inquire about minimum order requirements and seasonal pricing. Request a detailed quote from providers and compare prices. Book early to secure discounts and ensure availability. Review your quote to ensure it aligns with your vision and budget constraints.

Cost-Effective Balloon Decoration Ideas

Opt for standard balloon colors to avoid extra fees for custom hues. Choose simpler designs like garlands or columns‚ which start at $15 per foot‚ instead of intricate setups. Mix balloons with greenery or flowers for a budget-friendly yet elegant look. Consider smaller-scale decorations‚ such as centerpieces or bouquets‚ to reduce costs. DIY options‚ like pre-made balloon kits‚ can also save money. Avoid peak season pricing by planning events during off-peak times. Prioritize essential decor elements to allocate your budget wisely and achieve a stunning yet affordable setup for your event.

Comparing Prices and Providers

Research competitors to find the best rates for balloon decorations. Compare pricing structures‚ design options‚ and additional fees to ensure you get the best value for your budget.

Researching Competitors

Researching competitors is crucial for understanding market rates and finding the best deals. Compare pricing structures‚ design options‚ and additional fees across providers. Look for custom balloon options‚ delivery charges‚ and setup fees. Check if providers offer discounts for bulk orders or seasonal specials. Review portfolios to assess quality and creativity. Read client reviews to gauge reliability and customer satisfaction. Understanding competitors’ strengths and weaknesses helps you make informed decisions. This step ensures you find a provider that aligns with your budget and event vision‚ delivering value without compromising on quality or design.

Evaluating Quality vs. Cost

Evaluating quality vs. cost is essential for making informed decisions. High-quality balloons‚ such as premium latex or durable mylar‚ may cost more but offer better durability and visual appeal. Custom designs and intricate setups often require skilled labor‚ increasing prices. Consider the expertise of the provider‚ as experienced artists may charge more but deliver superior results. Compare packages to ensure you’re getting value for your budget. While cheaper options might seem appealing‚ they may lack customization or longevity. Balancing quality and cost ensures your event decor meets your expectations without overspending. Always review what’s included in the price‚ such as delivery or setup fees.

Seasonal and Event-Based Pricing

Prices vary by season‚ with holidays and peak events costing more. New Year’s‚ weddings‚ and graduations often see higher rates due to increased demand and design complexity.

Holiday and Peak Season Pricing

Holiday and peak season pricing for balloon decorations reflects increased demand and complexity. During events like New Year’s‚ weddings‚ and graduations‚ prices surge due to intricate designs and high-order volumes. Custom themes‚ such as festive colors or specialty balloons‚ add to costs. Setup requirements for large events or outdoor locations further inflate prices. Advance orders are often necessary‚ with some providers charging extra for delivery or breakdown services. Clients should budget accordingly‚ as peak season rates can be 20-30% higher than off-season pricing. Planning early ensures availability and helps manage expenses for these special occasions.

Special Event Pricing Considerations

Special events like weddings‚ corporate functions‚ and themed parties often require custom balloon designs‚ driving up costs. Prices increase due to intricate details‚ premium materials‚ and complex setups. Delivery‚ installation‚ and breakdown fees are typically added‚ especially for large-scale events. Outdoor events may incur extra charges for anchoring or weather-proofing. Advance orders are essential‚ with some vendors requiring deposits. Seasonal demand and unique requests‚ such as custom colors or shapes‚ also impact pricing. Clients should inquire about all-inclusive packages to avoid hidden fees. Proper planning ensures a stunning display while staying within budget for these memorable occasions.

This guide provides a comprehensive overview of balloon decoration pricing‚ helping you make informed decisions. By understanding factors like material costs‚ design complexity‚ and setup requirements‚ you can achieve stunning events within your budget.

Final Tips for Getting the Best Value

To maximize your budget‚ compare providers and request detailed quotes. Consider package deals or discounts for larger orders. Opt for seasonal or locally sourced balloons to reduce costs. Prioritize design elements that align with your event theme to avoid unnecessary expenses. Ask about setup and breakdown fees upfront to avoid surprises. Finally‚ ensure clear communication with your decorator to tailor designs to your budget while maintaining quality. By planning thoughtfully and negotiating effectively‚ you can achieve stunning balloon decor without overspending.

How to Get an Accurate Quote

For an accurate quote‚ provide clear details about your event‚ including date‚ location‚ and design preferences. Specify the type and quantity of balloons needed‚ as well as any custom elements. Compare quotes from multiple providers to ensure fair pricing. Ask about additional fees‚ such as setup‚ delivery‚ and taxes‚ to avoid surprises. Request a written breakdown of costs and confirm the quote in advance. Discuss any custom options or special requests upfront to ensure they are included in the final price. This ensures transparency and helps you stay within your budget while achieving your desired decor.

chaffle recipes pdf

A Chaffle Recipes PDF is a comprehensive guide offering various low-carb, keto-friendly waffle recipes․ It provides structured instructions, ingredient lists, and tips for making delicious chaffles at home․ Perfect for meal planning, these downloadable resources are ideal for those seeking versatile, easy-to-make dishes that cater to keto diets and beyond․

What is a Chaffle?

A chaffle is a keto-friendly waffle alternative made primarily with eggs and cheese․ It combines the crispiness of a waffle with the simplicity of a cheese omelet, offering a versatile base for various meals․ Chaffles are gluten-free, low-carb, and perfect for keto dieters․ They can be savory or sweet, serving as a breakfast staple, sandwich bread, or even a dessert option․ The basic recipe requires just two ingredients, but optional additions like flours or flavorings can enhance texture and taste․ Cooked in a waffle iron, chaffles are crispy on the outside and soft inside, making them a delicious and adaptable dish for any time of day․

Popularity of Chaffles in Keto Diets

Chaffles have gained immense popularity in keto diets due to their low-carb, high-fat composition, making them an ideal substitute for traditional waffles and bread․ Their versatility allows them to be used in various meals, from breakfast to dinner, and even as a base for sandwiches or pizzas․ The simplicity of ingredients, primarily eggs and cheese, aligns perfectly with keto principles․ Chaffles are also quick to prepare, requiring minimal time and effort, which appeals to busy individuals․ Their crisp exterior and soft interior provide a satisfying texture that mimics traditional waffles, making them a favorite among keto enthusiasts seeking delicious, compliant meal options without sacrificing flavor or convenience․

Why Chaffle Recipes are Ideal for Home Cooking

Chaffle recipes are perfect for home cooking due to their simplicity and accessibility․ They require minimal ingredients, often just eggs and cheese, making them budget-friendly and easy to prepare․ The use of a waffle iron ensures quick cooking times, ideal for busy households․ Chaffles are highly customizable, allowing home cooks to experiment with various flavors and additions, from sweet to savory․ Their versatility makes them suitable for any meal, whether it’s breakfast, lunch, or dinner․ Additionally, chaffles can be easily stored and reheated, making them a great option for meal prep․ This adaptability and ease of preparation have made chaffles a favorite among home cooks seeking delicious, low-carb meals without the hassle․

Benefits of Chaffle Recipes

Chaffle recipes offer a low-carb, keto-friendly alternative, perfect for various meals․ They are versatile, easy to make, and cater to different dietary needs, making them a great option․

Keto-Friendly and Low-Carb

Chaffles are a perfect fit for keto and low-carb diets, as they primarily use eggs and cheese, minimizing carb content․ This makes them an ideal substitute for traditional waffles, which are high in sugar and carbs․ The low-carb nature of chaffles ensures they align with ketogenic principles, helping individuals maintain ketosis․ Additionally, the use of cheese adds fat, which is essential for a keto diet․ With only 1․4 net carbs per serving, chaffles are a guilt-free option for breakfast, snacks, or even desserts․ Their versatility allows for creative flavor variations while keeping carb counts remarkably low, making them a staple in many keto meal plans․

Versatility in Meal Preparation

Chaffles offer unparalleled versatility in meal preparation, catering to various dietary needs and preferences․ They can be enjoyed as a sweet or savory option, making them suitable for breakfast, lunch, dinner, or snacks․ Whether you prefer classic cheese and egg combinations or creative additions like fruits, meats, or spices, chaffles adapt effortlessly․ Their versatility extends to serving as a bread substitute, allowing for keto-friendly sandwiches, pizzas, or even desserts․ This adaptability makes chaffles a go-to option for meal prep, enabling users to experiment with flavors and ingredients while maintaining a low-carb, keto-friendly diet․ Their ease of customization ensures they never become monotonous, keeping meals exciting and varied․

Easy to Make with Simple Ingredients

Chaffles are incredibly easy to make, requiring just a few simple ingredients like eggs, cheese, and optional additions such as almond flour or flavorings․ Their straightforward preparation makes them accessible to everyone, regardless of cooking experience․ The basic recipe involves mixing eggs and cheese, then cooking the batter in a waffle iron until crispy․ This simplicity ensures that chaffles can be prepared in minutes, making them a convenient option for quick meals․ Additionally, the ability to customize with various ingredients allows for endless creativity without complicating the process․ Their ease of preparation and minimal ingredients make chaffles a practical choice for home cooking, perfect for busy individuals or those new to keto diets․

Ingredients for Chaffle Recipes

Chaffle recipes primarily use eggs and cheese as base ingredients․ Optional additions like almond flour, coconut flour, and flavorings enhance texture and taste․

Basic Ingredients: Eggs and Cheese

The foundation of any chaffle lies in its two core ingredients: eggs and cheese․ Eggs provide structure and moisture, while cheese adds creaminess and flavor․ Mozzarella, cheddar, or any shredded cheese works well, though fresh, unprocessed options are recommended for the best results․ These ingredients are essential for achieving the perfect balance of crispiness on the outside and softness on the inside․ Some recipes may include additional elements like almond flour or spices, but eggs and cheese remain the heart of every chaffle․ Their simplicity makes chaffles accessible and quick to prepare, ideal for keto and low-carb diets․

Optional Additions: Flours and Flavorings

While eggs and cheese form the base of a chaffle, optional additions like flours and flavorings can enhance texture and taste․ Almond flour or coconut flour are popular choices for adding structure and reducing egginess․ Flavorings such as garlic, herbs, or spices can customize the taste, while sweet options like vanilla or cinnamon cater to dessert chaffles․ These additions allow for creativity, making chaffles versatile for various meals․ Whether savory or sweet, optional ingredients help tailor recipes to personal preferences, ensuring every chaffle is unique and delicious․ This flexibility makes chaffles a fun and adaptable option for keto and low-carb cooking․

Nutritional Benefits of Key Ingredients

The core ingredients in chaffle recipes, such as eggs and cheese, offer significant nutritional benefits․ Eggs are rich in high-quality protein, essential vitamins like B12, and minerals like selenium, supporting overall health․ Cheese provides healthy fats, calcium, and protein, making it a great addition for keto dieters․ Optional ingredients like almond flour add fiber and nutrients without extra carbs․ These components ensure that chaffles are not only delicious but also nutrient-dense, supporting a balanced and healthy diet․ By using wholesome ingredients, chaffles become a guilt-free, satisfying option for those following keto or low-carb lifestyles․

Basic Chaffle Recipe

A simple chaffle starts with eggs and cheese, whisked together and cooked in a waffle maker until crispy․ This base recipe is quick, versatile, and delicious․

Step-by-Step Instructions

To make a basic chaffle, preheat your waffle maker and grease it lightly with non-stick spray․ Crack 1-2 eggs into a bowl and whisk until smooth․ Add shredded cheese (like mozzarella or cheddar) and mix well․ Pour the batter onto the center of the waffle maker, spreading it evenly․ Cook for 3-5 minutes until the edges are golden and crispy․ Carefully remove the chaffle with a spatula; Serve warm with butter, sugar-free syrup, or your favorite toppings․ For extra crispiness, cook a bit longer, but watch to avoid burning․ This simple process yields a delicious, keto-friendly treat perfect for breakfast or snacks․

Nutritional Information

A basic chaffle made with eggs and cheese is a nutrient-dense option, perfect for keto and low-carb diets․ Each serving typically contains around 1․4g of net carbs, making it an ideal choice for those monitoring carbohydrate intake․ With approximately 350 calories per serving, chaffles provide a good balance of protein and healthy fats․ Eggs contribute essential vitamins like B12 and minerals such as selenium, while cheese adds calcium and additional protein․ This combination ensures that chaffles are not only delicious but also a wholesome, satisfying meal option․ Their low-carb and high-protein profile makes them a great fit for keto meal plans and weight management․

Tips for Achieving the Perfect Texture

To achieve the perfect chaffle texture, ensure your waffle maker is preheated and lightly greased to prevent sticking․ Use a combination of cheeses like mozzarella and cheddar for a crispy exterior and a creamy interior․ Avoid overmixing the batter, as this can make the chaffle dense․ Cook for 3-5 minutes until golden brown and crispy․ For an extra-crispy texture, cook a little longer but watch carefully to avoid burning․ Let the chaffle cool slightly before serving to set the texture․ Using a mini waffle maker can also help achieve a more even cook․ Experiment with cooking times to find your perfect balance of crispiness and softness․

Popular Chaffle Variations

Chaffles come in sweet and savory options, offering endless creativity․ From chocolate and strawberry sweet chaffles to savory versions perfect for breakfast, lunch, or dinner, there’s a chaffle for every craving․

Sweet Chaffle Recipes

Sweet chaffles are a delightful twist on traditional waffles, offering a low-carb, keto-friendly dessert option․ From chocolate to strawberry and even dessert-inspired variations, these chaffles satisfy sweet cravings․ Recipes often include sugar substitutes like erythritol or monk fruit sweetener to maintain keto compliance․ Add-ins such as cocoa powder, vanilla extract, or fresh berries enhance flavor․ Some recipes even incorporate cream cheese or sweetened whipped cream for extra indulgence․ These sweet treats are perfect for breakfast, snacks, or desserts, proving that keto diets don’t have to skip indulgence․ With endless customization, sweet chaffles are a versatile and delicious addition to any meal plan․

Savory Chaffle Recipes

Savory chaffles are a versatile and delicious option for keto and low-carb diets, perfect for meals beyond breakfast․ These recipes often feature ingredients like cheese, eggs, and herbs, creating a crispy, flavorful base․ Popular variations include pizza chaffles, stuffed with marinara and mozzarella, or sandwich chaffles as a bread alternative․ Additions like bacon, ham, or spinach enhance the savory profile, while seasonings such as garlic powder or paprika add depth․ These chaffles are ideal for lunch, dinner, or snacks, offering a satisfying, filling option․ With endless customization, savory chaffles cater to diverse tastes, making them a staple in keto meal planning and home cooking․

Breakfast, Lunch, and Dinner Chaffles

Chaffles are incredibly versatile, serving as a delicious base for meals throughout the day․ For breakfast, they can be topped with butter, sugar-free syrup, or fresh fruit, while savory additions like cheese, bacon, or ham make them a hearty start․ At lunch, chaffles can act as sandwich bread, stuffed with meats, lettuce, and mayo, or paired with soups and salads․ Dinner options include pizza chaffles topped with marinara, mozzarella, and pepperoni, or as a side dish with grilled meats and veggies․ Their adaptability makes them a convenient option for any meal, ensuring keto and low-carb dieters never run out of creative, satisfying ideas to enjoy․

Advanced Chaffle Recipes

Advanced chaffle recipes offer creative twists, such as stuffed, topped, or dessert variations․ These recipes elevate chaffles beyond basics, incorporating unique flavors and ingredients for a gourmet touch․

Stuffed and Topped Chaffles

Stuffed and topped chaffles take the classic recipe to the next level by adding creative fillings and toppings․ From savory options like grilled cheese or pizza chaffles to sweet variations with fruit or chocolate, these recipes offer endless possibilities․ Stuffed chaffles can be filled with meats, vegetables, or even desserts, while toppings like sauces, herbs, or nuts add extra flavor․ This versatility makes them perfect for any meal, whether it’s breakfast, lunch, or dinner․ The Chaffle Recipes PDF provides inspiration and step-by-step guides for crafting these gourmet treats, ensuring you never run out of ideas for delicious, low-carb meals․

Chaffles as Bread Alternatives

Chaffles are an excellent low-carb substitute for traditional bread, offering a versatile and keto-friendly solution․ They can be used to make sandwiches, burgers, or even mini pizzas, providing a satisfying crunch and texture similar to bread․ The Chaffle Recipes PDF highlights how to shape and cook chaffles to mimic bread perfectly, whether it’s for a grilled cheese or as a base for toppings․ This innovative approach allows you to enjoy your favorite meals without compromising on flavor or texture․ With endless possibilities, chaffles are a game-changer for those seeking bread alternatives that align with their dietary goals․

Dessert Chaffles

Dessert chaffles are a delightful twist on traditional waffles, offering a sweet, low-carb treat that satisfies cravings without compromising keto principles․ The Chaffle Recipes PDF includes a variety of sweet options, such as chocolate, strawberry, and dessert-inspired flavors, made with ingredients like sugar-free sweeteners and cocoa powder․ These recipes allow you to enjoy indulgent desserts while staying within your dietary goals․ From chocolate chip to fruity variations, dessert chaffles provide a guilt-free way to satisfy your sweet tooth․ Perfect for special occasions or everyday treats, these recipes showcase the versatility of chaffles beyond savory dishes, making them a must-try for anyone with a sweet craving․

Tips and Tricks for Making Chaffles

  • Use mozzarella for the best results, avoiding pre-shredded cheese with potato starch․
  • Cook longer for crispier chaffles, but monitor to prevent burning․
  • Don’t overfill the waffle iron for even cooking․
  • Experiment with flavors like sweet or savory for variety․

Common Mistakes to Avoid

When making chaffles, avoid overmixing the batter, as it can lead to a dense texture․ Using pre-shredded cheese with additives like potato starch can affect crispiness․ Ensure the waffle iron is properly preheated to prevent sticking․ Don’t open the iron too early, as this can break the chaffle․ Overfilling the iron is another common error, leading to uneven cooking․ Lastly, avoid rushing the cooking process; patience is key for achieving the perfect crisp exterior and soft interior․ These mistakes can easily be avoided with practice and attention to detail, ensuring your chaffles turn out delicious every time․

Cooking Techniques for Crispy Chaffles

To achieve crispy chaffles, preheat your waffle iron thoroughly and ensure it’s clean․ Use a non-stick spray or lightly grease the iron to prevent sticking; For optimal crispiness, cook chaffles on medium-high heat and avoid opening the iron too soon․ Using high-moisture cheese like mozzarella can help create a crisper exterior․ Don’t overmix the batter, as this can make the chaffles dense․ Cook for 3-5 minutes or until the edges are golden brown․ Let the chaffles cool slightly before serving to enhance crispiness․ Experimenting with cooking times and temperatures can also help perfect the texture․ These techniques ensure your chaffles are crispy on the outside and fluffy inside, making them a delightful keto-friendly treat․

Meal Prep and Reheating

Chaffles are ideal for meal prep due to their versatility and ease of reheating․ Simply cook, cool, and store them in airtight containers in the fridge for up to 5 days or freeze for up to 2 months․ To reheat, place chaffles in a pan over medium heat or toast them in the oven until crispy․ For a quick option, microwave them for 10-15 seconds to restore softness․ Prepping chaffles in advance saves time and ensures you always have a keto-friendly meal ready․ Reheating preserves their texture and flavor, making them a convenient option for busy lifestyles․ This feature makes chaffles a great addition to any meal prep routine․

Chaffle Recipes PDF Resources

Chaffle Recipes PDFs are digital guides offering various low-carb, keto-friendly waffle recipes․ Find them on platforms like Low Carb Inspirations or through downloadable cookbooks, perfect for easy meal planning and organization․

Where to Find Chaffle Recipes PDF

Chaffle Recipes PDFs are widely available online, with popular sources including Low Carb Inspirations, Etsy, and Pinterest․ Websites like LowCarbInspirations․com offer detailed cookbooks, such as the Keto Chaffle Recipes Cookbook, which includes over 50 recipes․ These PDFs are often downloadable instantly after purchase and can be printed for convenience․ Additionally, platforms like Etsy provide digital downloads of chaffle recipe bundles, while Pinterest offers free printable versions․ Many creators also share their PDF guides on personal blogs or through email newsletters․ Whether you prefer free resources or premium cookbooks, there are plenty of options to find the perfect chaffle recipes PDF tailored to your needs․

Benefits of Using a PDF Guide

A Chaffle Recipes PDF offers numerous benefits, making it an ideal resource for home cooks․ It provides a comprehensive, organized collection of recipes in one easy-to-access format․ PDF guides are downloadable, allowing offline access anytime, which is perfect for meal planning without internet connectivity․ They are also printable, enabling users to create physical copies for kitchen use․ Additionally, PDFs often include high-quality images, detailed instructions, and nutritional information, enhancing the cooking experience․ The digital format reduces clutter and is environmentally friendly compared to physical books․ Overall, a PDF guide simplifies cooking, saves time, and offers a convenient way to explore a variety of chaffle recipes․

Popular Chaffle Cookbooks in PDF Format

Several popular chaffle cookbooks are available in PDF format, offering a wide range of recipes and inspiration․ The Keto Chaffle Recipes Cookbook is a top choice, featuring over 50 sweet and savory recipes․ Another favorite is The Complete Keto Chaffle Cookbook for Beginners, which includes step-by-step guides for those new to chaffles․ These PDF cookbooks are designed for easy access, allowing users to download, print, or view recipes on any device․ They often include meal ideas for breakfast, lunch, dinner, and desserts, making them versatile resources for keto and low-carb enthusiasts; With detailed instructions and nutritional information, these cookbooks are perfect for anyone looking to explore the world of chaffles․

Chaffle recipes PDF offers a versatile and convenient way to explore keto-friendly dishes․ With easy-to-follow guides and creative ideas, these resources make cooking chaffles simple and enjoyable for everyone․

Final Thoughts on Chaffle Recipes

Chaffle recipes have revolutionized keto and low-carb cooking, offering endless creativity and simplicity․ These versatile dishes, from breakfast to dessert, cater to diverse tastes and dietary needs․ With minimal ingredients like eggs and cheese, chaffles are both nutritious and delicious․ The availability of PDF guides makes it easier than ever to access and print these recipes, ensuring meal prep and cooking are hassle-free․ Whether you’re a keto enthusiast or just exploring low-carb options, chaffles provide a satisfying and flavorful experience that’s hard to resist․ Embrace the chaffle trend and enjoy the freedom to experiment with countless variations!

Encouragement to Try Chaffles

Don’t hesitate to dive into the world of chaffles! These versatile, low-carb creations are perfect for any meal, offering a delicious alternative to traditional waffles․ With simple ingredients like eggs and cheese, chaffles are easy to make and customizable to your taste․ Whether you’re following a keto diet or just seeking a healthier option, chaffles provide a satisfying and flavorful experience․ Experiment with sweet or savory variations, and explore the endless possibilities for breakfast, lunch, or even dessert․ Grab a Chaffle Recipes PDF and start cooking—your taste buds and dietary goals will thank you!