Archive title

Autem vel eum iriure dolor in hendrerit in vulputate velit esse molestie consequat, vel illum dolore eu feugiat nulla facilisis at vero eros et dolore feugait.

Monthly Archive May 21, 2025

measurement guide

Measurement guides are essential tools for ensuring accuracy and consistency in various fields. They provide detailed instructions and techniques for taking precise measurements, covering tools like calipers, tape measures, and digital devices. These guides are crucial for fashion, engineering, and healthcare, helping professionals achieve reliable results and maintain high standards in their work. By following measurement guides, individuals can minimize errors and ensure that their measurements are clear, consistent, and actionable.

1.1 Importance of Accurate Measurements

Accurate measurements are fundamental to ensuring quality, reliability, and safety across various industries. They prevent errors, reduce waste, and enhance precision in tasks like engineering, fashion, and healthcare. Clear and consistent measurements facilitate effective communication and problem-solving. For instance, in fashion, precise body measurements ensure a perfect fit, while in engineering, they guarantee structural integrity. In healthcare, accurate measurements are critical for diagnoses and treatments. Investing time in proper measurement practices leads to better outcomes, increased efficiency, and higher customer satisfaction. Whether for creating garments or manufacturing parts, accuracy is essential for achieving desired results and maintaining professional standards.

1.2 Overview of Measurement Tools and Techniques

Measurement tools and techniques vary widely, catering to different industries and needs. Common tools include calipers, micrometers, tape measures, and digital devices, each offering precision for specific tasks. Techniques range from manual measurements to advanced methods like 3D scanning and laser tools. Technical illustrations with arrows and guidelines are often used to clarify measurement processes. These tools and techniques ensure accuracy, consistency, and efficiency in fields such as fashion, engineering, and healthcare. Proper selection and use of measurement tools are critical for achieving reliable results and maintaining high standards in professional and technical applications.

Types of Measurements

Measurements are categorized into body, technical, and environmental types. Body measurements are crucial for fashion and sewing, while technical measurements are used in engineering. Environmental measurements monitor scientific data, ensuring accuracy across various fields.

2.1 Body Measurements for Fashion and Sewing

Accurate body measurements are vital for fashion and sewing to ensure garments fit perfectly. Key measurements include bust, waist, hips, inseam, and outseam. For tops, measure around the bust and from shoulder to waist. Pants require waist, hip, and inseam measurements. Use a flexible tape measure and keep it level. Technical illustrations with arrows can guide precise measurement points. Documenting whether waistbands are stretched or relaxed is crucial for patterns. Clear instructions help others understand the process. Videos and tutorials demonstrate techniques for accuracy. These measurements form the foundation for creating custom-fit clothing, making them essential for sewists and fashion professionals alike.

2.2 Technical Measurements for Engineering

Technical measurements in engineering require precision and accuracy to ensure the proper dimensions of components and systems. Tools like calipers, micrometers, and coordinate measurement machines (CMMs) are commonly used. Workshops, such as those organized by NPL, focus on measuring engineered parts with hand tools. The ASME B89.7.2 standard provides guidelines for dimensional measurement planning, emphasizing best practices for CMM use. These measurements are critical for problem-solving, data analysis, and manufacturing. Accurate technical measurements ensure reliability and consistency, making them indispensable in engineering and related fields. They form the backbone of quality control and innovation in industrial applications.

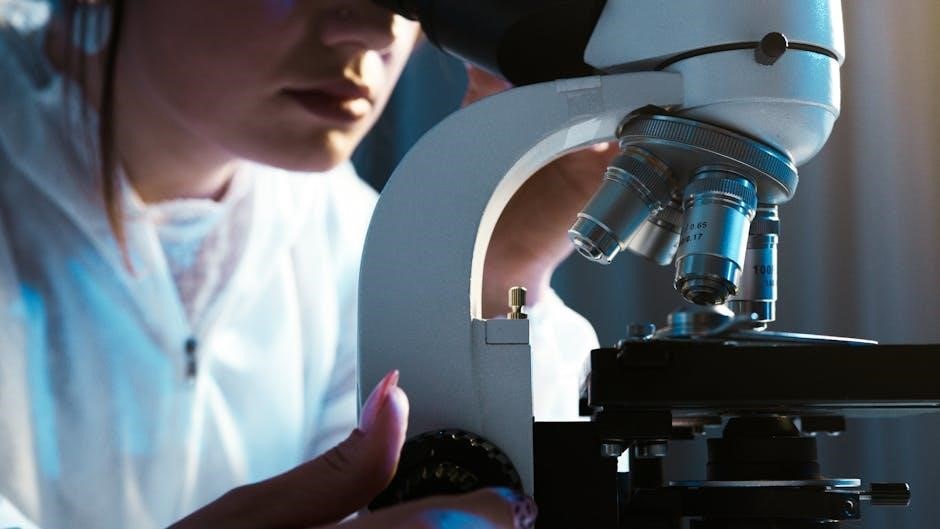
2.3 Environmental and Scientific Measurements

Environmental and scientific measurements are critical for understanding and monitoring natural systems. Tools like spectrometers and sensors are used to measure parameters such as air quality, water levels, and temperature. In scientific research, measurements often involve advanced techniques, including Fourier domain analysis and spatial domain conversions. These methods allow for precise data collection and analysis. Environmental measurements are essential for tracking climate change, ecosystem health, and pollution levels. Accurate scientific measurements enable researchers to draw reliable conclusions and inform policy decisions. They play a vital role in preserving our planet and advancing scientific knowledge across various disciplines.

Tools and Instruments for Measurement

Measurement tools range from basic hand tools like calipers and tape measures to advanced digital instruments. These devices ensure accuracy and precision in various fields, from engineering to fashion.

3.1 Calipers and Micrometers

Calipers and micrometers are precision tools for measuring dimensions accurately. Calipers are versatile, used for measuring diameters, depths, and distances between surfaces. Micrometers are ideal for smaller, intricate measurements, offering high precision. Both tools are essential in engineering and manufacturing for ensuring parts meet specifications. Proper calibration and technique are crucial to avoid errors. Regular maintenance ensures longevity and accuracy. These instruments are indispensable for achieving precise results in technical applications, making them cornerstone tools in many industries.

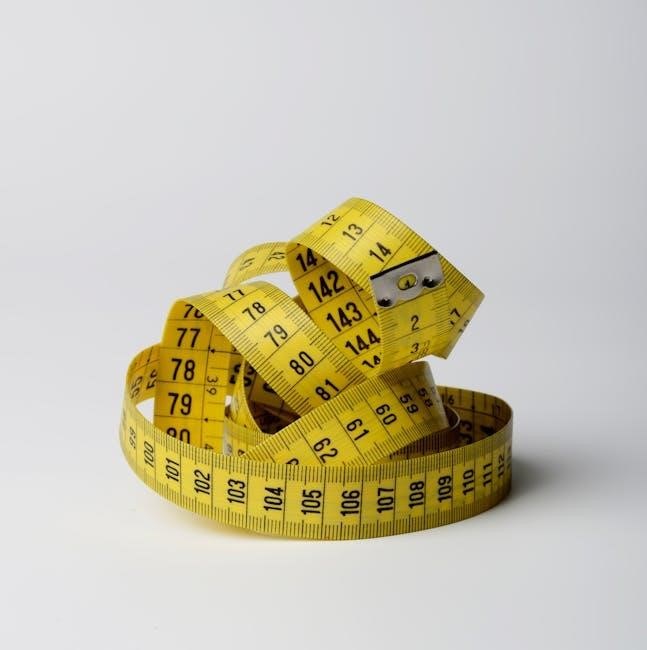
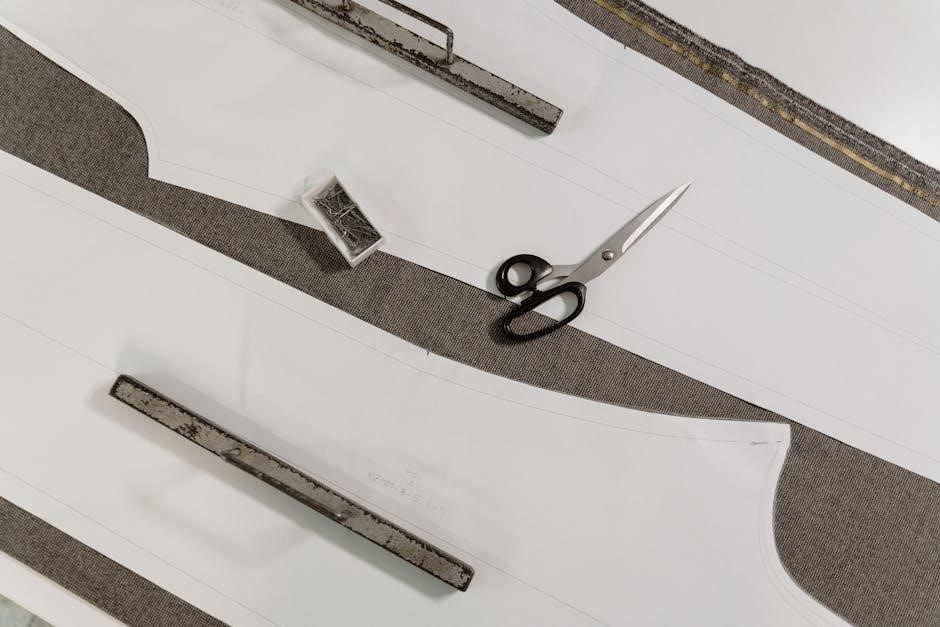
3.2 Tape Measures and Rulers

Tape measures and rulers are fundamental tools for measuring lengths and distances. Tape measures are flexible, making them ideal for body measurements in fashion and sewing, such as bust, waist, and hip circumference. Rulers provide straight-edge measurements, perfect for DIY projects and technical applications. Both tools are essential for ensuring accuracy in various tasks. When using tape measures, it’s important to keep the tape taut and aligned with the surface being measured. For rulers, clarity in markings and proper alignment are key to precise results. These tools are indispensable for everyday and professional use, offering reliability and simplicity in measurement tasks.

3.3 Digital Measurement Tools

Digital measurement tools offer advanced precision and efficiency for various applications. Laser measures provide quick and accurate distance calculations, while digital calipers are ideal for measuring small parts with high accuracy. These tools often feature data storage and Bluetooth connectivity, enabling easy transfer of measurements to devices for further analysis. Digital measuring tapes combine flexibility with electronic accuracy, making them versatile for both technical and everyday use. Their ability to convert units and store data enhances productivity, making them indispensable in engineering, construction, and scientific fields. Digital tools streamline workflows, ensuring reliable and efficient measurement processes.

Best Practices for Taking Measurements

Use calibrated tools, ensure clear documentation, and maintain consistency. Double-check measurements, use proper techniques, and verify results to ensure accuracy and reliability in all applications.

4.1 Ensuring Precision and Consistency

Ensuring precision and consistency in measurements requires using calibrated tools and following standardized techniques. Documenting each step clearly helps maintain accuracy and repeatability. For body measurements, consistent landmarks, like shoulder tips or hip bones, ensure reliability. In technical fields, using guidelines and technical illustrations with arrows can clarify measurement points. Regularly verifying tools and techniques minimizes errors. For example, stretching waistbands to a specific tension or using visual guides for armhole curves ensures consistency. Clear communication of methods and results is vital, especially in collaborative environments, to avoid misunderstandings and ensure everyone follows the same protocols.

4.2 Documenting Measurements Clearly

Documenting measurements clearly is crucial for accuracy and collaboration. Use photographs or technical flats with arrows to illustrate measurement points, ensuring clarity for others. Include details like stretched or relaxed states for elastic waistbands and specify landmarks for body measurements. Clear descriptions, such as “measure along the armhole seam from top to bottom,” prevent ambiguity. Organize data systematically, noting tools used and environmental conditions if relevant. This ensures consistency and reduces errors, especially in fields like fashion, engineering, and healthcare, where precise communication is vital for achieving accurate and reproducible results.

Understanding Measurement Uncertainty

Measurement uncertainty refers to the doubt associated with measurement results, crucial for reliable data analysis and problem-solving. It involves understanding statistical methods to calculate and report uncertainty accurately.

5.1 What is Measurement Uncertainty?

Measurement uncertainty is the doubt associated with the result of a measurement. It reflects the range of possible values within which the true value lies. Uncertainty arises from various sources, including instrument limitations, environmental factors, and human error. Understanding and quantifying uncertainty is crucial for reliable data analysis and decision-making. It ensures that measurements are reported with transparency and confidence, allowing for accurate assessments and comparisons. Properly addressing uncertainty enhances the credibility of results in fields like engineering, science, and healthcare, where precise and trustworthy data are essential for problem-solving and innovation.

5.2 Calculating and Reporting Uncertainty

Calculating measurement uncertainty involves statistical methods to quantify the range of possible values around a measured result. Techniques like maximum likelihood estimation (MLE) are often used to determine parameters from observed data. Reporting uncertainty requires clear documentation, stating the measured value along with its uncertainty range. Standards and guidelines, such as those from the National Institute of Standards and Technology (NIST), provide frameworks for accurate reporting. Properly calculated and reported uncertainty ensures transparency and credibility in scientific, engineering, and medical fields. It also helps in making informed decisions based on reliable data, fostering trust in the results and their applications.

Applications of Measurement Guides

Measurement guides are vital in fashion, engineering, and healthcare. They ensure accurate garment fitting, precise engineering specifications, and reliable medical assessments, enhancing quality and consistency across industries.

6.1 Fashion and Tailoring

In fashion and tailoring, measurement guides are indispensable for achieving precise fits. They detail how to measure body dimensions like bust, waist, and hips accurately. Technical illustrations and photographs are often used to clarify measurement points, ensuring consistency. For example, tutorials demonstrate how to measure armhole curves or elastic waistbands. These guides help create custom patterns and garments that fit perfectly, reducing the need for alterations. By following these standards, tailors and sewists can ensure their creations are both functional and flattering, catering to individual body types and styles effectively.

6.2 Engineering and Manufacturing

In engineering and manufacturing, measurement guides play a critical role in ensuring precision and quality. They outline best practices for using tools like calipers, micrometers, and CMMs to measure engineered parts accurately. Standards such as ASME B89.7.2 emphasize the importance of dimensional measurement planning. Workshops and resources, like those from NPL, provide hands-on training and tips for selecting the ideal measurement system; These guides help organizations maintain consistency, reduce errors, and comply with industry standards. By adhering to these protocols, engineers and manufacturers can achieve high levels of accuracy, ensuring the reliability and performance of their products.

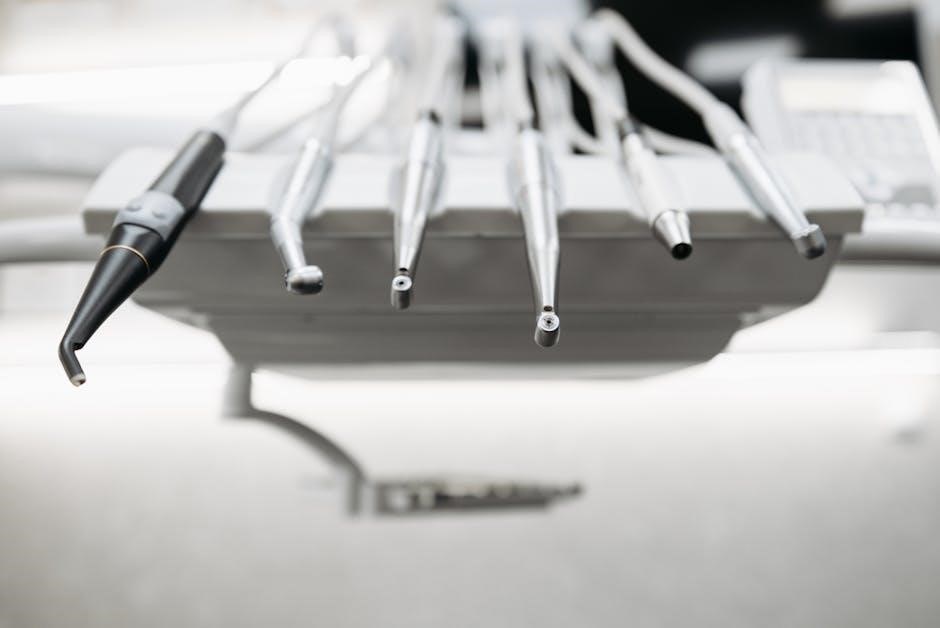
6.3 Healthcare and Medical Fields

In healthcare, measurement guides are vital for ensuring accurate assessments and treatments. They detail methods for using tools like digital scales, thermometers, and ECG machines. Reliable measurements are crucial for diagnosing conditions, monitoring progress, and administering medications. For instance, precise body measurements guide prosthetics and orthotics. Additionally, measurement guides help in calibrating medical equipment to maintain accuracy. In research, they ensure data integrity. Poor measurement practices can lead to misdiagnoses or ineffective treatments, emphasizing the need for adherence to established protocols. These guides are essential for maintaining patient safety and advancing medical science.

Advanced Measurement Techniques

Advanced techniques like laser measurement and 3D scanning offer high precision and efficiency. These tools enable detailed modeling and analysis, enhancing accuracy in complex applications across industries.

7.1 Using Laser Measurement Tools

Laser measurement tools offer unparalleled precision and efficiency in various industries. These devices use laser technology to measure distances, dimensions, and surfaces with high accuracy. Unlike traditional methods, lasers provide non-contact measurements, reducing the risk of damage to sensitive objects. They are widely used in engineering, construction, and quality control for tasks like aligning parts, inspecting surfaces, and calculating volumes. Advanced laser tools often integrate with software for real-time data analysis and 3D modeling. Their speed and reliability make them indispensable in modern manufacturing and scientific research, ensuring accurate and repeatable results in complex measurement scenarios.

7.2 3D Scanning and Modeling

3D scanning and modeling are advanced techniques that capture detailed digital representations of objects or environments. Using technologies like laser scanning or structured light, these tools create precise 3D models for analysis, design, and simulation. Widely applied in engineering, architecture, and healthcare, they enable accurate measurements of complex shapes and surfaces. The process involves capturing data points, which are then processed into a digital model. This technology enhances design accuracy, facilitates reverse engineering, and supports quality control. By integrating with CAD software, 3D scanning and modeling streamline workflows, improving productivity and innovation in various industries.

Resources and References

Explore tutorials, guides, and tools from organizations like NPL and National Instruments. These resources offer detailed measurement techniques, best practices, and advanced tools for precise data acquisition and analysis.

8.1 Recommended Measurement Guides and Tutorials

Discover a variety of resources, including tutorials from NPL and National Instruments, offering detailed measurement techniques. The iGUIDE system provides comprehensive guides for measuring properties. Videos and guides cover topics like body measurements for fashion, engineering tools, and scientific methods. Beginners can benefit from tutorials on uncertainty of measurement, while advanced users can explore 3D scanning and laser tools. These resources ensure accurate and efficient measurement practices across industries, helping professionals achieve precise results and maintain high standards in their work. They are essential for anyone looking to enhance their measurement skills and stay updated with the latest technologies.

8.2 Online Tools for Measurement Calculations

Utilize online tools like National Instruments’ DAQ systems and iGUIDE for precise measurement calculations. These platforms offer real-time data processing, 3D modeling, and advanced algorithms for complex measurements. Tools like NPL’s resources provide robust solutions for engineering and scientific applications. Online calculators for thickness, diameter, and shape measurements simplify tasks. Many tools are user-friendly, with cross-platform compatibility, ensuring accessibility for professionals and beginners alike. These resources enhance accuracy, efficiency, and innovation in measurement practices across industries, making them indispensable for modern applications.

Measurement guides are crucial for accuracy and consistency across industries. They provide essential tools and techniques, from traditional methods to advanced technologies like digital tools and 3D scanning. Embracing these resources ensures precision and efficiency, while staying updated on future trends like AI and IoT advancements in measurement technology.

9.1 Summary of Key Points

Measurement guides are vital for ensuring accuracy and consistency across various industries. They provide detailed instructions for using tools like calipers, tape measures, and digital devices. Key points include the importance of precise techniques, understanding measurement uncertainty, and documenting results clearly.
These guides are essential in fashion, engineering, and healthcare, offering methods to minimize errors and improve outcomes.
By following best practices and staying updated on advanced technologies, professionals can enhance their workflows and achieve reliable results.
Ultimately, measurement guides serve as foundational resources for anyone seeking to master the art of accurate measurement.

9.2 Future Trends in Measurement Technology

Advancements in measurement technology are expected to revolutionize industries through increased precision and automation. Laser-based tools and 3D scanning will become more prevalent, offering faster and more accurate data collection.
Integration of AI and machine learning will enhance analysis and reduce human error.
Portable and wireless devices will enable real-time measurements in diverse environments.
These innovations will streamline processes in engineering, healthcare, and fashion, ensuring higher efficiency and reliability.
As technology evolves, measurement guides will adapt, providing updated methods and tools to meet future demands.

lone working risk assessment pdf

Lone working risk assessments are essential for ensuring the safety of employees working alone, helping organizations identify hazards, evaluate risks, and implement control measures to mitigate them effectively.

Definition of Lone Working

Lone working refers to situations where employees work without direct supervision or support, often in isolated environments or during non-traditional hours. This includes tasks performed in remote locations, solitary roles, or jobs requiring independence. Lone workers may face unique risks due to the absence of immediate assistance, making risk assessments critical for their safety. The definition encompasses various scenarios, such as working alone on-site, in remote areas, or during night shifts. Understanding lone working is essential for implementing effective safety measures and ensuring compliance with workplace safety regulations. This concept is central to identifying hazards and developing strategies to protect employees in solitary work environments.

Importance of Risk Assessment for Lone Workers

Risk assessments are crucial for lone workers as they help identify and mitigate potential hazards associated with working alone. These evaluations ensure that employers take proactive measures to safeguard employees, reducing the likelihood of accidents and injuries. By conducting thorough risk assessments, organizations can comply with legal requirements, enhance worker safety, and foster a culture of responsibility. Regular reviews of these assessments adapt to changing work conditions, ensuring ongoing protection. Ultimately, risk assessments are vital for protecting lone workers and maintaining a safe, compliant work environment.

Understanding Lone Working Risk Assessment

A lone working risk assessment is a systematic process to identify, evaluate, and mitigate risks associated with employees working alone, ensuring their safety and well-being.

What is a Lone Working Risk Assessment?

A lone working risk assessment is a systematic process to identify, evaluate, and mitigate risks associated with employees working alone. It involves analyzing specific work environments, tasks, and activities to determine potential hazards and their impact on lone workers. This assessment ensures that adequate control measures are implemented to eliminate or reduce risks, safeguarding employees’ health and safety. Organizations use lone working risk assessment templates, such as PDF guides, to streamline the process and ensure compliance with workplace safety regulations. By addressing unique challenges like isolation or limited emergency response, these assessments help create a safer work environment for lone workers across various industries and roles.

Purpose of Conducting a Lone Working Risk Assessment

The primary purpose of conducting a lone working risk assessment is to ensure the safety and well-being of employees who work alone. It helps identify potential hazards, evaluate risks, and implement control measures to mitigate them. This process ensures compliance with workplace safety legislation and protects organizations from legal consequences. By assessing risks specific to lone working, employers can create a safer environment, reduce incidents, and enhance emergency preparedness. The assessment also provides a framework for documenting risks and control measures, ensuring transparency and accountability. Regular reviews of the risk assessment are crucial to adapt to changing work conditions and maintain a robust safety strategy for lone workers.

Legal Requirements for Lone Working Risk Assessments

Employers are legally required to conduct lone working risk assessments to ensure a safe environment for employees, adhering to workplace safety legislation and avoiding potential legal consequences.

Workplace Safety Legislation and Lone Workers

Workplace safety legislation mandates employers to ensure the safety of lone workers through comprehensive risk assessments. Laws like the Health and Safety at Work Act 1974 require employers to identify and mitigate risks specific to lone working environments. These regulations apply to all industries, ensuring lone workers receive the same level of protection as other employees. Employers must conduct thorough risk assessments, implement control measures, and provide emergency protocols for lone workers. Non-compliance with these legal requirements can result in fines, penalties, and reputational damage. By adhering to workplace safety legislation, organizations can create a safer environment for lone workers, reducing potential hazards and ensuring legal compliance.

Consequences of Not Conducting a Risk Assessment

Failing to conduct a lone working risk assessment can lead to severe legal and financial repercussions. Employers may face fines, penalties, and legal action for non-compliance with workplace safety regulations. Without proper risk assessments, lone workers are exposed to heightened risks, increasing the likelihood of accidents, injuries, or even fatalities. Organizations may also suffer reputational damage, loss of public trust, and increased insurance costs. Additionally, legal consequences can include criminal charges against employers for negligence. Proactively conducting risk assessments ensures compliance with safety laws, protects employees, and avoids costly legal and financial fallout. It is crucial for employers to prioritize lone worker safety through thorough risk assessments to prevent these negative outcomes.

The Process of Conducting a Lone Working Risk Assessment

Conducting a lone working risk assessment involves identifying hazards, evaluating risks, and implementing control measures to ensure the safety of employees working alone.

Identifying Hazards in Lone Working Environments

Identifying hazards in lone working environments involves systematically evaluating potential risks that lone workers may face. These hazards can be environmental, task-specific, or health-related. Environmental hazards include isolated locations, poor lighting, or extreme weather conditions. Task-specific risks may involve handling hazardous materials, operating heavy machinery, or performing physically demanding tasks without assistance. Health-related risks include pre-existing medical conditions or mental health challenges that may worsen when working alone. Additionally, lone workers may face increased risks of violence, theft, or accidents due to the lack of immediate support or emergency response. A thorough hazard identification process ensures that all potential risks are recognized and addressed, enabling organizations to implement effective control measures and ensure a safer working environment for lone workers.

Evaluating Risks Associated with Lone Working

Evaluating risks associated with lone working involves assessing the likelihood and potential impact of identified hazards. This step ensures that risks are prioritized based on their severity and likelihood of occurrence. Organizations should consider factors such as the worker’s environment, task complexity, and individual vulnerabilities. For example, environmental risks like poor lighting or isolated locations may pose higher threats, while task-specific risks like handling hazardous materials require careful evaluation. Health-related risks, such as pre-existing medical conditions, should also be assessed to determine their potential impact. By evaluating risks systematically, organizations can prioritize mitigation efforts, ensuring that the most critical risks are addressed first. This evaluation aligns with legal requirements and best practices for workplace safety, helping to create a safer environment for lone workers.

Implementing Control Measures

Implementing control measures is crucial to mitigate risks identified during the lone working risk assessment. These measures should be tailored to address specific hazards, ensuring the safety of lone workers. Common control measures include providing personal protective equipment (PPE), installing emergency communication devices, and establishing regular check-in protocols. Additionally, training lone workers on emergency procedures and first aid can significantly reduce risks. Organizations should also consider implementing buddy systems or real-time monitoring technologies to enhance safety. It is essential to review and update control measures periodically to ensure their effectiveness. By implementing these measures, organizations can create a safer working environment for lone workers, reducing the likelihood of incidents and ensuring compliance with legal requirements. Effective control measures are vital for safeguarding lone workers and promoting a culture of safety within the organization.

Key Elements of a Lone Working Risk Assessment

A lone working risk assessment involves hazard identification, risk evaluation, and control measures to ensure the safety of employees working alone, addressing specific workplace challenges effectively.

Hazard Identification

Hazard identification is the first step in a lone working risk assessment, focusing on recognizing potential dangers in the work environment, tasks, or activities. This process involves evaluating specific risks such as environmental hazards, like isolated locations or extreme weather, and task-specific risks, such as handling heavy equipment or hazardous materials. Additionally, it considers health-related risks, including pre-existing medical conditions that may be exacerbated by lone working. The goal is to identify who might be affected and how, ensuring that all possible threats are documented and addressed. By systematically identifying hazards, organizations can develop targeted strategies to mitigate risks and ensure the safety of lone workers. This step is crucial for creating a comprehensive risk assessment document, such as a lone working risk assessment PDF, which guides safety protocols and emergency procedures.

Risk Evaluation and Prioritization

Risk evaluation and prioritization are critical steps in lone working risk assessments, ensuring that identified hazards are analyzed for their potential impact and likelihood. This process involves categorizing risks as high, medium, or low, based on their severity and probability of occurrence. By prioritizing risks, organizations can allocate resources effectively, addressing the most critical threats first. This step also ensures that control measures are implemented in a logical order, focusing on eliminating or reducing the highest risks. Proper evaluation and prioritization help create a structured approach to mitigating dangers, ensuring the safety of lone workers and compliance with legal requirements. This process is often documented in a lone working risk assessment PDF, providing a clear record of risk management decisions.

Control Measures and Emergency Procedures

Control measures and emergency procedures are vital components of a lone working risk assessment, ensuring that risks are mitigated and workers are protected. These measures may include the use of communication devices, regular check-in protocols, and emergency response plans. Employers must implement controls that address specific hazards identified during the risk assessment, such as providing personal alarms or ensuring access to emergency services. Emergency procedures should outline steps for immediate response, including first aid, evacuation plans, and communication with supervisors. Documenting these measures in a lone working risk assessment PDF ensures clarity and accountability, helping organizations maintain a safe working environment for lone workers and comply with legal requirements.

Common Risks Faced by Lone Workers

Lone workers face risks like environmental hazards, task-specific dangers, and health-related issues, requiring tailored safety measures to ensure their protection in isolated work environments.

Environmental Hazards

Environmental hazards pose significant risks to lone workers, particularly in remote or isolated locations. These hazards include extreme weather conditions, such as heavy rain, snow, or heat, which can make working conditions dangerous. Additionally, lone workers may face risks from uneven terrain, poor lighting, or limited visibility, increasing the likelihood of accidents. Inadequate ventilation in confined spaces or exposure to harmful substances can also threaten their safety. Furthermore, lone workers in urban areas may encounter hazards like traffic accidents or criminal activities. Assessing these environmental risks is crucial to ensure lone workers are equipped with the necessary precautions and emergency protocols to mitigate potential dangers. Proper risk assessment helps organizations implement control measures, such as weather monitoring systems or improved lighting, to safeguard lone workers in challenging environments.

Task-Specific Risks

Task-specific risks are hazards directly related to the nature of the work lone workers perform. For example, manual handling tasks, such as lifting heavy objects, can lead to injuries if proper techniques are not followed. Lone workers engaged in maintenance or repair tasks may face risks from machinery malfunctions or electrical hazards. Additionally, tasks requiring the use of hazardous substances or tools can pose significant dangers, especially without immediate assistance. Assessing these risks involves evaluating the specific tasks, the tools involved, and the worker’s ability to perform them safely. Implementing control measures, such as regular equipment checks and proper training, is essential to minimize these risks and ensure lone workers can perform their duties safely and effectively.

Health-Related Risks

Health-related risks for lone workers are critical to address, as they can arise from pre-existing medical conditions or develop due to the nature of the work. Workers with health conditions, such as epilepsy or heart issues, may face heightened risks when working alone, as immediate assistance may not be available. Additionally, lone workers may experience stress or fatigue, which can exacerbate existing health issues. Employers must conduct medical assessments to identify at-risk employees and provide necessary accommodations, such as emergency response systems or regular check-ins. Ensuring lone workers have access to personal protective equipment (PPE) and training on managing health emergencies is also vital. Regular health monitoring and stress management programs can further mitigate these risks, ensuring a safer working environment for lone workers.

Tools and Resources for Lone Working Risk Assessment

Essential tools include lone working risk assessment templates, checklists, and PDF documentation to identify hazards and implement control measures effectively for lone worker safety.

Lone Working Risk Assessment Templates

Lone working risk assessment templates are structured tools designed to help organizations systematically identify and evaluate hazards specific to lone workers. These templates typically include sections for hazard identification, risk evaluation, and control measures implementation. They are often provided in PDF format for easy distribution and completion, ensuring consistency across different departments or locations. By using these templates, employers can ensure compliance with legal requirements and maintain a proactive approach to workplace safety. The templates are adaptable to various industries and work environments, making them a versatile resource for safeguarding lone workers. Regular updates to these templates help reflect changing work conditions and new safety standards, ensuring they remain effective and relevant over time.

Checklists for Lone Worker Safety

Checklists for lone worker safety are practical tools designed to help employers and employees systematically assess and mitigate risks associated with lone working. These checklists typically include questions and guidelines to evaluate work environments, tasks, and potential hazards. They often cover aspects such as communication protocols, emergency procedures, and access to safety equipment. By using these checklists, organizations can ensure compliance with safety regulations and identify specific risks that lone workers may face. Regular reviews of these checklists help maintain their relevance and effectiveness. They are particularly useful for roles involving remote work, night shifts, or isolated locations, providing a clear framework to prioritize worker safety and well-being.

PDF Templates for Documentation

PDF templates for lone working risk assessments provide a structured and professional format for documenting hazards, risks, and control measures. These templates are designed to be user-friendly, ensuring that all necessary information is captured systematically. They often include sections for hazard identification, risk evaluation, and implementation of safety measures. PDF templates are particularly useful for organizations looking to maintain clear and accessible records of their risk assessments. Many templates are customizable, allowing businesses to tailor them to their specific needs and industry requirements. By using PDF templates, organizations can ensure consistency and compliance with safety regulations while providing a clear reference point for managers and lone workers alike.

Best Practices for Lone Working Risk Assessment

Best practices include conducting thorough risk assessments, using templates, and ensuring compliance with safety regulations to protect lone workers effectively in all work environments.

Regular Review and Update of Assessments

Regularly reviewing and updating lone working risk assessments ensures they remain relevant and effective. Organizations should revisit assessments whenever work conditions, tasks, or environments change. This includes new equipment, procedures, or employee roles. Reviews should involve both managers and lone workers to ensure accuracy and address emerging risks. Updates should be documented and communicated to all relevant parties. Regular reviews also help maintain compliance with legal requirements and adapt to evolving safety standards. By periodically reassessing hazards and control measures, organizations can continuously improve safety protocols and protect lone workers more effectively. This proactive approach fosters a safer work environment and demonstrates a commitment to employee well-being.

Training for Lone Workers

Training is crucial for lone workers to understand risks and safety protocols. It equips them with skills to handle emergencies and communicate effectively. Organizations should provide regular sessions on hazard identification, emergency procedures, and the use of safety equipment. Training should also cover how to complete risk assessments and report incidents. Including scenario-based exercises helps prepare workers for real-life situations. Refresher courses ensure knowledge stays up-to-date. Employers must document training and ensure all lone workers participate. Proper training fosters a culture of safety, empowering workers to take responsibility for their well-being and others. It also helps organizations comply with legal requirements and reduce workplace incidents.

Communication and Emergency Protocols

Effective communication and emergency protocols are vital for lone worker safety. Regular check-ins via phone, GPS, or apps ensure employers monitor worker locations and well-being. Emergency protocols, such as panic buttons or alarms, enable quick responses during crises. Workers should know emergency contact procedures and have access to reliable communication devices. Employers must test these systems regularly to ensure functionality. Clear communication plans and emergency protocols minimize risks and provide reassurance to lone workers, ensuring timely assistance when needed. These measures are essential for preventing incidents and safeguarding employees in isolated or high-risk environments.

Case Studies and Examples

Real-life scenarios highlight lone working risks and successful risk assessment implementations. Examples from healthcare, fieldwork, and remote industries demonstrate effective hazard identification and emergency response strategies.

Real-Life Scenarios of Lone Working Risks

Real-life scenarios of lone working risks often involve healthcare workers, fieldworkers, and remote employees. For instance, a healthcare worker visiting patients at home may face risks like violent behavior or slips, trips, and falls. Fieldworkers in isolated areas might encounter environmental hazards such as extreme weather or wildlife. Remote IT employees working from home could experience ergonomic risks or mental health challenges due to isolation. These scenarios highlight the importance of tailored risk assessments to address specific hazards. By analyzing these real-life examples, organizations can better understand the unique challenges lone workers face and implement targeted safety measures. Such case studies are often detailed in lone working risk assessment PDF guides, providing practical insights for employers and employees alike.

Successful Implementation of Risk Assessments

Successful implementation of lone working risk assessments involves clear communication, proper training, and regular reviews. Organizations must ensure that lone workers understand the risks and control measures outlined in the assessment. Employers should provide regular training sessions to equip lone workers with the skills to handle emergencies and maintain safety. Additionally, implementing robust communication systems, such as check-in protocols or emergency response plans, is crucial. Regular reviews of the risk assessment ensure that it remains relevant and effective in addressing evolving workplace conditions. By fostering a culture of safety and accountability, organizations can successfully protect lone workers and minimize risks. Real-world examples often highlight how well-executed risk assessments have prevented incidents and improved overall workplace safety.

Lone working risk assessments are crucial for ensuring worker safety, identifying hazards, evaluating risks, and implementing control measures to protect employees working alone, ensuring compliance with legal standards.

Lone working risk assessments are vital for safeguarding employees who work alone. They involve identifying hazards, evaluating risks, and implementing control measures to ensure safety. Legal requirements mandate these assessments to protect lone workers from unique challenges. Organizations must regularly review and update their risk assessments to adapt to changing work environments. Training, communication, and emergency protocols are critical components of a comprehensive safety strategy. Utilizing templates and checklists can streamline the process, ensuring thorough hazard identification and mitigation. By prioritizing lone worker safety, organizations foster a culture of responsibility and compliance, ultimately reducing risks and enhancing worker well-being. Effective risk assessments are essential for preventing incidents and ensuring a safe working environment for all lone workers.

Final Thoughts on Ensuring Lone Worker Safety

Ensuring lone worker safety requires a proactive and comprehensive approach. Organizations must prioritize regular risk assessments, effective communication, and robust emergency protocols. Providing thorough training and using tailored templates can significantly enhance safety measures. Employers should foster a culture of vigilance, encouraging lone workers to report hazards and stay connected. By staying compliant with legal requirements and continuously updating safety strategies, organizations can protect their lone workers effectively. Ultimately, investing in the safety of lone workers not only prevents incidents but also boosts morale and operational efficiency, creating a safer and more responsible work environment for everyone.

nce practice exam pdf

The NCE Practice Exam PDF offers a comprehensive tool for exam preparation, simulating real test conditions and helping candidates identify strengths and weaknesses effectively.

1.1 Overview of the National Counselor Examination (NCE)

The National Counselor Examination (NCE) is a standardized test required for licensure and certification in counseling professions across the United States. Administered by the National Board for Certified Counselors (NBCC), it assesses knowledge, skills, and competencies essential for professional practice. The exam consists of 160 multiple-choice questions, covering topics such as human growth and development, career development, group work, assessment, and professional orientation. Candidates have 3 hours and 45 minutes to complete the test. The NCE is designed to ensure that counselors meet the minimum standards for safe and effective practice, making it a critical step in becoming a licensed professional. Its content reflects the foundational knowledge required for ethical and competent counseling services.

1.2 Importance of Practice Exams in Preparation

Practice exams are indispensable for effective preparation for the National Counselor Examination (NCE). They provide candidates with the opportunity to assess their readiness, identify knowledge gaps, and refine test-taking strategies. By simulating real exam conditions, practice exams help individuals become familiar with the format, timing, and question types, reducing anxiety and improving confidence. Regular use of practice exams allows candidates to track progress, focus on weak areas, and develop a study plan tailored to their needs. Additionally, practice exams enhance critical thinking and problem-solving skills, which are essential for success on the NCE. Consistent use of these resources ensures a more polished and prepared approach to the actual exam, ultimately leading to better performance and outcomes.

1.3 Benefits of Using NCE Practice Exam PDFs

NCE Practice Exam PDFs provide numerous benefits for exam preparation. They offer interactive scoring and immediate feedback, allowing candidates to track their progress and understand their mistakes. Detailed answer explanations help deepen understanding of complex topics. The PDF format ensures portability and accessibility, enabling study anywhere, anytime. These resources simulate real exam conditions, including timing and question structure, to build familiarity and confidence. Additionally, they cover a wide range of topics, mirroring the actual NCE, and help identify strengths and weaknesses. By using NCE Practice Exam PDFs, candidates can refine their test-taking strategies, improve time management, and develop a focused study plan. These tools are essential for achieving a high score and gaining licensure as a professional counselor.

Structure and Content of the NCE Practice Exam PDF

The NCE Practice Exam PDF features exam-style questions, realistic simulations, and detailed answer explanations, mirroring the actual exam’s timing, format, and content to aid effective preparation.

2.1 Format and Question Types

The NCE Practice Exam PDF mirrors the actual exam’s format, featuring multiple-choice questions, case studies, and scenario-based queries. It includes timed sections to simulate real test conditions, ensuring candidates adapt to the exam’s pacing. The questions cover a wide range of counseling topics, from theoretical concepts to practical applications, reflecting the exam’s content. Detailed answer explanations are provided for each question, helping candidates understand their mistakes and improve their knowledge. The PDF also includes interactive scoring, allowing users to track their progress and identify areas needing further study. This realistic simulation helps build confidence and test-taking skills, ensuring candidates are well-prepared for the actual NCE exam.

2.2 Topics Covered in the NCE Exam

The NCE Practice Exam PDF covers a wide range of topics, including human growth and development, career development, group counseling, assessment, and research methods. It also addresses legal and ethical issues, multicultural counseling, and family therapy concepts. The questions are designed to test both theoretical knowledge and practical application, ensuring a comprehensive understanding of counseling principles. The PDF includes scenarios that simulate real-world counseling situations, helping candidates apply their skills effectively. By practicing with these topics, candidates can familiarize themselves with the exam’s content and improve their problem-solving abilities. This alignment with the actual NCE exam ensures that candidates are well-prepared for the types of questions they will encounter.

2.3 Simulating Real Exam Conditions

The NCE Practice Exam PDF is designed to mirror the actual exam experience, allowing candidates to familiarize themselves with the format and timing. By simulating real exam conditions, candidates can practice under time constraints, ensuring they manage their pacing effectively. The PDF includes full-length practice tests with questions structured similarly to the official NCE, helping candidates build stamina and reduce test-day anxiety. Additionally, the realistic simulation enables candidates to assess their readiness and identify areas needing improvement. This immersive practice experience ensures that candidates are not only prepared for the content but also for the pressure of the actual exam environment, ultimately enhancing their confidence and performance. Regularly simulating exam conditions is a proven strategy for achieving success on the NCE.

Key Features of NCE Practice Exam PDFs

  • Interactive Scoring: Instant score calculation for self-assessment.
  • Detailed Explanations: Comprehensive answers to improve understanding.
  • Time Management: Tools to enhance pacing and exam strategy.

3.1 Interactive Scoring and Feedback

NCE Practice Exam PDFs offer interactive scoring systems that provide immediate results, allowing candidates to track their performance accurately. These tools often include detailed feedback, explaining correct and incorrect answers to enhance understanding. Many resources also offer progress tracking, enabling users to monitor improvement over time. Some platforms provide video walkthroughs and expert insights, further enriching the learning experience. This feature is particularly useful for identifying areas needing attention and refining test-taking strategies. By simulating real exam conditions, these PDFs help candidates build confidence and readiness for the actual NCE. The combination of instant scoring and comprehensive feedback makes these resources invaluable for focused and effective preparation.

3.2 Detailed Answer Explanations

NCE Practice Exam PDFs provide detailed answer explanations for each question, helping candidates understand their mistakes and improve their knowledge. These explanations are often written by experts and include insights into why certain answers are correct or incorrect. Many resources also offer additional materials, such as video walkthroughs, to further clarify complex topics. This feature allows learners to gain a deeper understanding of the subject matter and develop a stronger grasp of counseling concepts. By reviewing these explanations, candidates can identify gaps in their knowledge and focus their study efforts more effectively. The educational value of these explanations makes them an essential component of effective NCE preparation, ensuring a thorough understanding of the material. This approach fosters long-term learning and exam success.

3.4 Time Management and Pacing

NCE Practice Exam PDFs emphasize the importance of time management and pacing, as the actual exam is timed. These resources often include timed sections that simulate real exam conditions, helping candidates practice allocating their time effectively. By completing practice exams under time constraints, individuals can identify areas where they may spend too much time and develop strategies to manage their pace better. This feature is crucial for reducing test-day anxiety and ensuring candidates can complete all questions within the allotted time. Mastering time management through these practice exams is essential for improving overall performance and confidence in taking the NCE.

How to Use NCE Practice Exam PDFs Effectively

Use NCE Practice Exam PDFs to identify strengths, create targeted study plans, and improve test performance by simulating exam conditions and tracking progress systematically.

4.1 Identifying Strengths and Weaknesses

Using NCE Practice Exam PDFs helps candidates pinpoint their strengths and areas needing improvement. By completing practice tests, individuals can assess their performance across various topics, such as counseling theories, ethical standards, and assessment techniques. The exams provide immediate scoring, allowing users to track progress and identify gaps in knowledge. Detailed answer explanations further clarify incorrect responses, enabling learners to understand their mistakes and focus on weak areas. This process fosters a data-driven approach to study, ensuring time is allocated efficiently. Regularly reviewing results helps build confidence in strong areas while addressing vulnerabilities. This targeted identification of strengths and weaknesses is essential for creating an effective study plan tailored to individual needs. Consistent practice enhances overall readiness for the actual NCE exam.

4.2 Developing a Study Plan

Creating a structured study plan is crucial for effective NCE exam preparation. Begin by assessing your performance on practice exams to identify areas requiring attention. Allocate specific time slots for each topic, focusing more on weaknesses while reinforcing strengths. Utilize the detailed answer explanations in NCE Practice Exam PDFs to address gaps in knowledge. Incorporate a mix of practice questions, review sessions, and theoretical study to maintain a balanced approach. Set realistic goals and track progress regularly. Leverage official study guides and trusted test prep resources to enhance your strategy. Consistency is key; stick to your plan and adjust as needed based on performance improvements. A well-organized study plan ensures efficient use of time and maximizes exam readiness.

4.3 Strategies for Improving Test Performance

To enhance test performance, focus on simulating real exam conditions using NCE Practice Exam PDFs. Time yourself strictly to build stamina and pacing skills. Review each question thoroughly, analyzing correct and incorrect answers to understand patterns and areas for improvement. Prioritize understanding concepts over memorization, as this fosters long-term retention. Utilize interactive scoring to track progress and identify recurring weaknesses. Incorporate active learning techniques, such as summarizing key points or teaching concepts to others. Stay consistent with practice, gradually increasing difficulty to mirror exam challenges. Finally, maintain a positive mindset and manage test anxiety through relaxation techniques. By combining these strategies, candidates can optimize their performance and approach the NCE with confidence.

Popular Resources for NCE Practice Exam PDFs

Official study guides, trusted test prep providers like iPREP, and free online practice tests are top resources for NCE exam preparation, offering realistic questions and detailed feedback.

5.1 Official Study Guides and Materials

Official study guides and materials, such as those provided by Dr. Andrew Helwig, are essential resources for NCE preparation. These guides include comprehensive practice exams, detailed answer explanations, and expert-written questions that mirror the actual exam content. They cover all areas tested on the NCE, ensuring a thorough understanding of key concepts. Many official materials also offer realistic simulations of the exam environment, complete with timing and question structure. Additionally, these resources often include instant scoring and feedback, allowing candidates to track their progress and identify areas for improvement. By leveraging official study guides, aspiring counselors can gain confidence and readiness for the licensure exam, ensuring they are well-prepared for success.

5.2 Trusted Test Prep Providers

Trusted test prep providers like iPREP offer high-quality NCE practice exam resources, including full test prep courses and free sample questions. These providers ensure their materials are aligned with the actual exam content, offering realistic simulations and detailed explanations. Many platforms provide instant scoring, video walkthroughs, and expert-written questions to help candidates assess their readiness. For example, iPREP’s NCE test prep course includes comprehensive practice exams with full explanations, enabling candidates to identify gaps in their knowledge. These resources are designed to simulate real exam conditions, including timing and question structure, helping candidates build confidence and improve test-taking skills. By leveraging these trusted providers, aspiring counselors can access reliable and effective study tools to enhance their preparation journey. These platforms are widely recognized for their accuracy and relevance to the NCE exam format.

5.3 Free Online Practice Tests

Free online practice tests are an invaluable resource for NCE preparation, offering candidates the opportunity to assess their readiness without cost. Many platforms provide 50 exam-style questions, allowing users to identify gaps in their knowledge. These tests often include instant scoring, enabling immediate feedback on performance. Detailed answer explanations are also available, helping candidates understand their mistakes and improve. Some resources require no registration, making them easily accessible. For example, free NCE practice exams offer realistic simulations of the actual test, covering a wide range of topics. These tools are designed to help candidates familiarize themselves with the exam format and timing, ensuring they are well-prepared for the real test. Utilizing these free resources can significantly enhance one’s study plan and overall performance. They are a cost-effective way to gain confidence and readiness for the NCE exam.

Tips for Maximizing NCE Practice Exam Results

Simulate real exam conditions, review mistakes, and stay motivated to enhance performance. Consistent practice and focused study plans are key to achieving optimal results.

6.1 Creating a Realistic Test Environment

Simulating real exam conditions is crucial for effective preparation. Create a quiet, dedicated space free from distractions, mirroring the actual test setting. Use a computer or device similar to what you’ll use on exam day to ensure familiarity. Set a timer to adhere to the exam’s time limits, helping you practice pacing and time management. Replicate the exam format by using the NCE Practice Exam PDF to familiarize yourself with question types and structures. Review your results to identify areas for improvement. By mimicking the exam environment, you build confidence and reduce anxiety, ensuring a smoother experience on test day;

6.2 Reviewing and Learning from Mistakes

Reviewing mistakes is a critical step in improving test performance. After completing an NCE Practice Exam PDF, carefully analyze incorrect answers to understand where gaps in knowledge exist. Use the detailed explanations provided to clarify complex topics and reinforce learning. Focus on identifying patterns in errors, such as recurring themes or question types that pose challenges. Retake practice tests to apply lessons learned and track progress over time. This iterative process helps build confidence and ensures a stronger grasp of the material. By addressing weaknesses systematically, candidates can approach the actual exam with greater preparedness and reduce the likelihood of repeating mistakes.

6.3 Staying Motivated and Consistent

Staying motivated and consistent is essential for effective NCE exam preparation. Set realistic goals and celebrate small achievements to maintain momentum. Use the NCE Practice Exam PDF to track progress and identify areas for improvement. Regularly reviewing mistakes and understanding explanations helps build confidence. Incorporate breaks and self-care to avoid burnout. Surround yourself with supportive resources and study groups to stay engaged. Consistency in practice ensures familiarity with exam formats and question types. Remind yourself of the importance of becoming a licensed counselor to stay driven. By committing to regular study sessions and leveraging practice exams, candidates can maintain motivation and achieve their goals. Stay focused, persistent, and positive throughout the preparation journey.

Common Challenges and Solutions

Common challenges include test anxiety, complex questions, and balancing study with practice. Solutions involve deep breathing, detailed explanations, and structured study plans to enhance preparation.

7.1 Managing Test Anxiety

Test anxiety is a common challenge for many candidates preparing for the NCE exam. To manage this, it’s essential to create a realistic test environment during practice. Simulating exam conditions helps reduce unfamiliarity and builds confidence. Utilize NCE practice exam PDFs to familiarize yourself with the format and timing, allowing you to focus on content rather than stress. Practice exams also provide instant scoring and detailed explanations, enabling you to identify areas for improvement. Additionally, relaxation techniques such as deep breathing and short breaks can help calm nerves. Consistent practice and reviewing mistakes can further alleviate anxiety by reinforcing preparedness. By addressing anxiety proactively, candidates can approach the exam with greater composure and focus.

7.2 Understanding Complex Question Types

Complex question types on the NCE exam can be challenging, but practice exams help candidates gain clarity. NCE practice exam PDFs often include a variety of question formats, such as scenario-based, multiple-choice, and case study questions. These resources provide detailed explanations for each answer, enabling candidates to understand the reasoning behind correct and incorrect responses. Regular practice helps identify patterns and common themes in complex questions, improving critical thinking and problem-solving skills. Additionally, many practice exams offer video walkthroughs and expert insights, further breaking down difficult concepts. By consistently engaging with these materials, candidates can develop effective strategies to tackle complex questions with confidence and accuracy, ensuring they are well-prepared for the actual exam.

7.3 Balancing Study and Practice

Balancing study and practice is crucial for effective NCE exam preparation. While studying provides foundational knowledge, practice exams refine test-taking skills and apply concepts in real scenarios. NCE practice exam PDFs offer a structured way to integrate both, ensuring a well-rounded approach. Regular practice helps identify gaps in understanding, allowing focused study on weaker areas. Conversely, studying without practice can leave candidates unprepared for the exam format and timing. A balanced approach involves dedicating time to both reviewing materials and completing practice tests. This dual strategy enhances retention, improves time management, and builds confidence. By combining comprehensive study with consistent practice, candidates can optimize their readiness for the NCE exam and achieve their best possible performance.

The NCE Practice Exam PDF is a valuable resource for exam preparation, helping candidates identify gaps, improve skills, and build confidence for success on test day.

8.1 Final Thoughts on NCE Preparation

Effective preparation for the NCE requires a strategic approach, combining comprehensive study materials with consistent practice. Utilizing NCE Practice Exam PDFs is crucial, as they provide realistic simulations of the actual exam, helping candidates assess their readiness and identify areas for improvement. These resources not only enhance test-taking skills but also build confidence and familiarity with the exam format. By leveraging detailed answer explanations and interactive scoring, aspirants can refine their understanding and address weaknesses. Consistent practice and thoughtful review of mistakes are essential for achieving success. Ultimately, integrating these tools into a well-structured study plan ensures a thorough preparation for the National Counselor Examination.

8.2 Encouragement for Aspiring Counselors

Becoming a licensed counselor is a rewarding journey that requires dedication and perseverance. Aspiring counselors should stay committed to their preparation, leveraging tools like NCE Practice Exam PDFs to build confidence and competence. Remember, every practice question and study session brings you closer to your goal. The effort invested in understanding exam formats and refining test-taking strategies will pay off on exam day. Stay motivated by focusing on the positive impact you will have on clients’ lives. With consistent practice and a growth mindset, you can overcome challenges and achieve success. Believe in your abilities and keep moving forward—your hard work will lead to a fulfilling career in counseling.

8.3 Next Steps After Completing Practice Exams

After completing NCE practice exams, the next steps involve reviewing results, identifying areas for improvement, and refining study strategies. Use the detailed feedback to focus on weak areas and reinforce strengths. Create a structured study plan, prioritizing topics where gaps exist. Consider supplementing your preparation with additional resources, such as official study guides or courses, to deepen your understanding. Stay motivated by celebrating progress and maintaining a consistent study routine. Remember, practice exams are tools to enhance readiness, so apply the insights gained to refine your approach. By staying committed and proactive, you can confidently move toward achieving your goal of becoming a licensed counselor.

ashworth scale pdf

The Ashworth Scale is a clinical tool assessing spasticity by measuring muscle tone resistance during passive stretching, widely used in neurological conditions like multiple sclerosis and spinal injuries.

Overview of the Ashworth Scale

The Ashworth Scale is a clinical tool designed to assess spasticity by measuring resistance in muscle tone during passive stretching. It is widely used in neurological conditions such as multiple sclerosis, spinal cord injuries, and stroke rehabilitation. The scale evaluates muscle response to movement, providing insights into spasticity severity. Originally developed in the 1960s, it has evolved into the Modified Ashworth Scale (MAS), which improves reliability and clinical applicability. The MAS uses a 0-4 scoring system, with half-point increments for precision, making it a standardized and practical tool for both clinical practice and research in neurology and rehabilitation settings.

Importance of the Ashworth Scale in Clinical Practice

The Ashworth Scale is a vital tool in clinical practice for assessing and managing spasticity in patients with neurological conditions. It provides a standardized method to measure muscle tone, aiding in diagnosis, treatment planning, and monitoring progress. By quantifying spasticity, the scale enables clinicians to evaluate the effectiveness of interventions and adjust therapies accordingly. Its widespread use in neurology and rehabilitation highlights its significance in improving patient outcomes and facilitating communication among healthcare providers. The Modified Ashworth Scale (MAS) further enhances its clinical utility with refined scoring and reliability.

History and Evolution of the Ashworth Scale

The Ashworth Scale was originally developed in the 1960s to measure spasticity, using a 0-5 grading system. Later, the Modified Ashworth Scale (MAS) was introduced in 1987, refining the scoring system to 0-4 with half-point scores for improved precision and reliability.

Development of the Original Ashworth Scale

The original Ashworth Scale was created in the 1960s to measure spasticity in patients with neurological conditions. It used a 0-5 grading system to assess muscle tone resistance during passive stretching, focusing on the “catch” response. While it provided a foundational tool for clinicians, its simplicity and lack of detailed criteria for each grade led to questions about reliability and sensitivity. Despite these limitations, it remained a widely used clinical tool for assessing spasticity in various neurological disorders.

The Modified Ashworth Scale (MAS) was introduced to address the limitations of the original Ashworth Scale, particularly its lack of sensitivity and inter-rater reliability; Developed by Bohannon and Smith in 1987, the MAS refined the scoring system, reducing it from a 0-5 to a 0-4 scale with half-point scores for greater precision. This modification improved clinical applicability and reliability, making it a more effective tool for assessing spasticity in neurological patients. The MAS also provided clearer definitions for each score, enhancing consistency among clinicians.

Key Improvements in the Modified Version

The Modified Ashworth Scale (MAS) introduced several key improvements over the original scale. It refined the scoring system to a 0-4 scale with half-point scores, enhancing precision and sensitivity. Clearer definitions for each score improved consistency among clinicians, reducing subjectivity. Additionally, the MAS emphasized standardized testing procedures, such as moving joints at a consistent speed, to ensure reliability. These changes addressed the original scale’s limitations, making the MAS a more robust and reproducible tool for assessing spasticity in clinical and research settings.

Structure of the Modified Ashworth Scale (MAS)

The Modified Ashworth Scale (MAS) assesses muscle tone through passive stretching, using a 0-4 scale with half-point scoring for precision. It evaluates resistance during joint movement.

Scoring System: 0 to 4 Scale

The Modified Ashworth Scale (MAS) uses a 0-4 scale to assess muscle tone, with half-point scoring for enhanced precision. A score of 0 indicates normal muscle tone, while 1 reflects slight resistance. 2 denotes moderate resistance throughout most of the range, and 3 signifies significant resistance, making movement difficult. A score of 4 represents rigid muscles with no movement. This system provides a standardized method to quantify spasticity, aiding in accurate clinical assessments and treatment planning.

Definitions of Each Score

The Modified Ashworth Scale (MAS) defines each score to standardize spasticity assessment. A score of 0 indicates no increase in muscle tone, reflecting normal function. 1 suggests slight resistance with a catch and release or minimal resistance at the end of the range; 2 denotes minimal resistance throughout most of the range after the catch. 3 indicates marked resistance, making movement difficult, while 4 signifies rigid muscles with no movement. These definitions ensure consistent interpretation across assessments.

Half-Point Scoring for Precision

The Modified Ashworth Scale (MAS) incorporates a half-point scoring system to enhance precision in assessing spasticity. This feature allows clinicians to differentiate subtle variations in muscle tone, improving the scale’s sensitivity. For example, a score of 1.5 might indicate resistance between slight and moderate levels. This refinement addresses the original Ashworth Scale’s limitations, providing a more nuanced evaluation of spasticity. The half-point system ensures more accurate and reliable measurements, benefiting both clinical practice and research applications.

Administration Guidelines

The Modified Ashworth Scale (MAS) requires proper patient positioning, standardized movement speed, and clear instructions to ensure accurate spasticity assessment; Patients are typically placed in a supine position, and joints are moved at a consistent speed to evaluate resistance and muscle tone effectively. This standardized approach ensures reliable and reproducible results across assessments.

Proper Patient Positioning

Proper patient positioning is essential for accurate assessment using the Modified Ashworth Scale (MAS). Patients are typically placed in a supine position to ensure relaxation and minimize external interference. For muscles primarily involved in flexion, the joint is positioned in maximal flexion before moving to maximal extension over one second. This movement helps assess resistance and spasticity effectively. The examiner must ensure the patient is relaxed to avoid voluntary muscle contractions, which could skew results. Clear communication with the patient is essential to maintain cooperation and reduce anxiety. The scale is applied to specific muscle groups, and the position may vary slightly depending on the joint being tested. Consistency in positioning and movement speed is vital to ensure reliable and reproducible measurements. Proper preparation also involves explaining the procedure to the patient, ensuring comfort, and minimizing any potential discomfort during the assessment. This standardized approach ensures accurate and comparable results across different assessments and clinicians.

Technique for Passive Stretching

The Modified Ashworth Scale (MAS) involves moving the joint through its range of motion at a controlled speed. For muscles primarily involved in flexion, the joint is moved from maximal flexion to maximal extension over one second. This allows the examiner to assess resistance and the presence of a catch. The movement should be smooth and consistent to ensure accurate results. The examiner applies a passive stretch to the muscle being tested, noting any increases in muscle tone or resistance. This technique helps evaluate spasticity levels effectively.

Standardized Movement Speed

The Modified Ashworth Scale (MAS) requires moving the joint at a consistent speed to ensure accurate spasticity assessment. For muscles primarily involved in flexion, the joint is moved from maximal flexion to maximal extension over one second. This standardized speed helps assess resistance and catch responses effectively. Consistency in movement speed ensures reliable and reproducible measurements, minimizing variability between assessments. This methodological rigor is essential for accurate spasticity evaluation and comparability across clinical settings.

Interpretation of MAS Scores

The Modified Ashworth Scale (MAS) scores range from 0 to 4, interpreting spasticity severity. A score of 0 indicates normal tone, while higher scores reflect increased resistance and rigidity.

Clinical Significance of Each Score

The Modified Ashworth Scale (MAS) scores (0-4) provide clear clinical insights into spasticity severity. A score of 0 indicates normal muscle tone, while 1 suggests mild spasticity with slight resistance. Score 2 reflects moderate resistance throughout the range of motion, potentially impacting movement. Score 3 indicates significant resistance, affecting functionality, and score 4 signifies severe rigidity, limiting movement entirely. These scores guide clinicians in diagnosing spasticity severity, tailoring treatments, and monitoring progress, ensuring personalized and effective care for patients with neurological conditions.

Impact on Patient Functionality

The Modified Ashworth Scale (MAS) scores directly correlate with patient functionality. Lower scores (0-1) indicate minimal impact on movement, allowing near-normal functional abilities. Moderate scores (2) may cause mild difficulty in performing daily tasks, while higher scores (3-4) significantly impair mobility and independence. Understanding the functional implications of each score helps clinicians tailor rehabilitation programs, addressing specific challenges and improving patient outcomes. This insight is crucial for enhancing quality of life and restoring functional capabilities in individuals with spasticity.

Monitoring Progress Over Time

The Modified Ashworth Scale (MAS) enables clinicians to track changes in spasticity levels over time, providing valuable insights into treatment efficacy. Regular assessments allow for the documentation of score improvements or deteriorations, helping to refine rehabilitation strategies. Consistent use of the MAS ensures reliable longitudinal data, which is essential for adjusting therapies and optimizing patient outcomes. This longitudinal monitoring capability makes the MAS a critical tool for managing spasticity and supporting long-term patient care effectively.

Applications in Clinical Practice

The Modified Ashworth Scale (MAS) is widely used in clinical settings to assess spasticity, aiding in diagnosing and managing neurological conditions like multiple sclerosis and spinal injuries effectively.

Use in Neurological Conditions

The Modified Ashworth Scale (MAS) is extensively applied in assessing spasticity in neurological conditions such as multiple sclerosis, spinal cord injuries, and stroke. It evaluates muscle tone resistance during passive stretching, providing insights into spasticity severity. Clinicians use the MAS to guide treatment decisions, monitor progress, and assess the effectiveness of interventions. Its standardized scoring system ensures consistency in evaluating patients with CNS lesions, making it a vital tool in neurology and rehabilitation settings. The MAS is also available as a downloadable PDF template for convenient clinical use.

Role in Rehabilitation Settings

The Modified Ashworth Scale (MAS) plays a critical role in rehabilitation by providing a standardized method to monitor spasticity in patients undergoing physical therapy. It helps clinicians assess the effectiveness of interventions and adjust treatment plans accordingly. The MAS is particularly useful in tracking progress over time, enabling tailored rehabilitation strategies. Its simplicity and reliability make it a practical tool for consistent communication among multidisciplinary teams, ensuring cohesive care in rehabilitation environments. This tool is essential for optimizing patient outcomes.

Case Studies and Practical Examples

The Modified Ashworth Scale (MAS) has been applied in numerous case studies to assess spasticity in patients with spinal cord injuries and multiple sclerosis. For instance, a study involving 30 patients with spinal cord injuries demonstrated the MAS’s reliability in evaluating lower limb spasticity. Another example highlighted its use in monitoring the effectiveness of interventions, such as botulinum toxin injections, in reducing spasticity in wrist flexors. These practical applications showcase the MAS’s value in clinical decision-making and treatment monitoring, providing clear, actionable insights for rehabilitation strategies.

Applications in Research

The Modified Ashworth Scale (MAS) serves as a cornerstone in research, evaluating spasticity interventions and providing a standardized outcome measure for studies on neurological conditions and treatments.

Evaluating Spasticity Interventions

The Modified Ashworth Scale (MAS) is widely used in research to evaluate the effectiveness of spasticity interventions. Its standardized scoring system allows clinicians to measure changes in muscle tone before and after treatments, such as pharmacological interventions, physical therapy, or surgical procedures. By providing a reliable and reproducible measure, the MAS helps determine the efficacy of various therapies in reducing spasticity. This makes it an essential tool in clinical trials and studies focused on improving outcomes for patients with neurological conditions.

Standardized Outcome Measure

The Modified Ashworth Scale (MAS) serves as a standardized outcome measure in clinical trials and research, providing a reliable method to assess spasticity. Its consistent scoring system ensures reproducible results across different assessors and time points. By quantifying muscle tone, the MAS allows researchers to evaluate the effectiveness of interventions and track changes in spasticity levels. This standardization makes it a valuable tool for comparing outcomes in clinical studies and ensuring accurate data collection.

Contribution to Research Studies

The Modified Ashworth Scale (MAS) significantly contributes to research by providing a standardized method to assess spasticity. Its reliability and consistency enable researchers to evaluate the effectiveness of interventions, such as pharmacological treatments or therapies. The scale’s ability to quantify muscle tone changes over time supports longitudinal studies, offering valuable insights into spasticity progression and treatment responses. This makes the MAS an essential tool for advancing understanding and developing evidence-based practices in neurology and rehabilitation.

Psychometric Properties

The Modified Ashworth Scale (MAS) demonstrates strong reliability and validity, with high inter-rater and intra-rater agreement, making it a robust tool for assessing spasticity in clinical and research settings.

Reliability and Validity

The Modified Ashworth Scale (MAS) has demonstrated strong inter-rater and intra-rater reliability, ensuring consistent assessments across clinicians and over time. Studies have shown high agreement among examiners, validating its use in clinical practice. The scale’s validity is supported by its ability to accurately measure spasticity in neurological conditions, such as spinal cord injuries and multiple sclerosis. Its clear scoring system enhances precision, making it a reliable tool for both clinical decision-making and research. This robust psychometric profile underscores its value in spasticity assessment.

Inter-Rater and Intra-Rater Reliability

The Modified Ashworth Scale (MAS) demonstrates strong inter-rater and intra-rater reliability, ensuring consistent assessments across clinicians and over time. Studies have shown high agreement among examiners when evaluating spasticity in patients with conditions like spinal cord injuries and multiple sclerosis. The scale’s clear scoring system and standardized testing procedures contribute to its reliability, making it a practical tool for both clinical practice and research. This consistency enhances its validity and applicability in neurological rehabilitation settings.

Sensitivity and Specificity

The Modified Ashworth Scale (MAS) exhibits moderate sensitivity and specificity in assessing spasticity, particularly in neurological populations. Its ability to detect subtle changes in muscle tone is enhanced by the half-point scoring system, improving sensitivity. Specificity is supported by clear definitions of each score, reducing ambiguity. While the MAS is effective in clinical practice, its subjectivity may limit its sensitivity and specificity in certain cases, requiring careful administration to ensure accurate and reliable assessments.

Comparison with Other Scales

The Modified Ashworth Scale (MAS) is often compared to the Tardieu Scale, with the MAS offering a more detailed scoring system and improved reliability for spasticity assessment.

Contrast with the Original Ashworth Scale

The Modified Ashworth Scale (MAS) differs from the original by introducing a more refined scoring system, reducing the scale from 0-5 to 0-4 with half-point options for greater precision. The MAS also provides clearer definitions for each score, enhancing consistency and reliability. Unlike the original, it emphasizes standardized testing procedures, such as moving joints at a consistent speed, to improve accuracy. These adjustments address the original scale’s limitations in sensitivity and inter-rater reliability, making the MAS more clinically applicable and reliable for spasticity assessment.

Comparison with the Tardieu Scale

The Modified Ashworth Scale (MAS) and the Tardieu Scale both assess spasticity but differ in approach. The MAS measures resistance during passive stretching on a 0-4 scale with half-points, focusing on muscle tone and catch. In contrast, the Tardieu Scale evaluates the angle of catch during slow movement and classifies spasticity based on velocity dependency; While the MAS is more widely used in clinical settings, the Tardieu Scale provides additional insights into the velocity-dependent nature of spasticity, offering complementary perspectives in patient assessment.

Advantages Over Other Spasticity Scales

The Modified Ashworth Scale (MAS) offers several advantages, including its simplicity, ease of administration, and widespread clinical acceptance. Its 0-4 scoring system with half-points provides greater precision in assessing spasticity compared to other scales. The MAS is also practical for use in both clinical and research settings, with downloadable PDF templates available for consistent documentation. Its focus on passive stretching and resistance makes it highly effective for evaluating muscle tone in neurological conditions, enhancing its reliability and applicability across diverse patient populations.

Limits and Challenges

The Ashworth Scale faces challenges, including reliance on examiner expertise, potential variability in interpretations, and the need for precise training to ensure consistency and accuracy.

Potential Limitations in Clinical Use

The Ashworth Scale has limitations, including its reliance on passive stretching and joint positioning, which may not fully capture dynamic spasticity. Its subjectivity requires skilled examiners, potentially leading to variability in scores. Additionally, the scale’s sensitivity to detect subtle changes in spasticity is debated, limiting its utility in monitoring progress. These factors highlight the need for consistent training and standardized protocols to enhance reliability in clinical practice and research applications.

Challenges in Standardization

Standardizing the Ashworth Scale is challenging due to variability in examiner techniques and patient conditions. Differences in passive stretching speed, joint positioning, and patient relaxation levels can lead to inconsistent scores. Additionally, the scale’s reliance on subjective interpretation of resistance and catch phenomena introduces variability. These factors highlight the need for rigorous training and standardized protocols to ensure reliability across clinicians and settings. Addressing these challenges is crucial for maintaining consistency in clinical and research applications.

Subjectivity in Scoring

The Ashworth Scale faces challenges with subjectivity in scoring due to its reliance on examiner interpretation. The 0-4 scale, while structured, leaves room for variability in assessing resistance and catch phenomena. Different clinicians may interpret muscle tone and spasticity differently, leading to inconsistent scores. This subjectivity can affect the reliability of assessments, particularly in clinical and research settings. Standardized training and clear guidelines are essential to minimize scoring variability and ensure consistent results across evaluations.

Future Directions

Future directions for the Ashworth Scale include integrating advanced technologies to enhance accuracy and expand its clinical applications, ensuring more objective and precise spasticity assessments.

Advancements in Spasticity Assessment

Advancements in spasticity assessment aim to enhance the Ashworth Scale’s accuracy and applicability. Emerging technologies, such as wearable devices and digital tools, are being integrated to provide real-time, objective measurements of muscle tone. These innovations allow for more precise data collection and analysis, reducing subjectivity in scoring. Additionally, AI-driven systems are being explored to automate assessments, ensuring consistency and reliability. Such advancements not only improve clinical decision-making but also expand the scale’s utility in research and personalized treatment plans for patients with neurological conditions.

Technological Integration

Technological advancements are enhancing the Ashworth Scale’s application, with digital tools and software streamlining administration and scoring. Downloadable Ashworth Scale PDF templates provide standardized formats for documentation, improving consistency in clinical and research settings. Digital platforms also enable real-time data collection and analysis, reducing errors and facilitating easier sharing among healthcare providers. These innovations ensure the scale remains a practical and accessible tool for assessing spasticity, supporting both clinical decision-making and research endeavors effectively.

Expanding Clinical Applications

The Ashworth Scale is increasingly being applied across diverse clinical settings, including rehabilitation centers and neurology departments, to assess spasticity in conditions like multiple sclerosis and spinal cord injuries. Its use extends to monitoring recovery progress and evaluating treatment efficacy. The availability of downloadable Ashworth Scale PDF templates has further broadened its accessibility, enabling healthcare providers to implement it consistently. This expansion ensures the scale remains a vital tool for improving patient care and outcomes in various clinical scenarios.

The Ashworth Scale remains a cornerstone in clinical practice and research, providing reliable spasticity assessment. Its evolution and validity ensure effective management and improved patient outcomes.

The Ashworth Scale is a clinical tool for assessing spasticity, measuring muscle tone resistance during passive stretching. The Modified Ashworth Scale (MAS) improved reliability with a 0-4 scoring system, including half-point precision. It is widely used in neurological conditions like multiple sclerosis and spinal injuries. The MAS aids in monitoring spasticity, guiding treatment, and evaluating interventions. Its standardized approach ensures consistency across assessments, making it invaluable in both clinical practice and research. This tool remains essential for enhancing patient care and advancing spasticity management.

Final Thoughts on the Ashworth Scale PDF

The Ashworth Scale PDF serves as a cornerstone for spasticity assessment, offering a standardized and reliable tool for clinicians and researchers. Its evolution into the Modified Ashworth Scale (MAS) has enhanced its clinical utility, providing a clear framework for evaluating muscle tone and guiding treatment. The availability of downloadable PDF templates ensures accessibility and consistency in application. As a widely accepted measure, the MAS continues to play a pivotal role in improving patient outcomes and advancing spasticity management in neurological care.

the tortoise and the hare story pdf

This classic fable by Aesop teaches the moral “slow and steady wins the race.” Available as a free PDF, it remains a popular educational resource worldwide.

1.1 Overview of the Fable

The fable of “The Tortoise and the Hare” is one of Aesop’s most renowned stories, highlighting the moral “slow and steady wins the race.” It revolves around a race between a speedy hare and a slow tortoise, showcasing how overconfidence leads to the hare’s downfall. The tortoise, despite his slowness, perseveres and ultimately wins. This timeless tale emphasizes perseverance, humility, and the dangers of arrogance. Available in PDF format, it remains a widely accessed resource for teaching moral lessons to children and adults alike. Its simplicity and profound message make it a cornerstone of educational materials worldwide.

1.2 Historical Background and Aesop’s Contribution

Aesop’s fable of “The Tortoise and the Hare” dates back to ancient times, with its origins traced to the 6th century BCE. Aesop, a Greek storyteller, crafted this tale to convey timeless moral lessons. The story is concise yet profound, making it one of his most enduring works. Its moral, “slow and steady wins the race,” has become a universal proverb. Aesop’s contribution lies in his ability to use simple narratives to impart wisdom, making the story accessible to all ages. The fable’s availability in PDF format ensures its continued relevance, allowing modern readers to engage with Aesop’s teachings effortlessly. This story remains a cornerstone of moral education, reflecting Aesop’s enduring influence on literature and ethics.

1.3 Relevance of the Story in Modern Times

The timeless moral of “The Tortoise and the Hare” remains highly relevant today, emphasizing the importance of perseverance, humility, and avoiding overconfidence. In a fast-paced world, the story encourages individuals to value steady effort over complacency. Its universal appeal makes it a popular choice in educational curricula, where it teaches children essential life lessons. The availability of the story in PDF format has further enhanced its accessibility, allowing modern readers to easily access and share this classic fable. The story’s themes resonate across cultures, making it a valuable tool for personal development and moral education in contemporary society. Its enduring relevance underscores the power of simple narratives to impart wisdom in any era.

The Plot of “The Tortoise and the Hare”

A speedy hare challenges a slow tortoise to a race. The hare, overconfident, naps mid-race, while the tortoise steadily progresses, ultimately winning the race.

2.1 The Challenge: How the Race Began

The story begins with a hare boasting about his speed, claiming no one could beat him in a race. Tired of his arrogance, a tortoise challenges him to a race. The hare, confident in his abilities, agrees, believing it would be an easy victory. The two animals set a course, and with the other forest animals gathered to watch, the race begins. The hare, overconfident, takes an early lead, while the tortoise starts slowly but steadily. This setup highlights the contrasting personalities of the two characters and sets the stage for the race’s unexpected outcome.

2.2 The Race Dynamics: Hare’s Overconfidence and Tortoise’s Determination

As the race progresses, the hare’s overconfidence becomes evident. He sprints ahead, quickly leaving the tortoise far behind. Feeling certain of his victory, the hare decides to take a nap, believing he has ample time to spare. Meanwhile, the tortoise, undeterred by his slow pace, continues moving forward with determination. His steady and consistent effort contrasts sharply with the hare’s complacency. The hare’s overconfidence leads to a critical mistake, while the tortoise’s perseverance keeps him in the race. This dynamic shift in the race highlights the importance of focus and humility, setting the stage for the story’s unexpected conclusion.

2.3 The Outcome: Tortoise Wins the Race

As the race nears its end, the tortoise approaches the finish line while the hare remains asleep, unaware of the tortoise’s progress. When the hare finally awakens, he rushes toward the finish line but is too late. The tortoise, with his steady and unrelenting pace, crosses the finish line first, securing a surprising victory. The hare is left stunned and disappointed, realizing too late the consequences of his overconfidence. The outcome underscores the importance of perseverance and humility, as the tortoise’s determination triumphs over the hare’s arrogance. This unexpected twist makes the story memorable and impactful, driving home its timeless moral lesson.

2.4 Lessons Learned from the Race

The race between the tortoise and the hare teaches valuable lessons about perseverance, humility, and the dangers of overconfidence. The tortoise’s steady effort and determination highlight the importance of consistency and hard work, while the hare’s arrogance and complacency serve as a cautionary tale. The story emphasizes that talent alone is not enough without dedication and focus. It also shows that underestimating others can lead to unexpected outcomes. These lessons are timeless, making the fable a powerful tool for teaching moral values and life skills. The race’s outcome reminds us that success often comes from persistence rather than natural ability, encouraging everyone to stay humble and committed to their goals.

Moral and Themes of the Story

The fable’s primary moral is “slow and steady wins the race,” emphasizing perseverance and humility. It highlights the consequences of overconfidence and the power of determination.

3.1 The Primary Moral: “Slow and Steady Wins the Race”

The fable’s central moral, “slow and steady wins the race,” underscores the importance of perseverance and consistency. The tortoise’s steady, unhurried pace ultimately led to his victory, while the hare’s overconfidence and complacency caused his downfall. This timeless lesson teaches that sustained effort often triumphs over natural talent or speed. The story, widely available in PDF formats, remains a powerful tool for educating children and adults alike about the value of determination. By focusing on the tortoise’s relentless progress, the moral emphasizes that success is not solely dependent on speed but on maintaining a steady and focused effort. This principle continues to resonate in modern contexts, making the fable a enduring educational resource.

3.2 Additional Themes: Perseverance and Humility

Beyond the primary moral, the story highlights the importance of perseverance and humility. The tortoise’s unwavering determination to finish the race, despite his slow pace, exemplifies perseverance. His humility, shown through his quiet dedication, contrasts sharply with the hare’s arrogance. The hare’s overconfidence and mockery of the tortoise serve as a cautionary tale about the dangers of pride. These themes are reinforced in the PDF versions of the story, which often include commentary on the tortoise’s steady effort and the hare’s complacency. The fable teaches that humility and persistence are essential for achieving success, while arrogance can lead to failure. These lessons remain relevant today, making the story a timeless educational resource.

3.3 The Consequences of Overconfidence

The story vividly illustrates the consequences of overconfidence through the hare’s character. His arrogance leads him to underestimate the tortoise, causing him to take unnecessary risks, such as napping during the race. This overconfidence ultimately results in his defeat, as the tortoise’s steady pace secures victory. The hare’s downfall serves as a cautionary tale about the dangers of complacency and the importance of respecting all opponents. PDF versions of the story often emphasize this theme, highlighting how the hare’s pride blinds him to the tortoise’s determination. The moral lesson remains clear: overconfidence can lead to failure, while humility and effort often yield success. This timeless message resonates across generations, making the fable a valuable educational tool.

3.4 The Power of Determination and Will

The tortoise’s unwavering determination and will are central to the story’s moral. Despite his slow pace, the tortoise’s focus and persistence ultimately lead to his victory. While the hare underestimates the tortoise and becomes complacent, the tortoise remains committed to his goal. His steady progress, even when the hare is napping, demonstrates the strength of perseverance. The story highlights that determination can overcome natural disadvantages, teaching readers that consistent effort often triumphs over talent alone. PDF versions of the fable emphasize this theme, showing how the tortoise’s willpower and focus secure his success. This lesson inspires readers to value hard work and resilience in achieving their goals;

Availability of “The Tortoise and the Hare” in PDF Format

The story is widely available as a free PDF download on platforms like Lit2Go and Aesop’s Fables, making it easily accessible for educational purposes worldwide.

4.1 Popular Platforms Offering the Story as a PDF

The story of “The Tortoise and the Hare” is widely available in PDF format on various platforms. Lit2Go, a popular educational resource, offers a free downloadable version. Additionally, Aesop’s Fables websites provide high-quality PDFs of the story, making it easily accessible. Educational repositories and digital libraries also feature this classic fable in PDF format, ensuring its availability for schools and personal use. These platforms ensure that the story remains widely accessible, maintaining its relevance for modern readers. The PDF versions are often enhanced with illustrations and clear formatting, making them ideal for both children and educators. This accessibility has contributed to the story’s enduring popularity in digital formats.

4.2 Key Features of the PDF Versions

The PDF versions of “The Tortoise and the Hare” are designed to enhance readability and engagement. Many feature high-quality illustrations that bring the story to life, making it visually appealing for young readers. The text is typically formatted in a clear, easy-to-read font, ensuring accessibility for children and educators alike. Some versions include colorful graphics and interactive elements, such as clickable links or quizzes, to foster deeper engagement. Additionally, the PDFs are often optimized for mobile and tablet viewing, allowing readers to enjoy the story on various devices. These features make the PDF versions ideal for both personal reading and classroom use, ensuring the story’s timeless lessons are conveyed effectively.

4.3 Why the PDF Format is Preferred for This Story

The PDF format is widely preferred for “The Tortoise and the Hare” due to its universal accessibility and consistent layout. PDFs ensure that the story’s text and illustrations are displayed identically across all devices, preserving the intended visual experience. This format is also easy to share and download, making it a convenient option for educators and parents. Furthermore, PDFs are print-friendly, allowing users to create physical copies for storytelling sessions or classroom activities. The ability to highlight and annotate text in PDFs enhances its utility for educational purposes. Overall, the PDF format offers a reliable and versatile way to enjoy and teach this timeless fable, ensuring its lessons reach a broad audience effectively.

The Story’s Impact on Education and Literature

The story is widely used in educational curricula, teaching moral values and life lessons. Its timeless appeal has led to numerous adaptations, enriching children’s literature globally.

5.1 Use in Educational Curricula Worldwide

The story of “The Tortoise and the Hare” is widely incorporated into educational curricula globally. It is often included in school syllabi due to its moral and educational value. Teachers use the fable to teach children about perseverance, humility, and the dangers of overconfidence. The story’s simplicity and universal appeal make it a popular choice for early education. Many schools distribute the story in PDF format, ensuring easy access for students. Additionally, it is used in language learning programs to improve reading and comprehension skills. The fable’s timeless lessons are adapted across cultures, making it a cornerstone of moral education worldwide.

5.2 Adaptations and Retellings in Modern Literature

The timeless fable of “The Tortoise and the Hare” has been reimagined in various forms of modern literature. Authors and illustrators continue to adapt the story, often adding unique twists or contemporary themes. Some versions feature the characters in new settings, such as urban environments or futuristic worlds, while others explore deeper emotional layers. The story is also presented in graphic novels, children’s picture books, and even interactive digital formats. These adaptations ensure the fable remains relevant to new generations. Additionally, the story is frequently included in anthologies of classic tales, making it accessible to a wide audience. Its enduring appeal lies in its universal moral, which resonates across cultures and age groups;

5.3 The Story’s Role in Teaching Moral Values

The fable of “The Tortoise and the Hare” is a powerful tool for teaching moral values, particularly to children. Its clear and simple narrative makes it an effective medium for instilling lessons like perseverance, humility, and the dangers of overconfidence. The story emphasizes that steady effort and determination can overcome arrogance and complacency, a message that resonates universally. Educators often use this tale to help young minds understand the importance of hard work and patience. By presenting these values through relatable characters and a straightforward plot, the story ensures that its moral teachings are both memorable and impactful. Its timeless appeal makes it a cornerstone of moral education across cultures and generations.

Cultural and Symbolic Significance

The fable symbolizes perseverance and humility, with the tortoise embodying steady effort and the hare representing overconfidence, offering timeless lessons across cultures and generations;

6.1 The Tortoise as a Symbol of Perseverance

The tortoise symbolizes perseverance and determination, as seen in the story where it steadily progresses despite its slow pace. Its unwavering focus and refusal to give up, even when overtaken by the hare, highlight the power of consistency. The tortoise’s journey teaches that success is not solely about speed or talent but about maintaining effort. This character has become a cultural icon, embodying the idea that persistence can overcome adversity. The story, widely available in PDF formats, reinforces this message, making it a timeless lesson for generations. The tortoise’s perseverance serves as a universal inspiration, encouraging individuals to stay committed to their goals.

6.2 The Hare as a Symbol of Overconfidence

The hare represents overconfidence, as his arrogance leads to his downfall in the race. Despite his natural speed, he underestimates the tortoise, taking unnecessary breaks and napping, believing victory is assured. His complacency highlights the dangers of assuming success without effort. The story, available in PDF formats, underscores how overconfidence can lead to failure. The hare’s character serves as a cautionary tale, teaching humility and the importance of perseverance. His actions emphasize that talent alone is not enough without dedication. This lesson remains relevant, making the hare a timeless symbol of the pitfalls of overconfidence in literature and culture.

6.3 The Race as a Metaphor for Life’s Challenges

The race between the tortoise and the hare serves as a powerful metaphor for life’s challenges, emphasizing perseverance over complacency. The tortoise’s steady, relentless effort symbolizes the importance of consistency in overcoming obstacles, while the hare’s overconfidence highlights the risks of underestimating others and becoming complacent. The story, widely available in PDF formats, teaches that success often requires dedication and humility rather than mere talent. This timeless metaphor resonates universally, reminding individuals that life’s challenges are not solely about speed or strength but about maintaining focus and determination. The race’s outcome underscores the idea that anyone can achieve their goals with persistence, regardless of their natural abilities.

The Story’s Popularity in Digital Media

The story is widely popular in digital media, with animated versions, e-books, and educational resources available online, making it accessible and engaging for modern audiences.

7.1 Availability on Online Platforms

The story of “The Tortoise and the Hare” is widely available in PDF format on various online platforms, including educational websites and digital libraries. Platforms like Lit2Go, Aesop’s Fables, and other repositories offer free downloads, making it easily accessible to readers worldwide. These PDF versions are often accompanied by illustrations and moral lessons, enhancing their educational value. The story’s digital presence ensures it remains a popular resource for both children and educators, promoting its timeless message of perseverance and humility. Its availability in PDF format allows for easy sharing and offline reading, further contributing to its enduring popularity in modern times.

7.2 The Story’s Presence in E-Learning Resources

The story of “The Tortoise and the Hare” is widely integrated into e-learning platforms, offering interactive and engaging experiences for students. Many educational websites incorporate the PDF version of the fable into their curricula, often accompanied by quizzes, discussion questions, and study guides. These resources help teachers and parents use the story to teach moral lessons and promote critical thinking. The availability of the story in e-learning formats ensures it reaches a broader audience, making it a valuable tool for remote and hybrid learning environments. Its inclusion in digital educational materials highlights its enduring relevance in modern education, blending tradition with technology to inspire new generations.

7.3 Digital Adaptations and Multimedia Presentations

Digital adaptations of “The Tortoise and the Hare” have transformed the classic fable into engaging multimedia experiences. Animated videos, interactive slideshows, and gamified versions are widely available online, making the story more accessible and entertaining for modern audiences. Platforms like YouTube and educational apps feature animated renditions of the tale, complete with vibrant visuals and narration. Additionally, interactive PDFs and e-books incorporate clickable elements, quizzes, and puzzles to enhance learning. These multimedia presentations not only retain the story’s moral essence but also cater to diverse learning styles, ensuring the fable remains relevant and captivating in the digital age.

The timeless fable of “The Tortoise and the Hare” remains a beloved story, offering universal lessons on perseverance and humility. Its availability in PDF ensures its enduring appeal.

8.1 Summary of Key Points

The story of “The Tortoise and the Hare” is a timeless fable by Aesop, emphasizing the moral “slow and steady wins the race.” The tale revolves around a race between a confident hare and a determined tortoise. Despite the hare’s speed, his overconfidence leads to his downfall, while the tortoise’s steady effort secures his victory. This story is widely available in PDF format, making it accessible for educational purposes and personal reading. Its universal lessons on perseverance, humility, and the dangers of arrogance continue to resonate across generations. The PDF versions often include illustrations and moral summaries, enhancing its appeal for both children and adults. This fable remains a cornerstone of moral education and literary heritage.

8.2 Final Thoughts on the Story’s Timeless Appeal

The story of “The Tortoise and the Hare” endures as a timeless tale due to its universal moral lessons and relatable themes. Its simplicity and clarity make it accessible to all ages, while its depth ensures ongoing relevance. The fable’s emphasis on perseverance, humility, and the dangers of overconfidence resonates across cultures and generations. Available in PDF format, it remains a popular resource for education and personal reflection. Its ability to adapt to modern retellings and digital platforms further cements its appeal; This story not only entertains but also inspires, making it a cherished part of literary and moral education. Its timeless appeal lies in its ability to teach valuable life lessons through a simple yet profound narrative.

api kh test instructions

The API KH test kit helps measure water hardness, crucial for aquarium health. It includes a test tube, KH solution, and manual. Add drops until water turns yellow to determine levels accurately.

1.1 What is KH and Why is it Important?

KH, or carbonate hardness, measures the concentration of bicarbonate and carbonate ions in water. It plays a critical role in maintaining water stability and preventing drastic pH swings, which can harm aquatic life. In aquariums, KH levels are essential for fish and plant health, as unstable water conditions can cause stress and disease. Proper KH levels help buffer the water, ensuring a stable environment for aquatic organisms to thrive. Monitoring KH is particularly important in freshwater aquariums, where water hardness can fluctuate due to evaporation or biological processes. By understanding and controlling KH, aquarists can create optimal water quality, promoting the well-being of their aquatic ecosystem. Regular testing with the API KH test kit is a reliable way to assess and maintain these critical water parameters.

1.2 Overview of the API KH Test Kit

The API KH test kit is a comprehensive tool designed to measure carbonate hardness in water. It includes a test tube, cap, KH test solution, and an instruction manual. The kit is user-friendly, providing clear step-by-step directions for accurate results. By adding one drop of the KH solution at a time and observing color changes, users can determine their water’s KH levels. The kit is widely used in aquarium maintenance to ensure optimal water conditions. Its simplicity and reliability make it a popular choice among aquarists. Regular use helps prevent water quality issues, ensuring a healthy environment for fish and plants. The API KH test kit is an essential tool for anyone looking to monitor and maintain stable water parameters effectively.

Components of the API KH Test Kit

The API KH test kit includes a test tube, cap, KH test solution, and an instruction manual. These components work together to measure water hardness accurately and effectively.

2.1 Test Tube and Cap

The test tube and cap are essential components of the API KH test kit. The test tube is specifically designed to hold the water sample and KH test solution. It is important to rinse the test tube with the water being tested before use to ensure accurate results. The cap is used to seal the tube during shaking, preventing any solution from spilling. Always handle the test tube and cap with clean hands to avoid contamination. The tube is marked with a line indicating the correct volume of water to use, ensuring precise measurements. Proper use of the test tube and cap is crucial for obtaining reliable KH readings. Follow the instructions carefully to maintain the integrity of the testing process and achieve accurate water hardness measurements.

2.2 KH Test Solution

The KH test solution is a critical component of the API KH test kit, designed to measure water hardness. It comes in a bottle and is used in conjunction with the test tube. To use the solution, add one drop at a time to the water sample in the test tube. Shake the tube gently after each drop and observe the color change. The solution reacts with the water, turning it from blue to yellow as the KH level is determined. The number of drops required to achieve the color change indicates the KH concentration. The solution is sensitive and precise, ensuring accurate readings. Proper storage in a cool, dark place is essential to maintain its effectiveness. Always follow the instructions provided to ensure reliable results and optimal water quality monitoring. The KH test solution is a vital tool for aquarium enthusiasts to maintain healthy aquatic environments.

2.3 Instruction Manual

The instruction manual is a key component of the API KH test kit, providing detailed guidance for accurate test results. It outlines step-by-step procedures, safety precautions, and troubleshooting tips. The manual explains how to prepare the test tube, add the KH solution, and interpret color changes. It also includes information on understanding KH levels and their impact on water quality. By following the manual, users can ensure precise measurements and maintain optimal water conditions. The manual is essential for both beginners and experienced users, offering clear instructions to avoid errors. It emphasizes the importance of regular testing to monitor water hardness and prevent potential issues. The manual’s clarity and comprehensiveness make it an indispensable resource for anyone using the API KH test kit to achieve accurate and reliable results. Proper use of the manual ensures the test kit’s effectiveness in maintaining healthy aquatic environments.

Preparing for the KH Test

Gather all materials, including the test tube, KH solution, and water sample. Rinse the test tube thoroughly with the water to be tested to ensure accurate results and prevent contamination.

3.1 Gathering Materials

To begin the KH test, gather all necessary materials. This includes the API KH test kit, which contains a test tube, KH test solution, and an instruction manual. Ensure the test tube is clean and dry. Collect a water sample from your aquarium or the source you wish to test. Rinse the test tube with a small amount of the water sample to prevent contamination. Carefully read the instruction manual to familiarize yourself with the testing process. The KH test solution is added drop by drop, so handle the dropper carefully to avoid touching the water surface. Having all materials ready ensures a smooth and accurate testing experience. Proper preparation is key to obtaining reliable results and maintaining optimal water quality for your aquarium. Follow the manual’s guidelines to avoid errors and ensure the test is conducted correctly.

3.2 Understanding the Testing Process

Understanding the testing process is essential for accurate KH measurement. The API KH test involves adding drops of KH test solution to a water sample until a color change occurs. Start by filling the test tube with water, then add one drop of KH solution, shake gently, and observe the color. Repeat this process until the water turns from blue to yellow, indicating the KH level. Each drop represents a specific KH value, so count the drops added to determine the hardness. The test is complete when the color change is permanent. This method ensures precise measurement of water hardness, which is vital for maintaining optimal aquarium conditions. Regular testing helps monitor water quality and prevent fluctuations that can stress aquatic life. By following the steps carefully, you can achieve reliable results and ensure a healthy environment for your fish and plants.

Step-by-Step Testing Instructions

Rinse the test tube with water, fill it to the mark, add KH solution drops one by one, and observe the color change. Count the drops to determine KH levels accurately.

4.1 Rinse the Test Tube

Rinsing the test tube is essential to ensure accurate results. Start by rinsing the tube with the water sample you intend to test. This step removes any residue or contaminants that might interfere with the test. Gently shake the tube to coat the interior with the water, then discard the water. Repeat this process to guarantee the tube is clean and free from any impurities. After rinsing, fill the test tube with the same water sample up to the marked line. This ensures consistency and prevents cross-contamination. Proper rinsing and preparation of the test tube are critical for obtaining reliable KH readings. Always use the water sample to be tested for rinsing to maintain accuracy. This step sets the foundation for the rest of the testing process, ensuring your results are precise and trustworthy.

4.2 Fill the Test Tube with Water

After rinsing, fill the test tube with the water sample to the marked line. Ensure the water level is precise to avoid inaccurate readings. Use the same water sample for rinsing and testing to maintain consistency. Fill the tube slowly to prevent bubbles, which can affect the test results. Once filled, hold the tube upright to verify the water level aligns with the indicator. If necessary, adjust by gently tilting or adding a small amount of water. Proper filling ensures the correct volume for testing, which is essential for accurate KH measurements. Avoid overfilling or underfilling, as this can lead to errors. This step is crucial for ensuring the test solution reacts properly with the water sample. Always double-check the water level before proceeding to the next step. Accurate filling sets the stage for reliable and precise test outcomes.

4.3 Adding KH Test Solution

Hold the KH test solution bottle vertically and add one drop at a time to the water in the test tube. After each drop, cap the tube and shake it gently for about 5 seconds. Wait a few seconds to observe the color change. If the water does not turn yellow, repeat the process, adding one drop at a time. Continue until the water sample changes to a stable yellow color, indicating the test is complete. Be careful not to add too much solution, as this can lead to inaccurate results. The number of drops required to reach the yellow endpoint will determine the KH level. Ensure each drop is added slowly and evenly to maintain precision. This step is critical for obtaining an accurate measurement of water hardness. Always follow the instructions carefully to avoid errors in the testing process.

4.4 Observing Color Changes

After adding the KH test solution, observe the color change in the water sample. The solution will react with the water, causing a visible shift in color. The initial color of the water will typically change from blue to yellow as the KH solution is added. Shake the test tube gently after each drop and wait a few seconds to allow the reaction to complete. Continue monitoring until the color stabilizes and no further changes occur. The endpoint is reached when the color remains consistent for about 30 seconds. Note the number of drops added to determine the KH level. Ensure the color is observed under natural light for accuracy. If the color does not stabilize, it may indicate very high KH levels, and testing should be stopped to avoid wasting reagents. Accurate observation is crucial for reliable results. Always compare the final color to the reference chart provided in the manual. This step ensures precise measurement of water hardness.

4.5 Determining KH Levels

Once the color change stabilizes, count the number of KH test solution drops added to the test tube. Each drop typically represents 1 dKH (degree of carbonate hardness). Refer to the instruction manual for the exact conversion rate. Match the final color of the water sample to the reference chart provided in the manual to determine the KH level. Ensure the color comparison is done under natural light for accuracy. If the color does not stabilize after several drops, it may indicate extremely high KH levels. Record the number of drops used and consult the chart to interpret the results. Avoid over-titrating, as this can lead to inaccurate readings. Accurate determination of KH levels is essential for maintaining optimal water quality and preventing fluctuations that can stress aquatic life. Regular testing helps monitor water hardness and ensure a stable environment for plants and animals. Always follow the manual’s guidelines for precise results.

Interpreting Test Results

Interpreting test results involves observing the color change and counting the drops added. Match the final color to the reference chart to determine KH levels accurately. This ensures optimal water conditions.

5.1 Understanding Color Changes

Understanding color changes is crucial for accurate KH testing. The API KH test solution changes color as drops are added, typically transitioning from blue to yellow. Each drop represents a specific KH level, so careful observation is key. Shake the test tube thoroughly after each drop to ensure even color distribution. The color change indicates the endpoint, signaling the test’s completion. Always compare the final color to the reference chart provided in the manual for precise measurement. Consistent lighting conditions, such as natural light, are recommended for accurate color matching. Avoid guessing; wait for a clear, stable color change before recording results. This step ensures reliable data for maintaining optimal water quality. By following these guidelines, users can interpret KH levels effectively and make informed decisions for their aquarium or water system. Accurate color interpretation is essential for reliable test outcomes.

5.2 Relating Results to Water Quality

Understanding the relationship between KH test results and water quality is vital for maintaining a healthy aquatic environment. KH, or carbonate hardness, measures the water’s ability to resist pH changes, ensuring stability. Higher KH levels provide a buffer against sudden pH drops, which can be harmful to aquatic life. Low KH levels may indicate unstable water conditions, potentially leading to stress on plants and animals. Accurate KH readings help determine the need for adjustments, such as adding buffering agents to stabilize pH. Regular testing ensures water quality remains optimal, preventing issues like algae blooms or fish stress. By monitoring KH levels, users can make informed decisions to maintain a balanced ecosystem. This data is especially critical in aquariums, where water parameters directly impact the health and well-being of aquatic organisms. Consistent testing and adjustments ensure a stable and thriving environment.

Applications of KH Testing

KH testing is essential for monitoring water hardness in aquariums and maintaining optimal conditions. It helps prevent stressful changes in water chemistry, ensuring a stable environment for aquatic life to thrive.

6.1 Monitoring Water Hardness in Aquariums

Monitoring water hardness in aquariums is crucial for maintaining a stable environment for aquatic life. The API KH test kit helps measure carbonate hardness, which affects water stability and pH levels. By regularly testing KH levels, aquarium owners can prevent sudden changes that may stress fish or disrupt biological balance. The test involves filling a tube with aquarium water and adding KH solution drops until the water turns yellow. This process provides accurate readings to ensure optimal conditions. Proper KH levels support healthy aquatic plants and prevent issues like algae blooms. For aquariums with unstable water chemistry, using API KH test kits is essential for maintaining a thriving ecosystem. Regular testing ensures water quality remains consistent, promoting the well-being of fish and plants. This simple yet effective method is a cornerstone of aquarium maintenance.

6.2 Maintaining Optimal Water Conditions

Maintaining optimal water conditions is vital for the health of aquatic ecosystems. The API KH test kit plays a key role in ensuring water stability by measuring carbonate hardness. Regular testing helps prevent sudden changes in water chemistry, which can be harmful to aquatic life. By monitoring KH levels, aquarium owners can adjust water parameters to create a stable environment. This is especially important for aquariums with live plants, as stable KH levels promote healthy growth. Additionally, maintaining optimal KH levels helps prevent issues like algae blooms and pH swings. The API KH test kit provides a reliable method for achieving these goals. With consistent testing and adjustments, aquarium owners can ensure their aquatic environment remains balanced and thriving. This proactive approach to water maintenance is essential for the long-term success of any aquarium or pond system.

Troubleshooting Common Issues

Common issues include inaccurate readings or the test solution not changing color. Recalibrate the test kit or check the solution’s expiration date to ensure accurate and reliable results.

7.1 Inaccurate Readings

Inaccurate readings can occur due to expired test solutions, improper rinsing of the test tube, or failure to follow the drop-by-drop method. Contamination from dirty test tubes or incorrect shaking techniques may also affect results. Always ensure the test tube is clean and dry before use. Verify that the KH test solution is within its expiration date, as outdated reagents can lead to unreliable color changes. If the solution does not change color as expected, check for proper storage conditions and handling. Additionally, ensure the water sample is representative of the aquarium or water source being tested. For consistent results, strictly adhere to the instructions provided in the manual, including the correct number of drops and shaking procedures. If issues persist, recalibrate the test kit or consult the manufacturer’s troubleshooting guide for further assistance.

7.2 Test Solution Not Changing Color

If the KH test solution fails to change color, it may indicate an issue with the reagent or testing process. First, check the expiration date of the KH solution, as outdated reagents can lose potency. Ensure the test tube is clean and free from contaminants, as residue can interfere with the reaction. Verify that the solution is added correctly—hold the bottle vertically and add one drop at a time. If the water sample has an unusually low KH level, it might not reach the threshold needed for a color change. In such cases, incrementally add drops until a color shift occurs. If the problem persists, inspect the solution for visible signs of degradation, such as cloudiness or sediment. Replace the KH test solution if necessary and repeat the test. Always refer to the instruction manual for guidance on handling such issues effectively.

Maintenance and Storage

Clean the test tube thoroughly after each use with distilled water. Store the API KH test kit in a cool, dry place, away from direct sunlight and chemicals.

8.1 Cleaning the Test Tube

Cleaning the test tube is essential for accurate results. Rinse it thoroughly with distilled water after each use to remove any residue. Avoid using soap or chemicals, as they may leave contaminants. For stubborn stains, soak the tube in warm water before rinsing. Ensure the tube is completely dry before storing it in the kit. Regular cleaning prevents bacterial growth and maintains test accuracy. Always handle the tube with clean hands or gloves to avoid oil residue. Proper maintenance ensures the test tube remains reliable for future use. By following these steps, you extend the lifespan of the API KH test kit and guarantee consistent results. Cleanliness is key to precise water hardness measurements, making it a crucial part of the testing process.

8.2 Storing the Test Kit

Proper storage of the API KH test kit ensures its longevity and accuracy. Store the kit in a cool, dry place away from direct sunlight and moisture. Keep the test tube, KH solution, and instruction manual in their original packaging to prevent damage. Ensure the KH solution bottle is tightly sealed to maintain its effectiveness. Avoid exposing the kit to extreme temperatures, as this may affect the solution’s stability. Store the test tube separately from the solution to prevent contamination. Keep the kit out of reach of children and pets. Regularly check the expiration date of the KH solution and replace it as needed. Proper storage maintains the kit’s performance and ensures reliable results for future tests. By following these steps, you preserve the integrity of the API KH test kit and extend its usable life.

Conclusion

The API KH test kit is essential for maintaining optimal water quality. Regular testing ensures aquarium health and stability, preventing potential issues. Always follow instructions for accurate results and reliable outcomes.

9.1 Summary of Key Points

The API KH test kit is a reliable tool for measuring water hardness, essential for maintaining aquarium health. The kit includes a test tube, KH solution, and instructions. To use, rinse the tube, fill with water, and add drops of KH solution until the water turns yellow. This color change indicates the KH level. Regular testing helps monitor water quality and prevent stressful conditions for aquatic life. Accurate results ensure optimal water conditions, crucial for fish and plant health. By following the instructions carefully, users can easily determine KH levels and adjust water parameters as needed. This simple yet effective method makes the API KH test kit a must-have for aquarium enthusiasts and professionals alike. Consistent testing promotes a stable aquatic environment, ensuring the well-being of all aquatic organisms.

9.2 Importance of Regular Testing

Regular testing with the API KH test kit is essential for maintaining optimal water conditions in aquariums. Consistent monitoring ensures water hardness levels remain stable, preventing sudden changes that can stress aquatic life. By testing frequently, aquarium owners can identify and address potential issues before they affect fish and plants. Regular testing also helps in making informed adjustments to water parameters, ensuring a healthy environment for all aquatic organisms. Irregular testing can lead to water quality fluctuations, which may result in harmful conditions for fish and plants. The API KH test kit provides a reliable method for ongoing monitoring, allowing users to maintain a balanced and stable aquatic ecosystem. Regular testing is a simple yet critical step in promoting the long-term health and well-being of aquarium inhabitants.

husqvarna 440 chainsaw manual

The Husqvarna 440 is a reliable gas-powered chainsaw designed for residential use, featuring a 40.9 cc engine and 2.4 HP. Ideal for cutting small trees and branches, it ensures efficient performance. The manual provides essential guidance for safe operation, maintenance, and troubleshooting to maximize potential and lifespan.

Safety Guidelines

Always read the manual thoroughly for safe operation. Wear protective gear, including gloves and safety glasses. Ensure proper handling techniques to prevent accidents and injuries, and follow all guidelines for optimal performance.

2.1 Importance of Safety Precautions

Safety precautions are crucial when operating the Husqvarna 440 chainsaw to prevent accidents and ensure safe usage. The chainsaw is a powerful tool with sharp cutting elements, posing risks if mishandled. Adhering to safety guidelines helps protect the operator and bystanders from potential harm. Proper handling techniques, as outlined in the manual, reduce the likelihood of injuries. Additionally, safety precautions prevent damage to the chainsaw and surrounding materials. Ignoring these guidelines can lead to severe consequences, including equipment damage or environmental hazards. Always prioritize safety to ensure optimal performance and longevity of the tool. By following the manual’s instructions, users can operate the chainsaw confidently and responsibly. Safety should never be compromised, as it is essential for effective and efficient operation.

2.2 Personal Protective Equipment (PPE)

Using proper Personal Protective Equipment (PPE) is essential when operating the Husqvarna 440 chainsaw to minimize risks and ensure safe operation. Always wear safety glasses or goggles to protect your eyes from debris. Gloves are recommended to improve grip and reduce vibration effects on your hands. Hearing protection, such as earplugs or earmuffs, is necessary to prevent noise-induced hearing loss. Steel-toe boots or sturdy footwear with good traction are also crucial to protect your feet from injury. Additionally, wear protective clothing like long sleeves, pants, and chainsaw chaps to safeguard against accidental cuts. The manual emphasizes that PPE is a critical component of safe chainsaw operation. By wearing the appropriate gear, you significantly reduce the risk of injury and ensure a safer working environment. Always refer to the manual for specific PPE recommendations tailored to your tasks.

2.3 Pre-Operation Checks

Before starting the Husqvarna 440 chainsaw, perform a series of pre-operation checks to ensure safe and efficient use. First, inspect the chain for proper tension and sharpness, as a loose or dull chain can lead to poor performance and accidents. Check the bar for damage or wear, ensuring it is aligned correctly. Next, verify the engine oil and fuel levels, using the recommended types to maintain optimal performance. Inspect the air filter for cleanliness and ensure all controls, such as the throttle and chain brake, are functioning properly; Additionally, check for any loose or damaged parts, as these can pose safety risks. The manual strongly emphasizes the importance of these checks to prevent malfunctions and ensure the chainsaw operates safely. By following these steps, you can identify and address potential issues before they become critical. Regular pre-operation checks are essential for extending the lifespan of your chainsaw and ensuring reliable performance.

Technical Specifications

The Husqvarna 440 chainsaw features a 40.9 cc engine with 2.4 horsepower, delivering a maximum power speed of 9,000 rpm. Its cylinder bore is 41 mm, ensuring efficient performance for residential use.

3.1 Engine Specifications

The Husqvarna 440 chainsaw is equipped with a powerful 40.9 cc two-stroke engine, delivering a maximum power output of 2.4 horsepower. It operates at an idling speed of 2,900 rpm and reaches a maximum power speed of 9,000 rpm. The engine features a cylinder bore of 41 mm and a stroke of 31 mm, ensuring efficient combustion and reliable performance. Designed for residential use, this engine provides sufficient power for cutting small to medium-sized trees and branches. The chainsaw’s engine is also known for its durability and fuel efficiency, making it a popular choice among homeowners and professionals alike. Regular maintenance, as outlined in the manual, is essential to maintain optimal engine performance and extend its lifespan.

3.2 Design Features

The Husqvarna 440 chainsaw boasts a robust and ergonomic design, ensuring comfort and efficiency during operation. Its well-balanced body and lightweight construction reduce user fatigue, while the intuitive handle design provides a secure grip. The chainsaw features a high-quality air filter and a centrifugal air cleaning system, which helps maintain engine performance by reducing dust and debris intake. Additionally, the inertia-activated chain brake enhances safety by automatically stopping the chain in case of a kickback. The tool-less chain tensioning system allows for quick and easy adjustments, making maintenance more convenient. The chainsaw’s compact design and durable construction ensure reliability and longevity, making it suitable for a variety of cutting tasks. These design features, combined with its powerful engine, make the Husqvarna 440 a versatile and reliable tool for both homeowners and professionals.

Operating the Chainsaw

Operating the Husqvarna 440 involves starting, stopping, and cutting techniques. Ensure chain tension is correct, use proper cutting methods, and maintain safety. Regular checks ensure efficient and safe operation every time.

4.1 Starting the Chainsaw

Starting the Husqvarna 440 chainsaw requires careful steps to ensure safety and proper function. First, ensure the chain brake is engaged and the area is clear of obstacles. Place the chainsaw on a flat, stable surface. Prime the engine by pressing the primer bulb 3-5 times until fuel flows into the bulb. Move the choke lever to the “start” position. Hold the handle firmly with one hand and pull the starter cord slowly until resistance is felt, then pull sharply. Once the engine coughs, move the choke to the “run” position. Allow the engine to warm up for a few seconds before disengaging the chain brake and beginning work. Always refer to the manual for specific starting procedures to avoid issues and ensure optimal performance. Proper starting techniques help extend the chainsaw’s lifespan and ensure safe operation.

4.2 Stopping the Chainsaw

To stop the Husqvarna 440 chainsaw safely, follow these steps. First, disengage the throttle trigger and allow the chain to come to a complete stop. Do not shut off the engine while the chain is moving, as this can cause damage or kickback. Once the chain is stationary, move the chain brake forward to engage it. This ensures the chain remains still during shutdown. Next, locate the engine stop switch, typically found on the top of the chainsaw, and press it to shut off the engine. Always wear personal protective equipment (PPE) when handling the chainsaw, even during shutdown. After stopping, allow the chainsaw to cool before storing or performing maintenance. Proper stopping procedures help prevent accidents and maintain the chainsaw’s performance. Always refer to the manual for specific instructions tailored to your model.

4.3 Basic Cutting Techniques

Mastering basic cutting techniques with the Husqvarna 440 chainsaw ensures efficient and safe operation. Start by maintaining a firm grip on the handles, with your right hand on the rear handle and your left hand on the front handle. For horizontal cuts, use a ripping technique, moving the saw in a straight line along the grain. For vertical cuts, employ a cross-cutting method, ensuring the chain is perpendicular to the material. When making plunge cuts, tilt the saw gently and allow the chain to bite into the wood slowly. Always keep the chain sharp, as a dull chain increases effort and risk. Use proper body positioning to maintain balance and control. Avoid cutting in tight spaces or reaching beyond your capacity. Keep the chainsaw at a comfortable distance from your body and ensure the area is clear of obstacles. Refer to the manual for detailed diagrams and specific guidance on advanced techniques.

Maintenance and Care

Regular maintenance ensures optimal performance. Sharpen the chain frequently, lubricate the bar, and clean the saw thoroughly. Store in a dry place and refer to the manual for detailed care instructions.

5.1 Chain Maintenance

Proper chain maintenance is crucial for optimal performance and safety. Regularly inspect the chain for wear, damage, or dullness. Sharpen the chain when needed using a file or sharpening tool, ensuring correct angle and depth. Always check the tension; a loose chain can cause accidents, while an overtightened one may damage the bar or engine. Lubricate the chain with high-quality bar and chain oil to reduce friction and prevent overheating. Clean the chain regularly to remove dirt and debris, which can impair performance. After use, store the chainsaw in a dry place, away from direct sunlight. Refer to the manual for specific sharpening and tensioning guidelines. Proper chain care extends the lifespan of your Husqvarna 440 and ensures efficient cutting. Always follow safety precautions when handling the chain, as it remains sharp even when not in use.

5.2 Bar Maintenance

Regular bar maintenance is essential for the Husqvarna 440 chainsaw’s performance and longevity. Inspect the bar for wear, burrs, or damage. Clean the bar groove and oil holes to ensure proper lubrication. Apply high-quality bar and chain oil to the bar and chain during operation to reduce friction and prevent overheating. Check the bar for alignment and ensure it is securely fastened with the bar nuts. If the bar is worn or damaged, replace it immediately to avoid chain derailment or accidents. Lubricate the bar regularly, especially after cleaning or sharpening the chain. Store the bar in a dry place when not in use to prevent rust. Refer to the manual for specific lubrication and maintenance recommendations. Proper bar care ensures smooth operation, reduces wear on the chain, and extends the lifespan of your Husqvarna 440 chainsaw.

5.3 Cleaning the Chainsaw

Regular cleaning is crucial for maintaining the performance and longevity of your Husqvarna 440 chainsaw. Start by turning off the engine and allowing it to cool. Remove any debris, such as sawdust or dirt, from the chain, bar, and external surfaces using a soft-bristled brush or compressed air. Pay special attention to the chain brake, sprocket, and oil holes, as these areas are prone to clogging. Use a clean, dry cloth to wipe down the handle and other components. For tougher dirt, a mild soap solution can be used, but avoid harsh chemicals that may damage the finish. After cleaning, inspect all parts for wear or damage. Dry the chainsaw thoroughly to prevent rust. Regular cleaning ensures optimal performance, prevents corrosion, and extends the lifespan of your Husqvarna 440. Always refer to the manual for specific cleaning recommendations and safety guidelines.

5.4 Storage Tips

Proper storage of your Husqvarna 440 chainsaw is essential to maintain its performance and longevity. Before storing, ensure the chainsaw is clean and free from debris. Drain the fuel tank or use a fuel stabilizer to prevent corrosion and spoilage. Store the chain separately, ideally in a dry, oil-free environment, to avoid rust. Place the chainsaw in a cool, dry area away from direct sunlight and extreme temperatures. Avoid storing it in humid or damp environments, as this can lead to rust or mold. Use a protective cover to shield the chainsaw from dust and moisture. Regularly inspect the storage area for pests or damage. Always follow the manufacturer’s guidelines for storage, as outlined in the manual, to ensure your Husqvarna 440 remains in optimal condition for future use.

Troubleshooting Common Issues

The Husqvarna 440 chainsaw, like any tool, may encounter issues. Common problems include the chainsaw not starting, poor cutting performance, or chain lubrication issues. If the chainsaw fails to start, check the fuel level, spark plug, and air filter. Ensure the chain brake is disengaged and the choke is properly adjusted. For poor cutting performance, inspect the chain for dullness or improper tension. Sharpen or replace the chain as needed, and ensure the bar is clean and free from debris. Lubrication issues can be resolved by checking the oil reservoir and adjusting the chain tension. Refer to the manual for specific troubleshooting steps, as it provides detailed guidance for diagnosing and resolving common problems. Regular maintenance, such as cleaning the air filter and spark plug, can prevent many issues. Always follow the manufacturer’s recommendations to ensure optimal performance and longevity of your Husqvarna 440 chainsaw.

Accessories and Spare Parts

The Husqvarna 440 chainsaw can be enhanced with a variety of accessories and spare parts to optimize performance and extend its lifespan. Genuine Husqvarna parts, such as replacement chains, guide bars, and sprockets, are designed to maintain reliability and safety. Popular accessories include the H30 chain, known for its durability, and the H36 chain, which offers excellent cutting efficiency. Additionally, spare parts like air filters, spark plugs, and mufflers are readily available to ensure proper maintenance. For convenience, Husqvarna offers complete maintenance kits that include essential components for regular servicing. Users can also purchase protective gear, such as gloves and safety glasses, to complement their chainsaw operations. Always refer to the official Husqvarna website or authorized dealers for authentic parts and accessories to ensure compatibility and quality; This ensures your chainsaw remains in peak condition for years of reliable service.

Warranty and Support

Husqvarna offers a comprehensive warranty program for the 440 chainsaw, ensuring customer satisfaction and product reliability. The warranty covers defects in materials and workmanship for a specified period, typically for residential use. For detailed terms and conditions, users should refer to the official Husqvarna website or consult their local authorized dealer.

Additionally, Husqvarna provides extensive support resources, including online manuals, troubleshooting guides, and FAQs. Customers can access the Husqvarna support portal for assistance with maintenance, repairs, and spare parts. Authorized service centers are also available to provide professional help for complex issues.

Registering your Husqvarna 440 chainsaw ensures warranty validation and access to exclusive support services. Regular maintenance, as outlined in the manual, is essential to uphold warranty conditions. With Husqvarna’s commitment to quality and customer care, users can rely on robust support for their chainsaw needs.

Manual Download and Structure

The Husqvarna 440 chainsaw manual is readily available for download in PDF format from the official Husqvarna website or authorized dealers. This comprehensive guide is structured to provide clear instructions for safe and effective operation, maintenance, and troubleshooting. The manual is divided into sections, including safety guidelines, technical specifications, operating procedures, and maintenance tips. It also covers warranty information and troubleshooting common issues. Additional resources, such as parts diagrams and step-by-step guides, are included to help users understand and service their chainsaw. The manual is designed to be user-friendly, ensuring that both novice and experienced users can navigate its contents effortlessly. By referring to the manual, users can ensure optimal performance, safety, and longevity of their Husqvarna 440 chainsaw. Downloading the manual is a straightforward process, requiring only a few clicks on the Husqvarna support website.

primo bottom load water dispenser manual

Unpacking and Initial Setup

Carefully remove the dispenser from packaging and place it on a flat, stable surface. Ensure the area is dry and near a grounded electrical outlet. Clean the removable drip tray with mild soap and water before first use for optimal hygiene and performance.

Carefully Removing the Dispenser from Packaging

Begin by carefully cutting the packaging straps and lifting the dispenser out of the box. Ensure the dispenser is upright to prevent damage. Gently remove all protective materials, such as foam inserts and plastic wrap, taking care not to scratch the surface. Inspect for any visible damage or dents. Once unpacked, place the dispenser on a flat, stable surface near a grounded electrical outlet. This ensures safe and proper installation. Clean the removable drip tray with mild soap and water before first use.

Placing the Dispenser on a Flat, Stable Surface

Position the dispenser on a flat, stable surface to ensure proper balance and function. Choose a location near a grounded electrical outlet for safe operation. Avoid placing it on uneven or soft surfaces, as this could lead to instability. Ensure the surface is dry and away from direct sunlight or moisture to prevent damage. The dispenser must be upright during initial setup to allow internal components to stabilize. This step is crucial for maintaining the unit’s performance and safety features. Always follow the manufacturer’s guidelines for placement.

Installation Steps

Position the dispenser near a grounded electrical outlet for safe operation. If transporting on its side, set it upright for 24 hours before using the cooling function.

Positioning Near a Grounded Electrical Outlet

Place the dispenser on a flat, stable surface and ensure it is positioned near a grounded electrical outlet. This ensures safe and reliable operation. Avoid exposing the dispenser to water or moisture, as it is designed for indoor use only. Keep the area around the outlet clear to prevent any hazards. Always follow the manufacturer’s guidelines for proper installation to maintain safety and functionality. This step is crucial for ensuring the dispenser operates efficiently and safely. Proper placement near a grounded outlet is essential for optimal performance.

Transporting the Dispenser on Its Side (If Needed)

Transporting the dispenser on its side is possible if necessary. However, after moving, set it upright for 24 hours before using the cooling function. This allows the compressor lubricant to settle properly, ensuring optimal performance and preventing damage. Always handle the dispenser with care to avoid tilting or dropping, as this could affect its internal components. Follow these steps to maintain the dispenser’s efficiency and longevity after transportation.

Operating Instructions

Open the lower cabinet door. Remove the cap from a 3 or 5-gallon Primo water bottle. Align the bottle with the dispenser and ensure it is securely locked. Plug in the dispenser and select desired temperature.

Opening the Lower Cabinet Door

To access the water bottle compartment, gently pull the lower cabinet door handle. Ensure the door is opened fully to allow easy installation or removal of the water bottle. This step is essential for proper dispenser operation. Always handle the door with care to avoid damage. The compartment is designed to accommodate 3, 4, or 5-gallon bottles securely. Opening the door provides clear access for maintenance, cleaning, or replacing the water bottle as needed.

Removing the Cap from a 3 or 5-Gallon Primo Water Bottle

Before placing the bottle in the dispenser, ensure the cap and neck are clean. Remove the cap by twisting it counterclockwise until it comes off completely. Align the bottle with the dispenser’s probe to ensure proper connection. If the cap is not removed, the dispenser may not function correctly; Always handle the bottle with care to avoid spills or damage. This step is crucial for proper water flow and dispenser operation. Ensure the bottle is securely placed to prevent leaks or issues during use.

Troubleshooting Common Issues

If the dispenser isn’t dispensing water, check for clogs in the filter or tube. For bottom-load models, ensure the probe tip is clear of debris for proper function.

Dispenser Not Dispensing Water

If the dispenser fails to dispense water, check for common issues like a clogged filter or tube, especially in bottom-load models. Ensure the probe tip is clean and free from blockages. Verify that the water bottle is properly seated and the cap is removed. If the dispenser was recently transported, it may need to be upright for 24 hours to allow the compressor lubricant to settle. Check the water supply line for kinks or obstructions and ensure the dispenser is powered on. Consult the manual for further troubleshooting steps if the issue persists.

Clogged Filter or Tube in Bottom-Load Models

In bottom-load models, a clogged filter or tube can disrupt water flow. Check the probe tip for blockages, as debris or sediment may accumulate. Turn off the dispenser and unplug it before cleaning. Remove the filter screen at the end of the probe and rinse it with water. If clogged, soak the filter in warm water or replace it if damaged. Reassemble and test the dispenser to ensure proper function. Regular maintenance helps prevent future issues.

Maintenance and Cleaning

Regularly clean the removable drip tray with mild soap and water to prevent mineral buildup. Check the probe tip for clogs and ensure it’s free-flowing for proper function.

Cleaning the Removable Drip Tray with Mild Soap and Water

To clean the drip tray, remove it from the dispenser and rinse with warm water. Apply mild soap using a soft cloth or sponge, avoiding abrasive materials that may scratch the surface. Rinse thoroughly to ensure no soap residue remains. Dry the tray with a clean towel before reattaching it to the dispenser. Regular cleaning prevents bacterial growth and ensures a clean water supply. This simple maintenance step is essential for optimal performance and hygiene.

Checking the Probe Tip for Clogs

Regularly inspect the probe tip in bottom-load models to ensure proper water flow. Turn off the dispenser and unplug it for safety. Locate the probe at the bottom of the dispenser where the bottle sits. Use a soft brush or cloth to gently clean any debris or sediment. If clogged, soak the tip in warm water or replace it if damaged. Allow the dispenser to cool before reconnecting the power. This maintenance step prevents dispensing issues and ensures optimal performance. Refer to the manual for detailed guidance.

Safety Precautions

Always exercise basic safety precautions. Ensure the dispenser is properly assembled and installed before use. Keep it dry and avoid exposure to water splashes during operation.

Exercising Basic Safety Precautions During Operation

Always ensure the dispenser is properly assembled and installed before use. Place it on a dry, stable surface near a grounded electrical outlet. Avoid exposing the dispenser to direct sunlight or moisture. Keep children away from hot water dispensing areas to prevent burns. Regularly inspect the power cord and plugs for damage. Never attempt to modify or repair the dispenser yourself. Use only genuine Primo parts for maintenance. Follow all safety guidelines in the manual to ensure safe and efficient operation.

Features and Benefits

The dispenser offers an instant hot water function, providing quick access to hot water. It also features energy saver switches for optimal energy efficiency and performance.

Instant Hot Water Function

The Primo bottom load water dispenser features an instant hot water function, providing hot water at the touch of a button; This convenient feature is ideal for tea, coffee, or instant meals. The dispenser uses a built-in heating element to quickly heat water to a high temperature, ensuring a consistent supply. Energy-efficient switches help manage power usage while maintaining optimal performance. This function enhances user experience, offering hot water instantly without the need for a kettle or stove, making it a practical addition to any kitchen or office setting.

Technical Specifications

Compatibility with 3, 4, or 5-Gallon Bottles

Designed for use with standard 3, 4, or 5-gallon water bottles. Model 900161 supports bottom-loading functionality for convenient operation. For indoor use only.

The Primo Bottom Load Water Dispenser is designed to work seamlessly with standard 3, 4, or 5-gallon water bottles. This versatility ensures compatibility with most common bottle sizes available in the market. The dispenser’s bottom-loading design allows for easy installation of the bottle without lifting, making it convenient for users. Always ensure the bottle is clean and the neck is free from debris before placing it in the dispenser. Visit PrimoWater.com to find compatible bottles near you.

Warranty and Customer Support

Contact Primo Water Corporation for assistance with your dispenser. Visit their official website for support resources and to access user manuals for specific models like 900161.

Contacting Primo Water Corporation for Assistance

For any inquiries or issues, visit www.PrimoWater.com and navigate to the Support section. Models like 900161 and 601272-C are covered in their resources. Primo Water Corporation provides detailed manuals and troubleshooting guides. If further assistance is needed, contact their customer support team directly. Ensure your dispenser is used indoors and properly assembled before reaching out. This ensures efficient resolution to any questions or concerns about your bottom-load water dispenser.

Accessories and Compatible Bottles

Uses standard 3, 4, or 5-gallon water bottles. Visit PrimoWater;com to find compatible bottles near you. Bottle not included with dispenser.

Finding Primo Water Bottles at a Store Near You

To locate Primo Water bottles, visit www.PrimoWater.com and use the store locator tool. Ensure compatibility by selecting 3, 4, or 5-gallon bottles. Check availability at local retailers or online. The dispenser does not include a water bottle, so purchase separately. For convenience, verify store locations and bottle sizes before visiting. This ensures a seamless experience with your Primo Bottom Load Water Dispenser.

Energy Efficiency

The dispenser features energy saver switches, optimizing energy use while maintaining performance. These switches help reduce standby power consumption, ensuring efficient operation and lower energy bills.

Energy Saver Switches for Optimal Performance

The Primo Bottom Load Water Dispenser features energy saver switches to enhance efficiency. These switches allow you to manage power consumption effectively, ensuring optimal performance while reducing energy use. Enable the energy saver mode to minimize standby power consumption without compromising the dispenser’s functionality. Always refer to the manual for specific instructions on activating and utilizing these switches for maximum energy efficiency and cost savings. Regularly checking the switches ensures the dispenser operates at its best while maintaining eco-friendly performance.

Upgrading or Modifying the Dispenser

After any modification, set the dispenser upright for 24 hours to allow the compressor lubricant to settle before using the cooling function for optimal performance.

Setting the Dispenser Upright for 24 Hours Before Using the Cooling Function

After transporting the dispenser on its side, place it upright for 24 hours before using the cooling function. This allows the compressor lubricant to settle properly, ensuring optimal performance. Failure to do so may result in reduced cooling efficiency or potential damage to the internal components. Always follow this step to maintain the dispenser’s functionality and longevity. This setup is crucial for models with cooling features to operate effectively and safely.

User FAQ

Frequently Asked Questions About the Primo Bottom Load Water Dispenser

Q: Why isn’t my dispenser working? Check if the probe tip is clogged or if the filter needs cleaning. Ensure the bottle is properly seated.

Q: Can I transport the dispenser on its side? Yes, but set it upright for 24 hours before using the cooling function to allow the compressor lubricant to settle.

Q: How do I clean the drip tray? Remove the drip tray and wash it with mild soap and water. Rinse thoroughly before replacing it.

Q: What bottle sizes are compatible? The dispenser works with 3, 4, or 5-gallon bottles. Visit www.PrimoWater.com to find compatible bottles near you.

  • Q: Can the dispenser be transported on its side?

    A: Yes, but it must be set upright for 24 hours before using the cooling function.
  • Q: How do I resolve a clogged filter or tube?

    A: Check the probe tip for clogs and clean as needed.
  • Q: Is the dispenser compatible with all water bottles?

    A: It works with standard 3, 4, or 5-gallon bottles.
  • Q: How do I access troubleshooting guides?

    A: Visit Primo Water Support for detailed instructions.

Comparison with Other Models

The Primo bottom-load dispenser stands out with its instant hot water function and compatibility with 3, 4, or 5-gallon bottles, offering greater versatility than many competitors.

Key Differences Between Primo Bottom Load and Other Dispensers

The Primo Bottom Load Water Dispenser stands out for its unique bottom-loading design, eliminating the need to lift heavy bottles. It supports 3, 4, or 5-gallon bottles, offering flexibility. Unlike top-load models, it reduces spills and strain. Energy-efficient switches optimize performance, and the instant hot water function is a standout feature; The dispenser requires setting upright for 24 hours before cooling to allow lubricant settling. Its sleek design and user-friendly interface make it a preferred choice over traditional dispensers, combining convenience with advanced functionality.

Final Thoughts on the Primo Bottom Load Water Dispenser Manual

The Primo Bottom Load Water Dispenser offers convenience, reliability, and efficiency. With features like instant hot water and compatibility with 3-5 gallon bottles, it enhances daily hydration routines while ensuring energy efficiency through its saver switches.

The Primo Bottom Load Water Dispenser Manual provides a comprehensive guide for users, ensuring smooth operation and maintenance. From unpacking to troubleshooting, it covers essential steps for optimal performance. The dispenser’s features, such as instant hot water and energy-saving switches, enhance user convenience. Regular cleaning and proper assembly are emphasized to prolong longevity. With clear instructions and safety precautions, this manual equips users to make the most of their dispenser while minimizing potential issues. It’s a valuable resource for both new and experienced users.

year 7 maths worksheets with answers pdf free download

Year 7 maths worksheets are essential resources for structured, curriculum-aligned learning․ Available as free PDF downloads, they include answers for self-assessment and cover a wide range of topics, ensuring comprehensive skill development and understanding․ Perfect for home study, classroom use, or tutoring․

Importance of Year 7 Maths Worksheets

Year 7 maths worksheets are vital for reinforcing foundational maths skills and promoting academic success․ They provide structured, topic-specific practice that aligns with the curriculum, ensuring students grasp key concepts thoroughly․ Regular use of these worksheets enhances problem-solving abilities, improves accuracy, and builds confidence in tackling mathematical challenges․ With included answers, students can self-assess their progress, identifying strengths and areas needing improvement․ This fosters independent learning and encourages students to take ownership of their maths education․ Worksheets also serve as invaluable tools for homework, revision, and targeted skill development, ensuring a strong foundation for future learning․ By catering to different learning styles, they offer flexibility for both classroom and home use, making them an essential resource for students, parents, and educators alike․ Their clear layout and step-by-step solutions make complex concepts accessible, while their comprehensive coverage of topics ensures well-rounded maths proficiency․

Benefits of Using Year 7 Maths Worksheets

Year 7 maths worksheets offer numerous benefits for students, parents, and educators․ They provide structured, topic-specific practice that aligns with the curriculum, ensuring comprehensive learning and skill development․ The inclusion of answers enables self-assessment, allowing students to identify strengths and areas needing improvement․ This fosters independent learning and encourages students to take ownership of their maths education․ Worksheets also serve as invaluable tools for homework, revision, and targeted skill development, ensuring a strong foundation for future learning․ By catering to different learning styles, they offer flexibility for both classroom and home use, making them an essential resource for students, parents, and educators alike․ Their clear layout and step-by-step solutions make complex concepts accessible, while their comprehensive coverage of topics ensures well-rounded maths proficiency․

Where to Find Free Year 7 Maths Worksheets

Free Year 7 maths worksheets with answers are available on trusted educational websites like Mashup Math, White Rose Maths, and K5 Learning․ These platforms offer downloadable PDFs covering various maths topics, ensuring easy access to high-quality resources for students, parents, and educators․

Popular Websites for Downloading Worksheets

Several reputable websites offer free Year 7 maths worksheets with answers in PDF format․ Mashup Math provides a wide range of topic-specific worksheets, including algebra and geometry, with detailed answer keys․ White Rose Maths is another popular platform, offering resources aligned with the UK curriculum․ K5 Learning features downloadable worksheets covering various maths topics, while Cluey Learning offers comprehensive materials for targeted skill development․ These websites are user-friendly, ensuring easy access to high-quality educational resources․ They cater to diverse learning needs, making them ideal for students, parents, and educators․ Regular updates with new content ensure relevance and engagement․ By visiting these platforms, users can quickly find and download worksheets tailored to Year 7 maths requirements, supporting effective learning and skill mastery․

How to Download Worksheets

Downloading Year 7 maths worksheets with answers is a straightforward process․ Start by visiting trusted educational websites like Mashup Math or White Rose Maths․ Browse through the Year 7 maths section and select the desired worksheets by topic or curriculum area․ Click the download button to access the PDF files, which are typically free and easy to save or print․ Ensure the worksheets include answer keys for self-assessment․ Once downloaded, you can use the worksheets for practice, homework, or revision․ Many websites also offer categorized resources, making it easy to find specific topics like algebra or geometry․ By following these simple steps, students, parents, and educators can quickly access high-quality learning materials tailored to Year 7 maths needs․ Regularly updated content ensures relevance and variety, supporting effective skill development and understanding․

Design and Layout of Worksheets

Year 7 maths worksheets are designed with a clear, student-friendly layout․ Each PDF focuses on specific topics like fractions or algebra, featuring varied question types and answer keys․ Visual aids and structured sections enhance understanding, while editable formats allow customization for individual learning needs․

Structure of Worksheets

Year 7 maths worksheets are meticulously structured to ensure clarity and effectiveness․ Each worksheet typically begins with a clear introduction to the topic, followed by examples and step-by-step explanations․ Practice questions are organized into sections, ranging from basic to advanced levels, allowing students to progress at their own pace․ Many worksheets include visual aids such as diagrams, charts, and graphs to enhance understanding and engagement․ The inclusion of answer keys provides students with the opportunity for self-assessment, enabling them to identify areas where they need improvement․ Worksheets are often divided into core, foundation, and higher levels to cater to diverse learning abilities․ Additionally, some worksheets are editable, allowing teachers to customize content to meet specific classroom or individual needs․ The structured format ensures that concepts are introduced progressively, with each section building on the previous one․ This design supports both independent learning and classroom instruction, making the worksheets versatile and effective tools for mastering Year 7 maths skills․

Visual Aids and Clarity

Year 7 maths worksheets are designed with clarity and visual appeal to enhance learning․ Many worksheets incorporate diagrams, charts, and graphs to illustrate complex concepts, making them easier to understand․ Visual aids such as geometric shapes, number lines, and algebraic expressions are often used to break down problems into manageable parts․ This approach helps students, especially visual learners, to grasp abstract ideas more effectively․ The use of clear fonts, ample spacing, and logical organization ensures that the content is easy to follow․ Additionally, key terms and steps are frequently highlighted or bolded to draw attention to important information․

Clarity is further enhanced by the inclusion of step-by-step solutions and examples․ These visual guides help students see how problems are solved, fostering a deeper understanding of mathematical processes․ The combination of clear layouts and engaging visuals makes the worksheets both informative and user-friendly, catering to diverse learning styles and abilities․ This thoughtful design ensures that students can focus on learning without being overwhelmed by clutter or confusion․

Curriculum Coverage

Year 7 maths worksheets cover a wide range of topics, including factors, multiples, squares, fractions, angles, ratios, and algebraic expressions․ These resources ensure comprehensive coverage of the curriculum, building a strong foundation for future learning and skill development․

Key Areas Covered

Year 7 maths worksheets cover a diverse range of topics to ensure a comprehensive understanding of key mathematical concepts․ These include number skills, such as factors, multiples, and integers, as well as operations like addition, subtraction, multiplication, and division․ Geometry topics introduce students to angles, properties of triangles and quadrilaterals, and basic trigonometry․ Algebra is also a focus, with worksheets on expressions, equations, and graphing․ Ratios, proportions, and percentages are emphasized to develop practical problem-solving skills․ Additionally, worksheets address decimals and fractions, providing a solid foundation for more complex maths in later years․ Word problems and real-world applications are often included to enhance understanding and critical thinking․ The curriculum-aligned structure ensures that each topic builds progressively, allowing students to grasp concepts before advancing to higher-level challenges․ With clear instructions and answer keys, these worksheets provide a structured and effective way to master Year 7 maths skills․

Progression of Difficulty

Year 7 maths worksheets are designed to gradually increase in difficulty, ensuring students build confidence and mastery as they progress․ Worksheets typically begin with foundational concepts, such as basic fractions, simple algebra, and straightforward word problems, before introducing more complex topics like expanding brackets, solving equations with brackets, and multiplying or dividing integers․ This structured approach allows students to reinforce their understanding of core skills before tackling higher-level challenges․ As the difficulty progresses, problems incorporate multiple steps, requiring students to apply various mathematical operations and concepts in a single question․ Visual aids, such as diagrams and charts, are often included to support comprehension of more advanced topics․ The inclusion of answer keys enables students to track their progress and identify areas where they may need additional practice․ This gradual progression of difficulty ensures that students are well-prepared to tackle more complex maths problems as they advance through the curriculum․

Overcoming Common Challenges

Year 7 students often face challenges with fractions, algebra, and word problems․ Breaking problems into smaller steps, using visual aids, and regular practice with targeted worksheets can help build confidence and improve understanding․ Answer keys provide valuable feedback for self-correction and growth․

Specific Challenges Faced by Students

Year 7 students often encounter difficulties with fractions, algebra, and word problems․ Fractions can be challenging due to converting between forms and simplifying complex expressions․ Algebra introduces abstract concepts, such as solving equations and identifying patterns, which can be overwhelming․ Word problems require interpreting context and extracting key information, a skill many students find tricky․ Additionally, time management and applying mathematical concepts to real-world scenarios are common areas of struggle․ These challenges highlight the need for targeted practice and structured resources to support learning and build confidence․

Effective Strategies for Improvement

Consistent practice and targeted strategies are key to overcoming challenges in Year 7 maths․ Breaking problems into smaller, manageable steps helps students grasp complex concepts․ Visual aids, such as diagrams and charts, enhance understanding and make abstract ideas more tangible․ Regular use of worksheets with answer keys allows students to self-assess, identify mistakes, and learn from them․ Educators and parents can provide additional support by creating personalized learning plans and encouraging collaborative problem-solving․ Focusing on weak areas through targeted practice builds confidence and improves problem-solving skills․ By reinforcing key concepts and promoting independent learning, these strategies empower students to master maths topics effectively․ Regular review of progress and celebrating small achievements motivate students to stay engaged and committed to their learning journey․

vishnu sahasranamam gujarati pdf

Vishnu Sahasranamam is a revered Sanskrit hymn containing 1000 names of Lord Vishnu‚ symbolizing His divine attributes and universal significance. Its Gujarati translation enhances accessibility‚ preserving spiritual essence and cultural heritage.

Definition and Significance

Vishnu Sahasranamam‚ meaning “a thousand names of Vishnu‚” is a sacred Sanskrit hymn extolling the virtues and attributes of Lord Vishnu‚ a central deity in Hinduism. It originates from the Mahabharata and is revered for its profound spiritual significance. Each name in the Sahasranamam encapsulates a unique aspect of Vishnu’s divine nature‚ reflecting His role as the preserver of the universe. The hymn is not just a devotional text but also a philosophical guide‚ offering insights into the nature of the ultimate reality. Its translation into Gujarati has made it accessible to a broader audience‚ preserving its spiritual essence while adapting to regional linguistic traditions. Reciting or listening to Vishnu Sahasranamam is believed to bring spiritual enlightenment‚ mental peace‚ and emotional solace‚ making it a cornerstone of Vaishnavite devotion and cultural heritage.

Origin and Historical Background

Vishnu Sahasranamam‚ an ancient Sanskrit hymn‚ originates from the Mahabharata‚ specifically the Anushasana Parva. It is attributed to Bhishma‚ who recited it to Yudhishthira‚ highlighting Lord Vishnu’s divine attributes. The hymn is structured as a dialogue‚ emphasizing Vishnu’s role as the preserver of the universe. Its historical significance lies in its compilation by Sage Vyas‚ making it a cornerstone of Vaishnavite tradition. Over centuries‚ the text has been revered for its spiritual depth and philosophical insights. The Gujarati translation emerged as a regional adaptation‚ ensuring its accessibility to a broader audience while preserving its sacred essence. This translation maintains the original meaning‚ allowing devotees to connect with Vishnu’s divine attributes in their native language‚ fostering cultural and spiritual continuity.

Structure and Composition

Vishnu Sahasranamam consists of 108 shlokas and 1000 names‚ structured as a poetic dialogue in the Mahabharata. Its Gujarati translation retains this sacred composition‚ ensuring spiritual authenticity and linguistic accessibility.

108 Shlokas and 1000 Names

Vishnu Sahasranamam consists of 108 shlokas‚ each containing multiple names of Lord Vishnu‚ culminating in a total of 1000 divine names. These shlokas are structured in a rhythmic and poetic format‚ making them easy to recite and memorize. Each name in the Sahasranamam signifies a unique attribute‚ quality‚ or aspect of Lord Vishnu‚ highlighting His omnipresence‚ omnipotence‚ and divine grace. The number 108 holds spiritual significance in Hinduism‚ often symbolizing completeness and perfection. The 1000 names are not just a enumeration but a profound exploration of Vishnu’s divine nature‚ offering devotees a deeper understanding of His virtues and cosmic role. The Gujarati translation of these shlokas and names ensures that the sacred text remains accessible to a broader audience‚ preserving its spiritual and cultural essence for future generations.

Sanskrit to Gujarati Translation

The Sanskrit to Gujarati translation of Vishnu Sahasranamam has been meticulously done to ensure the preservation of its spiritual and philosophical essence. This translation aims to make the sacred text accessible to Gujarati-speaking devotees‚ allowing them to recite and understand the divine names of Lord Vishnu in their native language; The translation maintains the original meaning and poetic rhythm of the Sanskrit version‚ ensuring that the spiritual significance remains intact. Scholars and spiritual leaders have contributed to this translation‚ blending traditional knowledge with modern accessibility. The Gujarati version is widely appreciated for its clarity and faithfulness to the original text‚ making it a valuable resource for both devotees and scholars. This translation has also been digitized in PDF formats‚ enabling easy access and propagation among a global audience.

Benefits of Reciting Vishnu Sahasranamam

Reciting Vishnu Sahasranamam brings spiritual growth‚ mental peace‚ and positive energy. It fosters devotion‚ reduces stress‚ and enhances emotional well-being‚ making it a powerful practice for holistic well-being.

Spiritual and Mental Benefits

Reciting Vishnu Sahasranamam in Gujarati fosters profound spiritual growth and mental tranquility. The hymn’s 108 shlokas‚ rich in divine meanings‚ help devotees focus their minds and attain inner peace. By chanting‚ one experiences a deep connection to Lord Vishnu‚ fostering devotion and spiritual enlightenment. The mental benefits include reduced stress‚ improved concentration‚ and clarity of thought. The Gujarati translation makes the sacred text accessible to regional speakers‚ allowing them to absorb its spiritual essence effortlessly. Regular recitation is believed to purify the mind‚ cleanse past sins‚ and grant wisdom. It also cultivates a sense of calm and resilience‚ helping individuals navigate life’s challenges with grace. The spiritual and mental benefits of Vishnu Sahasranamam are timeless‚ offering solace and enlightenment to all who embrace it.

Emotional and Psychological Benefits

Reciting Vishnu Sahasranamam in Gujarati provides immense emotional solace and psychological stability. The divine hymn helps alleviate stress‚ anxiety‚ and emotional turmoil‚ offering a sense of calm and inner peace. Its rhythmic chanting fosters mental clarity and emotional resilience‚ enabling individuals to cope with life’s challenges more effectively. The psychological benefits include enhanced focus‚ reduced negativity‚ and a heightened sense of positivity. By immersing oneself in the sacred verses‚ devotees experience emotional healing and a stronger connection to their spiritual self. The Gujarati translation makes these benefits accessible to a broader audience‚ allowing them to embrace the emotional and psychological well-being that this ancient text offers. Regular recitation is a powerful tool for maintaining emotional balance and fostering a tranquil mind.

Cultural and Social Benefits

The Gujarati translation of Vishnu Sahasranamam has profound cultural and social implications‚ fostering unity and devotion within communities. It bridges generational gaps‚ allowing younger generations to connect with ancient traditions through a familiar language. The text is often recited in collective gatherings‚ strengthening social bonds and promoting harmony. Its cultural significance is evident in religious ceremonies and festivals‚ where it is chanted to invoke blessings and prosperity. The availability of the Gujarati PDF version ensures that this sacred text remains accessible‚ preserving cultural heritage for future generations. It also serves as a tool for educating people about the values and teachings of Hinduism‚ fostering a sense of identity and belonging. By integrating spiritual and cultural practices‚ Vishnu Sahasranamam in Gujarati continues to play a vital role in community life and social cohesion.

Gujarati Translation and Its Features

The Gujarati translation of Vishnu Sahasranamam offers accurate cultural relevance‚ simple language‚ and accessibility‚ making it a cherished resource for spiritual and educational purposes‚ widely accepted in both digital and print formats.

History of Gujarati Translation

The Gujarati translation of Vishnu Sahasranamam emerged as a bridge to connect regional devotees with the sacred Sanskrit text. Early efforts in the 20th century saw scholars like Shri Yogeshwarji rendering the hymn into Gujarati‚ ensuring linguistic and cultural alignment. The Digital Library of India archived versions from 2015‚ preserving these works. Modern translators incorporated traditional meanings while adapting to contemporary language‚ enhancing accessibility. The translation gained momentum with digital platforms‚ making it reachable to a broader audience. This linguistic adaptation has played a pivotal role in spreading Vishnu Sahasranamam’s teachings across Gujarat‚ fostering spiritual unity and cultural preservation.

Unique Features of Gujarati Version

The Gujarati version of Vishnu Sahasranamam stands out for its faithful translation of the original Sanskrit text while maintaining regional linguistic nuances. It incorporates simple‚ accessible language‚ making it easier for devotees to understand and recite. The translation retains the spiritual essence and rhythmic flow of the original hymn‚ ensuring its emotional and devotional impact remains intact. Additionally‚ it often includes transliterations of the Sanskrit names alongside their Gujarati meanings‚ aiding in pronunciation and comprehension. This version also reflects Gujarat’s cultural identity‚ blending traditional values with modern accessibility. Digital versions further enhance its reach‚ offering downloadable PDFs with clear formatting and searchable features‚ making it a valuable resource for both spiritual and educational purposes.

How to Download Vishnu Sahasranamam in Gujarati PDF

Visit trusted websites like swargarohan;org or T-Series Gujarati for authentic downloads. Search for “Vishnu Sahasranamam Gujarati PDF‚” and follow the site’s instructions to download the file securely.

Trusted Sources for Download

Several trusted sources offer the Vishnu Sahasranamam in Gujarati PDF format‚ ensuring authenticity and ease of access. Websites like Swargarohan.org and Vaidika Vignanam provide downloadable versions‚ maintaining the sacred text’s integrity. Additionally‚ platforms like the Digital Library of India and Gujarat Vidyapith Library host scanned copies‚ preserving cultural heritage. These sources are non-commercial‚ focusing on spiritual dissemination rather than profit. Users can visit these official websites‚ search for “Vishnu Sahasranamam Gujarati PDF‚” and follow simple download instructions. Ensure to verify the source’s credibility to avoid unauthorized or altered versions. These platforms are widely recognized for their accurate translations and user-friendly interfaces‚ making them ideal for devotees and scholars alike.

Steps to Download and Install

To download the Vishnu Sahasranamam in Gujarati PDF‚ visit trusted websites like Swargarohan.org or Vaidika Vignanam. Navigate to the “Downloads” or “Scriptures” section. Search for “Vishnu Sahasranamam Gujarati PDF” using the site’s search bar. Select the appropriate file from the results‚ ensuring it is a PDF format. Click the “Download” button to save the file to your device. Once downloaded‚ locate the file in your downloads folder and open it using a PDF reader. For offline access‚ save the file to your desired location. No installation is required; the PDF can be directly viewed. Ensure your device has a PDF viewer installed for seamless access. Follow these steps to easily obtain and access the sacred text for spiritual enrichment.

Popular Platforms for Access

Trusted platforms like Swargarohan.org‚ Vaidika Vignanam‚ and the Digital Library of India offer easy access to Vishnu Sahasranamam in Gujarati PDF‚ ensuring authenticity and convenience for devotees.

Digital Libraries and Archives

Digital libraries and archives play a vital role in preserving and distributing sacred texts like the Vishnu Sahasranamam in Gujarati. Platforms such as the Digital Library of India and archives like the Internet Archive have made the Gujarati translation of Vishnu Sahasranamam readily accessible. These repositories ensure that ancient scriptures are digitized and available for future generations. Many of these libraries‚ such as the Gujarat Vidyapith Library‚ have meticulously scanned and uploaded PDF versions of the text‚ complete with Sanskrit verses and their Gujarati meanings. This effort not only promotes religious and cultural heritage but also facilitates easy access for devotees worldwide. Additionally‚ these digital archives often include historical manuscripts and rare publications‚ making them invaluable resources for scholars and researchers. The use of OCR (Optical Character Recognition) technology ensures that the texts are searchable and readable‚ enhancing user convenience. These digital initiatives have revolutionized the way sacred texts are preserved and shared‚ bridging the gap between tradition and modernity.

Religious and Cultural Websites

Religious and cultural websites have become essential platforms for accessing the Vishnu Sahasranamam in Gujarati. Websites like Vaidika Vignanam and Swargarohan.org offer downloadable PDF versions of the text‚ complete with Sanskrit verses and their Gujarati translations. These platforms cater to devotees and scholars alike‚ providing a seamless way to explore the spiritual and cultural significance of the hymn. Many of these sites also include audio recitations‚ making it easier for followers to practice and recite the Sahasranamam. Additionally‚ some platforms‚ such as T-Series Gujarati‚ offer multimedia resources that blend traditional chants with modern digital accessibility. These websites not only preserve the sacred text but also foster a sense of community by allowing users to share and discuss their experiences. By leveraging technology‚ these platforms ensure that the Vishnu Sahasranamam remains relevant and accessible in the digital age‚ bridging the gap between tradition and contemporary practices.

Importance of PDF Format

The PDF format ensures convenient access to Vishnu Sahasranamam in Gujarati‚ offering easy readability‚ zoom functionality‚ and offline access. It preserves the sacred text’s integrity‚ making it ideal for spiritual practices and daily recitation.

Convenience and Accessibility

The availability of Vishnu Sahasranamam in Gujarati PDF format has revolutionized its accessibility for devotees. This digital version allows seamless downloading from trusted sources like the Digital Library of India or Vaidika Vignanam‚ ensuring it reaches a broader audience. The PDF format is portable‚ enabling users to carry the sacred text on smartphones‚ tablets‚ or laptops‚ making it easy to recite anytime‚ anywhere. Additionally‚ the digital version often includes features like search functionality‚ adjustable font sizes‚ and bookmarks‚ enhancing the reader’s experience. This convenience is particularly beneficial for those with limited access to physical copies or preferring a modern‚ eco-friendly alternative. The PDF also supports sharing among devotees‚ fostering a sense of community and spiritual connection. Its accessibility has made it easier for people to incorporate Vishnu Sahasranamam into daily worship‚ ensuring its timeless wisdom remains relevant in the digital age.

Preservation of Sacred Texts

The digital availability of Vishnu Sahasranamam in Gujarati PDF ensures the preservation of this sacred text for future generations. By digitizing the scripture‚ it is protected from physical degradation‚ such as wear and tear of traditional palm-leaf manuscripts. Organizations like the Digital Library of India and Vaidika Vignanam have played a pivotal role in archiving and distributing these texts‚ maintaining their integrity and accessibility. The PDF format allows for precise replication of the original Sanskrit verses alongside their Gujarati translations‚ ensuring linguistic and cultural authenticity. This digital preservation also safeguards the hymn from potential loss due to natural disasters or human error. As a result‚ Vishnu Sahasranamam remains a timeless spiritual resource‚ accessible to devotees worldwide while honoring its ancient heritage. This effort underscores the importance of blending tradition with modern technology to protect sacred knowledge.

Cultural Significance in Gujarat

Vishnu Sahasranamam holds deep cultural significance in Gujarat‚ with its Gujarati translation fostering spiritual unity and devotion. It is often recited in temples and homes‚ enriching religious practices and community bonds.

Role in Religious Ceremonies

Vishnu Sahasranamam holds a profound place in religious ceremonies across Gujarat‚ particularly in temples and home pujas. Its recitation is believed to invoke divine blessings‚ ensuring prosperity and peace. During weddings‚ Griha Pravesh‚ and other auspicious events‚ devotees chant these verses to seek Lord Vishnu’s grace. The Gujarati translation has made it accessible to a broader audience‚ fostering deeper spiritual connection. Many temples organize mass recitations‚ fostering community bonding and reinforcing faith. This sacred text is also integral to rituals honoring Vishnu‚ such as Janmashtami and Ekadashi‚ enhancing their spiritual significance. Its inclusion in ceremonies reflects its cultural and religious importance‚ making it a cornerstone of devotional practices in Gujarat.

Impact on Community Practices

The Gujarati translation of Vishnu Sahasranamam has profoundly influenced community practices‚ fostering unity and spiritual growth. Regular recitation sessions in temples and homes have become common‚ encouraging collective worship. Cultural festivals now often feature group chanting‚ creating a sense of togetherness. The translation has also inspired educational programs‚ teaching younger generations about Vishnu’s teachings. Community organizations frequently organize mass recitals‚ strengthening cultural bonds. This shared devotion has deepened faith and promoted harmony‚ making Vishnu Sahasranamam a cornerstone of community life in Gujarat. Its widespread adoption reflects its enduring relevance and the community’s commitment to preserving sacred traditions.

Modern Interpretations and Uses

Vishnu Sahasranamam’s modern interpretations include digital platforms‚ apps‚ and contemporary art‚ reimagining its spiritual essence for today’s audience while preserving its sacred roots.

Educational and Research Purposes

The Gujarati translation of Vishnu Sahasranamam serves as a valuable resource for educational and research purposes. Scholars and students can study the hymn’s spiritual and philosophical depth‚ while language learners benefit from its linguistic richness. The PDF format allows easy access to the text‚ enabling comparative analysis with the original Sanskrit version. Researchers can explore the cultural and historical context of the translation‚ tracing its evolution and adaptation into Gujarati. Additionally‚ the structured format of the PDF facilitates thematic studies‚ such as analyzing the names of Vishnu and their meanings. This resource is particularly useful for those interested in Hindu theology‚ linguistics‚ and the preservation of sacred texts. Its availability online promotes widespread academic engagement‚ making it a cornerstone for both personal and institutional studies.

Digital Sharing and Propagation

The Gujarati PDF version of Vishnu Sahasranamam has revolutionized its digital sharing and propagation. With the rise of online platforms‚ devotees and scholars can easily access and share the text globally. Websites like Swargarohan.org and Vaidika Vignanam offer downloadable PDFs‚ ensuring widespread dissemination. Social media platforms‚ messaging apps‚ and email have further facilitated sharing‚ making the sacred text accessible to a broader audience. This digital availability has also enabled younger generations to connect with their cultural and spiritual heritage. Additionally‚ platforms like YouTube‚ with channels such as T-Series Gujarati‚ provide audio and video recitations‚ complementing the PDF versions. This integration of technology and tradition has not only preserved the text but also enhanced its reach‚ fostering a sense of community and spiritual unity among followers worldwide. The digital format ensures that Vishnu Sahasranamam remains relevant and accessible in the modern era.

Vishnu Sahasranamam in Gujarati PDF is a timeless spiritual treasure‚ offering profound insights into Lord Vishnu’s divinity. Its digital availability ensures easy access‚ preserving its cultural and religious significance for future generations.

Final Thoughts on Vishnu Sahasranamam

Vishnu Sahasranamam is a timeless spiritual treasure‚ embodying the essence of devotion and wisdom. Its 1000 names of Lord Vishnu encapsulate His divine attributes‚ offering profound insights into His universal presence. The Gujarati translation bridges cultural and linguistic gaps‚ making this sacred text accessible to a broader audience. It not only preserves the spiritual heritage of India but also fosters a deeper connection with the divine. Reciting or studying this text is believed to bring peace‚ clarity‚ and spiritual growth; The availability of Vishnu Sahasranamam in Gujarati PDF format ensures its reach and convenience for modern seekers. It remains a vital tool for personal reflection‚ communal worship‚ and cultural preservation‚ inspiring generations to explore its timeless wisdom.

Encouragement for Further Exploration

Exploring Vishnu Sahasranamam in Gujarati PDF is a rewarding journey that deepens spiritual understanding and cultural connection. This sacred text‚ now accessible in Gujarati‚ invites devotees and learners to delve into its profound meanings and reflections. The availability of digital formats ensures convenience‚ making it easier to study and recite regularly. Readers are encouraged to embrace this opportunity to connect with Lord Vishnu’s divine attributes and experience the transformative power of His names. By engaging with the Gujarati translation‚ one can bridge the gap between ancient wisdom and modern accessibility. Further exploration fosters a deeper appreciation of Hindu spirituality and its universal messages of peace and harmony. Embrace this timeless text and let its wisdom guide you on your spiritual path.