Archive title

Autem vel eum iriure dolor in hendrerit in vulputate velit esse molestie consequat, vel illum dolore eu feugiat nulla facilisis at vero eros et dolore feugait.

Monthly Archive July 26, 2025

sock length guide

Sock length is a crucial aspect of both fashion and comfort‚ impacting functionality and self-expression. This guide helps you choose the perfect pair for every occasion.

1.1 Importance of Sock Length in Fashion and Comfort

Sock length plays a vital role in both fashion and comfort‚ often overlooked but essential for a polished look. The right length enhances outfit aesthetics while providing support and functionality. Whether for formal events or casual wear‚ proper sock length ensures feet stay comfortable and stylish. It influences moisture-wicking‚ cushioning‚ and overall foot health. Socks also serve as a canvas for self-expression‚ with varying lengths offering versatility. Gen Z’s preference for bold‚ statement-making socks highlights their growing importance in fashion trends. Additionally‚ eco-friendly materials like bamboo and cotton are gaining traction‚ blending style with sustainability. Choosing the right sock length is key to balancing practicality and personal flair‚ making it a cornerstone of everyday attire.

1.2 Brief Overview of Sock Length Varieties

Sock lengths vary to cater to different needs and preferences‚ ranging from no-show to over-the-calf options. No-show socks are invisible‚ ideal for casual shoes‚ while ankle socks offer subtle coverage. Crew socks are mid-calf‚ providing versatility for everyday wear. Mid-calf and over-the-calf styles are longer‚ often used for formal or athletic purposes. Materials like cotton‚ wool‚ and bamboo add comfort and durability. Each length serves specific occasions‚ ensuring functionality and style. Understanding these varieties helps in making informed choices‚ balancing aesthetics with practicality. Whether for sports‚ formal events‚ or casual outings‚ the right sock length enhances both comfort and confidence‚ making it a key element in wardrobe decisions.

Types of Sock Lengths

Socks come in various lengths‚ including no-show‚ ankle‚ crew‚ mid-calf‚ and over-the-calf‚ each designed for specific activities‚ styles‚ and comfort needs‚ ensuring versatility for every occasion;

2.1 No-Show Socks

No-show socks are designed to remain hidden beneath low-cut shoes‚ offering a sleek‚ minimalist look. They are ideal for casual outings‚ athletic activities‚ or pairing with sneakers. These socks typically feature a low profile‚ often sitting below the ankle bone‚ and are crafted with breathable materials to keep feet cool and dry. Their discreet design makes them a popular choice for those who prefer a clean aesthetic without sacrificing comfort. No-show socks are perfect for summer outfits or sports‚ providing support and moisture-wicking properties while staying out of sight. They are a versatile option for modern wardrobes‚ blending practicality with style seamlessly.

2.2 Ankle Socks

Ankle socks are a popular choice‚ sitting just above the ankle bone‚ offering a balance between style and practicality. They are versatile‚ suitable for casual wear‚ sports‚ or formal events. These socks provide adequate coverage while maintaining a sleek appearance‚ making them ideal for pairing with sneakers‚ loafers‚ or even dress shoes. Ankle socks are favored for their comfort and breathability‚ often featuring moisture-wicking materials. They are a staple in many wardrobes‚ catering to both everyday use and athletic activities. Their subtle design allows them to blend seamlessly with various outfits‚ while their durability ensures long-lasting wear. Ankle socks are a timeless option‚ perfect for those seeking a classic yet modern look.

2.3 Crew Socks

Crew socks are a classic choice‚ offering a mid-calf length that provides both comfort and versatility. They are ideal for everyday wear‚ casual outings‚ or even formal events‚ depending on the material and design. Crew socks are typically made from soft‚ breathable fabrics like cotton‚ wool‚ or bamboo‚ ensuring durability and comfort. Their mid-calf design allows for a balanced look‚ pairing well with jeans‚ trousers‚ or skirts. They are also popular for athletic activities‚ as they offer sufficient support and moisture-wicking properties. Crew socks are a timeless option‚ suitable for all genders and ages‚ making them a staple in many wardrobes. Their adaptability ensures they remain a favorite for various occasions and styles.

2.4 Mid-Calf Socks

Mid-calf socks are a versatile option‚ offering a length that falls just below the calf. They are ideal for both casual and formal settings‚ providing a balanced look that complements various outfits. Made from materials like bamboo‚ cotton‚ or wool‚ mid-calf socks ensure comfort and durability. Their slightly longer design offers additional support and coverage‚ making them suitable for athletic activities or colder weather. They are also a popular choice for winter outfits‚ as they can be layered with boots or shoes. Mid-calf socks are a practical and stylish option‚ catering to diverse preferences and occasions‚ making them a favorite for many individuals seeking comfort and versatility in their footwear choices.

2.5 Over-the-Calf Socks

Over-the-calf socks are a sophisticated choice‚ extending above the calf and staying in place throughout the day. They are ideal for formal events‚ business attire‚ and elegant outfits‚ ensuring a polished look. These socks are often made from premium materials like wool or bamboo‚ offering both comfort and durability. Their longer length provides additional warmth‚ making them a popular choice for winter outfits. Over-the-calf socks are also known for their ability to complement dress shoes and boots seamlessly. They are a versatile option for those seeking a balance between style and functionality‚ ensuring a refined appearance in any formal setting while maintaining comfort and practicality.

Sock Length by Occasion

Sock length is tailored to specific occasions‚ ensuring style and comfort. Formal events call for longer socks‚ while casual wear prefers shorter styles. Athletic activities demand moisture-wicking options‚ and winter outfits benefit from thick‚ warm socks.

3.1 Formal Events

In formal settings‚ sock length plays a significant role in completing a polished look. For business meetings or black-tie events‚ over-the-calf or mid-calf socks are ideal‚ as they stay in place and maintain a sleek appearance. These lengths ensure that socks remain visible when sitting or standing‚ avoiding any unsightly gaps. Opt for materials like wool or cotton for a refined feel. Neutral or subtle patterns are recommended to complement formal attire without drawing attention away from the outfit. Proper fit is essential to prevent slipping‚ ensuring comfort throughout the event. Socks in formal settings not only enhance style but also contribute to a professional and put-together image.

3.2 Casual Wear

Casual wear offers a versatile canvas for expressing personal style through sock length. For relaxed outings‚ ankle or no-show socks are popular‚ pairing seamlessly with sneakers or loafers. Crew socks also work well‚ adding a subtle touch to jeans or shorts. Bold colors and patterns can elevate a simple outfit‚ making socks a fun accessory. Gen Z often opts for statement-making designs‚ blending comfort with fashion. Eco-friendly materials‚ like bamboo or soft cotton‚ are gaining traction for casual settings‚ offering both sustainability and comfort. Whether running errands or meeting friends‚ the right sock length ensures a balanced look that’s both stylish and practical for everyday wear.

3.3 Athletic Activities

When engaging in athletic activities‚ sock length plays a vital role in performance and comfort. Crew or mid-calf socks are ideal for sports‚ offering support and moisture-wicking properties. Over-the-calf socks are preferred for high-intensity workouts‚ providing additional stability. Synthetic materials or wool blends are recommended for their breathability and sweat absorption. Proper fit is essential to prevent blisters and discomfort during exercise. Measuring foot length ensures a snug yet comfortable fit‚ enhancing overall athletic performance. Whether running‚ cycling‚ or training‚ the right sock length and material can make a significant difference in both endurance and recovery. Choose wisely to optimize your athletic experience and maintain peak performance levels.

3.4 Winter Outfits

During winter‚ sock length is essential for both warmth and style. Over-the-calf or mid-calf socks are ideal‚ as they provide insulation and complement boots or heavy footwear. Wool or bamboo socks are recommended for their thermal properties and moisture-wicking abilities. Proper fit ensures comfort and prevents blisters‚ especially during extended outdoor activities. Measuring foot length helps in selecting socks that stay snug without restricting movement. Pairing the right sock length with winter outfits enhances overall warmth and aesthetic appeal. Whether layering under thick pants or wearing with skirts‚ the correct sock length ensures a cozy and fashionable winter experience. Stay warm and stylish with the perfect sock choice.

Sock Length and Foot Measurements

Accurate foot measurements ensure proper sock fit‚ enhancing comfort and functionality. Measure foot length to determine ideal sock length for optimal support and style.

4.1 Measuring Foot Length for Socks

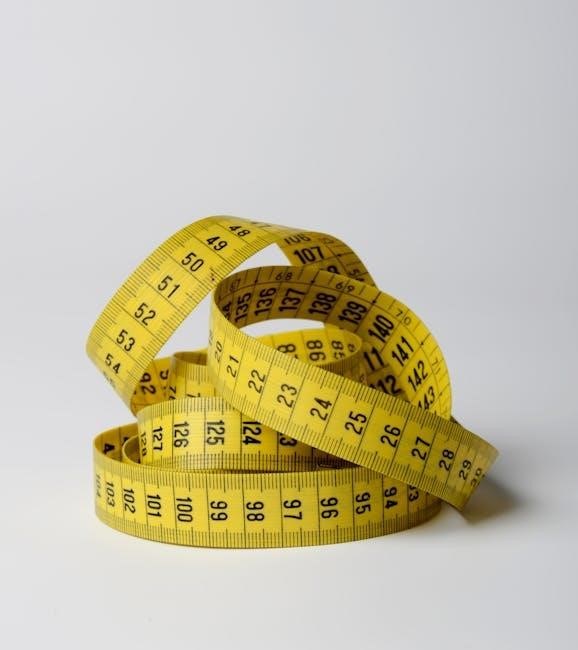
Measuring foot length is essential for selecting the right sock size. Place the foot flat on a ruler‚ measuring from the back of the heel to the tip of the longest toe. This ensures a proper fit‚ preventing discomfort and blisters. For handmade socks‚ two key measurements are crucial: foot length and circumference. Accurate measurements guarantee a snug‚ comfortable fit‚ whether for casual wear or athletic activities. Using a flexible ruler or a Brannock device can help achieve precise results. Proper fit enhances both functionality and style‚ making it a vital step in choosing the ideal sock length for any occasion.

4.2 Importance of Proper Fit

A proper fit is crucial for both comfort and functionality. Ill-fitting socks can lead to discomfort‚ blisters‚ or restricted movement‚ especially during physical activities. Correctly sized socks ensure optimal support and prevent issues like toe crowding or heel slippage. Proper fit also enhances style‚ as socks that are too tight or too loose can detract from an outfit. For athletic pursuits‚ a well-fitting sock is essential for performance and injury prevention. Additionally‚ proper fit contributes to overall foot health by maintaining circulation and reducing friction. Whether for formal events‚ casual wear‚ or sports‚ the right fit ensures a balance of aesthetics and practicality‚ making it a cornerstone of sock selection.

Sock Length Trends

Sock length trends are evolving‚ with Gen Z favoring bold‚ statement-making styles. Eco-friendly materials and vibrant designs are gaining popularity‚ blending fashion with sustainability and comfort seamlessly.

5.1 Gen Z Sock Preferences

Gen Z is redefining sock fashion with bold‚ statement-making styles. They favor vibrant colors‚ unique patterns‚ and creative designs that reflect individuality. Sock length preferences vary‚ but many opt for shorter styles like no-show or ankle socks for casual wear. Sustainability is key‚ with eco-friendly materials like bamboo gaining traction. This generation uses socks as a form of self-expression‚ often pairing them with sneakers or streetwear. The trend emphasizes comfort without compromising on style‚ making socks a versatile accessory for everyday outfits. Gen Z’s influence is driving the sock industry toward bolder‚ more personalized options that blend practicality with fashion-forward thinking.

5.2 Eco-Friendly Sock Options

Eco-friendly sock options are gaining popularity as consumers prioritize sustainability. Bamboo socks are a top choice due to their softness‚ breathability‚ and eco-conscious production. Organic cotton socks are another favorite‚ offering durability while minimizing environmental impact. Many brands now use recycled materials‚ reducing waste and promoting a greener lifestyle. These options not only align with environmental values but also provide comfort and style. The demand for sustainable socks reflects a broader shift toward responsible fashion‚ encouraging manufacturers to adopt eco-friendly practices. By choosing these options‚ consumers can enjoy high-quality socks while supporting a healthier planet. This trend highlights the importance of combining fashion with environmental responsibility.

Materials and Sock Length

Materials like cotton‚ wool‚ and synthetic fibers influence sock length choices. Cotton offers breathability‚ wool provides warmth‚ and synthetics ensure durability‚ catering to diverse needs and preferences.

6.1 Cotton Socks

Cotton socks are a popular choice due to their softness‚ breathability‚ and comfort. They are ideal for casual wear and athletic activities‚ offering moisture-wicking properties that keep feet dry.

Available in various lengths‚ cotton socks pair well with sneakers‚ loafers‚ or boots. Their versatility makes them suitable for both everyday use and sports‚ ensuring a cozy fit all day.

Additionally‚ cotton socks are eco-friendly‚ as they are made from natural fibers. This makes them a sustainable option for those prioritizing environmental consciousness without compromising on style or functionality.

6.2 Wool Socks

Wool socks are renowned for their exceptional warmth and moisture-wicking properties‚ making them ideal for colder climates and winter outfits. They are durable and breathable‚ ensuring comfort during extended wear.

Available in mid-calf and over-the-calf lengths‚ wool socks are perfect for pairing with boots or heavy footwear. Their natural insulation keeps feet cozy while preventing odor buildup.

Additionally‚ wool is a sustainable and eco-friendly material‚ aligning with the growing demand for environmentally conscious fashion choices. This makes wool socks a practical and stylish option for those seeking both functionality and sustainability.

6;3 Synthetic Socks

Synthetic socks‚ often made from materials like polyester or nylon‚ are known for their durability and moisture-wicking properties. They are ideal for athletic activities and casual wear.

These socks are lightweight and breathable‚ making them suitable for warm weather and high-intensity workouts. Their quick-drying fabric prevents moisture buildup‚ reducing the risk of blisters and odor.

Synthetic socks come in various lengths‚ including crew and ankle styles‚ offering versatility for different outfits and occasions. They are also easy to care for‚ maintaining their shape and performance after multiple washes.

While they may lack the natural feel of cotton or wool‚ synthetic socks are a practical choice for those prioritizing functionality and longevity in their footwear.

6.4 Bamboo Socks

Bamboo socks are an eco-friendly and stylish option‚ offering exceptional breathability and softness. Made from bamboo fibers‚ they are naturally antibacterial and moisture-wicking‚ making them ideal for warm weather.

These socks are lightweight and gentle on the skin‚ providing comfort for both casual and formal occasions. Their unique texture and sustainable production process appeal to environmentally conscious consumers.

Bamboo socks are available in various lengths‚ from ankle to crew styles‚ ensuring versatility for different outfits. They are durable and maintain their shape well after washing‚ making them a practical choice for everyday wear.

Choosing the right sock length enhances both style and comfort‚ ensuring a perfect fit for every occasion. Explore options wisely to elevate your wardrobe and well-being.

7.1 Final Thoughts on Choosing the Right Sock Length

Choosing the right sock length is a balance of style‚ comfort‚ and practicality. Whether for formal events‚ casual wear‚ or athletic activities‚ the perfect fit enhances both appearance and functionality. Current trends highlight bold designs and eco-friendly materials‚ catering to diverse preferences. Gen Z favors statement-making styles‚ while others opt for timeless classics. Proper fit ensures comfort and prevents issues like blisters or restricted movement. Measure your feet accurately to find the ideal length and material for your needs. Ultimately‚ socks are a personal expression‚ so select lengths that boost confidence and complement your lifestyle. With so many options‚ there’s a perfect pair for everyone.

17 day diet cycle 1 pdf

The 17 Day Diet Cycle 1 is a transformative phase designed to reset your metabolism and promote rapid weight loss through clean eating and nutrient-dense foods.

Overview of the 17 Day Diet Program

The 17 Day Diet is a structured, cyclical weight loss program divided into four distinct phases, each lasting 17 days. Cycle 1, known as the “Kickstart” phase, focuses on rapid weight loss by resetting metabolism and eliminating harmful dietary habits. It emphasizes clean eating, with a focus on lean proteins, healthy fats, and low-carbohydrate intake. This phase strictly limits processed foods, added sugars, and unhealthy fats to promote fat burning and detoxification. The program is designed to prevent plateaus by varying dietary approaches in subsequent cycles, ensuring sustained weight loss and improved overall health. Resources like the 17 Day Diet Cycle 1 PDF provide detailed meal plans and guidelines for success.

Understanding the Importance of Cycle 1

Cycle 1 of the 17 Day Diet is crucial for resetting your metabolism and initiating rapid weight loss. It focuses on clean eating, eliminating processed foods, added sugars, and unhealthy fats. This phase jumpstarts your body’s fat-burning process and helps establish healthy eating habits. By restricting certain food groups, Cycle 1 sets the foundation for the entire program, ensuring your body and mind are prepared for the subsequent phases. Its strict guidelines are designed to maximize results, making it an essential step toward achieving your weight loss goals and improving overall health.

Core Principles of Cycle 1

Cycle 1 emphasizes a cyclical approach, focusing on clean eating, balanced macronutrients, and eliminating processed foods to reset metabolism and promote rapid weight loss effectively.

The Cyclical Approach to Weight Loss

The 17 Day Diet employs a cyclical approach to weight loss, dividing the program into four distinct 17-day phases. This method prevents metabolic slowdown by varying dietary strategies, ensuring sustained progress. Cycle 1 focuses on resetting metabolism through clean eating and nutrient-dense foods, while subsequent cycles introduce new foods and macronutrient balances. This cyclical design keeps the body responsive, avoiding plateaus and maintaining motivation. By rotating strategies every 17 days, the diet promotes long-term weight loss and healthier habits, making it more effective than static diet plans.

Focus on Clean Eating and Nutrient-Dense Foods

Cycle 1 emphasizes clean eating, prioritizing whole, unprocessed foods rich in nutrients. This phase eliminates sugars, unhealthy fats, and processed items, focusing instead on lean proteins, vegetables, and healthy fats. By concentrating on nutrient-dense foods, the diet helps reset metabolism and reduce inflammation. Clean eating fosters a foundation for sustainable weight loss and improved overall health. This approach encourages dieters to avoid empty calories and focus on foods that provide energy and satisfaction, making it easier to adhere to the program and achieve long-term success.

Eliminating Processed Foods and Added Sugars

Cycle 1 strictly removes processed foods and added sugars to reset your metabolism and reduce inflammation. These items are replaced with whole, nutrient-dense foods to promote fat burning and energy. By cutting out refined carbohydrates and sugary snacks, the body transitions to a cleaner, more efficient state. This elimination phase helps break unhealthy cravings and kickstarts weight loss. The focus is on natural foods like lean proteins, vegetables, and healthy fats, ensuring a strong foundation for long-term success and improved overall health.

Importance of Protein, Carbohydrates, and Healthy Fats

In Cycle 1, balancing protein, carbohydrates, and healthy fats is crucial for optimal weight loss and metabolic function. Protein supports muscle retention and satiety, while low-carb, nutrient-dense vegetables provide sustained energy. Healthy fats, like avocados and nuts, aid in hormone production and satisfaction. This macronutrient balance prevents extreme hunger and fatigue, ensuring a smooth transition into the diet. By focusing on whole, unprocessed sources, the body efficiently burns fat, maintaining energy levels and promoting overall health during the initial phase of the program.

17 Day Diet Cycle 1 Food List

Cycle 1 emphasizes lean proteins, vegetables, and healthy fats, while eliminating processed foods, added sugars, and unhealthy fats to promote clean eating and rapid weight loss.

Approved Foods for Cycle 1

Cycle 1 focuses on lean proteins like chicken, turkey, fish, and eggs, along with non-starchy vegetables such as spinach, broccoli, and cucumbers. Healthy fats, including avocado, nuts, and seeds, are allowed in moderation. Low-sugar fruits like berries and citrus are also permitted. The diet encourages whole, unprocessed foods to maximize nutrient intake and support rapid weight loss. Staying hydrated with water and herbal teas is strongly recommended. This phase avoids grains, dairy, and high-sugar foods to jumpstart metabolism and fat burning. The approved foods list is designed to reset your body and establish a foundation for healthy eating habits.

Foods to Avoid During Cycle 1

Cycle 1 prohibits processed foods, added sugars, grains, and most dairy products to maximize fat burning and metabolic reset. Avoid high-sugar fruits, alcohol, and unhealthy fats. Refined carbohydrates, sugary snacks, and sodas are strictly off-limits. This phase also limits starchy vegetables like potatoes and corn. By eliminating these foods, the body shifts focus to burning stored fat for energy, promoting rapid weight loss. The strict restrictions are temporary and designed to kickstart metabolism, setting the stage for healthier habits in subsequent cycles. Adherence to this list is crucial for achieving the desired results in the initial phase.

Creating a Balanced Meal Plan

Creating a balanced meal plan for Cycle 1 involves focusing on lean proteins, vegetables, and healthy fats while avoiding restricted foods. Start with breakfast options like non-fat yogurt with berries or scrambled eggs with spinach. For lunch, include grilled chicken or fish paired with a variety of colorful vegetables. Dinners should feature similar protein sources, accompanied by steamed or roasted veggies. Snacks can include hard-boiled eggs, raw vegetables, or a small portion of nuts. Ensure meals are portion-controlled and hydrated with plenty of water. Planning meals in advance helps maintain adherence and keeps you on track throughout the cycle.

Sample 17 Day Diet Cycle 1 Meal Plan

Breakfast: Non-fat yogurt with berries and sweetener, green tea. Lunch: Grilled chicken on greens with vinaigrette. Dinner: Baked fish with steamed vegetables. Snacks: Raw veggies and nuts.

Breakfast Options

Start your day with nutrient-dense breakfasts like non-fat plain yogurt topped with fresh berries and a sweetener, paired with a cup of green tea. Eggs are also a great option—scrambled, boiled, or made into omelets with spinach or mushrooms. For a quick meal, try a protein smoothie with almond milk, spinach, and a scoop of low-sugar protein powder. Avoid sugary cereals and opt for whole, unprocessed foods to keep your metabolism active. These breakfast choices are designed to fuel your body and support your weight loss goals while keeping you satisfied until lunch.

Stay consistent and enjoy the variety!

Lunch Ideas

For lunch, focus on lean proteins and fresh vegetables. Grilled chicken breast served on a bed of mixed greens with cucumber, carrots, and cherry tomatoes is a great option. Add a light vinaigrette made from olive oil and apple cider vinegar for flavor. Another idea is a turkey lettuce wrap with avocado and tomato, or a tuna salad mixed with low-fat mayo and served on a bed of spinach. These meals are high in protein, low in carbs, and rich in nutrients, keeping you energized and aligned with Cycle 1’s goals. Stay hydrated with a cup of green tea or water.

Keep it fresh and satisfying!

Dinner Recipes

Dinner in Cycle 1 focuses on lean proteins and vegetables, avoiding carbs and sugars. Grilled chicken breast with roasted broccoli and cauliflower is a popular choice. Baked salmon with a side of asparagus and Brussels sprouts is another nutritious option. Turkey meatballs made with spinach and served over zucchini noodles (zoodles) are flavorful and filling. Stir-fries with lean ground beef or tofu, mixed with bell peppers, mushrooms, and snow peas, are also great. Don’t forget to include a side salad with olive oil and vinegar dressing. These meals are designed to keep you satisfied while supporting your weight loss goals.

Stay consistent and enjoy the flavors!

Snack Choices

Snacks in Cycle 1 are designed to keep you satisfied without breaking the diet rules. Opt for raw or roasted vegetables like cucumbers, bell peppers, or broccoli. A small handful of nuts or seeds, such as almonds or pumpkin seeds, is also allowed. Hard-boiled eggs, a small apple with a tablespoon of almond butter, or a cup of non-fat plain Greek yogurt are great options. For something sweet, try a few strawberries or blueberries. Remember to keep portions controlled and avoid added sugars or processed snacks. Staying hydrated with water or herbal tea is also encouraged.

Snack wisely to support your weight loss journey!

Benefits of Cycle 1

Cycle 1 jumpstarts metabolism, promoting rapid weight loss and establishing healthy eating habits. It focuses on clean, nutrient-dense foods, setting the foundation for long-term success.

Jumpstarting Metabolism

Cycle 1 of the 17 Day Diet is specifically designed to activate your metabolism, helping your body burn fat more efficiently. By eliminating processed foods, added sugars, and unhealthy fats, you create an environment where your metabolism can thrive. The focus on clean, nutrient-dense foods like lean proteins, healthy fats, and low-carb vegetables provides the energy your body needs to function optimally. This phase also introduces a balanced intake of macronutrients, ensuring your metabolism stays active and engaged; The result is a metabolic boost that sets the stage for successful weight loss in subsequent cycles, making it easier to maintain momentum and achieve long-term results.

Rapid Weight Loss

Rapid Weight Loss

Cycle 1 of the 17 Day Diet is renowned for its ability to deliver rapid weight loss by targeting fat stores through a strict, low-carb, high-protein approach. By eliminating sugars, processed foods, and unhealthy fats, your body transitions into a fat-burning mode, accelerating weight loss. The clean eating focus ensures you’re fueling your body with nutrient-dense foods that support optimal function. This phase is designed to shed pounds quickly, providing visible results that motivate and encourage continued commitment to the program. The combination of metabolic activation and dietary discipline makes Cycle 1 a powerful starting point for achieving rapid weight loss goals.

Establishing Healthy Eating Habits

Cycle 1 of the 17 Day Diet lays the groundwork for developing sustainable healthy eating habits by focusing on whole, nutrient-dense foods. By eliminating processed foods, added sugars, and unhealthy fats, participants learn to prioritize clean eating. The emphasis on lean proteins, vegetables, and low-sugar fruits helps reset taste preferences and reduce cravings for unhealthy options. This phase encourages mindful eating and portion control, setting the stage for long-term dietary changes. The structured food list and meal plans provide clarity, making it easier to adopt habits that promote overall wellness and weight management beyond the initial 17 days.

Challenges of Cycle 1

  • Strict dietary restrictions can be difficult to follow, especially for those accustomed to processed or high-sugar foods.
  • Adapting to a low-carb, high-protein diet may lead to initial cravings and withdrawal symptoms like fatigue or irritability.
  • Managing cravings for eliminated foods requires strong willpower and discipline.

Strict Dietary Restrictions

Cycle 1 imposes strict dietary rules, eliminating processed foods, added sugars, grains, and most dairy products. This restrictive approach aims to reset metabolism but can be challenging. Participants must focus on lean proteins, healthy fats, and low-carb vegetables, requiring careful meal planning. The sudden removal of familiar foods often leads to cravings and withdrawal-like symptoms, making adherence difficult. However, the program emphasizes the importance of these restrictions to achieve rapid weight loss and metabolic reboot. Staying disciplined is crucial during this phase to maximize results and prepare for subsequent cycles.

Adapting to a Low-Carb, High-Protein Diet

Transitioning to a low-carb, high-protein diet in Cycle 1 can be challenging, especially for those accustomed to carbohydrate-rich foods. The sudden reduction in carbs may lead to temporary withdrawal-like symptoms, such as fatigue or brain fog. However, focusing on lean proteins like chicken, turkey, and fish, along with healthy fats, helps stabilize energy levels and reduce hunger. This macronutrient shift encourages the body to burn fat for fuel, promoting weight loss. While the adjustment can be tough initially, many find the results transformative, making the effort worthwhile for sustainable weight loss.

Managing Cravings

Managing cravings during Cycle 1 of the 17 Day Diet can be challenging but achievable with strategic approaches. Eliminating processed foods and added sugars helps reduce cravings over time. Staying hydrated and incorporating physical activity can distract from hunger pangs. Focus on nutrient-dense foods like lean proteins, vegetables, and healthy fats to keep you satisfied. Planning meals in advance and having approved snacks on hand can prevent impulsive eating. Mental strategies, such as staying positive and reminding yourself of your weight loss goals, also play a crucial role in overcoming cravings and staying committed to the program.

Tips for Success in Cycle 1

Staying hydrated, incorporating physical activity, and tracking progress are essential for success in Cycle 1. These habits help maintain discipline and achieve rapid weight loss effectively.

Staying Hydrated

Staying hydrated is crucial during Cycle 1 of the 17 Day Diet. Drinking plenty of water supports metabolism, reduces hunger, and aids in detoxification. Aim for 64-96 ounces of plain water daily to keep your body functioning optimally. Avoid sugary beverages and opt for herbal teas or green tea for added benefits. Proper hydration helps prevent fatigue and supports the body’s natural cleansing processes, making it easier to stick to the diet. Incorporate water-rich foods like cucumbers and celery to enhance hydration levels naturally. Consistent hydration is key to maximizing weight loss and maintaining energy throughout the cycle.

Incorporating Physical Activity

Incorporating physical activity into Cycle 1 of the 17 Day Diet is essential for enhancing weight loss and improving overall health. Aim for at least 30 minutes of moderate exercise daily, such as brisk walking, cycling, or light cardio. Strength training can also be included to maintain muscle mass. Exercise helps boost metabolism, burn fat, and increase energy levels. Combining physical activity with the diet’s clean eating approach accelerates results and supports sustainable weight loss. Consistency is key, but rest days are allowed to prevent burnout. Make movement a priority to maximize the benefits of Cycle 1 and set a strong foundation for future cycles.

Tracking Progress

Tracking progress during Cycle 1 of the 17 Day Diet is crucial for staying motivated and ensuring you’re on the right path. Regularly monitor your weight, measurements, and progress photos to visualize changes. Keeping a food journal can help you stay accountable and identify patterns. Use a printable PDF guide to log meals, physical activity, and daily water intake. Celebrate small victories, like increased energy or improved digestion, to maintain momentum. By consistently tracking your journey, you’ll stay committed to the program and be inspired to continue through subsequent cycles. This habit also helps identify areas for adjustment, ensuring long-term success.

Comparison with Other Cycles

Cycle 1 is the most restrictive, focusing on rapid weight loss through clean eating and low-carb, high-protein meals. Unlike later cycles, it strictly limits sugars and processed foods, setting the foundation for subsequent phases that introduce more variety and flexibility. This initial phase is designed to jumpstart metabolism and establish healthy habits, making it more intense than Cycles 2, 3, and 4, which gradually reintroduce certain foods and macronutrients.

How Cycle 1 Differs from Cycles 2, 3, and 4

Cycle 1 is the most restrictive phase, focusing on rapid weight loss through a low-carb, high-protein diet. It eliminates processed foods, added sugars, and unhealthy fats to reset metabolism. Unlike later cycles, Cycle 1 strictly limits carbohydrates and sugars, emphasizing lean proteins and vegetables. Cycles 2, 3, and 4 gradually reintroduce carbs, fats, and other foods, offering more flexibility. Cycle 1 sets the foundation, while subsequent cycles focus on maintenance, variety, and long-term habits. This phased approach prevents plateaus and keeps metabolism engaged, making Cycle 1 uniquely intense compared to the others.

Preparing for Subsequent Cycles

After completing Cycle 1, the focus shifts to maintaining momentum and adapting to less restrictive phases. Gradually reintroducing carbohydrates and other foods requires careful planning to avoid weight regain. Tracking progress and adjusting habits ensures a smooth transition. Staying consistent with healthy eating and physical activity is crucial. Cycle 1 lays the foundation, but preparation for future cycles involves mental readiness and flexibility. By understanding the next phases, dieters can avoid plateaus and continue their weight loss journey effectively, building on the habits established in Cycle 1.

Frequently Asked Questions (FAQs)

What foods are allowed in Cycle 1? Focus on lean proteins, vegetables, and low-sugar fruits. Avoid processed foods, added sugars, and unhealthy fats. How long does Cycle 1 last? It lasts 17 days, designed to jumpstart metabolism and promote rapid weight loss. Can I repeat Cycle 1? Yes, but it’s recommended to progress through subsequent cycles for sustained results. Always consult a healthcare provider before starting any diet.

Common Questions About Cycle 1

What foods are allowed in Cycle 1? Focus on lean proteins, vegetables, and low-sugar fruits. Avoid processed foods, added sugars, and unhealthy fats. How long does Cycle 1 last? It lasts 17 days, designed to jumpstart metabolism and promote rapid weight loss. Can I repeat Cycle 1? Yes, but it’s recommended to progress through subsequent cycles for sustained results. Are there any side effects? Some may experience initial cravings or fatigue, but these typically subside. Stay hydrated and listen to your body. Always consult a healthcare provider before starting any diet for personalized advice.

Addressing Concerns and Misconceptions

Some believe Cycle 1 is overly restrictive, but it’s designed to reset metabolism and habits. While it limits sugars and processed foods, it’s not a starvation diet. Critics argue it’s too low in carbs, but the focus is on nutrient-dense foods, not calorie restriction. Concerns about sustainability are valid, but the program encourages gradual reintroduction of foods in later cycles. Misconceptions about it being a quick fix are addressed by its cyclical approach, promoting long-term lifestyle changes. Always consult a healthcare provider before starting, especially for those with specific dietary needs or health conditions.

Cycle 1 of the 17 Day Diet is a powerful starting point for weight loss, focusing on metabolism reset and healthy habits. Stay committed for lasting results.

Final Thoughts on Cycle 1

Cycle 1 of the 17 Day Diet is a foundational phase designed to reset your metabolism and establish healthy eating habits. By focusing on clean, nutrient-dense foods and eliminating processed sugars and unhealthy fats, you set the stage for sustainable weight loss. The strict dietary restrictions may be challenging, but the rapid results and improved energy levels make it worthwhile. Staying hydrated, incorporating physical activity, and tracking progress are key to success. This phase is not just about losing weight—it’s about adopting a healthier lifestyle that will benefit you long after the 17 days are over.

Encouragement for Continuing the Program

Completing Cycle 1 is a significant achievement, and the results you’ve seen are just the beginning. Remember, the 17 Day Diet is a journey, not a quick fix. Each cycle builds on the previous one, helping you develop healthier habits and a stronger metabolism. Stay committed, and you’ll continue to see progress. Celebrate small victories, like increased energy or improved eating habits, and use them as motivation to keep moving forward. With persistence and dedication, you’ll achieve your weight loss goals and embrace a healthier, more balanced lifestyle. Keep pushing forward—you’ve got this!

self guided tour antelope canyon

Antelope Canyon is a renowned natural wonder in Arizona, known for its stunning sandstone formations and breathtaking landscapes. A self-guided tour offers a unique, flexible way to explore its beauty at your own pace.

1.1 Overview of Antelope Canyon

Antelope Canyon, located in Arizona, is one of the most iconic natural wonders in the American Southwest. Known for its mesmerizing sandstone formations, it is a must-visit destination for nature enthusiasts and photographers. The canyon is divided into two main sections: Upper Antelope Canyon and Lower Antelope Canyon, each offering unique landscapes and experiences. Carved over millions of years by erosion, the canyon’s smooth, swirling walls create a surreal environment. Its narrow passages and vibrant colors make it a visually stunning location. As a Navajo Tribal Park, Antelope Canyon holds cultural and spiritual significance to the Navajo Nation. Visitors can explore its breathtaking beauty, capturing unforgettable moments amidst its natural artistry.

1.2 Why Choose a Self-Guided Tour?

A self-guided tour of Antelope Canyon offers unparalleled flexibility and personalization, allowing you to explore at your own pace. Unlike group tours, you can linger at breathtaking formations or take breaks whenever desired. This approach is ideal for photographers seeking uninterrupted time to capture perfect shots. Additionally, self-guided tours often cost less than guided options, making them a budget-friendly choice. You can tailor your experience to focus on what interests you most, whether it’s hiking, photography, or simply soaking in the natural beauty. With proper planning, a self-guided tour provides a more intimate and immersive connection with Antelope Canyon’s stunning landscapes.

Planning Your Self-Guided Tour

Planning a self-guided tour of Antelope Canyon involves understanding the best times to visit, securing permits, and preparing essential gear for a seamless and enjoyable experience.

2.1 Best Time to Visit Antelope Canyon

The best time to visit Antelope Canyon for a self-guided tour is during spring (April–May) and fall (September–October), when temperatures are mild and crowds are manageable. Summer months offer intense sunlight, creating stunning light beams that illuminate the canyon’s depths, ideal for photography. However, summer can be very hot, and winters may be chilly, with limited daylight. If you prefer fewer visitors, consider visiting during the shoulder season (November–March), though some facilities might operate on reduced hours. Plan your visit around midday for optimal light conditions, especially if you’re aiming to capture the iconic light beams. Be prepared for variable weather and potential closures due to flash floods, which are more common during monsoon season (July–September).

2.2 Obtaining Permits and Tickets

Visiting Antelope Canyon requires a permit, which must be obtained through an authorized tour operator or the Navajo Nation Parks and Recreation Department. Tickets for self-guided tours can be purchased online in advance, as on-site sales are limited. Peak season (March–October) often sells out quickly, so plan ahead. Ensure you select the correct entry time and type of tour, as changes may not be possible. Some areas, like Upper Antelope Canyon, may require a guided tour, while Lower Antelope Canyon offers more self-guided options. Check the official website for availability and pricing, and bring your confirmation and ID to the entrance. Note that some tickets are non-refundable, so verify all details before booking.

2.3 What to Bring for the Tour

For a self-guided tour of Antelope Canyon, it’s essential to bring the right gear to ensure a safe and enjoyable experience. Pack plenty of water, snacks, and sun protection, including a hat, sunglasses, and sunscreen. Wear comfortable hiking shoes or sturdy sandals, as the terrain can be uneven. Bring a lightweight backpack to carry essentials like a map, extra batteries, and a portable phone charger. A camera or smartphone is a must for capturing stunning photos, and consider bringing a tripod for steady shots. Don’t forget a first-aid kit and emergency supplies, such as a flashlight and whistle. Lastly, ensure you have your permit and ID readily available. Avoid bringing unnecessary items to keep your journey light and stress-free.

Understanding the Layout of Antelope Canyon

Antelope Canyon’s unique layout features stunning sandstone formations and narrow passages. Understanding its structure helps visitors navigate and explore its breathtaking sections during self-guided tours effectively.

3.1 Upper Antelope Canyon vs. Lower Antelope Canyon

Upper Antelope Canyon, also known as “The Crack,” is the more accessible and popular section, featuring iconic light beams and smoother trails. Lower Antelope Canyon, or “The Corkscrew,” offers a more adventurous experience with narrower passages and unique spiral rock formations. While Upper Canyon is easier to navigate, Lower Canyon provides a quieter, less crowded environment. Both sections boast stunning visuals, but their layouts cater to different preferences. Understanding these differences helps self-guided tourists choose the canyon that aligns with their interests and physical abilities, ensuring a more enjoyable and tailored exploration of this natural wonder.

3.2 Key Landmarks and Photo Opportunities

Antelope Canyon is a photographer’s paradise, with its mesmerizing sandstone formations and dramatic light beams. Key landmarks include the iconic “Light Beam” in Upper Canyon, where sunlight filters through narrow openings, creating stunning visual effects. The “Great Throne” in Lower Canyon is another must-see, offering a majestic view of towering rock formations. Photographers often seek out the “Corkscrew,” a spiral-shaped rock that adds a unique twist to compositions. The canyon’s smooth, wavy walls provide endless opportunities for capturing abstract patterns and textures. Timing your visit during midday maximizes the impact of light beams, while early morning or late afternoon offers softer, warmer tones. These landmarks and natural wonders make Antelope Canyon a truly unforgettable destination for self-guided exploration and photography.

Navigating the Canyon on Your Own

Navigating Antelope Canyon on your own is straightforward with clear trails and marked paths. Bring a map, stay alert, and enjoy the scenic beauty at your pace.

4.1 Arrival and Parking

Upon arriving at Antelope Canyon, you’ll find designated parking areas near the entrance. Plan to arrive early, especially during peak seasons, as parking spaces can fill quickly. Ensure your vehicle is parked in marked areas to avoid fines or towing. The parking lot is a short walk from the canyon entrance, offering stunning views even before you begin your hike. Restrooms and shade structures are available near the parking area for visitor convenience. Remember to bring your permit and ticket for entry, as these are required. Check the weather forecast beforehand, as parking conditions can change due to rain or extreme heat. Always stay within designated areas to preserve the natural environment and ensure a safe, enjoyable experience for all visitors.

4.2 Hiking Through the Canyon

Hiking through Antelope Canyon is an exhilarating experience, offering breathtaking views of its iconic sandstone formations. The terrain can be challenging, with narrow passages and uneven ground, so sturdy footwear is essential. As you navigate the canyon, take your time to appreciate the unique rock patterns and vibrant colors illuminated by natural light. Stay hydrated and be mindful of your surroundings, especially in crowded areas. Follow marked trails and any safety guidelines provided to ensure a safe and enjoyable journey. The stunning vistas and serene atmosphere make the effort worthwhile, providing unforgettable memories of your self-guided tour.

4.3 Exploring the Canyon’s Unique Features

Antelope Canyon is renowned for its extraordinary geological formations, carved over millions of years by wind and water. As you explore, marvel at the swirling sandstone walls, dramatic arches, and vibrant color patterns. The canyon’s unique features include the famous “corkscrew” formations and the breathtaking “light beams” that illuminate the depths during midday. Take time to appreciate the textures and shapes created by erosion, which give the canyon its otherworldly appearance. Popular spots like the “Heart of the Canyon” and the “Chamber of Secrets” offer unforgettable photo opportunities. Be sure to look up and around to capture the full majesty of these natural wonders. Exploring these features at your own pace allows for a deeper connection with the canyon’s natural beauty.

Photography Tips for a Self-Guided Tour

Capture Antelope Canyon’s stunning beauty by using natural light, experimenting with unique angles, and bringing essential gear like tripods and wide-angle lenses to enhance your shots.

5.1 Best Camera Settings for Capturing the Canyon

To capture Antelope Canyon’s stunning beauty, use a low ISO (100-400) for sharp images. Shoot in manual mode with an aperture of f/8-f/11 to balance light and depth. A shutter speed of 1/15s-1/30s works well for indoor lighting. Use a tripod to avoid blur in low-light conditions. Shoot in RAW format to preserve detail and adjust white balance for accurate colors. Take advantage of the golden hour for soft, warm tones. Experiment with wide-angle lenses to frame the vastness of the canyon. Focus on textures, patterns, and light beams to create visually striking photos. Adjust settings as you move through the canyon to adapt to changing light conditions.

5.2 Avoiding Crowds for Perfect Shots

To capture perfect shots without crowds, plan your visit during early morning or late afternoon when fewer tourists are present. Weekdays are generally less busy than weekends. Move efficiently through the canyon, taking quick photos when spots are empty. Position yourself in less crowded areas, such as near lesser-known formations, to frame your shots without distractions. Use a wide-angle lens to focus on the canyon’s vastness, making it easier to exclude people from your frame. Be patient and wait for others to move out of the way before taking your shot. If crowds are unavoidable, focus on detailed close-ups or unique angles to create compelling images despite the presence of others.

5.3 Creative Composition Ideas

Antelope Canyon offers endless opportunities for creative composition. Use the canyon’s flowing sandstone walls as leading lines to guide the viewer’s eye. Capture the dramatic interplay of light and shadow by positioning yourself where beams of light illuminate the canyon floor. Experiment with unique perspectives, such as looking up or down to emphasize the canyon’s depth. Incorporate natural frames, like arches or narrow passageways, to add depth to your shots. Don’t hesitate to get low or climb to higher vantage points for a fresh angle. Play with patterns by focusing on the abstract shapes and textures of the sandstone. Finally, embrace the beauty of reflections by capturing light bouncing off the canyon walls or in small pools of water. These techniques will help you create visually stunning and memorable photos.

Safety Considerations

Always stay alert to your surroundings, watch for loose rocks, and ensure proper footwear. Follow park rules and guidelines to ensure a safe and enjoyable experience.

6.1 Understanding Flash Flood Risks

Flash floods are a significant hazard in Antelope Canyon, particularly during monsoon season. The canyon acts as a drainage system, and heavy rain miles away can cause sudden flooding. Always monitor weather conditions before and during your visit. If you notice darkening skies, thunder, or rising water levels, seek higher ground immediately. Stay alert to warning signs like unusual sounds or rapid water flow. In case of a flash flood, remain calm, follow guide instructions, and move to elevated areas or exits. Never underestimate the power of these natural events, as they can be deadly. Check forecasts beforehand and stay informed to ensure a safe experience.

  • Monitor weather forecasts before visiting.
  • Recognize signs of impending floods.
  • Know escape routes and higher ground locations.

6.2 Navigating Narrow Passages Safely

Navigating Antelope Canyon’s narrow passages requires caution and awareness. The tight spaces can be challenging, especially for those with claustrophobia or mobility issues. Move slowly and carefully, using handrails when available. Watch your step size to avoid tripping on uneven terrain. Be mindful of low-hanging rocks and avoid touching delicate sandstone formations. If you encounter tight squeezes, take deep breaths and proceed calmly. Avoid overhanging rocks that may destabilize with weight. Stay alert in narrow sections, as visibility can be limited. Travel with a partner or group for assistance if needed. Always follow park rules and guidance to ensure a safe and enjoyable experience while exploring these natural wonders.

  • Move slowly and use handrails when available.
  • Watch for uneven terrain and low-hanging rocks.
  • Avoid touching or destabilizing formations.
  • Stay calm in tight spaces and breathe deeply.
  • Travel with a partner or group for support.

6.3 Emergency Preparedness

Emergency preparedness is crucial for a safe self-guided tour of Antelope Canyon. Always carry essentials like water, a first aid kit, a map, and a fully charged phone. Inform someone about your itinerary and expected return time. Familiarize yourself with the canyon’s emergency exit points and know the location of the nearest ranger station or help center. Be aware of weather conditions, as flash floods can occur suddenly. Carry a whistle or other signaling device in case of separation from your group. Stay calm in emergencies and follow established safety protocols. Ensuring you are well-prepared enhances your safety and allows you to enjoy the canyon’s beauty with peace of mind.

  • Carry water, a first aid kit, and a charged phone.
  • Inform someone about your tour plans and expected return time.
  • Know the location of emergency exits and help centers.
  • Be prepared for sudden weather changes and flash floods.
  • Carry a whistle or signaling device for emergencies.

A self-guided tour of Antelope Canyon offers a unique, unforgettable experience, allowing you to connect with nature at your own pace. Embrace the freedom and create lasting memories.

7.1 Final Tips for a Memorable Self-Guided Tour

To ensure a memorable self-guided tour of Antelope Canyon, arrive early to avoid crowds, bring essential gear, and stay hydrated. Respect the environment by leaving no trace and following all guidelines. Take your time to absorb the canyon’s beauty, capture stunning photos, and reflect on the natural wonder. Stay alert, especially in narrow passages, and be prepared for changing weather conditions. Embrace the freedom of exploring at your own pace and immerse yourself in the serene atmosphere. By being mindful and prepared, you’ll create unforgettable memories of this incredible destination.

7.2 Leaving a Positive Impact on the Environment

Leaving a positive impact on Antelope Canyon’s environment is crucial for preserving its natural beauty for future generations. Always stay on designated trails to prevent erosion and avoid touching the canyon walls, as the oils from skin can damage the rock formations. Pack out all trash, including food wrappers and water bottles, to maintain the pristine condition of the area. Respect wildlife by not feeding or disturbing animals, and keep noise levels low to avoid disrupting their habitats. Use biodegradable soap for washing hands or gear, and ensure proper waste disposal. By adhering to these practices, you contribute to the conservation of this incredible natural wonder and help protect it for years to come.

teaching reading sourcebook pdf

The Teaching Reading Sourcebook is a comprehensive guide designed to enhance reading instruction by connecting research-based strategies with practical lesson models. It serves as a bridge between evidence-based reading research and actionable instructional strategies, making it an essential resource for educators. The sourcebook covers the five essential components of effective reading instruction: phonemic awareness, decoding, fluency, vocabulary, and comprehension. Aligned with Common Core State Standards, it includes lesson models, assessment tools, and reproducible resources to support teachers in improving literacy skills. Updated editions incorporate new features and expert contributions, solidifying its reputation as a trusted tool for educators.

H2: Key Features of the Teaching Reading Sourcebook

The Teaching Reading Sourcebook is renowned for its comprehensive and practical approach to literacy instruction. One of its standout features is its alignment with the Common Core State Standards, ensuring that educators can seamlessly integrate its strategies into their curriculum. The sourcebook is structured to cover the five essential components of reading instruction: phonemic awareness, decoding, fluency, vocabulary, and comprehension. This ensures a well-rounded approach to teaching reading, addressing all critical areas of literacy development.

A key feature of the sourcebook is its inclusion of research-based practices combined with actionable lesson models. Educators can find explicit guidance on how to implement evidence-based strategies in the classroom, making it a valuable resource for both new and experienced teachers. The book also includes reproducible pages, activity masters, and teaching charts, providing teachers with ready-to-use materials that save time and enhance instruction.

Another notable feature is the sourcebook’s focus on diverse learner needs. It offers specific strategies for English learners and students requiring intervention, ensuring that all students receive targeted support. The inclusion of sample texts and assessment tools further equips educators to monitor progress and adjust instruction accordingly. Additionally, the sourcebook’s resources section, available in PDF format, includes sample lesson models and activity masters, making it a versatile tool for lesson planning.

The updated editions of the sourcebook have introduced new features, such as enhanced coverage of essential reading components and contributions from respected experts in the field. These updates ensure that the content remains relevant and aligned with current educational standards. The sourcebook’s companion website also provides additional resources, including a sampler and table of contents, offering educators even more support.

Overall, the Teaching Reading Sourcebook is a must-have resource for educators seeking to improve literacy outcomes. Its combination of research-based strategies, practical tools, and alignment with educational standards makes it an indispensable guide for effective reading instruction.

H2: Structure and Organization of the Sourcebook

The Teaching Reading Sourcebook is meticulously organized to provide educators with a clear and accessible framework for effective literacy instruction. The sourcebook is divided into logical sections, each focusing on specific aspects of reading development, ensuring a systematic approach to teaching. The structure begins with foundational knowledge, including the scientific basis of reading instruction, followed by practical strategies for implementing evidence-based practices in the classroom.

The sourcebook is organized into chapters that align with the five essential components of reading: phonemic awareness, decoding, fluency, vocabulary, and comprehension. Each chapter provides in-depth guidance, including lesson models, sample activities, and reproducible resources. This clear alignment ensures that educators can easily navigate the content and find relevant materials to support their teaching practices. Additionally, the sourcebook includes a resources section, available in PDF format, which contains activity masters, teaching charts, and sample texts to complement the lesson models.

The sourcebook also incorporates a user-friendly design, with features such as a detailed table of contents, an index, and a list of references; These elements enable educators to quickly locate specific information and resources. The inclusion of an answer key and grade-specific correlations to the Common Core State Standards further enhances its practicality, making it a versatile tool for teachers across all grade levels.

One of the standout organizational features of the sourcebook is its emphasis on explicit instruction. The content is structured to support educators in delivering structured, systematic, and scaffolded lessons. This approach ensures that students receive the support they need to master critical reading skills. The sourcebook’s organization also reflects its commitment to addressing diverse learner needs, with dedicated sections for English learners and students requiring intervention.

Overall, the Teaching Reading Sourcebook is structured to serve as both a reference guide and a hands-on resource for educators. Its logical organization, combined with its comprehensive content, makes it an invaluable tool for improving reading instruction and student outcomes.

H2: Essential Components of Reading Instruction

The Teaching Reading Sourcebook emphasizes the importance of understanding and implementing the five essential components of reading instruction, as supported by scientific research. These components—phonemic awareness, decoding, fluency, vocabulary, and comprehension—form the foundation of effective literacy instruction. Each component is addressed in depth, providing educators with a comprehensive framework to support students’ reading development.

Phonemic awareness is highlighted as the ability to identify and manipulate individual sounds (phonemes) in spoken words. The sourcebook provides strategies for teaching this foundational skill, including activities and assessments to ensure students can detect and manipulate phonemes effectively. Decoding, the ability to translate written words into spoken language, is also a critical focus. The sourcebook offers systematic approaches to teaching decoding skills, including phonics instruction and word recognition strategies.

Fluency, the ability to read with accuracy, speed, and expression, is another key component. The sourcebook includes methods for fostering fluency through guided practice, modeling, and opportunities for oral reading. Vocabulary development is emphasized as essential for comprehension, with strategies for explicit instruction and fostering word knowledge through context and discussion.

Comprehension, the ultimate goal of reading, is addressed through techniques that help students engage with and understand texts. The sourcebook provides guidance on teaching strategies such as questioning, summarization, and visualization to enhance comprehension skills. By integrating these five components, educators can create a balanced and effective reading program that addresses the diverse needs of all learners.

The sourcebook’s focus on these essential components ensures that educators have the tools and knowledge to deliver research-based instruction. By aligning teaching practices with these foundational elements, teachers can help students build a strong literacy foundation and achieve long-term reading success.

H2: Lesson Planning and Instructional Strategies

The Teaching Reading Sourcebook provides educators with a wealth of practical lesson planning ideas and instructional strategies to enhance reading instruction. The sourcebook emphasizes the importance of creating structured, research-based lesson plans that align with educational standards and address the diverse needs of students. It offers sample lesson models that demonstrate how to integrate phonemic awareness, decoding, fluency, vocabulary, and comprehension into daily instruction.

One of the key features of the sourcebook is its focus on explicit instruction. It provides step-by-step guidance for teaching specific reading skills, such as systematic phonics, word recognition, and comprehension strategies. Educators are encouraged to use scaffolding techniques to gradually release responsibility to students as they gain proficiency. The sourcebook also includes reproducible activity masters and teaching charts, which can be used to support interactive and engaging lessons.

In addition to its practical strategies, the sourcebook emphasizes the importance of differentiation in lesson planning. It offers suggestions for modifying instruction to meet the needs of English learners, struggling readers, and advanced students. Teachers are provided with tools to assess student progress and adjust instruction accordingly, ensuring that all learners have the opportunity to succeed.

The sourcebook also highlights the role of technology and multimedia resources in modern reading instruction. It includes recommendations for using digital tools to enhance lessons and provide additional practice opportunities for students. By combining traditional teaching methods with innovative strategies, educators can create a dynamic and effective learning environment.

Overall, the Teaching Reading Sourcebook serves as a valuable resource for educators seeking to improve their lesson planning and instructional practices. Its combination of research-based strategies, practical examples, and adaptable resources makes it an indispensable tool for teachers at every level of experience.

H2: Aligning with Educational Standards

The Teaching Reading Sourcebook is specifically designed to align with educational standards, ensuring that educators can seamlessly integrate its strategies and resources into their curriculum. One of the key features of the sourcebook is its alignment with the Common Core State Standards for English Language Arts. This ensures that the instructional strategies and lesson models provided are not only research-based but also meet the rigorous expectations set by these standards.

The sourcebook includes detailed grade-specific correlations that demonstrate how its content aligns with the Common Core State Standards. This feature is particularly useful for teachers who need to ensure that their instruction is both standards-based and effective. By connecting the five essential components of reading instruction—phonemic awareness, decoding, fluency, vocabulary, and comprehension—to the standards, the sourcebook provides a clear roadmap for teaching literacy skills.

In addition to its alignment with the Common Core, the sourcebook incorporates assessment tools and strategies that help educators measure student progress toward meeting these standards. The included reproducible resources, such as activity masters and teaching charts, are designed to support standards-based instruction and can be easily adapted to meet the needs of diverse learners.

The updated editions of the sourcebook reflect the latest developments in educational standards and research-based practices. For example, the third edition includes new features such as explicit coverage of essential reading components and sample lesson models that are aligned with the standards. This ensures that educators have access to the most current and effective strategies for teaching reading.

Overall, the Teaching Reading Sourcebook serves as a valuable resource for educators who are committed to providing high-quality, standards-based reading instruction. Its alignment with educational standards, combined with its practical tools and strategies, makes it an indispensable guide for teachers at every level of experience.

H2: Addressing Diverse Learner Needs

The Teaching Reading Sourcebook places a strong emphasis on addressing the diverse needs of learners, recognizing that no two students approach reading in the same way. The sourcebook provides educators with practical strategies and resources to support students with varying abilities, learning styles, and linguistic backgrounds. One of the key features is its focus on English learners, offering specific tips and interventions to help these students develop their reading skills while navigating a new language.

The sourcebook includes intervention strategies tailored for students who may be struggling with reading, whether due to learning difficulties or gaps in foundational skills. These strategies are grounded in research and provide teachers with actionable steps to identify and address these challenges early. For example, the book emphasizes the importance of explicit instruction in phonemic awareness and decoding, which are critical for students who may need additional support.

In addition to supporting struggling readers, the sourcebook also offers guidance for teaching gifted students. It provides advanced strategies and activities that challenge these learners and help them deepen their comprehension and critical thinking skills. The inclusion of sample lesson models and activity masters allows teachers to differentiate instruction effectively, ensuring that all students, regardless of their abilities, are engaged and supported.

Cultural sensitivity is another key aspect of the sourcebook’s approach to diverse learners. It recognizes the importance of connecting reading instruction to students’ backgrounds and experiences. By incorporating diverse texts and perspectives, educators can create an inclusive learning environment that resonates with all students. The sourcebook also provides resources for teaching reading in multiple languages, such as Spanish, further highlighting its commitment to addressing the needs of linguistically diverse learners.

Overall, the Teaching Reading Sourcebook is a valuable tool for educators seeking to create a more inclusive and effective reading program. Its focus on diverse learner needs ensures that every student, regardless of their background or abilities, has the opportunity to succeed in reading.

H2: Resources and Support for Teachers

The Teaching Reading Sourcebook is renowned for its extensive collection of resources and support materials designed to empower educators in their mission to improve literacy instruction. One of the standout features of the sourcebook is its companion website, which offers a wealth of downloadable resources, including sample texts, activity masters, and teaching charts. These materials are specifically designed to complement the lesson models provided in the book, giving teachers practical tools to implement in their classrooms.

Among the resources included are reproducible pages, assessment tools, and grade-specific correlations that align with the Common Core State Standards. These resources are invaluable for teachers seeking to create differentiated instruction and track student progress effectively. The sourcebook also includes a comprehensive list of references and an index, making it easier for educators to locate specific strategies or activities tailored to their needs.

The sourcebook’s resources extend beyond the classroom. For instance, the Teaching Reading Sourcebook provides guidance on how to support English learners through targeted interventions and bilingual strategies. This includes sample lesson models and activities that cater to students learning English as a second language, ensuring that all learners have the opportunity to succeed. Additionally, the book offers resources for teaching reading in multiple languages, such as Spanish, further enhancing its utility for diverse educational settings.

Teachers also benefit from the sourcebook’s emphasis on professional development. The inclusion of expert contributions and research-based practices encourages educators to refine their instructional strategies and stay updated on best practices in reading instruction. The companion website further supports this by offering access to updated materials, ensuring that teachers have the most current tools at their disposal.

H2: Impact and Reception of the Sourcebook

The Teaching Reading Sourcebook has garnered widespread acclaim for its comprehensive approach to literacy instruction, making it a highly regarded resource in the field of education. Its impact is evident in its recognition by the National Council on Teacher Quality, which listed it as one of the top textbooks covering the scientific basis of reading instruction. This endorsement underscores its credibility and effectiveness in bridging research and practice.

Educators have praised the sourcebook for its ability to support teachers at all levels of experience. Many have highlighted its practicality, noting how it provides actionable strategies and lesson models that can be immediately implemented in the classroom. The inclusion of reproducible resources, such as activity masters and teaching charts, has been particularly well-received, as these tools save teachers time and enhance instruction.

The sourcebook’s alignment with Common Core State Standards has also contributed to its positive reception. Educators appreciate how it offers grade-specific correlations, ensuring that the strategies and activities provided are relevant and effective for students at every level. This alignment not only helps teachers meet educational standards but also supports their efforts to improve student outcomes.

Moreover, the Teaching Reading Sourcebook has been embraced for its ability to address diverse learner needs. Its inclusion of strategies for English learners and students with varying skill levels has made it a valuable resource for educators working in diverse classrooms. The sourcebook’s focus on evidence-based practices has also resonated with educators seeking to implement proven methods in their teaching.

H2: Practical Applications and Future Directions

The Teaching Reading Sourcebook is widely recognized for its practical applications in classroom settings, offering educators a wealth of tools and strategies to enhance reading instruction. One of its most notable features is the inclusion of reproducible resources, such as activity masters and teaching charts, which provide teachers with ready-to-use materials for lesson planning. These resources are designed to support the five essential components of reading instruction: phonemic awareness, decoding, fluency, vocabulary, and comprehension.

Teachers have found the sourcebook’s lesson models particularly useful, as they provide step-by-step guidance for delivering effective reading lessons. These models are aligned with the Common Core State Standards, ensuring that instruction is both rigorous and relevant. Additionally, the sourcebook’s focus on explicit instruction has made it a valuable resource for educators seeking to implement evidence-based practices in their classrooms.

Looking ahead, the Teaching Reading Sourcebook is poised to continue its impact on literacy education. Future editions are expected to incorporate emerging research and technologies, such as digital tools and multimedia resources, to further enhance teaching and learning. The sourcebook’s companion website already offers supplementary materials, including sample texts and activity masters, which can be accessed digitally. This integration of technology ensures that the sourcebook remains a cutting-edge resource for educators.

Moreover, the sourcebook’s emphasis on addressing diverse learner needs is likely to expand in future editions. With increasing recognition of the importance of culturally responsive teaching and differentiated instruction, the sourcebook may include additional strategies for supporting English learners, students with disabilities, and other diverse populations. This evolution will ensure that the sourcebook remains a comprehensive and inclusive guide for educators.

panasonic bread maker user manual

The Panasonic Bread Maker is a versatile appliance designed for effortless bread-making at home. With digital controls‚ preset timers‚ and multiple bread settings‚ it offers convenience and customization. Its user-friendly interface and robust features make it ideal for both novice bakers and experienced enthusiasts‚ ensuring perfect loaves every time.

1.1 Overview of the Panasonic Bread Maker

The Panasonic Bread Maker is a high-quality appliance designed for home use‚ offering versatility and ease of operation. It features a digital display‚ preset timer‚ and multiple bread settings‚ including white‚ whole wheat‚ and French modes. With custom program options‚ users can tailor recipes to their preferences. Its sturdy design and advanced features ensure consistent results‚ making it a reliable choice for both novice and experienced bakers.

1.2 Importance of the User Manual

The user manual is essential for safe and effective use of the Panasonic Bread Maker. It provides detailed instructions for assembly‚ operation‚ and maintenance‚ ensuring optimal performance. The manual also includes safety precautions‚ troubleshooting tips‚ and warranty information. By following the guidelines‚ users can maximize the appliance’s features‚ customize settings‚ and maintain its longevity. It serves as a comprehensive guide to unlocking the full potential of the bread maker.

Key Features of the Panasonic Bread Maker

The Panasonic Bread Maker features a digital display‚ preset timer‚ multiple bread settings‚ and custom program options‚ offering versatility and precision for perfect bread-making results.

2.1 Digital Display Controls

The Panasonic Bread Maker features an intuitive digital display that simplifies navigation through its various functions. Users can easily select bread modes‚ set timers‚ and monitor the baking process. The display provides clear visual feedback‚ ensuring precise control over settings like crust color and loaf size. This feature enhances user experience‚ making it easy to customize and achieve perfect results with minimal effort.

2.2 Preset Timer Function

The preset timer function allows users to schedule bread-making up to 13 hours in advance. This feature offers flexibility‚ enabling you to prepare ingredients and set the timer‚ ensuring freshly baked bread upon waking or returning home. The timer is easy to set via the digital controls‚ providing convenience and peace of mind for a perfect loaf every time without constant monitoring.

2.3 Multiple Bread Settings (White‚ Whole Wheat‚ French‚ etc.)

The Panasonic Bread Maker offers diverse bread settings‚ including white‚ whole wheat‚ French‚ and more‚ catering to various preferences and dietary needs. These preset modes optimize temperature‚ rising time‚ and baking duration for perfect results. Users can explore a wide range of bread types effortlessly‚ ensuring versatility and satisfaction for every household. This feature enhances the overall baking experience‚ making it ideal for both traditional and specialty breads.

2.4 Custom Program Options

The Panasonic Bread Maker allows users to create and save custom programs‚ offering flexibility for unique recipes. By adjusting settings like temperature‚ rising time‚ and baking duration‚ users can tailor the process to their preferences. This feature is ideal for experimenting with new bread types or replicating favorite recipes. Saved programs ensure consistent results and streamline future baking sessions‚ making it a valuable tool for creative bakers.

Safety Precautions

Always read the manual before use‚ avoid hot surfaces‚ and keep children away. Ensure proper electrical connections and avoid overloading the machine for safe operation.

3.1 General Safety Instructions

Always read the manual thoroughly before using the Panasonic Bread Maker. Ensure the appliance is placed on a stable‚ heat-resistant surface. Keep children away from hot surfaces and moving parts; Avoid touching the bread pan or blades during operation. Never immerse the machine in water or expose it to extreme temperatures. Use only recommended attachments and follow power cord safety guidelines to prevent accidents and ensure safe operation.

3.2 Electrical Safety Tips

Ensure the Panasonic Bread Maker is used with a properly grounded power outlet. Avoid overloading circuits‚ and keep the power cord away from water or heat sources. Never operate the appliance near flammable materials or in humid environments. If the cord is damaged‚ discontinue use and contact Panasonic support. Always unplug the machine when not in use or during cleaning to prevent electrical hazards and ensure safe operation at all times.

3.3 Proper Handling and Usage

Handle the bread pan and kneading blade with care to avoid damage. Place the machine on a stable‚ heat-resistant surface. Avoid using metal utensils‚ as they may scratch the pan. Always ensure the bread maker is placed on a flat surface and kept away from children. Never leave the machine unattended during operation. Follow the user manual guidelines for proper usage to ensure safety and optimal performance of your Panasonic Bread Maker.

Assembly and Initial Setup

Unpack and inspect the bread maker for any damage. Place it on a stable‚ heat-resistant surface. Remove all packaging materials and prepare for first-time use by cleaning the bread pan and kneading blade thoroughly. Ensure all parts are properly assembled before initial operation.

4.1 Unpacking and Inspection

Carefully unpack the Panasonic Bread Maker and inspect for any visible damage. Ensure all accessories‚ including the bread pan‚ kneading blade‚ and measuring tools‚ are included. Check the control panel and cables for integrity. Before first use‚ verify that all components are undamaged and properly aligned. Refer to the manual for a detailed list of included parts and their proper identification.

4.2 Placing the Bread Maker

Place the Panasonic Bread Maker on a stable‚ heat-resistant surface‚ ensuring proper ventilation. Keep it away from children and other appliances to avoid accidental damage or interference. Avoid direct sunlight and moisture exposure. Position the unit in a well-ventilated area to prevent overheating during operation. Ensure the power cord is securely connected and accessible. Follow these guidelines to ensure safe and optimal performance of your bread maker.

4.3 First-Time Cleaning and Preparation

Before first use‚ wash the bread pan and kneading blade with warm‚ soapy water. Rinse thoroughly and dry with a soft cloth. Wipe the exterior with a damp cloth to remove any packaging residue. Ensure all parts are clean and dry to prevent contamination. Avoid using harsh chemicals or abrasive cleaners‚ as they may damage the finish. Proper preparation ensures optimal performance and longevity of your Panasonic Bread Maker.

Basic Operations

Understand the control panel‚ set the timer‚ and start the bread-making process. Select your desired mode‚ input settings‚ and let the machine handle mixing‚ kneading‚ and baking seamlessly.

5.1 Understanding the Control Panel

The control panel features a digital display and intuitive buttons for selecting modes‚ timer settings‚ and custom programs. Use the menu button to navigate through options like bread type‚ crust color‚ and delay start. The display shows real-time progress‚ ensuring precise control. Familiarize yourself with the buttons to easily adjust settings and save custom programs for future use‚ enhancing your bread-making experience with convenience and flexibility.

5.2 Setting the Timer

To set the timer‚ press the timer button on the control panel and use the +/- buttons to adjust the desired time. The digital display will show the selected time‚ allowing you to delay baking up to 13 hours. This feature ensures your bread is ready when you need it‚ whether you prefer waking up to fresh bread or having it ready for dinner. The timer enhances convenience and flexibility for any schedule.

5.3 Starting the Bread-Making Process

Once all settings are configured‚ press the Start button to begin the bread-making process. The machine will automatically mix‚ knead‚ rise‚ and bake the dough according to the selected mode. Ensure the bread pan is properly placed and the machine is plugged in. The digital display will show the progress‚ and once the cycle is complete‚ the machine will beep to indicate your fresh bread is ready to be removed and cooled.

Baking Modes and Options

The Panasonic Bread Maker offers various baking modes‚ including white‚ whole wheat‚ French‚ and dough settings‚ allowing users to customize their bread-making experience with ease and precision.

6.1 White Bread Mode

The white bread mode on the Panasonic Bread Maker is designed for classic bread recipes‚ ensuring a light and fluffy texture with a golden crust. This mode is perfect for traditional bread‚ offering customizable crust color options and precise temperature control. It accommodates various loaf sizes and features a preset timer for convenience. The machine automatically mixes‚ kneads‚ and bakes‚ making it ideal for everyday use and consistent results.

6.2 Whole Wheat Bread Mode

The whole wheat bread mode is tailored for denser‚ heavier bread recipes‚ ensuring proper kneading and baking for a hearty texture. This mode adjusts kneading time and temperature to handle whole grain flours effectively. It supports various whole wheat recipes‚ from classic loaves to nutty variations‚ making it versatile for health-conscious bakers seeking nutritious and flavorful bread options with minimal effort.

6.3 French Bread Mode

The French Bread Mode is designed to create crusty‚ authentic French bread with a chewy interior. This mode adjusts baking time and temperature to achieve the perfect crust. It ensures a longer rise and baking process‚ replicating traditional bread-making techniques. Ideal for baguettes and rustic loaves‚ this setting delivers a classic French bread experience with minimal effort‚ enhancing your home baking repertoire.

6.4 Dough Mode

The Dough Mode allows you to prepare dough without baking it in the machine‚ perfect for those who prefer to bake in a traditional oven. This mode mixes‚ kneads‚ and rises the dough to the optimal consistency. It’s ideal for creating homemade pizza‚ pasta‚ or bread rolls. The machine handles the initial preparation‚ saving time and effort‚ while you can finish baking in your oven for a personalized touch.

Custom Settings and Recipes

The Panasonic Bread Maker allows users to create and save custom programs‚ enabling personalized bread-making experiences. Explore a variety of recipes‚ from classic to artisanal‚ with ease and precision‚ ensuring every loaf meets your unique preferences and dietary needs.

7.1 Creating Custom Programs

Creating custom programs on the Panasonic Bread Maker allows users to tailor bread-making to their preferences. Utilize the digital interface to set specific kneading‚ rising‚ and baking times. Choose from various dough and bake settings to craft unique recipes. This feature enables experimentation with different flours‚ yeasts‚ and ingredients‚ ensuring each loaf is personalized to your taste. Save your custom settings for quick access in future baking sessions.

7.2 Saving Custom Programs

Saving custom programs on the Panasonic Bread Maker ensures your unique settings are preserved for future use. After creating a custom program‚ navigate to the save option in the menu. Select an empty program slot and confirm to store your settings. This feature allows quick access to your favorite recipes‚ streamlining the baking process and maintaining consistency in your bread-making endeavors.

7.3 Recommended Recipes

The Panasonic Bread Maker comes with a variety of recommended recipes to suit every taste. From classic white bread to hearty whole wheat and crusty French bread‚ the machine offers preset modes for perfect results. Additionally‚ the dough mode allows for homemade pasta and pizza crusts. Experiment with custom recipes or follow the manual’s suggestions for gluten-free and sourdough options‚ ensuring endless baking possibilities.

Troubleshooting Common Issues

Common issues like bread not baking properly or the machine not turning on can often be resolved by checking power connections or adjusting settings. Refer to the manual for specific error codes and solutions to ensure optimal performance and troubleshoot effectively.

8.1 Bread Not Baking Properly

If your bread isn’t baking properly‚ check the preset timer and ensure it’s set correctly. Verify that the machine is plugged in and the start button was pressed. Consult the manual for error codes‚ as they can indicate specific issues like temperature or sensor malfunctions. Ensure the bread pan is properly aligned and the lid is closed securely. Incorrect ingredient measurements or settings may also cause this issue;

8.2 Machine Not Turning On

If the machine doesn’t turn on‚ ensure it is properly plugged into a working electrical outlet. Check the power cord for damage and verify that the outlet is functioning. Make sure the start button is pressed firmly and the digital display is active. If issues persist‚ consult the user manual for troubleshooting steps or contact Panasonic support for assistance. Always ensure the machine is assembled correctly before use.

8.3 Error Codes and Solutions

The Panasonic Bread Maker displays error codes like E01‚ E02‚ or E03 to indicate specific issues. E01 often relates to a faulty temperature sensor‚ while E02 may signal a motor malfunction. E03 could indicate a problem with the heating element. Refer to the user manual for detailed explanations and solutions. If issues persist‚ contact Panasonic customer support for professional assistance. Regular maintenance can help prevent these errors from occurring. Always follow the manual’s troubleshooting guide for optimal resolution.

Maintenance and Cleaning

Regular cleaning is essential for optimal performance. Wipe the exterior with a damp cloth and clean the bread pan after each use. Deep clean periodically to remove residue. Always unplug the machine before cleaning and avoid harsh chemicals. Refer to the manual for detailed maintenance instructions to ensure longevity and hygiene.

9.1 Regular Cleaning Tips

Regular cleaning ensures optimal performance and longevity. Unplug the machine before cleaning. Wipe the exterior with a damp cloth and dry thoroughly. Clean the bread pan and kneading blade after each use‚ removing any dough residue. Avoid harsh chemicals‚ as they may damage surfaces. For tough stains‚ soak parts in warm water. Consistent cleaning prevents mold and bacteria growth‚ maintaining hygiene and freshness in your bread-making process.

9.2 Deep Cleaning the Bread Maker

Deep cleaning every 1-2 months ensures thorough maintenance. Unplug the machine and remove the bread pan and kneading blade for soaking. Wipe the interior with a damp cloth‚ paying attention to crevices where dough residue accumulates. For stubborn stains‚ mix baking soda and water into a paste‚ apply‚ and let sit before rinsing. Regular deep cleaning prevents mold growth and ensures consistent bread quality and hygiene.

9.3 Maintaining the Bread Pan

Regularly clean the bread pan with mild soap and warm water‚ avoiding abrasive cleaners or scrubbers. Dry thoroughly after washing to prevent rust. For tough dough residue‚ soak the pan before cleaning. Avoid using metal utensils‚ as they may scratch the surface. Store the pan in a dry place to maintain its condition and ensure optimal performance for future use.

Accessories and Additional Features

The Panasonic Bread Maker comes with a bread pan‚ kneading blade‚ and measuring tools. Optional accessories include additional pans and recipe books for enhanced functionality.

10.1 Bread Pan and Kneading Blade

The bread pan and kneading blade are essential components of the Panasonic Bread Maker. The pan is designed with a non-stick coating for easy bread removal‚ while the blade ensures thorough dough mixing. Both parts are durable and built for long-term use.

Regular cleaning is recommended to maintain performance. Avoid using abrasive cleaners or metal utensils‚ as they may damage the non-stick surface. Proper care ensures consistent baking results and extends the lifespan of these key accessories.

10.2 Measuring Cups and Spoons

The Panasonic Bread Maker comes with measuring cups and spoons‚ essential for accurate ingredient measurements. These tools ensure precise quantities‚ which are critical for achieving the best baking results. The cups and spoons are designed for ease of use and durability‚ making them a convenient addition to your bread-making process. Proper measurement is key to consistent outcomes‚ as outlined in the user manual.

10.4 Optional Accessories

Panasonic offers optional accessories to enhance your bread-making experience. These include additional bread pans‚ kneading blades‚ and recipe books. Optional accessories provide flexibility and versatility‚ allowing you to explore more recipes and baking techniques. They are designed to work seamlessly with your bread maker‚ ensuring optimal performance and convenience. These extras can be purchased separately to expand your bread-making capabilities and enjoy a wider variety of bread types and dough preparations.

Warranty and Customer Support

Panasonic provides a comprehensive warranty for their bread makers‚ ensuring coverage for parts and labor. Dedicated customer support is available for inquiries‚ repairs‚ and troubleshooting‚ offering peace of mind and assistance whenever needed.

11.1 Warranty Information

Panasonic offers a comprehensive warranty for their bread makers‚ typically covering parts and labor for a specified period. The warranty ensures protection against manufacturing defects‚ providing users with peace of mind. For detailed terms and conditions‚ refer to the user manual or visit Panasonic’s official website. Proper registration and adherence to usage guidelines are essential to maintain warranty validity and enjoy hassle-free support.

11.2 Contacting Panasonic Support

For assistance with your Panasonic Bread Maker‚ contact their customer support team through the official website or toll-free number. Additionally‚ email support is available for inquiries. Visit Panasonic’s website for regional contact details and online resources. Ensure to have your product serial number ready for efficient service. Panasonic’s dedicated support team is committed to resolving issues promptly and providing helpful guidance.

11.3 Online Resources and Manuals

Panasonic provides comprehensive online resources‚ including downloadable PDF manuals‚ recipe books‚ and troubleshooting guides. Visit their official website to access these materials. Additionally‚ video tutorials and FAQs are available to help users optimize their bread maker’s performance. These resources ensure easy navigation and troubleshooting‚ making your bread-making experience seamless and enjoyable.

The Panasonic Bread Maker is a versatile and user-friendly appliance that simplifies bread-making. With its advanced features and comprehensive manual‚ it ensures a delightful baking experience for all users.

12.1 Final Tips for Optimal Use

For the best results‚ clean the bread maker regularly and ensure accurate ingredient measurements. Use the preset timer for fresh bread in the morning. Experiment with custom programs to tailor recipes to your taste. Store the machine in a cool‚ dry place to maintain performance. Always refer to the manual for troubleshooting and maintenance tips to extend the lifespan of your Panasonic Bread Maker.

12.2 Enjoying Your Panasonic Bread Maker

Experience the joy of homemade bread with your Panasonic Bread Maker. From classic white loaves to artisanal French bread‚ explore endless possibilities. Utilize preset modes and custom settings to create personalized recipes. Regularly experiment with new ingredients and techniques to enhance your baking skills. Proper maintenance ensures long-term performance‚ allowing you to enjoy fresh‚ delicious bread for years to come. Happy baking!

save our sleep routines pdf

The Save Our Sleep Routines PDF by Tizzie Hall offers expert solutions for establishing healthy sleep habits in babies, providing practical advice and customizable routines for parents․

1․1 Overview of the Book

The Save Our Sleep Routines PDF is a comprehensive guide by Tizzie Hall, offering expert advice on establishing healthy sleep habits for babies․ The book provides detailed, age-specific routines from birth to two years, addressing both breastfed and bottle-fed babies․ It includes practical solutions to common sleep challenges, such as hunger, growth spurts, and settling techniques․ Hall’s approach emphasizes consistency and customization, making it adaptable to various family needs․ The revised edition features updated content, including new routines and tips for premature babies, twins, and safety considerations like swaddling and child safety seats․ This resource is a must-have for parents seeking peaceful nights and well-rested families․

1․2 Importance of Sleep Routines for Babies

Establishing consistent sleep routines is crucial for a baby’s development, as it promotes better brain function, emotional stability, and physical growth․ A well-rested baby is more alert, curious, and able to thrive during waking hours․ Sleep routines also help prevent common issues like overtiredness, which can lead to difficulty settling and frequent nighttime wakings․ By fostering healthy sleep habits early on, parents can support their baby’s overall well-being and create a foundation for lifelong sleep health․ Consistent routines also provide structure, helping babies feel secure and parents manage their daily schedules more effectively․

1․3 Brief Biography of Tizzie Hall

Tizzie Hall is an internationally renowned baby sleep expert with over 15 years of experience helping parents establish healthy sleep routines for their children․ Born and raised in Ireland, she has dedicated her career to understanding infant behavior and developing practical solutions for sleep challenges․ Her expertise has earned her the nickname “baby whisperer,” as her methods have successfully helped thousands of babies sleep through the night․ Hall’s approach is rooted in customized routines tailored to individual needs, making her a trusted resource for parents worldwide․

Key Features of the “Save Our Sleep” Guide

The guide offers customized sleep routines, practical advice, and solutions to common sleep challenges, providing expert tips for establishing healthy sleep habits in babies and toddlers․

2․1 Customized Sleep Routines for Different Ages

Tizzie Hall’s guide provides customized sleep routines tailored to different age groups, from newborns to toddlers․ These routines are designed to adapt to a baby’s developmental stages, ensuring flexibility and consistency․ The book includes detailed schedules for breastfed and bottle-fed babies, addressing their unique needs․ Hall also offers guidance on introducing solids and managing sleep during growth spurts․ Her approach emphasizes understanding a baby’s cues and creating a soothing environment․ This section is particularly helpful for parents seeking structured yet adaptable plans to promote healthy sleep habits from birth to two years․

2․2 Practical Advice for Parents

Tizzie Hall’s guide offers practical advice for parents, focusing on actionable strategies to improve their baby’s sleep․ She emphasizes the importance of establishing consistent bedtime rituals and creating a calming sleep environment․ Hall provides tips on swaddling, feeding schedules, and handling common challenges like hunger and growth spurts․ Her advice is tailored to help parents identify and address their baby’s unique needs, ensuring a restful night’s sleep for the whole family․ This section is filled with real-world solutions, making it a valuable resource for parents seeking to establish healthy sleep habits for their children․

2․3 Solutions to Common Sleep Problems

Tizzie Hall addresses common sleep challenges, offering tailored solutions for issues like hunger, feeding difficulties, and frequent waking․ She provides strategies to overcome these problems, such as adjusting feeding schedules and creating a soothing sleep environment․ Hall also shares tips for handling growth spurts and calming overtired babies․ Her approach focuses on identifying triggers and implementing practical steps to resolve them․ By addressing these challenges, parents can help their babies develop consistent sleep patterns, leading to better rest for the entire family․ Hall’s solutions are designed to be adaptable, ensuring they meet the unique needs of each child․

Sleep Routines from Birth to Two Years

Save Our Sleep Routines PDF provides a comprehensive guide for establishing sleep routines from birth to two years, covering both breastfed and bottle-fed babies, and introducing solids smoothly․

3․1 Routines for Newborns (0-3 Months)

Tizzie Hall emphasizes the importance of establishing gentle, flexible routines for newborns to promote healthy sleep habits from the start․ The guide provides detailed schedules for feeding, sleeping, and playtime, tailored to a newborn’s developmental needs․ It focuses on creating a soothing environment, recognizing sleep cues, and gradually teaching self-settling techniques․ Hall also addresses common challenges like irregular sleep cycles and offers practical tips for managing nighttime feedings․ By fostering consistency and adaptability, parents can help their newborns develop a foundation for restful sleep, even during the first few months of life․

3․2 Routines for Infants (4-6 Months)

Tizzie Hall provides tailored routines for infants aged 4-6 months, focusing on establishing predictable patterns for feeding, play, and sleep․ The guide includes detailed schedules to help parents transition from frequent newborn feedings to more structured mealtimes․ Hall emphasizes the importance of introducing solids gradually and aligning sleep routines with developmental milestones․ She offers practical advice on managing sleep disruptions, such as teething or overstimulation, and encourages parents to create a calming bedtime environment․ These routines aim to promote self-settling skills and prepare infants for smoother transitions as they grow․

3․3 Routines for Babies (7-12 Months)

Tizzie Hall offers detailed routines for babies aged 7-12 months, focusing on solid introduction and activity balance․ The guide provides structured feeding times, play periods, and sleep schedules tailored to this developmental stage․ Hall emphasizes the importance of maintaining consistent routines to support self-settling skills and uninterrupted nighttime sleep․ She also addresses common challenges, such as teething and overstimulation, with practical solutions․ The routines are designed to adapt to growing independence while ensuring restful sleep for both babies and parents, promoting healthy sleep habits as they approach toddlerhood․

3․4 Routines for Toddlers (1-2 Years)

Tizzie Hall provides tailored routines for toddlers aged 1-2 years, focusing on maintaining consistency and adapting to their growing independence․ The guide includes structured daytime naps, playtime, and bedtime schedules to promote healthy sleep habits․ Hall addresses common challenges like resistance to bedtime and nighttime waking, offering practical solutions․ She emphasizes the importance of a calming pre-sleep routine and maintaining consistent boundaries․ These strategies help toddlers develop self-soothing skills and ensure restful sleep for the entire family, supporting their physical and emotional development during this active stage․

Addressing Common Sleep Challenges

Tizzie Hall identifies triggers like hunger, growth spurts, and feeding issues, offering practical solutions to overcome these challenges․ Her advice helps parents establish consistent routines and resolve disruptions, ensuring peaceful sleep for babies and families alike․

4․1 Triggers for Sleep Problems

Tizzie Hall identifies common triggers for sleep issues, such as hunger, dummy use, and rocking babies to sleep․ These habits can disrupt routines and make it harder for babies to self-soothe․ Hall also highlights environmental factors like cold temperatures and inconsistent bedtime rituals as potential disruptors․ By addressing these triggers, parents can create a more stable sleep environment․ Hall’s insights help families recognize and avoid these pitfalls, promoting healthier sleep habits from an early age․ Her practical advice empowers parents to overcome these challenges and establish consistent routines․

4․2 Overcoming Hunger and Feeding Issues

Hunger is a common trigger for sleep disruptions, and Tizzie Hall provides practical strategies to address feeding challenges․ She emphasizes understanding the difference between hunger and other causes of waking, such as discomfort or overstimulation․ Hall offers tailored advice for breastfed and bottle-fed babies, ensuring feeding schedules align with sleep routines․ Her guidance also covers managing growth spurts, which often increase feeding needs․ By addressing these issues, parents can help their babies sleep more soundly․ Hall’s approach ensures feeding needs are met while maintaining consistent sleep routines, reducing nighttime waking and promoting better rest for the whole family․

4․3 Dealing with Growth Spurts

Growth spurts often disrupt sleep routines, but Tizzie Hall provides effective strategies to navigate these phases․ She explains that increased feeding needs during growth spurts can temporarily affect sleep patterns․ Hall recommends adjusting feeding schedules to accommodate these periods while maintaining consistent sleep routines․ Her approach ensures babies receive adequate nutrition without forming associations between feeding and waking․ By understanding and addressing growth-related hunger, parents can help their babies return to sleeping through the night․ Hall’s guidance helps distinguish between growth-related waking and other issues, ensuring routines remain intact and promoting long-term sleep success for the whole family․

Special Cases and Considerations

Tizzie Hall addresses unique challenges, offering tailored advice for premature babies, twins, and adjusting routines for breastfed versus bottle-fed babies, ensuring sleep success in diverse situations․

5․1 Sleep Routines for Premature Babies

Tizzie Hall provides tailored advice for premature babies, emphasizing gentle, adjusted routines to support their unique developmental needs․ Her guide includes tips on creating a safe sleep environment, managing feeding schedules, and addressing common challenges like growth spurts․ Hall’s approach focuses on flexibility and sensitivity, ensuring premature babies can thrive while establishing healthy sleep habits․ The revised edition offers integrated feedback and specialized strategies, making it a valuable resource for parents of preemies seeking restful nights for their little ones․

5․2 Sleep Routines for Twins

Tizzie Hall addresses the unique challenges of raising twins with tailored sleep routines in her guide․ She provides practical advice on synchronizing schedules, managing double the workload, and ensuring both babies receive adequate rest․ Hall emphasizes the importance of consistency and flexibility, offering strategies to help twins sleep through the night․ The revised edition includes tips on creating a harmonious sleep environment and balancing individual needs․ Her approach helps parents of twins establish peaceful routines, ensuring everyone in the household gets the rest they need;

5․3 Adjusting Routines for Breastfed vs․ Bottle-Fed Babies

Tizzie Hall provides tailored advice for breastfed and bottle-fed babies, recognizing their unique needs․ She outlines feeding schedules, sleep training, and routines to ensure both types of babies thrive․ Hall addresses challenges like nighttime waking and burping, offering practical solutions․ Her guide helps parents adapt routines to their baby’s feeding method, promoting healthy sleep habits․ The revised edition includes updated tips for managing feeding-related sleep disruptions, ensuring a smooth transition for all families, regardless of their feeding choice․

Additional Tips and Resources

Tizzie Hall offers practical advice on choosing safe cots, effective swaddling techniques, and using child safety seats to promote better sleep and overall baby well-being․

6․1 Choosing the Right Cots and Bedding

Tizzie Hall emphasizes the importance of selecting safe and comfortable cots and bedding to promote better sleep for babies․ She recommends using a firm, well-fitting mattress and breathable bedding to reduce the risk of SIDS․ Avoiding soft materials like pillows and loose blankets until the baby is old enough is also advised․ Hall suggests ensuring the cot is the correct size for the baby’s age and that it is placed in a quiet, dark room to create an ideal sleep environment․ Proper bedding choices can significantly impact a baby’s ability to sleep soundly and safely․

6․2 Swaddling Techniques for Better Sleep

Tizzie Hall highlights the benefits of swaddling in her guide, explaining how it helps babies feel secure and comfortable, mimicking the womb environment․ She provides step-by-step techniques for proper swaddling, emphasizing the importance of using lightweight materials and ensuring the baby’s hips and arms are correctly positioned․ Hall also offers tips on when to stop swaddling, typically around 6-7 months, and how to transition smoothly․ Her advice ensures safety and effectiveness, helping parents create a calming sleep routine that promotes better rest for their baby․

6․3 Child Safety Seats and Sleep

Tizzie Hall addresses the importance of child safety seats in relation to sleep, ensuring they are used correctly to promote safe and restful environments․ She provides guidance on selecting seats that align with sleep routines, emphasizing proper fitting and comfort․ Hall also discusses how to transition from safety seats to beds seamlessly, maintaining consistent sleep patterns․ Her advice focuses on balancing safety with comfort, helping parents create a secure setting that supports their child’s sleep development without compromising on safety standards or routine consistency․

The Revised Edition Updates

The Revised Edition of Tizzie Hall’s guide includes new sleep routines, feedback integration, and updated advice for modern parents, ensuring comprehensive support for diverse family needs and challenges․

7․1 New Routines and Integrated Feedback

The revised edition introduces new sleep routines and incorporates feedback from parents, enhancing the guide’s effectiveness․ Tizzie Hall addresses diverse challenges, including premature babies and twins, with tailored advice․ The updated routines cover both breastfed and bottle-fed babies, as well as the introduction of solids․ Practical tips on creating a sleep-friendly environment, such as choosing cots and bedding, are also included․ This edition reflects modern parenting needs, ensuring families receive comprehensive support for establishing healthy sleep habits․ The integrated feedback and updated routines make the guide more adaptable and user-friendly for parents facing various sleep-related issues․

7․2 Updated Advice for Modern Parents

The revised edition of Save Our Sleep offers updated advice tailored to modern parenting challenges․ Tizzie Hall addresses contemporary issues, such as swaddling techniques, child safety seats, and adjusting routines for breastfed versus bottle-fed babies․ The guide also includes tips for creating a sleep-friendly environment, ensuring parents can apply the routines in today’s fast-paced world․ Hall’s expertise shines through as she provides practical, adaptable solutions for diverse family dynamics․ This updated advice ensures parents can navigate sleep challenges with confidence, making the guide a valuable resource for modern families seeking restful nights and healthy sleep habits for their children․

Case Studies and Parent Feedback

Save Our Sleep features real-life success stories and feedback from parents who’ve implemented Tizzie Hall’s routines․ These testimonials highlight the guide’s effectiveness in resolving sleep challenges and improving family well-being․

8․1 Real-Life Success Stories

Save Our Sleep shares inspiring real-life success stories from parents who successfully implemented Tizzie Hall’s routines․ These testimonials highlight how her methods transformed their babies’ sleep patterns, even during challenging phases like growth spurts․ Parents praise the guide for its practical advice, noting how it helped their babies sleep through the night and improved family well-being․ These stories serve as powerful examples of the guide’s effectiveness, offering hope and motivation for others facing similar sleep challenges․

8․2 Common Questions from Parents

Parents often seek guidance on adjusting sleep routines for unique circumstances, such as premature babies or twins․ They also inquire about overcoming challenges like hunger, growth spurts, and feeding issues․ Many ask how to handle disruptions, such as travel or illness, while maintaining consistent routines․ Additionally, parents frequently request advice on transitioning between stages, like moving from swaddling to independent sleeping․ Tizzie Hall addresses these concerns with practical solutions, ensuring her guide remains a trusted resource for families navigating the complexities of baby sleep․

The Save Our Sleep Routines PDF provides effective solutions and practical advice, helping families establish healthy sleep habits․ Tizzie Hall’s expertise ensures restful nights for all․

9․1 Summary of Key Points

The Save Our Sleep Routines PDF by Tizzie Hall offers a comprehensive guide to establishing healthy sleep habits for babies․ It provides customizable routines, practical advice, and solutions to common sleep challenges․ The book emphasizes the importance of consistency and addresses factors like hunger, growth spurts, and feeding issues․ Hall’s expertise, gained over years of working with families, ensures that parents receive tailored strategies for different ages and needs․ The revised edition includes updated routines, tips for premature babies and twins, and advice on choosing safe sleep environments․ This guide is a valuable resource for achieving restful nights for the whole family․

9․2 Final Thoughts on Implementing Sleep Routines

Implementing the sleep routines from Tizzie Hall’s guide requires consistency, patience, and adaptability․ Parents are encouraged to tailor the strategies to their baby’s unique needs and remain flexible during growth spurts or developmental changes․ The book emphasizes that small adjustments can lead to significant improvements in sleep quality․ By following Hall’s expert advice, families can create a peaceful sleep environment, helping both babies and parents thrive․ The guide’s practical approach ensures that sleep challenges are addressed with empathy and effectiveness, fostering long-term healthy sleep habits for the entire family․

Resources for Further Reading

The Save Our Sleep Routines PDF is available for free download, offering comprehensive guides․ Explore additional books and resources by Tizzie Hall for further sleep solutions․

10․1 Where to Download the PDF

The Save Our Sleep Routines PDF is available for free download, offering expert sleep solutions․ Access it through Google Play Books or direct download links․ This revised edition includes new routines, tips for premature babies, and swaddling techniques, ensuring comprehensive guidance for parents seeking to establish healthy sleep habits for their babies․

10․2 Additional Books and Guides by Tizzie Hall

Tizzie Hall, a renowned baby sleep expert, has authored several books and guides beyond Save Our Sleep․ Her works focus on sleep training, feeding, and child development, offering practical solutions for parents․ Hall’s guides cover topics like overcoming growth spurts, managing feeding schedules, and ensuring child safety․ With over 24 years of experience, her books are trusted resources for establishing healthy routines․ Parents can explore her additional titles for comprehensive advice on raising well-rested, happy babies, making her a go-to expert for families worldwide․

safe popm exam questions and answers pdf

The PRINCE2 Agile Foundation exam introduces core methodologies, blending PRINCE2 frameworks with Agile practices. Free PDFs offer practice questions, detailed answers, and scenarios to aid preparation effectively.

What is PRINCE2 Agile?

PRINCE2 Agile combines the structured governance of PRINCE2 with the flexibility of Agile methodologies, enabling effective project management in dynamic environments. It integrates iterative delivery, collaboration, and continuous improvement, aligning with modern project demands. This framework emphasizes product-based planning, frequent deliveries, and adaptability, making it suitable for diverse project sizes and industries. By blending PRINCE2’s governance with Agile’s responsiveness, it ensures projects remain aligned with business objectives while fostering innovation and efficiency. The result is a balanced approach that supports both stability and adaptability, catering to organizations seeking to enhance their project management capabilities in an ever-changing landscape.

  • Combines PRINCE2 governance with Agile flexibility.
  • Focuses on iterative delivery and continuous improvement.
  • Suitable for projects requiring adaptability and structure.

Significance of PRINCE2 Agile Certification

Obtaining a PRINCE2 Agile certification significantly enhances your project management skills, blending traditional PRINCE2 methodologies with Agile practices. It validates your ability to manage projects effectively in both structured and dynamic environments. This certification is highly valued in the industry, as it demonstrates expertise in delivering projects efficiently while adapting to changing requirements. Professionals with this certification are better equipped to lead teams, improve workflows, and align projects with organizational goals. Additionally, it opens doors to career advancement and higher salary potential. The certification is particularly beneficial for those seeking to bridge the gap between governance and flexibility in project management. By mastering PRINCE2 Agile, you gain a competitive edge in the job market and enhance your credibility as a project manager.

  • Enhances project management skills with Agile integration.
  • Demonstrates expertise in adaptive project delivery.
  • Boosts career prospects and earning potential.

Overview of the PRINCE2 Agile Foundation Exam

The PRINCE2 Agile Foundation exam is a multiple-choice assessment designed to evaluate your understanding of PRINCE2 Agile principles and practices. It consists of 50 questions, with a 60-minute time limit, and requires a passing score of 55% or higher. The exam focuses on key concepts such as product-based planning, Agile methodologies, and integrating PRINCE2 frameworks with flexible approaches. Candidates are tested on their ability to apply these principles in real-world scenarios, ensuring they can manage projects effectively in both structured and adaptive environments. Preparation materials, including free PDF resources, provide practice questions, detailed explanations, and study guides to help candidates build confidence and succeed. Regular updates ensure the content aligns with the latest exam standards for 2025;

  • 50 multiple-choice questions.
  • 60-minute duration.
  • Passing score: 55%.

Importance of Practice Exams for PRINCE2 Agile Preparation

Practice exams are crucial for familiarizing candidates with the exam format, building confidence, and improving time management. They provide realistic scenarios and detailed answers to enhance understanding of PRINCE2 Agile concepts.

Why Practice Exams Are Essential for Success

Practice exams are vital for PRINCE2 Agile preparation as they simulate real exam conditions, helping candidates familiarize themselves with the format and content. They improve time management skills, reduce anxiety, and build confidence. By attempting realistic questions, individuals can identify knowledge gaps and focus on weak areas. Detailed explanations in PDF resources enhance understanding and retention of complex concepts. Regular practice also ensures a deeper grasp of PRINCE2 Agile principles, enabling better application in actual scenarios. These exams are a proven way to refine strategies and ensure readiness for the certification, making them an indispensable tool for achieving success.

How Practice Exams Simulate Real Exam Conditions

Practice exams for PRINCE2 Agile Foundation closely mirror the actual exam, featuring similar question types, formats, and time constraints. They include multiple-choice questions, scenario-based problems, and detailed explanations, replicating the exam environment. The timed format helps candidates adapt to the pressure of completing questions within the allotted 60 minutes. Additionally, the structure of practice exams aligns with the real exam’s content, covering topics like Agile principles, PRINCE2 methodologies, and practical applications. This similarity ensures that candidates are well-prepared for the exam’s pacing and complexity. By exposing themselves to realistic scenarios and questions, individuals can build familiarity and confidence, reducing anxiety and improving their ability to perform under exam conditions. Regular practice also enhances problem-solving skills and strategic thinking, essential for success in the PRINCE2 Agile Foundation exam.

Role of Community Assistance in Answer Explanation

Community assistance plays a vital role in explaining answers for PRINCE2 Agile exam questions. Online forums and discussion groups provide platforms where candidates can seek clarification on complex topics. Experienced practitioners and certified professionals often contribute to these communities, offering detailed explanations and insights. This collaborative learning environment helps candidates understand not just the correct answers but also the reasoning behind them. Additionally, many community members share real-world examples, making abstract concepts more relatable. The explanations are frequently updated to align with the latest exam content, ensuring relevance. This support system is particularly beneficial for self-study candidates, as it fills knowledge gaps and builds confidence. By leveraging community assistance, learners can gain a deeper understanding of PRINCE2 Agile principles and improve their problem-solving skills, ultimately enhancing their exam performance.

Structure of the PRINCE2 Agile Exam

The PRINCE2 Agile exam consists of 50 multiple-choice questions, with a 60-minute duration and a pass mark of 55%. It assesses knowledge of PRINCE2 Agile concepts and practices.

Types of Questions in the PRINCE2 Agile Exam

The PRINCE2 Agile exam features multiple-choice questions designed to assess knowledge of Agile principles and PRINCE2 methodologies. Questions focus on scenario-based problem-solving, testing understanding of concepts like product-based planning, tolerances, and Agile frameworks. Some questions require applying PRINCE2 Agile principles to real-world scenarios, while others focus on definitions and processes. The exam also includes questions that evaluate the ability to differentiate between PRINCE2 and Agile practices, ensuring a comprehensive understanding of both frameworks. Practice exams and PDF resources provide similar question formats, helping candidates familiarize themselves with the exam structure and content. Regularly updated materials ensure questions align with the latest PRINCE2 Agile syllabus for 2025, offering a realistic preview of the actual exam experience.

Time Management Strategies for the Exam

Effective time management is crucial for success in the PRINCE2 Agile exam. Allocate 60 seconds per question to ensure all 50 questions are attempted. Practice exams help simulate real conditions, allowing candidates to refine their pacing. Focus on answering easy questions first, then return to challenging ones. Regular practice with PDF resources and mock tests builds confidence and speed. Reviewing answers at the end ensures no mistakes are left unaddressed. Utilize study guides to prioritize key concepts and avoid time-wasting during the exam; Consistent practice with updated 2025 materials ensures familiarity with the format and content, enabling efficient time allocation and improved performance.

Understanding the Scoring System

The PRINCE2 Agile exam uses a straightforward scoring system to evaluate candidate performance. The exam consists of 50 multiple-choice questions, each worth one mark, totaling 50 marks. To pass, candidates must score at least 28 marks (55%). Each correct answer earns one mark, while incorrect or skipped questions do not deduct marks. This scoring system emphasizes accuracy and encourages candidates to attempt all questions. Free PDF resources and practice exams provide detailed scoring breakdowns, helping candidates understand their performance. Regular updates in 2025 materials ensure alignment with the latest exam format. By familiarizing themselves with the scoring system, candidates can strategically allocate time and focus on high-probability questions, maximizing their chances of achieving the required pass mark; This clear scoring structure allows for precise tracking of progress during preparation.

Benefits of Using PDF Resources for Exam Preparation

PDF resources offer accessible, comprehensive study materials with accurate questions and answers. Regular 2025 updates ensure relevance, providing candidates with reliable tools to excel in their PRINCE2 Agile exams.

Convenience of PDF Format for Study Materials

The PDF format offers unparalleled convenience for exam preparation, allowing candidates to access study materials anytime, anywhere. Portable and easily shareable, PDFs can be viewed on smartphones, tablets, and laptops, making them ideal for on-the-go learning. Offline access ensures uninterrupted study sessions, even without internet connectivity. The clean, organized layout of PDFs enhances readability, with clear typography and structured content that aids focus. Regular updates to PDF materials guarantee that candidates have the most current information, aligning with the latest exam requirements. Additionally, PDFs are environmentally friendly and cost-effective, eliminating the need for printed resources. This format is particularly beneficial for PRINCE2 Agile exam preparation, providing a flexible and efficient way to review questions, answers, and explanations. Its versatility makes it a preferred choice among candidates seeking to maximize their study efficiency and effectiveness.

Comprehensive Content in PRINCE2 Agile PDFs

PRINCE2 Agile PDFs provide extensive, well-structured content tailored to exam preparation. They include a wide range of practice questions, detailed answer explanations, and real-world scenarios to simulate exam conditions. These resources cover all key topics, from foundational concepts to advanced methodologies, ensuring a thorough understanding of PRINCE2 Agile principles. The PDFs are designed to mirror the actual exam format, offering multiple-choice questions, case studies, and practical exercises. This comprehensive approach helps candidates identify knowledge gaps and strengthen their problem-solving skills. Regular updates ensure the content remains relevant and aligned with the latest exam syllabus. By offering both theoretical insights and practical applications, PRINCE2 Agile PDFs serve as an invaluable tool for achieving certification and excelling in project management roles. Their depth and breadth make them an essential resource for aspirants seeking to master PRINCE2 Agile methodologies effectively.

Regular Updates in PDF Materials for 2025

PRINCE2 Agile PDF materials are regularly updated to reflect the latest exam content and methodologies for 2025. These updates ensure candidates access the most current and relevant practice questions, answers, and scenarios. The PDFs are revised to align with the 2025 syllabus, incorporating new question types and updated answer explanations. This ensures aspirants are well-prepared for the evolving standards of PRINCE2 Agile certification. Regular updates also include fresh case studies and real-world examples, keeping the content dynamic and aligned with industry trends; By providing the most up-to-date resources, these PDFs help candidates stay ahead in their exam preparation. The frequent revisions also address any changes in exam patterns or question formats, ensuring a seamless study experience. This commitment to updates makes PRINCE2 Agile PDFs a reliable and indispensable tool for achieving certification success in 2025.

How to Prepare for the PRINCE2 Agile Practitioner Exam

Utilize study guides, sample papers, and enroll in courses to master PRINCE2 Agile methodologies. Practice with updated PDF materials and mock exams to build confidence and exam readiness effectively.

Study Guides and Materials for Practitioner Level

Comprehensive study guides and materials for the PRINCE2 Agile Practitioner exam are essential for mastering advanced methodologies. Free PDF resources, including practice questions and detailed answers, are widely available online. These materials are designed to align with the exam’s objectives, ensuring a thorough understanding of both PRINCE2 and Agile principles. Regularly updated PDFs for 2025 guarantee access to the latest content, reflecting current best practices. Additionally, exam simulators and scenario-based practice tests mimic real exam conditions, helping candidates assess their readiness. Community-driven platforms also offer explanations and insights, fostering a deeper grasp of complex topics. Leveraging these resources enables practitioners to refine their skills and approach the exam with confidence and preparedness.

Sample Papers and Mock Exams for Practitioners

Sample papers and mock exams are indispensable tools for PRINCE2 Agile Practitioner preparation. Free PDF resources provide access to realistic practice questions, detailed answers, and scenario-based tests. These materials simulate actual exam conditions, helping practitioners assess their knowledge and identify gaps. Mock exams include multiple-choice questions, case studies, and practical scenarios, ensuring a comprehensive understanding of PRINCE2 Agile methodologies. Regularly updated PDFs for 2025 reflect the latest exam patterns and content, while exam simulators offer timed sessions to improve time management. Additionally, community-driven platforms provide explanations and insights, enabling practitioners to refine their strategies. By leveraging these resources, candidates can build confidence, enhance problem-solving skills, and approach the exam with a well-prepared mindset.

Enrolling in PRINCE2 Agile Practitioner Courses

Enrolling in PRINCE2 Agile Practitioner courses provides structured learning and expert guidance, essential for mastering Agile methodologies. These courses offer in-depth training, combining theoretical knowledge with practical applications. Many platforms, such as PeopleCert and Axelos, provide accredited programs with experienced instructors. Course materials include interactive sessions, case studies, and group discussions, ensuring a comprehensive understanding of PRINCE2 Agile principles. Additionally, these courses often include access to study guides, sample papers, and mock exams, helping practitioners prepare for the certification. With 24/7 access to learning resources and support from online communities, participants can study at their own pace. Regular updates in 2025 ensure the content remains relevant and aligned with the latest exam requirements. By enrolling in these courses, practitioners gain the skills and confidence needed to excel in both the exam and real-world projects.

Key Tips for Passing the PRINCE2 Agile Exam

Mastering PRINCE2 Agile concepts, practicing with realistic exam questions, and managing time effectively are crucial. Utilize free PDF resources for comprehensive preparation and realistic practice scenarios to ensure success.

Mastering PRINCE2 Agile Concepts and Principles

Mastering PRINCE2 Agile concepts and principles is essential for exam success. The framework blends PRINCE2’s structured approach with Agile’s flexibility, emphasizing continuous improvement and collaboration. Key principles include prioritizing deliverables, setting tolerances, and maintaining stakeholder engagement. Practice exams in PDF format provide hands-on experience with real-world scenarios, ensuring a deep understanding of these concepts. By focusing on product-based planning and iterative delivery, candidates can align their study materials with exam objectives. Detailed explanations in PDF resources help reinforce learning, ensuring a strong foundation in PRINCE2 Agile methodologies. Regular updates in 2025 materials guarantee relevance and accuracy, making them indispensable for effective preparation and mastery of the subject matter.

Effective Time Management During the Exam

Effective time management is crucial for success in the PRINCE2 Agile exam. With 60 minutes to answer 50 questions, candidates must allocate time wisely. Practice exams help familiarize oneself with the format, enabling better pacing. Skim through all questions first to identify easier ones, then allocate 60-90 seconds per question. For complex questions, spend no more than 2-3 minutes to avoid losing momentum. Use the remaining time to review answers and address skipped questions. Regular breaks during study sessions can improve focus and efficiency. Mastering time management ensures candidates can confidently tackle all questions within the allotted time, maximizing their score and reducing exam stress.

Continuous Learning and Improvement Strategies

Continuous learning and improvement are vital for excelling in the PRINCE2 Agile exam. Regularly reviewing practice questions and answers in PDF format helps reinforce key concepts. Candidates should focus on understanding mistakes, adapting strategies, and refining their approach; Updated study materials for 2025 ensure relevance and alignment with the latest exam content. Engaging with online communities and forums provides additional insights and tips from experienced professionals. By consistently applying these strategies, learners can build confidence, deepen their knowledge, and stay prepared for the evolving demands of the PRINCE2 Agile certification. This iterative process not only enhances exam readiness but also fosters long-term professional growth in project management.

Additional Resources for PRINCE2 Agile Exam Preparation

Free PDFs, exam simulators, and online communities provide comprehensive resources. Updated materials for 2025 include real questions, detailed answers, and explanations, ensuring well-rounded preparation and understanding of PRINCE2 Agile concepts.

Free Question Banks and Practice Tests

Free PRINCE2 Agile Foundation and Practitioner question banks are widely available, offering realistic exam simulations. These resources include multiple-choice questions, detailed answer explanations, and scenario-based problems. Updated regularly, they reflect the latest exam content for 2025. Many platforms provide downloadable PDFs, ensuring accessibility for offline study. Practice tests are designed to mimic actual exam conditions, helping candidates assess their readiness. Additionally, free exam simulators and interactive tools enhance preparation by providing timed environments and instant feedback. These resources are complemented by online communities, where experts and peers offer guidance and clarify doubts. Utilizing these free materials enables candidates to build confidence and refine their understanding of PRINCE2 Agile principles and practices effectively.

Exam Simulators for Realistic Practice

Exam simulators are invaluable tools for PRINCE2 Agile exam preparation, offering realistic practice environments that mirror actual test conditions. These simulators feature timed sessions, authentic question formats, and detailed score reports to help candidates assess their performance. Many platforms provide free or premium access to these tools, ensuring candidates can familiarize themselves with the exam interface and timing. By simulating real-world scenarios, exam simulators help reduce anxiety and improve time management skills. They also allow candidates to identify weak areas, enabling focused study. Regular use of these simulators, combined with free PDF question banks, ensures a comprehensive and confident preparation approach for the PRINCE2 Agile Foundation and Practitioner exams.

Online Communities and Forums for Support

Online communities and forums play a crucial role in PRINCE2 Agile exam preparation by offering peer-to-peer support and shared resources. These platforms provide access to free PDFs, practice questions, and detailed explanations, enabling candidates to engage with others preparing for the same exam. Many forums feature discussions where community members share study tips, clarify doubts, and exchange materials. Additionally, expert contributors often provide insights and guidance, helping candidates understand complex concepts. These communities also offer updated resources, such as hourly refreshed question banks, ensuring candidates stay aligned with the latest exam content. By leveraging these forums, candidates can gain confidence, address weaknesses, and stay motivated throughout their preparation journey. The collective knowledge and support from these online groups significantly enhance the learning experience.

The PRINCE2 Agile Foundation exam effectively prepares candidates for project management roles; Utilizing free PDFs, practice questions, and community support ensures success and confidence in the certification journey.

Final Thoughts on PRINCE2 Agile Exam Preparation

Preparing for the PRINCE2 Agile exam requires a strategic approach, leveraging free PDF resources, practice questions, and community support. These materials provide realistic simulations, ensuring candidates grasp both Agile and PRINCE2 methodologies. Regular updates in PDFs keep the content relevant for 2025, while detailed explanations and answer keys enhance understanding. Utilizing exam simulators and online forums further reinforces preparation. By mastering these tools, candidates can confidently tackle the exam, demonstrating their ability to blend structured frameworks with Agile flexibility. Continuous learning and practical application are key to success, making these resources indispensable for aspiring professionals aiming to excel in project management roles.

by way of deception pdf

“By Way of Deception” is a revealing memoir by Victor Ostrovsky, a former Mossad officer, exposing the agency’s operations and moral dilemmas. The PDF version has gained significant popularity, making the book widely accessible and sparking global debates about espionage and its ethical implications.

1.1 Overview of the Book

“By Way of Deception” is a gripping memoir by Victor Ostrovsky, a former Mossad officer, offering an insider’s perspective on Israel’s elite intelligence agency. The book chronicles Ostrovsky’s journey from recruitment to his eventual disillusionment, detailing the Mossad’s secretive operations, training methods, and moral ambiguities. It exposes the agency’s global covert activities, including high-stakes missions and controversial tactics. The PDF version of the book has become widely accessible, allowing readers to explore its explosive revelations about espionage, ethical dilemmas, and the psychological toll on agents. This memoir remains a significant work in espionage literature, providing unparalleled insight into the Mossad’s inner workings.

1.2 Author Background: Victor Ostrovsky

Victor Ostrovsky, born in 1945 in Canada, immigrated to Israel in 1963, where he became deeply involved in the nation’s intelligence apparatus. Recruited by the Mossad, Ostrovsky initially declined to join the Kidon, their elite assassination unit, but later enrolled in the rigorous three-year training program to become a katsa, or intelligence case officer. His experiences within the Mossad shaped his perspective on its operations and ethics. In 1990, Ostrovsky co-authored “By Way of Deception” with Claire Hoy, revealing controversial details about the Mossad’s activities. The book sparked significant debate and backlash, cementing Ostrovsky’s reputation as a whistleblower and critic of Israel’s intelligence practices.

1.3 Historical Context of the Mossad

The Mossad, Israel’s national intelligence agency, was established in 1949 to protect the state’s security and conduct covert operations globally. Its creation was rooted in Israel’s need to survive in a hostile region, relying on intelligence to counter threats. The Mossad gained fame for daring operations like the capture of Adolf Eichmann in 1960 and its role in the 1972 Munich Olympics aftermath. Victor Ostrovsky’s revelations in “By Way of Deception” offer a rare insider’s perspective on the Mossad’s history, shedding light on its structure, tactics, and the moral dilemmas inherent in its operations. The book underscores the agency’s significance in Israel’s defense strategy and global espionage landscape.

The Making of a Mossad Officer

The Making of a Mossad Officer reveals Victor Ostrovsky’s journey through recruitment, rigorous training, and psychological challenges, offering a gripping insight into the Mossad’s transformative process.

2.1 Recruitment Process

The recruitment process into the Mossad, as detailed in By Way of Deception, is highly secretive and meticulous. Victor Ostrovsky was first approached for the Kidon unit but declined, later joining as a katsa. Candidates are often identified through personal connections or exceptional skills. The process involves psychological evaluations, background checks, and assessments of loyalty and discretion. Ostrovsky’s journey highlights the rigorous vetting and initial reluctance before committing to the Mossad’s demanding training program. This phase is critical in shaping future officers, ensuring only the most suitable candidates proceed.

2.2 Training and Indoctrination

The training and indoctrination process for Mossad recruits, as described in By Way of Deception, is intense and transformative. Victor Ostrovsky underwent a grueling three-year program designed to mold candidates into skilled intelligence officers. The training emphasized psychological conditioning, operational tactics, and loyalty to the Mossad’s mission. Recruits were taught advanced surveillance, espionage techniques, and how to operate in high-stakes environments. The program also focused on mental resilience, preparing agents for the moral and ethical challenges they would face. Ostrovsky’s account reveals the rigorous indoctrination aimed at creating a cadre of highly disciplined and dedicated operatives capable of executing complex missions worldwide.

2.3 Psychological and Physical Challenges

The psychological and physical challenges faced by Mossad recruits, as detailed in By Way of Deception, are immense. Victor Ostrovsky describes the grueling training that pushed candidates to their limits, both mentally and physically. The program was designed to test resilience, loyalty, and the ability to operate under extreme pressure. Recruits endured intense physical conditioning, simulations of high-risk scenarios, and psychological evaluations to assess their suitability for espionage work. The mental toll was significant, with agents often grappling with the moral implications of their actions. Ostrovsky’s account highlights the profound emotional and psychological strain that came with serving in the Mossad, shaping the lives of its operatives forever.

Inside the Mossad

By Way of Deception offers a rare glimpse into the Mossad’s inner workings, revealing its structure, operations, and the psychological demands placed on its agents, as detailed in the PDF.

3.1 Structure and Hierarchy

The Mossad’s structure, as revealed in By Way of Deception, is highly centralized, with a director overseeing all operations. The agency is divided into departments, including intelligence gathering, operations, and security. Ostrovsky details how recruits progress through ranks, from junior roles to senior positions, emphasizing loyalty and secrecy. The hierarchy ensures tight control over missions, with decisions made at the top. This rigid structure allows the Mossad to maintain its reputation as one of the world’s most effective intelligence agencies, as highlighted in the PDF version of the book.

3.2 Operations and Missions

By Way of Deception provides a detailed account of the Mossad’s operations, showcasing their global reach and strategic precision. Ostrovsky reveals how the agency employs clandestine tactics, including the use of sayanim (Jewish volunteers worldwide) for intelligence gathering. Missions often involve high-risk operations, such as political assassinations and sabotage, with agents operating under false identities. The book highlights the Mossad’s ability to infiltrate even the most secure organizations, demonstrating their expertise in espionage. These operations, as described in the PDF version, underscore the Mossad’s reputation for ruthlessness and effectiveness, while also raising ethical questions about their methods and consequences.

3.4 The Role of the Kidon Unit

The Kidon Unit, Mossad’s elite assassination squad, plays a central role in By Way of Deception. Ostrovsky reveals how this unit executes high-stakes missions, often targeting enemies of Israel. The Kidon operatives are trained for precision and lethality, conducting operations globally. Their methods include sabotage, infiltration, and targeted killings, often under false identities. The PDF version of the book details how agents like Ostrovsky were recruited for such tasks, highlighting the unit’s ruthless efficiency and the moral dilemmas faced by its members. This section exposes the darker side of espionage, where the line between duty and ethics often blurs.

Notable Missions and Operations

The book details Mossad’s most daring operations, including Operation Sphinx, the hunt for Carlos the Jackal, and Operation Moses, revealing their strategic depth and global reach.

4.1 Operation Sphinx

Operation Sphinx was a covert mission detailed in Victor Ostrovsky’s “By Way of Deception”, showcasing the Mossad’s strategic operations. The mission involved infiltrating and gathering critical intelligence, highlighting Ostrovsky’s role in planning and execution. It demonstrated the Mossad’s ability to operate in hostile environments, blending deception with precision. The operation’s success underscored the agency’s global reach and its focus on protecting Israeli interests. Ostrovsky’s account provides a rare glimpse into the Mossad’s tactical brilliance and the moral complexities surrounding such operations. The PDF version of the book has made this mission’s details widely accessible, sparking debates on espionage ethics and strategies.

4.2 The Hunt for Carlos the Jackal

Carlos the Jackal, a notorious terrorist, was a key target in the Mossad’s operations, as revealed in Victor Ostrovsky’s “By Way of Deception”. The Mossad employed sophisticated deception tactics to track and disrupt Carlos’s network, showcasing their global reach and intelligence capabilities. Ostrovsky’s account highlights the meticulous planning and infiltration strategies used to counter Carlos’s activities, demonstrating the Mossad’s ability to operate in the shadows. The PDF version of the book provides a detailed insight into this mission, offering readers a unique perspective on the Mossad’s methods and the ethical dilemmas surrounding such operations. This mission remains a testament to the Mossad’s strategic brilliance and its focus on neutralizing threats to Israeli and global security.

4.3 Operation Moses and Its Implications

Operation Moses, detailed in Victor Ostrovsky’s “By Way of Deception”, was a covert Mossad mission to rescue Ethiopian Jews and bring them to Israel. The operation showcased the Mossad’s ability to execute large-scale, high-stakes missions with precision. Ostrovsky’s account reveals the intricate planning and logistical challenges involved, highlighting the agency’s commitment to protecting Jewish communities worldwide. The PDF version of the book provides a gripping narrative of this operation, emphasizing its historical significance and the ethical considerations surrounding such interventions. Operation Moses not only demonstrated the Mossad’s operational prowess but also underscored the geopolitical complexities of such endeavors, leaving a lasting impact on Israeli intelligence operations and global perceptions.

Ethical Dilemmas and Controversies

Victor Ostrovsky’s “By Way of Deception” exposes the Mossad’s morally ambiguous operations, revealing the psychological toll on agents and criticism of their controversial tactics, sparking global debates.

5.1 Moral Ambiguities in Espionage

Victor Ostrovsky’s “By Way of Deception” delves into the moral complexities of espionage, revealing how Mossad agents often blurred the lines between right and wrong. The book highlights the psychological strain agents faced, grappling with the ethical implications of their actions. Ostrovsky’s firsthand accounts expose the justification of deception, manipulation, and even violence in the name of national security. This moral ambiguity raises questions about the true cost of espionage and the lasting impact on those involved. The PDF version of the book has further amplified these debates, making the ethical dilemmas of espionage accessible to a global audience.

5.2 The Psychological Toll on Agents

Victor Ostrovsky’s “By Way of Deception” sheds light on the profound psychological challenges faced by Mossad agents. The book reveals how the constant pressure, secrecy, and moral dilemmas took a heavy toll on their mental health. Agents often struggled with feelings of isolation, guilt, and paranoia, exacerbated by the high-stakes nature of their work. The PDF version of the book highlights how the rigorous training and indoctrination processes further intensified these struggles, leaving many agents emotionally scarred. Ostrovsky’s personal experiences illustrate the long-term psychological damage that can result from a career in espionage, offering a stark reminder of the human cost of intelligence work.

5.3 Criticism of Mossad’s Tactics

Victor Ostrovsky’s “By Way of Deception” critically examines the Mossad’s controversial tactics, revealing a pattern of ruthlessness and disregard for international law. The book exposes the agency’s use of sayanim, informal Jewish helpers worldwide, to infiltrate and manipulate targets. Ostrovsky also critiques the Mossad’s willingness to sacrifice innocent lives and destabilize foreign governments to achieve its objectives. The PDF version of the book highlights how these tactics often prioritized short-term gains over long-term ethical consequences. Such revelations have sparked intense debate, with many questioning the morality and legality of Mossad’s operations, further fueling criticism of its methods and the broader ethical implications of espionage.

The Impact of “By Way of Deception”

“By Way of Deception” sparked global controversy, with its PDF version widely circulated, challenging Mossad’s secrecy and tactics. The book’s revelations fueled debates on espionage ethics and accountability.

6.1 Publication and Reception

“By Way of Deception” was first published in 1990 by St. Martin’s Press, co-authored by Victor Ostrovsky and Claire Hoy. The book immediately sparked controversy due to its explosive revelations about Mossad operations. Its PDF version became widely available online, further amplifying its reach and impact. Critics praised the book for its insider perspective, while others condemned it for exposing sensitive intelligence practices. The publication led to significant debates about espionage ethics and the role of intelligence agencies. Despite backlash, the book remains a pivotal work in espionage literature, offering a rare glimpse into the Mossad’s inner workings.

6.2 Controversy and Backlash

“By Way of Deception” faced intense backlash upon its release in 1990. The Mossad and Israeli government vehemently opposed the book, claiming it compromised national security. Legal actions were taken to block its publication, and Ostrovsky faced widespread criticism. The PDF version circulating online further fueled the controversy, as it made the book’s sensitive content widely accessible. Critics accused Ostrovsky of betraying his country, while others defended his right to expose unethical practices. The backlash highlighted the delicate balance between transparency and secrecy in espionage, sparking global debates about the morality of intelligence operations and the consequences of whistleblowing.

6.3 The Book’s Legacy in Espionage Literature

“By Way of Deception” has left an indelible mark on espionage literature, offering a rare insider’s perspective on the Mossad. The PDF version has ensured its accessibility, making it a widely read and debated work. Ostrovsky’s revelations about Mossad operations and ethical dilemmas have influenced subsequent espionage narratives, setting a precedent for whistleblowers. The book’s legacy lies in its ability to provoke critical discussions about intelligence agencies’ conduct. Its impact continues to resonate, solidifying its place as a pivotal work in the genre, while the digital format has ensured its enduring relevance in modern discourse on espionage and global security.

The PDF Version and Digital Availability

The PDF version of “By Way of Deception” has been widely circulated online, produced by advocates of freedom, ensuring global accessibility and spreading its controversial revelations about the Mossad.

7.1 The Rise of Digital Copies

The digital version of “By Way of Deception” has become widely accessible, with PDF copies available on platforms like Internet Archive and other online repositories. Produced by advocates of freedom, the digital format ensures global reach, allowing readers to explore Ostrovsky’s revelations about the Mossad’s operations and ethical dilemmas. The rise of digital copies has democratized access to the book, making it easier for a global audience to engage with its controversial content. This shift underscores the power of the internet in spreading sensitive information, bypassing traditional publishing constraints and fostering widespread discussion.

7.2 Piracy and Accessibility Issues

The PDF version of “By Way of Deception” has faced challenges with piracy, as unauthorized copies circulate online. While this has made the book more accessible globally, it also raises concerns about copyright infringement and the loss of revenue for authors and publishers. Despite these issues, the digital availability has ensured that Victor Ostrovsky’s insights into the Mossad’s operations remain widely accessible, even to those who might not have had access to physical copies. This balance between piracy and accessibility highlights the complexities of digital content distribution in the modern age.

7.3 The Role of the Internet in Spreading the Book’s Message

The internet has played a pivotal role in spreading the message of “By Way of Deception”, enabling global access to Victor Ostrovsky’s revelations. Digital platforms and PDF sharing sites have made the book widely available, transcending geographical boundaries. Online forums and discussions have further amplified its reach, sparking debates about espionage and intelligence agencies. The internet’s ability to bypass traditional publishing constraints has ensured that Ostrovsky’s insights remain relevant and accessible to a new generation of readers. This digital dissemination has not only preserved the book’s legacy but also introduced its controversial themes to a broader audience worldwide.

“By Way of Deception” remains a pivotal work, offering rare insights into Mossad’s operations. Victor Ostrovsky’s revelations continue to spark debates on espionage ethics, ensuring its enduring relevance.

8.1 Summary of Key Points

“By Way of Deception” by Victor Ostrovsky is a groundbreaking memoir that exposes the inner workings of the Mossad. As a former Mossad officer, Ostrovsky provides a unique insider perspective, detailing recruitment, training, and the moral dilemmas faced by agents. The book reveals the agency’s structure, operations, and controversial tactics, offering a gripping narrative of espionage and intrigue. The PDF version has made the book widely accessible, sparking global debates about intelligence ethics and the Mossad’s role in international affairs. Ostrovsky’s revelations have left a lasting impact on espionage literature, ensuring the book’s relevance in understanding modern intelligence operations.

8.2 Final Thoughts on the Mossad and Espionage

Victor Ostrovsky’s “By Way of Deception” offers a compelling yet controversial perspective on the Mossad and espionage. The book reveals the Mossad’s sophisticated operations, its global influence, and the moral complexities inherent in espionage. Ostrovsky’s account highlights the psychological toll on agents and the ethical dilemmas they face, raising questions about the justification of covert actions. The Mossad’s reputation as a formidable intelligence agency is both admired and criticized, reflecting the dual nature of espionage as a tool for national security and a source of moral ambiguity. The PDF version of the book has ensured its message reaches a wide audience, fostering debates about the role of intelligence in modern geopolitics.

8.3 The Enduring Relevance of “By Way of Deception”

“By Way of Deception” remains a significant work in espionage literature, offering unparalleled insights into the Mossad’s operations and ethical dilemmas. The PDF version has ensured its accessibility, allowing readers to explore Ostrovsky’s revelations about intelligence tactics and moral ambiguities. The book’s enduring relevance lies in its ability to spark critical discussions about espionage’s role in global politics. It serves as a vital resource for understanding the complexities of intelligence work and the psychological toll it exacts on agents. Ostrovsky’s firsthand account continues to influence debates on national security and the ethics of covert operations, cementing its place as a cornerstone of espionage literature.

franklin electric control box manual

The Franklin Electric Control Box Manual is a comprehensive guide for installing, troubleshooting, and maintaining control boxes, ensuring optimal performance and safety in submersible motor systems.

1.1 Overview of Franklin Electric Control Boxes

Franklin Electric control boxes are essential for submersible motor systems, designed to ensure reliable operation and safety. They feature heavy-duty terminals, quick-disconnect lids, and compatibility with 3-wire motors; These boxes meet rigorous industry standards, including LVD, EMC, and RoHS, ensuring durability and compliance. Their robust design and advanced engineering make them a trusted choice for various applications, from residential to industrial settings.

1.2 Importance of the Control Box Manual

The Franklin Electric Control Box Manual is crucial for proper installation, operation, and maintenance. It provides detailed wiring diagrams, troubleshooting guides, and safety precautions, ensuring optimal performance and longevity. The manual also includes technical specifications and compliance standards, helping users adhere to industry regulations. Accessible in PDF format, it serves as a one-stop resource for all control box needs, enhancing user confidence and system reliability.

Features and Benefits of Franklin Electric Control Boxes

Franklin Electric control boxes feature heavy-duty terminals and quick disconnects for easy troubleshooting. They are designed for compatibility with submersible motors, ensuring reliable performance and durability;

2.1 Key Features of Franklin Electric Control Boxes

Franklin Electric control boxes feature heavy-duty box-type terminals for reliable connections and quick disconnect (QD) designs for easy troubleshooting. They are engineered for compatibility with 3-wire submersible motors, ensuring seamless integration and optimal performance. These control boxes also meet rigorous safety and quality standards, including LVD, EMC, and RoHS compliance, making them durable and suitable for various applications.

2.2 Compatibility with Submersible Motors

Franklin Electric control boxes are specifically designed for compatibility with Franklin 3-wire, single-phase submersible motors, ranging from 1/3 to 1 hp. They ensure optimal performance and reliability when paired with these motors, adhering to nameplate ratings and technical specifications. This compatibility guarantees efficient operation and minimizes potential issues, making them a trusted choice for submersible motor systems.

2.3 Advantages of Using Franklin Electric Control Boxes

Franklin Electric control boxes offer robust performance, durability, and ease of use. They feature heavy-duty terminals and quick-disconnect designs for simplified troubleshooting. These boxes are engineered to withstand harsh environments and ensure reliable operation; Their compatibility with submersible motors and adherence to safety standards make them a preferred choice for efficient and secure electrical systems.

Technical Specifications and Ratings

Franklin Electric control boxes are designed for 3-wire submersible motors, featuring certifications like LVD and EMC, and offering enclosures suitable for both indoor and outdoor use.

3.1 Motor Ratings and Capacities

Franklin Electric control boxes are designed for 3-wire submersible motors, ranging from 1/3 to 1 hp, with compatible ratings up to 2 hp. They support motors with capacities from 0.25 to 3.7 kW, ensuring optimal performance. The control boxes are optimized for Franklin Electric motors, adhering to nameplate ratings for voltage, current, and power. This ensures safe and efficient operation across various applications.

3.2 Certifications and Compliance Standards

Franklin Electric control boxes meet rigorous international standards, including LVD (EN 61439-2:2011), EMC (EN 61439-2:2011), and RoHS (EN IEC 63000:2018). They also comply with EN 60529:1999/A2:2012 for environmental protection. These certifications ensure safety, reliability, and environmental compliance, making the control boxes suitable for global applications and adhering to regulatory requirements for submersible motor systems.

3.3 Enclosure Types and Environmental Suitability

Franklin Electric control boxes are available in various enclosure types, including Type 3R, suitable for both indoor and outdoor applications. They are designed to operate in temperatures as low as -10°C (14°F) and offer protection against dust and moisture, ensuring durability in harsh environments. This makes them ideal for diverse installations, from residential to industrial settings, while maintaining reliable performance and safety standards.

Installation and Wiring Guidelines

The manual provides step-by-step installation guides, wiring diagrams, and pre-installation checks to ensure safe and optimal setup of Franklin Electric control boxes for submersible motor systems.

4.1 Step-by-Step Installation Process

The manual outlines a detailed, step-by-step installation process for Franklin Electric control boxes, ensuring proper setup and functionality. It includes pre-installation checks, wiring connections, and mounting procedures. Heavy-duty box-type terminals accommodate up to AWG 2 wire, while Quick Disconnect (QD) boxes simplify troubleshooting by isolating control components. The guide emphasizes adherence to safety standards and compatibility with Franklin Electric submersible motors, ensuring reliable operation and system integrity;

4.2 Wiring Diagrams and Schematics

The manual provides clear wiring diagrams and schematics to ensure proper connections for Franklin Electric control boxes. These visual guides detail terminal layouts, wire sizing, and circuit configurations, facilitating safe and accurate installations. Compatibility with 3-wire submersible motors is emphasized, along with adherence to safety and technical standards like LVD and EMC. The diagrams are essential for troubleshooting and maintaining system performance.

4.3 Pre-Installation Checks and Considerations

Before installing Franklin Electric control boxes, ensure compatibility with submersible motors and verify nameplate ratings. Check environmental suitability, including temperature ranges and enclosure types. Ensure all components meet technical standards like LVD and EMC. Properly assess wire sizing and system configuration to avoid electrical hazards. Always follow safety guidelines to prevent electric shock and ensure reliable operation.

Troubleshooting and Maintenance Tips

Identify common issues using diagnostic tools and follow maintenance procedures to ensure optimal performance. Regular checks and timely repairs extend the control box’s lifespan and reliability.

5.1 Common Issues and Solutions

Common issues include faulty relays, loose connections, and overheating. Solutions involve testing relays, tightening wires, and ensuring proper ventilation. Regular maintenance and inspections can prevent these problems. Always refer to the Franklin Electric AIM manual for detailed troubleshooting steps and guidelines to resolve issues effectively and safely.

5.2 Routine Maintenance Procedures

Regular maintenance ensures optimal performance and longevity. Check connections for tightness, inspect components for wear, and clean the control box to prevent dust buildup. Verify proper settings and update software if necessary. Refer to the Franklin Electric AIM manual for detailed procedures and schedules to maintain your control box efficiently and safely.

5.3 Diagnostic Tools and Techniques

Use multimeters to check voltage and resistance, ensuring proper electrical connections. Thermal imaging can detect overheating components. Refer to the Franklin Electric AIM manual for advanced diagnostic procedures. Utilize control box-specific software tools for real-time monitoring and fault detection. Regularly inspect relays, capacitors, and terminals for wear or damage. These techniques help identify issues early, preventing system downtime and ensuring reliable operation.

Safety Precautions and Best Practices

Always disconnect power before servicing. Wear protective gear to prevent electric shock. Follow manual guidelines for handling and storing components. Ensure proper grounding and ventilation.

6.1 Electrical Safety Guidelines

Always disconnect power before servicing. Use protective gear like gloves and goggles. Ensure proper grounding to prevent shock. Follow manual instructions for safe electrical connections. Avoid overloading circuits. Keep areas well-ventilated to prevent arc flash hazards. Never touch live components. Use insulated tools for added safety. Regularly inspect wires and connections for damage. Adhere to local electrical codes and standards for installation and maintenance.

6.2 Handling and Storage Recommendations

Handle control boxes with care to avoid physical damage. Store in a dry, cool environment away from direct sunlight. Keep units upright to prevent component displacement. Ensure storage areas are free from flammable materials. Use original packaging for transport to minimize risk of damage. Avoid exposure to extreme temperatures or humidity. Regularly inspect stored units for signs of wear or corrosion before installation or use.

6.3 Emergency Procedures and Shutdowns

In case of an emergency, immediately disconnect power to the control box. Use the emergency stop button if available. Allow the system to cool before restarting. Inspect for damage or faults. Follow proper shutdown procedures to prevent electrical shock or further damage. Always refer to the manual for specific emergency guidelines. Ensure safety protocols are strictly adhered to during any unexpected system failure or malfunction.

Compatibility with Franklin Electric Motors

Franklin Electric control boxes are specifically designed to work seamlessly with Franklin submersible motors, ensuring optimal performance and compatibility for various applications and power requirements.

7.1 Motor and Control Box Pairing Guide

Franklin Electric control boxes are designed to pair seamlessly with specific submersible motors, ensuring optimal performance. The guide provides detailed compatibility information, helping users match the correct control box with their motor based on horsepower, voltage, and application requirements. Proper pairing ensures efficient operation, safety, and longevity of the system. Always refer to the AIM manual for precise motor-control box configurations and technical specifications.

7.2 Ensuring Proper System Configuration

Proper system configuration is critical for optimal performance and safety. Always adhere to the control box’s nameplate ratings and technical specifications. Ensure compatibility with Franklin Electric motors by following the AIM manual’s guidelines. Verify wiring, voltage, and horsepower ratings match the motor and control box. Correct configuration prevents electrical issues, ensures efficiency, and extends system lifespan. Refer to the manual for detailed setup instructions and compliance with safety standards.

7.3 Upgrading or Replacing Motors and Control Boxes

Upgrading or replacing motors and control boxes requires careful planning. Always ensure the new components are compatible with existing systems. Refer to the Franklin Electric AIM manual for guidance on selecting the right upgrades. Follow installation instructions precisely to maintain system performance and safety. Proper replacement prevents electrical hazards and ensures optimal functionality. Regular updates help keep your system efficient and compliant with current standards.

Accessories and Additional Components

Franklin Electric offers a range of accessories, including spare parts and replacement kits, to enhance control box functionality and ensure system compatibility and longevity.

8.1 Optional Accessories for Enhanced Functionality

Franklin Electric offers optional accessories like Quick Disconnect boxes, which simplify troubleshooting by isolating control components. Additional components include variable speed drives, spare parts, and replacement kits, ensuring compatibility and system optimization. These accessories enhance control box performance, adaptability, and longevity, catering to specific application needs while maintaining compliance with industry standards and environmental requirements.

8.2 Spare Parts and Replacement Kits

Franklin Electric provides a range of spare parts and replacement kits to ensure seamless maintenance and repairs. These kits include components like terminals, relays, and capacitors, designed for easy replacement. Genuine parts guarantee compatibility and reliability, extending the control box’s lifespan. The manual offers detailed part numbers and diagrams, simplifying identification and ordering processes for optimal system performance and minimal downtime.

8.3 Compatibility with Variable Speed Drives

Franklin Electric control boxes are compatible with variable speed drives (VSDs), enhancing motor performance and efficiency. The manual provides guidelines for integrating VSDs, ensuring proper configuration and compatibility. This setup allows for precise speed control, reducing energy consumption and optimizing system operation. The integration supports advanced motor control, making it suitable for various applications requiring adjustable speed settings.

Parts Breakdown and Component Identification

Franklin Electric control boxes include detailed component breakdowns, helping users identify and understand each part’s function, ensuring proper maintenance and troubleshooting of the system effectively.

9.1 Detailed Component Overview

The Franklin Electric control box includes heavy-duty terminals, relays, capacitors, and disconnects. Each component is engineered for durability and efficiency, ensuring reliable operation. The Quick Disconnect (QD) feature simplifies troubleshooting by isolating control components. These parts are designed to work seamlessly with Franklin Electric submersible motors, providing a robust and maintenance-friendly system. Understanding each component’s role is crucial for optimal performance and longevity.

9.2 Understanding the Control Box Layout

The Franklin Electric control box features a logical layout with clearly labeled components, including terminals, relays, and capacitors. The Quick Disconnect (QD) design allows easy access for troubleshooting. Heavy-duty box-type terminals accommodate up to AWG 2 wires, ensuring secure connections. The layout is optimized for compatibility with Franklin Electric submersible motors, providing a user-friendly interface for installation, maintenance, and operation. This design enhances safety and efficiency in various applications.

9.3 Identifying and Replacing Faulty Components

Identifying faulty components in Franklin Electric control boxes involves checking relays, capacitors, and terminals for signs of wear or damage. Refer to the AIM manual for diagnostic guidance. Before replacing, ensure the system is powered off. Use genuine Franklin Electric spare parts for compatibility. Consult wiring diagrams for precise replacement procedures, and follow safety protocols to avoid electric shock or system damage during repairs.

Downloading and Accessing the Manual

The Franklin Electric control box manual is available in PDF format on the official Franklin Electric website, ensuring easy access for troubleshooting, installation, and maintenance guidance.

10.1 Official Sources for the Franklin Electric Control Box Manual

The Franklin Electric control box manual can be downloaded from the official Franklin Electric website, ensuring authenticity and reliability. Additional resources are available through authorized distributors and technical support platforms, providing easy access to the latest versions and updates. These sources guarantee accurate and comprehensive information for optimal system performance and safety.

10.2 PDF Format and Digital Accessibility

The Franklin Electric control box manual is available in PDF format, ensuring easy access and digital readability. This format allows users to search, zoom, and navigate content effortlessly. PDFs are compatible with most devices, making the manual accessible on computers, tablets, and smartphones. Franklin Electric also provides digital tools and resources to enhance accessibility and user experience, ensuring the manual is readily available for all users.

10.3 Updating to the Latest Version

Regularly updating to the latest version of the Franklin Electric control box manual ensures access to the most accurate and up-to-date information. Visit the official Franklin Electric website to download the newest PDF version. This ensures compatibility with the latest products and features. Users are encouraged to check for updates periodically to maintain optimal performance and compliance with current standards.

Franklin Electric AIM Manual Overview

The Franklin Electric AIM Manual is a comprehensive resource for submersible motor application, installation, and maintenance. It provides detailed guidance and troubleshooting tips, making it indispensable for professionals and technicians.

11.1 Purpose and Scope of the AIM Manual

The Franklin Electric AIM Manual serves as a vital resource for professionals, providing detailed guidance on submersible motor application, installation, and maintenance. It covers troubleshooting, best practices, and compliance standards, ensuring optimal system performance and safety. First introduced in the 1960s, the AIM Manual has become an indispensable tool for technicians and engineers working with Franklin Electric systems.

11.2 Key Sections and Information Included

The AIM Manual includes detailed sections on motor application, installation, and maintenance, along with troubleshooting guides and safety protocols. It provides technical specifications, wiring diagrams, and compliance standards. The manual also covers best practices for system configuration and diagnostic tools, ensuring comprehensive support for professionals working with Franklin Electric submersible systems. Regular updates reflect industry advancements and user feedback.

11.3 How to Use the AIM Manual Effectively

Refer to the AIM Manual for detailed application, installation, and maintenance procedures. Use the troubleshooting guides to diagnose and resolve common issues; Familiarize yourself with safety protocols to ensure secure operations. Access the manual digitally for convenience and regular updates. Leverage the comprehensive resource library for additional technical support and best practices, enhancing your proficiency with Franklin Electric systems.

The Franklin Electric Control Box Manual provides essential guidance for optimal system performance. Always follow safety protocols and refer to the AIM manual for additional support and troubleshooting.

12.1 Summary of Key Points

The Franklin Electric Control Box Manual offers detailed guidance on installation, troubleshooting, and maintenance; It emphasizes safety protocols, compatibility with submersible motors, and proper system configuration. The manual also highlights the importance of routine maintenance and diagnostic tools for optimal performance. By following the guidelines, users can ensure reliable operation and extend the lifespan of their control boxes and associated motors.

12.2 Final Tips for Optimal Use of Franklin Electric Control Boxes

Always adhere to the manual’s guidelines for installation and maintenance. Regularly inspect components and follow safety protocols to prevent electric shock. Ensure compatibility with Franklin Electric motors for seamless operation. Refer to the AIM manual for advanced troubleshooting. Schedule routine maintenance to prolong system lifespan. For complex issues, consult certified professionals to avoid damage and ensure optimal performance.

tv viera panasonic manual

The Panasonic Viera TV manual is a comprehensive guide for optimal TV performance. It covers models like TC-P65VT60 and TH-L42ET5H, detailing setup, picture settings, smart features, connectivity, troubleshooting, and maintenance tips.

1.1 Overview of Panasonic Viera TVs

Panasonic Viera TVs are renowned for their cutting-edge technology and exceptional viewing experiences. These televisions feature advanced plasma panel technology, delivering deep blacks and vibrant colors for immersive visuals. Models like the TC-P65VT60 and TH-L42ET5H showcase Panasonic’s commitment to innovation, offering large screens for an engaging experience. The TC-P65ST30 and TC-P50U50 further highlight the brand’s versatility, catering to different screen size preferences. Viera TVs are equipped with smart TV capabilities, enabling seamless connectivity to apps and online content. Energy efficiency is another key feature, with eco modes designed to reduce power consumption. Whether it’s plasma or LED technology, Panasonic Viera TVs are built to provide high-quality performance and durability, making them a popular choice for home entertainment. Their robust feature set ensures they meet the diverse needs of modern consumers, from cinematic experiences to everyday viewing.

1.2 Importance of the Manual for Optimal TV Performance

The Panasonic Viera TV manual is essential for unlocking the full potential of your television. It provides detailed guidance for setup, customization, and troubleshooting, ensuring a seamless viewing experience. Whether you’re adjusting picture settings, connecting devices via HDMI or Wi-Fi, or exploring smart TV features, the manual offers step-by-step instructions. It also includes maintenance tips to prolong the TV’s lifespan and optimize performance. For models like the TC-P65VT60 and TH-L42ET5H, the manual is a vital resource for resolving common issues and understanding advanced functionalities. Additionally, it covers warranty information and repair procedures, helping users navigate technical challenges. By following the manual, users can ensure their Viera TV operates at peak efficiency, delivering the best possible picture and sound quality. It serves as a comprehensive guide, empowering users to make the most of their investment and enjoy uninterrupted entertainment.

How to Obtain the Panasonic Viera TV Manual

Download the Panasonic Viera TV manual from the official Panasonic website or support page. Models like TC-P65VT60 and TH-L42ET5H have manuals available for free, ensuring easy access to setup and troubleshooting guides.

2.1 Downloading the Manual from Panasonic’s Official Website

To download the Panasonic Viera TV manual, visit the official Panasonic website. Navigate to the support page and select your TV model, such as TC-P65VT60 or TH-L42ET5H. Enter the model number in the search bar, and click on the provided link to access the PDF manual. This ensures you get the most accurate and up-to-date guide for your specific device. The manual is available for free and can be downloaded instantly. It includes detailed instructions for setup, troubleshooting, and optimal performance. By downloading directly from Panasonic, you ensure authenticity and relevance to your Viera TV model. This resource is essential for both new users and those seeking to resolve specific issues. The process is straightforward, making it easy for anyone to access the necessary information for their television.

2.2 Accessing the Manual through Panasonic Support Page

Accessing the Panasonic Viera TV manual through the support page is a convenient option. Visit the official Panasonic website and navigate to the support section. Select your TV model, such as TC-P65VT60 or TH-L42ET5H, from the product category list. Enter the model number in the search bar to find the corresponding manual. The support page provides direct links to download the PDF version of the manual, ensuring easy access. This method is ideal for users who prefer a streamlined process. The support page also offers additional resources, such as troubleshooting guides and firmware updates, to enhance your TV experience. By using the support page, you can quickly locate the manual and other essential information tailored to your specific Viera TV model. This ensures you have all the necessary details to operate and maintain your television effectively.

Contents of the Panasonic Viera TV Manual

The manual includes setup guides, picture and sound settings, smart TV features, connectivity options, troubleshooting, and maintenance tips to ensure optimal performance and user satisfaction.

3.1 Setup and Installation Guide

The setup and installation guide in the Panasonic Viera TV manual provides step-by-step instructions for unpacking, placing, and connecting your TV. It covers wall-mounting options, ensuring a secure and stable installation. Detailed diagrams and safety precautions are included to prevent damage or injury. The guide also explains how to connect cables, such as HDMI and USB, for optimal functionality. Additionally, it walks users through initial setup, including language selection, network configuration, and tuning channels. Specific models, like the TC-P65VT60 and TH-L42ET5H, may have unique setup requirements, which are clearly outlined. The manual emphasizes proper handling of the plasma panel to avoid damage. By following these instructions, users can ensure their Panasonic Viera TV is installed correctly and ready for use. This section is essential for first-time users to achieve a seamless setup experience and enjoy their TV’s features immediately.

3.2 Picture and Sound Settings

The Panasonic Viera TV manual offers detailed guidance on customizing picture and sound settings for an enhanced viewing experience. Users can adjust brightness, contrast, and color calibration to suit their preferences. The manual also explains advanced features like motion smoothing and noise reduction for clearer visuals. For sound, it provides instructions on balancing audio settings, enabling surround sound, and optimizing equalization. Specific models, such as the TC-P65VT60 and TH-L42ET5H, may have additional audio-visual customization options. The guide ensures users can fine-tune their TV’s settings to achieve the best picture and sound quality. Whether for movies, sports, or gaming, the manual helps users optimize their settings for any content type. This section is crucial for those seeking to maximize their TV’s performance and enjoy immersive entertainment.

3.3 Smart TV Features and Apps

The Panasonic Viera TV manual provides extensive details on utilizing smart TV features and apps. It guides users through installing and navigating popular apps like streaming services and multimedia platforms. The manual also explains how to customize the smart TV interface, organize apps, and access online content seamlessly. For models such as the TC-P65VT60 and TH-L42ET5H, the guide highlights voice control and multi-device integration capabilities. Troubleshooting tips are included to resolve connectivity issues or app malfunctions. Additionally, the manual offers advice on optimizing app performance and ensuring stable internet connectivity for a smooth smart TV experience. By following the instructions, users can fully leverage their Viera TV’s smart capabilities, enhancing their entertainment and multimedia experience. This section is essential for anyone looking to explore and utilize the advanced features of their Panasonic Viera TV.

3.4 Connectivity Options (HDMI, USB, Wi-Fi)

The Panasonic Viera TV manual details various connectivity options to enhance your viewing experience. HDMI ports allow for high-definition connections to devices like Blu-ray players and gaming consoles. USB ports enable easy playback of multimedia content from external drives. Wi-Fi connectivity provides seamless access to smart TV features and online streaming services. The manual guides users through setting up these connections, ensuring optimal performance. It also offers troubleshooting tips for common issues, such as unstable Wi-Fi signals or HDMI port malfunctions. Additionally, the guide explains how to connect devices like soundbars or external storage for expanded functionality. By following the manual’s instructions, users can maximize their TV’s connectivity potential, ensuring a smooth and immersive entertainment experience. This section is crucial for anyone looking to integrate their Viera TV with other devices and networks.

3.5 Troubleshooting Common Issues

The Panasonic Viera TV manual includes a dedicated section for troubleshooting common issues. It addresses problems such as poor picture quality, sound malfunctions, and connectivity errors. Users can find step-by-step solutions for resolving issues like no image display, distorted audio, or unstable Wi-Fi connections. The manual also provides guidance for firmware updates, ensuring the TV operates with the latest software. Additionally, it covers how to reset the TV to factory settings if needed. Tips for diagnosing HDMI port issues and optimizing smart TV performance are included. This section is designed to help users identify and fix problems independently, minimizing the need for external assistance. By following the troubleshooting guide, users can restore their TV’s functionality and enjoy uninterrupted entertainment. The manual’s clear instructions make it easier to address common challenges and maintain optimal performance.

3.6 Maintenance and Care Tips

The Panasonic Viera TV manual provides essential maintenance and care tips to ensure longevity and optimal performance. Regularly cleaning the screen with a soft, dry cloth is recommended to avoid dust buildup. Avoid using harsh chemicals or abrasive materials, as they may damage the display. Proper ventilation is crucial to prevent overheating, so ensure the TV is placed in a well-ventilated area. The manual also advises against exposing the TV to extreme temperatures or humidity. For wall-mounted models, it emphasizes the importance of using a sturdy bracket and following installation guidelines to prevent damage. Updating the TV’s firmware periodically is another key maintenance step to ensure all features function smoothly. Additionally, checking for loose connections and securing cables can prevent signal issues. By following these care tips, users can maintain their Panasonic Viera TV’s performance and extend its lifespan. Regular maintenance ensures a superior viewing experience and protects the investment in the television.

Model-Specific Guides

The manual provides detailed guides for specific Panasonic Viera models, including TC-P65VT60, TH-L42ET5H, and TH-42PV70P. Each guide offers tailored instructions for setup, features, and troubleshooting, ensuring optimal performance for each model.

4.1 Panasonic Viera TC-P65VT60 Manual

The Panasonic Viera TC-P65VT60 manual provides detailed instructions for this 65-inch plasma HDTV. It covers setup, picture settings, and troubleshooting for optimal performance. The manual highlights the TV’s plasma panel technology, delivering deep blacks and vibrant colors. It also includes guidance on connectivity options like HDMI and USB. Additionally, the manual offers tips for energy efficiency and maintenance. Users can download the TC-P65VT60 manual from Panasonic’s official support page, ensuring access to the latest operational guidance. This model-specific guide is essential for owners seeking to maximize their viewing experience and resolve common issues efficiently. The manual is part of the 55/60/65 Class series, catering to various screen sizes within the same product line. By following the manual’s instructions, users can enjoy immersive visuals and reliable performance from their Panasonic Viera TC-P65VT60 television.

4.2 Panasonic Viera TH-L42ET5H Manual

The Panasonic Viera TH-L42ET5H manual is a detailed guide for this 42-inch LED TV. It belongs to the ET5H series, offering smart TV features and vibrant display quality. The manual covers setup, picture settings, and connectivity options like HDMI and USB. It also provides troubleshooting tips and maintenance advice to ensure optimal performance. Users can download the TH-L42ET5H manual from Panasonic’s official support page, ensuring access to the latest operational guidance. This model-specific guide is essential for owners seeking to maximize their viewing experience and resolve common issues efficiently. The manual is part of the ET5H series, catering to various screen sizes within the same product line. By following the manual’s instructions, users can enjoy immersive visuals and reliable performance from their Panasonic Viera TH-L42ET5H television.

4.3 Panasonic Viera TH-42PV70P Manual

The Panasonic Viera TH-42PV70P manual provides detailed instructions for this 42-inch plasma TV. It covers setup, installation, and operation, ensuring users can maximize their viewing experience. The manual includes guidance on picture and sound settings, connectivity options like HDMI and USB, and troubleshooting common issues. Maintenance tips are also provided to help users care for their TV. The TH-42PV70P manual is available for download from Panasonic’s official support page, offering easy access to operational guidance. This model-specific guide is tailored for the TH-42PV70P, focusing on its unique features and requirements. By following the manual, users can enjoy the TV’s plasma panel technology, which delivers deep blacks and vibrant colors. The manual is a valuable resource for resolving technical queries and ensuring optimal performance. It is designed to help users navigate the TV’s capabilities and maintain its longevity effectively.

Panasonic Viera TV Features

Panasonic Viera TVs offer advanced features like plasma panel technology for vibrant colors and deep blacks. LED models provide energy efficiency, while smart TV capabilities enable app integration and internet connectivity, enhancing the viewing experience.

5.1 Plasma Panel Technology

Panasonic Viera TVs with plasma panel technology deliver exceptional image quality, offering deep blacks and vibrant colors for an immersive viewing experience. Models like the TC-P65VT60 and TH-L42ET5H showcase this technology, providing sharp contrast and color accuracy. Plasma panels operate by lighting individual cells, ensuring precise control over brightness and color reproduction. This results in a more natural and lifelike picture compared to other display technologies. Additionally, plasma TVs are known for their wide viewing angles, making them ideal for large rooms where multiple viewers are present. The technology also excels in motion handling, reducing blur in fast-paced scenes, which is beneficial for sports and action movies. Overall, Panasonic’s plasma panel technology enhances the visual experience, making it a standout feature in their Viera TV lineup.

5.2 LED and Smart TV Capabilities

Panasonic Viera TVs equipped with LED backlighting offer enhanced brightness and energy efficiency. Models like the TH-L42ET5H and TC-P50U50 feature LED technology, providing crisp images with improved color accuracy. These TVs also integrate smart TV capabilities, enabling access to a wide range of apps and streaming services. The user-friendly interface allows seamless navigation through entertainment options, including popular platforms like Netflix and YouTube. Smart TV features also support wireless connectivity, making it easy to stream content from mobile devices. Additionally, Panasonic’s smart TVs often come with voice control and multi-device synchronization, enhancing the overall viewing experience. The combination of LED technology and smart TV functionality ensures that Panasonic Viera TVs deliver both visual excellence and modern convenience, catering to a variety of entertainment needs.

5.3 Energy Efficiency and Eco Modes

Panasonic Viera TVs are designed with energy efficiency in mind, offering eco-friendly features to reduce power consumption. The Eco Mode adjusts brightness and backlight settings to optimize energy use while maintaining picture quality. Models like the TH-L42ET5H and TC-P50U50 include energy-saving technologies that meet global standards. These TVs also feature automatic shutdown and adaptive dimming, further enhancing energy efficiency. Panasonic’s commitment to eco-conscious design ensures that users can enjoy their viewing experience while minimizing environmental impact. The manual provides detailed guidance on enabling and customizing these eco modes, helping users balance performance and energy savings. By incorporating advanced LED backlighting and smart power management, Panasonic Viera TVs deliver both visual excellence and environmental responsibility, making them a sustainable choice for modern households.

Panasonic Support Services

Panasonic offers comprehensive support services, including customer assistance, repair, and warranty information. Users can access firmware updates and troubleshooting guides for models like TC-P65VT60 and TH-L42ET5H through the official support page.

6.1 Customer Support and Assistance

Panasonic provides dedicated customer support to ensure a seamless experience with Viera TVs. Users can access troubleshooting guides, repair services, and warranty information through the official Panasonic support page. Additionally, firmware updates and software enhancements are available to keep your TV up-to-date. The support page also offers detailed manuals and operational guides for specific models, such as the TC-P65VT60 and TH-L42ET5H, ensuring optimal performance. For further assistance, customers can contact Panasonic’s support team via phone, email, or live chat. This comprehensive support system helps resolve issues quickly and efficiently, ensuring uninterrupted enjoyment of your Panasonic Viera TV.

6.2 Repair and Warranty Information

Panasonic offers comprehensive repair and warranty services for Viera TVs, ensuring long-term reliability. The official support page provides detailed information on warranty coverage, repair options, and authorized service centers. For models like the TC-P65VT60 and TH-L42ET5H, repairs are typically covered under warranty if issues arise within the specified period. Users can verify their warranty status online or through customer support. Repairs must be performed by authorized technicians to maintain warranty validity. Additionally, Panasonic emphasizes the importance of using genuine parts to ensure optimal performance and safety. The company also provides guidelines for proper installation and maintenance to prevent damage. Failure to follow these instructions may void the warranty; By leveraging Panasonic’s repair and warranty services, users can enjoy uninterrupted viewing experiences and protect their investment in Viera TVs.

6.3 Firmware Updates and Software Enhancements

Panasonic regularly releases firmware updates and software enhancements to improve the performance and functionality of Viera TVs. These updates often include bug fixes, feature improvements, and compatibility enhancements for smart TV apps and connectivity options. Users can update their TV firmware either automatically via the internet or manually by downloading the latest version from Panasonic’s official support page. Models like the TC-P65VT60 and TH-L42ET5H benefit from these updates, ensuring optimal viewing experiences. The manual provides step-by-step instructions for updating firmware, emphasizing the importance of using only official Panasonic sources to avoid security risks. By keeping the TV software up-to-date, users can enjoy the latest features, improved stability, and enhanced security. Panasonic also offers customer support for any issues related to firmware updates, ensuring a seamless experience for Viera TV owners.