Hunter Ceiling Fans are renowned for their quality, innovation, and timeless designs․ With over 130 years of expertise, they offer a wide range of models, from classic to modern, ensuring energy efficiency and aesthetic appeal․ Their fans often feature advanced technologies like smart home integration and LED lighting, providing both functionality and style․ Hunter fans are designed to enhance comfort and decor, making them a trusted choice for homeowners seeking reliable and stylish ceiling fans․
Installation Guide
The Hunter Ceiling Fan installation guide provides step-by-step instructions for mounting, wiring, and assembling your fan․ It covers tools needed, mounting methods, and optional accessories, ensuring a smooth and safe installation process․ Refer to the manual for detailed guidance․
Tools and Mounting Methods
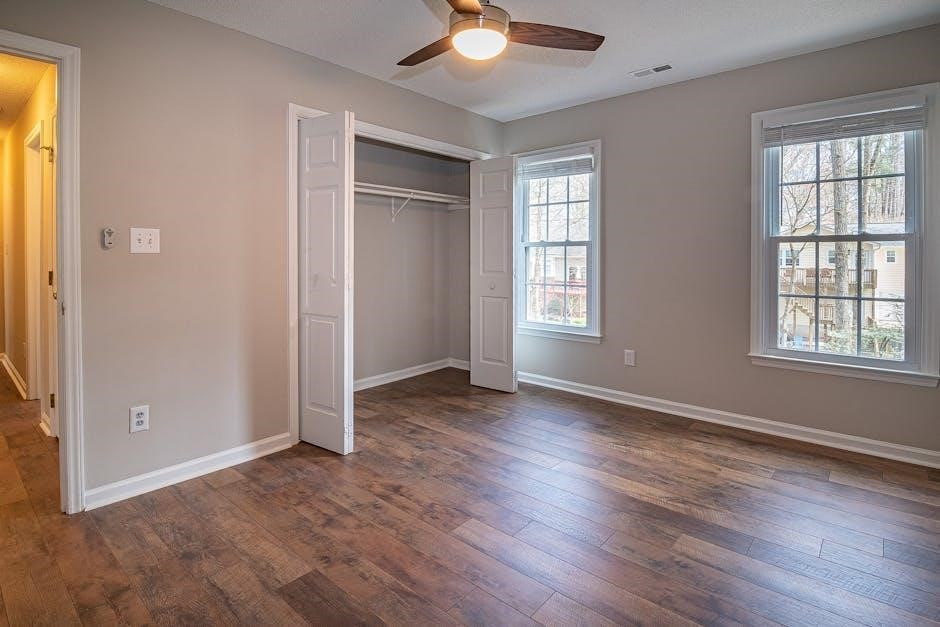
Installing a Hunter ceiling fan requires specific tools and careful preparation․ Essential tools include a screwdriver, pliers, a voltage tester, and a ladder․ Ensure the ceiling junction box is securely anchored to support the fan’s weight․ For mounting, Hunter fans typically use a standard bracket or an angled mount for sloped ceilings․ Flush mounting is ideal for low ceilings, while downrod mounting suits higher ceilings․ The fan’s hardware includes a mounting bracket and screws designed for secure installation․ Follow the manual’s instructions to attach the motor housing and blades properly․ Optional accessories like extension rods may be needed for unique spaces․ Always turn off the power supply before starting․ If unsure, consult the manual or seek professional help to ensure safety and proper installation․ Proper mounting ensures stability and optimal performance of your Hunter ceiling fan․
Wiring Instructions
Proper wiring is crucial for the safe and efficient operation of your Hunter ceiling fan․ Begin by turning off the power supply at the circuit breaker or fuse box․ Identify the wires: black (hot), white (neutral), copper (ground), and any additional wires for lights or remote controls․ Connect the black wire to the fan’s motor wires and the white wire to the neutral terminal․ Ground wires should be securely attached to the grounding screw on the mounting bracket․ If your fan includes a light kit, connect the blue wire to the light’s hot wire and ensure all connections are secure․ Consult the manual for specific wiring diagrams, as configurations may vary by model․ Double-check all connections before restoring power․ If unsure, consider hiring a licensed electrician to avoid safety hazards․ Correct wiring ensures your Hunter ceiling fan operates smoothly and safely, providing years of reliable service․
Optional Accessories Installation
Installing optional accessories for your Hunter ceiling fan enhances functionality and customization․ Begin with the light kit by attaching the glass globe or shade to the fan’s housing, ensuring it is securely fastened․ For remote control installation, pair the receiver with the fan’s motor and mount the remote holder․ If using a downrod, attach it to the fan’s motor and ceiling bracket, ensuring proper alignment․ Always follow the manual’s specific instructions for each accessory․ Turn off the power before starting any installation to avoid electrical hazards․ Double-check all connections to ensure they are secure and correctly wired․ If unsure, consult the manual or seek professional assistance․ Proper installation of optional accessories ensures optimal performance and safety, allowing you to enjoy additional features like dimming, speed control, and extended reach․ Accessories like light kits and remotes add convenience and style, making your Hunter ceiling fan even more versatile and user-friendly․
Troubleshooting Common Issues
Identify common issues like uneven airflow or flickering lights․ Check wiring connections and ensure proper installation․ Consult the manual for specific solutions or seek professional help if problems persist․ Regular maintenance can prevent many issues․
Common Problems and Solutions
One common issue with Hunter ceiling fans is the light switch only working when the fan switch is on, often due to incorrect wiring․ Ensure the light and fan are wired independently for proper function․ Another frequent problem is the light globe falling, which may be caused by incorrect installation instructions․ Always follow the manual for secure assembly․ If the fan wobbles, check blade balance and tighten loose screws․ For flickering lights, verify bulb compatibility and connections․ Remote control issues can arise from battery problems or signal interference; replace batteries or reset the fan․ If the fan stops working, check circuit breakers and wiring connections․ Regular maintenance, like cleaning and lubricating moving parts, can prevent many issues․ Consult the owner’s manual for specific troubleshooting steps or contact Hunter support for assistance․ Proper care ensures optimal performance and longevity of your Hunter ceiling fan․

How to Reset Your Hunter Ceiling Fan
Resetting your Hunter ceiling fan can resolve various operational issues․ Start by turning off the power to the fan at the wall switch and circuit breaker․ Wait for 30 seconds to ensure all components are fully powered down․ Turn the power back on and test the fan’s operation․ If using a remote control, remove the batteries, press and hold the reset button (if available), and reinsert the batteries․ This process often restores default settings․ For fans with smart features, refer to the owner’s manual for specific reset instructions․ Regularly cleaning and lubricating moving parts can prevent issues․ If problems persist, consult the manual or contact Hunter support for assistance․ Proper maintenance ensures optimal performance and longevity of your Hunter ceiling fan․

Maintenance and Cleaning
Regular maintenance ensures your Hunter ceiling fan operates efficiently․ Clean fan blades and housing with a soft cloth to remove dust․ Lubricate moving parts annually to maintain smooth operation and extend lifespan․ Always follow manual guidelines for best results․
Cleaning the Fan Blades and Housing
Regular cleaning is essential to maintain the performance and appearance of your Hunter ceiling fan․ Start by turning off the power to the fan at the electrical source․ Use a soft, dry cloth to wipe down the fan blades, removing dust and debris․ For more thorough cleaning, dampen the cloth slightly with water, but avoid using harsh chemicals or abrasive cleaners, as they may damage the finish․ Gently scrub any stubborn stains or grime, ensuring not to bend or warp the blades; Next, clean the housing and light kit (if applicable) using the same method․ Avoid spraying cleaning products directly onto the fan, as moisture can seep into internal components․ For added shine, use a microfiber cloth to buff the surfaces․ Cleaning should be done every 1-2 months, depending on usage and dust accumulation․ This simple maintenance routine will keep your Hunter ceiling fan running smoothly and looking like new․
Lubricating Moving Parts
Lubricating the moving parts of your Hunter ceiling fan is crucial for ensuring smooth operation and minimizing noise․ Start by turning off the power to the fan at the circuit breaker to ensure safety․ Locate the motor housing and identify the accessible moving components, such as the bearings or pivot points․ Use a high-quality, non-detergent silicone-based lubricant, as it is suitable for most ceiling fan mechanisms․ Apply a few drops to the bearings or moving joints, following the manufacturer’s instructions․ Avoid over-lubricating, as excess oil can attract dust and dirt, leading to premature wear․ Gently rotate the fan blades by hand to distribute the lubricant evenly․ If your fan has a removable motor housing, consult the owner’s manual for specific instructions on accessing internal parts․ Regular lubrication, ideally every 6-12 months, will help maintain the fan’s efficiency and extend its lifespan․ Always refer to the Hunter ceiling fan manual for model-specific guidance on lubrication․

Additional Features
Hunter ceiling fans offer advanced features like LED lighting, smart home integration, and remote control operation․ These enhancements provide convenience, energy efficiency, and seamless control, making them a modern and practical choice for any home․
Understanding Light Kits
Hunter ceiling fans often come with optional light kits, adding both functionality and style to your space․ These kits are designed to be installed with your fan, providing a unified look and enhanced lighting․ They typically include fixtures, glass globes, and bulbs, with options like LED for energy efficiency․ Installation instructions are detailed in the owner’s manual, ensuring a seamless setup․ Light kits are available in various designs, from modern to traditional, to match your home decor․ They also offer dimming capabilities when paired with compatible remotes or smart home systems․ Always refer to the manual for specific compatibility and wiring instructions․ Proper installation ensures safety and optimal performance, making your Hunter ceiling fan a versatile and stylish addition to any room․
Using the Remote Control
The remote control for your Hunter ceiling fan offers convenient operation, allowing you to adjust fan speed, turn the light on/off, and dim the brightness without leaving your seat․ Many Hunter models come with a pre-paired remote, while others may require syncing during installation․ To use the remote, ensure batteries are installed correctly and the fan is powered on․ The remote typically features buttons for fan speed adjustment (low, medium, high) and light control, including dimming functionality․ Some remotes are compatible with smart home systems like Apple HomeKit, enabling voice or app control․ Always refer to the owner’s manual for specific instructions, as features may vary by model․ If the remote stops working, check the batteries or ensure it is properly synced with the fan․ Regularly cleaning the remote and ensuring it has a clear line of sight to the fan’s receiver can improve performance․ This convenient feature enhances the overall user experience, making it easy to customize your comfort settings․
Safety Precautions
When installing or operating your Hunter ceiling fan, it is essential to follow safety precautions to avoid accidents and ensure optimal performance․ Always turn off the power to the fan at the electrical source before attempting any installation, maintenance, or repair․ Never touch electrical components with wet hands or while standing on a wet surface․ Keep children away from the fan while it is in operation․ Avoid using the fan near water sources, such as in bathrooms or kitchens, unless it is specifically rated for damp or wet locations․ Ensure the fan is securely mounted to prevent wobbling or falling․ Do not exceed the recommended weight limit for the fan or attach foreign objects to the blades․ If you notice any unusual noise, vibration, or malfunction, stop using the fan immediately and consult the manual or a professional․ Additionally, always use genuine Hunter replacement parts to maintain safety and performance․ By adhering to these guidelines, you can enjoy your Hunter ceiling fan safely and efficiently for years to come․
Hunter Ceiling Fan Manuals
Hunter ceiling fan manuals provide detailed guides for installation, operation, and troubleshooting․ They include owners manuals, installation guides, and parts lists, ensuring users can safely and effectively maintain their fans․ Manuals are available for download online․
Types of Manuals Available
Hunter ceiling fans come with various manuals tailored to meet specific needs․ The owners manual provides comprehensive information on troubleshooting, safety precautions, and operating instructions․ It also includes details on how to clean and maintain the fan for optimal performance․ Additionally, an installation guide is available, offering step-by-step instructions for mounting the fan, wiring, and installing optional accessories like light kits․ For users needing replacement parts, a parts guide is provided, listing all components with their respective part numbers․ This guide helps users identify and order the correct replacements efficiently․ Furthermore, some models include a user manual focused on daily operation, remote control functionality, and energy-saving features․ These manuals are designed to cater to different aspects of fan ownership, ensuring users have all the information they need to install, maintain, and troubleshoot their Hunter ceiling fans effectively․ They are available for download online, making it easy for users to access the specific guide they require․
How to Download and Access Manuals
Accessing Hunter ceiling fan manuals is straightforward and convenient․ Visit the official Hunter Ceiling Fans website, where you can find a dedicated section for manuals and guides․ Simply navigate to the support or resources page and search for your specific fan model․ Most manuals are available in PDF format, allowing you to download and print them for easy reference․ Additionally, third-party websites like ManualsLib or ManualsOnline host a wide range of Hunter fan manuals, ensuring availability even if the official site is unreachable․ For models like the Hunter Contempo, manuals can also be found on retailer websites such as Home Depot․ Once downloaded, manuals can be saved to your device or cloud storage for future access․ If you’re unable to locate your manual, contact Hunter’s customer support for assistance․ This ensures you always have the necessary guidance for installation, troubleshooting, and maintenance of your ceiling fan․
In conclusion, Hunter ceiling fan owners manuals are essential resources for ensuring optimal performance, safety, and longevity of your fan․ These manuals provide comprehensive guides for installation, operation, and troubleshooting, catering to both DIY enthusiasts and professionals․ By following the instructions, users can avoid common issues and maintain their fans effectively․ Hunter’s commitment to quality and innovation is evident in their detailed manuals, which also highlight advanced features like smart home integration․ Whether you’re installing a new fan or resolving an issue, the manual serves as a trusted companion․ For additional support, Hunter offers online resources and customer service, ensuring a seamless experience․ Investing time in understanding your manual will enhance your overall satisfaction with your Hunter ceiling fan, making it a reliable and stylish addition to your home for years to come․