Welcome to the Kenmore 158 Sewing Machine Manual‚ your comprehensive guide to understanding and operating this versatile sewing machine. This manual provides detailed instructions for setup‚ operation‚ maintenance‚ troubleshooting‚ and advanced features‚ ensuring optimal performance for both beginners and experienced users.
1.1 Overview of the Kenmore 158 Sewing Machine
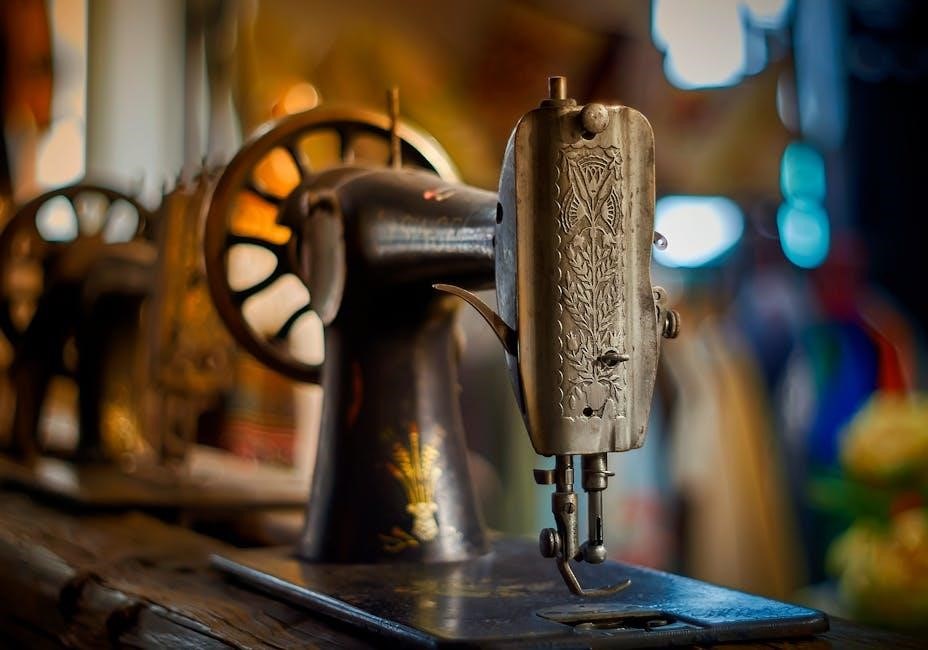
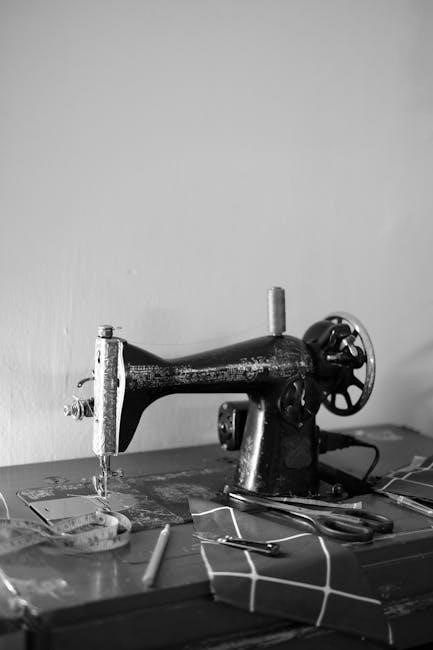
The Kenmore 158 is a popular and versatile sewing machine designed for both beginners and experienced sewists. Known for its durability and ease of use‚ it offers a range of features suitable for various sewing projects. The machine supports multiple stitch patterns‚ including straight and zigzag stitches‚ and is compatible with different fabrics. Its design includes a buttonhole feature‚ presser foot options‚ and adjustable tensions‚ making it ideal for crafting‚ repairs‚ and heavy-duty sewing. Available in several models (e.g.‚ 158.120‚ 158.1358)‚ it caters to diverse sewing needs. Referencing the manual is essential for understanding model-specific features and optimal performance.
1.2 Importance of the Manual for Proper Usage
The Kenmore 158 Sewing Machine Manual is essential for ensuring proper usage and maximizing the machine’s potential. It provides detailed instructions for threading‚ bobbin winding‚ and adjusting tensions‚ which are critical for smooth operation. The manual also outlines safety precautions to prevent accidents and damage. By following the guide‚ users can troubleshoot common issues like thread breakage or skipped stitches. Model-specific instructions ensure compatibility with various Kenmore 158 versions (e.g.‚ 158.120‚ 158.1358). Downloading the PDF manual allows for easy access and future reference‚ making it a vital resource for both beginners and experienced sewists.
Safety Precautions
Ensure safe operation of your Kenmore 158 sewing machine by following essential precautions. Keep loose clothing tied back‚ avoid flammable materials‚ and unplug the machine during repairs. Always follow the manual’s guidelines to prevent accidents and maintain optimal performance.
2.1 General Safety Tips for Sewing Machines
Always prioritize safety when using the Kenmore 158 sewing machine. Keep loose clothing and long hair tied back to avoid entanglement. Ensure the machine is placed on a stable‚ flat surface. Avoid sewing near flammable materials or in areas with poor ventilation. Use the correct needle type for your fabric to prevent breakage. Keep children and pets away while operating the machine. Never touch electrical components with wet hands or while standing on a damp surface. Unplug the machine during repairs or when not in use. Regularly inspect the power cord for damage. Follow these guidelines to ensure safe and efficient sewing.
2.2 Specific Safety Guidelines for the Kenmore 158
For the Kenmore 158 sewing machine‚ always unplug it before cleaning or performing repairs. Use compressed air to remove lint and debris‚ ensuring no flammable materials are nearby. Avoid touching internal components with wet hands. Regularly inspect the power cord and replace it if damaged. Keep the work area clear of clutter to prevent accidents. Use only recommended needles and presser feet for your fabric type. Follow the manual’s instructions for oiling to avoid over-lubrication. Never operate the machine near open flames or sparks. These guidelines ensure safe and efficient use of your Kenmore 158 sewing machine.
Getting to Know Your Kenmore 158 Sewing Machine
Welcome to the Kenmore 158 Sewing Machine Manual. This section helps you identify your machine model‚ understand its parts‚ and familiarize yourself with its controls.
3.1 Identifying Your Machine Model Number
Your Kenmore 158 Sewing Machine model number is essential for accessing the correct manual and troubleshooting. Locate the model number on the machine’s metal plate or engraved label‚ typically found on the bottom‚ back‚ or near the serial number. Common models include 158.120‚ 158.1358‚ and 158.1400. This number ensures you download the right manual from trusted sources like ManualsLib or official Kenmore websites. Always verify the model number before downloading to avoid confusion. This step is crucial for proper setup‚ operation‚ and maintenance of your sewing machine.
3.2 Understanding the Parts and Components
Familiarizing yourself with the Kenmore 158 Sewing Machine parts is crucial for effective operation. Key components include the bobbin‚ presser foot‚ spool pins‚ tension dials‚ and stitch selectors. The bobbin holds the lower thread‚ while the presser foot keeps fabric in place. Spool pins secure the thread‚ and tension dials adjust thread tightness. The stitch selector allows you to choose from various patterns. Refer to the manual’s diagrams for a visual guide to these components. Understanding each part’s function ensures proper setup and operation‚ helping you achieve professional results in your sewing projects.
3.3 Familiarizing Yourself with the Machine Controls
Familiarizing yourself with the Kenmore 158 Sewing Machine parts is crucial for effective operation. Key components include the bobbin‚ presser foot‚ spool pins‚ tension dials‚ and stitch selectors. The bobbin holds the lower thread‚ while the presser foot keeps fabric in place. Spool pins secure the thread‚ and tension dials adjust thread tightness. The stitch selector allows you to choose from various patterns. Refer to the manual’s diagrams for a visual guide to these components. Understanding each part’s function ensures proper setup and operation‚ helping you achieve professional results in your sewing projects.

Threading and Setting Up the Machine
Threading the Kenmore 158 involves carefully guiding the thread through the machine’s tension discs and take-up lever. Properly wind and install the bobbin for smooth stitching.
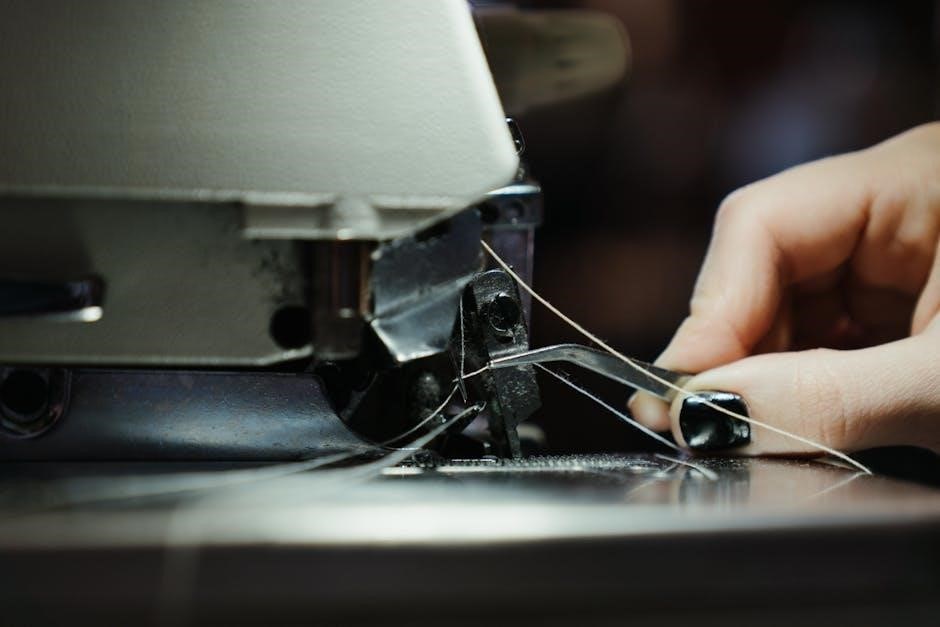
4.1 Step-by-Step Guide to Threading the Machine
Threading the Kenmore 158 sewing machine requires precision to ensure smooth operation. Start by placing the spool on the spool pin and pulling the thread through the tension discs. Guide the thread through the take-up lever‚ ensuring it clicks into place. Next‚ pass the thread through the needle bar and insert it into the needle. Gently pull the thread to remove any slack. Proper threading ensures consistent stitch quality and prevents issues like thread breakage or uneven tension. Always refer to the manual for specific diagrams and adjustments.
4.2 Winding and Installing the Bobbin
To wind the bobbin‚ place it on the bobbin winder and thread the machine as instructed. Wind the thread slowly‚ ensuring it fills the bobbin evenly. Once full‚ cut the thread and remove the bobbin. To install‚ lift the needle to its highest position and remove the bobbin case. Insert the wound bobbin into the case‚ pulling the thread gently to secure it. Replace the bobbin case and lower the needle. Ensure the thread is properly seated in the tension spring before sewing. Always use the correct bobbin size and type for your Kenmore 158 machine.

Operating the Kenmore 158 Sewing Machine
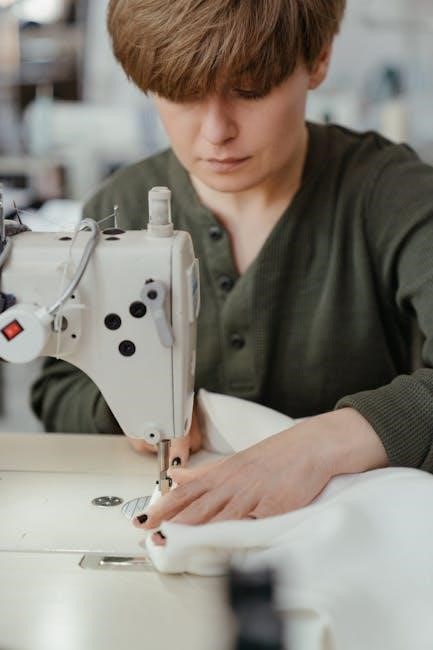
Start by turning on the machine and selecting your desired stitch pattern. Guide the fabric smoothly under the presser foot‚ using the handwheel if needed for control. Always ensure the needle is in the highest position before cutting thread or adjusting settings. Use the reverse stitch lever for backstitching and adjust the stitch length or width as needed for your project. Keep the machine well-lit and maintain steady fabric movement for consistent results.
5.1 Basic Sewing Operations
Begin by turning on the machine and selecting the desired stitch pattern using the control dial. Guide the fabric smoothly under the presser foot‚ ensuring it aligns with the edge guide. Use the handwheel to manually raise or lower the needle if needed. For straight stitching‚ maintain steady fabric movement. Engage the reverse stitch lever for backstitching at the start or end of a seam. Adjust the stitch length and width according to your fabric type. Always keep the work area well-lit and clear of clutter for optimal visibility and control during sewing operations.
5.2 Selecting and Using Different Stitch Patterns
The Kenmore 158 offers a variety of stitch patterns to suit different sewing needs. Use the stitch selector dial or button to choose from straight‚ zigzag‚ or decorative stitches. For straight stitching‚ set the dial to the middle position. Zigzag stitches are ideal for stretchy fabrics or decorative edges. Consult the manual for specific stitch codes and their applications. Always test the stitch on scrap fabric before sewing your final project. Adjust stitch length and width as needed for optimal results. Proper stitch selection ensures professional-looking seams and enhances your sewing experience.
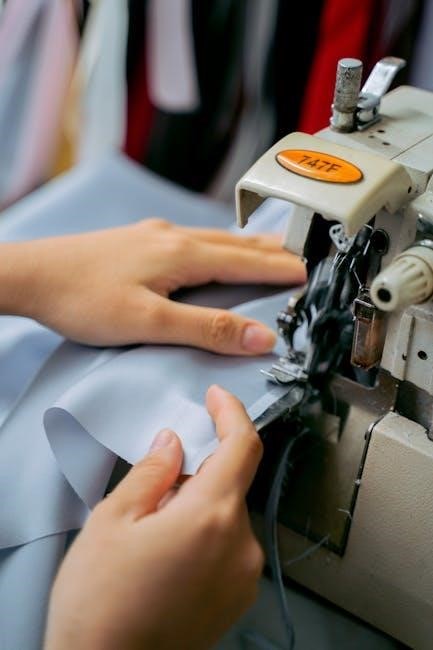
5.3 Using the Presser Foot and Other Attachments
The presser foot is essential for maintaining fabric control during sewing. The Kenmore 158 comes with a standard zigzag foot‚ ideal for general sewing. For specialized tasks‚ use the buttonhole foot for precise buttonholes or the zipper foot for close-edge stitching. To attach or detach‚ lift the presser foot lever and align the foot with the shank. Snap it into place until it clicks. Other optional attachments‚ like a walking foot or quilting guide‚ can enhance your sewing experience. Always refer to the manual for compatibility and installation instructions. Proper use of attachments ensures accurate fabric feeding and professional results.
5.4 Sewing in Reverse and Backstitching
To sew in reverse on the Kenmore 158‚ press the reverse stitch button‚ located near the stitch selector. This feature is useful for reinforcing seams at the beginning or end of a stitch line. For backstitching‚ sew a few stitches forward‚ then reverse direction to create strong anchor points. This technique is especially useful for heavy fabrics or delicate materials. Ensure the machine is properly threaded and the presser foot is lowered before starting. Always test on scrap fabric to confirm tension settings. Proper use of reverse and backstitching enhances seam durability and professional finish.
Maintenance and Care
Regular maintenance ensures your Kenmore 158 runs smoothly. Clean the machine with compressed air‚ oil moving parts‚ and check for lint buildup. This prevents issues and extends machine life. Always follow the manual’s guidelines for proper care.
6.1 Cleaning the Machine
Regular cleaning is essential for maintaining your Kenmore 158 sewing machine. Use compressed air to remove lint and debris from the bobbin area‚ feed dogs‚ and hook race. Gently wipe the exterior with a soft cloth and mild cleaner. Avoid harsh chemicals or abrasive materials that could damage the finish. For internal cleaning‚ remove the covers and carefully brush or blow out lint. Always unplug the machine before cleaning to ensure safety. Regular cleaning prevents thread jams and ensures smooth operation. Refer to the manual for specific cleaning instructions tailored to your machine’s model and components.
6.2 Oiling the Machine
Regular oiling is crucial for the smooth operation of your Kenmore 158 sewing machine. Use high-quality sewing machine oil to lubricate moving parts‚ such as the hook race‚ gears‚ and bobbin winder. Apply a few drops to the specified areas‚ as indicated in the manual. Avoid over-oiling‚ as excess oil can attract dust and lint‚ leading to mechanical issues. Gently turn the hand wheel to distribute the oil evenly. Proper lubrication ensures reduced friction‚ prevents wear‚ and maintains consistent stitch quality. Always refer to the manual for specific oiling points and recommendations for your machine model.
6.3 Troubleshooting Common Issues
Troubleshooting your Kenmore 158 sewing machine involves identifying and resolving common issues. If the upper thread breaks‚ check for a blunt or bent needle‚ incorrect tension‚ or improper threading. For lower thread breakage‚ ensure the bobbin is correctly inserted and the right type is used. Skipping stitches may result from improper threading‚ incorrect needle size‚ or misaligned hook timing. Stitch length variations can occur due to incorrect tension settings or fabric type. Regular cleaning‚ oiling‚ and proper maintenance can prevent many of these issues. Always refer to the manual for specific solutions and adjustments.
Advanced Features and Techniques
Explore advanced features like the buttonhole function‚ tension adjustments‚ and presser foot lock. Learn to sew with various fabrics and master techniques for precise stitching and customization.
7;1 Using the Buttonhole Feature
The Kenmore 158 offers a convenient buttonhole feature for creating professional-looking buttonholes. To use this feature‚ select the buttonhole stitch on your machine. Place your fabric under the presser foot‚ positioning the button where you want the hole. Sew a few straight stitches to secure the area‚ then activate the buttonhole function. The machine will automatically sew a precise buttonhole. For best results‚ use a stabilizing material like interfacing and ensure the button fits the hole perfectly. This feature is ideal for garments‚ home decor‚ and crafts‚ saving time and effort.
7.2 Adjusting the Tensions
Proper tension adjustment is crucial for consistent stitching on the Kenmore 158. Start by ensuring the upper thread tension is set to a medium range for general sewing. For the bobbin tension‚ pull the thread gently; it should offer moderate resistance without being too tight. Use the small screw on the bobbin case to make adjustments. Always test stitches on scrap fabric after adjustments. If threads break or stitches are uneven‚ tweak the tensions slightly and retest. For precise control‚ use a screwdriver and turn adjustments a quarter turn at a time. Proper tension ensures balanced stitches and prevents fabric damage. Consult the manual for specific model variations.
7.3 Using the Presser Foot Lock
The presser foot lock on the Kenmore 158 is essential for maintaining fabric stability during sewing. Engage the lock by pressing the lever located on the back or side of the presser foot. This ensures the foot stays firmly in place‚ preventing fabric slippage. Use the lock for straight stitching or when sewing thick materials. For zigzag or decorative stitches‚ disengage the lock to allow the foot to move freely. Always disengage the lock before changing presser feet or adjusting fabric. Proper use of the presser foot lock enhances stitching accuracy and control‚ especially when using the buttonhole feature or sewing heavy fabrics.
7.4 Sewing with Different Fabrics
The Kenmore 158 sewing machine is versatile for various fabrics‚ from lightweight cotton to heavy denim. For delicate materials like silk or chiffon‚ use a sharp needle and reduce tension. When sewing thick fabrics‚ such as canvas or leather‚ engage the presser foot lock and use a heavy-duty needle. Adjust stitch length and tension settings to accommodate fabric thickness. Use the buttonhole feature for precise results on thicker fabrics. Always test settings on scrap fabric before sewing your final project to ensure optimal results and prevent damage to your machine or material.
Downloading and Accessing the Manual
The Kenmore 158 sewing machine manual is available online in PDF format for instant download. Models like 158.120‚ 158.1358‚ and 158.1400 can be accessed easily by finding your model number and clicking the download button. You can save and print the manual for future use‚ ensuring you always have a copy on hand for reference.
8.1 Where to Find the Kenmore 158 Manual Online
The Kenmore 158 sewing machine manual can be easily found online through various resources. Websites like ManualsLib and official Kenmore support pages offer free PDF downloads for models such as 158.120‚ 158.1358‚ and 158.1400. Simply visit the website‚ use the search feature‚ enter your model number‚ and download the manual instantly. Additional resources‚ including sewing forums and communities‚ often share links to these manuals‚ ensuring accessibility for all users.
8.2 How to Download and Print the Manual
To download and print the Kenmore 158 sewing machine manual‚ visit reputable websites like ManualsLib or official Kenmore support pages; Locate your specific model number (e.g.‚ 158.120 or 158.1358) and click the download link to access the PDF file. Once downloaded‚ open the file using a PDF reader and select the print option. Ensure your printer is set to high-quality settings for clear instructions. You can also save the manual digitally for future reference‚ making it easily accessible for troubleshooting or maintenance tasks.
Troubleshooting Common Problems
The Kenmore 158 sewing machine manual addresses common issues like thread breakage‚ skipped stitches‚ and uneven tension. Check needle condition‚ thread alignment‚ and bobbin installation for quick fixes.
9.1 Upper Thread Breakage
Upper thread breakage on the Kenmore 158 sewing machine can occur due to a blunt or bent needle‚ incorrect tension settings‚ or improper threading. Check if the needle is damaged or dull‚ as this can cause frequent thread snaps. Ensure the top tension is not too tight‚ as excessive tension can lead to breakage. Verify that the thread is properly threaded through the take-up lever and tension discs. If issues persist‚ consult the manual for guidance on adjusting the tension or replacing the needle. Regular maintenance‚ like cleaning and oiling‚ can also prevent such problems.
9.2 Lower Thread Breakage
Lower thread breakage on the Kenmore 158 sewing machine often occurs due to improper bobbin insertion or incorrect bobbin tension. Ensure the bobbin is seated correctly in the bobbin case and that the thread is properly wound. Using the wrong type of bobbin or failing to pull the thread tail through the tension spring can also cause issues. Check for misaligned feed dogs or hook timing problems‚ as these can disrupt the lower thread flow. If the bobbin thread is too tight or loose‚ adjust the bobbin tension screw gently. Always refer to the manual for specific guidance on resolving lower thread breakage effectively.
9.3 Skipping Stitches
Skipping stitches on the Kenmore 158 sewing machine can occur due to improper threading‚ a blunt or damaged needle‚ or incorrect hook timing. Ensure the take-up lever is properly threaded and the needle is in good condition. If the hook timing is off‚ the needle may not pick up the bobbin thread correctly‚ leading to missed stitches. Check for thread jams or lint buildup in the bobbin area‚ as these can disrupt stitch formation. Adjusting the tension or re-threading the machine may resolve the issue. Always refer to the manual for specific guidance on troubleshooting and correcting skipped stitches effectively.
9.4 Stitch Length Variations
Stitch length variations on the Kenmore 158 sewing machine can occur due to incorrect feed dog settings‚ improper tension adjustments‚ or issues with the needle. Ensure the feed dogs are in the correct position and not clogged with debris. Check the stitch length dial to confirm it is set appropriately for your fabric type. If the needle is blunt or damaged‚ replace it with a sharp one. Additionally‚ verify that the upper and bobbin thread tensions are balanced‚ as uneven tension can affect stitch consistency. Consult the manual for guidance on adjusting these settings to achieve uniform stitches. Regular maintenance‚ like cleaning and oiling‚ can also help prevent irregular stitch lengths. Always test stitches on scrap fabric before sewing your final project to ensure optimal results. By addressing these factors‚ you can maintain consistent stitch quality and enjoy smooth sewing experiences with your Kenmore 158. Proper adjustment and regular upkeep are key to avoiding stitch length inconsistencies‚ ensuring your projects look professional and well-finished. If issues persist‚ refer to the troubleshooting section of the manual for further assistance.
DIY Repairs and Adjustments
Empower yourself to handle minor repairs and adjustments on your Kenmore 158 sewing machine. Learn to replace needles‚ clean lint‚ and oil moving parts to maintain performance. DIY fixes can resolve common issues like thread breakage or uneven stitches‚ saving time and money. Always unplug the machine before starting repairs and use genuine Kenmore parts for reliability. Regular maintenance ensures smooth operation and extends the machine’s lifespan. Troubleshooting guides in the manual provide step-by-step solutions for various problems‚ helping you become more self-sufficient in machine care.
10.1 Adjusting the Hook Timing
Adjusting the hook timing on your Kenmore 158 sewing machine ensures proper needle and hook alignment‚ crucial for consistent stitching. Start by inserting a new needle and turning the hand wheel to position the needle bar. Loosen the screw securing the hook‚ then gently rotate it until the hook meets the needle at the correct point. For some models‚ a special tool may be required. Once aligned‚ tighten the screw and test the machine. Proper timing prevents thread breakage and ensures smooth operation. Always refer to the manual for specific instructions and diagrams to avoid errors during adjustment.
10.2 Cleaning and Lubricating the Machine
Regular cleaning and lubrication are essential for maintaining the performance and longevity of your Kenmore 158 sewing machine. Use compressed air to remove lint and debris from the bobbin area‚ feed dogs‚ and gears. Apply high-quality sewing machine oil to moving parts‚ such as the hook race and bobbin winder‚ to ensure smooth operation. Avoid over-lubricating‚ as excess oil can attract dust. Wipe away any excess oil with a soft cloth. Cleaning and lubricating regularly prevents mechanical issues and keeps your machine running efficiently. Always unplug the machine before performing these tasks for safety.
10.3 Replacing the Needle and Other Parts
Replacing the needle and other parts on your Kenmore 158 sewing machine is a straightforward process. Always use high-quality needles‚ such as Organ brand‚ to ensure optimal performance. To replace the needle‚ unplug the machine‚ lift the needle bar‚ and remove the old needle. Insert the new needle with the flat side facing the correct direction. For other parts‚ like the bobbin case or presser foot‚ refer to the manual for specific instructions. Regularly inspect and replace worn or damaged parts to maintain stitching quality and prevent mechanical issues. Genuine Kenmore parts are recommended for compatibility and reliability.
Additional Resources
Explore online communities‚ video tutorials‚ and authorized service centers for further support. Websites like manualslib.com and Sewing Parts Online offer guides‚ parts‚ and expert advice for your Kenmore 158.
11.1 Online Communities and Forums
Join online communities and forums dedicated to sewing enthusiasts for support and advice. Websites like Sewing Parts Online and ManualsLib host discussions and resources for Kenmore 158 users. These platforms allow you to connect with experienced sewists‚ share tips‚ and troubleshoot common issues. Many forums also provide access to downloadable manuals‚ repair guides‚ and tutorials. For example‚ users on OurWorkBench have shared their experiences and even uploaded manuals for specific models like the Kenmore 158. These communities are invaluable for resolving complex problems and optimizing your machine’s performance.
11.2 Video Tutorials and Guides
Enhance your sewing skills with video tutorials and guides available online. Platforms like YouTube and Sewing Parts Online offer step-by-step instructions for the Kenmore 158. These videos cover topics such as threading‚ bobbin winding‚ and troubleshooting common issues. Tutorials often include visual demonstrations‚ making complex tasks easier to understand. For example‚ videos on adjusting tensions or using the buttonhole feature provide clear‚ actionable guidance. Many creators also share tips for maintaining and repairing your machine. These resources are especially helpful for visual learners and those seeking hands-on instruction to master their Kenmore 158 sewing machine.
11.3 Authorized Service Centers
For professional assistance‚ locate authorized Kenmore service centers through the official Kenmore website or customer support. These centers specialize in Kenmore 158 sewing machine repairs and maintenance‚ ensuring genuine parts and expert care. They handle complex issues‚ from motor repairs to electronic adjustments‚ and provide routine maintenance to keep your machine performing optimally. Additionally‚ authorized centers often offer guidance on troubleshooting and preventive care. Visit the Kenmore website or contact their support team to find a certified service center near you and ensure your machine remains under warranty and in peak condition.
The Kenmore 158 Sewing Machine Manual provides comprehensive guidance for optimal use‚ maintenance‚ and troubleshooting. Regular care and proper usage ensure longevity and peak performance of your machine.
12.1 Summary of Key Points
The Kenmore 158 Sewing Machine Manual covers essential setup‚ threading‚ and operation steps. It emphasizes proper maintenance‚ including cleaning‚ oiling‚ and tension adjustments. Troubleshooting guides address common issues like thread breakage and stitch variations. The manual also provides detailed diagrams and model-specific instructions‚ ensuring users can optimize their machine’s performance. By following the guidelines‚ users can extend the machine’s lifespan and achieve professional-grade sewing results. Regular upkeep and adherence to safety precautions are stressed to ensure smooth operation and durability.
12.2 Final Tips for Optimal Machine Performance
For the best results with your Kenmore 158 Sewing Machine‚ always perform regular cleaning and oiling to maintain smooth operation. Use the correct needle type and size for your fabric to prevent damage and ensure precise stitching. Properly thread the machine and adjust tensions as needed to avoid thread breakage or uneven stitches. Refer to the manual for model-specific guidance and troubleshooting. Practice patience and consistency when sewing‚ and experiment with different fabrics and stitch patterns to master your skills. By following these tips‚ you’ll extend the life of your machine and achieve professional-quality results.