Unpacking and Initial Setup
Carefully remove the dispenser from packaging and place it on a flat, stable surface. Ensure the area is dry and near a grounded electrical outlet. Clean the removable drip tray with mild soap and water before first use for optimal hygiene and performance.
Carefully Removing the Dispenser from Packaging
Begin by carefully cutting the packaging straps and lifting the dispenser out of the box. Ensure the dispenser is upright to prevent damage. Gently remove all protective materials, such as foam inserts and plastic wrap, taking care not to scratch the surface. Inspect for any visible damage or dents. Once unpacked, place the dispenser on a flat, stable surface near a grounded electrical outlet. This ensures safe and proper installation. Clean the removable drip tray with mild soap and water before first use.
Placing the Dispenser on a Flat, Stable Surface
Position the dispenser on a flat, stable surface to ensure proper balance and function. Choose a location near a grounded electrical outlet for safe operation. Avoid placing it on uneven or soft surfaces, as this could lead to instability. Ensure the surface is dry and away from direct sunlight or moisture to prevent damage. The dispenser must be upright during initial setup to allow internal components to stabilize. This step is crucial for maintaining the unit’s performance and safety features. Always follow the manufacturer’s guidelines for placement.

Installation Steps
Position the dispenser near a grounded electrical outlet for safe operation. If transporting on its side, set it upright for 24 hours before using the cooling function.
Positioning Near a Grounded Electrical Outlet
Place the dispenser on a flat, stable surface and ensure it is positioned near a grounded electrical outlet. This ensures safe and reliable operation. Avoid exposing the dispenser to water or moisture, as it is designed for indoor use only. Keep the area around the outlet clear to prevent any hazards. Always follow the manufacturer’s guidelines for proper installation to maintain safety and functionality. This step is crucial for ensuring the dispenser operates efficiently and safely. Proper placement near a grounded outlet is essential for optimal performance.
Transporting the Dispenser on Its Side (If Needed)
Transporting the dispenser on its side is possible if necessary. However, after moving, set it upright for 24 hours before using the cooling function. This allows the compressor lubricant to settle properly, ensuring optimal performance and preventing damage. Always handle the dispenser with care to avoid tilting or dropping, as this could affect its internal components. Follow these steps to maintain the dispenser’s efficiency and longevity after transportation.
Operating Instructions
Open the lower cabinet door. Remove the cap from a 3 or 5-gallon Primo water bottle. Align the bottle with the dispenser and ensure it is securely locked. Plug in the dispenser and select desired temperature.
Opening the Lower Cabinet Door
To access the water bottle compartment, gently pull the lower cabinet door handle. Ensure the door is opened fully to allow easy installation or removal of the water bottle. This step is essential for proper dispenser operation. Always handle the door with care to avoid damage. The compartment is designed to accommodate 3, 4, or 5-gallon bottles securely. Opening the door provides clear access for maintenance, cleaning, or replacing the water bottle as needed.
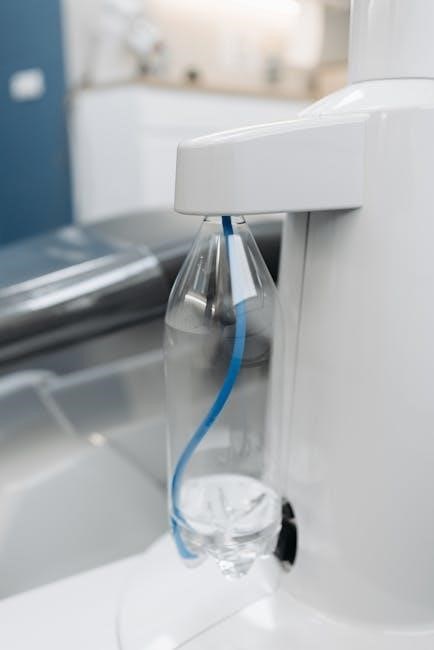
Removing the Cap from a 3 or 5-Gallon Primo Water Bottle
Before placing the bottle in the dispenser, ensure the cap and neck are clean. Remove the cap by twisting it counterclockwise until it comes off completely. Align the bottle with the dispenser’s probe to ensure proper connection. If the cap is not removed, the dispenser may not function correctly; Always handle the bottle with care to avoid spills or damage. This step is crucial for proper water flow and dispenser operation. Ensure the bottle is securely placed to prevent leaks or issues during use.

Troubleshooting Common Issues
If the dispenser isn’t dispensing water, check for clogs in the filter or tube. For bottom-load models, ensure the probe tip is clear of debris for proper function.
Dispenser Not Dispensing Water
If the dispenser fails to dispense water, check for common issues like a clogged filter or tube, especially in bottom-load models. Ensure the probe tip is clean and free from blockages. Verify that the water bottle is properly seated and the cap is removed. If the dispenser was recently transported, it may need to be upright for 24 hours to allow the compressor lubricant to settle. Check the water supply line for kinks or obstructions and ensure the dispenser is powered on. Consult the manual for further troubleshooting steps if the issue persists.
Clogged Filter or Tube in Bottom-Load Models
In bottom-load models, a clogged filter or tube can disrupt water flow. Check the probe tip for blockages, as debris or sediment may accumulate. Turn off the dispenser and unplug it before cleaning. Remove the filter screen at the end of the probe and rinse it with water. If clogged, soak the filter in warm water or replace it if damaged. Reassemble and test the dispenser to ensure proper function. Regular maintenance helps prevent future issues.
Maintenance and Cleaning
Regularly clean the removable drip tray with mild soap and water to prevent mineral buildup. Check the probe tip for clogs and ensure it’s free-flowing for proper function.
Cleaning the Removable Drip Tray with Mild Soap and Water
To clean the drip tray, remove it from the dispenser and rinse with warm water. Apply mild soap using a soft cloth or sponge, avoiding abrasive materials that may scratch the surface. Rinse thoroughly to ensure no soap residue remains. Dry the tray with a clean towel before reattaching it to the dispenser. Regular cleaning prevents bacterial growth and ensures a clean water supply. This simple maintenance step is essential for optimal performance and hygiene.
Checking the Probe Tip for Clogs
Regularly inspect the probe tip in bottom-load models to ensure proper water flow. Turn off the dispenser and unplug it for safety. Locate the probe at the bottom of the dispenser where the bottle sits. Use a soft brush or cloth to gently clean any debris or sediment. If clogged, soak the tip in warm water or replace it if damaged. Allow the dispenser to cool before reconnecting the power. This maintenance step prevents dispensing issues and ensures optimal performance. Refer to the manual for detailed guidance.
Safety Precautions
Always exercise basic safety precautions. Ensure the dispenser is properly assembled and installed before use. Keep it dry and avoid exposure to water splashes during operation.
Exercising Basic Safety Precautions During Operation
Always ensure the dispenser is properly assembled and installed before use. Place it on a dry, stable surface near a grounded electrical outlet. Avoid exposing the dispenser to direct sunlight or moisture. Keep children away from hot water dispensing areas to prevent burns. Regularly inspect the power cord and plugs for damage. Never attempt to modify or repair the dispenser yourself. Use only genuine Primo parts for maintenance. Follow all safety guidelines in the manual to ensure safe and efficient operation.
Features and Benefits
The dispenser offers an instant hot water function, providing quick access to hot water. It also features energy saver switches for optimal energy efficiency and performance.
Instant Hot Water Function
The Primo bottom load water dispenser features an instant hot water function, providing hot water at the touch of a button; This convenient feature is ideal for tea, coffee, or instant meals. The dispenser uses a built-in heating element to quickly heat water to a high temperature, ensuring a consistent supply. Energy-efficient switches help manage power usage while maintaining optimal performance. This function enhances user experience, offering hot water instantly without the need for a kettle or stove, making it a practical addition to any kitchen or office setting.
Technical Specifications
Compatibility with 3, 4, or 5-Gallon Bottles
Designed for use with standard 3, 4, or 5-gallon water bottles. Model 900161 supports bottom-loading functionality for convenient operation. For indoor use only.
The Primo Bottom Load Water Dispenser is designed to work seamlessly with standard 3, 4, or 5-gallon water bottles. This versatility ensures compatibility with most common bottle sizes available in the market. The dispenser’s bottom-loading design allows for easy installation of the bottle without lifting, making it convenient for users. Always ensure the bottle is clean and the neck is free from debris before placing it in the dispenser. Visit PrimoWater.com to find compatible bottles near you.
Warranty and Customer Support
Contact Primo Water Corporation for assistance with your dispenser. Visit their official website for support resources and to access user manuals for specific models like 900161.
Contacting Primo Water Corporation for Assistance
For any inquiries or issues, visit www.PrimoWater.com and navigate to the Support section. Models like 900161 and 601272-C are covered in their resources. Primo Water Corporation provides detailed manuals and troubleshooting guides. If further assistance is needed, contact their customer support team directly. Ensure your dispenser is used indoors and properly assembled before reaching out. This ensures efficient resolution to any questions or concerns about your bottom-load water dispenser.
Accessories and Compatible Bottles
Uses standard 3, 4, or 5-gallon water bottles. Visit PrimoWater;com to find compatible bottles near you. Bottle not included with dispenser.
Finding Primo Water Bottles at a Store Near You
To locate Primo Water bottles, visit www.PrimoWater.com and use the store locator tool. Ensure compatibility by selecting 3, 4, or 5-gallon bottles. Check availability at local retailers or online. The dispenser does not include a water bottle, so purchase separately. For convenience, verify store locations and bottle sizes before visiting. This ensures a seamless experience with your Primo Bottom Load Water Dispenser.

Energy Efficiency
The dispenser features energy saver switches, optimizing energy use while maintaining performance. These switches help reduce standby power consumption, ensuring efficient operation and lower energy bills.
Energy Saver Switches for Optimal Performance
The Primo Bottom Load Water Dispenser features energy saver switches to enhance efficiency. These switches allow you to manage power consumption effectively, ensuring optimal performance while reducing energy use. Enable the energy saver mode to minimize standby power consumption without compromising the dispenser’s functionality. Always refer to the manual for specific instructions on activating and utilizing these switches for maximum energy efficiency and cost savings. Regularly checking the switches ensures the dispenser operates at its best while maintaining eco-friendly performance.

Upgrading or Modifying the Dispenser
After any modification, set the dispenser upright for 24 hours to allow the compressor lubricant to settle before using the cooling function for optimal performance.
Setting the Dispenser Upright for 24 Hours Before Using the Cooling Function
After transporting the dispenser on its side, place it upright for 24 hours before using the cooling function. This allows the compressor lubricant to settle properly, ensuring optimal performance. Failure to do so may result in reduced cooling efficiency or potential damage to the internal components. Always follow this step to maintain the dispenser’s functionality and longevity. This setup is crucial for models with cooling features to operate effectively and safely.

User FAQ
Frequently Asked Questions About the Primo Bottom Load Water Dispenser
Q: Why isn’t my dispenser working? Check if the probe tip is clogged or if the filter needs cleaning. Ensure the bottle is properly seated.
Q: Can I transport the dispenser on its side? Yes, but set it upright for 24 hours before using the cooling function to allow the compressor lubricant to settle.
Q: How do I clean the drip tray? Remove the drip tray and wash it with mild soap and water. Rinse thoroughly before replacing it.
Q: What bottle sizes are compatible? The dispenser works with 3, 4, or 5-gallon bottles. Visit www.PrimoWater.com to find compatible bottles near you.
- Q: Can the dispenser be transported on its side?
A: Yes, but it must be set upright for 24 hours before using the cooling function. - Q: How do I resolve a clogged filter or tube?
A: Check the probe tip for clogs and clean as needed. - Q: Is the dispenser compatible with all water bottles?
A: It works with standard 3, 4, or 5-gallon bottles. - Q: How do I access troubleshooting guides?
A: Visit Primo Water Support for detailed instructions.

Comparison with Other Models
The Primo bottom-load dispenser stands out with its instant hot water function and compatibility with 3, 4, or 5-gallon bottles, offering greater versatility than many competitors.
Key Differences Between Primo Bottom Load and Other Dispensers
The Primo Bottom Load Water Dispenser stands out for its unique bottom-loading design, eliminating the need to lift heavy bottles. It supports 3, 4, or 5-gallon bottles, offering flexibility. Unlike top-load models, it reduces spills and strain. Energy-efficient switches optimize performance, and the instant hot water function is a standout feature; The dispenser requires setting upright for 24 hours before cooling to allow lubricant settling. Its sleek design and user-friendly interface make it a preferred choice over traditional dispensers, combining convenience with advanced functionality.
Final Thoughts on the Primo Bottom Load Water Dispenser Manual
The Primo Bottom Load Water Dispenser offers convenience, reliability, and efficiency. With features like instant hot water and compatibility with 3-5 gallon bottles, it enhances daily hydration routines while ensuring energy efficiency through its saver switches.
The Primo Bottom Load Water Dispenser Manual provides a comprehensive guide for users, ensuring smooth operation and maintenance. From unpacking to troubleshooting, it covers essential steps for optimal performance. The dispenser’s features, such as instant hot water and energy-saving switches, enhance user convenience. Regular cleaning and proper assembly are emphasized to prolong longevity. With clear instructions and safety precautions, this manual equips users to make the most of their dispenser while minimizing potential issues. It’s a valuable resource for both new and experienced users.