
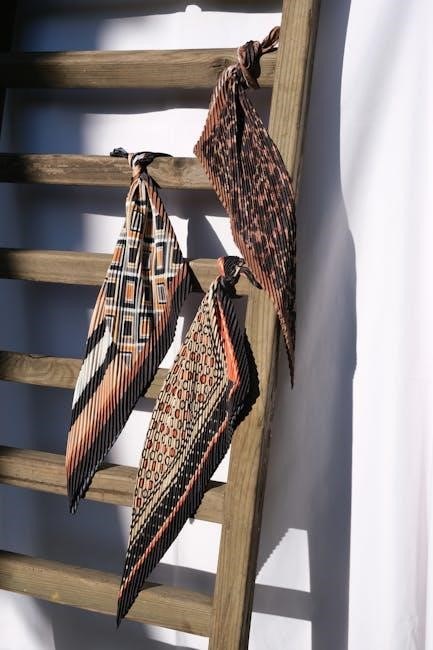
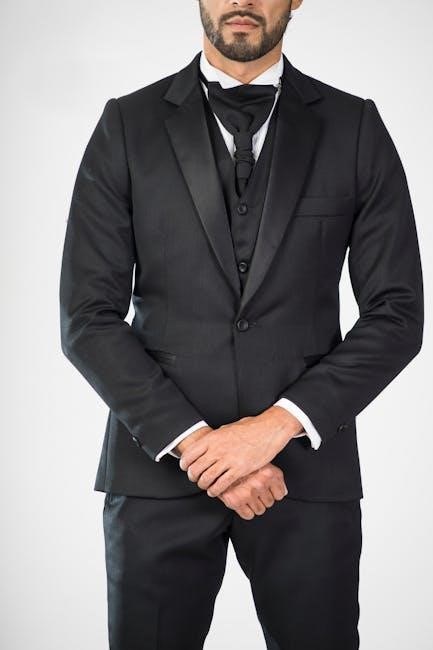
Tie knots are essential for making a stylish impression, offering versatility for various occasions. From the simple Four-in-Hand to intricate designs, mastering these knots enhances professionalism and personal flair effortlessly.
1.1 Importance of Knowing Different Tie Knots
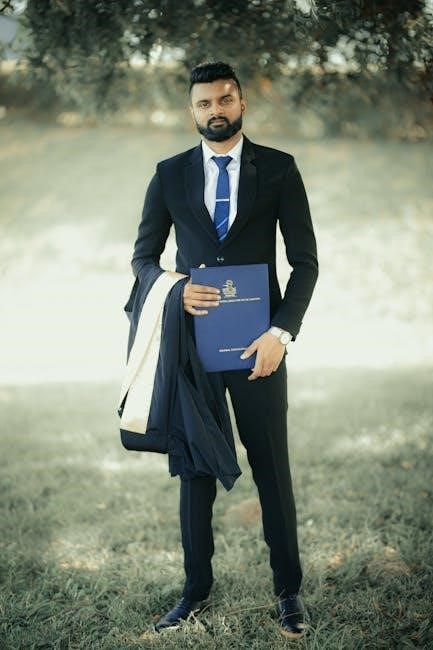
Mastering various tie knots is crucial for making a polished impression in professional and formal settings. Different knots suit different occasions, collar styles, and personal preferences, offering versatility. The Four-in-Hand, Windsor, and Half Windsor are popular choices, each with unique characteristics. Learning these knots enhances confidence and adaptability, ensuring you’re prepared for any event. Whether it’s a job interview, wedding, or casual gathering, the right knot can elevate your outfit and reflect your personality. Additionally, understanding how to tie multiple knots allows for experimentation, helping you discover what works best for your face shape, neck size, and tie fabric. This skill not only adds to your grooming but also showcases attention to detail and effort, making it a valuable asset in both personal and professional life.
1.2 Brief History of Tie Knots
The origins of tie knots trace back to the 17th century with the Croatian mercenaries, who wore distinctive scarves that inspired the modern necktie. Over time, the cravat evolved, and by the 19th century, the Four-in-Hand knot became the first practical necktie knot. Named after a British gentlemen’s club, it was simple and functional. The 20th century saw the rise of the Windsor and Half Windsor knots, popularized by public figures like Winston Churchill. These knots symbolized professionalism and elegance. Today, tie knots continue to evolve, with new styles emerging to suit modern fashion. The art of tying knots has become a hallmark of sophistication, reflecting both personal style and historical influence. Understanding their origins adds depth to the practice, making it more than just a practical skill but a connection to cultural heritage.
1.3 Essential Tools for Tying Knots
Mastering tie knots requires the right tools and resources. A high-quality tie made from smooth, durable fabric is essential, as it ensures the knot lies flat and holds its shape. Online guides, such as Animated Knots by Grog, offer step-by-step tutorials with visuals, making the learning process easier. A mirror is indispensable for monitoring progress and adjusting the knot’s symmetry. Proper lighting is also crucial to see the details clearly. Practice is key, as it builds muscle memory and improves technique. Lastly, patience and persistence are vital tools, as tying knots can be challenging at first. With these tools, anyone can master the art of tie knots and achieve a polished, professional look.
Popular Types of Tie Knots
Discover the Four-in-Hand, Windsor, and Half Windsor knots, each offering unique styles for different occasions, from casual to formal events, ensuring a perfect match for any outfit.
2.1 Four-in-Hand Knot
The Four-in-Hand Knot is a classic and simple tie knot, ideal for beginners. It creates a small, asymmetrical shape, making it versatile for both casual and business settings. This knot is easy to learn and works well with most collar styles. Its simplicity ensures it doesn’t overpower the outfit, making it a go-to choice for everyday wear. The Four-in-Hand Knot is also a great starting point for those new to tying knots, as it requires minimal steps and is quick to master. Its adaptability and timeless appeal make it a staple in any professional or social setting.
2.2 Windsor Knot
The Windsor Knot, also known as the Full Windsor, is a thick and triangular tie knot that exudes confidence and sophistication. It is best suited for spread-collar shirts and formal occasions, such as weddings or business meetings. This knot is known for its wide and symmetrical shape, making it a popular choice for those who want to make a strong impression. The Windsor Knot is slightly more complex than the Four-in-Hand but is still achievable with practice. It works well with heavier tie fabrics and is ideal for individuals with longer necks, as it creates a balanced look. The Windsor Knot is versatile enough to be worn in both formal and business-casual settings, making it a timeless addition to any professional wardrobe. Its bold presence ensures it stands out, making it a favorite for those who appreciate classic elegance.
2.3 Half Windsor Knot
The Half Windsor Knot is a slightly smaller and more versatile version of the Windsor Knot, offering a balanced and elegant appearance. It is easier to tie than the Full Windsor and works well with most collar styles, making it suitable for both formal and semi-formal events. This knot is ideal for individuals who prefer a neat, symmetrical look without the bulk of the Full Windsor. The Half Windsor is particularly flattering on those with medium-sized necks and pairs well with a variety of tie fabrics. Its moderate size ensures it complements both spread and point collars, making it a practical choice for everyday wear. The Half Windsor Knot is a timeless option that strikes a perfect balance between sophistication and simplicity, ensuring a polished look for any occasion.
Step-by-Step Guides for Common Knots
Mastering tie knots is made easy with clear, step-by-step guides. From beginners to experienced users, these tutorials offer simplicity and precision, ensuring a perfect knot every time, quickly and effortlessly.
3.1 Tying the Four-in-Hand Knot
The Four-in-Hand Knot is a classic and simple tie knot, perfect for beginners. Start by facing a mirror and placing the tie around your neck with the wide end on your left and the narrow end on your right. Cross the wide end over the narrow end, then loop it behind and bring it up through the neck loop from the left side. You’ll see the knot start to form. Pass the wide end behind the narrow end again and bring it up through the neck loop once more. Tighten the knot by pulling gently on the wide end. Adjust the tie so it’s centered and sits comfortably under your collar. This knot works well for most collar styles and is ideal for casual or business-casual settings. With practice, you’ll master it in no time!
3.2 Mastering the Windsor Knot
The Windsor Knot, also known as the Full Windsor, is a thick and triangular tie knot, ideal for spread-collar shirts. Begin by placing the tie around your neck with the wide end on your left and the narrow end on your right. Cross the wide end over the narrow end, then loop it behind and bring it up through the neck loop from the left side. Pass the wide end behind the narrow end and bring it up through the loop again, creating the base of the Windsor. Repeat this step one more time to add volume. Tighten the knot by pulling the wide end gently. Adjust the tie so it’s centered and snug against your collar. The Windsor Knot is perfect for formal occasions and creates a powerful, professional appearance. With practice, it becomes a go-to knot for important events, offering unmatched versatility and style.
3.3 Perfecting the Half Windsor Knot
The Half Windsor Knot is a slightly smaller version of the Windsor Knot, offering a balanced and elegant appearance. Begin by placing the tie around your neck with the wide end on your left and the narrow end on your right. Cross the wide end over the narrow end, then loop it behind and bring it up through the neck loop from the left side. Pass the wide end behind the narrow end and bring it up through the loop again, but this time, do not pass it through the neck loop. Instead, tuck it behind the narrow end and pull it gently to tighten. Adjust the knot by sliding it up to your collar and centering it. The Half Windsor Knot is versatile, suitable for most collar styles and occasions, making it a reliable choice for both formal and semi-formal events. With consistent practice, it becomes a staple in any tie-wearing repertoire.

Specialty Knots for Different Occasions
Specialty knots add flair to outfits, with options like the Bow Tie for formality, Eldred for uniqueness, and Trinity for casual settings, enhancing personal style and making a statement.
4.1 Bow Tie Knot for Formal Events
The Bow Tie Knot is a classic choice for formal events, such as black-tie weddings and galas. Its distinctive shape adds elegance to any outfit. To tie a Bow Tie, start by facing a mirror and placing the tie around your neck with one end longer than the other. Cross the longer end over the shorter one, forming an “X” shape. Loop the longer end behind the shorter one and bring it up through the neck loop. You should now see the beginnings of the bow shape. Tighten the knot by pulling gently on both ends. Adjust the bow to ensure it is symmetrical and sits comfortably under your collar. Practice makes perfect, so don’t be discouraged if it takes a few tries to master this sophisticated knot.

4.2 Eldred Knot for a Unique Look
The Eldred Knot offers a distinctive and asymmetrical appearance, making it a standout choice for those seeking a unique style. It is slightly more complex than the Four-in-Hand but still accessible for beginners. To tie the Eldred Knot, start by crossing the wide end over the narrow end, forming a loop. Bring the wide end behind the narrow end and up through the loop. Repeat this step to create the second layer. Tighten the knot gently to maintain its shape. The Eldred Knot is ideal for formal and semi-formal events, adding a touch of personality to your outfit. Its asymmetrical design makes it a great option for those who want to break away from traditional knots while still looking polished and sophisticated.
4.3 Trinity Knot for Casual Settings
The Trinity Knot is a stylish and modern option perfect for casual gatherings or relaxed professional environments. Its three-layered structure creates a unique, asymmetrical appearance that adds character to any outfit. To tie the Trinity Knot, start by crossing the wide end over the narrow end, forming a loop. Bring the wide end behind the narrow end and up through the loop, then repeat this step to create the second layer. Finally, pass the wide end behind the knot and through the loop one last time to secure it. The Trinity Knot is ideal for casual events, such as parties or daytime meetings, and pairs well with patterned or textured ties. Its relaxed yet polished look makes it a versatile choice for those who want to stand out without appearing overly formal.
Tips for Choosing the Right Knot

Selecting the perfect tie knot involves considering collar style, tie fabric, and personal preference. Match wider collars with thicker knots like the Windsor, while slimmer collars suit the Four-in-Hand. Ensure the knot complements the occasion and your attire for a polished look.
5.1 Matching Knots to Collar Styles
Choosing the right tie knot based on your collar style ensures a balanced and polished look. For slim or pointed collars, the Four-in-Hand or Half Windsor knots are ideal due to their smaller, asymmetrical shape. Wider spread collars pair perfectly with the Windsor knot, as its triangular form fills the space evenly. Cutaway collars, with their wide, angular tips, complement the bold Eldred or Cape knots. Button-down collars, typically casual, work well with simpler knots like the Four-in-Hand or a relaxed Half Windsor. Always ensure the knot proportions align with the collar width to avoid an unbalanced appearance. Experimenting with different combinations can help you find the perfect match for your unique style and wardrobe. This harmony between collar and knot elevates your overall aesthetic, making it essential for any occasion.
5.2 Selecting Knots Based on Tie Fabric
The choice of tie knot can greatly depend on the fabric of your tie. Thicker fabrics, such as wool or knitted ties, are best paired with larger knots like the Windsor or Half Windsor, as they hold the fabric securely and create a balanced look. Slimmer fabrics, such as silk or cotton, work well with smaller knots like the Four-in-Hand, which prevents the tie from appearing overly bulky. Patterned ties with busy designs can hide minor imperfections in the knot, making them versatile for most styles. Solid-colored or textured ties benefit from cleaner, more precise knots to maintain a polished appearance. Considering the fabric ensures the knot complements the tie’s texture and pattern, enhancing the overall aesthetic. This thoughtful approach helps create a cohesive and stylish look tailored to your outfit.
5.3 Knots for Different Neck Sizes
Choosing the right tie knot based on neck size ensures a balanced and polished appearance. For larger neck sizes, opt for fuller knots like the Windsor or Half Windsor, as they create a proportional look. These knots fill the space around the collar, preventing the tie from appearing too small. For smaller neck sizes, simpler and slimmer knots, such as the Four-in-Hand, are ideal, as they avoid overwhelming the frame. Medium-sized necks can versatilely accommodate most knots, but the Half Windsor is a popular choice for its moderate size. Ensuring the knot complements your neck size enhances the overall symmetry of your outfit. This tailored approach guarantees a stylish and confident look, regardless of your build or collar style.
Advanced Knots for Experienced Users
For experienced users, advanced knots like the Pratt, Van Wijk, and Cape offer intricate designs and a sophisticated look, perfect for mastering a polished appearance and elevating your style.
6.1 Tying the Pratt Knot
The Pratt Knot, also known as the Shelby Knot, is a sophisticated and elegant tie knot that creates a triangular shape with a dimple in the center. It is slightly asymmetrical, making it unique and visually appealing. To tie the Pratt Knot, start by facing a mirror and standing up straight. Cross the wide end of the tie over the narrow end, then loop it behind and bring it up through the neck loop from the right side. Next, pass the wide end behind the narrow end and bring it up through the neck loop again from the left side. Adjust the knot gently to center it and tighten it by pulling down on the wide end. Ensure the knot is snug against the collar for a polished look. This knot is ideal for formal occasions and those who want to showcase their mastery of advanced tying techniques. It works well with spread-collar shirts and adds a touch of refinement to any outfit. With practice, the Pratt Knot becomes a standout choice for special events or professional settings.
6.2 The Art of the Van Wijk Knot
The Van Wijk Knot is a distinctive and elegant tie knot known for its asymmetrical design, making it a standout choice for those seeking a unique aesthetic. It creates a slightly offset, triangular shape that adds character to any outfit. To tie the Van Wijk Knot, begin by crossing the wide end of the tie over the narrow end, then loop it behind and bring it up through the neck loop from the right side. Next, pass the wide end behind the narrow end and bring it up through the neck loop again from the left side. Adjust the knot to achieve the desired asymmetry and tighten it by pulling gently on the wide end. This knot is perfect for formal events and pairs well with spread-collar shirts. Its intricate design makes it a conversation starter, while its simplicity ensures it remains wearable for most occasions. With practice, the Van Wijk Knot becomes a go-to for those who appreciate balance between elegance and uniqueness.
6.3 Creating the Cape Knot
The Cape Knot is a sophisticated and visually striking tie knot that offers a modern twist on traditional designs. It is characterized by its layered, textured appearance, creating a three-dimensional effect that adds depth to any outfit. To tie the Cape Knot, start by facing a mirror and placing the tie around your neck with the wide end on your left and the narrow end on your right. Cross the wide end over the narrow end, then loop it behind and bring it up through the neck loop from the right side. Next, pass the wide end behind the narrow end and bring it up through the neck loop again from the left side. Adjust the knot to achieve the desired fullness and symmetry. The Cape Knot is ideal for formal events and works well with point-collar shirts. Its unique texture makes it a standout choice for those who want to elevate their style. With patience and practice, mastering the Cape Knot can add a touch of elegance to any ensemble.

Troubleshooting Common Issues
Fixing uneven knots, adjusting tightness, and preventing knots from coming undone are common challenges. Proper adjustment and tucking ensure a polished, secure finish for any tie knot style.
7.1 Fixing an Uneven Knot
An uneven knot can ruin the polished look of a tie. To fix it, start by loosening the knot slightly and adjusting the tie’s edges to ensure symmetry. Pull the wider end gently to align both sides. If one side is higher, tug the lower side upward. Tighten the knot by sliding it up and centering it under your collar. For persistent unevenness, repeat the tying process, paying attention to how tightly you wrap the tie around your neck. Using a mirror helps spot imbalances. Adjusting the knot while it’s still loose makes it easier to achieve an even appearance. Practice makes perfect—over time, you’ll develop the skill to tie a balanced knot effortlessly.
7.2 Adjusting Knot Tightness

Adjusting the tightness of a tie knot is crucial for comfort and appearance. If the knot feels too tight, loosen it slightly by gently pulling on the wide end of the tie. For a tighter fit, slide the knot up and tug the wide end downward. Ensure the knot sits snugly under your collar without being overly constricting. To fine-tune, adjust the narrow end of the tie, pulling it downward to tighten or upward to loosen. Avoid over-tightening, as it can cause discomfort and make the knot look overly bulky. Practice adjusting the knot while tying to achieve the perfect balance of tightness and ease. Proper adjustment ensures a polished look and all-day comfort, making it a key skill in mastering tie knots.
7.3 Preventing Knots from Coming Undone
Ensuring your tie knot stays secure throughout the day is essential for maintaining a polished appearance. To prevent knots from coming undone, always tuck the skinny end of the tie into your shirt and adjust the knot tightly. After tying, gently pull the wide end to ensure the knot is snug. For added security, tuck the narrow end firmly into your shirt and collar. Periodically check and tighten the knot, especially after meals or prolonged wear. Using dimples (small indentations) on either side of the knot can also help keep it in place. Avoid excessive movement that might loosen the knot. By following these steps, you can enjoy a neatly tied knot that lasts all day, enhancing both comfort and professionalism.
Maintenance and Care for Ties
Regular cleaning, proper storage, and avoiding wrinkles are key to extending tie life. Hand wash with mild soap, avoid machine washing, and use steam to remove creases. Store ties in a cool, dry place to prevent damage and maintain their appearance.
8.1 Cleaning and Storing Ties
Proper cleaning and storage are crucial for maintaining the quality and appearance of your ties. For silk or wool ties, avoid machine washing, as it can damage the fabric. Instead, spot clean stains with a damp cloth and mild soap. For tougher stains, use a fabric cleaner specifically designed for silk or wool. Allow the tie to air dry away from direct sunlight to prevent fading.
When storing ties, avoid folding or creasing them, as this can cause permanent wrinkles. Instead, roll them gently and place them in a cool, dry area. For extended storage, consider using a tie rack or box to keep them organized and protected from dust. Regular steaming can help remove wrinkles without damaging the fabric. By following these care tips, you can extend the life of your ties and keep them looking their best.
8.2 Avoiding Wrinkles and Creases
Avoiding wrinkles and creases in ties requires careful handling and storage. To prevent creases, never fold a tie; instead, roll it gently and store it in a cool, dry place. Using a tie rack or laying ties flat in a drawer can help maintain their shape. For silk or wool ties, steaming is an effective way to remove wrinkles without damaging the fabric. Avoid ironing, as high heat can ruin the material or cause discoloration. When traveling, consider using a tie case to protect your ties from creasing. Regularly hanging ties on a rack can also help them retain their smooth appearance. By adopting these habits, you can keep your ties looking sharp and professional for years to come.
8.3 Extending the Life of Your Tie
To extend the life of your tie, proper care and attention are essential. Avoid exposing ties to direct sunlight for prolonged periods, as this can cause fading. For silk or wool ties, spot clean stains immediately with a damp cloth, avoiding harsh chemicals. Never iron a tie directly; instead, use steam to gently remove wrinkles. Store ties in a cool, dry place, preferably on a tie rack or rolled in a drawer to prevent creasing. Avoid pulling or tugging the tie excessively, as this can cause fabric stretching or damage. For polyester ties, mild hand washing with cold water can refresh the material. Regularly inspect ties for loose threads or fraying and trim them promptly. By following these care tips, you can ensure your ties remain vibrant and intact for years, maintaining their professional and stylish appearance.