Category title

Autem vel eum iriure dolor in hendrerit in vulputate velit esse molestie consequat, vel illum dolore eu feugiat nulla facilisis at vero eros et dolore feugait.

Category Archive Australia

sas australia 2023 tv guide

SAS Australia 2023 returns on October 9 at 7:30 pm on Channel 7 and 7plus. Set in the Middle East, celebrities face extreme physical and psychological challenges led by Ant Middleton and the DS team, pushing their limits in harsh environments.

Overview of the Show

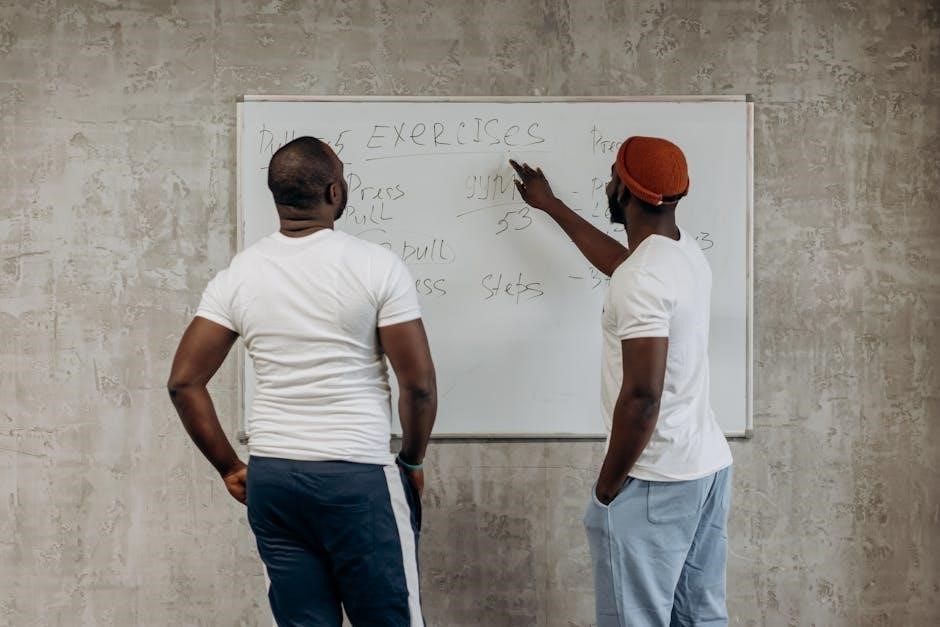
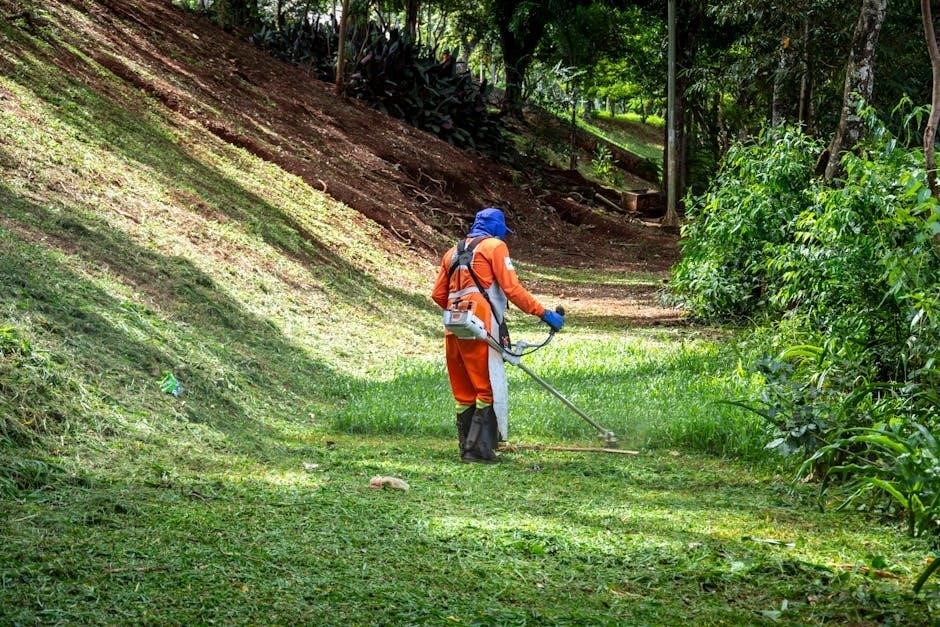
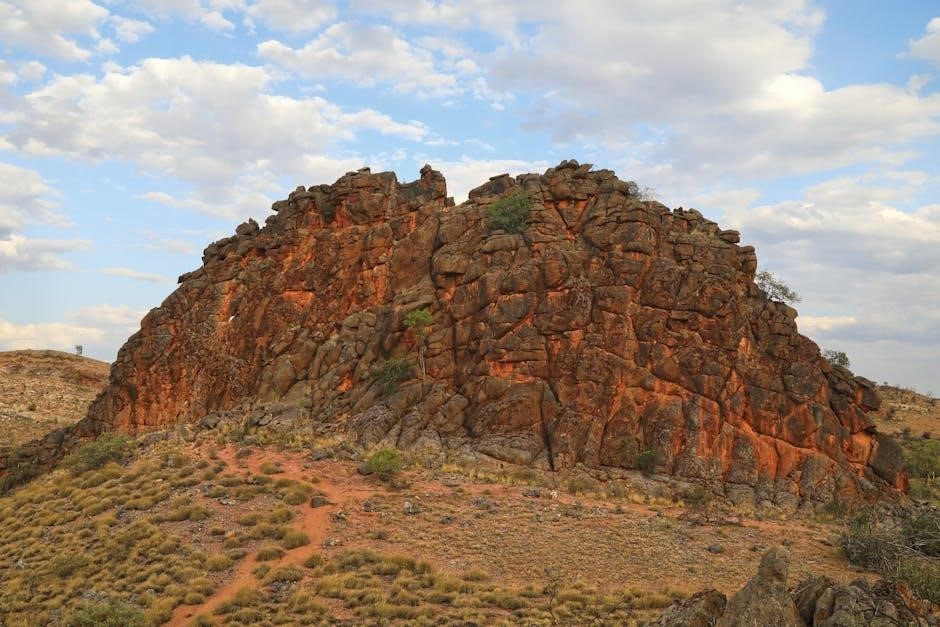
SAS Australia 2023 drops celebrities into the Middle East, one of the toughest environments for Special Forces. The show features extreme physical and psychological challenges, including being buried alive and handling live grenades. Celebrities like Stephanie Rice, Craig McLachlan, and Anthony Mundine face these trials, pushing their limits. The series, led by Ant Middleton and the DS team, tests endurance, mental strength, and resilience. It airs on Channel 7 and 7plus, offering a gripping look at how these recruits handle the intense selection process, making it a must-watch for fans of high-stakes reality TV.

Premiere Date and Time

SAS Australia 2023 premiered on Monday, October 9, 2023, at 7:30 pm on Channel 7 and 7plus. This highly anticipated season kicked off with a thrilling start, showcasing celebrities facing extreme challenges in the Middle East, a notoriously tough environment for Special Forces training. The premiere marked the beginning of a grueling journey for the recruits, setting the stage for intense physical and psychological tests led by Ant Middleton and the DS team. Fans tuned in to witness the dramatic start of this season, which promised to deliver high-stakes drama and unforgettable moments.

Channel and Streaming Information

SAS Australia 2023 airs exclusively on Channel 7 and streams on 7plus, offering viewers convenient access to the show’s intense challenges and dramatic moments.

Channel 7 and 7plus Details

SAS Australia 2023 premieres on Channel 7 at 7:30 pm on October 9, 2023. The show is also available to stream on 7plus, offering viewers the flexibility to watch episodes live or on-demand. 7plus provides free access to all episodes, making it an ideal platform for fans to catch up on the intense challenges and dramatic moments. With Channel 7 as the primary broadcaster, audiences can rely on high-quality coverage of the series, ensuring they don’t miss any of the action-packed scenes featuring celebrity recruits and the DS team.

How to Stream SAS Australia 2023

Streaming SAS Australia 2023 is convenient and free via the 7plus platform. Simply visit the 7plus website or download the app to access all episodes live or on-demand. 7plus is the exclusive streaming home for the series, offering a seamless viewing experience. There are no other official streaming platforms for the show, making 7plus the go-to destination for fans. With its user-friendly interface, viewers can easily catch up on missed episodes or rewatch their favorite moments from the intense challenges and dramatic twists of SAS Australia 2023.

Celebrity Recruits in 2023

SAS Australia 2023 features a diverse lineup of celebrities, including Stephanie Rice, Craig McLachlan, and Anthony Mundine, all facing intense challenges and controversies in the desert environment.

Notable Celebrity Participants

SAS Australia 2023 features a star-studded lineup, including Olympic swimmer Stephanie Rice, actor Craig McLachlan, and boxer Anthony Mundine. These celebrities, known for their diverse backgrounds, are thrust into extreme physical and psychological challenges. Stephanie Rice, a renowned athlete, brings her competitive spirit, while Craig McLachlan, facing past controversies, seeks redemption. Anthony Mundine, a former sports icon, tests his resilience in the harsh desert environment. Their participation sparks curiosity, blending fame with the grueling SAS selection process, designed to push them beyond their limits for personal growth and public scrutiny.

Backgrounds and Controversies of Recruits

The 2023 recruits bring diverse and controversial backgrounds to SAS Australia. Craig McLachlan, an actor, faces legal battles, while Anthony Mundine, a boxer, has sparked debate with polarizing comments. Stephanie Rice, an Olympic swimmer, joins amid personal challenges. Their past controversies add layers to their journeys, as they navigate the rigorous SAS selection process. These recruits aim to redefine public perceptions, using the show as a platform for redemption and self-discovery. Their complex histories create a compelling narrative, blending fame, resilience, and the pursuit of personal growth in one of television’s toughest environments.

The DS Team

Ant Middleton leads the DS Team, comprising former Special Forces operatives. Their expertise and no-nonsense approach push recruits to extreme limits, testing physical and mental endurance relentlessly.

Ant Middleton and the DS Team

Ant Middleton, a former British Special Forces soldier, leads the DS Team in SAS Australia 2023. Known for his tough, no-nonsense approach, Ant is joined by other ex-Special Forces operatives who bring their expertise to the show. Together, they design and execute grueling physical and psychological challenges that test the recruits’ limits. Ant’s leadership and the team’s real-world experience make them formidable figures, ensuring the selection process is as authentic as possible. Their presence adds intensity and credibility to the series, pushing celebrities beyond their comfort zones.

Role of the DS Team in the Show

The DS Team, led by Ant Middleton, plays a pivotal role in SAS Australia 2023 by designing and executing extreme challenges that simulate Special Forces training. Their expertise ensures authenticity, pushing recruits to their limits through physical and psychological tests. The team’s real-world experience adds intensity, making the selection process demanding and credible. Their role is to assess recruits’ resilience, teamwork, and leadership, providing harsh feedback that mirrors actual military evaluations. This approach keeps the show grounded and intense, ensuring only the toughest survive.

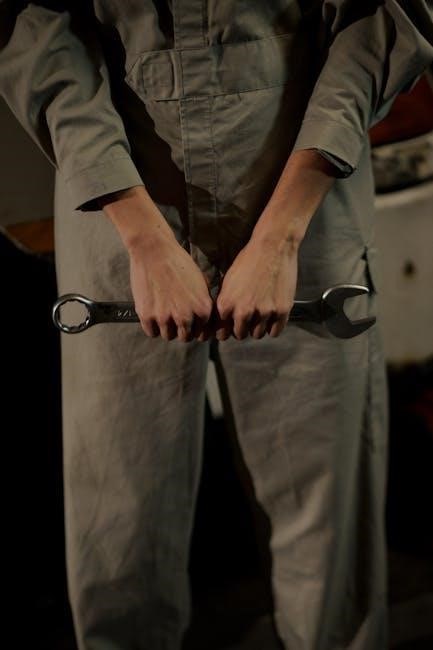
Challenges and Selection Process

SAS Australia 2023 features extreme physical and psychological challenges, including being buried alive and handling live grenades, designed to test recruits’ resilience and determination in harsh environments.

Physical Challenges Faced by Recruits

Recruits endure extreme physical challenges, including being buried alive, launching live hand grenades, and jumping backward out of helicopters. These tasks, set in the harsh Middle Eastern environment, push their endurance to the limit. The selection process replicates Special Forces training, with recruits facing grueling tests of strength, agility, and mental fortitude. From hand-to-hand combat to high-stakes obstacle courses, the physical demands are relentless, designed to weed out those who cannot withstand the pressure. The challenges are led by the DS team, ensuring only the toughest survive.

Psychological Tests and Their Impact

Recruits face intense psychological challenges designed to test their mental resilience. Isolation, stress, and emotional strain are key components, pushing contestants to their breaking points. Tasks like being buried alive or reciting prayers in a coffin create extreme discomfort, revealing their true character. The DS team employs these tests to assess mental toughness, loyalty, and decision-making under pressure. The psychological toll is significant, with many recruits struggling to cope, leading to emotional breakdowns and self-doubt. These tests are crucial in determining who has the mental strength to survive the SAS selection process and thrive in high-pressure environments.

TV Guide and Episode Schedule

SAS Australia 2023 airs on Channel 7 and 7plus, with episodes premiering weekly. Viewers can track upcoming episodes via the TV guide or calendar for exact air dates and times.

Episode Air Dates and Times

SAS Australia 2023 premiered on October 9, 2023, at 7:30 pm on Channel 7 and 7plus. New episodes air weekly, with exact dates and times available on the TV guide. Viewers can track upcoming episodes via the TV calendar or through the 7plus platform. Each episode features recruits facing grueling physical and psychological challenges, with highlights and key moments shared across social media. Fans can also set reminders for upcoming episodes to ensure they don’t miss the action-packed series.

How to Track Upcoming Episodes

Stay updated on SAS Australia 2023 episodes by checking the official TV guide or the 7plus platform. Viewers can track upcoming episodes via the TV calendar, which provides exact air dates and times. Additionally, fans can set reminders on their devices or follow the show’s page on 7plus to receive notifications. Social media platforms also offer updates and countdowns for new episodes. By staying connected, audiences can ensure they never miss the thrilling challenges and dramatic moments of SAS Australia 2023.

Exclusive Updates and Highlights

Get exclusive behind-the-scenes content and episode highlights from SAS Australia 2023. Catch key moments, dramatic challenges, and unseen footage on Channel 7 and 7plus platforms.

Behind-the-Scenes Content

Get an exclusive look at the intense training sessions and raw emotions of the recruits. From grueling challenges to personal struggles, the behind-the-scenes footage reveals the true toll of the selection process. The DS team, led by Ant Middleton, pushes celebrities to their limits, capturing every moment of their transformation. Fans can access unseen clips and interviews on 7plus, offering a deeper insight into the recruits’ journeys and the harsh environment of the Middle East. This content provides a unique perspective on the physical and mental battles faced during SAS Australia 2023.

Episode Highlights and Key Moments

SAS Australia 2023 delivers thrilling challenges, from recruits being buried alive to launching live hand grenades. The series showcases intense physical and psychological tests, pushing celebrities to their limits. Key moments include dramatic eliminations, emotional breakdowns, and surprising alliances. The DS team, led by Ant Middleton, maintains a no-nonsense approach, amplifying the pressure. Fans can expect heart-stopping stunts, such as helicopter jumps and hand-to-hand combat, while also witnessing the raw emotional struggles of the participants. These highlights make for unforgettable television, capturing the true essence of the SAS selection process.

Controversies and Criticisms

SAS Australia 2023 faced public backlash over controversial recruits like Anthony Mundine and Craig McLachlan, whose past actions sparked debate. The show’s intense challenges, including burying recruits alive, drew criticism for being overly extreme, with some questioning the ethics of such harsh psychological and physical tests. Additionally, the portrayal of certain moments, like Mundine reciting prayers in a coffin, was deemed uncomfortable by viewers, raising concerns about sensitivity and exploitation for ratings.

Controversies Surrounding the Show

SAS Australia 2023 has sparked significant backlash due to its controversial recruits and extreme challenges. Celebrities like Anthony Mundine and Craig McLachlan, both with troubled pasts, faced public scrutiny for their participation. The show’s intense physical and psychological tests, such as being buried alive, raised ethical concerns. Viewers criticized the show for pushing recruits to extreme limits, questioning the humanity of such methods. Additionally, the emotional manipulation and harsh conditions sparked debates about the ethics of reality TV. The show’s portrayal of distressing scenarios, like Mundine’s coffin prayer, further fueled criticism, with many calling it insensitive and exploitative for ratings.

Public and Media Reactions

Public opinion on SAS Australia 2023 is divided, with some praising the show’s intensity and others criticizing its extreme nature. Media outlets highlight the controversial recruits, such as Anthony Mundine and Craig McLachlan, whose past scandals sparked debate. Viewers expressed shock over the harsh challenges, like being buried alive, questioning the show’s ethics. Social media buzzed with mixed reactions, ranging from admiration for the recruits’ resilience to outrage over the show’s perceived exploitation. Despite the backlash, the show remains a hot topic, drawing significant attention and maintaining its reputation as one of Australia’s most talked-about TV series.

Impact on Recruits

Recruits face extreme physical toll, mental strain, and emotional challenges, with some experiencing lasting personal growth while others struggle with the aftermath of the intense experience.

Physical and Mental Toll on Participants

Recruits endure extreme physical challenges, including being buried alive and handling live grenades, pushing their bodies to the limit. The harsh environment and relentless tasks cause significant mental strain, with psychological tests amplifying stress. Many participants experience emotional breakdowns and struggle with the pressure, while others find unexpected resilience. The combination of physical exhaustion and mental fatigue creates a grueling experience, often leading to lasting emotional and psychological effects long after the show ends.

Post-Show Life of Recruits

After the grueling SAS Australia experience, recruits often face a mix of personal and professional challenges. Some find redemption, while others struggle with public scrutiny. The show’s intense environment can lead to lasting mental health impacts, with many participants openly discussing their struggles post-filming. Public perception plays a significant role, as controversies surrounding certain recruits, like Craig McLachlan and Anthony Mundine, continue to affect their careers. Despite the challenges, some participants, such as Stephanie Rice, use the platform to rebuild their public image and advocate for mental health awareness, showcasing the transformative power of the show.

Fan Reactions and Engagement

Fans eagerly engage with SAS Australia 2023, sharing reactions on social media and discussing episodes in real-time. The show sparks strong emotions and lively debates among viewers.

Viewer Responses to the Show

Viewers of SAS Australia 2023 have expressed strong reactions, praising the show’s intense challenges and the recruits’ resilience. Many fans took to social media to share their thoughts, with episodes trending on platforms like Twitter. The controversial pasts of some recruits, such as Anthony Mundine and Craig McLachlan, sparked heated debates. Audiences were particularly captivated by extreme challenges, including being buried alive and handling live grenades. The show’s ability to push celebrities to their limits has left viewers both amazed and emotionally invested, making it a watercooler moment for many. Its popularity continues to grow as fans eagerly anticipate upcoming episodes.

Social Media and Fan Discussions

Social media has been abuzz with discussions about SAS Australia 2023, as fans share their reactions to the show’s intense challenges and controversial recruits. Twitter trends frequently feature hashtags like #SASAustralia, with viewers debating the physical and mental toll on participants. Many fans praised the recruits’ resilience, while others criticized the show’s extreme methods. Memes and clips from episodes, such as Anthony Mundine’s coffin challenge, went viral, sparking lively debates. The show’s popularity has also led to fan theories about upcoming episodes, with viewers eagerly speculating about who will survive the selection process. Social media engagement continues to fuel the show’s growing fanbase.

Cultural Significance of SAS Australia

SAS Australia holds a prominent place in Australian television, offering a unique blend of reality TV and military challenges. Its popularity rivals international versions, making it a cultural staple.

Popularity in Australian TV Culture

SAS Australia has become a staple in Australian television, captivating audiences with its intense challenges and celebrity recruits. Its unique blend of reality TV and military-style training resonates deeply, making it a cultural phenomenon. The show’s ability to push participants to their limits while showcasing their vulnerabilities has fostered a loyal fan base. With its premiere on Channel 7 and availability on 7plus, SAS Australia continues to dominate watercooler conversations and social media discussions, solidifying its place as one of Australia’s most-watched and talked-about series.

Comparison with International Versions

While SAS Australia 2023 shares its core concept with international versions, its unique challenges and harsh Middle Eastern setting set it apart. The show’s focus on Australian celebrities and their personal struggles resonates locally, making it a standout in the global SAS franchise. Unlike some international iterations, SAS Australia emphasizes both physical and mental resilience, often pushing recruits to extreme limits. This blend of local flavor and universal appeal has cemented its place as a fan favorite, distinguishing it from other adaptations while maintaining the gritty essence of the original format.

Future of SAS Australia

SAS Australia is renewed for future seasons, with Ant Middleton’s DS team continuing to lead. The show will feature even more intense challenges in harsh environments.

Renewal and Upcoming Seasons

SAS Australia has been officially renewed for future seasons, with Ant Middleton and the DS team set to return. The show will continue to feature celebrities facing extreme physical and psychological challenges in harsh environments. New seasons promise even more intense tasks, including hand-to-hand combat and survival drills. The series remains a top priority for Channel 7, ensuring its continued success. Fans can expect fresh locations and tougher selections, solidifying SAS Australia’s reputation as one of the most demanding reality TV shows. The renewal underscores its popularity and cultural impact in Australian television.

Potential Changes in Future Seasons

Future seasons of SAS Australia may introduce new locations and tougher challenges to keep the format fresh. Producers could explore new themes, such as increased focus on teamwork or survival skills. The show might also feature guest instructors or expanded psychological evaluations. Additionally, there could be changes in the selection process to diversify the recruit pool. These potential updates aim to maintain the show’s high intensity and viewer engagement while evolving its format to stay relevant in the competitive reality TV landscape.

SAS Australia 2023 delivers intense challenges and gripping drama. Catch all episodes on Channel 7 and 7plus for a thrilling experience. Stay tuned for updates!

Final Thoughts on SAS Australia 2023

SAS Australia 2023 has delivered an unforgettable season, pushing celebrities to their limits with extreme physical and psychological challenges. The show, led by Ant Middleton and the DS team, showcased the resilience and determination of its recruits. From being buried alive to handling live grenades, the tasks were as intense as the emotions. Fans can catch up on all episodes via Channel 7 and 7plus; With its gripping drama and real-life struggles, SAS Australia remains a must-watch for reality TV enthusiasts. Stay updated for more thrilling content and future seasons.

Where to Watch and Stay Updated

SAS Australia 2023 airs on Channel 7 at 7:30 pm, with episodes available to stream on 7plus. Fans can catch up on missed episodes or binge-watch the series anytime via the 7plus platform. For exclusive updates, behind-the-scenes content, and episode highlights, visit the official Channel 7 website or follow their social media channels. Additionally, track upcoming episodes and set reminders using the TV Guide calendar. Stay tuned for more thrilling moments and updates on SAS Australia 2023 by checking local listings and following the show’s official accounts.

improve your grammar the essential guide to accurate writing

Improve Your Grammar: The Essential Guide to Accurate Writing

Mastering grammar is key to clear communication. Use tools like Grammarly and QuillBot to check errors, practice writing regularly, and seek feedback to refine your skills effectively.

Improving grammar is a cornerstone of effective communication, enabling clearer expression of ideas. By understanding grammar rules and practicing consistently, you can enhance your writing and speaking skills. Start by identifying common mistakes and using tools like Grammarly or QuillBot to correct errors. Regular writing practice and reading widely expose you to proper grammar in context. Learning from feedback and revising your work helps refine your skills. Grammar improvement is a lifelong process, but with dedication and the right resources, you can achieve accuracy and confidence in your communication.

Begin with the basics, such as parts of speech and sentence structure, and gradually tackle more complex areas like punctuation and tenses. Consistent effort and a willingness to learn will lead to noticeable improvement over time.

Why Grammar Matters in Writing

Grammar is the foundation of clear and effective communication, ensuring your ideas are conveyed accurately and professionally. Proper grammar enhances readability, avoiding confusion and misinterpretation. It also boosts credibility, as well-crafted writing reflects attention to detail and competence. In professional settings, such as emails or reports, grammar mistakes can undermine authority and professionalism. Additionally, grammar is essential for academic success, as it directly impacts the clarity and persuasiveness of arguments. By mastering grammar, you can express yourself with precision, making your writing more engaging and impactful. Whether in personal or professional contexts, good grammar is indispensable for making a strong impression and achieving your communication goals.

Understanding the Basics of Grammar

Grammar basics include parts of speech, sentence structure, and common mistakes. Mastering these fundamentals enhances clarity and precision in writing, using tools like Grammarly and QuillBot for accuracy.

Parts of Speech: Nouns, Verbs, Adjectives, and More

Understanding parts of speech is fundamental to accurate writing. Nouns represent people, places, or things, while verbs describe actions or states. Adjectives modify nouns, and adverbs enhance verbs, adjectives, or other adverbs. Pronouns replace nouns, prepositions show relationships, conjunctions connect ideas, and interjections express emotion. Mastering these elements ensures clear communication. Practice identifying and using them correctly by underlining subjects and verbs in sentences. Utilize resources like GrammarBook.com for rules and Purdue OWL for examples. Tools like Ludwig.guru provide grammatically correct sentences for reference. Regular practice and feedback refine your skills, helping you avoid common mistakes and improve readability. Incorporate these strategies into your writing routine to enhance clarity and precision in your work.

Sentence Structure: Subjects, Predicates, and Clauses

Mastering sentence structure is crucial for clear and effective communication. A sentence typically consists of a subject (the person, place, or thing) and a predicate (the action or description). Clauses, which may be independent or dependent, add complexity to sentences. Practice identifying these components by underlining subjects and verbs in example sentences. Tools like Ludwig.guru and Purdue OWL provide examples of well-structured sentences. Regular writing practice helps refine your ability to construct sentences accurately. Pay attention to common mistakes, such as run-on sentences or misplaced modifiers. By focusing on proper structure, you can enhance readability and ensure your ideas are conveyed clearly. This foundation is essential for improving grammar and overall writing accuracy.

Common Grammar Mistakes to Avoid

Avoiding common grammar mistakes is essential for polished writing. Frequently overlooked errors include subject-verb agreement issues, inconsistent tenses, and incorrect punctuation. Misplaced modifiers and dangling participles can confuse readers, while overused words and redundant phrases weaken clarity. Proofread carefully to catch these errors, and use tools like Grammarly or QuillBot for assistance. Pay attention to comma splices and run-on sentences, which can disrupt sentence flow. Additionally, avoid confusing homophones (e.g., “their” vs. “there”) and ensure proper capitalization. Regular practice and feedback can help identify and correct these mistakes. By addressing these common pitfalls, you can significantly improve the accuracy and professionalism of your writing. Consistent attention to detail will enhance your communication and make your writing more impactful.

Active Learning Strategies for Better Grammar

Engage in regular writing, use grammar checkers like Grammarly, and seek feedback to identify and correct mistakes. Practice with exercises and apply learned rules in context.

Reading Widely: Learning from Examples

Reading widely exposes you to diverse writing styles and grammatical structures, helping you internalize correct usage. Pay attention to sentence construction, word choice, and punctuation in academic texts, journals, and literary works. Observing how professional writers structure their sentences and use grammar can serve as a powerful learning tool. For instance, notice how modifiers are placed or how tenses are consistently applied. Websites like Ludwig.guru offer examples of grammatically correct sentences, while resources like Purdue OWL provide clear explanations of grammar rules. By studying these examples, you can identify patterns and apply them to your own writing. Regular reading also enhances your ability to recognize and mimic proper grammar in context, making it a vital component of your learning process.

Writing Regularly: Practice Makes Perfect

Consistent writing is essential for improving grammar. Start by writing in a notebook or using digital tools to practice daily. Focus on specific grammar points, such as verb tenses or punctuation, and deliberately check for errors after each paragraph. Tools like Grammarly and QuillBot can help identify mistakes, while resources like Purdue OWL provide clear explanations. Varying sentence structures and practicing active voice can enhance clarity. Additionally, submitting your work for feedback through services like Write & Improve or the Virtual Writing Tutor offers personalized insights. Regular writing not only builds confidence but also reinforces grammar rules, making them second nature over time. By combining practice with feedback, you can steadily refine your skills and achieve accurate, polished writing.

Using Grammar Checkers and Editing Tools

Grammar checkers and editing tools are invaluable for refining your writing. Tools like Grammarly and QuillBot analyze text for grammatical, spelling, and punctuation errors, offering suggestions for improvement. DeepL Write and Outparse provide advanced features to enhance clarity and tone. These tools can identify tricky errors, such as dangling modifiers or tense shifts, often missed by basic checkers. Additionally, resources like Ludwig.guru and the Purdue OWL offer examples of grammatically sound sentences for reference. By incorporating these tools into your writing routine, you can catch mistakes, learn from feedback, and develop a more polished writing style. Regular use of such tools complements practice, helping you achieve accuracy and confidence in your writing over time.

Targeted Practice for Grammar Mastery

Targeted practice involves focused exercises, error correction, and feedback. Concentrate on tricky areas like punctuation and verb tenses to build a strong grammar foundation.

Grammar Exercises: Identifying and Correcting Errors

Engaging in grammar exercises is a proven way to enhance accuracy. Start by identifying common errors in sentences, such as subject-verb agreement or misplaced modifiers. Underline subjects once and verbs twice to improve your understanding of sentence structure. Practice rewriting sentences with correct grammar and punctuation. Use online tools like Grammarly or QuillBot to reveal mistakes and learn from feedback. Regular exercises help build confidence and consistency in writing. For example, focus on tricky areas like tenses or word choice. Over time, these practices will refine your skills, making grammar a natural part of your writing process.

Focusing on Tricky Areas: Punctuation and Tenses

Mastering punctuation and tenses is crucial for accurate writing. Common pitfalls include comma splices, apostrophe misuse, and inconsistent verb tenses. To improve, practice identifying these errors in sentences. For punctuation, study rules for commas, semicolons, and quotation marks. Pay attention to how tenses change sentence meaning and ensure consistency. Use online tools like Grammarly or QuillBot to highlight mistakes and provide corrections. Regular practice with exercises can help solidify these skills. Additionally, reading widely exposes you to correct usage, making it easier to apply in your writing. By focusing on these tricky areas, you can enhance clarity and precision, ensuring your writing is both grammatically sound and engaging.

Learning from Feedback: Revising Your Work

Learning from feedback is a powerful way to refine your writing and improve grammar. After receiving feedback, carefully review the corrections to understand common mistakes. Use tools like Grammarly or Purdue OWL to check for errors and implement suggested changes. Regularly submitting your work for feedback, whether through writing tutors or online platforms, helps identify persistent issues. For instance, tools like QuillBot and DeepL Write offer instant corrections and suggestions to enhance clarity. By revising your work consistently, you can address grammar, punctuation, and style issues effectively. Over time, this process sharpens your ability to write accurately and confidently, making feedback a valuable resource for continuous improvement.

Advanced Techniques for Accurate Writing

Enhance readability by varying sentence structure and using active voice. Employ tools like Grammarly and DeepL Write to refine tone, clarity, and style for polished writing.

Varying Sentence Structure for Clarity

Varying sentence structure enhances readability and keeps readers engaged. Mix short, concise sentences with longer, complex ones to create rhythm. Avoid repetitive patterns by using compound or compound-complex sentences. This approach ensures clarity and maintains flow. Tools like Wordtune can help adapt tone and structure. Pay attention to sentence length and complexity in academic texts for inspiration. By varying structure, you avoid monotony and make your writing more dynamic. This technique also helps emphasize key points and improves overall comprehension. Regular practice and reviewing examples can refine your ability to craft clear, engaging sentences.

Using Active Voice for Stronger Writing

Active voice makes your writing clearer, more direct, and engaging. It strengthens your message by placing the subject before the action, reducing ambiguity. For example, “The team completed the project” is more impactful than “The project was completed by the team.” Switching to active voice enhances readability and professionalism. Tools like Grammarly can help identify passive constructions and suggest improvements. Regular practice in rewriting sentences using active voice improves clarity and conciseness. This technique is especially beneficial in academic and professional writing, where precision is key. By adopting active voice, you ensure your ideas are communicated effectively, making your writing more dynamic and easier to understand.

Enhancing Readability: Clear and Concise Language

Clear and concise language is essential for effective communication. Avoid unnecessary words and complex sentences that can confuse readers. Use tools like Grammarly or QuillBot to refine your writing and eliminate redundancy. Shorten overly long sentences and replace vague phrases with specific terms. For instance, instead of saying “due to the fact that,” simply use “because.” Active voice also enhances clarity, making your writing more direct. Additionally, avoid jargon unless it’s necessary for your audience. Regularly review and edit your work to ensure your message is conveyed clearly. By focusing on simplicity and precision, you make your writing more accessible and engaging, ensuring your ideas are understood without effort. This approach is vital for both professional and academic writing, where clarity is paramount.

Real-World Application of Grammar Skills

Apply grammar skills in professional writing, emails, and reports for clear communication. Use tools like Grammarly and Purdue OWL to ensure accuracy and effectiveness in real-world contexts.

Grammar in Professional Writing: Emails, Reports, and More

Grammar is crucial in professional writing, ensuring clarity and professionalism in emails, reports, and documents. Tools like Grammarly and Purdue OWL help maintain accuracy and tone. Regularly reviewing your work for grammatical errors enhances credibility. Practice structuring sentences clearly and avoid jargon for better readability. Using active voice strengthens your writing, while proper punctuation ensures your message is conveyed effectively. Seek feedback from colleagues or mentors to refine your skills. By applying grammar rules consistently, you communicate ideas with precision and confidence, making your professional writing more impactful and polished.

Applying Grammar in Creative Writing

Grammar is a cornerstone of creative writing, enabling writers to express ideas with precision and flair. While creativity knows no bounds, proper grammar ensures clarity and engages readers effectively. Tools like Grammarly and DeepL Write help refine sentences, maintaining tone and style. Varying sentence structures and using active voice can enhance readability and emotional impact. Paying attention to punctuation and word choice allows writers to craft vivid imagery and convey complex emotions. Even in imaginative writing, grammar provides the foundation for clear communication. By mastering grammar, writers can focus on storytelling, creating compelling narratives that resonate with readers. Regular practice and feedback further refine skills, making grammar a powerful tool in the creative process.

Continuous learning and practice are essential for mastering grammar. Use tools like Grammarly and QuillBot to refine your skills and embrace feedback for lifelong improvement in accurate writing.

Continuous Improvement: Lifelong Learning in Grammar

Grammar mastery is a lifelong journey that requires consistent practice and dedication. By incorporating daily habits such as reading widely and writing regularly, you can refine your skills over time. Utilize tools like Grammarly and QuillBot to identify and correct errors, ensuring accuracy in your writing. Additionally, seeking feedback from others and revising your work can provide valuable insights for improvement. Embrace learning from mistakes and stay updated with evolving language rules. Resources like Purdue OWL and academic support programs offer guidance for ongoing development. Remember, grammar is not just about rules—it’s about clear communication. With persistence and the right tools, you can achieve lifelong mastery and confidence in your writing abilities.

children’s services award pay guide 2023

The Children’s Services Award Pay Guide 2023 is essential for understanding pay rates, classifications, allowances, and leave entitlements in the childcare and early education sector. It ensures compliance with Fair Work standards, providing clarity for employers and employees alike.

1.1 Overview of the Children’s Services Award

The Children’s Services Award governs employment conditions for workers in childcare, early education, and related services. It outlines pay rates, classifications, allowances, and leave entitlements, ensuring fair and consistent standards across the sector. The Award applies to employees in centers, family day care, and out-of-school hours care, covering roles from educators to managers. It is established under the Fair Work Act to protect both employers and employees, providing a framework for workplace relations. Understanding the Award is crucial for compliance, fostering a fair and productive work environment in the children’s services industry.

1.2 Importance of Understanding the Pay Guide

Understanding the Children’s Services Award Pay Guide 2023 is crucial for both employers and employees to ensure compliance with legal requirements and fair payment practices. It provides clarity on minimum wages, classifications, and entitlements, helping employers avoid underpayment issues and legal disputes. For employees, it ensures transparency in their remuneration, allowing them to verify their pay and understand their rights. The guide also supports budgeting and financial planning for organizations, fostering a positive workplace culture. Staying informed about the Pay Guide is essential for maintaining fair and equitable employment conditions in the children’s services sector.

1.3 Key Updates for 2023

The 2023 Children’s Services Award Pay Guide introduces several key updates to ensure fair and modern employment conditions. These include adjustments to minimum pay rates, reflecting cost-of-living increases, and revised classification structures to better align with industry roles. Casual and part-time employee provisions have been clarified, providing greater certainty for both employers and staff. Additionally, new compliance requirements aim to streamline record-keeping and reporting processes. These updates ensure the Award remains relevant and responsive to the evolving needs of the children’s services sector, promoting transparency and equity in workplace practices.

Pay Rates and Classifications

This section outlines the pay rates and classifications under the Children’s Services Award Pay Guide 2023, ensuring fair compensation for employees based on their roles and experience.

2.1 Minimum Hourly Rates for Employees

The Children’s Services Award Pay Guide 2023 sets minimum hourly rates for employees, ensuring fair compensation across various roles. Rates vary based on classification levels and experience, with increases for casual and part-time workers. Employers must adhere to these rates to comply with Fair Work standards. The guide also outlines overtime pay conditions, ensuring employees are fairly compensated for additional hours worked. These rates are regularly updated to reflect industry standards and economic changes, providing transparency for both employers and employees in the childcare and education sectors.

2.2 Classification Levels and Their Corresponding Pay Rates

The Children’s Services Award Pay Guide 2023 outlines specific classification levels, each with corresponding pay rates based on qualifications, experience, and job responsibilities. These levels ensure fair compensation for roles ranging from entry-level support staff to senior educators. Higher classifications, such as early childhood teachers, receive increased rates due to their specialized expertise. The guide provides a structured framework, ensuring transparency and equity in pay across the sector. Employers can use this information to accurately determine wages, while employees can understand their entitlements based on their role and qualifications.

2.3 Pay Rates for Casual and Part-Time Employees

The Children’s Services Award Pay Guide 2023 provides specific pay rates for casual and part-time employees, ensuring fair compensation for their work. Casual employees receive a higher hourly rate compared to full-time employees, often including a casual loading to account for the lack of leave entitlements. Part-time employees are paid at the same rate as full-time staff but on a pro-rata basis, reflecting their reduced hours. The guide outlines these rates clearly, helping employers and employees understand their obligations and entitlements. This ensures transparency and equity in pay structures across different employment types within the sector.

2.4 Overtime Pay Rates and Conditions

The Children’s Services Award Pay Guide 2023 outlines specific overtime pay rates and conditions to ensure fair compensation for employees working beyond standard hours. Overtime rates are typically 1.5 times the ordinary hourly rate for the first two hours and double the rate thereafter. Employees are entitled to overtime pay when they work more than 38 hours per week or exceed the agreed daily or weekly hours. The guide also specifies conditions for mandatory breaks and payment calculations, ensuring transparency and compliance with Fair Work regulations. Employers must adhere to these guidelines to avoid underpayment and maintain workplace fairness.

Allowances and Additional Payments

The Children’s Services Award Pay Guide 2023 details allowances for meals, travel, first aid, and uniforms, ensuring employees are reimbursed for work-related expenses and responsibilities.

3.1 Meal Allowances and Reimbursement

The Children’s Services Award Pay Guide 2023 outlines meal allowances for employees working extended shifts without access to meals. Employees are entitled to a fixed meal allowance per meal, provided they meet specific conditions, such as working overtime or being required to stay on premises. The allowance aims to reimburse employees for meal expenses incurred due to work-related demands. Employers must adhere to the specified rates and conditions for meal reimbursements, ensuring compliance with the Award’s provisions; This entitlement supports employees who face meal-related costs as part of their job requirements in the childcare and education sector.

3.2 Travel Allowances and Expenses

The Children’s Services Award Pay Guide 2023 provides provisions for travel allowances and expenses incurred by employees in the course of their work. Employees may be entitled to reimbursement for travel costs when required to travel for work-related purposes, such as visiting clients, attending meetings, or transporting children. The allowance covers expenses like fuel, tolls, and parking, with rates set by the Award. Employers must ensure accurate record-keeping, including receipts, to validate claims. This provision supports employees who incur additional costs while performing their duties, ensuring fair compensation for work-related travel expenses.

3.3 First Aid Allowance

The Children’s Services Award Pay Guide 2023 includes provisions for a first aid allowance, recognizing employees who hold current first aid qualifications. This allowance is paid to staff required to maintain first aid certification as part of their role, ensuring workplaces can respond to medical emergencies. The allowance is typically a weekly or fortnightly payment, varying based on the employer’s policy and the Award’s specifications. Employees must provide proof of their first aid certification to be eligible. This provision underscores the importance of workplace safety and the role of trained first aiders in childcare settings.

3.4 Uniform and Laundry Allowances

The Children’s Services Award Pay Guide 2023 includes provisions for uniform and laundry allowances to support employees in maintaining required work attire. These allowances are designed to reimburse staff for the cost of purchasing and maintaining uniforms, ensuring professionalism and hygiene in childcare settings. Employees eligible for this allowance typically receive a weekly or fortnightly payment, with the amount varying based on the employer’s policy and the Award’s guidelines. Proof of uniform purchase or laundry expenses may be required to claim this allowance, which helps offset the financial burden of workplace attire.

Leave Entitlements

Leave entitlements under the Children’s Services Award ensure employees receive fair access to annual, sick, and long service leave, supporting work-life balance and employee well-being.

4.1 Annual Leave and Loading

Employees under the Children’s Services Award are entitled to annual leave, accruing at a rate of 4 weeks per year for full-time staff. Part-time employees receive pro-rata entitlements. Annual leave loading, typically 17.5%, is paid when leave is taken. This loading reflects the award’s commitment to ensuring fair compensation for time off. Employees can request annual leave in advance, subject to employer approval. The award also outlines conditions for cashing out annual leave or taking leave in advance, ensuring flexibility while maintaining compliance with Fair Work standards. Proper record-keeping is essential to track accruals and payments accurately.

4.2 Sick Leave and Carer’s Leave

Employees under the Children’s Services Award are entitled to sick and carer’s leave, accruing at 10 days per year for full-time staff. Part-time employees receive pro-rata entitlements. Sick leave can be used for personal illness or injury, while carer’s leave supports employees caring for immediate family members. A medical certificate may be required for extended absences. Employees can take unpaid carer’s leave if paid entitlements are exhausted. The award ensures employees are protected from adverse actions when accessing these entitlements, maintaining job security during periods of illness or caregiving responsibilities.

4.3 Long Service Leave

Under the Children’s Services Award, Long Service Leave (LSL) is granted to employees after completing 10 years of continuous service. Full-time employees accrue 13 weeks of LSL, while part-time employees receive pro-rata entitlements. LSL can be taken as a lump sum payment or continuous leave, providing employees with a well-deserved break. Employees must provide notice before taking LSL, and employers may refuse leave during peak periods with reasonable notice. LSL entitlements are portable if an employee moves to another employer in the same industry, ensuring continuity of benefits. This provision recognizes and rewards long-term dedication and service in the sector.

4.4 Parental Leave Entitlements

Under the Children’s Services Award, employees are entitled to unpaid parental leave for up to 12 months for the birth or adoption of a child. Employees with at least 12 months of continuous service can take unpaid parental leave, while casual employees may access leave if they have a reasonable expectation of ongoing employment. Parents can split the leave into two periods, with agreement from their employer. Employers must not unreasonably refuse requests for parental leave. During this period, employees retain their job security and accrued entitlements, ensuring a smooth transition back to work after caring for their child.

Superannuation and Benefits

The Children’s Services Award requires employers to contribute to employees’ superannuation funds, meeting the Superannuation Guarantee of 10.5%. Additional benefits may include voluntary contributions and insurance.

5.1 Employer Superannuation Contributions

Employers under the Children’s Services Award 2023 are required to make superannuation contributions on behalf of their employees. The Superannuation Guarantee (SG) rate is 10.5% of an employee’s ordinary time earnings. These contributions must be paid into a complying superannuation fund or retirement savings account. Employers can choose to make payments quarterly, but they must meet the SG deadline to avoid penalties. Employees can nominate their preferred fund, or the employer may default to an approved fund. Accurate record-keeping is essential to ensure compliance with Fair Work regulations and to provide transparency for employees regarding their superannuation entitlements.

5.2 Voluntary Superannuation Contributions

Voluntary superannuation contributions allow employees to boost their retirement savings beyond the mandatory employer contributions. Employees can make additional payments through salary sacrifice arrangements or after-tax contributions. These contributions are optional and can be tailored to individual financial goals. Employers may also offer matching contributions, though this is not required under the Award; Voluntary contributions are subject to annual caps set by the Australian Taxation Office. Employees can choose their preferred superannuation fund for these contributions, provided it complies with regulatory standards. Voluntary contributions are a flexible way to enhance retirement savings and can offer tax benefits, depending on the contribution type and individual circumstances.

5.3 Other Employee Benefits

Beyond superannuation, employees in the children’s services sector may access additional benefits. These can include professional development opportunities, wellness programs, and access to employee assistance services. Some employers offer salary packaging options to maximize tax benefits. Others provide discounted childcare services or on-site facilities to support work-life balance. Health and wellness initiatives, such as mental health support or fitness programs, are also common. These benefits aim to enhance job satisfaction and overall well-being, fostering a supportive work environment. They vary by employer but are designed to complement the core pay and superannuation entitlements outlined in the Award.

Compliance and Record-Keeping

Employers must adhere to the Children’s Services Award 2023, maintaining accurate records of pay, hours, and leave. Compliance ensures fairness and transparency in workplace practices.

6.1 Employer Obligations Under the Award

Employers in the children’s services sector must comply with the 2023 Award, ensuring accurate pay rates, record-keeping, and adherence to leave entitlements. They are required to provide fair wages, maintain precise documentation of hours worked, and ensure all employee benefits align with the Award’s provisions. Employers must also stay informed about updates and changes to the Award to avoid non-compliance. Failure to meet these obligations can result in legal consequences. Employers are encouraged to consult Fair Work resources and seek professional advice to ensure they fulfill all responsibilities effectively and maintain a fair workplace environment.

6.2 Record-Keeping Requirements

Employers must maintain accurate and detailed records of employee hours, pay rates, leave balances, and other entitlements under the Children’s Services Award. Records must be kept for at least seven years and be readily accessible for audits. This includes timesheets, pay slips, and leave requests. Employers are also required to provide employees with written records of their classification, pay rates, and leave entitlements. Accurate record-keeping ensures compliance with the Award and facilitates smooth audits; Employers who fail to maintain proper records may face penalties under Fair Work laws. It is crucial to ensure all documentation is up-to-date and easily accessible.

6.3 Audits and Compliance Checks

Employers in the children’s services sector must prepare for regular audits to ensure compliance with the 2023 Award. The Fair Work Ombudsman conducts these checks to verify accurate pay rates, record-keeping, and adherence to entitlements. During audits, employers must provide access to payroll records, timesheets, and employee agreements. Non-compliance may result in penalties or legal action. Proactive compliance measures, such as regular internal audits and staff training, can help avoid issues. Employers are encouraged to seek professional advice to ensure all practices align with the Award’s requirements. Compliance is crucial to maintaining trust and avoiding financial repercussions.

Dispute Resolution and Support

The Fair Work Commission facilitates dispute resolution through mediation, conciliation, and hearings. Employers and employees can access support services, including counseling and legal advice, to resolve workplace conflicts effectively.

7.1 Resolving Workplace Disputes

Workplace disputes in the children’s services sector are addressed through structured processes to ensure fair and timely resolutions. Employers and employees are encouraged to first resolve issues internally through discussions or mediation. If unresolved, disputes can be escalated to the Fair Work Commission for arbitration. The Commission provides a neutral platform for resolving conflicts, ensuring compliance with the Children’s Services Award and the Fair Work Act. Documentation and evidence are crucial in these proceedings. Employers must maintain clear records of pay, hours, and conditions to support their position. Employees are also entitled to seek legal or union representation for guidance and support.

7.2 Access to Industrial Advice and Support

Employees and employers in the children’s services sector can access industrial advice and support to navigate workplace issues. Unions and industry associations provide guidance on pay rates, entitlements, and dispute resolution. Legal professionals specializing in employment law offer tailored advice, ensuring compliance with the Children’s Services Award. The Fair Work Ombudsman is a key resource for understanding rights and obligations. Employers can also seek support from HR consultants to manage workplace relations effectively. These resources help foster a fair and informed work environment, promoting positive employer-employee relationships and ensuring adherence to the Award’s provisions.

7.3 Role of the Fair Work Commission

The Fair Work Commission (FWC) plays a pivotal role in interpreting and enforcing the Children’s Services Award 2023. It resolves disputes, approves enterprise agreements, and ensures compliance with workplace laws. The FWC provides a platform for employees and employers to address grievances, fostering fair workplace practices. Its decisions and rulings set precedents, guiding the interpretation of the Award. Additionally, the FWC offers educational resources to help stakeholders understand their rights and obligations. By upholding the principles of fairness and equity, the FWC supports the effective operation of the children’s services sector, ensuring that all parties adhere to the established pay guide and workplace standards.

Industry-Specific Considerations

Children’s Services Award Pay Guide 2023 addresses sector-specific needs, ensuring fair pay for early childhood teachers, childcare workers, and out-of-school care staff, reflecting industry demands and standards.

8.1 Pay Rates for Early Childhood Teachers

Early childhood teachers under the 2023 Children’s Services Award receive competitive pay rates based on their qualifications and experience. The award specifies minimum hourly rates, with increases for higher certifications. Teachers with bachelor degrees or specialized diplomas qualify for higher classifications, reflecting their expertise. Casual and part-time rates include additional loadings to compensate for benefits like leave entitlements. Employers must adhere to these rates to ensure fairness and compliance. The pay structure supports the sector’s professional standards, recognizing the critical role of early childhood educators in child development and education.

8.2 Pay Rates for Childcare Workers

Childcare workers’ pay rates under the 2023 Children’s Services Award are structured to reflect their roles and qualifications. Employees are classified into levels based on responsibilities, with corresponding hourly rates. Casual and part-time workers receive additional payments to account for benefits like annual leave. The award ensures fair compensation, acknowledging the importance of childcare workers in providing quality care and education. Employers must comply with these rates to maintain legal standards and support staff retention. The pay guide outlines clear entitlements, helping employers and employees understand their obligations and rights within the childcare sector.

8.3 Pay Rates for Out-of-School Hours Care Workers

Out-of-school hours care workers’ pay rates are detailed in the 2023 Children’s Services Award, ensuring fair compensation for their essential role in providing care and education. Rates are determined by classification levels, reflecting qualifications and responsibilities. Casual and part-time workers receive additional loadings to account for benefits like annual leave. The award outlines clear entitlements, promoting transparency and compliance for employers. These rates recognize the importance of out-of-school hours care workers in supporting families and delivering quality programs. Employers must adhere to these standards to ensure fair pay and maintain workforce stability in the sector.

Modern Award Review and Changes

The 2023 Children’s Services Award undergoes regular reviews by the Fair Work Commission to ensure relevance and fairness. Changes aim to address workforce needs, improve clarity, and align with industry standards, benefiting both employers and employees through transparent updates.

9.1 Recent Changes to the Children’s Services Award

The 2023 Children’s Services Award has introduced several key updates to reflect modern workforce needs. These changes include adjustments to pay rates, new classifications for specialized roles, and expanded allowances. The Fair Work Commission has also clarified rules around overtime, casual employment, and leave entitlements to ensure fairness and transparency. Additionally, there are new provisions to support employees balancing work and family responsibilities, such as enhanced parental leave arrangements. These updates aim to align the award with current industry standards and address emerging challenges in the childcare and education sectors, ensuring better outcomes for both employers and employees.

9.2 Impact of Award Changes on Employers and Employees

The 2023 Children’s Services Award changes bring significant impacts for both employers and employees. Employers must adapt to updated pay rates, new classifications, and expanded allowances, ensuring compliance to avoid penalties. Employees benefit from increased wages, improved allowances, and clearer entitlements, enhancing job security and overall satisfaction. The changes also promote fairness and transparency in workplace practices. While employers may face initial challenges in implementing the updates, the long-term effects are expected to foster a more equitable and sustainable work environment, aligning with industry standards and supporting the retention of skilled workforce in the childcare and education sectors.

9.3 Future Directions for the Award

The Children’s Services Award is expected to evolve further, focusing on addressing workforce demands and industry growth; Future updates may include enhanced provisions for professional development, technology integration, and employee well-being. There could also be adjustments to pay rates and classifications to reflect emerging roles in early childhood education. Sustainability practices and environmental considerations may be incorporated to align with broader industry trends. The Award will likely prioritize flexibility and adaptability to support the diverse needs of employers and employees, ensuring the sector remains competitive and attractive. These changes aim to foster long-term stability and innovation in the childcare and education workforce.

Resources and References

The Children’s Services Award Pay Guide 2023 is supported by resources from the Fair Work Ombudsman, official government websites, and industry-specific associations for accurate information.

10.1 Fair Work Ombudsman Resources

The Fair Work Ombudsman provides essential resources for understanding the Children’s Services Award Pay Guide 2023. Their website offers detailed pay guides, compliance tools, and fact sheets to ensure employers and employees adhere to the latest regulations. Additionally, they provide calculators for leave entitlements and overtime rates, helping to simplify complex payroll calculations. The FWO also offers dispute resolution services and educational materials to promote workplace fairness. These resources are regularly updated to reflect changes in the award, making them a reliable source for staying informed about pay rates, classifications, and workplace obligations in the childcare sector.

10;2 Industry Associations and Support Organizations

Industry associations and support organizations play a crucial role in assisting employers and employees in the childcare sector. Bodies like the Australian Childcare Alliance (ACA) and Early Childhood Australia (ECA) provide resources, training, and advocacy to ensure compliance with the Children’s Services Award. These organizations offer guidance on pay rates, classifications, and workplace practices, helping employers navigate complex regulations. They also provide professional development opportunities for staff, ensuring high-quality care and education for children. By leveraging these resources, employers can maintain compliance and foster a supportive work environment, benefiting both their teams and the families they serve.

10.3 Online Tools for Pay Rate Calculations

Online tools for pay rate calculations are invaluable for employers and employees in the children’s services sector. The Fair Work Ombudsman provides a Pay Calculator to determine correct rates under the Children’s Services Award. Additionally, payroll software and industry-specific platforms offer tailored solutions for calculating wages, allowances, and overtime. These tools ensure accuracy and compliance with the 2023 pay guide, reducing errors and saving time. Employers can also access resources to understand classification levels and apply the correct rates. Utilizing these tools helps maintain transparency and fairness in compensation, aligning with the Award’s requirements and fostering a compliant workplace environment;

cox lawn boss 13hp manual

The Cox Lawn Boss 13HP manual is a comprehensive guide for operating and maintaining your ride-on mower‚ covering safety‚ troubleshooting‚ and maintenance procedures for optimal performance.

Overview of the Cox Lawn Boss 13HP Ride-On Mower

The Cox Lawn Boss 13HP Ride-On Mower is a reliable and efficient lawn care solution‚ designed for both residential and small-scale commercial use. Equipped with a powerful 13HP Honda GX390 engine‚ it delivers consistent performance and durability. The mower features a robust design‚ easy-to-use controls‚ and a zero-turning radius for precise maneuverability. Its compact size and versatile cutting capabilities make it ideal for managing various terrain types. With a focus on user comfort and productivity‚ the Lawn Boss 13HP is a popular choice among homeowners and professionals seeking a dependable ride-on mower.

Importance of the Manual for Optimal Performance

The Cox Lawn Boss 13HP manual is essential for ensuring optimal performance‚ safety‚ and longevity of the mower. It provides detailed instructions for proper operation‚ maintenance‚ and troubleshooting‚ helping users avoid common issues. The manual includes schedules for regular servicing‚ oil changes‚ and blade care‚ which are critical for maintaining the mower’s efficiency. By following the guidelines‚ users can prevent premature wear‚ reduce repair costs‚ and ensure consistent cutting results. Adhering to the manual’s recommendations also enhances safety‚ making it a vital resource for both new and experienced operators.

Safety Precautions and Guidelines

Always follow safety guidelines in the Cox Lawn Boss 13HP manual to ensure safe operation. Wear protective gear‚ check tyre pressures‚ and avoid mowing slopes across. Keep the machine free of debris and follow pre-operation checks to prevent accidents and maintain efficiency.

General Safety Tips for Operating the Mower

Always wear protective gear‚ including gloves‚ safety glasses‚ and sturdy footwear. Check tyre pressures regularly and ensure the mower is free from debris. Avoid mowing slopes across and never operate the mower near children or pets. Keep the machine well-maintained‚ with sharp blades and proper engine function. Follow pre-operation checks‚ such as cleaning the air filter‚ especially after use in dusty conditions. Service the mower more frequently in dusty environments or where airborne debris is present; Adhere to these guidelines to ensure safe and efficient operation of your Cox Lawn Boss 13HP mower.

Protective Gear and Pre-Operation Checks

Always wear protective gear‚ including gloves‚ safety glasses‚ and sturdy footwear‚ to minimize injury risks. Conduct thorough pre-operation checks: inspect blades for sharpness‚ ensure proper tyre pressure‚ and clean the air filter‚ especially after use in dusty conditions; Check for loose bolts and ensure all guards are securely in place. Verify that all controls function smoothly and that there are no obstructions in the mowing deck. Regular servicing‚ such as oil changes and belt inspections‚ is crucial for optimal performance and safety. These steps ensure your Cox Lawn Boss 13HP operates efficiently and safely‚ preventing potential hazards and extending its lifespan.

Operating Instructions

Learn to operate the Cox Lawn Boss 13HP with ease. Follow guidelines for starting‚ using controls‚ and mowing techniques to ensure safe and efficient lawn maintenance.

Starting and Stopping the Mower

Starting and stopping the Cox Lawn Boss 13HP requires attention to safety and proper procedure. Always conduct pre-start checks‚ such as ensuring the mower is on level ground‚ disengaging the blades‚ and checking for obstacles. Refer to the manual for specific steps to engage the parking brake and activate the ignition. For stopping‚ gradually slow the mower‚ disengage the cutting deck‚ and turn off the engine. Regularly clean the air filter‚ especially after use in dusty conditions‚ to maintain optimal performance. Follow these guidelines to ensure safe and efficient operation of your mower.

Basic Controls and Features of the Lawn Boss 13HP

The Cox Lawn Boss 13HP features intuitive controls designed for ease of use; The steering wheel and foot-operated hydrostatic transmission provide smooth maneuverability; Key controls include the ignition switch‚ choke‚ throttle‚ and blade engagement lever. The mower also includes a adjustable cutting height mechanism and a comfortable‚ ergonomic seat. Additional features like a large fuel tank and robust chassis ensure durability and performance. Familiarize yourself with these components to optimize your mowing experience and maintain your lawn efficiently; Regular maintenance‚ as outlined in the manual‚ will keep these features functioning at their best.

Mowing Techniques for Different Terrain

Adapt your mowing technique to the terrain for optimal results. On flat ground‚ mow in straight‚ overlapping rows to ensure even cutting. For slopes‚ mow up and down to maintain stability and avoid tipping. When encountering uneven terrain‚ reduce speed and raise the cutting deck slightly to prevent scalping. For areas with obstacles‚ make slow‚ precise turns and use the mower’s zero-turn radius feature if available. Regularly clean debris from the mower to maintain performance. Adjust tire pressure as needed for traction on varying surfaces. These techniques ensure efficient and safe mowing across diverse landscapes.

Maintenance and Servicing

Regular servicing ensures optimal performance. Change engine oil‚ clean or replace air filters‚ and sharpen blades periodically. Check tire pressure and adjust as needed for stability.

Regular Maintenance Schedule

Regular maintenance is crucial for the longevity and performance of your Cox Lawn Boss 13HP. Follow a schedule that includes oil changes every 50 hours‚ air filter cleaning after dusty use‚ and blade sharpening annually. Check tire pressure every 10 hours and ensure proper adjustment. Clean the mower deck after each use to prevent debris buildup. Refer to the manual for specific intervals and procedures tailored to your model. Adhering to this schedule ensures reliable operation and extends the life of your mower.

Engine Servicing and Oil Change Procedures

Regular engine servicing is essential for the Cox Lawn Boss 13HP. Change the oil every 50 hours of operation using SAE 10W-30 oil. Warm the engine before draining to ensure a complete oil change. Replace the oil filter with a genuine part. Clean or replace the air filter as needed‚ especially after mowing in dusty conditions. Check the spark plug annually and replace it if worn. Refer to the manual for specific torque settings and procedures. Proper engine maintenance ensures optimal performance‚ fuel efficiency‚ and extends the lifespan of your mower.

Blade Care and Sharpening

Proper blade care is crucial for maintaining the performance of your Cox Lawn Boss 13HP. Sharpen blades regularly to ensure clean cuts and prevent damage to the mower. Use an angle grinder or file to sharpen the blades‚ following the manual’s recommended angle. Always disconnect the spark plug before servicing. Inspect blades for wear or damage and replace them if necessary. Balancing the blades after sharpening ensures even cutting and prevents vibration. Refer to the manual for specific instructions and safety guidelines to maintain optimal mowing efficiency and extend the lifespan of your mower.

Troubleshooting Common Issues

Identify symptoms like uneven cutting or starting problems. Check air filters‚ blade condition‚ and oil levels. Refer to the manual for diagnostic steps and solutions.

Diagnosing and Solving Starting Problems

Starting issues with the Cox Lawn Boss 13HP can often be resolved by checking the air filter‚ oil level‚ and fuel supply. Ensure the air filter is clean‚ especially after use in dusty conditions. Verify the oil level is within the recommended range and the mower is on a level surface. If the engine doesn’t start‚ try using the choke and priming the engine. Refer to the manual for specific diagnostic steps and solutions. Regular maintenance‚ such as cleaning the air filter and checking belts‚ can prevent starting problems and ensure reliable performance.

Addressing Uneven Cutting and Blade Issues

Uneven cutting and blade issues can be resolved by checking blade balance‚ sharpening‚ and ensuring proper mower deck alignment. Dull or damaged blades should be sharpened or replaced. Regularly inspect the mower deck for debris and clean it thoroughly. If the cutting deck is not level‚ adjust it according to the manual’s instructions. Sharpening blades with an angle grinder can restore cutting efficiency. For severe blade damage‚ refer to the exploded parts diagram in the manual for replacement guidance. Maintaining sharp‚ balanced blades ensures even cutting and prolongs mower performance.

Model-Specific Information

The Cox Lawn Boss 13HP manual covers models like A14011M and A14111M‚ detailing their unique features‚ engine specifications‚ and maintenance requirements for optimal performance.

Cox Lawn Boss A14011M and A14111M Models

The Cox Lawn Boss A14011M and A14111M models are high-performance ride-on mowers equipped with a 13HP Honda GX390 engine‚ known for reliability and power. These models feature a durable design‚ hydrostatic transmission‚ and a robust cutting deck‚ making them ideal for maintaining large lawns. The manual provides detailed specifications‚ maintenance schedules‚ and troubleshooting tips specific to these models. Regular servicing‚ such as oil changes and air filter cleaning‚ is emphasized to ensure longevity. These models are popular for their versatility and are well-suited for both residential and small commercial use‚ offering excellent value for their performance and build quality.

Key Features and Differences

The Cox Lawn Boss 13HP models A14011M and A14111M boast a powerful 13HP Honda GX390 engine‚ hydrostatic transmission‚ and a durable cutting deck. Key features include adjustable cutting heights‚ mulching capability‚ and a comfortable operating design. The A14111M differs by offering enhanced horsepower options‚ while the A14011M focuses on fuel efficiency. Both models are designed for heavy-duty use‚ with robust steel frames and high-capacity fuel tanks. These differences cater to varying user needs‚ ensuring optimal performance for both residential and small-scale commercial applications. Regular maintenance‚ as outlined in the manual‚ ensures these mowers remain reliable and efficient over time.

Engine Specifications

The Cox Lawn Boss 13HP features the robust Honda GX390 engine‚ delivering 13 horsepower with reliable performance‚ durability‚ and excellent fuel efficiency for demanding mowing tasks.

13HP Honda GX390 Engine Overview

The Cox Lawn Boss 13HP is powered by the Honda GX390 engine‚ a reliable and durable powerplant designed for demanding mowing tasks. This 13HP engine features an overhead valve design‚ ensuring efficient fuel consumption and reduced emissions. Its cast-iron cylinder sleeve enhances durability‚ while the dual-element air filter provides superior protection against dust and debris. The GX390 engine is renowned for its smooth operation‚ low vibration‚ and consistent performance‚ making it ideal for heavy-duty lawn mowing applications. Regular maintenance‚ as outlined in the manual‚ ensures optimal engine longevity and peak performance.

Engine Maintenance and Repair Tips

Regular engine maintenance is crucial for the longevity and performance of the Cox Lawn Boss 13HP. Ensure to change the oil every 50 hours of operation using high-quality oil suitable for the Honda GX390 engine. Clean or replace the air filter after each use‚ especially in dusty conditions‚ to maintain proper airflow. Check and gap the spark plug annually‚ and replace it every two years or as specified. Inspect the fuel filter and replace it if contaminated. Refer to the manual for detailed procedures and guidelines to keep the engine running smoothly and efficiently.

Parts and Accessories

The Cox Lawn Boss 13HP manual includes an exploded parts diagram and catalog‚ detailing components like blades‚ belts‚ and engine parts‚ ensuring easy identification and replacement.

Exploded Parts Diagrams and Catalog

The Cox Lawn Boss 13HP manual features detailed exploded parts diagrams‚ providing a visual breakdown of components like blades‚ belts‚ and engine parts. The catalog lists part numbers‚ descriptions‚ and quantities‚ aiding in identification and ordering. Models such as A14011M and A14111M are covered‚ ensuring compatibility. This section is invaluable for DIY repairs and maintenance‚ allowing users to locate and replace parts efficiently. The clear illustrations and comprehensive listings make it easier to understand and service the mower‚ ensuring optimal performance and longevity. Regular reference to this section helps maintain the mower in top condition.

Recommended Parts and Tools for Maintenance

The Cox Lawn Boss 13HP manual recommends essential parts and tools for regular maintenance‚ ensuring optimal performance. Key items include air filters‚ spark plugs‚ blade sharpening kits‚ and lubricants. A socket set‚ wrenches‚ and gloves are also advised for safe and efficient servicing. The manual provides a detailed list of compatible parts‚ such as belts and oil filters‚ to simplify ordering. Regularly stocking these items helps prevent downtime and extends the mower’s lifespan. Always refer to the manual for specific tool recommendations tailored to your model‚ ensuring all maintenance tasks are performed correctly and safely.

Downloading and Using the Manual

The Cox Lawn Boss 13HP manual can be downloaded from the official Cox website or authorized dealers. It provides detailed instructions for safe operation‚ maintenance‚ and troubleshooting.

Where to Find the Cox Lawn Boss 13HP Manual

The Cox Lawn Boss 13HP manual can be downloaded from the official Cox website or authorized dealers. Visit the Cox website’s “Brochures and Manuals” section for direct access. Additionally‚ authorized retailers like B.W. Machinery or Wright Machines may provide downloadable versions. Some models are also available through online forums or community support groups. Ensure you verify the source for authenticity to avoid incorrect or outdated information. For specific models like the A14011M or A14111M‚ refer to the Cox website or contact their customer support for assistance. Always use official sources for accurate and reliable guidance.

How to Use the Manual Effectively

To maximize the benefits of the Cox Lawn Boss 13HP manual‚ start by thoroughly reading the safety precautions and operating instructions. Familiarize yourself with the table of contents to quickly locate specific sections‚ such as maintenance schedules or troubleshooting guides. Always follow the recommended maintenance routines and refer to exploded parts diagrams for clarity. Pay attention to safety guidelines and pre-operation checks to ensure safe and efficient mowing. For complex tasks‚ use the step-by-step instructions and consult the engine specifications for accurate adjustments. Keep the manual handy for quick reference and update it if new information becomes available. Proper usage ensures optimal performance and longevity of your mower.

Additional Resources

Access how-to videos‚ community forums‚ and detailed parts diagrams for models like A14011M and A14111M. These resources offer troubleshooting guides and maintenance tips for optimal performance.

How-to Videos and Tutorials

Explore a wealth of how-to videos and tutorials for the Cox Lawn Boss 13HP‚ available on platforms like coxmowers.com.au and DIY forums. These resources cover essential tasks such as blade sharpening‚ oil changes‚ and troubleshooting common issues. Videos provide step-by-step guidance for maintenance procedures‚ ensuring you can handle repairs confidently. Additionally‚ tutorials on mowing techniques and safety practices help maximize efficiency and safety. For models like the A14011M and A14111M‚ these resources are invaluable for keeping your mower in peak condition. Use these tools to enhance your mowing experience and prolong your mower’s lifespan.

Community Support and Forums

The Cox Lawn Boss 13HP community offers extensive support through forums and discussion groups. Enthusiasts and experts share tips‚ troubleshooting advice‚ and maintenance strategies. Platforms like DIY Lawnmower Repair and specialized mower forums provide valuable insights. Users can discuss issues‚ ask questions‚ and learn from others’ experiences. These communities are particularly helpful for resolving specific problems‚ such as blade sharpening or engine maintenance. Active participation fosters a collaborative environment‚ ensuring owners get the most out of their mowers. Engaging with these forums can enhance your mowing experience and help you troubleshoot effectively.

The Cox Lawn Boss 13HP manual is essential for optimal performance and longevity. It provides comprehensive guidance on safety‚ maintenance‚ and troubleshooting‚ ensuring your mower operates at its best.

Final Tips for Maximizing Mower Performance

Regularly sharpen blades to ensure clean cuts and prevent grass tearing. Check tyre pressures before each use for stability and even cutting. Clean the air filter after mowing in dusty conditions to maintain engine efficiency. Lubricate moving parts periodically to reduce wear and tear. Store the mower in a dry‚ protected area to prevent rust and damage. Follow the recommended maintenance schedule in the manual for optimal performance. By adhering to these tips‚ you can extend the lifespan of your Cox Lawn Boss 13HP and keep your lawn looking its best.

Importance of Following Manual Guidelines

Adhering to the Cox Lawn Boss 13HP manual ensures safe and efficient operation‚ prolonging the mower’s lifespan. Proper maintenance‚ as outlined‚ prevents engine damage and maintains cutting performance. Following safety guidelines reduces accident risks‚ while troubleshooting tips help resolve issues quickly. Regular servicing‚ like oil changes and blade sharpening‚ keeps the mower running smoothly. Neglecting manual instructions can lead to premature wear‚ void warranties‚ or cause unsafe operating conditions. By following the manual‚ you ensure optimal performance‚ reliability‚ and longevity of your Cox Lawn Boss 13HP‚ while also protecting your investment and maintaining lawn care efficiency.

work sharp guided field sharpener

The Work Sharp Guided Field Sharpener is a portable, compact tool designed for outdoor enthusiasts, offering precise knife sharpening with diamond plates, ceramic rods, and a leather strop.

Overview of the Product

The Work Sharp Guided Field Sharpener is a compact, portable sharpening system designed for outdoor enthusiasts. It features diamond plates, ceramic rods, and a leather strop, offering five levels of sharpening with angle guides for precision. Built for durability, it’s ideal for hunters, campers, and anglers, ensuring knives, broadheads, and hooks stay sharp in the field. Its lightweight design and all-in-one functionality make it a reliable tool for maintaining edges on the go.

Importance of Knife Sharpening in Outdoor Activities

A sharp knife is essential for safety, efficiency, and reliability in outdoor activities like camping, hunting, and hiking. Dull blades increase the risk of accidents and make tasks like cutting branches or preparing food more difficult. A well-maintained edge ensures precision and control, which are critical for survival and utility in the field. Sharpening knives before and during trips is a fundamental skill for any outdoor enthusiast, enhancing both performance and safety.

Key Features of the Work Sharp Guided Field Sharpener

The Work Sharp Guided Field Sharpener features diamond plates, ceramic rods, a leather strop, and adjustable angle guides for precise sharpening. Its compact, portable design includes interchangeable abrasives and a pivoting system for versatility, making it ideal for outdoor use.

Components and Accessories Included

The Work Sharp Guided Field Sharpener includes diamond plates for coarse and fine sharpening, ceramic rods with coarse, fine, and grooved surfaces for hooks, and a leather strop for polishing. It also features interchangeable abrasives, sharpening guides for precise angles, and a pivoting system for versatility. The compact design includes a broad head wrench for field use, ensuring all tools needed for sharpening are neatly organized and portable.

Portability and Compact Design

The Work Sharp Guided Field Sharpener is lightweight and compact, making it ideal for outdoor adventures. Its sleek design allows easy carrying in backpacks or on belts, ensuring sharpening tools are always accessible. Built for field use, it combines durability with portability, perfect for hiking, camping, or emergency situations. The compact size doesn’t compromise functionality, offering a complete sharpening solution in a small, travel-friendly package;

Customizable Sharpening Angles

The Work Sharp Guided Field Sharpener features adjustable angle guides, allowing users to customize sharpening angles between 20-25 degrees. This versatility ensures precise edge control for various blade types, from hunting knives to pocket knives. The preset angles guide novice users, while experienced sharpeners can fine-tune for specific needs. This adaptability makes it suitable for maintaining different blade types, ensuring optimal sharpness in every situation, whether in the field or at home.

How the Work Sharp Guided Field Sharpener Works

The Work Sharp Guided Field Sharpener uses a pivoting system with angle guides, diamond plates, and ceramic rods to sharpen knives efficiently, ensuring precise edge control and sharp results.

Step-by-Step Sharpening Process

  • Set the desired angle using the built-in guide (20-25 degrees).
  • Start with coarse diamond plates for initial sharpening.
  • Progress to fine diamond plates for edge refinement.
  • Use ceramic rods for honing and polishing.
  • Finish with the leather strop to remove burrs and finalize the edge.

This systematic approach ensures a sharp, consistent edge every time, making it ideal for field use.

Role of the Pivoting System and Guides

The pivoting system and guides ensure precise angle control, maintaining consistent sharpening results. The guides help position the blade accurately, while the pivoting mechanism allows smooth, even strokes. This design simplifies the sharpening process, making it accessible for beginners and ensuring professional-grade results. The system’s adaptability accommodates various blade types, guaranteeing a sharp edge every time, whether in the field or at home.

Versatility for Different Blade Types

The Work Sharp Guided Field Sharpener excels at sharpening various blade types, from hunting knives to pocket knives and fish hooks. Its interchangeable diamond plates and ceramic rods cater to different blade sizes and materials. The grooved surface on the ceramic rod is specifically designed for sharpening fish hooks, making it a versatile tool for outdoor enthusiasts. This adaptability ensures it meets the needs of hunters, anglers, and campers alike, providing a sharp edge regardless of the blade type.

Benefits of Using the Work Sharp Guided Field Sharpener

The Work Sharp Guided Field Sharpener offers consistent sharpening results, ease of use, and portability, making it ideal for outdoor enthusiasts. Its durable design ensures long-lasting performance.

Consistency in Sharpening Results

The Work Sharp Guided Field Sharpener ensures consistent sharpening results through its precise angle guides and multiple abrasives. The pivoting system helps maintain the correct angle, delivering a sharp edge every time. This consistency is crucial for outdoor enthusiasts who rely on their knives for various tasks. The tool’s design allows for uniform sharpening across different blade types, making it a reliable choice for maintaining sharpness in the field or at home.

Ease of Use for Beginners

The Work Sharp Guided Field Sharpener is designed to be user-friendly, making it ideal for beginners. The integrated angle guides and pivoting system simplify the sharpening process, ensuring proper technique. Even those new to sharpening can achieve professional results with minimal effort. The tool’s intuitive design and step-by-step process reduce the learning curve, allowing anyone to sharpen knives effectively, whether in the field or at home.

Durability and Build Quality

The Work Sharp Guided Field Sharpener is renowned for its exceptional durability and robust build quality, making it a reliable tool for outdoor use. Constructed with high-quality materials, it withstands frequent use and harsh environments. The diamond plates and ceramic rods are designed for longevity, while the compact design ensures minimal wear. Replaceable parts, such as the leather strop and sharpening guides, further enhance its durability, making it a long-lasting investment for outdoor enthusiasts;

User Reviews and Ratings

The Work Sharp Guided Field Sharpener boasts a 4.6-star Amazon rating, praised for its portability, ease of use, and affordability, making it a top choice for outdoor enthusiasts.

Amazon Ratings and Customer Feedback

The Work Sharp Guided Field Sharpener holds an impressive 4.6-star rating on Amazon, with customers praising its ease of use, portability, and effectiveness. Many hunters and outdoor enthusiasts highlight its ability to sharpen knives quickly and consistently. The all-in-one system, including diamond plates and ceramic rods, is a major draw. Some users note minor issues with durability over time, but overall, the sharpener is highly recommended for its value and performance in the field.

Testimonials from Outdoor Enthusiasts

Outdoor enthusiasts rave about the Work Sharp Guided Field Sharpener, praising its effectiveness in the field. Many users, including hunters and campers, appreciate its portability and ease of use. The all-in-one system with diamond plates, ceramic rods, and a leather strop is frequently highlighted. Several testimonials mention how it quickly sharpens knives, even for tasks like skinning elk. Overall, it’s a top choice for maintaining tools in outdoor settings, highly recommended by those who’ve used it.

Comparison with Other Sharpening Tools

The Work Sharp Guided Field Sharpener stands out for its versatility and ease of use, making it a top choice among outdoor enthusiasts. Unlike traditional sharpening stones, it offers a guided system for consistent results. Its compact design and all-in-one features set it apart from bulkier sharpening kits. Many users find it more effective and user-friendly than manual sharpening methods, especially for maintaining knives in the field. Its affordability and durability further enhance its appeal compared to other tools.

Where to Buy the Work Sharp Guided Field Sharpener

The Work Sharp Guided Field Sharpener is available on Amazon, authorized retailers, and outdoor gear stores, offering a price range of $25-$40, providing great value for money.

Authorized Retailers and Online Platforms

The Work Sharp Guided Field Sharpener is widely available at authorized retailers like Amazon, Bass Pro Shops, REI, and Cabela’s. Online platforms offer convenient purchasing options, ensuring accessibility for outdoor enthusiasts. With a price range of $25-$40, it provides excellent value for its durability and performance, making it a cost-effective choice for sharpening needs in the field or at home.

Price Range and Value for Money

The Work Sharp Guided Field Sharpener is priced between $25 and $40, offering exceptional value for its durability and versatility. Its compact design and multiple sharpening options make it a cost-effective solution for outdoor enthusiasts and home users. With consistent performance and ease of use, it provides a great return on investment for maintaining sharp edges effortlessly.

Maintenance and Care Tips

Regularly clean diamond plates and ceramic rods with water or mild soap. Store in a dry place to prevent rust and ensure longevity of the sharpener.

Cleaning and Storing the Sharpener

Regularly clean the Work Sharp Guided Field Sharpener by wiping diamond plates and ceramic rods with a damp cloth or mild soap. Dry thoroughly to prevent rust. Store in a dry, cool place to maintain performance. Avoid harsh chemicals, as they may damage components. Proper care ensures longevity and optimal sharpening results. Always inspect for wear and replace parts as needed to keep the sharpener in prime condition.

Replacing Wearable Parts

Regularly inspect and replace wearable parts like diamond plates, ceramic rods, and leather strops to maintain the sharpener’s performance. These components are designed to wear over time and can be easily replaced to ensure consistent results. Replacement parts are available from Work Sharp or authorized retailers, ensuring your sharpener remains in optimal condition. Proper replacement extends the tool’s lifespan and keeps it functioning effectively for years of reliable use.

Common Mistakes to Avoid

Avoid using incorrect sharpening angles and over-sharpening, which can damage the blade. Proper angle alignment and moderate strokes ensure a sharp, undamaged edge consistently.

Incorrect Angle Usage

Using incorrect sharpening angles is a common mistake that can lead to poor results. The Work Sharp Guided Field Sharpener includes angle guides to help maintain the correct angle, typically between 20-25 degrees. Ignoring these guides or applying too much pressure can misalign the blade, resulting in an uneven edge. Proper angle alignment ensures a sharp, consistent edge. Always refer to the tool’s guides to avoid this error and achieve optimal sharpening performance for your knives.

Over-Sharpening and Edge Damage

Over-sharpening can lead to excessive wear and potential damage to the knife’s edge. The Work Sharp Guided Field Sharpener helps prevent this with its controlled, guided system. Users should avoid excessive strokes and monitor progress to avoid overheating or removing too much metal. The tool’s multiple abrasive stages allow for precise sharpening, reducing the risk of over-sharpening. Proper technique and moderation are key to maintaining the knife’s integrity and achieving a sharp, durable edge.

Accessories and Upgrades

The Work Sharp Guided Field Sharpener offers additional diamond plates, ceramic rods, and a leather strop for enhanced sharpening. Upgrades like the Elite version provide improved features and durability.

Additional Diamond Plates and Ceramic Rods

The Work Sharp Guided Field Sharpener includes interchangeable diamond plates for coarse and fine sharpening, along with ceramic rods for honing. These accessories ensure versatility, allowing users to adapt to different blade types and sharpening needs. The diamond plates are durable and effective for restoring edges, while the ceramic rods provide a polished finish. Upgrading with additional plates or rods enhances the tool’s longevity and performance, making it a reliable choice for outdoor enthusiasts and professionals alike.

Leather Strop and Honing Rods

The Work Sharp Guided Field Sharpener includes a high-quality leather strop for final edge polishing and ceramic honing rods with coarse and fine surfaces. The leather strop ensures a razor-sharp finish, while the ceramic rods, featuring a grooved surface for fish hooks, provide precise edge refinement. These accessories are essential for maintaining and refining blades, making the sharpener a comprehensive tool for outdoor and everyday use.

The Work Sharp Guided Field Sharpener Elite Version

The Elite Version offers upgraded features, improving upon the original with enhanced sharpening capabilities and durability, making it ideal for serious outdoor enthusiasts and professionals.

Upgraded Features and Improvements

The Elite Version introduces enhanced sharpening capabilities, including additional diamond plates and improved angle guides for precision. It features a more robust build and expanded accessories, such as advanced ceramic rods and a refined leather strop. The pivoting system has been optimized for smoother operation, and the compact design now includes a removable handle for easier storage. These upgrades ensure better performance and longevity, catering to both casual users and professionals seeking a reliable sharpening tool.

Comparison with the Original Model

The Elite Version of the Work Sharp Guided Field Sharpener offers enhanced features, including additional diamond plates, improved angle guides, and a more robust build. It retains the original’s portability but adds a removable handle for easier storage. While the original model excels in basic sharpening, the Elite version provides greater versatility and durability, making it ideal for heavy-duty use. Both models share the same core sharpening functionality but differ in accessory options and build quality.

Troubleshooting Common Issues

Common issues include incorrect angle usage and over-sharpening, which can damage edges. Adjusting the angle guide and monitoring strokes helps prevent these problems, ensuring optimal results.

Sharpening Difficulties and Solutions

Sharpening difficulties often arise from incorrect angle usage or over-sharpening, which can damage the blade. To resolve this, ensure the angle guide is properly adjusted and monitor the number of strokes. For extremely dull knives, start with coarse abrasives and progress to finer ones. If the edge becomes uneven, use the leather strop to refine it. Regular cleaning and maintenance of the sharpener also help maintain optimal performance and prevent common issues.

Warranty and Customer Support

The Work Sharp Guided Field Sharpener is backed by a limited warranty, ensuring protection against manufacturing defects. Customer support is readily available through Work Sharp’s official website, offering troubleshooting guides, replacement parts, and assistance for any issues. The company’s commitment to quality and customer satisfaction reinforces its reputation as a trusted brand for outdoor enthusiasts and knife sharpening needs.

The Work Sharp Guided Field Sharpener is a reliable, portable tool for outdoor enthusiasts, offering consistent results and durability, making it a valuable addition to any adventurer’s kit.

Final Thoughts on the Product

The Work Sharp Guided Field Sharpener is a standout tool for outdoor enthusiasts, offering unmatched portability and ease of use. Its ability to sharpen knives, broadheads, and fish hooks with precision makes it indispensable. The inclusion of diamond plates, ceramic rods, and a leather strop ensures versatility. Users consistently praise its durability and value for money. Whether for camping, hunting, or everyday use, this sharpener delivers consistent results, making it a must-have for anyone needing a reliable edge in the field. The Elite version further enhances its capabilities, solidifying its reputation as a top-tier sharpening solution.

Recommendation for Outdoor Enthusiasts

The Work Sharp Guided Field Sharpener is a must-have for outdoor enthusiasts, offering a portable and efficient solution for sharpening knives, broadheads, and fish hooks. Its compact design and versatility make it ideal for camping, hunting, or hiking. With its ease of use and consistent results, it ensures your tools stay sharp in the field. A worthwhile investment for anyone needing a reliable sharpening tool on the go.

self guided walking tours melbourne

Discover Melbourne’s vibrant culture and hidden gems through self-guided walking tours. Explore iconic laneways, historic landmarks, and scenic parklands at your own pace. These tours offer flexibility, allowing you to immerse yourself in the city’s artistic and cultural heritage effortlessly.

What Are Self-Guided Walking Tours?

Self-guided walking tours are independent, flexible explorations of a city or region, allowing individuals to discover attractions at their own pace. Unlike guided tours, these experiences are tailored to personal preferences, with participants using maps, apps, or brochures to navigate. In Melbourne, self-guided walking tours often focus on specific themes, such as street art, gardens, or historical sites, offering a deeper connection to the city’s culture and landmarks. These tours are designed to be easy to follow, with predefined routes and highlights, making them accessible to both locals and visitors. They provide the freedom to pause, linger, or diverge from the path, creating a unique and personalized adventure. Whether you’re interested in art, nature, or history, self-guided walking tours in Melbourne offer an engaging way to explore one of Australia’s most vibrant cities.

Benefits of Self-Guided Walking Tours

Self-guided walking tours offer numerous benefits, making them a popular choice for exploring Melbourne. One of the most significant advantages is the flexibility to create a personalized itinerary, allowing you to focus on the attractions and themes that interest you most. These tours are cost-effective, as they often require no additional fees beyond the cost of maps or apps. They also provide the freedom to set your own pace, enabling you to linger at sites that captivate you or skip those that don’t. Additionally, self-guided tours encourage a deeper connection to the city, as you can immerse yourself in its culture, history, and hidden gems without the constraints of a group schedule. For solo travelers, couples, or families, these tours offer a convenient and enjoyable way to experience Melbourne’s vibrant streets, iconic landmarks, and scenic parklands. Whether you’re a local or a visitor, self-guided walking tours are an excellent way to discover the city’s unique charm at your own convenience.

Popular Self-Guided Walking Tours in Melbourne

Explore Melbourne’s iconic attractions through its popular self-guided walking tours. Discover vibrant street art in laneways like Hosier Lane and AC/DC Lane, or stroll through lush gardens and parklands. Cultural and historical walks reveal the city’s rich heritage, offering something for every interest and pace.

Street Art Laneways

Melbourne’s street art laneways are a must-visit for art enthusiasts. Explore iconic spots like Hosier Lane, Centre Place, and AC/DC Lane, where vibrant murals and graffiti transform urban spaces into open-air galleries. These laneways are a hub for both emerging and established artists, showcasing Melbourne’s thriving creative culture. The Keith Haring mural, a landmark in the city, is another highlight, reflecting the city’s appreciation for international art. Visitors can embark on a self-guided tour starting at Flinders Street Station, weaving through these artistic alleyways. The dynamic and ever-changing nature of the art ensures a unique experience with each visit. Whether you’re capturing photos for social media or simply soaking in the creativity, Melbourne’s street art laneways offer an unforgettable journey through the city’s artistic soul.

Gardens and Parklands

Melbourne’s gardens and parklands offer a serene escape from the city’s hustle, providing breathtaking landscapes and tranquil atmospheres. The “A Walk in the Park” tour is a 2-hour journey through magnificent cathedrals, lush parklands, and charming Flinders Lane, covering 3.75 km. Another option is the “Secret Gardens” tour, which spans 6 km and takes 2.5 hours, featuring the Arts Centre, sculptures, monuments, and the stunning Royal Botanic Gardens. These self-guided walks allow visitors to explore Melbourne’s natural beauty at their own pace, discovering hidden gems and iconic landmarks. The Royal Botanic Gardens, with its diverse plant species and scenic pathways, is a highlight for nature lovers. These tours are perfect for those seeking a peaceful retreat while immersing themselves in Melbourne’s cultural and natural heritage. Whether strolling through manicured gardens or admiring public art, these walks provide a refreshing way to experience the city’s green spaces.

Cultural and Historical Walks

Melbourne’s cultural and historical walks offer a fascinating journey through the city’s rich heritage. These self-guided tours allow visitors to explore iconic landmarks, historic sites, and cultural hubs at their own pace. Federation Square, a cornerstone of Melbourne’s cultural identity, is a key feature of many tours. The city’s historic cathedrals, such as St. Patrick’s Cathedral and St. Paul’s Cathedral, provide a glimpse into Melbourne’s religious and architectural history. Additionally, the integration of public art and monuments throughout the city adds depth to these walks, showcasing Melbourne’s vibrant cultural scene. These tours are designed to highlight the city’s diverse history, from its Indigenous heritage to its modern-day identity. By following these routes, visitors can gain a deeper understanding of Melbourne’s evolution and the cultural forces that have shaped it. Whether you’re interested in history, architecture, or art, Melbourne’s cultural and historical walks provide a meaningful and enriching experience.

Creating Your Own Custom Self-Guided Walking Tour

Design your perfect Melbourne adventure by selecting attractions and landmarks that align with your interests. Use online tools to map your route, ensuring a seamless and personalized experience. This flexibility allows you to explore the city at your own pace and preference.

Choosing Attractions and Landmarks

Melbourne offers a diverse array of attractions, making it easy to craft a personalized self-guided walking tour. Start by identifying your interests—whether it’s street art, historical sites, or scenic parklands. Consider iconic spots like Hosier Lane for its vibrant murals or the Royal Botanic Gardens for a peaceful escape. Cultural enthusiasts might gravitate toward landmarks such as Federation Square or the Arts Centre, while history buffs could explore the Melbourne Cricket Ground or St. Patrick’s Cathedral.

When selecting landmarks, think about their proximity to one another to minimize travel time. Mix popular destinations with hidden gems, such as lesser-known laneways or boutique cafes, to create a well-rounded experience. Use online resources or maps to identify must-see locations and ensure they align with your tour’s theme. This step allows you to tailor your journey, making every stop meaningful and aligned with your preferences.

Additionally, consider the duration of your tour and the distance between attractions. Prioritize spots that offer a mix of visual appeal, historical significance, and cultural depth. This thoughtful selection process ensures your self-guided tour is both enjoyable and enriching, reflecting the unique spirit of Melbourne.

Mapping Your Route

Creating a well-planned route is essential for a seamless self-guided walking tour in Melbourne. Start by listing your chosen attractions and determining their locations on a map. Digital tools like Google Maps or specialized walking tour apps can help you visualize the layout and calculate distances. Consider starting at a central location, such as Flinders Street Station, to minimize travel time between points of interest.

When mapping your route, aim for a logical flow that connects attractions in a cohesive order. For example, if exploring street art, begin at Hosier Lane and progress through AC/DC Lane and Degraves Street. For nature enthusiasts, a route might wind through the Royal Botanic Gardens and Federation Square. Ensure the path is walkable within your desired timeframe, accounting for stops and breaks.

Include waypoints for cafes, rest areas, or scenic viewpoints to enhance your experience. Use GPS-enabled maps to navigate in real-time, and consider downloading offline versions for areas with limited Wi-Fi. A well-mapped route ensures you make the most of your time, allowing you to focus on enjoying Melbourne’s vibrant culture and landscapes.

Practical Tips for Self-Guided Walking Tours

Plan ahead with maps and navigation tools, wear comfortable shoes, and stay hydrated. Capture memories through photography and share your experiences on social media. Enjoy Melbourne’s unique culture and landscapes at your own pace with these essential tips.

Using Maps and Navigation Tools

Effective navigation is key to enjoying self-guided walking tours in Melbourne. Use detailed maps or GPS-enabled apps to explore the city seamlessly. Download PDF guides or load digital maps on your phone for easy access. Many tours, such as the Best of Melbourne Self-Guided Free Walking Tour, provide route maps, ensuring you don’t miss iconic spots like Hosier Lane or the Royal Botanic Gardens. Federation Square and the City of Melbourne also offer downloadable resources to help you plan your route. Familiarize yourself with landmarks and street names to stay on track. With these tools, you can navigate Melbourne’s laneways, parklands, and cultural sites with confidence, making your walking tour both enjoyable and stress-free.

Safety Tips for Walkers

Ensuring your safety while exploring Melbourne on a self-guided walking tour is essential. Always stay aware of your surroundings, especially in crowded areas like laneways and popular landmarks. Keep valuables secure and avoid distractions like using your phone in busy streets. Be mindful of traffic rules and pedestrian crossings, as Melbourne’s streets can be bustling. Carry a map or use a GPS app to avoid getting lost, and inform someone about your route and expected return time. In case of emergencies, dial 000 for police, fire, or ambulance services. Additionally, the Melbourne Mobility Centre (1800 735 266) can assist with accessibility concerns. Stay hydrated, wear comfortable shoes, and plan for variable weather. By taking these precautions, you can enjoy a safe and enjoyable walking tour in Melbourne, immersing yourself in the city’s vibrant culture and scenic beauty without worry.

Photography and Social Media

Melbourne’s self-guided walking tours offer endless opportunities for capturing stunning photos and sharing memorable moments on social media. The city’s vibrant street art, iconic laneways, and picturesque gardens provide unique backdrops for photography. Popular spots like Hosier Lane, AC/DC Lane, and the Royal Botanic Gardens are favorites among Instagram users. When snapping photos, consider the lighting and angles to make your shots stand out. Share your experiences using hashtags like #MelbourneStreetArt or #VisitMelbourne to connect with other travelers and locals alike. Geotagging your locations can also help others discover these hidden gems. Don’t forget to capture the city’s cultural landmarks and historical sites, as they tell a story of Melbourne’s rich heritage. Whether you’re a professional photographer or a casual shooter, these tours offer inspiration and content for your social media feeds. Remember to respect street artists and their work when photographing murals and installations. By sharing your journey, you contribute to the vibrant online community that celebrates Melbourne’s beauty and creativity.

Cultural Insights and Historical Context

Melbourne’s cultural identity shines through its street art, historic landmarks, and multicultural heritage. Self-guided walking tours allow you to explore the city’s rich history, from its colonial past to its modern artistic expression, at your own pace.

Melbourne’s Street Art Scene

Melbourne is renowned for its vibrant street art, which transforms laneways and buildings into dynamic canvases. Self-guided walking tours allow visitors to explore iconic spots like Hosier Lane, AC/DC Lane, and the Keith Haring mural. These areas are hubs for both emerging and established artists, showcasing a diverse range of styles and themes. The city’s street art scene is constantly evolving, with new works appearing regularly, making each visit unique. Many tours start at Flinders Street Station and wind through the central business district, highlighting the best murals and graffiti. Visitors can discover hidden gems like Caledonian Lane and Degraves Street, where art blends seamlessly with the urban landscape. The self-guided format lets you pause, admire, and photograph the works at your own pace. Whether you’re an art enthusiast or a casual observer, Melbourne’s street art offers a fascinating glimpse into the city’s creative soul. With maps and guides readily available, it’s easy to embark on a self-guided adventure and uncover the artistic treasures that make Melbourne a global street art capital.

Historical Landmarks and Monuments

Melbourne’s self-guided walking tours offer a chance to delve into the city’s rich history through its iconic landmarks and monuments. Visitors can explore magnificent structures like St. Paul’s Cathedral and the Shrine of Remembrance, which reflect Melbourne’s cultural and historical significance. The city’s parklands, such as the Royal Botanic Gardens, are also home to sculptures and monuments that tell stories of the past. Walking tours like “A Walk in the Park” and “Secret Gardens” provide a blend of history and natural beauty, allowing visitors to discover hidden gems. These tours are designed to guide walkers through Melbourne’s heritage sites, offering insights into the city’s development and cultural identity. With detailed maps and guides, self-guided tours make it easy to uncover Melbourne’s historical treasures at your own pace. Whether you’re interested in architecture, memorials, or scenic landscapes, the city’s landmarks and monuments provide a fascinating journey through time.

Self-guided walking tours in Melbourne offer a unique and flexible way to explore the city’s vibrant culture, rich history, and stunning landscapes. Whether you’re interested in street art, gardens, or historical landmarks, these tours provide an immersive experience at your own pace. With easy-to-follow maps and routes, visitors can craft their own adventures, discovering hidden gems and iconic sites. Melbourne’s self-guided tours are perfect for travelers who value independence and want to soak in the city’s atmosphere without rushed schedules. By combining cultural insights, practical tips, and scenic beauty, these tours ensure a memorable journey through one of Australia’s most captivating cities. So, grab your map, lace up your shoes, and embark on a self-guided adventure to uncover the best of Melbourne!

brivis nc1 wall controller manual pdf

The Brivis NC1 Wall Controller is a smart device designed to manage heating and cooling systems efficiently. It offers advanced features for temperature control, scheduling, and energy optimization. The manual provides detailed guidance for installation, operation, and troubleshooting, ensuring users can maximize its functionality and enjoy a comfortable environment year-round.

1.1 Overview of the Brivis NC1 Wall Controller

The Brivis NC1 Wall Controller is a sophisticated device designed to regulate and monitor heating, cooling, and ventilation systems. It provides users with precise temperature control, intuitive navigation, and real-time system feedback. The controller features a user-friendly interface with a high-resolution display, allowing seamless adjustment of settings. It supports advanced scheduling options, enabling users to customize their comfort levels throughout the day. Additionally, the NC1 offers energy-saving modes and smart integration capabilities, making it a versatile solution for modern homes. The device is compatible with various HVAC systems and can be easily mounted on any wall, ensuring convenient access. Its compact design and robust functionality make it an essential component for efficient climate control. The manual provides comprehensive instructions to help users unlock its full potential and troubleshoot common issues.

1.2 Key Features and Benefits

The Brivis NC1 Wall Controller offers a range of innovative features designed to enhance user experience and system efficiency. Its high-resolution display provides clear visibility of current settings and status updates. The controller includes advanced temperature control, allowing precise adjustments for optimal comfort. With intuitive navigation, users can easily access and modify settings. The NC1 also features programmable scheduling, enabling users to set custom temperature profiles for different times of the day. Energy-saving modes help reduce consumption, while smart integration capabilities allow compatibility with various HVAC systems. The controller’s compact design ensures seamless wall mounting, blending into any home decor. These features collectively ensure efficient climate control, energy efficiency, and a user-friendly interface, making the NC1 a versatile and practical solution for modern heating and cooling needs.

1.3 Importance of the Manual

The Brivis NC1 Wall Controller manual is an essential resource for users, providing comprehensive guidance on installation, operation, and troubleshooting. It ensures proper setup and configuration, maximizing the controller’s performance and efficiency. The manual details key features, helping users understand and utilize advanced functions effectively. It also includes safety precautions, warranty information, and maintenance tips, ensuring long-term reliability. By following the manual, users can optimize energy savings, customize settings, and resolve common issues quickly. This guide is crucial for both new and experienced users, offering clear instructions to enhance their overall experience with the Brivis NC1 Wall Controller. Referencing the manual regularly ensures users can fully leverage its capabilities, maintaining comfort and efficiency in their environment.

Installation of the Brivis NC1 Wall Controller

The manual provides step-by-step installation guidance, ensuring proper mounting, wiring, and setup. It outlines pre-installation requirements and configuration steps for a seamless and efficient installation process.

2.1 Pre-Installation Requirements

Before installing the Brivis NC1 Wall Controller, ensure compatibility with your HVAC system and verify all necessary tools are available. Check the wiring diagram in the manual to understand connections. Ensure the wall location is accessible and suitable for mounting. Power requirements must be confirmed to avoid electrical issues. Review the manual thoroughly to familiarize yourself with the installation process and safety precautions; Ensure all components, such as screws and brackets, are included in the package. Plan the installation time when the system is offline to prevent damage or interference. Following these steps ensures a smooth and safe installation process.

2.2 Mounting the Controller

MOUNTING the Brivis NC1 Wall Controller requires careful preparation to ensure proper installation. First, choose a suitable location on the wall, ideally at a comfortable height for easy access. Ensure the wall is sturdy and can support the controller’s weight. Use the provided screws and wall anchors to secure the mounting bracket firmly. Align the bracket straight using a spirit level to avoid tilting. Once the bracket is fixed, gently place the controller onto it, ensuring it clicks securely into place. Double-check the alignment and tighten the screws to prevent any movement. Finally, test the controller’s fit and ensure it is level before finalizing the installation. Proper mounting ensures reliable operation and longevity of the device.

2.3 Wiring and Electrical Connections

WIRING and electrical connections for the Brivis NC1 Wall Controller must be performed carefully to ensure safe and proper functionality. Begin by turning off the power supply to the system at the circuit breaker. Use the wiring diagram provided in the manual to identify the correct terminals for each connection. Connect the wires to the controller’s terminal block, ensuring they are securely fastened and not loose. Use the appropriate wire gauge as specified in the manual to prevent overheating or voltage drop. After completing the connections, turn the power back on and test the controller to ensure all functions operate correctly. If unsure, consult a licensed electrician to avoid potential hazards. Always refer to the manual for specific wiring requirements and safety precautions.

2.4 Initial Setup and Configuration

After mounting and wiring the Brivis NC1 Wall Controller, proceed with the initial setup and configuration. Power on the controller and follow the on-screen prompts to navigate through the menu. Set the time, date, and preferred temperature units (Celsius or Fahrenheit). Configure the controller to recognize your heating or cooling system type, ensuring compatibility. Use the navigation buttons to scroll through options and confirm settings. If connecting to a smart system, enter the Wi-Fi password or pair the device according to the manual’s instructions. Test the controller by adjusting the temperature and observing the system’s response. Refer to the manual for specific syntax or codes required during setup. Proper configuration ensures optimal performance and energy efficiency; If issues arise, restart the device or consult the troubleshooting section for guidance.

Operating the Brivis NC1 Wall Controller

Operating the Brivis NC1 Wall Controller is straightforward, with an intuitive interface for adjusting temperature, scheduling, and monitoring system performance. It ensures efficient and precise climate control.

3.1 Basic Operations and Navigation

Mastering the basic operations of the Brivis NC1 Wall Controller is essential for optimal performance. The controller features a user-friendly interface with a clear display and intuitive buttons. Users can easily adjust temperature settings, toggle between heating and cooling modes, and set daily schedules. Navigation is straightforward, with a menu-driven system that allows quick access to key functions. The display provides real-time feedback, showing current temperature, selected mode, and active settings. For new users, the manual recommends familiarizing yourself with the button layout and basic commands. Regularly checking the display for system status ensures smooth operation. By following these steps, users can efficiently manage their climate control system and maintain a comfortable environment with minimal effort.

3.2 Advanced Features and Settings

The Brivis NC1 Wall Controller offers advanced features to enhance your climate control experience. Users can access energy-saving modes, smart scheduling, and custom temperature profiles. The controller supports geofencing, learning your schedule to optimize heating and cooling. Advanced settings include humidity control, fan speed adjustment, and system diagnostics. The manual provides detailed instructions for configuring these features. For example, energy-saving mode reduces consumption during periods of inactivity, while smart scheduling adapts to your lifestyle. Custom profiles allow you to set specific conditions for different times of the day. These features ensure maximum comfort and efficiency. By exploring the advanced settings, users can tailor the system to their preferences and enjoy enhanced performance. Refer to the manual for step-by-step guidance on unlocking these capabilities.

3.3 Customizing Your Experience

The Brivis NC1 Wall Controller allows users to tailor their heating and cooling experience to suit their preferences. Customizable profiles enable you to set specific temperature levels for different times of the day or week. The controller also supports smart scheduling, where you can program settings in advance to maintain comfort without wasting energy. Additionally, users can adjust fan speeds, humidity levels, and even integrate with smart home systems for seamless control. The manual provides clear instructions on how to access and modify these settings. By customizing your experience, you can optimize comfort, reduce energy consumption, and enjoy a personalized climate control system. Explore the advanced customization options to create a system that perfectly aligns with your lifestyle and needs.

3.4 Understanding the Display and Indicators

The Brivis NC1 Wall Controller features an intuitive display designed to provide clear and essential information at a glance. The screen shows current temperature, selected mode (heating, cooling, or fan), and active settings. Various indicators, such as icons for Wi-Fi connectivity, schedule status, and error notifications, help users monitor the system’s operation. The display also highlights energy-saving modes and maintenance alerts, ensuring users stay informed about their system’s performance. By understanding these indicators, users can quickly identify system status, troubleshoot issues, and make adjustments as needed. The manual details each symbol and message, ensuring users can interpret the display accurately and take appropriate actions to maintain optimal comfort and efficiency.

Troubleshooting Common Issues

The Brivis NC1 Wall Controller may encounter issues like display malfunctions or connectivity problems. Refer to the manual for diagnostic steps, error code explanations, and reset procedures to resolve common faults efficiently.

4;1 Identifying Common Problems

Common issues with the Brivis NC1 Wall Controller include display malfunctions, connectivity problems, or unresponsive buttons. Users may also encounter errors like incorrect temperature readings or failed schedule executions. The manual provides a troubleshooting section to help identify these problems. It outlines potential causes, such as loose wiring, software glitches, or incorrect settings. Additionally, the manual lists error codes and their meanings, guiding users through diagnostic steps. For example, if the display is blank, it could indicate a power issue or faulty backlight. The manual advises checking the electrical connections and ensuring the controller is properly mounted. By following the troubleshooting guide, users can often resolve issues independently, reducing the need for professional assistance. Regular maintenance, such as updating software and cleaning the controller, can also prevent many common problems.

4.2 Error Codes and Their Meanings

The Brivis NC1 Wall Controller manual includes a detailed section on error codes, helping users understand and resolve issues quickly. Common error codes like E1 or E2 indicate specific problems, such as communication failures or sensor malfunctions. Each code is accompanied by a description and troubleshooting steps. For instance, E3 might signal a temperature sensor issue, while E4 could point to a power supply problem. The manual also provides guidance on how to clear codes and restart the system. Users are advised to consult the error code list before attempting repairs. This section ensures that even non-technical users can identify and address common issues effectively, minimizing downtime and ensuring optimal performance. Regularly reviewing this section can help users familiarize themselves with potential problems and their solutions.

4.3 Maintenance and Diagnostic Tips

Regular maintenance is crucial for ensuring the Brivis NC1 Wall Controller operates efficiently. Users should clean the touchscreen regularly to prevent dust buildup and ensure accurate touch responses. Checking wiring connections and electrical components periodically can help identify potential issues before they escalate. The manual recommends updating the controller’s software to the latest version for optimal performance. For diagnostics, the controller features a built-in mode that allows users to test system functionality and identify faults. Additionally, reviewing error logs and system event histories can provide insights into recurring issues. Performing a factory reset, as outlined in the manual, can resolve software-related problems. By following these maintenance and diagnostic tips, users can extend the lifespan of their controller and ensure seamless operation. Regular checks also help prevent unexpected malfunctions, keeping the system running smoothly year-round.

4.4 When to Contact a Professional

Regular maintenance is crucial for ensuring the Brivis NC1 Wall Controller operates efficiently. Users should clean the touchscreen regularly to prevent dust buildup and ensure accurate touch responses. Checking wiring connections and electrical components periodically can help identify potential issues before they escalate. The manual recommends updating the controller’s software to the latest version for optimal performance. For diagnostics, the controller features a built-in mode that allows users to test system functionality and identify faults. Additionally, reviewing error logs and system event histories can provide insights into recurring issues. Performing a factory reset, as outlined in the manual, can resolve software-related problems. By following these maintenance and diagnostic tips, users can extend the lifespan of their controller and ensure seamless operation. Regular checks also help prevent unexpected malfunctions, keeping the system running smoothly year-round.

The Brivis NC1 Wall Controller Manual

The Brivis NC1 Wall Controller manual is a comprehensive guide providing detailed instructions for installation, operation, and troubleshooting. Available as a PDF, it ensures seamless functionality and optimal performance.

5.1 How to Download the Manual

To download the Brivis NC1 Wall Controller manual, visit the official Brivis website and navigate to the “Support” or “Resources” section. Use the search bar to find “NC1 Wall Controller Manual” and select the PDF version. Ensure you verify the source for authenticity to avoid incorrect or outdated information. The manual is typically available for free and provides detailed instructions for installation, operation, and troubleshooting. It is essential to refer to the official manual for accurate guidance, as third-party sources may not offer the most reliable or up-to-date content. By following these steps, you can easily access the manual and gain a comprehensive understanding of your Brivis NC1 Wall Controller’s features and functionality.

5.2 Structure and Organization of the Manual

The Brivis NC1 Wall Controller manual is structured to provide clear and organized guidance for users. It begins with an introduction to the device, followed by detailed installation instructions, including pre-installation requirements and wiring guidelines. The manual then covers operational aspects, such as basic navigation, advanced features, and customization options. A dedicated section focuses on troubleshooting common issues, complete with error codes and diagnostic tips. The document also includes energy efficiency optimization strategies and integration options with smart home systems. Appendices provide technical specifications, warranty details, and contact information for support. The manual is designed to be user-friendly, with clear headings, diagrams, and tables to enhance understanding. Each section is logically sequenced to help users progress from setup to advanced operations seamlessly.

5.3 Key Sections to Focus On

The Brivis NC1 Wall Controller manual contains several essential sections that users should prioritize. The Installation chapter provides step-by-step guidance for mounting and wiring the controller, ensuring a smooth setup process. The Operating section explains how to navigate the interface, use advanced features, and customize settings for optimal performance. The Troubleshooting section is crucial for diagnosing and resolving common issues, complete with error codes and maintenance tips. Additionally, the Energy Efficiency section offers strategies to optimize settings for energy savings. Finally, the Integration chapter details how to connect the controller with smart home systems. Focusing on these sections ensures users can fully utilize the controller’s capabilities and troubleshoot effectively, making it a comprehensive resource for both setup and ongoing use.

Energy Efficiency and Optimization

The Brivis NC1 Wall Controller offers advanced energy-saving features, optimizing heating and cooling systems for maximum efficiency without compromising comfort, ensuring reduced energy consumption and lower utility bills.

6.1 Optimizing Settings for Energy Savings

The Brivis NC1 Wall Controller provides intuitive tools to optimize energy consumption while maintaining comfort. By adjusting temperature setpoints, scheduling operating times, and utilizing smart sensors, users can significantly reduce energy waste. The controller allows for programmable schedules, enabling precise control over heating and cooling cycles. Additionally, its adaptive learning capabilities automatically adjust settings based on usage patterns, ensuring efficient operation. Regularly reviewing and updating these settings can further enhance energy savings. For optimal results, users are encouraged to lower temperatures in winter and raise them in summer, leveraging the controller’s energy-saving modes. These features not only minimize energy bills but also contribute to a more sustainable and eco-friendly home environment.

6.2 Understanding Energy Usage Patterns

Understanding energy usage patterns is crucial for maximizing the efficiency of the Brivis NC1 Wall Controller. By analyzing your household’s heating and cooling habits, you can identify peak usage times and adjust settings accordingly. The controller provides detailed insights into energy consumption, helping you pinpoint areas where energy might be wasted. For instance, it highlights periods of high demand and suggests optimal temperature ranges to balance comfort and savings. Regularly reviewing these patterns allows you to refine your settings and adopt more energy-conscious behaviors. This data-driven approach empowers users to make informed decisions, reducing energy waste and lowering utility bills without compromising comfort. Over time, this understanding fosters a more sustainable and cost-effective approach to managing your home’s climate control system.

Integration with Smart Home Systems

The Brivis NC1 Wall Controller seamlessly integrates with popular smart home systems, enabling voice control and centralized management through platforms like Alexa or Google Assistant. This enhances convenience and automation, allowing users to adjust settings effortlessly alongside other smart devices for a unified home experience.

7.1 Compatibility with Smart Home Devices

The Brivis NC1 Wall Controller is designed to integrate seamlessly with various smart home devices, enhancing your home automation experience. It is compatible with popular platforms like Amazon Alexa and Google Assistant, allowing for voice control and centralized management of your heating and cooling system. This compatibility enables users to adjust temperatures, schedules, and modes effortlessly, alongside other smart devices. The controller also supports integration with smart thermostats and hubs, ensuring a unified and efficient home environment. By leveraging these integrations, users can enjoy advanced automation features, remote access, and energy-saving capabilities. The manual provides detailed steps for setting up these connections, ensuring a smooth and hassle-free experience. This compatibility makes the Brivis NC1 a versatile and modern solution for smart home enthusiasts.

7.2 Configuring Smart Home Integration

Configuring smart home integration with the Brivis NC1 Wall Controller is a straightforward process that enhances your system’s functionality. The manual provides step-by-step guidance to connect the controller with popular smart home platforms like Amazon Alexa and Google Assistant. Users can enable voice control, schedule automation, and integrate with other smart devices seamlessly. To begin, ensure the controller is connected to your home network and compatible with your smart home hub. Follow the manual’s instructions to link accounts, enable skills, and customize settings. Once integrated, you can control your heating and cooling system remotely, receive notifications, and optimize energy usage. The manual also offers troubleshooting tips for common issues during setup, ensuring a smooth and efficient integration process. This feature allows for a unified smart home experience, making it easier to manage your comfort and energy efficiency effortlessly.

Warranty and Support

The Brivis NC1 Wall Controller comes with a comprehensive warranty and dedicated support. It includes a 2-year warranty covering manufacturing defects and offers extensive customer support options, ensuring optimal performance and user satisfaction.

8.1 Understanding the Warranty Terms

The Brivis NC1 Wall Controller is backed by a comprehensive warranty program designed to protect your investment. The standard warranty typically covers manufacturing defects for a specified period, ensuring repairs or replacements are handled efficiently. Registration is often required to activate the warranty, and maintaining the product in accordance with the manual’s guidelines is essential for coverage. The warranty does not cover damage caused by improper installation, misuse, or unauthorized modifications. For detailed terms and conditions, refer to the official manual or contact Brivis support. Understanding the warranty ensures you can address any issues promptly and enjoy uninterrupted functionality of your wall controller.

8.2 Available Support Options

The Brivis NC1 Wall Controller offers comprehensive support options to ensure optimal performance and user satisfaction. Users can access detailed troubleshooting guides and FAQs through the official Brivis website or the manual. For technical assistance, Brivis provides customer support via phone, email, or live chat, available during business hours. Additionally, registered users can benefit from priority support and exclusive resources. The manual itself serves as a primary support tool, offering step-by-step instructions for installation, operation, and maintenance. For complex issues, Brivis recommends contacting certified professionals. Regular software updates are also available to enhance functionality and address potential bugs. By utilizing these support options, users can resolve issues efficiently and maintain their controller’s performance. Always refer to the manual or official Brivis channels for reliable assistance.

8.3 Registering Your Product

Registering your Brivis NC1 Wall Controller is a straightforward process that ensures you receive warranty benefits, software updates, and exclusive support. To register, visit the official Brivis website and navigate to the product registration section. You will need to provide your personal details, product serial number, and purchase information. Once registered, you gain access to extended warranty coverage, priority customer support, and notifications about firmware updates. Registration also helps Brivis provide tailored assistance and maintain accurate records for your device. Ensure to complete the registration process within the specified timeframe to avoid missing out on these advantages. Refer to the manual or Brivis website for step-by-step guidance on registering your NC1 Wall Controller effectively.

Best Practices for Usage

Regularly update software, maintain the controller, train users, and adjust settings to optimize performance and energy efficiency. Ensure compatibility with smart home systems for enhanced functionality.

9.1 Tips for Effective Usage

For optimal performance, regularly update the Brivis NC1 Wall Controller’s software and ensure proper installation. Train users on navigation and features to maximize efficiency. Adjust settings seasonally to balance comfort and energy savings. Schedule maintenance checks to prevent issues and extend lifespan. Use the manual as a reference for troubleshooting common problems. Customize settings to align with personal preferences and lifestyle. Monitor energy usage patterns to identify areas for optimization. Ensure compatibility with smart home systems for seamless integration. Keep the controller clean and free from dust for reliable operation. Refer to the manual for advanced features and settings to enhance your experience. By following these tips, users can enjoy a comfortable and energy-efficient environment year-round.

9.2 Regular Maintenance and Care

Regular maintenance is essential to ensure the Brivis NC1 Wall Controller operates efficiently and lasts longer. Clean the screen and buttons with a soft cloth to prevent dust buildup. Check for software updates and install them promptly to access new features and improvements. Inspect the wiring and connections periodically to avoid electrical issues. Replace batteries in wireless models when needed to maintain functionality. Schedule professional servicing annually to ensure optimal performance. Avoid exposing the controller to extreme temperatures or moisture. Mount the device securely to prevent damage from vibrations or accidental impacts. Train users to avoid excessive button presses, which can wear out components. Regular maintenance ensures reliable operation, energy efficiency, and a longer lifespan for the controller.

fisher and paykel auto sensing 7kg dryer manual

Welcome to the Fisher & Paykel Auto Sensing 7kg Dryer manual. This guide provides essential information to optimize performance‚ featuring auto-sensing technology‚ fabric care cycles‚ and energy efficiency.

1.1 Overview of the Fisher & Paykel Auto Sensing 7kg Dryer

The Fisher & Paykel Auto Sensing 7kg Dryer is a cutting-edge appliance designed for efficient and convenient laundry care. It features advanced auto-sensing technology that automatically detects moisture levels‚ ensuring clothes are dried to the selected dryness level without over-drying. With a spacious 7kg drum capacity‚ it accommodates large loads‚ making it ideal for families. The dryer offers multiple fabric care cycles‚ catering to delicate and heavy-duty fabrics alike. Its energy-efficient design reduces power consumption‚ aligning with eco-friendly practices. User-friendly controls and a robust build ensure reliability and longevity. This dryer combines innovation‚ practicality‚ and performance‚ making it a versatile solution for modern households.

1.2 Importance of the Manual for Optimal Performance

The Fisher & Paykel Auto Sensing 7kg Dryer manual is essential for achieving optimal performance and extending the lifespan of your appliance. It provides detailed guidance on installation‚ operation‚ and maintenance‚ ensuring you understand how to use advanced features like auto-sensing technology and multiple fabric care cycles effectively. The manual also offers troubleshooting tips and safety guidelines to prevent damage and ensure efficient energy use. By following the manual‚ you can avoid common issues‚ maintain the dryer’s energy efficiency‚ and enjoy consistent drying results. Referencing the manual ensures you maximize the appliance’s potential‚ making it a vital resource for both new and experienced users.

Key Features of the Fisher & Paykel Auto Sensing 7kg Dryer

Discover the Fisher & Paykel Auto Sensing 7kg Dryer’s key features‚ including advanced auto-sensing technology‚ multiple fabric care cycles‚ energy-efficient design‚ and a spacious 7kg drum capacity for convenient laundry solutions.

2.1 Auto-Sensing Technology Explained

The Fisher & Paykel Auto Sensing 7kg Dryer features advanced auto-sensing technology that automatically detects the moisture levels in your laundry. This innovative system continuously monitors the drying process‚ adjusting time and heat to ensure clothes are dried to the selected level without over-drying. By sensing when the load is dry‚ the dryer shuts off‚ saving energy and preventing damage to fabrics. This smart feature eliminates the guesswork of manual timers‚ ensuring optimal results for every cycle. It’s designed to adapt to different fabric types and load sizes‚ making it a convenient and efficient solution for all your drying needs.

2.2 Multiple Fabric Care Cycles

The Fisher & Paykel Auto Sensing 7kg Dryer offers multiple fabric care cycles designed to cater to various laundry needs. With 10 drying cycles‚ including options for delicate fabrics‚ wool‚ and heavily soiled items‚ this dryer ensures gentle yet effective drying. Each cycle is tailored to specific fabric types‚ preventing damage and maintaining the quality of your clothes. The dryer’s intelligent system adapts to the load‚ ensuring optimal care for every fabric. Whether it’s a fragile lingerie cycle or a robust heavy-duty cycle‚ the Fisher & Paykel dryer provides versatility and convenience‚ making it ideal for households with diverse laundry requirements.

2.3 Energy-Efficient Design

The Fisher & Paykel Auto Sensing 7kg Dryer is designed with energy efficiency in mind‚ offering eco-friendly performance. Its advanced sensor technology optimizes drying times by detecting moisture levels‚ reducing unnecessary energy consumption. This intelligent system ensures that the dryer operates only as long as needed‚ lowering your energy bills and environmental impact. Additionally‚ the dryer’s eco-mode further enhances energy savings by minimizing power usage during cycles. With a focus on sustainability‚ this appliance combines high performance with eco-conscious design‚ making it an ideal choice for environmentally aware households seeking to reduce their carbon footprint while enjoying efficient laundry drying.

2.4 Spacious 7kg Drum Capacity

The Fisher & Paykel Auto Sensing 7kg Dryer features a generously sized drum‚ accommodating large laundry loads with ease. This 7kg capacity is ideal for families‚ allowing you to dry bulky items like blankets or multiple garments in a single cycle. The drum’s spacious design ensures clothes move freely‚ promoting even drying and reducing wrinkles. Constructed from durable materials‚ such as stainless steel‚ the drum is built to withstand frequent use while maintaining gentle fabric care. This capacity‚ combined with the dryer’s advanced sensor technology‚ ensures efficient drying performance for both small and large loads‚ making it a practical solution for everyday laundry needs.

Installation and Setup Guide

Ensure proper installation by following the manual’s guidelines for venting‚ leveling‚ and electrical connections. Correct setup is crucial for optimal performance‚ safety‚ and energy efficiency.

3.1 Pre-Installation Requirements

Before installing the Fisher & Paykel Auto Sensing 7kg Dryer‚ ensure the location is well-ventilated and away from direct sunlight and moisture. Check that the floor is level and sturdy to support the appliance. Verify electrical connections match the dryer’s requirements‚ typically 230V‚ and ensure a dedicated circuit is available. Proper venting is essential for safe operation; use high-quality venting materials and follow local regulations. Measure the installation area to ensure the dryer fits comfortably. Refer to the manual for specific clearance requirements and safety guidelines to avoid installation issues. Proper preparation ensures efficient and safe operation of the dryer.

3.2 Step-by-Step Installation Instructions

Begin by carefully unpacking the dryer and ensuring all components are included. Position the dryer in a well-ventilated area‚ ensuring it is level and secure. Connect the power supply according to the manual’s specifications‚ typically requiring a 230V outlet. Install the venting system‚ ensuring it is properly sealed and meets local safety standards. Attach the vent hose to the dryer and secure it to an external vent. Double-check all connections for tightness and integrity. Finally‚ test the dryer by running a short cycle to ensure proper operation. Always follow the manufacturer’s guidelines for a safe and correct installation process.

3.3 Venting and Connectivity Options

The Fisher & Paykel Auto Sensing 7kg Dryer requires proper venting to ensure efficient operation and safety. Use a high-quality venting kit to connect the dryer to an external vent‚ ensuring minimal resistance and optimal airflow. The venting system should be installed according to local regulations and the manual’s guidelines. For connectivity‚ ensure the dryer is plugged into a dedicated 230V power outlet. Avoid using extension cords to maintain electrical safety. Proper venting and connectivity are crucial for energy efficiency‚ performance‚ and preventing potential hazards like lint buildup or carbon monoxide accumulation. Always follow the manufacturer’s recommendations for venting and electrical connections.

Operating the Fisher & Paykel Auto Sensing 7kg Dryer

Operating the Fisher & Paykel Auto Sensing 7kg Dryer is straightforward‚ thanks to its intuitive control panel and advanced features like auto-sensing technology‚ ensuring efficient and convenient drying.

4.1 Understanding the Control Panel

The Fisher & Paykel Auto Sensing 7kg Dryer features a user-friendly control panel designed for easy operation. The panel includes a range of buttons and an LCD display that guides you through the drying process. The auto-sensing technology is central to the control panel‚ allowing you to select your desired dryness level and letting the dryer automatically adjust the cycle. Additional options include multiple fabric care cycles‚ eco-mode‚ and customizable settings to suit different laundry needs.

By navigating the control panel‚ you can access advanced features like reverse tumbling and drying rack options. The interface is intuitive‚ ensuring a seamless experience for users of all skill levels. Refer to the manual for detailed instructions on utilizing each function effectively.

4.2 Selecting the Right Drying Cycle

Selecting the right drying cycle on your Fisher & Paykel Auto Sensing 7kg Dryer ensures optimal results for your laundry. The dryer offers multiple fabric care cycles‚ including delicate‚ normal‚ and heavy-duty options‚ catering to different fabric types and soil levels. The auto-sensing feature automatically adjusts drying times based on the load’s dryness‚ eliminating guesswork. For energy efficiency‚ the eco-mode reduces energy consumption while maintaining performance. Additionally‚ specialized cycles like wool and outdoor settings provide tailored care for specific fabrics. Always match the cycle to the laundry load to achieve the best drying results and protect your garments.

4.3 Using the Auto-Sensing Feature

The Fisher & Paykel Auto Sensing 7kg Dryer’s auto-sensing feature simplifies laundry by automatically detecting moisture levels and adjusting drying times. This technology ensures clothes are dried to the selected dryness level without over-drying‚ saving energy and protecting fabrics. To use it‚ select your desired dryness level‚ start the cycle‚ and let the sensor take over. The dryer will stop once the clothes reach the set dryness‚ eliminating guesswork. This feature is especially useful for delicate or mixed loads‚ ensuring optimal results every time. Refer to your manual for specific settings and model details‚ like the DE7060G2‚ to maximize this convenient feature.

4.4 Loading and Unloading the Dryer

Proper loading and unloading techniques ensure efficient drying and prevent damage to your Fisher & Paykel Auto Sensing 7kg Dryer. Always load clothes loosely‚ avoiding overfilling‚ to allow air circulation. Separate delicate fabrics from heavier items and remove loose items like coins to prevent damage. When unloading‚ remove clothes immediately to avoid wrinkles and musty odors. Check pockets for small objects and ensure the dryer filter is cleaned regularly for optimal performance. The auto-sensing feature stops the dryer once clothes are dry‚ so unloading promptly helps maintain fabric quality and reduces energy use. Refer to your manual for specific loading guidelines tailored to your model‚ such as the DE7060G2.

Maintenance and Troubleshooting

Regularly clean the dryer filter and vent to ensure optimal performance. Check for blockages and ensure proper ventilation. Refer to the manual for troubleshooting common issues efficiently.

5.1 Regular Maintenance Tips

Regular maintenance ensures your Fisher & Paykel Auto Sensing 7kg Dryer operates efficiently. Clean the dryer filter after each use to prevent lint buildup and improve airflow. Check the venting system regularly for blockages‚ as obstructed vents can reduce performance and increase energy consumption. Ensure the dryer is installed on a level surface to prevent vibration and noise. Refer to the manual for specific maintenance schedules and guidelines. Proper care extends the appliance’s lifespan and maintains optimal drying performance. Always follow the manufacturer’s recommendations for cleaning and inspections to avoid potential issues and ensure safety.

5.2 Common Issues and Solutions

Common issues with the Fisher & Paykel Auto Sensing 7kg Dryer include poor drying performance‚ excessive noise‚ or error codes. If clothes aren’t drying properly‚ check the filter for blockages and ensure the venting system is clear. Noise issues may indicate an uneven installation or debris in the drum. Refer to the manual for troubleshooting error codes‚ as they often indicate specific problems like sensor malfunctions or overheating. Regularly cleaning the filter and ensuring proper ventilation can prevent many issues. For unresolved problems‚ consult the troubleshooting section or contact Fisher & Paykel customer support for assistance. Proper maintenance and timely repairs ensure optimal performance.

5.3 Cleaning the Dryer Filter and Vent

Regular cleaning of the dryer filter and vent is essential for maintaining optimal performance and safety. The filter should be removed and cleaned after each use to prevent lint buildup‚ which can reduce efficiency and pose a fire risk. Gently brush or rinse the filter with water to remove debris. The venting system should also be inspected and cleaned periodically to ensure proper airflow. Use a vacuum or specialized brush to remove lint accumulation in the vent hose and exterior vent. Cleaning these components regularly helps prevent overheating‚ improves drying times‚ and ensures your dryer operates efficiently and safely. Always refer to the manual for specific cleaning instructions.

Energy Efficiency and Eco-Friendly Features

The Fisher & Paykel Auto Sensing 7kg Dryer features energy-efficient design and auto-sensing technology‚ optimizing energy consumption while ensuring eco-friendly performance for your laundry needs.

6.1 Energy-Saving Benefits

The Fisher & Paykel Auto Sensing 7kg Dryer offers significant energy-saving benefits through its advanced auto-sensing technology. This feature detects moisture levels and automatically adjusts drying times‚ ensuring clothes are dried efficiently without over-drying. By optimizing energy consumption‚ the dryer reduces utility bills and minimizes environmental impact. Additionally‚ the eco-mode further enhances energy efficiency‚ making it an eco-friendly choice for households. The combination of smart sensors and energy-efficient design ensures that the dryer operates at peak performance while maintaining low energy consumption. This makes it an ideal option for those seeking to reduce their carbon footprint and lower energy costs.

6.2 Eco-Mode and Low Energy Consumption

The Fisher & Paykel Auto Sensing 7kg Dryer features an Eco-Mode designed to minimize energy consumption while maintaining optimal drying performance. This mode ensures that the dryer operates at lower energy levels without compromising efficiency‚ making it an eco-friendly choice. By utilizing advanced sensor technology‚ the dryer adjusts heat and cycle duration to reduce energy usage further. The combination of Eco-Mode and auto-sensing technology ensures that clothes are dried efficiently‚ reducing both energy bills and environmental impact. This eco-conscious design makes the dryer an excellent option for households aiming to reduce their carbon footprint while enjoying reliable and efficient laundry results.

Safety Precautions and Guidelines

Ensure the dryer is installed and operated as per guidelines to avoid hazards. Keep children away‚ avoid flammable materials‚ and follow electrical safety standards for safe usage.

7.1 General Safety Tips

Always follow safety guidelines when using the Fisher & Paykel Auto Sensing 7kg Dryer. Ensure proper installation and venting to prevent fire hazards. Avoid placing flammable materials near the dryer and never leave it unattended during operation. Keep children away from the dryer‚ as they may accidentally start it or get injured. Regularly clean the lint filter to maintain efficiency and safety. Do not overload the dryer‚ as this can cause damage or pose a fire risk. Check pockets for flammable items like matches or lighters before drying. Never dry wet items that have been in contact with flammable substances. Refer to the manual for specific safety guidelines.

7.2 Child Safety Features

The Fisher & Paykel Auto Sensing 7kg Dryer includes child safety features to ensure safe operation. A child safety lock prevents accidental start or interruption of the dryer‚ protecting children from potential harm; The secure control panel ensures that settings cannot be altered by young users. Additionally‚ the dryer is designed with a cool-touch exterior to avoid burns. Parents are advised to supervise children near the appliance and teach them proper usage. Regularly cleaning the lint filter and ensuring proper venting also contribute to a safer environment. Always follow the manual’s guidelines for maintaining child safety while operating the dryer.

7.3 Electrical Safety Considerations

Ensure the Fisher & Paykel Auto Sensing 7kg Dryer is installed and operated according to electrical safety guidelines. Use a dedicated 230V power supply and avoid overloading circuits. Keep the dryer away from water to prevent electrical hazards. Never use damaged power cords or plugs‚ as this can lead to electrical fires. Avoid DIY repairs and only allow licensed technicians to service the appliance. Regularly inspect the power cord and ensure proper grounding. Always follow the manual’s electrical safety recommendations to maintain a safe operating environment and prevent potential risks.

User Manual Specifics

The Fisher & Paykel Auto Sensing 7kg Dryer manual is a comprehensive guide detailing features‚ installation‚ operation‚ and maintenance. It ensures optimal use and troubleshooting of the appliance.

8.1 Understanding the Manual Layout

The Fisher & Paykel Auto Sensing 7kg Dryer manual is structured to provide clear‚ organized information. It begins with an overview of the appliance‚ followed by detailed installation and setup instructions.

The manual is divided into sections‚ including operation‚ maintenance‚ and troubleshooting. Each section is designed to guide users through specific tasks‚ ensuring optimal performance and longevity of the dryer.

Additional features like a table of contents and index make navigation easy. The manual also includes model-specific details‚ ensuring users can quickly find relevant information tailored to their appliance.

Visual aids‚ such as diagrams and charts‚ complement the text‚ offering a comprehensive understanding of the dryer’s features and functions. This layout ensures users can efficiently utilize the manual for any need.

8;2 Navigating the Installation Guide

The installation guide section of the Fisher & Paykel Auto Sensing 7kg Dryer manual is designed to simplify the setup process. It begins with pre-installation requirements‚ ensuring users prepare their space and tools adequately.

Detailed step-by-step instructions guide users through unpacking‚ positioning‚ and leveling the dryer. Clear diagrams and descriptions help with venting options and electrical connections‚ ensuring a safe and proper setup.

The guide emphasizes the importance of correct installation for optimal performance and safety. By following each step carefully‚ users can ensure their dryer operates efficiently from the start.

Additional tips are provided for checking the venting system and ensuring proper electrical connections‚ making the process straightforward even for first-time users.

8.3 Operation and Maintenance Sections

The operation section of the Fisher & Paykel Auto Sensing 7kg Dryer manual provides clear instructions for using the appliance effectively. It explains how to navigate the control panel‚ select drying cycles‚ and utilize the auto-sensing feature for optimal results.

Maintenance tips are also included to ensure longevity. Regular cleaning of the filter and vent is emphasized to maintain efficiency and safety. The manual offers troubleshooting advice for common issues‚ helping users resolve problems quickly.

By following the guidelines‚ users can enjoy energy-efficient performance and extend the life of their dryer. The section is designed to be user-friendly‚ ensuring seamless operation and maintenance.

8.4 Troubleshooting and FAQs

The troubleshooting section of the Fisher & Paykel Auto Sensing 7kg Dryer manual addresses common issues users may encounter. It provides solutions for error codes‚ uneven drying‚ and noise problems‚ ensuring quick resolution.

  • Check the filter and vent for blockages if clothes aren’t drying properly.
  • Ensure the dryer is level to avoid vibration and noise.
  • Refer to the error code list for specific fault diagnoses.

Frequently Asked Questions cover topics like cycle times‚ energy consumption‚ and maintenance. This section helps users troubleshoot independently‚ minimizing downtime and ensuring optimal performance.

Additional Resources and Support

Welcome to the Fisher & Paykel Auto Sensing 7kg Dryer manual.
Access the manual online‚ explore customer support options‚ and join online forums for community assistance and expert advice.

9.1 Downloading the Manual Online

Downloading the Fisher & Paykel Auto Sensing 7kg Dryer manual is convenient and straightforward. Visit the official Fisher & Paykel website or authorized portals to access the PDF version. Models like DE7060P2 and DE7060G2 are readily available‚ ensuring you find the exact guide for your appliance. The manual includes detailed installation instructions‚ operation tips‚ and troubleshooting advice. Regularly check for updates to ensure you have the latest version. This resource is essential for understanding features like auto-sensing technology and energy-efficient settings. Download now to explore comprehensive guides‚ FAQs‚ and expert recommendations for optimal dryer performance and maintenance.

9.2 Customer Support and Service Centers

Fisher & Paykel offers comprehensive customer support to ensure a seamless experience with your Auto Sensing 7kg Dryer. Their dedicated support team is available via phone‚ email‚ or live chat to address queries and concerns. For hands-on assistance‚ visit one of their authorized service centers located across various regions. These centers are equipped with skilled technicians who provide expert repairs and maintenance using genuine parts. Additionally‚ the official Fisher & Paykel website offers a support section with FAQs‚ troubleshooting guides‚ and contact details. Whether you need installation help or repair services‚ Fisher & Paykel’s customer support and service centers are designed to provide prompt and reliable assistance.

9.3 Online Communities and Forums

Engage with Fisher & Paykel’s online communities and forums to connect with other users‚ share experiences‚ and gain insights. These platforms offer valuable tips‚ troubleshooting advice‚ and real-user feedback about the Auto Sensing 7kg Dryer. Many forums feature discussions on optimal usage‚ maintenance‚ and resolving common issues. Additionally‚ official Fisher & Paykel forums provide direct interaction with experts and enthusiasts. These communities are a great resource for learning how to maximize your dryer’s performance and address any concerns. By participating‚ you can access a wealth of knowledge and support from a vibrant and helpful community dedicated to enhancing your laundry experience.