Category title

Autem vel eum iriure dolor in hendrerit in vulputate velit esse molestie consequat, vel illum dolore eu feugiat nulla facilisis at vero eros et dolore feugait.

Category Archive Instructions

laser hair removal instructions

Laser hair removal is a modern technique using controlled laser pulses for long-term hair reduction. It requires multiple sessions for optimal results, ensuring safety and effectiveness with a qualified practitioner.

What is Laser Hair Removal?

Laser hair removal is a medical procedure using a concentrated beam of light to target and remove unwanted hair. The laser emits controlled pulses of energy, which are absorbed by hair follicles, damaging them to reduce future growth. It is most effective on hair in the active growth phase, requiring multiple sessions for optimal results. The process is tailored to individual needs, ensuring safety and effectiveness. A qualified practitioner performs the treatment, making it a popular choice for long-term hair reduction.

Benefits of Laser Hair Removal

Laser hair removal offers numerous benefits, including long-term hair reduction, smooth skin, and reduced need for frequent shaving or waxing. It is precise, targeting only unwanted hair while leaving surrounding skin undamaged. The procedure is faster than traditional methods, especially for larger areas, and reduces ingrown hairs and skin irritation. Over time, it saves time and money, making it a convenient and effective solution for those seeking permanent hair reduction. Results are noticeable after a few sessions, providing a confident, hair-free appearance.

Step 1: Consultation

The consultation is the first step, where you discuss your hair removal goals, medical history, and allergies. This helps determine eligibility and set realistic expectations for treatment.

Importance of Initial Consultation

The initial consultation is crucial for understanding your hair removal goals and ensuring a safe, effective treatment. It allows your practitioner to assess your skin and hair type, discuss medical history, and address any concerns. This step helps tailor the procedure to your needs, ensuring realistic expectations and minimizing risks. Open communication during the consultation is key to achieving the best possible results and building trust with your practitioner.

Determining Eligibility

Determining eligibility for laser hair removal involves assessing medical history, allergies, and skin conditions. Certain medications, like Accutane, or conditions may make the procedure unsuitable. Your practitioner will evaluate factors such as skin tone, hair color, and texture to ensure safe treatment. This step helps identify potential risks and ensures the procedure is tailored to your needs. Eligibility is crucial for achieving optimal results and minimizing side effects, ensuring the treatment is both effective and safe for your specific situation.

Discussing Medical History and Allergies

During the consultation, it’s essential to discuss your medical history and allergies to ensure safe treatment. Inform your practitioner about any medical conditions, previous surgeries, or allergies to avoid complications. Certain medications, such as Accutane, may require a waiting period before treatment. Openly sharing this information helps tailor the procedure to your needs and prevents potential risks. This step ensures your safety and the effectiveness of the laser hair removal process, making it a critical part of the initial consultation.

Setting Realistic Expectations

Setting realistic expectations is crucial for satisfaction with laser hair removal results. Most individuals require 6-8 sessions for optimal hair reduction, as hair grows in phases. Results vary based on skin type, hair texture, and color. While significant reduction is common, some maintenance may be needed. It’s important to understand that laser hair removal is not always 100% permanent but offers long-term hair reduction. Managing expectations ensures a positive experience and helps align outcomes with individual goals, fostering patience and commitment throughout the process.

Step 2: Preparation

Preparation is key for safe and effective laser hair removal. Stop using depilatory creams 3-4 weeks prior and avoid sun exposure. Shave the area 12-24 hours before treatment and refrain from using skincare products on the day of the procedure to ensure optimal results and minimize risks.

Stopping Depilatory Creams and Other Hair Removal Methods

Discontinue depilatory creams and other hair removal methods like waxing or plucking 3-4 weeks before treatment. These can irritate the skin or interfere with laser effectiveness. Avoid chemical-based products, as they may cause adverse reactions. Shaving is permitted but ensure the hair is not too long, as this can increase heat intensity during the procedure. Stopping these methods ensures a smoother, safer process and better results. Adhering to this step is crucial for optimal outcomes and minimizing potential side effects.

Avoiding Sun Exposure

Avoiding sun exposure is crucial before and after laser hair removal to prevent complications. Prolonged sun exposure can increase the risk of side effects like skin darkening or burns. Stay out of direct sunlight for at least two weeks prior to treatment and use a broad-spectrum sunscreen with high SPF. Protective clothing, such as hats and long sleeves, can also help shield your skin. This precaution ensures your skin remains sensitive enough for the laser to target hair effectively, promoting safer and more even results.

Shaving Before Treatment

Shaving before laser hair removal is essential for optimal results. It is recommended to shave the treatment area 12-24 hours prior to your session. This ensures the hair is short enough for the laser to target the follicle effectively, reducing the risk of skin irritation. Avoid leaving hair too long, as it can cause discomfort during the procedure. Proper shaving helps the laser penetrate evenly, leading to better outcomes and minimizing potential side effects. Always follow your practitioner’s specific instructions for shaving to prepare your skin correctly for the treatment.

Avoiding Skincare Products on the Day of Treatment

Avoiding skincare products on the day of laser hair removal is crucial for a safe and effective procedure. Refrain from using lotions, creams, or deodorants on the treatment area, as these can interfere with the laser’s ability to target hair follicles. Certain products may contain ingredients that could cause skin irritation or affect the laser’s performance. Ensure the skin is clean and free of any products to allow the laser to work efficiently. Following this guideline helps minimize potential side effects and ensures optimal results from your treatment.

Step 3: Treatment

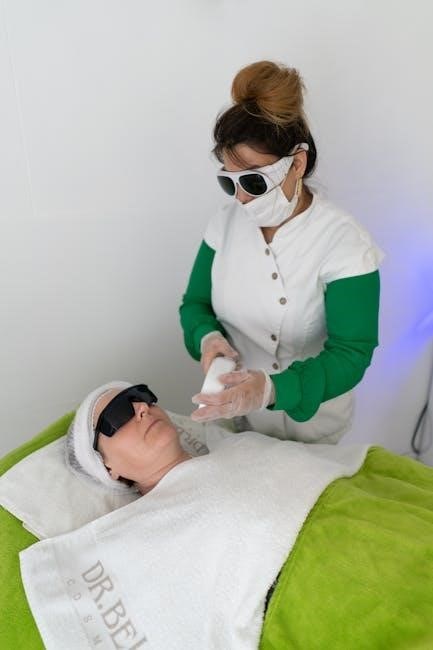
During laser hair removal, a concentrated light beam targets hair follicles. A practitioner guides the laser, ensuring precision. Topical anesthetic may be applied for comfort. The procedure duration varies depending on the area being treated.

How the Laser Hair Removal Procedure Works

Laser hair removal uses a concentrated beam of light to target and destroy hair follicles. The laser emits pulses of energy that are absorbed by the pigment in the hair, heating the follicle and preventing future growth. The procedure is typically performed in a clinical setting by a trained practitioner. The laser is guided over the treatment area, and a cooling device may be used to minimize discomfort. The process is precise, targeting only the hair follicle while leaving surrounding skin undamaged. This method ensures long-term hair reduction with minimal risk of complications when performed correctly.

Use of Topical Anesthetic

A topical anesthetic may be applied before the laser hair removal procedure to reduce discomfort. This cream helps numb the skin, making the treatment more tolerable. It is typically applied 30 minutes to an hour before the session. While it minimizes pain, it doesn’t completely eliminate discomfort. The anesthetic is especially useful for sensitive areas. However, its effectiveness can vary depending on individual pain thresholds. Always follow your practitioner’s instructions regarding its use to ensure safety and optimal results during the procedure.

Duration of the Procedure

The duration of a laser hair removal session varies depending on the size of the treatment area. Small areas, like the underarms or bikini line, may take only a few minutes, while larger areas, such as the legs or back, can take up to an hour. The procedure time also depends on hair thickness and skin type. Each session is typically spaced 4-6 weeks apart to target hair in the active growth phase. Overall, the process is efficient, with most sessions completed within 30 minutes to an hour, ensuring a smooth and timely experience for patients.

Step 4: Aftercare

Proper aftercare ensures healing and results. Avoid sun exposure, moisturize daily, and follow practitioner instructions for optimal recovery and long-term hair reduction outcomes.

Immediate Post-Treatment Care

After laser hair removal, avoid sun exposure and apply cold compresses to reduce discomfort or swelling. Gently cleanse the treated area with mild soap and lukewarm water. Avoid harsh skincare products, exfoliating, or tight clothing for 24-48 hours. Moisturize to soothe and hydrate the skin. Follow your practitioner’s specific instructions to promote healing and prevent complications. Proper care ensures optimal results and minimizes side effects, supporting the skin’s recovery process effectively.

Protecting Skin from Sun Exposure

Protecting your skin from sun exposure is crucial before and after laser hair removal. Avoid direct sunlight for at least 7-10 days post-treatment and use a broad-spectrum sunscreen with SPF 30 or higher. Wear protective clothing, such as hats and long sleeves, when outdoors. Tanning beds should also be avoided, as UV exposure can increase the risk of complications like hyperpigmentation. Proper sun protection ensures optimal healing, prevents side effects, and maintains the effectiveness of your laser hair removal treatment.

Moisturizing the Treated Area

Moisturizing the treated area is essential for soothing and hydrating the skin after laser hair removal. Use a gentle, fragrance-free moisturizer to prevent dryness and irritation. Avoid products containing retinol, exfoliants, or harsh chemicals for at least 24-48 hours post-treatment. Apply moisturizer as directed by your practitioner to promote healing and maintain skin health. Proper hydration helps reduce the risk of side effects like redness or dry patches, ensuring a smoother recovery and better treatment outcomes.

Follow-Up Appointments

Follow-up appointments are crucial for achieving optimal results in laser hair removal. Typically, multiple sessions are needed, spaced 4-6 weeks apart, to target hair in different growth phases. Your practitioner will schedule these based on your hair type and treatment area. Consistency is key to ensuring long-term hair reduction. Attend all recommended sessions to maximize effectiveness and maintain desired outcomes. Skipping appointments may lead to uneven results or the need for additional treatments. Adhere to your practitioner’s schedule for the best experience and results.

Step 5: Follow-Up Treatments

Follow-up treatments are essential for optimal results, typically spaced 4-6 weeks apart. Consistency ensures all hair follicles are targeted during their active growth phase, achieving long-term reduction.

Why Multiple Sessions Are Necessary

Laser hair removal requires multiple sessions because hair grows in different phases. The laser targets hair in the active growth phase, while dormant hairs remain unaffected. Since only a fraction of hair follicles are active at any time, several treatments are needed to ensure all hairs are addressed. Consistency is key for achieving long-term reduction, with sessions typically spaced 4-6 weeks apart to maximize effectiveness and minimize regrowth.

Scheduling Follow-Up Treatments

Follow-up treatments are essential for achieving optimal results in laser hair removal. Sessions are typically scheduled every 4-6 weeks to target hair follicles during their active growth phase. Consistency is crucial, as hair grows in cycles, and only a portion is removable in each session. Your practitioner will help determine the best schedule based on your hair type, growth patterns, and treatment area. Regular follow-ups ensure gradual reduction and long-term success, with most patients requiring 6-9 treatments for desired outcomes.

At-Home Laser Hair Removal

At-home laser hair removal offers convenience with devices like ULike Air 10 and Kenzzi, providing pain-free sessions. They are cost-effective but require careful use to ensure safety and effectiveness.

Pros and Cons of At-Home Devices

At-home laser hair removal devices, like ULike Air 10 and Kenzzi, offer convenience and cost-effectiveness. They are pain-free, easy to use, and provide long-term results. However, effectiveness varies based on skin and hair type. Some users report inconsistent results, and multiple sessions are often needed. Proper use is crucial to avoid skin irritation. While these devices are more affordable than professional treatments, they may lack the potency of clinical-grade lasers, making them less efficient for coarse or thick hair. Following guidelines ensures safety and maximizes outcomes.

Popular At-Home Laser Hair Removal Devices

Popular at-home devices include the ULike Air 10, known for its pain-free and easy-to-use design, and the Kenzzi laser hair removal device, which offers a 50% discount with specific codes. These devices use IPL technology, providing long-term hair reduction with proper use. They are often recommended for their affordability and convenience, allowing users to achieve professional-like results in the comfort of their homes. Many users praise these devices for their effectiveness, though results may vary based on hair and skin type. They are a great option for those seeking a cost-effective, DIY solution.

Safety and Considerations

Laser hair removal requires careful consideration of risks, such as skin irritation or burns. It’s essential to avoid sun exposure and choose a qualified practitioner to ensure safety and optimal results.

Risks and Side Effects

Common side effects of laser hair removal include mild skin irritation, redness, and temporary discomfort. Rare risks involve burns, blisters, or changes in skin pigmentation, especially in darker skin tones. Proper preparation, such as avoiding sun exposure and following pre-treatment guidelines, minimizes these risks. Choosing an experienced practitioner and using appropriate laser settings further reduces complications. Most side effects are temporary, resolving within a few days. Severe reactions are uncommon but highlight the importance of adhering to aftercare instructions and attending follow-up appointments.

Who Should Avoid Laser Hair Removal

Individuals with certain medical conditions, such as porphyria or active skin infections, should avoid laser hair removal. Those taking photosensitizing medications, like Accutane, or with a history of keloid scarring may also be ineligible. Pregnant or breastfeeding women are often advised against it due to hormonal changes. People with darker skin tones or tanned skin face higher risks of pigmentation changes. Additionally, those with tattoos or moles in the treatment area should avoid laser hair removal, as it can cause complications or interfere with results.

Importance of Choosing a Qualified Practitioner

Choosing a qualified practitioner is crucial for safe and effective laser hair removal; A licensed professional ensures proper technique, minimizing risks like burns or uneven results. They assess eligibility, adjust laser settings for skin type, and provide personalized care. Inexperienced practitioners may lead to complications or poor outcomes. Always opt for established medspas or clinics with a proven track record to ensure a smooth and successful treatment experience.

Cost and Financing

Laser hair removal costs vary based on treatment area, sessions needed, and location. Financing options and payment plans are often available to make the procedure affordable.

Factors Affecting the Cost of Laser Hair Removal

The cost of laser hair removal varies based on the size of the treatment area, number of sessions required, and location. Larger areas like the back or legs cost more than smaller areas such as the underarms. The number of sessions needed, typically 6-8 for optimal results, also impacts the total cost. Additionally, the expertise of the practitioner and the clinic’s location can influence pricing. Financing options are often available to help manage the expense, making the procedure more accessible for individuals seeking long-term hair reduction.

Payment Options and Financing

Many clinics offer flexible payment options to make laser hair removal accessible. Financing plans, credit card payments, and package deals are common. Some providers allow splitting costs into installments, while others offer discounts for multiple sessions. Additionally, pre-payment options for full treatment packages can reduce overall expenses. It’s important to discuss payment methods with your practitioner during the consultation to find a plan that suits your budget and needs.

Step-by-Step Guide

From consultation to post-treatment care, laser hair removal involves preparation, treatment, and follow-up sessions. Each step ensures safety, effectiveness, and optimal results for long-term hair reduction.

From Consultation to Post-Treatment Care

The process begins with a consultation to discuss goals and eligibility. Preparation involves stopping depilatory creams, avoiding sun exposure, and shaving before treatment. During the procedure, a laser targets hair follicles, and topical anesthetics may be used for comfort. After treatment, the skin is sensitive, requiring careful aftercare, such as avoiding sun exposure and moisturizing. Follow-up appointments are essential for maintaining results, as multiple sessions are typically needed. Proper care ensures optimal outcomes and minimizes side effects, leading to long-term hair reduction.

Maintenance and Results

Laser hair removal offers long-term reduction, requiring follow-up treatments for optimal results. Proper skincare and sun protection maintain smooth skin, ensuring lasting effectiveness and minimizing regrowth.

Long-Term Hair Reduction

Laser hair removal provides long-term hair reduction by targeting follicles during the active growth phase. Over several sessions, the laser’s energy damages the root, reducing regrowth significantly. While not permanent, results can last for years with proper maintenance. Patients typically experience smoother skin and finer, lighter hair over time. To maintain optimal results, follow-up treatments are recommended, ensuring continued hair reduction and preventing regrowth. This method is highly effective for achieving a more permanent solution to unwanted hair, offering both convenience and aesthetic benefits.

Maintaining Results

To maintain the results of laser hair removal, follow-up treatments are essential. Protecting the skin from sun exposure and using gentle skincare products helps preserve outcomes. Avoiding harsh hair removal methods like waxing ensures the treated area remains smooth. Touch-ups may be needed to address any regrowth, especially in areas with hormonal hair growth. While results are long-lasting, they may not be permanent, and annual maintenance sessions can help sustain hair reduction. Proper aftercare and consistent follow-ups are key to enjoying lasting benefits from the procedure.

Common Misconceptions

A common myth is that laser hair removal is permanent, but it reduces hair growth significantly. Another misconception is that it’s painful, though modern lasers minimize discomfort.

Myths About Laser Hair Removal

One common myth is that laser hair removal is painful, but modern lasers often include cooling systems to minimize discomfort. Another misconception is that it works instantly; multiple sessions are typically needed for optimal results. Some believe it’s only for certain skin types, but advancements now cater to various tones. Additionally, it’s often thought to be permanent, but maintenance sessions may be required; Lastly, many think it’s only for women, but men also benefit from this effective hair reduction method.

Laser hair removal is a safe and effective solution for long-term hair reduction, offering convenience and precision; By following proper steps and aftercare, it delivers lasting results.

Final Thoughts on Laser Hair Removal

Laser hair removal is a highly effective and long-lasting solution for unwanted hair, offering convenience and precision. By adhering to pre- and post-treatment guidelines and selecting a qualified practitioner, individuals can achieve smooth, hair-free skin with minimal discomfort. While it requires multiple sessions, the results are well worth the investment. Proper aftercare ensures optimal outcomes, making it a popular choice for those seeking a permanent reduction in hair growth.

Additional Resources

Explore reputable websites like the American Society of Plastic Surgeons for detailed guides. Check out devices like ULike Air 10 and Kenzzi for at-home solutions.

Recommended Reading and Websites

For detailed insights, visit the American Society of Plastic Surgeons (ASPS) and American Society for Dermatologic Surgery (ASDS) websites. Explore at-home devices like ULike Air 10 and Kenzzi, which offer discounts with promo codes. Check out Dr. Ghada Afifi’s website for a step-by-step guide to laser hair removal. These resources provide comprehensive information on procedures, safety, and maintenance, ensuring you make informed decisions about your hair removal journey.

api kh test instructions

The API KH test kit helps measure water hardness, crucial for aquarium health. It includes a test tube, KH solution, and manual. Add drops until water turns yellow to determine levels accurately.

1.1 What is KH and Why is it Important?

KH, or carbonate hardness, measures the concentration of bicarbonate and carbonate ions in water. It plays a critical role in maintaining water stability and preventing drastic pH swings, which can harm aquatic life. In aquariums, KH levels are essential for fish and plant health, as unstable water conditions can cause stress and disease. Proper KH levels help buffer the water, ensuring a stable environment for aquatic organisms to thrive. Monitoring KH is particularly important in freshwater aquariums, where water hardness can fluctuate due to evaporation or biological processes. By understanding and controlling KH, aquarists can create optimal water quality, promoting the well-being of their aquatic ecosystem. Regular testing with the API KH test kit is a reliable way to assess and maintain these critical water parameters.

1.2 Overview of the API KH Test Kit

The API KH test kit is a comprehensive tool designed to measure carbonate hardness in water. It includes a test tube, cap, KH test solution, and an instruction manual. The kit is user-friendly, providing clear step-by-step directions for accurate results. By adding one drop of the KH solution at a time and observing color changes, users can determine their water’s KH levels. The kit is widely used in aquarium maintenance to ensure optimal water conditions. Its simplicity and reliability make it a popular choice among aquarists. Regular use helps prevent water quality issues, ensuring a healthy environment for fish and plants. The API KH test kit is an essential tool for anyone looking to monitor and maintain stable water parameters effectively.

Components of the API KH Test Kit

The API KH test kit includes a test tube, cap, KH test solution, and an instruction manual. These components work together to measure water hardness accurately and effectively.

2.1 Test Tube and Cap

The test tube and cap are essential components of the API KH test kit. The test tube is specifically designed to hold the water sample and KH test solution. It is important to rinse the test tube with the water being tested before use to ensure accurate results. The cap is used to seal the tube during shaking, preventing any solution from spilling. Always handle the test tube and cap with clean hands to avoid contamination. The tube is marked with a line indicating the correct volume of water to use, ensuring precise measurements. Proper use of the test tube and cap is crucial for obtaining reliable KH readings. Follow the instructions carefully to maintain the integrity of the testing process and achieve accurate water hardness measurements.

2.2 KH Test Solution

The KH test solution is a critical component of the API KH test kit, designed to measure water hardness. It comes in a bottle and is used in conjunction with the test tube. To use the solution, add one drop at a time to the water sample in the test tube. Shake the tube gently after each drop and observe the color change. The solution reacts with the water, turning it from blue to yellow as the KH level is determined. The number of drops required to achieve the color change indicates the KH concentration. The solution is sensitive and precise, ensuring accurate readings. Proper storage in a cool, dark place is essential to maintain its effectiveness. Always follow the instructions provided to ensure reliable results and optimal water quality monitoring. The KH test solution is a vital tool for aquarium enthusiasts to maintain healthy aquatic environments.

2.3 Instruction Manual

The instruction manual is a key component of the API KH test kit, providing detailed guidance for accurate test results. It outlines step-by-step procedures, safety precautions, and troubleshooting tips. The manual explains how to prepare the test tube, add the KH solution, and interpret color changes. It also includes information on understanding KH levels and their impact on water quality. By following the manual, users can ensure precise measurements and maintain optimal water conditions. The manual is essential for both beginners and experienced users, offering clear instructions to avoid errors. It emphasizes the importance of regular testing to monitor water hardness and prevent potential issues. The manual’s clarity and comprehensiveness make it an indispensable resource for anyone using the API KH test kit to achieve accurate and reliable results. Proper use of the manual ensures the test kit’s effectiveness in maintaining healthy aquatic environments.

Preparing for the KH Test

Gather all materials, including the test tube, KH solution, and water sample. Rinse the test tube thoroughly with the water to be tested to ensure accurate results and prevent contamination.

3.1 Gathering Materials

To begin the KH test, gather all necessary materials. This includes the API KH test kit, which contains a test tube, KH test solution, and an instruction manual. Ensure the test tube is clean and dry. Collect a water sample from your aquarium or the source you wish to test. Rinse the test tube with a small amount of the water sample to prevent contamination. Carefully read the instruction manual to familiarize yourself with the testing process. The KH test solution is added drop by drop, so handle the dropper carefully to avoid touching the water surface. Having all materials ready ensures a smooth and accurate testing experience. Proper preparation is key to obtaining reliable results and maintaining optimal water quality for your aquarium. Follow the manual’s guidelines to avoid errors and ensure the test is conducted correctly.

3.2 Understanding the Testing Process

Understanding the testing process is essential for accurate KH measurement. The API KH test involves adding drops of KH test solution to a water sample until a color change occurs. Start by filling the test tube with water, then add one drop of KH solution, shake gently, and observe the color. Repeat this process until the water turns from blue to yellow, indicating the KH level. Each drop represents a specific KH value, so count the drops added to determine the hardness. The test is complete when the color change is permanent. This method ensures precise measurement of water hardness, which is vital for maintaining optimal aquarium conditions. Regular testing helps monitor water quality and prevent fluctuations that can stress aquatic life. By following the steps carefully, you can achieve reliable results and ensure a healthy environment for your fish and plants.

Step-by-Step Testing Instructions

Rinse the test tube with water, fill it to the mark, add KH solution drops one by one, and observe the color change. Count the drops to determine KH levels accurately.

4.1 Rinse the Test Tube

Rinsing the test tube is essential to ensure accurate results. Start by rinsing the tube with the water sample you intend to test. This step removes any residue or contaminants that might interfere with the test. Gently shake the tube to coat the interior with the water, then discard the water. Repeat this process to guarantee the tube is clean and free from any impurities. After rinsing, fill the test tube with the same water sample up to the marked line. This ensures consistency and prevents cross-contamination. Proper rinsing and preparation of the test tube are critical for obtaining reliable KH readings. Always use the water sample to be tested for rinsing to maintain accuracy. This step sets the foundation for the rest of the testing process, ensuring your results are precise and trustworthy.

4.2 Fill the Test Tube with Water

After rinsing, fill the test tube with the water sample to the marked line. Ensure the water level is precise to avoid inaccurate readings. Use the same water sample for rinsing and testing to maintain consistency. Fill the tube slowly to prevent bubbles, which can affect the test results. Once filled, hold the tube upright to verify the water level aligns with the indicator. If necessary, adjust by gently tilting or adding a small amount of water. Proper filling ensures the correct volume for testing, which is essential for accurate KH measurements. Avoid overfilling or underfilling, as this can lead to errors. This step is crucial for ensuring the test solution reacts properly with the water sample. Always double-check the water level before proceeding to the next step. Accurate filling sets the stage for reliable and precise test outcomes.

4.3 Adding KH Test Solution

Hold the KH test solution bottle vertically and add one drop at a time to the water in the test tube. After each drop, cap the tube and shake it gently for about 5 seconds. Wait a few seconds to observe the color change. If the water does not turn yellow, repeat the process, adding one drop at a time. Continue until the water sample changes to a stable yellow color, indicating the test is complete. Be careful not to add too much solution, as this can lead to inaccurate results. The number of drops required to reach the yellow endpoint will determine the KH level. Ensure each drop is added slowly and evenly to maintain precision. This step is critical for obtaining an accurate measurement of water hardness. Always follow the instructions carefully to avoid errors in the testing process.

4.4 Observing Color Changes

After adding the KH test solution, observe the color change in the water sample. The solution will react with the water, causing a visible shift in color. The initial color of the water will typically change from blue to yellow as the KH solution is added. Shake the test tube gently after each drop and wait a few seconds to allow the reaction to complete. Continue monitoring until the color stabilizes and no further changes occur. The endpoint is reached when the color remains consistent for about 30 seconds. Note the number of drops added to determine the KH level. Ensure the color is observed under natural light for accuracy. If the color does not stabilize, it may indicate very high KH levels, and testing should be stopped to avoid wasting reagents. Accurate observation is crucial for reliable results. Always compare the final color to the reference chart provided in the manual. This step ensures precise measurement of water hardness.

4.5 Determining KH Levels

Once the color change stabilizes, count the number of KH test solution drops added to the test tube. Each drop typically represents 1 dKH (degree of carbonate hardness). Refer to the instruction manual for the exact conversion rate. Match the final color of the water sample to the reference chart provided in the manual to determine the KH level. Ensure the color comparison is done under natural light for accuracy. If the color does not stabilize after several drops, it may indicate extremely high KH levels. Record the number of drops used and consult the chart to interpret the results. Avoid over-titrating, as this can lead to inaccurate readings. Accurate determination of KH levels is essential for maintaining optimal water quality and preventing fluctuations that can stress aquatic life. Regular testing helps monitor water hardness and ensure a stable environment for plants and animals. Always follow the manual’s guidelines for precise results.

Interpreting Test Results

Interpreting test results involves observing the color change and counting the drops added. Match the final color to the reference chart to determine KH levels accurately. This ensures optimal water conditions.

5.1 Understanding Color Changes

Understanding color changes is crucial for accurate KH testing. The API KH test solution changes color as drops are added, typically transitioning from blue to yellow. Each drop represents a specific KH level, so careful observation is key. Shake the test tube thoroughly after each drop to ensure even color distribution. The color change indicates the endpoint, signaling the test’s completion. Always compare the final color to the reference chart provided in the manual for precise measurement. Consistent lighting conditions, such as natural light, are recommended for accurate color matching. Avoid guessing; wait for a clear, stable color change before recording results. This step ensures reliable data for maintaining optimal water quality. By following these guidelines, users can interpret KH levels effectively and make informed decisions for their aquarium or water system. Accurate color interpretation is essential for reliable test outcomes.

5.2 Relating Results to Water Quality

Understanding the relationship between KH test results and water quality is vital for maintaining a healthy aquatic environment. KH, or carbonate hardness, measures the water’s ability to resist pH changes, ensuring stability. Higher KH levels provide a buffer against sudden pH drops, which can be harmful to aquatic life. Low KH levels may indicate unstable water conditions, potentially leading to stress on plants and animals. Accurate KH readings help determine the need for adjustments, such as adding buffering agents to stabilize pH. Regular testing ensures water quality remains optimal, preventing issues like algae blooms or fish stress. By monitoring KH levels, users can make informed decisions to maintain a balanced ecosystem. This data is especially critical in aquariums, where water parameters directly impact the health and well-being of aquatic organisms. Consistent testing and adjustments ensure a stable and thriving environment.

Applications of KH Testing

KH testing is essential for monitoring water hardness in aquariums and maintaining optimal conditions. It helps prevent stressful changes in water chemistry, ensuring a stable environment for aquatic life to thrive.

6.1 Monitoring Water Hardness in Aquariums

Monitoring water hardness in aquariums is crucial for maintaining a stable environment for aquatic life. The API KH test kit helps measure carbonate hardness, which affects water stability and pH levels. By regularly testing KH levels, aquarium owners can prevent sudden changes that may stress fish or disrupt biological balance. The test involves filling a tube with aquarium water and adding KH solution drops until the water turns yellow. This process provides accurate readings to ensure optimal conditions. Proper KH levels support healthy aquatic plants and prevent issues like algae blooms. For aquariums with unstable water chemistry, using API KH test kits is essential for maintaining a thriving ecosystem. Regular testing ensures water quality remains consistent, promoting the well-being of fish and plants. This simple yet effective method is a cornerstone of aquarium maintenance.

6.2 Maintaining Optimal Water Conditions

Maintaining optimal water conditions is vital for the health of aquatic ecosystems. The API KH test kit plays a key role in ensuring water stability by measuring carbonate hardness. Regular testing helps prevent sudden changes in water chemistry, which can be harmful to aquatic life. By monitoring KH levels, aquarium owners can adjust water parameters to create a stable environment. This is especially important for aquariums with live plants, as stable KH levels promote healthy growth. Additionally, maintaining optimal KH levels helps prevent issues like algae blooms and pH swings. The API KH test kit provides a reliable method for achieving these goals. With consistent testing and adjustments, aquarium owners can ensure their aquatic environment remains balanced and thriving. This proactive approach to water maintenance is essential for the long-term success of any aquarium or pond system.

Troubleshooting Common Issues

Common issues include inaccurate readings or the test solution not changing color. Recalibrate the test kit or check the solution’s expiration date to ensure accurate and reliable results.

7.1 Inaccurate Readings

Inaccurate readings can occur due to expired test solutions, improper rinsing of the test tube, or failure to follow the drop-by-drop method. Contamination from dirty test tubes or incorrect shaking techniques may also affect results. Always ensure the test tube is clean and dry before use. Verify that the KH test solution is within its expiration date, as outdated reagents can lead to unreliable color changes. If the solution does not change color as expected, check for proper storage conditions and handling. Additionally, ensure the water sample is representative of the aquarium or water source being tested. For consistent results, strictly adhere to the instructions provided in the manual, including the correct number of drops and shaking procedures. If issues persist, recalibrate the test kit or consult the manufacturer’s troubleshooting guide for further assistance.

7.2 Test Solution Not Changing Color

If the KH test solution fails to change color, it may indicate an issue with the reagent or testing process. First, check the expiration date of the KH solution, as outdated reagents can lose potency. Ensure the test tube is clean and free from contaminants, as residue can interfere with the reaction. Verify that the solution is added correctly—hold the bottle vertically and add one drop at a time. If the water sample has an unusually low KH level, it might not reach the threshold needed for a color change. In such cases, incrementally add drops until a color shift occurs. If the problem persists, inspect the solution for visible signs of degradation, such as cloudiness or sediment. Replace the KH test solution if necessary and repeat the test. Always refer to the instruction manual for guidance on handling such issues effectively.

Maintenance and Storage

Clean the test tube thoroughly after each use with distilled water. Store the API KH test kit in a cool, dry place, away from direct sunlight and chemicals.

8.1 Cleaning the Test Tube

Cleaning the test tube is essential for accurate results. Rinse it thoroughly with distilled water after each use to remove any residue. Avoid using soap or chemicals, as they may leave contaminants. For stubborn stains, soak the tube in warm water before rinsing. Ensure the tube is completely dry before storing it in the kit. Regular cleaning prevents bacterial growth and maintains test accuracy. Always handle the tube with clean hands or gloves to avoid oil residue. Proper maintenance ensures the test tube remains reliable for future use. By following these steps, you extend the lifespan of the API KH test kit and guarantee consistent results. Cleanliness is key to precise water hardness measurements, making it a crucial part of the testing process.

8.2 Storing the Test Kit

Proper storage of the API KH test kit ensures its longevity and accuracy. Store the kit in a cool, dry place away from direct sunlight and moisture. Keep the test tube, KH solution, and instruction manual in their original packaging to prevent damage. Ensure the KH solution bottle is tightly sealed to maintain its effectiveness. Avoid exposing the kit to extreme temperatures, as this may affect the solution’s stability. Store the test tube separately from the solution to prevent contamination. Keep the kit out of reach of children and pets. Regularly check the expiration date of the KH solution and replace it as needed. Proper storage maintains the kit’s performance and ensures reliable results for future tests. By following these steps, you preserve the integrity of the API KH test kit and extend its usable life.

Conclusion

The API KH test kit is essential for maintaining optimal water quality. Regular testing ensures aquarium health and stability, preventing potential issues. Always follow instructions for accurate results and reliable outcomes.

9.1 Summary of Key Points

The API KH test kit is a reliable tool for measuring water hardness, essential for maintaining aquarium health. The kit includes a test tube, KH solution, and instructions. To use, rinse the tube, fill with water, and add drops of KH solution until the water turns yellow. This color change indicates the KH level. Regular testing helps monitor water quality and prevent stressful conditions for aquatic life. Accurate results ensure optimal water conditions, crucial for fish and plant health. By following the instructions carefully, users can easily determine KH levels and adjust water parameters as needed. This simple yet effective method makes the API KH test kit a must-have for aquarium enthusiasts and professionals alike. Consistent testing promotes a stable aquatic environment, ensuring the well-being of all aquatic organisms.

9.2 Importance of Regular Testing

Regular testing with the API KH test kit is essential for maintaining optimal water conditions in aquariums. Consistent monitoring ensures water hardness levels remain stable, preventing sudden changes that can stress aquatic life. By testing frequently, aquarium owners can identify and address potential issues before they affect fish and plants. Regular testing also helps in making informed adjustments to water parameters, ensuring a healthy environment for all aquatic organisms. Irregular testing can lead to water quality fluctuations, which may result in harmful conditions for fish and plants. The API KH test kit provides a reliable method for ongoing monitoring, allowing users to maintain a balanced and stable aquatic ecosystem. Regular testing is a simple yet critical step in promoting the long-term health and well-being of aquarium inhabitants.

smithfield roasted garlic and herb pork loin cooking instructions

Smithfield’s Roasted Garlic and Herb Pork Loin offers a flavorful, restaurant-quality dish with a crispy exterior and juicy interior, perfect for any occasion, and easy to prepare at home.

Overview of Smithfield Foods

Smithfield Foods is a leading American food company specializing in high-quality, value-added packaged meats and fresh pork. With over 88 years of experience, the company has grown into an industry leader, generating over $14 billion in annual sales. Headquartered in Smithfield, Virginia, it employs approximately 34,000 people in the U.S. and 2,500 in Mexico. Smithfield is committed to producing delicious, sustainable food while respecting its people, animals, and communities. Its diverse portfolio includes beloved brands that offer consumers flavorful and convenient meal solutions. Trusted by home cooks and professional chefs alike, Smithfield Foods has become synonymous with quality and innovation in the culinary world.

Key Features of the Roasted Garlic and Herb Pork Loin

The Smithfield Roasted Garlic and Herb Pork Loin is a premium cut of meat infused with a rich blend of garlic and aromatic herbs. Its dry-rub seasoning enhances flavor without added mess. Perfectly balanced, it offers a crispy exterior and a tender, juicy interior when cooked. The loin is easy to prepare using various methods like oven roasting, grilling, or pan-frying. Its versatility makes it ideal for both special occasions and everyday meals. With minimal prep required, this product delivers a restaurant-quality dining experience at home, ensuring a delicious and satisfying meal every time.

Why Choose Smithfield for Your Cooking Needs

Smithfield Foods, with over 88 years of experience, is a trusted leader in high-quality meats, offering flavorful and convenient options for every meal. Their commitment to sustainability, animal care, and community support ensures ethical and delicious products. Smithfield’s dedication to innovation and customer satisfaction makes their Roasted Garlic and Herb Pork Loin a standout choice for home cooks and professionals alike. With a focus on bold flavors and ease of preparation, Smithfield helps create memorable meals that exceed expectations, making it a go-to brand for anyone seeking quality and taste in their cooking.

Cooking Instructions for Smithfield Roasted Garlic and Herb Pork Loin

Cook Smithfield’s Roasted Garlic and Herb Pork Loin in the oven at 425°F for 25-30 minutes per pound, or grill for 18-30 minutes, ensuring an internal temperature of 145°F for safe, juicy results.

Oven Cooking Method

Preheat your oven to 425°F (220°C). Place the Smithfield Roasted Garlic and Herb Pork Loin on a rack in a shallow roasting pan. Roast for 25-30 minutes per pound, or until the internal temperature reaches 145°F (63°C). Use a meat thermometer to ensure accuracy. Let the pork loin rest for 10-15 minutes before slicing to retain juices. This method ensures a crispy, golden-brown exterior and a tender, flavorful interior. For optimal results, avoid overcrowding the pan and baste occasionally if desired. The oven method is ideal for achieving a restaurant-quality finish with minimal effort.

Slow Cooker Cooking Method

Place the Smithfield Roasted Garlic and Herb Pork Loin in a slow cooker. Add a splash of broth or water if desired. Cook on low for 8-10 hours or high for 4-6 hours. The pork loin will be tender and infused with rich flavors. Use a meat thermometer to ensure the internal temperature reaches 145°F (63°C). Let it rest for 10 minutes before slicing. This method is perfect for hands-off cooking, resulting in a juicy and aromatic dish. Optional: Add vegetables like carrots or potatoes for a complete meal. The slow cooker ensures even cooking and locks in moisture for a delicious outcome.

Grill Cooking Method

Preheat your grill to medium heat. Season the Smithfield Roasted Garlic and Herb Pork Loin with your desired garlic-herb rub. Place the pork loin on the grill, closing the lid. Cook for 18-30 minutes per side, or until the internal temperature reaches 145°F (63°C). Use a meat thermometer to ensure doneness. Let the pork rest for 10 minutes before slicing. For added flavor, brush with olive oil or garlic butter during grilling. The grill method enhances the pork’s smoky flavor while retaining its juicy texture. Ensure even cooking by flipping occasionally. This method is ideal for a crispy exterior and a tender interior.

Pan-Frying Cooking Method

Heat a large skillet over medium-high heat and add a tablespoon of oil. Sear the Smithfield Roasted Garlic and Herb Pork Loin for 2-3 minutes on each side to achieve a golden-brown crust. Reduce the heat to medium-low, cover the skillet, and continue cooking for 15-20 minutes, or until the internal temperature reaches 145°F (63°C). Use a meat thermometer to ensure doneness. Let the pork loin rest for 5-10 minutes before slicing. This method allows for even cooking and a crispy exterior while maintaining a juicy interior. The pan-frying technique is ideal for achieving a flavorful crust and tender meat.

Preparation Tips for the Perfect Pork Loin

Thaw the pork loin, marinate if desired, and season generously with garlic and herbs. Bring to room temperature before cooking for even roasting and juicy results.

Thawing and Marinating

Proper thawing and marinating are essential for achieving the best flavor and texture in your Smithfield Roasted Garlic and Herb Pork Loin. Always thaw the pork loin in the refrigerator overnight to ensure even thawing and food safety. For marinating, combine olive oil, minced garlic, and your favorite herbs like rosemary and thyme. Place the pork loin in a large ziplock bag or a shallow dish, pour the marinade over it, and refrigerate for at least 2 hours or overnight. This step enhances the pork’s tenderness and infuses it with rich, aromatic flavors, ensuring a delicious and savory dish when cooked.

Seasoning with Garlic and Herbs

Seasoning the Smithfield Roasted Garlic and Herb Pork Loin with a blend of aromatic spices and fresh herbs is key to enhancing its flavor. Start by creating a paste using minced garlic, chopped rosemary, thyme, and a pinch of salt and pepper. Gently rub this mixture all over the pork loin, ensuring even coverage. For added depth, drizzle a small amount of olive oil over the meat before applying the seasoning; Let the pork loin sit for about 15 minutes after seasoning to allow the flavors to penetrate the meat. This step ensures a fragrant, savory crust that complements the pork’s natural tenderness, making it a standout dish for any meal.

Bringing the Pork Loin to Room Temperature

Bringing the Smithfield Roasted Garlic and Herb Pork Loin to room temperature before cooking is a crucial step for even cooking and to prevent the outside from burning. Remove the pork loin from the refrigerator and let it sit on a clean, dry surface for about 30 minutes to 1 hour. This allows the meat to relax, ensuring a more consistent internal temperature during cooking. Pat the pork loin dry with paper towels to remove excess moisture, which helps the seasoning adhere evenly. This simple step enhances the overall texture and flavor, making the pork loin juicy and perfectly cooked every time.

Cooking Time and Temperature Guidelines

Cook to an internal temperature of 145°F (63°C) for safety. Roast at 425°F (220°C), allowing 25-30 minutes per pound for a juicy, evenly cooked loin.

Internal Temperature for Safe Cooking

Cooking the Smithfield Roasted Garlic and Herb Pork Loin to an internal temperature of 145°F (63°C) ensures food safety and optimal tenderness. Use a meat thermometer to check the thickest part of the loin, avoiding fat or bone. The pork may still appear slightly pink in the center, which is normal and safe at this temperature. Proper cooking prevents undercooked meat, reducing the risk of foodborne illness. Always let the pork rest for a few minutes before slicing to retain juices and ensure even distribution of heat. This step guarantees a juicy, flavorful, and safely cooked meal every time.

Cooking Time per Pound

Cooking time for Smithfield Roasted Garlic and Herb Pork Loin varies based on the method and size. For oven roasting, cook at 425°F for 25-30 minutes per pound, ensuring the internal temperature reaches 145°F. This ensures even cooking and prevents overcooking. For smaller loins, adjust the time slightly, while larger cuts may require a few extra minutes. Always use a meat thermometer to verify doneness. If grilling or pan-frying, adjust the time accordingly, as these methods may cook the pork faster. Proper timing ensures a juicy, flavorful result every time, making it perfect for any meal.

Resting the Pork Loin After Cooking

Resting the Smithfield Roasted Garlic and Herb Pork Loin after cooking is essential for retaining its juiciness and flavor. Once cooked, remove the pork loin from the heat and let it rest, covered with foil, for 10-15 minutes. This allows the internal juices to redistribute, ensuring a tender and moist texture. During this time, the pork will retain its heat, making it ready to slice and serve. Avoid slicing too soon, as this can cause the juices to escape, leading to a drier result. Proper resting ensures a perfectly cooked, flavorful dish every time.

Serving Suggestions and Side Dishes

Pair the Smithfield Roasted Garlic and Herb Pork Loin with roasted vegetables, mashed potatoes, or a fresh salad for a well-rounded, flavorful meal.

Garlic and Herb-Infused Gravy

Enhance your Smithfield Roasted Garlic and Herb Pork Loin with a rich, flavorful gravy. Start by collecting the pan drippings from the roasted pork loin, which are infused with garlic and herbs. Add a tablespoon of butter to the pan and let it melt, then sprinkle in a tablespoon of flour to create a roux, whisking continuously. Gradually pour in chicken broth or white wine, stirring to avoid lumps; Bring the mixture to a simmer and let it thicken for a few minutes. Season with salt, pepper, and a pinch of the same herbs used in the pork loin. Serve the gravy drizzled over the pork for a cohesive, savory meal.

Roasted Vegetables as a Side

Pair your Smithfield Roasted Garlic and Herb Pork Loin with a vibrant medley of roasted vegetables for a well-rounded meal. Brussels sprouts, red potatoes, and carrots are excellent choices, as they complement the pork’s flavors. Toss the vegetables in olive oil, season with salt, pepper, and a sprinkle of garlic powder, and roast in the oven at 425°F for 20-25 minutes, or until tender and caramelized. This method enhances the natural sweetness of the vegetables while infusing them with a hint of garlic and herbs, creating a harmonious balance of flavors and textures that elevate the dish to a satisfying, complete meal.

Mashed Potatoes with Garlic Butter

Elevate your meal with creamy mashed potatoes infused with garlic butter, a perfect side dish for Smithfield’s Roasted Garlic and Herb Pork Loin. Boil diced potatoes until tender, then mash with unsalted butter, milk, and a sprinkle of garlic powder. For extra flavor, mix in minced roasted garlic or herbs like parsley and chives. This side dish complements the pork loin’s savory notes while adding a rich, velvety texture to the plate. To enhance the dish further, drizzle with pan drippings from the pork loin for a burst of aromatic flavor. This simple yet indulgent side ensures a satisfying and well-rounded dining experience.

Common Mistakes to Avoid

  • Overcooking, leading to dry meat.
  • Not letting the pork loin rest after cooking.
  • Using too much garlic and herbs, overpowering the dish.

Overcooking the Pork Loin

Overcooking is a common mistake that can make the pork loin dry and tough. To avoid this, use a meat thermometer to ensure the internal temperature reaches 145°F. Remove the loin from heat once it reaches this temperature, as overcooking beyond this point will result in a less juicy and flavorful dish. Always let the pork loin rest for 10-15 minutes before slicing, allowing juices to redistribute. Overcooking can also occur when the pork is left unattended, especially in the oven or grill. Monitor the cooking time closely and adjust as needed to achieve tender, moist results.

Not Letting the Meat Rest

Not letting the pork loin rest after cooking is a common mistake that can lead to a less enjoyable dining experience. Resting allows the juices to redistribute, ensuring the meat stays tender and juicy. Without resting, the pork may become dry and tough. After cooking, remove the loin from heat and let it sit for 10-15 minutes before slicing. Covering it with foil during this time helps retain heat and moisture. Skipping this step can result in a loss of flavor and texture, making the dish less satisfying. Always prioritize resting to achieve the best results for your Smithfield pork loin.

Incorrect Use of Herbs and Spices

Using herbs and spices incorrectly can significantly impact the flavor of your Smithfield Roasted Garlic and Herb Pork Loin. Over-seasoning or using low-quality herbs can overpower the dish, while under-seasoning may result in a bland taste. It’s important to stick to the recommended seasoning blend provided with the product, as it’s specifically designed to enhance the pork loin’s natural flavors. Avoid mixing too many herbs, as this can create an unbalanced taste. Instead, focus on complementing the garlic and herb notes with fresh, high-quality ingredients. Proper seasoning ensures a harmonious and delicious final result for your meal.

Storage and Reheating Instructions

Store cooked pork loin in an airtight container in the fridge for up to 3 days. Reheat in the oven or microwave until heated through. Freeze for longer storage.

Proper Storage in the Refrigerator

To maintain freshness, store Smithfield Roasted Garlic and Herb Pork Loin in an airtight container in the refrigerator at 40°F or below. Use a glass or plastic container with a tight-fitting lid to prevent air exposure and contamination. Cooked pork loin can be refrigerated for up to 3 days. Keep it away from strong-smelling foods to avoid odor transfer. For optimal organization, place the container on a middle or bottom shelf to maintain consistent refrigeration. Avoid freezing at this stage, as refrigeration is sufficient for short-term storage. Always check for any signs of spoilage before consuming.

Reheating in the Oven or Microwave

For even reheating, preheat your oven to 425°F (220°C). Wrap the Smithfield Roasted Garlic and Herb Pork Loin tightly in aluminum foil and place it on a baking sheet; Heat for 15-20 minutes per pound, or until warmed through. Alternatively, use a microwave-safe dish, cover with a damp paper towel, and heat on medium power in 30-second increments until hot. Ensure the internal temperature reaches 165°F for food safety. Let the pork loin rest for 5 minutes before slicing to retain juices. Both methods preserve the garlic-herb flavor and texture, ensuring a delicious, reheated meal.

Freezing the Cooked Pork Loin

For optimal freshness, freeze the cooked Smithfield Roasted Garlic and Herb Pork Loin in an airtight container or heavy-duty freezer bag. Slice the pork loin into portions before freezing for easier reheating. Label and date the container, then store at 0°F (-18°C) for up to 3 months. When ready to eat, thaw overnight in the refrigerator or reheat directly from frozen using your preferred method. Freezing preserves the garlic-herb flavors, ensuring a delicious meal even after storage. This convenient option allows you to enjoy the pork loin at a later time without compromising its quality or taste.

Nutritional Information

Smithfield’s Roasted Garlic and Herb Pork Loin provides a balanced mix of protein, vitamins, and minerals, with minimal artificial flavors or preservatives, ensuring a wholesome meal option.

Calories and Macronutrients

A 3-ounce serving of Smithfield Roasted Garlic and Herb Pork Loin contains approximately 180 calories, with 25 grams of protein, 8 grams of fat, and 2 grams of carbohydrates. This lean protein source is rich in essential nutrients, making it a healthy choice for balanced meals. The garlic and herb seasoning enhances flavor without adding significant calories, ensuring a nutritious and delicious option for home cooking. Perfect for health-conscious individuals, this pork loin supports various dietary preferences while maintaining its savory appeal.

Vitamins and Minerals

Smithfield Roasted Garlic and Herb Pork Loin is a rich source of essential vitamins and minerals. It provides vitamin B12, crucial for nerve function and energy production, and vitamin B6, which supports immune health. The pork loin is also a good source of niacin, important for metabolism, and selenium, an antioxidant that protects cells. Additionally, it contains phosphorus, which supports bone health, and zinc, vital for immune function and wound healing. These nutrients make the dish not only flavorful but also nutritionally beneficial, offering a well-rounded meal option for health-conscious individuals.

Allergen Information

Smithfield Roasted Garlic and Herb Pork Loin contains pork, which is an animal by-product. It is processed in facilities that also handle milk, eggs, wheat, and soy, though the product itself does not include these allergens. If you have specific dietary restrictions or allergies, always check the packaging for the most accurate and up-to-date information. For those with pork allergies, this product is not suitable. Additionally, individuals with sensitivities to garlic or herbs should exercise caution, as the seasoning blend may cause reactions in sensitive individuals. Always prioritize food safety and consult a healthcare professional if unsure.

Recipe Variations and Ideas

Add a crispy crust with breadcrumbs and Parmesan, or infuse with wine for a rich flavor. Serve with a fruit glaze for a sweet and savory twist.

Adding a Crispy Crust

To enhance the texture and flavor of your Smithfield Roasted Garlic and Herb Pork Loin, try adding a crispy crust. Mix breadcrumbs with grated Parmesan, minced garlic, and a pinch of herbs like thyme or rosemary. Brush the pork loin with olive oil, then coat it evenly with the breadcrumb mixture, pressing gently to ensure it adheres. Bake in the oven at 400°F for about 25-30 minutes, or until the crust is golden brown and crispy. This method adds a satisfying crunch while retaining the juicy interior. Let it rest before slicing for the best results;

Incorporating Wine or Beer in Cooking

Incorporating wine or beer into your Smithfield Roasted Garlic and Herb Pork Loin recipe can elevate its flavor profile. For a rich, savory taste, add a cup of white wine or beer to the roasting pan during the last 30 minutes of cooking. This creates a moist environment and infuses the pork with subtle, aromatic notes. Alternatively, mix wine or beer into the marinade for added depth. The acidity in the liquid helps tenderize the meat, ensuring it stays juicy and flavorful. Experiment with different varieties, like a crisp white wine or a malty beer, to find your perfect pairing.

Serving with a Fruit Glaze

A fruit glaze adds a sweet and tangy contrast to the savory flavors of the Smithfield Roasted Garlic and Herb Pork Loin. Try using an apple or berry glaze for a delicious twist. Simply simmer fresh or frozen fruit with a bit of sugar and vinegar until thickened. Brush the glaze over the pork during the last 10-15 minutes of cooking to create a caramelized, sticky exterior. For extra depth, mix in a hint of mustard or spices. This method not only enhances the visual appeal but also balances the dish with a refreshing sweetness, making it perfect for special occasions or family dinners.

Smithfield’s Roasted Garlic and Herb Pork Loin offers a flavorful, easy-to-prepare dish perfect for any occasion. Trust Smithfield for a delicious, memorable meal every time—give it a try!

Final Tips for a Perfect Meal

For a flawless Smithfield Roasted Garlic and Herb Pork Loin, ensure the meat is evenly coated with the garlic-herb paste. Avoid overcrowding the pan to promote even cooking. Let the pork loin rest before slicing to retain juices. Pair with roasted vegetables or mashed potatoes for a balanced meal. Experiment with a fruit glaze for a sweet and savory twist. Don’t forget to serve with a side of garlic-infused gravy for added flavor. Follow these tips to create a memorable and delicious dish that impresses every time!

Encouragement to Try the Recipe

Don’t hesitate to give Smithfield’s Roasted Garlic and Herb Pork Loin a try! This recipe is perfect for both novice cooks and experienced chefs, offering a flavorful and moist result every time. The combination of roasted garlic and herbs creates a rich, aromatic profile that elevates any meal. Whether it’s a special occasion or a cozy family dinner, this dish is sure to impress. Pair it with your favorite sides, like roasted vegetables or mashed potatoes, for a well-rounded meal. Take the opportunity to get creative with the recipe by adding your own twists, such as a fruit glaze or crispy crust. Your taste buds—and your guests—will thank you!

pepperidge farm garlic bread instructions

Pepperidge Farm Garlic Bread is a beloved favorite, offering a perfect blend of soft centers and golden crusts. This article provides clear instructions and expert tips for baking, enhancing flavor, and achieving restaurant-quality results at home. Discover how to make the most of this delicious, convenient side dish for any meal.

Overview of Pepperidge Farm and Its Products

Pepperidge Farm, founded in the 1950s, is a trusted name in baking, known for its high-quality bread, cookies, and frozen products. The company emphasizes using premium ingredients to create delicious, wholesome treats. Its product line includes iconic items like Texas Toast and Garlic Bread, which are celebrated for their flavor and convenience. Pepperidge Farm combines tradition with innovation, offering products that cater to diverse tastes and dietary needs. Their commitment to quality and taste has made them a staple in many households, providing easy-to-prepare solutions for meals and snacks alike.

Importance of Garlic Bread in Modern Cuisine

Garlic bread has become a staple in modern cuisine, offering a versatile and flavorful accompaniment to various dishes. Its aromatic appeal enhances meals, from soups and salads to entrees. The convenience of pre-made options like Pepperidge Farm Garlic Bread allows busy households to enjoy restaurant-quality flavor without effort. It serves as a carrier for appetizers and sandwiches, adding texture and taste. Additionally, garlic bread complements bread baskets, elevating dining experiences. Its popularity lies in its ability to adapt to diverse culinary settings, making it a must-have for both casual gatherings and special occasions, ensuring it remains a timeless favorite in kitchens worldwide.

Objective of the Article: Providing Clear Instructions

This article aims to provide straightforward, step-by-step guidance for preparing Pepperidge Farm Garlic Bread. Whether you’re baking it in a conventional oven, toaster oven, or air fryer, the instructions are designed to ensure a perfect golden crust and soft center. Tips for enhancing flavor, preventing burning, and achieving restaurant-quality results are included. The goal is to empower home cooks with easy-to-follow methods, making it simple to enjoy this delicious side dish. By adhering to these instructions, anyone can create mouthwatering garlic bread that complements any meal, from casual gatherings to special occasions, with minimal effort and maximum flavor.

History of Pepperidge Farm Garlic Bread

Pepperidge Farm Garlic Bread originated in the 1950s, founded by Margaret Rudkin, who began baking bread in her kitchen. The garlic bread evolved into a beloved product, combining traditional recipes with modern convenience, becoming a staple in American cuisine.

Origins of Pepperidge Farm

Pepperidge Farm was founded in 1937 by Margaret Rudkin, who began baking bread in her kitchen during the Great Depression. Rudkin, motivated by her son’s wheat allergies, created a wholesome bread using natural ingredients. The company’s name, inspired by her family’s ancestral home in Scotland, reflects its commitment to tradition and quality. Starting with a single bread recipe, Pepperidge Farm grew into a beloved brand, introducing iconic products like garlic bread. The company’s early success stemmed from Rudkin’s dedication to using premium ingredients and time-honored baking methods, laying the foundation for its enduring legacy in American cuisine.

Evolution of Garlic Bread as a Popular Product

Pepperidge Farm Garlic Bread emerged as a beloved product in the 1950s, capitalizing on the growing popularity of garlic bread in American cuisine. The company innovated by introducing a frozen version, making it convenient for home preparation. Its rise to fame was fueled by its versatility, pairing perfectly with soups, salads, and entrees. Over the years, Pepperidge Farm Garlic Bread became a staple in many households, offering a delicious, easy-to-bake option for family meals; Its enduring success lies in its ability to deliver consistent quality and flavor, making it a timeless favorite in modern kitchens and gatherings alike.

Key Milestones in the Development of the Recipe

The recipe for Pepperidge Farm Garlic Bread has undergone significant refinement since its inception. Initially introduced in the 1950s, it quickly gained popularity for its simplicity and flavor. A major milestone was the introduction of the frozen version, which revolutionized home baking by offering convenience without compromising taste. Over the years, the recipe has been tweaked to enhance texture and flavor, incorporating high-quality ingredients like real garlic and parsley. The addition of cheese variations further expanded its appeal. Today, the recipe remains a testament to Pepperidge Farm’s commitment to delivering a delicious, easy-to-prepare garlic bread that satisfies diverse tastes.

Ingredients and Nutritional Information

Pepperidge Farm Garlic Bread contains enriched wheat flour, garlic, parsley, and cheeses. Each serving has 140 calories, 3g fat, and 250mg sodium. Contains milk and soy; not gluten-free.

Key Ingredients in Pepperidge Farm Garlic Bread

Pepperidge Farm Garlic Bread features enriched wheat flour, garlic, parsley, and a blend of cheeses, including mozzarella, provolone, cheddar, asiago, and parmesan. Real butter and seasonings enhance the flavor, creating a savory, aromatic taste. The ingredients are carefully selected to ensure a soft center and a golden, crispy crust. The combination of high-quality components makes it a delicious and convenient option for any meal; These ingredients work together to deliver the signature taste that has made Pepperidge Farm Garlic Bread a favorite for many.

Nutritional Facts and Caloric Content

Pepperidge Farm Garlic Bread offers a delicious yet moderate nutritional profile. One serving (about 63g) contains 210 calories, with 8g of fat, 25g of carbohydrates, and 420mg of sodium. It provides 6g of protein and 2g of fiber, making it a satisfying side dish. The bread is free from trans fats and includes enriched flour for added nutrients. While it’s a tasty addition to meals, moderation is key due to its caloric and sodium content. Always check the packaging for the most accurate nutritional information, as formulations may vary.

Common Allergens and Dietary Considerations

Pepperidge Farm Garlic Bread contains wheat, milk, and soy, making it unsuitable for those with allergies to these ingredients. It is not vegan due to the presence of dairy. The bread is produced in a facility that also processes tree nuts and eggs, posing a risk for individuals with severe allergies to these. For those with gluten intolerance or celiac disease, this product is not gluten-free. Always check the packaging for allergen warnings and ingredient updates, as formulations may change. If you have specific dietary needs, consult the label or contact the manufacturer for confirmation.

Instructions for Baking Pepperidge Farm Garlic Bread

Preheat your oven to 400°F (200°C). Place frozen garlic bread halves, cut-side up, on an ungreased baking sheet. Bake for 8-10 minutes until golden brown and crispy.

Preheating the Oven: Essential Steps

Preheating your oven is a crucial step for achieving perfectly baked Pepperidge Farm Garlic Bread. Start by setting your oven to 400°F (200°C) and ensure it reaches the desired temperature before baking; Place the oven rack in the middle position to promote even cooking. While the oven preheats, prepare your baking sheet by placing the frozen garlic bread halves, cut-side up, ensuring they are evenly spaced. For a softer center, you can preheat the oven to 350°F (175°C) and wrap the loaf in foil. Proper preheating ensures a golden crust and a delicious, aromatic result every time.

Preparing the Garlic Bread for Baking

Start by removing the Pepperidge Farm Garlic Bread from its packaging. For frozen halves, place them cut-side up on an ungreased baking sheet, ensuring even spacing for proper cooking. If the halves are frozen together, gently insert a fork between them to separate. For a softer center, wrap the entire loaf in foil before placing it on the baking sheet. Make sure the bread is positioned cut-side up to allow the garlic butter to melt evenly during baking. Proper preparation ensures a golden crust and a delicious, aromatic result. Always handle the bread gently to avoid tearing the slices.

Baking Process: Temperature and Time Guidelines

Preheat your oven to 400°F (200°C) for a crispy texture. Place the garlic bread on the middle rack and bake for 8-10 minutes, or until golden brown. For a softer center, bake at 350°F (175°C) for 30-35 minutes, wrapped in foil. If using an air fryer, cook at 360°F (180°C) for 5 minutes. Always ensure the bread is heated through and reaches a golden-brown color. Avoid overcrowding the baking sheet for even cooking. Follow these guidelines to achieve the perfect balance of a crispy crust and a soft, flavorful interior. Adjust time slightly if using a toaster oven or grill for compact cooking.

Ensuring the Perfect Golden Crust

To achieve a golden crust, preheat your oven to 400°F (200°C) and place the garlic bread on the middle rack; Ensure the bread is evenly spaced on the baking sheet to allow proper air circulation. Bake for 8-10 minutes, or until the crust reaches a golden-brown color. For an extra-crispy texture, avoid overcrowding the sheet. If using an air fryer, cook at 360°F (180°C) for 5 minutes, shaking halfway through. Keep an eye on the bread during the last few minutes to prevent over-browning. A perfectly golden crust enhances the flavor and texture of Pepperidge Farm Garlic Bread.

Cooking Methods and Variations

Pepperidge Farm Garlic Bread can be baked in a conventional oven, toaster oven, or air fryer for crispy results. Grilling adds a smoky flavor, while the oven ensures a golden crust and soft center. These versatile methods offer flexibility for any kitchen setup, delivering delicious garlic bread every time.

Using an Air Fryer for Crispy Garlic Bread

For a crispy texture, preheat the air fryer to 360°F (180°C). Place Pepperidge Farm Garlic Bread slices in a single layer, ensuring even cooking. Cook for 5 minutes, or until golden brown. This method delivers a crunchy exterior while maintaining a soft center. Perfect for quick preparation, the air fryer enhances flavor without extra oil. Achieve restaurant-quality results effortlessly with this modern cooking alternative. Ensure not to overcrowd the basket for optimal crispiness. Check halfway through cooking to ensure even browning. This method is ideal for smaller batches and faster cooking times compared to traditional oven baking.

Grilling for a Smoky Flavor

Grilling Pepperidge Farm Garlic Bread adds a smoky, charred flavor. Preheat your grill to medium-low heat. Place the frozen bread slices, cut-side up, directly on the grates. Cook for 2-3 minutes per side, or until golden brown and crispy. Keep an eye on the bread to prevent burning. For a softer texture, wrap the bread in foil and grill for 5-7 minutes, turning occasionally. The grill enhances the garlic flavor and creates a crispy crust. Perfect for outdoor gatherings, this method adds a unique twist to the classic recipe. Ensure the grill is clean to avoid sticking and flip gently to maintain the bread’s integrity.

Toaster Oven Instructions for Compact Cooking

For a compact and efficient cooking method, preheat your toaster oven to 425°F (220°C). Place the frozen Pepperidge Farm Garlic Bread slices on an ungreased baking sheet, cut-side up. Bake for 5-7 minutes, or until the bread reaches a golden-brown color and crispy texture. Keep an eye on the bread during the last few minutes to ensure even cooking. For a softer center, reduce the baking time by 1-2 minutes. This method is ideal for smaller portions and maintains the signature flavor and texture of Pepperidge Farm Garlic Bread. Perfect for quick meals or snacks, it delivers delicious results every time.

Tips for Achieving the Best Results

Thaw frozen garlic bread before baking for even cooking. Enhance flavor by brushing with butter or sprinkling herbs. Monitor baking to prevent burning and ensure a golden crust.

Thawing Frozen Garlic Bread: Best Practices

For optimal results, thaw Pepperidge Farm Garlic Bread before baking to ensure even cooking. Remove the bread from the freezer and let it thaw at room temperature for a few hours. To maintain freshness, keep the bread frozen until ready to use. If thawing, store it in an airtight container to prevent drying out. Avoid microwaving, as it can lead to uneven thawing and a tough texture. Proper thawing ensures the bread bakes evenly, delivering a soft center and crispy crust. Always follow the package instructions for thawing and baking to achieve the best flavor and texture.

Enhancing Flavor with Additional Ingredients

Pepperidge Farm Garlic Bread can be elevated by adding fresh or dried herbs like parsley, oregano, or basil. Sprinkle shredded mozzarella, parmesan, or cheddar cheese for extra richness. Drizzle with olive oil or butter for a buttery aroma. For a spicy kick, add red pepper flakes. Fresh garlic powder or minced garlic can intensify the flavor. Experiment with combinations like roasted garlic or Italian seasoning for a unique twist. These additions enhance the bread’s natural taste without overpowering it, creating a customizable dish perfect for any meal. Let your creativity shine to make Pepperidge Farm Garlic Bread even more delicious and satisfying.

Preventing Burning and Ensuring Even Cooking

To prevent burning and ensure even cooking, place Pepperidge Farm Garlic Bread slices evenly spaced on an ungreased baking sheet. Avoid overcrowding, as this can lead to uneven browning. Bake on the middle oven rack to promote consistent heat distribution. Keep an eye on the bread during the last few minutes of baking, as oven temperatures can vary. If edges begin to brown too quickly, cover them lightly with foil. For crispiness without burning, follow the recommended baking time and temperature guidelines. Properly thawing frozen bread beforehand also helps achieve an even bake. Monitor closely to ensure golden perfection without overcooking.

Serving Suggestions and Pairings

Pepperidge Farm Garlic Bread pairs perfectly with soups, salads, and entrees, adding a flavorful touch to any meal. It also serves as a versatile base for appetizers or complements a bread basket, offering a delicious and aromatic accompaniment.

Classic Pairings: Soups, Salads, and Entrees

Pepperidge Farm Garlic Bread is a timeless companion to soups, salads, and entrees. Serve it alongside creamy tomato soup or hearty minestrone for a comforting meal. It pairs beautifully with fresh green salads, adding a satisfying crunch. For entrees, try it with pasta dishes, roasted meats, or seafood for a flavorful accompaniment. The golden crust and soft center enhance any meal, offering a warm, aromatic touch that elevates dining experiences. Its versatility makes it a perfect addition to both casual and formal gatherings, ensuring every bite is filled with delicious, garlicky goodness.

Using Garlic Bread as a Base for Appetizers

Pepperidge Farm Garlic Bread is an excellent base for creating delicious appetizers. Try topping it with fresh mozzarella, cherry tomatoes, and basil for a quick bruschetta. Alternatively, use it as a sturdy base for mini sliders, loaded with beef, chicken, or turkey. For a cheesy twist, melt mozzarella or parmesan on top and sprinkle with herbs like parsley or oregano. You can also add cured meats like prosciutto or ham for added flavor. The crispy crust and soft center provide the perfect foundation for creative appetizers, making it easy to impress guests with minimal effort and maximum taste.

Incorporating Garlic Bread into a Bread Basket

Pepperidge Farm Garlic Bread adds a delicious and aromatic touch to any bread basket. Arrange slices alongside crusty baguette pieces, soft dinner rolls, and artisanal breads for variety. Drizzle with olive oil or butter for extra flavor. Pair with dips like marinara or spinach dip for a savory treat. For a rustic presentation, wrap the garlic bread in foil and bake until warm and fragrant. This creates a cozy, inviting centerpiece for family dinners or gatherings. The combination of textures and flavors will elevate your bread basket, making it a memorable part of any meal.

Safety and Storage Tips

Always handle frozen garlic bread carefully to avoid damage. Store in the freezer at 0°F (-18°C) or below until ready to bake. Keep bread frozen until use to maintain freshness and quality. Ensure proper sealing to prevent freezer burn. Follow package instructions for thawing and reheating. Never refreeze thawed bread. Maintain a consistent freezer temperature to preserve texture and flavor. Proper storage ensures Pepperidge Farm Garlic Bread remains delicious and safe to enjoy.

Proper Handling of Frozen Garlic Bread

Always keep Pepperidge Farm Garlic Bread frozen at 0°F (-18°C) or below until ready to bake. Store in the original packaging to maintain freshness. When handling frozen bread, avoid touching the slices excessively to prevent thawing. If the bread is stuck together, gently separate the slices with a fork or knife. Never refreeze thawed garlic bread, as this can affect texture and flavor. For optimal quality, use within a few months of purchase. Proper handling ensures the bread retains its crispy exterior and soft interior when baked. Follow these steps to enjoy the best taste and texture every time.

Storage Guidelines for Freshness

Store Pepperidge Farm Garlic Bread in the freezer at 0°F (-18°C) or below to maintain freshness. Keep the bread in its original packaging to protect it from moisture and freezer burn. Once baked, leftovers can be stored in an airtight container at room temperature for up to 2 days or refrigerated for up to 5 days. For longer storage, freeze baked garlic bread at 0°F (-18°C) for up to 2 months. Ensure the bread is wrapped tightly in plastic wrap or aluminum foil before freezing. Proper storage helps preserve the bread’s texture and flavor for optimal enjoyment.

Freezing and Reheating Instructions

Pepperidge Farm Garlic Bread can be frozen at 0°F (-18°C) in its original packaging for up to 2 months. When reheating, preheat the oven to 350°F (175°C). Wrap the bread in aluminum foil and bake for 5-7 minutes, or until warmed through. For a crisper texture, remove the foil during the last 2 minutes of reheating. Ensure the bread is wrapped tightly to retain moisture and flavor. Reheating in the oven is recommended for the best results, but you can also reheat in a toaster oven or air fryer at similar temperatures for a shorter time.

Expert Tips and Tricks

For a soft center, wrap Pepperidge Farm Garlic Bread in foil and bake at 350°F. Adjust baking time for crispiness or a golden crust, enhancing flavor naturally.

Creating a Soft Center with a Crispy Crust

To achieve a soft center and crispy crust, preheat your oven to 350°F. Wrap the entire loaf of Pepperidge Farm Garlic Bread in foil and place it on a baking sheet. Bake for 30-35 minutes until heated through. Remove the foil for the last 5 minutes to allow the crust to crisp up. This method ensures the inside remains soft while the outside develops a golden, crunchy texture. Avoid microwaving to maintain even heating and texture quality. This technique is perfect for serving alongside soups or as a side dish.

Customizing Garlic Bread with Herbs and Cheese

Elevate Pepperidge Farm Garlic Bread by adding fresh herbs and cheese for extra flavor. Sprinkle shredded mozzarella, parmesan, or a blend of cheeses like provolone and cheddar on top before baking. For herbs, try parsley, basil, or oregano for a fresh twist. Bake at 350°F for 25-30 minutes, or until the cheese is melted and bubbly. You can also mix minced garlic with butter and spread it evenly for a richer taste. Experiment with combinations to create a personalized flavor profile that complements your meal. This customization makes Pepperidge Farm Garlic Bread even more special and versatile for any occasion.

Troubleshooting Common Baking Issues

If your Pepperidge Farm Garlic Bread is burning, ensure your oven temperature is accurate and avoid placing it too close to the heating element. For undercooked bread, extend the baking time by a few minutes and check for doneness. Sogginess can result from insufficient baking time or high humidity; bake a little longer to crisp it up. If the bread is too crispy, reduce the oven temperature by 25°F. Always preheat your oven and use a middle rack for even cooking. Proper thawing and spacing on the baking sheet can also prevent these issues, ensuring a perfect golden crust every time.

Pepperidge Farm Garlic Bread offers a delicious, easy-to-bake solution for any meal. With proper instructions and tips, you can achieve perfect results every time. Enjoy baking!

Final Thoughts on Pepperidge Farm Garlic Bread

Pepperidge Farm Garlic Bread is a timeless favorite, offering convenience and flavor. Its golden crust and soft center make it a perfect accompaniment to any meal. With easy baking instructions, it’s simple to achieve restaurant-quality results at home. Whether served alongside soups, salads, or as a base for appetizers, this garlic bread enhances any dining experience. The combination of high-quality ingredients and straightforward preparation makes it a must-have for busy households. Experiment with additional toppings or cooking methods to tailor it to your taste, ensuring every bite is delicious and satisfying.

Encouragement to Experiment and Enjoy

Don’t be afraid to get creative with Pepperidge Farm Garlic Bread! Add herbs, cheeses, or spices to create unique flavor profiles. Try grilling or air frying for a crispy twist. Experimenting with different cooking methods and toppings can elevate this classic dish into something extraordinary. Whether you’re hosting a gathering or enjoying a cozy night in, let your imagination guide you. The versatility of Pepperidge Farm Garlic Bread invites you to explore endless possibilities, ensuring every meal is both memorable and delicious. Embrace the joy of cooking and savor the warmth of freshly baked garlic bread, tailored to your taste.

black and decker trimmer instruction manual

Welcome to the Black+Decker trimmer instruction manual. This guide provides essential information to ensure safe and effective use of your trimmer. Read carefully to optimize performance and maintain your product.

1.1 Welcome and Thank You for Choosing Black+Decker

Thank you for selecting Black+Decker, a brand committed to innovation, quality, and reliability. Your new trimmer is designed to make lawn maintenance easier and more efficient. To ensure optimal performance, register your product at

Safety Precautions

Always read and follow the safety guidelines in this manual. Wear protective gear, keep children away, and avoid trimming in wet conditions. Proper storage prevents accidents.

2.1 General Safety Warnings

Always wear protective gear, including gloves and eyewear, when operating the trimmer. Keep children and pets away from the work area. Avoid using the trimmer in wet conditions or near open flames. Ensure loose clothing or long hair is tied back. Never touch electrical components with wet hands. Be cautious of sharp trimmer lines and hot blades after use. Read this manual thoroughly and follow all safety guidelines to prevent accidents and ensure safe operation.

2.2 Specific Safety Warnings for Trimmer Usage

Always install the guard before trimming or edging. Never use the trimmer near flammable materials or in enclosed spaces. Avoid cutting thick branches or hard objects, as this may damage the trimmer or cause injury. Keep the trimmer away from children and pets; Do not use the trimmer as a toy or for purposes other than intended. Ensure the area is clear of debris before operation. Never modify the trimmer or use unauthorized parts, as this can lead to malfunction or harm. Always follow the manufacturer’s guidelines for safe usage.

2.3 Precautions for Handling Electrical Components

Always disconnect the trimmer from the power source before performing maintenance or repairs. Avoid exposing electrical components to water or moisture, as this can cause malfunctions or electrical shock. Never touch electrical parts with wet hands or while standing on a damp surface. Use only genuine Black+Decker replacement parts to ensure compatibility and safety. Keep the battery pack away from extreme temperatures and avoid puncturing or crushing it. Regularly inspect cords and plugs for damage and replace them if necessary to prevent hazards.

Product Description and Features

The Black+Decker trimmer is a versatile tool designed for efficient lawn maintenance. It features an ergonomic design, adjustable handle, and automatic feed system for optimal performance.

3.1 Overview of the Black+Decker Trimmer

The Black+Decker trimmer is a high-performance tool designed for lawn care. Available in models like LST300 and NST1118, it offers cordless convenience, adjustable handles, and an automatic feed system. Built for efficiency, it features a powerful motor and durable construction. The trimmer is versatile, suitable for edging and trimming grass in hard-to-reach areas. With ergonomic design and lightweight build, it ensures ease of use. Detailed care instructions and troubleshooting tips are provided in the manual to maintain optimal performance and extend product lifespan.

3.2 Key Features and Benefits

The Black+Decker trimmer boasts a cordless design, offering greater mobility and convenience. It features an adjustable handle for ergonomic comfort and a pivoting head for precise edging. The automatic feed system ensures continuous operation without manual line advancement. With models like the LST300 and NST1118, it delivers powerful performance for various lawn care tasks. The trimmer is lightweight, reducing fatigue during extended use, and its durable construction ensures long-lasting reliability. These features make it an ideal choice for maintaining neat and well-groomed lawns effortlessly.

3.3 Technical Specifications

The Black+Decker trimmer models, such as the LST300 and NST1118, feature a 20-volt maximum initial battery pack voltage. They include a lithium-ion battery for cordless operation and a 12-inch cutting swath. The trimmer weighs approximately 4.5 pounds, making it lightweight and easy to maneuver. The handle is adjustable and measures 40 inches in length for ergonomic comfort. The automatic feed system simplifies line advancement, while the pivoting head allows for precise edging. These specifications ensure efficient performance for various lawn care needs.

Assembly and Installation

Unpack all parts and verify inventory. Follow step-by-step assembly instructions to attach the trimmer head and handle. Ensure all components are securely tightened for safe operation.

4.1 Unpacking and Inventory of Parts

Carefully unpack the trimmer and all accessories from the box. Verify the presence of the trimmer unit, handle, guard, trimming line, and any additional components. Check for the catalog number to ensure all parts are included. Refer to the manual for a detailed list of items. If any part is missing or damaged, contact Black+Decker customer service immediately. Proper inventory ensures smooth assembly and operation. Save the packaging for future reference or storage.

4.2 Step-by-Step Assembly Instructions

Begin by carefully unpacking all components. Align the handle with the trimmer unit, ensuring proper connection points match. Secure the handle using the provided screws, tightening firmly. Attach the guard to protect against debris during use. Next, connect the trimming head to the main shaft, following the manual’s alignment guide. Adjust the handle length for comfort if applicable. Refer to the diagram for precise assembly details. Double-check all connections before use to ensure safety and functionality. Proper assembly is crucial for optimal performance and longevity of your Black+Decker trimmer.

4.3 Attaching the Trimmer Head

To attach the trimmer head, align it with the main shaft, ensuring the connection points match; Secure the head using the provided screws, tightening firmly. For models with a bump feed mechanism, ensure the spring is properly seated. If your trimmer has an edging feature, verify the head is locked in the correct position. Refer to the diagram in the manual for specific guidance. Once attached, test the connection by gently tugging the head to ensure it is secure. Proper installation ensures safe and efficient operation of your Black+Decker trimmer.

Operating Instructions

Start the trimmer, adjust the head, and use it for trimming or edging. Follow safety guidelines, maintain proper technique, and ensure regular maintenance for optimal performance.

5.1 Starting the Trimmer

To start the Black+Decker trimmer, ensure all safety precautions are followed. For cordless models, insert the battery and press the safety lock. Squeeze the trigger to power on. For corded trimmers, plug in the device and press the trigger. Always wear protective gear. Refer to the manual for specific instructions tailored to your model, such as the LST300 or NST1118. Proper startup ensures efficient operation and safety. Follow these steps carefully to avoid accidents and maintain optimal performance.

5.2 Basic Trimming Operations

Hold the trimmer firmly with both hands, keeping the cutting head parallel to the ground. Move the trimmer in steady, sweeping motions to maintain even cutting. For thicker grass, reduce the swath width to avoid overloading the machine. Use the edge guide for precise trimming along borders. Always keep the trimmer at a comfortable height to avoid strain. Regularly inspect the cutting line and replace it as needed for optimal performance. Follow these steps to achieve clean, professional-looking results for your lawn.

5.3 Using the Trimmer as an Edger

To use the trimmer as an edger, attach the edge guide to maintain straight, precise cuts. Hold the trimmer vertically, aligning the cutting line with the edge of the lawn or border. Move the trimmer slowly and steadily along the desired path, keeping the cutting head close to the ground. Use short, controlled strokes for tight spaces or curves. Ensure the guard is in place to protect flowers and plants. This feature allows for clean, defined edges, enhancing the appearance of your lawn while saving time and effort.

5.4 Adjusting the Trimmer Head

To adjust the trimmer head, start by turning the unit off and ensuring the cutting line has stopped moving. For length adjustment, pull the line to the desired length and cut excess with scissors or the built-in cutter. To rotate the head for edging, press the release button and twist the head until it locks in the vertical position. Always ensure the edge guide is securely attached for precise cuts. Proper adjustment ensures optimal performance and clean, professional-looking edges. Regularly check and adjust the head to maintain balance and efficiency during use.

Maintenance and Care

Regularly clean the trimmer, lubricate moving parts, and store it properly to ensure optimal performance and longevity. Follow these steps to maintain your trimmer effectively.

6.1 Cleaning the Trimmer

Regular cleaning is essential to maintain your Black+Decker trimmer’s performance. Turn off and unplug the trimmer before cleaning. Use a soft brush or cloth to remove dirt and debris from the exterior and cutting head. Avoid using harsh chemicals or abrasive materials that may damage the finish. For tougher residue, dampen a cloth with water, but ensure no moisture enters electrical components. Clean the air vents to prevent overheating. Always refer to the manual for specific cleaning instructions tailored to your model.

6.2 Lubricating Moving Parts

Regular lubrication of moving parts ensures smooth operation and extends the life of your Black+Decker trimmer. Apply a small amount of high-quality silicone-based lubricant to the gear system and cutting head components. Avoid over-lubrication, as it may attract dirt and reduce efficiency. Use a clean cloth to wipe off excess lubricant. For specific lubrication points, refer to the manual or manufacturer’s guidelines. Proper lubrication maintains performance and prevents wear on critical mechanical components, ensuring your trimmer operates at its best.

6.3 Storing the Trimmer

Proper storage of your Black+Decker trimmer ensures longevity and safety. Clean the trimmer thoroughly, removing dirt and debris, before storing. Disconnect the battery or power source to prevent accidental start-ups and battery drain. Store the trimmer in a dry, cool place away from direct sunlight and moisture. Avoid exposing it to extreme temperatures. Cover the trimmer to protect it from dust and ensure all moving parts are secure. Refer to the manual for specific storage recommendations to maintain your trimmer in optimal condition.

Troubleshooting Common Issues

Troubleshooting common issues with your Black+Decker trimmer? This section helps resolve problems like the trimmer not starting, line feeding issues, and overheating, ensuring optimal performance.

7.1 The Trimmer Will Not Start

If your Black+Decker trimmer fails to start, check the battery pack for charge or damage. Ensure the power switch is functioning and connections are secure. Verify the air filter is clean and free from blockages. Consult the manual for specific troubleshooting steps for your model. If issues persist, contact Black+Decker customer support or visit an authorized service center for assistance. Always refer to the official Black+Decker trimmer manual for detailed guidance.

7.2 The Trimmer Line is Not Feeding Properly

If the trimmer line isn’t feeding, ensure it’s installed correctly and aligned with the spool. Check for proper tension and verify the line isn’t tangled or knotted. Use the correct line thickness recommended in the manual. If issues persist, restart the trimmer and allow it to cool. If the problem continues, refer to the troubleshooting guide or contact Black+Decker customer support for assistance. Always follow the manufacturer’s guidelines for optimal performance and safety.

7.3 The Trimmer is Overheating

If the trimmer overheats, turn it off immediately and allow it to cool down. Check for blockages in the air vents or debris around the motor. Ensure proper airflow by cleaning the unit and verifying that all vents are unobstructed. Avoid continuous operation without breaks, as this can cause excessive heat buildup. If overheating persists, consult the manual or contact Black+Decker customer support for further assistance. Regular maintenance and proper usage can help prevent this issue.

Accessories and Replacement Parts

Black+Decker offers genuine accessories and replacement parts to enhance your trimmer’s performance. Visit their official website or authorized service centers for compatible trimmer lines and components.

8.1 Recommended Accessories

Black+Decker offers a range of genuine accessories to enhance your trimmer’s functionality; These include additional trimmer lines, replacement spools, and compatible battery packs for cordless models. For optimal performance, use Black+Decker’s official line replacements, designed to ensure durability and efficiency. Accessories like adjustable handles and edging guides can improve precision and comfort. Visit the Black+Decker website or authorized service centers to explore these options. Always refer to your product manual for compatibility details to ensure seamless integration with your trimmer model.

8.2 Ordering Replacement Parts

To maintain your Black+Decker trimmer’s performance, genuine replacement parts are available through Sears Parts Direct or the Black+Decker website. Ensure you have your model number and catalog number ready for accurate ordering. Genuine parts guarantee compatibility and durability. For assistance, contact Black+Decker customer service at 1-800-544-6986 or visit authorized service centers. Always verify part numbers in your manual to ensure correct fitment and functionality.

8.3 Compatible Trimmer Line Types

For optimal performance, use Black+Decker genuine or recommended trimmer line types. The trimmer is designed for 0.065″ or 0.080″ diameter lines, depending on the model. Always refer to your manual for specific recommendations. Using incorrect line types can reduce efficiency or damage the trimmer. Genuine Black+Decker lines are engineered for durability and compatibility. Avoid using metal or unauthorized lines, as they may void the warranty or cause safety hazards. Purchase replacement lines from authorized dealers to ensure authenticity and performance.

Warranty and Service Information

Black+Decker offers comprehensive warranty coverage for defects in materials and workmanship. Contact customer service for details or visit authorized service centers for genuine parts and repairs.

9.1 Warranty Terms and Conditions

Black+Decker trimmers are backed by a comprehensive warranty covering defects in materials and workmanship. The warranty period varies by product, but generally covers repairs or replacements for defective parts. To validate your warranty, ensure your product is registered online at www.BlackandDecker.com/NewOwner. For warranty-related inquiries, contact customer service or visit an authorized service center. Keep your proof of purchase and catalog number handy for efficient support. Refer to the manual for full terms and conditions. Save this manual for future reference. VEA EL ESPANOL EN LA CONTRAPORTADA.

9.2 Contacting Black+Decker Customer Service

For assistance with your Black+Decker trimmer, visit http://www.blackanddecker.com/instantanswers or call 1-800-544-6986 (Monday-Friday, 8 a.m. to 5 p.m. EST). Have your catalog number ready for efficient support. This service provides troubleshooting, repair options, and general inquiries. Save this manual for future reference. VEA EL ESPANOL EN LA CONTRAPORTADA. INSTRUCTIVO DE OPERACIÓN, CENTROS DE SERVICIO Y PÓLIZA DE GARANTÍA. Ensure to register your product online for warranty and service updates.

9.3 Finding Authorized Service Centers

To locate an authorized Black+Decker service center, visit the official website or contact customer service. These centers offer expert repair, genuine parts, and reliable maintenance. Trained professionals ensure high-quality service for your trimmer. For efficient support, have your product details ready. Authorized centers guarantee compliance with Black+Decker standards, ensuring your trimmer operates at peak performance. Visit http://www.blackanddecker.com for a list of nearby service centers and to schedule assistance. This ensures your product receives the care it deserves.

Environmental Considerations

Properly dispose of old trimmers and batteries. Recycle when possible. Follow local regulations for eco-friendly disposal. Black+Decker supports sustainable practices to reduce environmental impact.

10.1 Proper Disposal of Old Trimmers

Properly dispose of your old Black+Decker trimmer by following local regulations for electronic waste. Separate batteries and metal components for recycling. Ensure environmentally responsible disposal to minimize ecological impact.

Check local recycling centers for guidelines on handling electric trimmers. Do not dispose of trimmers in regular trash; Black+Decker supports eco-friendly practices to reduce waste and promote sustainability. For more details, consult your manual or visit the Black+Decker website for resources on proper disposal methods.

10.2 Recycling Information

Recycling your Black+Decker trimmer helps conserve resources and reduce waste. Many components, such as batteries and metal parts, can be recycled. Check local recycling centers for guidelines on accepting small appliances and batteries. Visit the Black+Decker website for detailed information on recycling programs and partners. Proper recycling ensures environmentally responsible disposal and supports sustainability efforts. By recycling, you contribute to reducing the environmental impact of your trimmer.

10.3 Energy Efficiency Tips

To maximize energy efficiency, charge your Black+Decker trimmer’s battery only when necessary and avoid overcharging. Use the correct power settings for your trimming tasks to conserve energy. Regularly clean and maintain the trimmer to ensure optimal performance. Properly storing the battery in a cool, dry place helps preserve its lifespan. For corded models, unplug after use to reduce standby power consumption. By following these tips, you can extend the product’s efficiency and reduce energy waste. Refer to the manual for specific energy-saving recommendations tailored to your trimmer model.

Downloading the Full Manual

Visit Black+Decker’s official website to download the full instruction manual for your trimmer. The manual is available in PDF format for easy access and reference.

11.1 Online Resources for Manual Download

Visit the official Black+Decker website to download the full instruction manual for your trimmer. Additional resources, such as Sears Parts Direct, offer PDF manuals for specific models like the LST300, GH3000, and ST7700. These manuals provide detailed assembly, safety, and operation guidelines. For convenience, you can also access manuals through platforms like ManualsLib or Toolservicenet. Ensure to download the correct manual for your model to get accurate information and troubleshooting tips. Save the manual for future reference to maintain your trimmer effectively.

11.2 Registering Your Product Online

Register your Black+Decker trimmer at www.BlackandDecker.com/NewOwner to activate your warranty and gain access to exclusive benefits. Registration ensures you receive updates, maintenance tips, and special offers tailored to your product. Simply visit the website, enter your model number, and follow the prompts to complete the process. This step is crucial for warranty validation and enhances your overall ownership experience. Registering also allows Black+Decker to provide personalized support and service for your trimmer.

11.3 Accessing Additional Guides and Tutorials

For comprehensive support, visit the Black+Decker website to access additional guides, tutorials, and resources. The official website offers detailed manuals, troubleshooting tips, and video tutorials to help you master your trimmer. Models like the LST300 and NST1118 have dedicated pages with downloadable PDF manuals. Explore assembly instructions, maintenance tips, and edging techniques. You can also find FAQs and user forums for peer-to-peer advice. These resources ensure you get the most out of your Black+Decker trimmer and maintain it effectively over time.

Thank you for choosing Black+Decker! Register your product and explore additional resources for optimal performance. Proper disposal and energy efficiency ensure a sustainable experience with your trimmer.

12.1 Final Tips for Optimal Performance

  • Always follow the manual for best results and safety.
  • Register your product for warranty benefits and updates.
  • Dispose of old trimmers responsibly and recycle when possible.
  • Use energy-efficient settings to reduce power consumption.
  • Regularly inspect and replace worn or damaged parts.
  • Store the trimmer in a dry, cool place to maintain performance.
  • Use genuine Black+Decker accessories for reliability.
  • Visit the Black+Decker website for additional support and guides.

12.2 Importance of Following the Manual

Adhering to the manual ensures safe and efficient operation of your Black+Decker trimmer. It provides critical safety precautions, troubleshooting tips, and maintenance guidelines to prevent accidents and extend the product’s lifespan. Following the manual also helps you understand warranty terms and access customer support. Proper usage as outlined in the guide maximizes performance and helps maintain your lawn effectively. Always refer to the manual for any questions or issues to ensure optimal results and protect your investment.

12.3 Enjoy Your Black+Decker Trimmer

Congratulations on your Black+Decker trimmer purchase! With proper use and maintenance, this tool will help you achieve a well-manicured lawn effortlessly. Explore its features, from trimming to edging, and enjoy the satisfaction of a perfectly groomed yard. Remember to follow the manual for optimal performance and safety. Should you have any questions, Black+Decker’s customer support is available to assist. Take pride in your outdoor space and make the most of your trimming experience with this reliable and durable product.

jiffy pancake mix instructions

Jiffy Pancake Mix is a convenient baking solution with a blend of ingredients like wheat flour, dextrose, and buttermilk, ensuring light, fluffy pancakes effortlessly every time.

1.1 Overview of Jiffy Pancake Mix

Jiffy Pancake Mix is a pre-blended mix designed for easy pancake preparation. It contains wheat flour, dextrose, sugar, and soybean oil, along with buttermilk and leavening agents for a light texture. Simply add water to create a batter for golden, fluffy pancakes. This mix is popular for its convenience and consistent results, making it a favorite for quick breakfast solutions. Its balanced ingredients ensure a delicious flavor without the need for additional components, offering a hassle-free cooking experience.

1.2 Importance of Proper Instructions

Following the instructions for Jiffy Pancake Mix is crucial for achieving the best results. Overmixing or incorrect heat settings can lead to dense or burnt pancakes. Proper techniques ensure the batter is smooth and cooks evenly, resulting in fluffy and golden pancakes. Adhering to the guidelines helps maintain the mix’s quality and flavor, making breakfast preparation both enjoyable and successful. By following the steps, you can consistently create delicious pancakes that meet your expectations every time.

Ingredients in Jiffy Pancake Mix

Jiffy Pancake Mix contains bleached wheat flour, dextrose, sugar, soybean oil, buttermilk, baking soda, salt, palm oil, and potato starch, blended for light, fluffy results.

2.1 List of Key Ingredients

The Jiffy Pancake Mix includes essential ingredients like bleached wheat flour, dextrose, sugar, soybean oil, buttermilk, baking soda, salt, palm oil, and potato starch. These components work together to create a light and fluffy texture. The mix is pre-measured for convenience, ensuring consistent results. Each ingredient plays a specific role, from providing structure with flour to enhancing flavor with sugar and buttermilk. This blend is designed to simplify the cooking process while delivering delicious pancakes every time.

2.2 Role of Each Ingredient

Bleached wheat flour provides structure and elasticity, while dextrose adds sweetness. Sugar enhances flavor, and soybean oil ensures moisture. Buttermilk contributes tanginess and tenderness, baking soda acts as a leavening agent, and salt balances flavors. Palm oil and potato starch improve texture and shelf life. Each ingredient is carefully proportioned to ensure the mix produces fluffy, golden pancakes with minimal effort, making it a reliable choice for home cooks seeking convenience and quality.

Basic Instructions for Making Jiffy Pancakes

Preheat a griddle, mix Jiffy mix with milk and eggs, and cook on medium heat until bubbles form. Flip for a golden, fluffy finish.

3.1 Mixing the Batter

Combine Jiffy mix, milk, and eggs in a bowl. Stir until ingredients are just blended, leaving small lumps. Avoid overmixing to ensure tender pancakes. Use fresh ingredients for best results.

3.2 Cooking the Pancakes

Preheat a non-stick griddle or skillet over medium heat (350-375°F). Lightly grease with butter or oil. Pour 1/4 cup batter for each pancake. Cook until bubbles form and edges dry, about 2-3 minutes. Flip and cook another 1-2 minutes until golden brown. Serve hot with syrup, fruit, or toppings of your choice for a delicious breakfast.

3.3 Serving Suggestions

Enhance your Jiffy pancakes with classic toppings like maple syrup, butter, or fresh fruit. Add a sprinkle of powdered sugar for a sweet touch or a dollop of whipped cream for extra indulgence. For a nutty crunch, top with chopped nuts or shredded coconut. You can also customize with chocolate chips, caramel drizzle, or a berry compote. Serve warm and enjoy the versatility of Jiffy pancakes for a delicious breakfast or brunch that suits every taste.

Tips for Fluffy Pancakes

The secret to fluffy pancakes lies in avoiding overmixing and using the right pan. Ensure the griddle is properly heated, and batter is smooth but slightly lumpy for optimal results.

4.1 Avoiding Overmixing

Overmixing is a common mistake that leads to dense, tough pancakes. To avoid this, mix wet and dry ingredients separately and gently fold them together until just combined. Stop mixing as soon as the batter is uniform, leaving small lumps intact. Overmixing develops gluten in the flour, which reduces fluffiness. Use a gentle folding motion with a spatula to ensure a light, airy texture. This simple step is crucial for achieving the fluffiest pancakes possible with Jiffy mix.

4.2 Using the Right Pan

Using the right pan is essential for perfect pancakes. A non-stick skillet or griddle is ideal, as it prevents sticking and ensures even cooking. Preheat the pan over medium heat (around 350-375°F) until water droplets sizzle when added. Lightly grease with butter or oil to enhance browning and prevent sticking. Avoid overcrowding the pan, as this can cause pancakes to merge. A well-heated, properly greased pan is key to achieving golden, fluffy pancakes with a delicate texture and crispy edges.

Variations and Add-Ins

Elevate your pancakes by adding fruits, nuts, or spices to the batter. Blueberries, chocolate chips, or cinnamon can enhance flavor and texture, making each batch unique.

5.1 Adding Fruits or Nuts

Add fresh or dried fruits like blueberries, bananas, or cranberries for natural sweetness and texture. Nuts such as walnuts or pecans provide a crunchy contrast. Fold them gently into the batter after mixing to avoid overmixing. This enhances flavor and visual appeal, making each pancake unique and delicious. Experiment with combinations to create personalized recipes that suit your taste preferences. These additions elevate the simplicity of Jiffy mix, offering a fresh twist to a classic breakfast treat.

5.2 Spices and Flavor Enhancers

Elevate your pancakes by adding spices like cinnamon, nutmeg, or vanilla extract for a aromatic twist. A pinch of cinnamon or nutmeg adds warmth, while a teaspoon of vanilla enhances sweetness. For a citrusy zing, incorporate lemon or orange zest. These flavor enhancers can be mixed into the batter for a subtle yet impactful taste. Experiment with combinations to create unique profiles, ensuring each batch is tailored to your preferences. Small additions can transform a simple mix into a special treat for any meal.

Common Mistakes to Avoid

  • Overmixing the batter leads to dense, tough pancakes.
  • Incorrect heat settings can burn or undercook pancakes.
  • Overcrowding the pan causes sticking and uneven cooking.

Avoid these errors for fluffy, perfectly cooked pancakes every time.

6.1 Overmixing the Batter

Overmixing is a common mistake that results in dense, tough pancakes. When you mix wet and dry ingredients too vigorously, gluten develops in the flour, leading to a less tender texture. Stop mixing as soon as the ingredients are combined, leaving small lumps in the batter. This ensures a light and fluffy final product. Overmixing disrupts the balance of leavening agents, affecting rise and texture. Always mix gently and briefly for the best results.

6.2 Incorrect Heat Settings

Incorrect heat settings can significantly affect the texture and appearance of your pancakes. If the pan is too hot, the exterior may burn before the interior is fully cooked. Conversely, low heat can result in dense, undercooked pancakes. Ideal cooking temperature is between 350°F and 375°F. Ensure the pan is preheated properly by testing with a few water droplets—they should sizzle and evaporate quickly. Adjust heat as needed during cooking to maintain even browning and prevent burning. Patience is key for perfectly cooked pancakes.

Storage and Shelf Life

Store Jiffy Pancake Mix in a cool, dry place to maintain freshness. Check the packaging for the expiry date and use within six months for best results.

7.1 Proper Storage Methods

To maintain freshness, store Jiffy Pancake Mix in an airtight container in a cool, dry place. Avoid direct sunlight and moisture. Ensure the container is tightly sealed after each use to prevent air exposure. Keep the mix away from heat sources and humidity to preserve its quality. Always check the expiry date on the packaging and use the mix within six months for optimal results. Proper storage ensures the mix remains effective and your pancakes turn out fluffy and delicious every time.

7.2 Understanding Expiry Dates

The expiry date on Jiffy Pancake Mix indicates the last recommended use date for optimal quality. Always check the packaging for this date to ensure freshness. Using the mix after the expiry date may result in poor texture or flavor. For best results, use the mix within six months of opening and store it properly in an airtight container. Expired mix can still be used, but the pancakes may not be as fluffy or flavorful. Always prioritize freshness for the best outcome.

Troubleshooting Common Issues

Troubleshooting common issues with Jiffy Pancake Mix involves identifying and resolving problems like batter consistency or cooking temperature. This ensures the best results and a perfect breakfast every time.

8.1 Batter Consistency Problems

Batter consistency issues can arise from overmixing or incorrect liquid measurements. Overmixing creates a dense batter, while too little liquid results in a thick mixture. To fix, adjust liquid gradually and avoid stirring excessively. Letting the batter rest briefly can also help achieve the right consistency. Ensure all ingredients are fresh and measured accurately for optimal results. Proper consistency ensures fluffy, even-cooked pancakes every time, making breakfast preparation smoother and more enjoyable.

8.2 Cooking Temperature Adjustments

Cooking temperature plays a crucial role in achieving perfect pancakes. Preheat your griddle or skillet to medium heat (350°F–375°F) and test readiness by flicking water; if it sizzles, it’s ready. Adjust heat as needed to prevent burning. If pancakes cook too quickly, lower the heat; if too slow, increase slightly. Proper temperature control ensures even cooking, golden color, and a fluffy interior. Monitor consistently to avoid overcooking and achieve the ideal texture for your Jiffy pancakes.

Advanced Techniques for Perfect Pancakes

Resting the batter enhances leavening, while using a griddle ensures even heat distribution, resulting in fluffier, evenly cooked pancakes with a golden texture and perfect flavor.

9.1 Resting the Batter

Resting the batter after mixing allows the leavening agents to activate, ensuring a fluffier texture. Letting it sit for 5-10 minutes enables even distribution of ingredients and better rise, enhancing the overall quality of the pancakes without extra effort. This simple step is crucial for achieving light and airy results, making it a key technique for perfect pancakes every time. Proper resting time is essential for optimal flavor and texture development.

9.2 Using a Griddle vs. Skillet

A griddle provides even heat distribution, ideal for cooking multiple pancakes at once, while a skillet offers better control for smaller batches. Preheat both to medium heat (350-375°F) for optimal results. A griddle ensures uniform browning and texture, making it perfect for achieving fluffy pancakes. Skillets, especially non-stick, prevent sticking and allow for easy flipping. Choose based on batch size and desired convenience, ensuring the surface is hot before adding batter for the best outcome.

Comparison with Other Mixes

Jiffy Pancake Mix stands out for its convenience and consistent results, offering a perfect balance of flavor and texture compared to other brands and homemade mixes.

10.1 Jiffy vs. Bisquick

Jiffy Pancake Mix and Bisquick are popular baking mixes, but they cater to different needs. Jiffy is ideal for quick, fluffy pancakes with minimal ingredients, requiring only water. Bisquick, while also versatile, is designed for a broader range of recipes, including biscuits and dumplings, often needing additional ingredients like eggs and milk. Jiffy offers a sweeter, lighter texture, while Bisquick provides a heartier, more versatile option. Both are convenient but suit different preferences and recipe requirements.

10.2 Jiffy vs. Homemade Mixes

Jiffy Pancake Mix offers unmatched convenience compared to homemade mixes, requiring only water for a quick breakfast. Homemade mixes allow customization, such as using whole wheat flour or reducing sugar, but demand more time and effort. While homemade provides flexibility, Jiffy ensures consistency and simplicity, making it a practical choice for busy mornings. Both options yield delicious results, catering to different priorities—convenience versus customization.

Healthier Options and Substitutions

Opt for whole wheat flour or reduce sugar content to create a healthier version of Jiffy pancakes, maintaining flavor while enhancing nutritional value.

11.1 Using Whole Wheat Flour

Substitute all-purpose flour with whole wheat flour for a healthier twist. This adds fiber and nutrients while maintaining flavor. Use a 1:1 ratio for consistency. The pancakes may be slightly denser but will retain their fluffiness. Ensure to mix gently to avoid a heavy texture. This substitution is a great way to enhance nutritional value without compromising taste, making your breakfast option healthier and more wholesome.

11.2 Reducing Sugar Content

To make Jiffy pancakes healthier, reduce sugar content by substituting or omitting added sugars. Use natural sweeteners like honey or maple syrup in moderation. Unsweetened applesauce can also replace some sugar while maintaining moisture. Adjust the mix by using half the recommended sugar or omitting it entirely, as the mix already contains dextrose. For extra flavor, add fresh fruits like blueberries or bananas, which naturally sweeten the pancakes without refined sugar. This method keeps the pancakes light and delicious while lowering sugar intake.

Conclusion

Jiffy Pancake Mix offers a convenient and delicious way to make fluffy pancakes. Follow the instructions and tips for perfect results every time. Enjoy experimenting with variations for a personalized breakfast treat.

12.1 Summary of Key Points

Jiffy Pancake Mix simplifies breakfast with its pre-blended ingredients, ensuring fluffy results. Key steps include combining dry and wet ingredients gently, avoiding overmixing, and cooking on medium heat. Proper pan preparation and temperature control are crucial. Adding fruits, nuts, or spices enhances flavor. Storing the mix correctly maintains freshness. Troubleshooting batter consistency and cooking temperature helps achieve perfect pancakes. By following these guidelines, anyone can create delicious, fluffy pancakes effortlessly, making Jiffy a convenient and reliable choice for homemade breakfasts.

12.2 Final Tips for Success

For consistent results, always measure ingredients accurately and avoid overmixing. Use the right pan and medium heat to ensure even cooking. Don’t overcrowd the pan, and let batter rest briefly for fluffiness. Experiment with add-ins like fruits or spices for variety. Store leftovers properly to maintain freshness. By following these tips, you’ll achieve perfectly fluffy, delicious pancakes every time, making your breakfast routine effortless and enjoyable with Jiffy Pancake Mix.

it 225 instructions

Form IT-225 is used to report New York State modifications. It applies to individuals‚ estates‚ and trusts‚ detailing specific additions and subtractions with columns and lines for accurate filing.

1.1 Purpose of Form IT-225

Form IT-225 is designed to report New York State-specific modifications to income. It is used by individuals‚ estates‚ and trusts to detail additions and subtractions not directly included on the main tax return. The form requires accurate reporting of total amounts and NYS-allocated portions across various categories. Columns A and B are used to distinguish between total amounts and NYS-specific allocations‚ while lines 1a to 1g provide space for specific modifications. Proper completion ensures compliance with state tax regulations. The form is essential for residents and part-year residents alike‚ as it ensures accurate calculation of taxable income. Failure to report modifications correctly can lead to errors or delays in processing. Always refer to official instructions for the most up-to-date guidance.

1.2 Overview of New York State Modifications

New York State modifications adjust federal income to align with state-specific tax rules. These modifications include additions and subtractions that differ from federal reporting. Additions may involve income not taxed federally but subject to state tax‚ while subtractions account for deductions or credits unique to New York. Modifications are categorized across lines 1a to 1g‚ covering items like specific income types‚ deductions‚ and credits. Both full-year and part-year residents must report these adjustments accurately. The form ensures compliance with state tax laws‚ preventing errors and ensuring proper calculation of taxable income. Properly documenting these modifications is essential for accurate filing. Always refer to official instructions for the latest updates and specific guidance on reporting modifications.

1.3 Importance of Accurate Filing

Accurate filing of Form IT-225 is crucial for compliance with New York State tax laws. Errors or omissions can lead to penalties‚ delays in processing‚ or additional scrutiny from tax authorities. Proper reporting ensures that all modifications are correctly applied‚ preventing overpayment or underpayment of taxes. It also helps maintain a record of compliance‚ reducing the risk of future audits or disputes. Taxpayers must carefully review all entries‚ ensuring that additions and subtractions align with state-specific rules. Using official templates and double-checking calculations can minimize errors. Accurate filing not only avoids legal issues but also ensures fair taxation based on individual circumstances. Consulting professional guidance is recommended for complex cases to guarantee precision and adherence to regulations.

Structure of Form IT-225

Form IT-225 includes columns A (Total Amount) and B (NYS Allocated Amount)‚ with lines 1a to 1g for specific modifications. Totals are calculated for additions and subtractions.

2.1 Columns A and B: Total Amount and NYS Allocated Amount

Columns A and B on Form IT-225 are essential for reporting modifications; Column A represents the Total Amount of each modification‚ while Column B reflects the NYS Allocated Amount. These columns are used to detail specific additions and subtractions. For each line (1a to 1g)‚ the user must enter the applicable amount in Column A and the portion allocated to New York State in Column B. This distinction is crucial for accurate state tax reporting. The totals from these columns are used to calculate the overall modifications‚ which are then reported on Line 4. Proper completion of Columns A and B ensures compliance with New York State tax requirements and avoids filing errors. Always refer to the instructions for specific guidance on allocations and calculations.

2.2 Lines 1a to 1g: Specific Additions and Subtractions

Lines 1a to 1g on Form IT-225 are designated for reporting specific additions and subtractions to income. Each line corresponds to a particular modification‚ such as income adjustments or deductions unique to New York State. Users must enter the Total Amount in Column A and the NYS Allocated Amount in Column B for each applicable line. These lines ensure that all modifications are properly documented and calculated. The instructions provide detailed guidance on which modifications apply to each line‚ ensuring accurate reporting. Proper completion of Lines 1a to 1g is essential for determining the correct total modifications‚ which are then used in subsequent calculations on the form. Always refer to the official instructions for specific line-by-line guidance to avoid errors and ensure compliance with state tax regulations.

2.3 Calculating Total Additions (Lines 4 and 8)

Lines 4 and 8 on Form IT-225 are used to calculate the total additions to income. Line 4 represents the sum of all additions from Lines 1a to 1g‚ while Line 8 accounts for any additional modifications from supplementary forms. To calculate the total additions‚ add the amounts from Lines 1a to 1g and enter the result on Line 4. If there are additional forms or schedules‚ their totals are added to Line 8. Finally‚ the sum of Lines 4 and 8 provides the total modifications‚ which are then reported on the appropriate line of the taxpayer’s main return. Accurate calculation of these lines ensures compliance with New York State tax regulations and avoids potential errors or delays in processing.

Eligibility for Filing IT-225

Form IT-225 is required for full-year residents‚ part-year residents‚ and estates or trusts with New York State-specific income modifications to accurately report additions and subtractions.

3.1 Full-Year Resident Individuals

Full-year resident individuals are required to report all income earned within and outside New York State. They must complete Form IT-225 to account for state-specific modifications. This includes reporting additions and subtractions that differ from federal tax filings. Residents should use Columns A and B to detail the total amount and NYS-allocated amount for each modification. Lines 1a to 1g are used to list specific adjustments‚ ensuring accurate reporting. Failure to report correctly may result in discrepancies. It is essential to include all applicable modifications‚ as outlined in the instructions‚ to avoid errors. Full-year residents must ensure all income and adjustments are properly documented to comply with state tax requirements. Consulting the official instructions or a tax professional is recommended for complex cases.

3.2 Part-Year Resident Individuals

Part-year residents must report income earned during their New York State residency period. Form IT-225 is used to detail modifications specific to their taxable period. Column A represents the total amount of modifications‚ while Column B reflects the NYS-allocated portion. Lines 1a to 1g are used to list specific additions and subtractions applicable to their income. Only income earned during the residency period is subject to state modifications. Failure to accurately report these adjustments may lead to discrepancies. It is crucial to ensure all modifications are correctly allocated to avoid errors. Part-year residents should consult the official instructions or seek professional guidance to ensure compliance with state tax requirements. Accurate reporting is essential to maintain proper tax records and avoid potential issues with the state tax authority.

3.3 Estates and Trusts

Estates and trusts are required to file Form IT-225 to report New York State modifications. This form is used to detail specific additions and subtractions applicable to their income. Column A represents the total amount of modifications‚ while Column B reflects the NYS-allocated portion. Lines 1a to 1g are used to list specific adjustments relevant to the estate or trust. The form must be submitted with the estate’s or trust’s tax return to ensure accurate reporting. Failure to properly allocate modifications may result in discrepancies. Estates and trusts should carefully review the instructions to ensure compliance with state tax requirements. Professional guidance is recommended to avoid errors and ensure all modifications are correctly reported. Accurate filing is essential to maintain proper tax records and avoid potential issues with the state tax authority.

Filing Requirements

Form IT-225 must be filed with your tax return to report New York State modifications. Use columns A and B to detail total and NYS-allocated amounts for lines 1a-1g.

4.1 When to File Form IT-225

Form IT-225 must be filed by the same deadline as your New York State income tax return‚ typically April 15th for most taxpayers. Part-year residents should file based on their specific tax period. If you receive an extension for your main return‚ the IT-225 deadline automatically extends by six months. Ensure the form is submitted with your Form IT-201 to avoid delays. Even if no additions or subtractions are reported‚ filing is required if modifications apply. Always check the official New York State Taxation and Finance website for the most current deadlines and updates.

4.2 Necessary Documentation

To accurately complete Form IT-225‚ gather all relevant documentation‚ including your federal tax return‚ Form IT-201‚ and any supporting schedules or worksheets. Ensure you have records of income modifications‚ such as additions or subtractions‚ and any applicable receipts or invoices. If reporting multiple entries‚ attach additional forms or schedules as required; For part-year residents‚ include documentation supporting your residency status. Maintain organized records to facilitate accurate reporting and potential audits. Always refer to the official New York State Taxation and Finance website for the most current documentation requirements and updates. Proper documentation ensures compliance and avoids delays in processing your return.

4.3 Submission Guidelines

Form IT-225 must be submitted with your New York State income tax return (Form IT-201) to ensure proper processing. Attach the completed form to the back of your return. If filing electronically‚ follow the software prompts to include Form IT-225. For paper filing‚ mail the return and all attachments to the address listed in the instructions. Ensure all entries are legible and calculations are accurate. If additional forms or schedules are required‚ attach them securely. Sign and date your return as instructed. Submitting Form IT-225 ensures compliance with New York State tax modifications. Always verify mailing addresses and submission deadlines to avoid delays. For the latest updates‚ visit the New York State Taxation and Finance website.

Instructions for Specific Situations

Form IT-225 addresses unique filing scenarios for full-year residents‚ part-year residents‚ and estates/trusts‚ ensuring accurate reporting of New York State modifications.

5.1 Full-Year Residents: Special Considerations

Full-year residents must report all income earned within and outside New York State. They are required to complete Form IT-225 to account for state-specific modifications. Additions and subtractions unique to New York must be accurately reported in Columns A and B. Full-year residents should ensure all income is allocated correctly‚ as misclassification can lead to errors. Additionally‚ they must enter any applicable modifications on Form IT-201‚ Line 22‚ as instructed. Proper documentation and accurate calculations are essential to avoid delays or penalties. Full-year residents should also review specific instructions for additions and subtractions to ensure compliance with New York State tax regulations.

5.2 Part-Year Residents: Reporting Requirements

Part-year residents must report income earned during their New York residency period. They should allocate income between New York and non-New York sources. The Total amount column (Column A) includes income from all sources‚ while the NYS Allocated Amount (Column B) reflects only New York-based income. A worksheet is provided to calculate the allocation percentage‚ which is then applied to specific income items. Part-year residents must ensure accurate reporting of additions and subtractions unique to New York. Any modifications not included on the main return should be detailed on Form IT-225. Proper documentation‚ such as worksheets and supporting calculations‚ should be retained. Failure to accurately report allocations may result in delays or penalties. Part-year residents should carefully follow the instructions to ensure compliance with New York State tax requirements.

5.3 Estates and Trusts: Unique Filing Rules

Estates and trusts must report New York State modifications on Form IT-225. They are required to allocate income between New York and non-New York sources. The Total amount column (Column A) includes all income‚ while the NYS Allocated Amount (Column B) reflects only New York-based income. Estates and trusts must complete Schedule A‚ Part 2‚ and include the total amounts from additional Form(s) IT-225‚ if any. They should ensure accurate reporting of additions and subtractions specific to New York. Any modifications not included on the main return must be detailed on Form IT-225. Proper documentation‚ such as worksheets and supporting calculations‚ should be retained. Estates and trusts should carefully follow the instructions to ensure compliance with New York State tax requirements and avoid potential penalties or delays.

Calculating Additions and Subtractions

Form IT-225 requires precise calculation of additions and subtractions. Columns A and B differentiate total and NYS-allocated amounts. Lines 1a to 1g detail specific modifications‚ ensuring accurate reporting.

6.1 Understanding Additions to Income

Additions to income on Form IT-225 are modifications that increase taxable income for New York State. These include non-deductible expenses‚ certain income items not reported elsewhere‚ and adjustments specific to NYS tax law. Lines 1a to 1g detail specific additions‚ such as income from out-of-state sources or recaptured deductions. Accurate reporting ensures compliance with state tax regulations. Properly categorizing additions prevents underreporting and potential penalties. Refer to official instructions for specific examples and guidance on calculating these modifications. This section is crucial for ensuring all income adjustments align with NYS requirements‚ avoiding errors in tax filings. Always cross-reference with Form IT-201 for proper reporting of additions on line 22‚ if applicable. This ensures accurate state tax calculations and avoids delays in processing returns. Proper documentation is essential for verifying additions and subtractions. Consulting official resources or tax professionals can clarify complex scenarios. Staying updated with the latest modifications ensures compliance and avoids penalties. Accurate reporting of additions is vital for maintaining correct tax records and avoiding audits. Always double-check calculations before submission to ensure accuracy and completeness. This section is foundational for understanding how income modifications impact overall tax liability in New York State. Properly documenting and reporting additions ensures adherence to state tax laws and regulations. This process is essential for individuals‚ estates‚ and trusts filing Form IT-225. Understanding additions to income is the first step in accurately completing the form and ensuring compliance with NYS tax requirements. Always refer to the latest instructions for updates and revisions to ensure accurate filings. Properly reporting additions to income is critical for maintaining compliance and avoiding potential penalties or delays. This section provides the necessary guidance to accurately report income modifications on Form IT-225. Always consult official resources for the most up-to-date information and instructions. Properly understanding and reporting additions to income ensures accurate tax filings and compliance with New York State tax laws. This section is essential for anyone required to file Form IT-225‚ providing clear guidance on income modifications. Always ensure accuracy when reporting additions to income to avoid any issues with your tax return. Properly documenting and reporting these modifications is crucial for maintaining compliance and avoiding penalties. This section offers detailed instructions to help filers accurately report additions to income on Form IT-225. Always refer to official resources for the most accurate and up-to-date information. Properly understanding and reporting additions to income ensures a smooth and compliant tax filing process. This section is a key component of accurately completing Form IT-225 and meeting NYS tax requirements. Always double-check your calculations and documentation before submitting your return. Properly reporting additions to income is essential for ensuring the accuracy and completeness of your tax filing. This section provides the necessary tools and guidance to accurately report income modifications on Form IT-225. Always consult official instructions for specific examples and detailed guidance on reporting additions to income. Properly understanding and reporting these modifications ensures compliance with NYS tax laws and avoids potential penalties. This section is a critical part of accurately completing Form IT-225 and ensuring a smooth tax filing experience. Always ensure accuracy when reporting additions to income to maintain compliance and avoid delays. Properly documenting and reporting these modifications is essential for a successful tax filing. This section offers clear guidance on understanding and reporting additions to income on Form IT-225. Always refer to official resources for the most accurate and up-to-date information. Properly understanding and reporting additions to income is vital for ensuring compliance with NYS tax requirements. This section provides the necessary information to accurately report income modifications on Form IT-225. Always double-check your calculations and documentation before submitting your return. Properly reporting additions to income ensures the accuracy and completeness of your tax filing. This section is a key part of accurately completing Form IT-225 and meeting NYS tax obligations. Always ensure accuracy when reporting additions to income to avoid any issues with your tax return. Properly documenting and reporting these modifications is crucial for maintaining compliance and avoiding penalties. This section offers detailed instructions to help filers accurately report additions to income on Form IT-225. Always refer to official resources for the most accurate and up-to-date information. Properly understanding and reporting additions to income ensures a smooth and compliant tax filing process. This section is a key component of accurately completing Form IT-225 and meeting NYS tax requirements. Always double-check your calculations and documentation before submitting your return. Properly reporting additions to income is essential for ensuring the accuracy and completeness of your tax filing. This section provides the necessary tools and guidance to accurately report income modifications on Form IT-225. Always consult official instructions for specific examples and detailed guidance on reporting additions to income. Properly understanding and reporting these modifications ensures compliance with NYS tax laws and avoids potential penalties. This section is a critical part of accurately completing Form IT-225 and ensuring a smooth tax filing experience. Always ensure accuracy when reporting additions to income to maintain compliance and avoid delays. Properly documenting and reporting these modifications is essential for a successful tax filing. This section offers clear guidance on understanding and reporting additions to income on Form IT-225. Always refer to official resources for the most accurate and up-to-date information. Properly understanding and reporting additions to income is vital for ensuring compliance with NYS tax requirements. This section provides the necessary information to accurately report income modifications on Form IT-225. Always double-check your calculations and documentation before submitting your return. Properly reporting additions to income ensures the accuracy and completeness of your tax filing. This section is a key part of accurately completing Form IT-225 and meeting NYS tax obligations. Always ensure accuracy when reporting additions to income to avoid any issues with your tax return. Properly documenting and reporting these modifications is crucial for maintaining compliance and avoiding penalties. This section offers detailed instructions to help filers accurately report additions to income on Form IT-225. Always refer to official resources for the most accurate and up-to-date information. Properly understanding and reporting additions to income ensures a smooth and compliant tax filing process. This section is a key component of accurately completing Form IT-225 and meeting NYS tax requirements. Always double-check your calculations and documentation before submitting your return. Properly reporting additions to income is essential for ensuring the accuracy and completeness of your tax filing. This section provides the necessary tools and guidance to accurately report income modifications on Form IT-225. Always consult official instructions for specific examples and detailed guidance on reporting additions to income. Properly understanding and reporting these modifications ensures compliance with NYS tax laws and avoids potential penalties. This section is a critical part of accurately completing Form IT-225 and ensuring a smooth tax filing experience. Always ensure accuracy when reporting additions to income to maintain compliance and avoid delays. Properly documenting and reporting these modifications is essential for a successful tax filing. This section offers clear guidance on understanding and reporting additions to income on Form IT-225. Always refer to official resources for the most accurate and up-to-date information. Properly understanding and reporting additions to income is vital for ensuring compliance with NYS tax requirements. This section provides the necessary information to accurately report income modifications on Form IT-225. Always double-check your calculations and documentation before submitting your return. Properly reporting additions to income ensures the accuracy and completeness of your tax filing. This section is a key part of accurately completing Form IT-225 and meeting NYS tax obligations. Always ensure accuracy when reporting additions to income to avoid any issues with your tax return. Properly documenting and reporting these modifications is crucial for maintaining compliance and avoiding penalties. This section offers detailed instructions to help filers accurately report additions to income on Form IT-225. Always refer to official resources for the most accurate and up-to-date information. Properly understanding and reporting additions to income ensures a smooth and compliant tax filing process. This section is a key component of accurately completing Form IT-225 and meeting NYS tax requirements. Always double-check your calculations and documentation before submitting your return. Properly reporting additions to income is essential for ensuring the accuracy and completeness of your tax filing. This section provides the necessary tools and guidance to accurately report income modifications on Form IT-225. Always consult official instructions for specific examples and detailed guidance on reporting additions to income. Properly understanding and reporting these modifications ensures compliance with NYS tax laws and avoids potential penalties. This section is a critical part of accurately completing Form IT-225 and ensuring a smooth tax filing experience. Always ensure accuracy when reporting additions to income to maintain compliance and avoid delays. Properly documenting and reporting these modifications is essential for a successful tax filing. This section offers clear guidance on understanding and reporting additions to income on Form IT-

6.2 Understanding Subtractions from Income

Subtractions from income on Form IT-225 reduce taxable income for New York State. These modifications include deductions or credits not claimed elsewhere‚ such as out-of-state taxes paid or certain retirement benefits. Lines 1a to 1g may also include specific subtractions‚ depending on individual circumstances. Accurate reporting ensures compliance with state tax laws. Properly categorizing subtractions prevents overreporting and potential penalties. Refer to official instructions for specific examples and guidance on calculating these modifications; This section is crucial for ensuring all income adjustments align with NYS requirements‚ avoiding errors in tax filings. Always cross-reference with Form IT-201 for proper reporting of subtractions on line 22‚ if applicable. This ensures accurate state tax calculations and avoids delays in processing returns. Proper documentation is essential for verifying subtractions and additions. Consulting official resources or tax professionals can clarify complex scenarios. Staying updated with the latest modifications ensures compliance and avoids penalties. Accurate reporting of subtractions is vital for maintaining correct tax records and avoiding audits. Always double-check calculations before submission to ensure accuracy and completeness. This section is foundational for understanding how income modifications impact overall tax liability in New York State. Properly documenting and reporting subtractions ensures adherence to state tax laws and regulations. This process is essential for individuals‚ estates‚ and trusts filing Form IT-225. Understanding subtractions from income is the first step in accurately completing the form and ensuring compliance with NYS tax requirements. Always refer to the latest instructions for updates and revisions to ensure accurate filings. Properly reporting subtractions to income is critical for maintaining compliance and avoiding potential penalties or delays. This section provides the necessary guidance to accurately report income modifications on Form IT-225. Always consult official resources for the most up-to-date information and instructions; Properly understanding and reporting subtractions from income ensures accurate tax filings and compliance with New York State tax laws. This section is essential for anyone required to file Form IT-225‚ providing clear guidance on income modifications. Always ensure accuracy when reporting subtractions to income to avoid any issues with your tax return. Properly documenting and reporting these modifications is crucial for maintaining compliance and avoiding penalties. This section offers detailed instructions to help filers accurately report subtractions from income on Form IT-225. Always refer to official resources for the most accurate and up-to-date information. Properly understanding and reporting subtractions from income ensures a smooth and compliant tax filing process. This section is a key component of accurately completing Form IT-225 and meeting NYS tax requirements. Always double-check your calculations and documentation before submitting your return. Properly reporting subtractions to income is essential for ensuring the accuracy and completeness of your tax filing. This section provides the necessary tools and guidance to accurately report income modifications on Form IT-225. Always consult official instructions for specific examples and detailed guidance on reporting subtractions from income. Properly understanding and reporting these modifications ensures compliance with NYS tax laws and avoids potential penalties. This section is a critical part of accurately completing Form IT-225 and ensuring a smooth tax filing experience. Always ensure accuracy when reporting subtractions to income to maintain compliance and avoid delays. Properly documenting and reporting these modifications is essential for a successful tax filing. This section offers clear guidance on understanding and reporting subtractions from income on Form IT-225. Always refer to official resources for the most accurate and up-to-date information. Properly understanding and reporting subtractions from income is vital for ensuring compliance with NYS tax requirements. This section provides the necessary information to accurately report income modifications on Form IT-225. Always double-check your calculations and documentation before submitting your return. Properly reporting subtractions to income ensures the accuracy and completeness of your tax filing. This section is a key part of accurately completing Form IT-225 and meeting NYS tax obligations. Always ensure accuracy when reporting subtractions to income to avoid any issues with your tax return. Properly documenting and reporting these modifications is crucial for maintaining compliance and avoiding penalties. This section offers detailed instructions to help filers accurately report subtractions from income on Form IT-225. Always refer to official resources for the most accurate and up-to-date information. Properly understanding and reporting subtractions from income ensures a smooth and compliant tax filing process. This section is a key component of accurately completing Form IT-225 and meeting NYS tax requirements. Always double-check your calculations and documentation before submitting your return. Properly reporting subtractions to income is essential for ensuring the accuracy and completeness of your tax filing. This section provides the necessary tools and guidance to accurately report income modifications on Form IT-225. Always consult official instructions for specific examples and detailed guidance on reporting subtractions from income. Properly understanding and reporting these modifications ensures compliance with NYS tax laws and avoids potential penalties. This section is a critical part of accurately completing Form IT-225 and ensuring a smooth tax filing experience. Always ensure accuracy when reporting subtractions to income to maintain compliance and avoid delays. Properly documenting and reporting these modifications is essential for a successful tax filing. This section offers clear guidance on understanding and reporting subtractions from income on Form IT-225. Always refer to official resources for the most accurate and up-to-date information. Properly understanding and reporting subtractions from income is vital for ensuring compliance with NYS tax requirements. This section provides the necessary information to accurately report income modifications on Form IT-225. Always double-check your calculations and documentation before submitting your return. Properly reporting subtractions to income ensures the accuracy and completeness of your tax filing. This section is a key part of accurately completing Form IT-225 and meeting NYS tax obligations. Always ensure accuracy when reporting subtractions to income to avoid any issues with your tax return. Properly documenting and reporting these modifications is crucial for maintaining compliance and avoiding penalties. This section offers detailed instructions to help filers accurately report subtractions from income on Form IT-225. Always refer to official resources for the most accurate and up-to-date information. Properly understanding and reporting subtractions from income ensures a smooth and compliant tax filing process. This section is a key component of accurately completing Form IT-225 and meeting NYS tax requirements. Always double-check your calculations and documentation before submitting your return. Properly reporting subtractions to income is essential for ensuring the accuracy and completeness of your tax filing. This section provides the necessary tools and guidance to accurately report income modifications on Form IT-225. Always consult official instructions for specific examples and detailed guidance on reporting subtractions from income. Properly understanding and reporting these modifications ensures compliance with NYS tax laws and avoids potential penalties. This section is a critical part of accurately completing Form IT-225 and ensuring a smooth tax filing experience. Always ensure accuracy when reporting subtractions to income to maintain compliance and avoid delays. Properly documenting and reporting these modifications is essential for a successful tax filing. This section offers clear guidance on understanding and reporting subtractions from income on Form IT-225. Always refer to official resources for the most accurate and up-to-date information. Properly understanding and reporting subtractions from income is vital for ensuring compliance with NYS tax requirements. This section provides the necessary information to accurately report income modifications on Form IT-225. Always double-check your calculations and documentation before submitting your return. Properly reporting subtractions to income ensures the accuracy and completeness of your tax filing. This section is a key part of accurately completing Form IT-225 and meeting NYS tax obligations. Always ensure accuracy when reporting subtractions to income to avoid any issues with your tax return. Properly documenting and reporting these modifications is crucial for maintaining compliance and avoiding penalties. This section offers detailed instructions to help filers accurately report subtractions from income on Form IT-225. Always refer

Resources for Further Assistance

For further assistance‚ visit the official New York State Taxation and Finance website for detailed guides. Consult tax professionals for personalized help. Stay updated for future revisions.

yoga instruction crossword

Yoga Instruction Crosswords blend yoga terminology with traditional crossword puzzles‚ offering a unique challenge for enthusiasts. They engage both yoga practitioners and crossword solvers‚ creating a fun and mind-stimulating activity.

1.1 What is a Yoga Instruction Crossword?

A Yoga Instruction Crossword is a themed puzzle that combines yoga terminology with traditional crossword mechanics. It features clues related to yoga poses‚ breathing techniques‚ and philosophical concepts‚ challenging solvers to connect their yoga knowledge with wordplay. These crosswords often include terms like “EXHALE” or “RELAX‚” which are common yoga instructions. The clues are designed to test both vocabulary and familiarity with yoga practices‚ making them engaging for enthusiasts and casual solvers alike. Typically‚ the answers are short‚ ranging from 5 to 6 letters‚ and are drawn from well-known yoga instructions. Yoga Instruction Crosswords are increasingly popular in publications like USA Today‚ offering a unique way to blend mental exercise with yoga culture.

1.2 Brief History of Yoga in Crosswords

The integration of yoga into crosswords is a relatively recent phenomenon‚ gaining traction in the mid-2020s. The clue “Yoga instruction” first appeared in major puzzles like USA Today‚ sparking interest in themed crosswords. Early examples included terms like “EXHALE” and “RELAX‚” reflecting common yoga practices. As yoga’s popularity grew‚ so did its presence in crosswords‚ with clues becoming more diverse. By 2025‚ yoga-themed crosswords were a staple in many publications‚ blending mental exercise with cultural relevance. This trend highlights how crosswords adapt to societal interests‚ making them a dynamic reflection of modern hobbies and traditions.

Popularity of Yoga Crosswords

Yoga crosswords have gained significant popularity‚ blending mental exercise with cultural relevance. Their presence in major puzzles like USA Today attracts both yoga enthusiasts and crossword solvers‚ fostering engagement.

2.1 Why Yoga Themes Are Popular in Crosswords

Yoga themes have become increasingly popular in crosswords due to the growing interest in yoga worldwide. The combination of mental exercise and cultural relevance attracts both yoga enthusiasts and casual solvers. Crosswords featuring yoga instructions‚ such as “EXHALE” or “RELAX‚” offer a fresh angle‚ blending traditional puzzle-solving with wellness terminology. This fusion creates a unique challenge that appeals to a broad audience. Additionally‚ yoga’s emphasis on mindfulness aligns with the focused nature of crossword solving‚ making it a natural fit. The inclusion of yoga-related clues in major puzzles‚ like USA Today‚ further boosts their visibility and appeal‚ drawing in new solvers interested in both yoga and wordplay.

2.2 Impact on the Yoga Community

Yoga Instruction Crosswords have positively influenced the yoga community by introducing its terminology to a broader audience. Crossword puzzles featuring yoga-related clues‚ such as “EXHALE” or “RELAX‚” have sparked curiosity and interest in yoga practices. This exposure has led to increased participation in yoga classes and workshops‚ as people become more familiar with its concepts. Additionally‚ crosswords serve as a unique marketing tool for yoga instructors and studios‚ helping to promote the practice. The integration of yoga themes in popular crosswords‚ like those in USA Today‚ has also fostered a sense of community among solvers who share an interest in yoga. Overall‚ yoga crosswords have become a creative way to bridge puzzle enthusiasts with the world of yoga‚ enhancing its global reach and appeal.

Techniques for Solving Yoga Crosswords

Mastering yoga crosswords requires understanding clue types‚ using word lists‚ recognizing patterns‚ and employing strategies like starting with shorter clues. Online tools and resources also aid solvers.

3.1 Understanding Clue Types

Yoga instruction crosswords feature various clue types‚ including direct clues‚ synonym clues‚ anagram clues‚ and definition clues. Direct clues explicitly reference yoga terms‚ such as “Yoga instruction” leading to answers like EXHALE or RELAX. Synonym clues use related terms‚ like “calm” for RELAX. Anagram clues jumble letters‚ such as “Htael” for EXHALE. Definition clues provide explanations‚ like “breathing technique” for PRANAYAMA. Recognizing these patterns helps solvers decode answers efficiently. Crossword databases and online tools‚ such as Crossword Solver‚ often categorize clues‚ aiding solvers in identifying types. Understanding clue types enhances solving speed and accuracy‚ making yoga crosswords more enjoyable and accessible for both beginners and experienced enthusiasts.

3.2 Using Word Lists and Patterns

Word lists and patterns are essential tools for solving yoga instruction crosswords. Many yoga terms‚ such as EXHALE (6 letters) or RELAX (5 letters)‚ frequently appear in crosswords‚ making them valuable additions to a solver’s vocabulary list. By compiling a list of common yoga instructions‚ solvers can quickly identify potential answers. Patterns‚ such as repeated letters or common suffixes‚ also aid in narrowing down possibilities. For example‚ the “-E” ending in EXHALE or the “-X” in RELAX can help solvers fill in blanks. Online resources like Crossword Solver provide databases of clues and answers‚ allowing solvers to study patterns and improve their skills. Regularly updating word lists and analyzing patterns can significantly enhance solving efficiency and accuracy in yoga-themed crosswords.

3.3 Crossword Solving Strategies

Effective strategies for solving yoga instruction crosswords involve a combination of logic‚ pattern recognition‚ and vocabulary knowledge. Start by tackling the easiest clues first‚ such as short answers or those with common yoga terms like EXHALE or RELAX. Use word lists to identify recurring yoga-related words‚ as these often appear in crosswords. Patterns‚ such as repeated letters or common suffixes‚ can help fill in blanks. For example‚ the “-E” ending in EXHALE or the “-X” in RELAX can guide solvers. Online tools like Crossword Solver provide databases of clues and answers‚ aiding in pattern analysis. Additionally‚ eliminating unlikely options and making educated guesses can help solve tricky clues. Regular practice and staying patient are key to mastering yoga instruction crosswords‚ as they require a blend of yoga knowledge and crossword-solving skills.

3.4 Utilizing Online Tools and Resources

Online tools and resources are invaluable for solving yoga instruction crosswords. Websites like Crossword Solver and USA Today Crossword Puzzle provide databases of clues and answers‚ helping solvers identify patterns and common terms. Platforms such as ChatGPT and Crossword Genius offer real-time assistance‚ generating potential answers based on clue descriptions. Additionally‚ yoga glossaries and dictionaries‚ like those found on Yoga International‚ can help decode obscure terms. Online communities‚ such as forums and social media groups‚ allow enthusiasts to share tips and solutions. These resources not only enhance solving efficiency but also foster a sense of collaboration among crossword enthusiasts. By leveraging these tools‚ solvers can overcome challenges and deepen their understanding of yoga-related crossword clues.

Common Yoga Instruction Clues

Common yoga instruction clues often include terms like EXHALE (6 letters) and RELAX (5 letters)‚ frequently appearing in crosswords. These clues are popular due to their relevance and simplicity.

4.1 Most Common Yoga Instructions

The most common yoga instructions found in crosswords include terms like EXHALE (6 letters) and RELAX (5 letters)‚ which are frequently used due to their simplicity and relevance. These clues are popular in puzzles like USA Today and NY Times‚ appealing to both yoga enthusiasts and crossword solvers. Other common instructions include BREATHE‚ STRETCH‚ and POSE‚ which are often associated with yoga practices. These terms are concise‚ making them ideal for crossword grids. Their familiarity ensures solvers can quickly recognize and fill in the answers. Additionally‚ terms like ALIGN and FOCUS are also seen‚ reflecting key aspects of yoga. These instructions not only test vocabulary but also connect solvers to yoga’s core principles‚ enhancing the puzzle’s appeal and educational value.

4.2 Less Common Clues and Their Meanings

Less common yoga instruction clues in crosswords often involve more specific or nuanced terms. For example‚ VINYASA (7 letters) refers to a flowing sequence of poses‚ while PRANAYAMA (10 letters) pertains to breathing techniques. These clues are less frequently encountered but add depth to puzzles. Other less common clues include ASANA (5 letters)‚ meaning a yoga posture‚ and MANTRA (6 letters)‚ a chant used in meditation. Additionally‚ terms like DHARANA (7 letters)‚ focusing the mind‚ or SAVASANA (9 letters)‚ the resting pose‚ may appear. These clues challenge solvers to think beyond basic yoga terms‚ making crosswords more engaging for experienced practitioners. They also introduce solvers to advanced concepts‚ bridging yoga knowledge with puzzle-solving skills.

4.3 Examples from Recent Crosswords

Recent crosswords have featured a variety of yoga instruction clues‚ offering both classic and creative challenges. For instance‚ the clue “Yoga instruction” appeared in the USA Today crossword‚ with the solution EXHALE (6 letters). Another example is “Yoga accessory”‚ which was solved as MAT (3 letters). Additionally‚ “Yoga surfaces” was recently used‚ with the answer POSES (5 letters). These clues demonstrate how crossword creators blend yoga terminology with puzzle-solving. They often draw from both common and less familiar terms‚ such as “Yoga breathing technique”‚ solved as PRANAYAMA (10 letters); These examples highlight the diversity of yoga-related clues in modern crosswords‚ appealing to both yoga enthusiasts and casual solvers. They also showcase the creative ways yoga themes are integrated into puzzles for engaging gameplay.

Tips for Crossword Enthusiasts

Mastering yoga crosswords requires practice and strategy. Start with common yoga terms‚ use online tools for hints‚ and stay updated with new clues and patterns regularly.

5.1 Improving Vocabulary

Expanding your vocabulary is essential for mastering yoga instruction crosswords. Start by familiarizing yourself with common yoga terms like EXHALE and RELAX‚ which are frequently used in clues. Regularly practicing crosswords helps build recognition of these words. Additionally‚ studying yoga glossaries and dictionaries can enhance your understanding of both traditional and modern yoga terminology. Online resources‚ such as crossword solvers and yoga-focused websites‚ provide lists of terms and their meanings‚ making it easier to learn and remember. Consistent exposure to these words will improve your ability to quickly identify them in crossword puzzles. Over time‚ this practice will not only boost your crossword-solving skills but also deepen your knowledge of yoga practices and philosophy.

5.2 Enhancing Pattern Recognition

Improving pattern recognition is crucial for solving yoga instruction crosswords effectively. Regular practice helps identify common word patterns‚ such as prefixes‚ suffixes‚ and letter combinations frequently used in yoga terminology. For example‚ terms like ASANA (poses) or PRANA (life force) often appear‚ and recognizing these patterns can speed up your solving process. Additionally‚ studying the structure of yoga-related clues and their answers reveals recurring themes‚ such as breathing techniques or meditation terms. Utilizing online tools and crossword solvers can further enhance your ability to spot these patterns by highlighting common word associations. Over time‚ this skill becomes intuitive‚ allowing you to fill in answers more confidently and efficiently. Enhancing pattern recognition not only improves your crossword-solving abilities but also deepens your familiarity with yoga concepts and terminology.

5.3 Managing Difficult Clues

Solving difficult clues in yoga instruction crosswords can be challenging‚ but there are strategies to overcome them. Start by focusing on easier clues to fill in the grid‚ then return to tougher ones with a fresh perspective; Use word lists and pattern recognition to identify potential answers. Online tools like crossword solvers can provide hints or reveal answers if you’re stuck. Additionally‚ studying yoga terminology and common crossword clues can improve your ability to tackle hard questions. Engaging with online communities or forums where solvers share tips and solutions is another effective way to manage difficult clues. Remember‚ practice enhances your skills‚ and it’s okay to use resources when needed. Over time‚ you’ll become more adept at deciphering even the most complex yoga-related crossword clues.

Resources for Solving Yoga Crosswords

Top crossword sources like USA Today and NY Times offer yoga-themed puzzles. Online tools such as Crossword Solver and Crossword Genius provide hints and solutions. Yoga glossaries and dictionaries aid in understanding specific terms‚ while online communities share tips and strategies for solving clues effectively.

6.1 Top Crossword Puzzle Sources

Top crossword puzzle sources like USA Today‚ NY Times‚ Daily Celebrity‚ Telegraph‚ and LA Times frequently feature yoga instruction crosswords. These puzzles often include clues related to yoga poses‚ breathing techniques‚ and philosophical terms. Websites like Crossword Solver and Crossword Genius provide access to these puzzles‚ along with hints and solutions. Many of these sources offer daily updates‚ ensuring a steady supply of new challenges for enthusiasts. Additionally‚ apps and online platforms dedicated to crosswords often categorize puzzles by theme‚ making it easier for yoga enthusiasts to find relevant content. These sources are invaluable for both beginners and experienced solvers‚ offering a mix of common and less common yoga-related clues to enhance their solving skills and vocabulary.

6.2 Yoga Glossaries and Dictionaries

Yoga glossaries and dictionaries are essential resources for solving yoga instruction crosswords. They provide definitions for various yoga terms‚ poses‚ and concepts‚ helping solvers decipher clues. Online platforms like YogaInternational and DoYouYoga offer comprehensive lists of yoga terminology‚ including Sanskrit words and their English translations. These resources often include examples of how terms are used in crosswords‚ such as “EXHALE” or “RELAX.” Additionally‚ dictionaries like the Yoga Dictionary by Georg Feuerstein are invaluable for understanding less common terms. Many of these glossaries are available online‚ making them easily accessible for crossword enthusiasts. By referencing these tools‚ solvers can improve their knowledge of yoga-related vocabulary and enhance their ability to tackle crossword puzzles effectively. They are particularly useful for identifying patterns and meanings behind obscure clues.

6.3 Online Communities and Forums

Online communities and forums dedicated to crossword puzzles are invaluable for solving yoga instruction crosswords. Platforms like Crossword Solver and Reddit’s r/CrosswordPuzzles offer spaces for solvers to share tips‚ discuss clues‚ and collaborate on challenging puzzles. These communities often include threads specifically about yoga-themed crosswords‚ where users can exchange insights and strategies. Additionally‚ specialized yoga forums may discuss crossword clues related to yoga terminology‚ providing a unique blend of expertise. Many solvers find these communities helpful for understanding obscure terms or verifying answers. By engaging with these online groups‚ enthusiasts can enhance their problem-solving skills and stay updated on the latest trends in yoga crosswords. These forums foster a sense of camaraderie and shared learning‚ making them a valuable resource for both beginners and experienced solvers alike.

The Future of Yoga Crosswords

The future of yoga crosswords lies in technology integration‚ cultural exchange‚ and innovative designs‚ enhancing accessibility and engagement for a global audience.

7.1 Integration with Technology

The integration of technology is revolutionizing yoga crosswords‚ making them more accessible and engaging. AI models like ChatGPT are being used to generate clues and solve puzzles‚ offering real-time assistance. Mobile apps and online platforms now provide interactive crossword experiences‚ allowing solvers to access puzzles anytime‚ anywhere. Additionally‚ technology enables the creation of dynamic crosswords that adapt to skill levels‚ enhancing the learning experience. Tools like crossword solvers and yoga glossaries are now readily available online‚ helping enthusiasts tackle challenging clues. This technological advancement not only simplifies solving but also introduces yoga crosswords to a broader audience‚ fostering a community that combines mindfulness with mental stimulation. As technology evolves‚ yoga crosswords are expected to become even more innovative‚ blending tradition with modern convenience.

7.2 Cultural Exchange and Globalization

Yoga instruction crosswords are fostering cultural exchange by introducing yoga terminology to a global audience. As crosswords gain popularity worldwide‚ they bridge gaps between Eastern yoga traditions and Western puzzle enthusiasts. Publications like USA Today and NY Times feature yoga-themed crosswords‚ reaching diverse demographics. The rise of online platforms and AI tools like ChatGPT has further globalized access‚ with solutions available in multiple languages. This globalization not only broadens the audience for yoga crosswords but also promotes cross-cultural understanding. By incorporating yoga terms‚ crosswords educate players about mindfulness and wellness practices‚ creating a shared interest that transcends borders. This cultural exchange enriches both yoga and crossword communities‚ making them more inclusive and interconnected on a global scale.

7.3 Emerging Trends in Crossword Design

Emerging trends in crossword design are revolutionizing how yoga instruction crosswords are created and experienced. Modern crosswords now incorporate interactive digital formats‚ allowing solvers to engage with puzzles online. Dynamic clues and adaptive difficulty levels are becoming popular‚ catering to both beginners and advanced solvers. The integration of multimedia‚ such as images and videos‚ enhances the puzzle-solving experience. Additionally‚ AI tools like ChatGPT are being used to generate crosswords with yoga themes‚ ensuring fresh and unique content. These innovations make crosswords more accessible and appealing to a broader audience. As technology advances‚ yoga instruction crosswords are likely to feature real-time leaderboards and collaborative solving options‚ fostering a sense of community among enthusiasts. These trends not only modernize the traditional crossword but also align with the growing interest in yoga and mindfulness worldwide.

Yoga Instruction Crosswords offer a unique blend of mindfulness and mental challenge. Popular clues like EXHALE and RELAX highlight yoga’s core principles. Technology enhances accessibility‚ making these puzzles a timeless‚ engaging activity for all.

8.1 Final Thoughts

Yoga Instruction Crosswords have emerged as a unique and engaging activity‚ blending mindfulness with mental exercise. These puzzles cater to both yoga enthusiasts and crossword lovers‚ offering a fun way to explore yoga terminology. The integration of common clues like EXHALE and RELAX highlights the connection between yoga practices and wordplay. With the rise of technology‚ online tools and AI-driven solvers have made these crosswords more accessible‚ ensuring their popularity endures. The community around yoga crosswords continues to grow‚ fostering a sense of shared challenge and learning. As yoga and crosswords evolve‚ their fusion remains a timeless and enjoyable pursuit for many.

8.2 Encouragement for Future Solvers

Embarking on yoga instruction crosswords is a rewarding journey that combines mindfulness with mental sharpness. For newcomers‚ starting with simpler clues like EXHALE or RELAX can build confidence. As you progress‚ exploring yoga terminology will deepen your understanding of both the practice and puzzle-solving. Don’t hesitate to use online tools or join crossword communities for support. Each solved clue is a step toward mastering this unique blend of yoga and wordplay. Remember‚ patience and persistence are key. Whether you’re a yoga enthusiast or a crossword aficionado‚ these puzzles offer a fun and educational experience. Dive in‚ embrace the challenge‚ and enjoy the process of learning and growth. The world of yoga crosswords awaits‚ ready to inspire and engage you!

firex smoke alarm instruction manual

Welcome to the Firex Smoke Alarm Instruction Manual; This guide provides essential information for installing, operating, and maintaining your smoke alarm to ensure safety and compliance with industry standards. Read carefully to understand features, troubleshooting, and maintenance tips for optimal performance and protection.

1.1 Purpose of the Manual

This manual is designed to provide clear instructions for the installation, operation, and maintenance of the Firex Smoke Alarm. It ensures users understand the device’s features, safety standards, and troubleshooting procedures. The guide helps maximize the alarm’s performance, ensuring compliance with industry regulations and optimal protection. Reading this manual carefully is crucial for proper usage and safety. It serves as a reference for future owners, guaranteeing the alarm functions effectively in various conditions.

1.2 Scope of the Guide

This manual provides comprehensive instructions for the Firex Smoke Alarm, covering installation, operation, and maintenance. It details safety features, troubleshooting, and compliance with industry standards. The guide includes step-by-step installation procedures, operational guidelines, and maintenance tips to ensure optimal performance. Users will find detailed information on alarm testing, hush button functionality, and resolving common issues. The scope ensures all aspects of the smoke alarm are addressed for safe and effective use.

1.3 Importance of Reading the Manual

Reading this manual is crucial for understanding your Firex Smoke Alarm’s features, installation, and maintenance. It ensures proper setup, optimal performance, and compliance with safety standards. Failing to read the manual may lead to incorrect installation or misuse, reducing the alarm’s effectiveness. This guide provides essential tips for testing, troubleshooting, and maintaining your smoke alarm, ensuring it functions correctly during emergencies. Take time to review the manual thoroughly for your safety and the safety of others.

Key Features of the Firex Smoke Alarm

The Firex Smoke Alarm offers advanced features like 120V AC operation with 9V battery backup, front-load battery test, and hush button functionality for user convenience and safety.

  • 120V smoke alarm with 9V battery backup for continuous protection.
  • Front-load battery test and hush button for easy maintenance.
  • Alarm memory feature for tracking past activations.
  • Compliance with UL standards and industry safety regulations.

2.1 Model Overview (i4618A, i4718A, i5000A Series)

The Firex Smoke Alarm series includes models i4618A, i4718A, and i5000A, each designed for reliable fire detection. The i4618A features a 120V AC connection with a 9V battery backup, while the i4718A includes advanced features like an alarm memory. The i5000A Series offers enhanced functionality, including wireless connectivity options. All models are UL-listed, ensuring compliance with safety standards, and are equipped with a front-load battery test and hush button for user convenience.

2.2 120 Volt Smoke Alarm with 9 Volt Battery Back-up

The Firex Smoke Alarm features a 120V AC connection with a 9V battery back-up, ensuring continuous operation during power outages. This dual-power design enhances reliability and safety, providing uninterrupted fire detection. The battery back-up ensures the alarm remains functional even when the main power supply is lost, while the 120V connection guarantees consistent performance under normal conditions. This feature is essential for maintaining home safety and meeting industry standards for smoke alarm reliability.

2.3 Front Load Battery Test and Hush Button

The Firex Smoke Alarm includes a front load battery test feature, allowing users to easily test and replace the 9V battery without disassembling the unit. The hush button enables temporary silencing of false alarms, such as those caused by cooking smoke, while maintaining active protection. These features enhance user convenience and ensure the alarm remains functional and reliable, providing peace of mind and compliance with safety standards.

Safety Standards and Compliance

The Firex Smoke Alarm adheres to UL listing and meets industry safety regulations, ensuring compliance with local and national fire safety codes for reliable protection and peace of mind.

3.1 UL Listing and Certification

The Firex Smoke Alarm is UL listed, ensuring it meets rigorous safety standards for smoke detection. This certification confirms the alarm’s reliability in detecting fires and alerting occupants. UL listing is a trusted mark of compliance with national safety regulations, providing homeowners and builders with confidence in the product’s performance. Regular inspections and maintenance, as outlined in the manual, are essential to uphold this certification and ensure continuous protection. Always verify the UL mark when installing or replacing your smoke alarm.

3;2 Industry Safety Regulations

The Firex Smoke Alarm is designed to comply with industry safety regulations, ensuring it meets or exceeds national standards for fire detection. These regulations mandate specific requirements for smoke alarm sensitivity, response time, and reliability. Compliance with these standards ensures the alarm provides effective early warning in case of a fire. Regular testing and maintenance, as outlined in the manual, are crucial to maintaining compliance and ensuring the alarm functions as intended. Always follow local fire safety codes when installing or maintaining your Firex smoke alarm.

Pre-Installation Requirements

Before installing your Firex Smoke Alarm, ensure location considerations and electrical requirements are met. Proper placement and power supply are critical for reliable performance and safety compliance.

4.1 Location Considerations

Proper placement of your Firex Smoke Alarm is crucial for effective fire detection. Install alarms on every level of your home, inside and outside sleeping areas. Avoid areas near kitchens, bathrooms, or garages to minimize false alarms from cooking fumes or steam. Ensure alarms are at least 10 feet away from cooking appliances. Do not install in dead air spaces, such as corners or near vents, as this may reduce detection efficiency. Refer to local building codes for specific requirements;

4.2 Electrical Requirements

Your Firex Smoke Alarm requires a 120V AC power supply with a 9V battery backup for continuous operation during power outages. Ensure the wiring is done by a licensed electrician using 18 AWG wire, rated for 90°C. The alarm should be connected to a dedicated circuit to avoid interference. Do not use the smoke alarm as a system receptor for other devices. Always follow local electrical codes and the manufacturer’s guidelines for a safe and proper installation.

Installation Instructions

Follow the step-by-step guide to install your Firex Smoke Alarm. Ensure proper mounting, wiring, and connectivity. Refer to the manual for detailed instructions and safety guidelines.

5.1 Mounting the Smoke Alarm

Mount the Firex Smoke Alarm on a ceiling or wall, ensuring it is at least 4 inches away from any wall. For optimal detection, install it on every level of your home and inside sleeping areas. Use the provided hardware to secure the mounting bracket firmly. Avoid areas near vents or draft sources. Refer to the manual for specific model requirements, such as the i4618A or i4718A series. Ensure compliance with local fire codes and test the alarm after installation.

5.2 Wiring and Connectivity

Connect the Firex Smoke Alarm to a 120V AC power supply, ensuring the wiring is done by a licensed electrician. Use the provided terminal screws to secure the wires, following the manual’s wiring diagram. The alarm includes a 9V battery backup for continuous operation during power outages. Connect the wires to the correct terminals, avoiding short circuits. After wiring, test the alarm to ensure proper functionality. Refer to the manual for specific model requirements, such as the i4618A or i4718A series, and ensure compliance with local electrical codes.

Understanding the Smoke Alarm Indicators

The Firex Smoke Alarm features visual and audible indicators, including a steady red light for normal operation and a beeping sound for low battery or alarm activation.

6.1 Visual and Audible Signals

The Firex Smoke Alarm uses visual and audible signals to indicate its status. A steady red light confirms normal operation, while a flashing red light signals an alarm. The alarm emits a loud, continuous beep when smoke is detected. A low battery is indicated by a chirping sound and a flashing red light. These signals ensure prompt awareness of potential hazards or maintenance needs, enhancing home safety and reliability. Always monitor these indicators for optimal protection.

6.2 Alarm Memory Feature

The Firex Smoke Alarm features an alarm memory function, which provides a visual indication when an alarm has previously sounded. This feature helps users identify if a smoke condition occurred in their absence. The memory function is activated after the alarm has been silenced, ensuring awareness of past incidents. It does not require resetting, allowing for continuous monitoring and peace of mind. This feature enhances safety by keeping users informed of potential hazards, even after the alarm has stopped sounding.

Operating the Smoke Alarm

Learn how to test the alarm, use the hush button, and understand its indicators for optimal functionality. Regular testing ensures reliability and safety in your home.

7.1 Testing the Alarm

Testing the Firex smoke alarm is crucial for ensuring its reliability. Press and hold the test button until the alarm sounds; This verifies the unit is functioning correctly. Conduct tests weekly and after battery installation. Clean the alarm regularly to prevent dust interference. If the alarm does not sound, check for obstructions or expired sensors. Refer to the manual for detailed troubleshooting steps to maintain optimal performance and safety. Regular testing ensures your smoke alarm is ready to alert you in case of emergencies.

7.2 Using the Hush Button

The Hush Button allows temporary silencing of the smoke alarm during false triggers, such as cooking or showering. Press the button to mute the alarm. Note that this feature does not disable the alarm permanently. The Hush Button is designed for convenience but should not be used in actual emergencies. Regular testing ensures the alarm functions correctly when needed. Always address the cause of false alarms to maintain safety and reliability. Use this feature responsibly to avoid compromising your fire safety system.

Maintenance and Troubleshooting

Regularly clean the smoke alarm to remove dust and debris, ensuring optimal performance. Check battery levels and connections. Address common issues promptly for reliable operation and safety.

8;1 Cleaning the Smoke Alarm

Regular cleaning is crucial for maintaining your Firex smoke alarm’s performance. Use a vacuum cleaner or soft brush to gently remove dust and debris from the exterior and interior. Avoid using harsh chemicals or liquids, as they may damage the sensor. Clean the alarm every 30 days to ensure it remains free from contaminants. This simple maintenance step helps prevent false alarms and ensures reliable detection of smoke, keeping your home and family safe.

8.2 Common Issues and Solutions

Common issues with Firex smoke alarms include false alarms, low battery warnings, and sensor malfunctions. For false alarms, check for dust or cooking fumes and clean the unit. If the low battery warning sounds, replace the 9V battery. For sensor issues, ensure the alarm is clean and free from obstructions. If problems persist, reset the alarm by disconnecting power and reinstalling. Regular maintenance and troubleshooting can resolve most issues, ensuring reliable performance and home safety.

Upgrading or Replacing the Smoke Alarm

Upgrade or replace your Firex smoke alarm every 10 years or when outdated. Ensure compatibility with existing systems and follow manual instructions for proper replacement and installation.

9.1 When to Replace the Alarm

Replace your Firex smoke alarm every 10 years or when it shows signs of aging, such as reduced sensitivity or physical damage; If the alarm is no longer functioning properly, even after testing and maintenance, it should be replaced immediately. Additionally, if you are relocating or upgrading your system, ensure the new alarm meets current safety standards and compatibility requirements. Always consult the manual for specific replacement guidelines and compatibility checks.

9.2 Compatibility with Other Systems

Ensure your Firex smoke alarm is compatible with existing home security or fire systems. Check the manual for specific compatibility guidelines to avoid integration issues. Most Firex models work seamlessly with standard systems, but verify voltage requirements and communication protocols. For smart home integration, consult the manufacturer’s compatibility list. Proper compatibility ensures reliable performance and enhanced safety, so always confirm before installation or upgrade to maintain system harmony and functionality.

Compliance with Local Regulations

Ensure your Firex smoke alarm meets local building codes and safety standards. Regular inspections and adherence to regulations are crucial for compliance and optimal functionality. Compliance ensures safety and avoids legal issues, so always verify local requirements before installation.

10.1 Building Codes and Standards

Ensure your Firex smoke alarm installation complies with local building codes and standards. These requirements dictate placement, spacing, and installation height to maximize effectiveness. UL certification ensures the alarm meets rigorous safety standards. Always verify specific regulations in your area, such as smoke alarm spacing (typically 30 feet apart) and installation height (at least 4 inches from walls). Proper compliance ensures safety and avoids potential legal or insurance issues. Local building codes may also specify requirements for kitchens, bathrooms, and sleeping areas.

10.2 Inspection Requirements

Regular inspections are crucial to ensure your Firex smoke alarm operates correctly. Check for proper installation, functionality, and cleanliness. Test the alarm monthly and clean dust from sensors. Inspect battery levels and replace as needed. Ensure compliance with local regulations, which may require annual professional inspections. Failure to meet these requirements can result in non-compliance with safety standards and potential penalties. Always follow the manufacturer’s guidelines and local codes to maintain optimal safety and avoid issues. Inspections are vital for ensuring your smoke alarm provides reliable protection.

Frequently Asked Questions (FAQs)

Find answers to common questions about Firex smoke alarm installation, testing, and troubleshooting. Refer to the manual for detailed solutions to ensure optimal performance and safety.

11.1 General Usage Questions

Common questions include optimal installation locations, testing procedures, and understanding alarm indicators. Ensure alarms are placed on every floor and in sleeping areas. Test monthly and clean regularly to avoid false alarms. Refer to the manual for troubleshooting tips and maintenance schedules to ensure reliable performance and safety compliance. Proper usage enhances fire detection and response time, protecting lives and property effectively.

11.2 Technical Support and Assistance

For technical inquiries or issues, refer to the Firex Smoke Alarm Instruction Manual or visit the official website for downloadable guides. Troubleshooting tips and maintenance instructions are provided to address common problems. Contact Firex customer support directly for personalized assistance. Ensure your smoke alarm functions correctly by following the manual’s guidelines or seeking help from certified professionals. Proper technical support ensures your safety and the reliability of your smoke alarm system.

Warranty and Support Information

Your Firex smoke alarm is backed by a comprehensive warranty covering defects in materials and workmanship. For details, refer to the warranty section in the manual. Support is available through Firex customer service, including troubleshooting and maintenance guidance to ensure optimal performance and safety.

12.1 Warranty Terms and Conditions

Your Firex smoke alarm is protected under a limited warranty that covers defects in materials and workmanship for a specified period. The warranty is void if the product is tampered with or misused. For detailed terms and conditions, refer to the manual provided with your smoke alarm, which includes the warranty period and claim procedures. Ensure to retain the manual and purchase receipt for warranty validation.

12.2 Contacting Customer Support

For assistance with your Firex smoke alarm, contact our customer support team via phone, email, or through the official website. Support is available Monday to Friday, 8 AM to 6 PM EST. Our team is ready to help with troubleshooting, maintenance, and warranty inquiries. Visit the Firex website for contact details and additional resources, including FAQs and downloadable guides, to ensure your smoke alarm operates effectively and safely.

By following this manual, you ensure your Firex smoke alarm operates effectively, providing reliable safety and protection. Regular maintenance and adherence to guidelines are crucial for optimal performance.

13.1 Final Tips for Optimal Performance

  1. Test your Firex smoke alarm monthly to ensure proper function.
  2. Clean the unit every 30 days to remove dust and debris.
  3. Replace the battery annually or as indicated by the manufacturer.
  4. Avoid installing alarms near cooking areas to reduce false alarms.
  5. Replace the entire unit every 10 years for maximum reliability.

These steps ensure your Firex smoke alarm operates effectively, providing consistent protection for your home and family.

13.2 Importance of Regular Maintenance

Regular maintenance is crucial for ensuring your Firex smoke alarm functions reliably. Clean the alarm every 30 days to remove dust and debris, and test it monthly. Replace batteries annually or as specified. Addressing issues promptly prevents false alarms and ensures continuous protection. Following these practices guarantees your smoke alarm remains operational, safeguarding your home and family from potential fire hazards.

Additional Resources

For further assistance, download the full manual or access online guides from the official Firex website. Visit https://usermanual.wiki for detailed instructions and support for models like the i4618A.

14.1 Downloading the Full Manual

Access the complete Firex Smoke Alarm manual online at https://usermanual.wiki. This free PDF guide covers models like the i4618A, i4718A, and i5000A, offering detailed installation, troubleshooting, and maintenance instructions. Download now to ensure proper setup and optimal performance of your smoke alarm system.

14.2 Online Support and Guides

Visit https://usermanual.wiki for comprehensive online support and guides for your Firex Smoke Alarm. Access user manuals, troubleshooting tips, and compatibility information for models like the i4618A and i5000A. The official Firex website also offers detailed resources to help you resolve issues and optimize your smoke alarm system. Download guides or view them online for convenient access to expert advice and maintenance instructions.

jacuzzi jss50 sand filter instructions

Overview of the Jacuzzi JSS50 Sand Filter

The Jacuzzi JSS50 Sand Filter is a reliable and efficient filtration system designed for soft-sided pools, featuring a 0.5 HP pump and 50-pound sand capacity for clean water circulation.

1.1 Product Features and Benefits

The Jacuzzi JSS50 Sand Filter offers a 0.5 HP pump for efficient water circulation and a 50-pound sand capacity, ensuring effective filtration. Its user-friendly design simplifies installation and maintenance, making it ideal for pool owners seeking a low-maintenance solution. The system is compatible with various pool sizes and provides consistent water quality. Key benefits include durable construction, easy operation, and advanced sand filtering technology. This filter is perfect for soft-sided pools, delivering clean and clear water with minimal effort. Its reliability and efficiency make it a top choice for enhancing swimming experiences.

1.2 Technical Specifications

The Jacuzzi JSS50 Sand Filter features a 0.5 HP pump, providing efficient water circulation and filtration. It has a 50-pound sand capacity, designed for optimal performance in soft-sided pools. The system includes a durable sand tank, a powerful pump, and a multiport control valve for easy operation. Its compact design makes it suitable for various pool sizes, while its advanced filtration technology ensures clean and clear water. The filter operates at a maximum flow rate, making it ideal for maintaining consistent water quality with minimal energy consumption.

1.3 Importance of Proper Installation and Maintenance

Proper installation and maintenance of the Jacuzzi JSS50 Sand Filter are crucial for optimal performance and longevity. Correct setup ensures efficient water circulation, prevents leaks, and maintains clean pool water. Regular maintenance tasks, such as backwashing, inspecting connections, and replacing sand, prevent clogs and premature wear. Neglecting these steps can lead to reduced filtration efficiency, higher energy bills, and potential system damage. Following the manufacturer’s guidelines ensures safety, extends the filter’s lifespan, and guarantees a consistently clean swimming environment for years to come.

Key Components of the Jacuzzi JSS50 Sand Filter

The Jacuzzi JSS50 Sand Filter includes a durable sand tank, powerful pump, motor, control valve, and high-quality sand, all working together for effective water filtration and circulation.

2.1 Sand Tank and Its Role

The sand tank is a core component of the Jacuzzi JSS50 Sand Filter, designed to hold the filtration sand and pool water. Its durable construction ensures long-lasting performance and withstands the system’s operational demands. The tank plays a critical role in the filtration process by allowing water to flow through the sand, which traps dirt and debris. Proper installation and leveling of the sand tank are essential to prevent leaks and ensure efficient water circulation. Regular maintenance, such as inspecting the tank for cracks or damage, is vital for optimal functionality.

2.2 Pump and Motor Assembly

The pump and motor assembly is a vital part of the Jacuzzi JSS50 Sand Filter, responsible for driving water through the filtration system. The 0.5 HP motor provides the power needed for efficient water circulation, while the pump ensures consistent flow rates. Together, they work seamlessly with the sand tank and control valve to maintain clean and clear pool water. Proper installation and alignment of the pump and motor are essential for optimal performance. Regular checks for wear and tear, and ensuring secure electrical connections, help prevent operational issues and extend the system’s lifespan.

2.3 Control Valve and Its Functions

The control valve is a key component of the Jacuzzi JSS50 Sand Filter, enabling precise water flow management. It features multiple settings, including Filter, Backwash, and Rinse, allowing users to direct water flow for optimal filtration and maintenance. The valve ensures clean water returns to the pool after backwashing and facilitates efficient sand cleaning. Proper operation of the control valve is essential for maintaining clear water and extending the lifespan of the filter. Regular inspection and lubrication of the valve’s seals help prevent leaks and ensure smooth functionality.

2.4 Filter Media (Sand)

The filter media in the Jacuzzi JSS50 Sand Filter consists of high-quality sand, which plays a crucial role in trapping dirt, debris, and impurities from the pool water. The system is designed to hold up to 50 pounds of sand, ensuring effective filtration. Regular backwashing helps clean the sand, but over time, the sand loses efficiency and needs replacement, typically every 5-7 years. Proper sand maintenance is essential for clear water and optimal system performance. Always use the recommended type and amount of sand for best results.

How the Jacuzzi JSS50 Sand Filter Works

The Jacuzzi JSS50 Sand Filter operates by circulating pool water through a bed of sand, trapping impurities. The pump drives water through the sand, while the control valve manages flow direction for filtration, backwashing, and rinsing, ensuring clean water returns to the pool. Regular backwashing cleans the sand, maintaining efficiency and water clarity.

3.1 Water Circulation Process

The Jacuzzi JSS50 Sand Filter circulates water by drawing it into the pump, which pushes it through the sand tank. Water enters the top of the tank, flows downward through the sand, and exits clean at the bottom. The control valve directs water flow, enabling modes like filtration, backwashing, and rinsing. During filtration, clean water returns to the pool, while backwashing reverses flow to clean the sand. This continuous process ensures efficient water purification and optimal pool maintenance with minimal user intervention; Regular operation maintains clear and safe swimming conditions.

3.2 Filtration Mechanism

The Jacuzzi JSS50 Sand Filter uses sand as its primary filter media to remove impurities from pool water. As water flows through the sand bed, dirt, debris, and contaminants are trapped, allowing clean water to exit the tank. The sand acts as a barrier, capturing particles as small as 20 microns, ensuring crystal-clear water. Over time, the sand becomes saturated with debris, requiring periodic backwashing to clean it. This efficient filtration mechanism maintains optimal water quality and extends the lifespan of the filter system. Regular maintenance ensures consistent performance.

3.3 Backwashing Process

The Jacuzzi JSS50 Sand Filter uses sand as its primary filter media to remove impurities from pool water. As water flows through the sand bed, dirt, debris, and contaminants are trapped, allowing clean water to exit the tank. The sand acts as a barrier, capturing particles as small as 20 microns, ensuring crystal-clear water. Over time, the sand becomes saturated with debris, requiring periodic backwashing to clean it. This efficient filtration mechanism maintains optimal water quality and extends the lifespan of the filter system. Regular maintenance ensures consistent performance.

Installation Steps for the Jacuzzi JSS50 Sand Filter

The Jacuzzi JSS50 Sand Filter installation involves connecting the pump, control valve, and sand tank, ensuring all connections are secure and following manufacturer guidelines for optimal setup.

4.1 Pre-Installation Preparation

Before installing the Jacuzzi JSS50 Sand Filter, ensure the area is level and clear of debris. Gather all components, tools, and materials, including the filter tank, pump, control valve, and sand. Assemble the filter tank and pump according to the manufacturer’s instructions. Inspect all parts for damage or defects. Ensure the area is well-ventilated and accessible for easy setup. Double-check the compatibility of the system with your pool size and type. Proper preparation ensures a smooth and safe installation process.

4.2 Physical Installation of the Filter System

Place the Jacuzzi JSS50 Sand Filter system on a level, stable surface, ensuring it is secure and evenly balanced. Connect the pump and motor assembly to the sand tank, aligning all ports correctly. Attach the control valve to the tank, ensuring proper sealing to prevent leaks. Fill the sand tank with the recommended type and amount of sand, following the manufacturer’s guidelines. Connect the inlet and outlet hoses to the pool and filter system, ensuring tight and secure fittings. Test the system for leaks and proper water flow before finalizing the installation.

4.3 Connecting the Pump and Control Valve

Align the pump and control valve ports to ensure proper connection. Secure the pump to the sand tank using the provided fittings, tightening evenly to avoid damage. Connect the control valve to the pump, ensuring all threads are properly sealed. Attach the inlet and outlet hoses to the valve, following the manufacturer’s instructions for correct flow direction. Tighten all connections firmly but avoid over-tightening, which could damage threads. Test the system by running water through it to check for leaks or air pockets before final operation.

4.4 Final Testing and Setup

After installation, turn on the system and check for leaks at all connections. Monitor the pressure gauge to ensure it operates within the recommended range. Prime the pump by filling it with water to remove any airlocks. Run the system in Filter mode for 2-3 hours to cycle the water. Check the flow rate and adjust settings as needed for optimal performance. Ensure all components function correctly before regular use; Refer to the manual for specific startup procedures and troubleshooting tips.

Operating the Jacuzzi JSS50 Sand Filter

The system operates in Filter, Backwash, Rinse, and Recirculate modes. Use the control panel to select modes, monitor the pressure gauge, and adjust settings for optimal water clarity and flow.

5.1 Control Panel Overview

The control panel of the Jacuzzi JSS50 Sand Filter is designed for easy operation, featuring multiple modes to optimize pool maintenance. The primary modes include Filter, Backwash, Rinse, and Recirculate. The Filter mode is for normal operation, while Backwash cleans the sand bed. Rinse ensures clean water returns to the pool after backwashing, and Recirculate bypasses filtration for special chemicals. The panel also includes a timer for automating filtration cycles and a pressure gauge to monitor system performance. Adjusting these settings ensures efficient and effective pool maintenance.

5.2 Starting the System for the First Time

Before starting the Jacuzzi JSS50 Sand Filter, ensure all connections are secure and the sand is properly filled. Prime the pump by filling it with water to remove airlocks. Turn on the system at the control panel, starting with the Filter mode. Allow it to run for 2-3 hours to cycle the water. Check for leaks during operation and monitor the pressure gauge. If the pressure reads high, backwash the filter to ensure optimal performance. Familiarize yourself with the control panel settings to adjust modes as needed for proper filtration.

5.3 Regular Operation and Mode Settings

The Jacuzzi JSS50 Sand Filter operates with multiple modes to ensure optimal pool maintenance. The Filter mode is for normal operation, circulating clean water. The Backwash mode reverses water flow to clean the sand bed, while Rinse ensures clean water returns to the pool after backwashing. The Recirculate mode bypasses filtration for special chemical treatments. Use the timer to automate filtration cycles and monitor the pressure gauge for system performance; Adjust settings based on pool size and usage for efficient and effective water maintenance.

Maintenance Tips for the Jacuzzi JSS50 Sand Filter

Regular backwashing and inspecting connections ensure optimal performance. Replace sand every 3-5 years and lubricate O-rings annually. Monitor pressure gauges and address leaks promptly.

6.1 Daily Maintenance Checks

Performing daily checks ensures the Jacuzzi JSS50 Sand Filter operates efficiently. Inspect the control panel and valves for proper function. Check the pressure gauge to ensure it’s within the recommended range. Look for signs of leaks around connections and seals. Verify that water is flowing smoothly and the pump basket is free of debris. Clean the skimmer and pump baskets as needed to prevent clogs. Monitor water clarity and flow rate, addressing any issues promptly to maintain optimal filtration performance. Regular checks help prevent major issues and extend system lifespan.

6;2 Weekly Maintenance Tasks

Weekly maintenance is essential for the Jacuzzi JSS50 Sand Filter to ensure optimal performance. Backwash the filter to remove trapped debris and restore sand efficiency. Inspect the hoses and connections for signs of wear or leaks. Clean the pump basket to prevent clogs and maintain proper water flow. Lubricate the O-rings and gaskets to ensure a watertight seal. Monitor the pressure gauge and adjust settings if necessary. These tasks help maintain clean water, prevent system damage, and extend the lifespan of the filter. Regular upkeep ensures consistent performance.

6.3 Monthly Maintenance Procedures

Monthly maintenance ensures the Jacuzzi JSS50 Sand Filter operates efficiently. Perform a deep clean of the filter by backwashing and rinsing thoroughly. Inspect the sand level and top it up if necessary. Check the control valve for proper function and clean or replace worn gaskets. Lubricate moving parts to prevent friction and wear. Monitor the pressure gauge and adjust settings as needed. These monthly tasks help maintain optimal water quality, prevent clogs, and extend the lifespan of the filter. Regular checks ensure consistent performance.

6.4 Annual Maintenance and Inspections

Annual maintenance is essential for the long-term performance of the Jacuzzi JSS50 Sand Filter. Replace the sand every 5-7 years to ensure optimal filtration. Inspect the control valve and replace worn gaskets or seals. Check all hoses and connections for cracks or leaks and replace them if necessary. Lubricate the O-rings and gaskets to maintain a watertight seal. Inspect the pump and motor for wear and tear, and ensure all electrical connections are secure; Annual inspections help prevent major issues and ensure the system runs efficiently year-round.

Troubleshooting Common Issues

For the Jacuzzi JSS50 Sand Filter, common issues include high pressure readings, low water flow, and leaks. Backwashing often resolves high pressure and flow problems. Inspect connections and seals for leaks, tightening or replacing them as needed. Regular maintenance, like cleaning the filter and checking valve function, helps prevent issues and ensures optimal performance.

7.1 Identifying and Addressing Leaks

Leaks in the Jacuzzi JSS50 Sand Filter can often be identified by inspecting connections, valves, and seals. Tighten any loose fittings and replace worn gaskets or O-rings. Apply silicone-based lubricant to ensure a watertight seal. Check the pump lid and its O-ring for proper alignment and lubrication. After addressing leaks, run the system on a low setting to monitor for further issues. Promptly addressing leaks prevents damage and maintains optimal filtration performance. Regular inspections help prevent future leaks.

7.2 Resolving Low Water Flow Issues

Low water flow in the Jacuzzi JSS50 Sand Filter can be resolved by backwashing the filter to remove debris. Ensure the pump is set to the correct flow rate for your pool size. Check for blockages in return lines or valves and clean or replace them if necessary. Inspect the sand level and ensure it’s within the recommended range. Avoid overloading the filter, as this can restrict water flow. Regular maintenance, including sand replacement and valve cleaning, helps maintain optimal performance and prevents pressure-related problems.

7.3 High Pressure Gauge Readings

High pressure gauge readings in the Jacuzzi JSS50 Sand Filter often indicate clogged sand or debris buildup. Start by backwashing the filter to clean the sand bed. If the issue persists, inspect the sand quality and replace it if it’s older than 5-7 years. Ensure proper installation and maintenance, as incorrect setup can lead to increased pressure. Regularly check for blockages in hoses or valves and clean them as needed. Proper sand replacement and backwashing routines will help maintain optimal pressure levels and system performance.

7.4 Backwashing and Rinse Mode Issues

Issues with backwashing and rinse mode on the Jacuzzi JSS50 Sand Filter often arise from improper valve alignment or clogged sand. Ensure the control valve is set correctly for each mode. After backwashing, run the rinse mode for 30 seconds to clear debris. If problems persist, check for sand blockages or worn gaskets. Always depressurize the system before adjusting the valve. Regular maintenance, like cleaning the sand bed and lubricating O-rings, prevents mode-related issues and ensures smooth operation. Follow the manual for proper mode sequencing.

Safety Precautions and Guidelines

Always ensure the system is properly grounded to prevent electrical shocks. Keep children and pets away from the filter and pump. Wear protective gloves when handling sand or filter media to avoid skin irritation. Never operate the system without proper ventilation or near open flames. Regularly inspect electrical connections and follow manual instructions carefully.

8.1 General Safety Tips

Always follow safety guidelines when operating the Jacuzzi JSS50 Sand Filter. Ensure the system is properly grounded to prevent electrical shocks. Keep children and pets away from the filter and pump. Wear protective gloves when handling sand or filter media to avoid skin irritation. Never operate the system without proper ventilation or near open flames. Regularly inspect electrical connections and follow manual instructions carefully. Proper safety practices ensure a safe and efficient filtration process for your pool.

8.2 Electrical Safety Considerations

Ensure the Jacuzzi JSS50 Sand Filter is properly grounded to prevent electrical shocks. Keep the area around the system dry and avoid exposing electrical components to water. Never overload circuits or use damaged cords. Install a Ground Fault Circuit Interrupter (GFCI) outlet for added safety. Always follow the manufacturer’s instructions for electrical connections. If unsure, consult a licensed electrician for installation. Keep children and pets away from electrical components. Avoid operating the system near open flames or sparks. Proper electrical safety ensures reliable and hazard-free operation.

8.3 Handling Filter Media Safely

When handling the sand or other filter media in the Jacuzzi JSS50, wear protective gloves and goggles to avoid skin and eye irritation. Avoid inhaling dust during sand replacement by working in a well-ventilated area. Keep children and pets away from the sand to prevent accidental ingestion. Ensure the area is clean and free from debris before handling the media. Proper handling ensures safety and maintains the filter’s efficiency. Always follow the manufacturer’s guidelines for sand replacement and disposal.

Winterization and Seasonal Shutdown

Properly drain the Jacuzzi JSS50 Sand Filter system and store components in a dry, protected area to prevent freeze damage during the off-season.

9.1 Preparing the System for Winter

Properly winterizing the Jacuzzi JSS50 Sand Filter ensures protection from freeze damage and extends its lifespan. Start by draining all water from the pump, hoses, and filter tank. Disconnect and store hoses in a dry, protected area. Use a non-toxic antifreeze in the pipes if necessary. Clean the filter media and store it in a sealed container. Finally, cover the system to shield it from harsh weather conditions. This preparation prevents ice damage and ensures smooth operation when reopening the pool in spring.

9.2 Draining and Storing Components

To prepare the Jacuzzi JSS50 Sand Filter for winter, drain all water from the pump, filter tank, and hoses. Disconnect hoses and store them in a dry, protected area to prevent cracking. Remove and clean the sand filter media, storing it in a sealed container. Lubricate O-rings and gaskets with silicone-based lubricant to prevent drying out. Cover the entire system to shield it from harsh weather conditions. Properly storing components ensures they remain in good condition for the next pool season.

9.3 Protecting the System from Freeze Damage

To protect the Jacuzzi JSS50 Sand Filter from freeze damage, drain all water from the pump, filter tank, and hoses. Use RV-grade antifreeze in the pump and lines to prevent freezing. Insulate exposed pipes and the sand tank with foam covers or blankets. Avoid operating the system in freezing temperatures, as ice formation can crack components. Proper winterization ensures the filter remains undamaged and ready for use in the next pool season. Always follow manufacturer guidelines for freeze protection.

Upgrading or Replacing Parts

Upgrading or replacing parts on the Jacuzzi JSS50 Sand Filter, such as the sand, pump, or motor, ensures optimal performance and extends system longevity. Replace sand every 5-7 years for best results. Always use genuine Jacuzzi parts for compatibility and reliability.

10.1 When to Upgrade or Replace Components

Upgrade or replace components of the Jacuzzi JSS50 Sand Filter when performance declines or parts show wear. Replace the sand every 5-7 years for optimal filtration. If leaks or damage occur, inspect and replace seals, gaskets, or valves promptly. Consider upgrading the pump or motor for improved efficiency, especially if your pool demands increase. Always use genuine Jacuzzi parts to ensure compatibility and maintain warranty validity. Regular inspections and timely replacements prevent system downtime and ensure clean, safe pool water year-round.

10.2 How to Replace the Sand

To replace the sand in your Jacuzzi JSS50 Sand Filter, start by turning off the pump and backwashing the system to remove debris. Carefully remove the old sand from the tank, taking note of the recommended level. Inspect the tank and internal components for wear or damage. Add new, high-quality filter sand to the specified level, ensuring even distribution. After replacing, rinse the sand by running the system in rinse mode for 1-2 minutes; This ensures clean water and optimal filtration performance. Always follow the manufacturer’s guidelines for sand replacement.

10.3 Upgrading the Pump or Motor

Upgrading the pump or motor on your Jacuzzi JSS50 Sand Filter can enhance performance and efficiency. Ensure the new pump is compatible with your system’s voltage and flow rate requirements. Turn off the power and disconnect electrical connections before starting. Remove the old pump and install the new one, securing all connections tightly. Prime the system to prevent airlocks and test the pump at a low setting to ensure proper operation. Always refer to the manufacturer’s specifications for compatibility and installation guidelines to avoid voiding the warranty. Regular maintenance after the upgrade ensures optimal functionality.

The Jacuzzi JSS50 Sand Filter is a reliable, efficient, and user-friendly system designed for soft-sided pools. Proper installation and maintenance ensure optimal performance and longevity.

11.1 Summary of Key Points

The Jacuzzi JSS50 Sand Filter is a reliable and efficient system designed for soft-sided pools, offering clean water circulation with a 0.5 HP pump and 50-pound sand capacity. Proper installation and regular maintenance are essential for optimal performance. Key tasks include backwashing, sand replacement, and checking for leaks. Following the manual ensures longevity and safety. This system provides a low-maintenance solution for pool owners, ensuring clear and safe water for years of enjoyment. Regular upkeep and adherence to guidelines are crucial for maintaining its efficiency and effectiveness.

11.2 Final Tips for Optimal Performance

For the Jacuzzi JSS50 Sand Filter to perform optimally, regular backwashing and sand replacement every 5-7 years are essential. Always monitor the pressure gauge and address high readings promptly. Inspect connections and seals for leaks to prevent water loss. Follow the manual for proper installation and maintenance. Keep the system clean, and ensure all electrical connections are secure. By adhering to these guidelines, you can enjoy clear, safe pool water and extend the lifespan of your filtration system. Proper care ensures years of efficient operation.