Category title

Autem vel eum iriure dolor in hendrerit in vulputate velit esse molestie consequat, vel illum dolore eu feugiat nulla facilisis at vero eros et dolore feugait.

Category Archive Instructions

marie callender’s pie crust instructions

Marie Callender’s Pie Crust is a beloved choice for both sweet and savory pies, known for its flaky, buttery texture and ease of use. A favorite among pie enthusiasts, it offers a convenient yet delicious foundation for homemade creations, requiring mindful preparation to achieve golden, flaky perfection every time.

1.1 Overview of Marie Callender’s Pie Crust

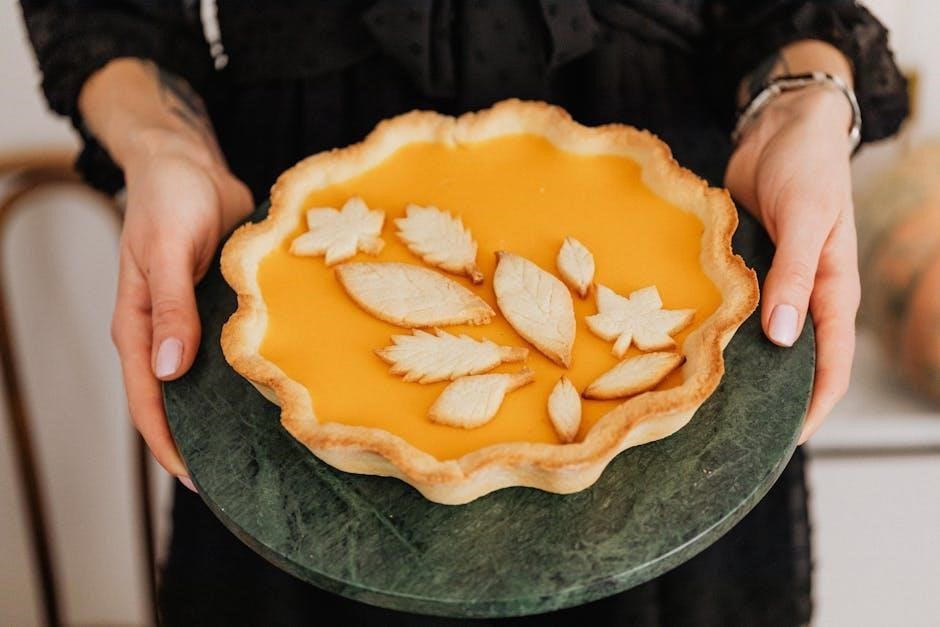
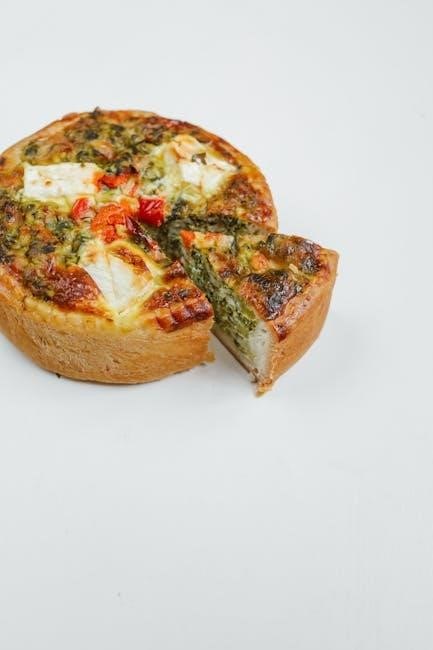
Marie Callender’s Pie Crust is a beloved choice for both sweet and savory pies, renowned for its flaky, buttery texture and ease of preparation. This convenient option allows home bakers to achieve professional-quality results without the hassle of making dough from scratch. The crust’s golden, tender layers are a hallmark of its appeal, making it a favorite for classic recipes like pumpkin, apple, and chicken pot pies. Its popularity stems from its ability to balance convenience with homemade flavor, ensuring a delicious base for any filling. Whether you’re a novice baker or an experienced cook, Marie Callender’s Pie Crust offers a reliable foundation for creating memorable desserts and meals. This guide will walk you through the steps to prepare and bake the crust to perfection, ensuring a flaky, golden crust every time.

1.2 Importance of Crust Quality in Pies

The crust is the foundation of a pie, and its quality can make or break the entire dish. A well-made crust enhances the overall flavor and texture, providing a delicate balance between crumbliness and structure. For Marie Callender’s Pie Crust, achieving this balance is crucial, as it supports the filling while adding its own rich, buttery flavor. A poor-quality crust can result in a soggy or tough base, overshadowing even the most carefully prepared filling. Conversely, a flaky, golden crust elevates the pie, creating a harmonious union of flavors and textures. This is why proper preparation and baking techniques are essential, ensuring the crust meets its full potential. By following the right steps, you can achieve a crust that complements your filling perfectly, making every bite a delight. The crust’s quality is not just about aesthetics; it’s about delivering a memorable culinary experience.

Ingredients and Tools Needed

The essential ingredients for Marie Callender’s Pie Crust include flour, shortening, and water. Tools like a rolling pin, pie dish, and oven are necessary for preparation and baking. Ensure all items are ready for a smooth process.

2.1 Essential Ingredients for the Crust

The foundation of a delicious Marie Callender’s Pie Crust lies in its simple yet high-quality ingredients. The primary components include all-purpose flour, which provides structure, and shortening, such as Crisco, for a flaky texture. Cold water is essential for hydration, while a pinch of salt enhances flavor. Some recipes may also include a tablespoon of white vinegar to help create tenderness. For an extra-golden finish, an optional egg wash (beaten egg mixed with water) can be brushed on before baking. Using cold ingredients is crucial, as it prevents the shortening from melting and ensures a light, layered crust. Avoid overworking the dough, as this can lead to a tough texture. The right ratio of flour to shortening is key, ensuring the crust bakes up tender and flaky every time. These ingredients, when combined properly, create the perfect base for both sweet and savory pies.

2.2 Tools Required for Preparing the Crust

To prepare Marie Callender’s Pie Crust effectively, you’ll need a few essential tools. A rolling pin is crucial for rolling out the dough evenly, ensuring a uniform thickness. A pastry brush is handy for applying an egg wash or water to the crust before baking. A 9-inch pie dish is necessary for shaping the crust properly. Additionally, a clean, lightly floured surface or a silicone mat is ideal for rolling out the dough without sticking. A sharp knife or pastry cutter can help trim excess dough from the edges. For blind baking, pie weights or dried beans are useful to prevent the crust from puffing up. A cooling rack is also helpful for letting the crust cool after baking. Optional tools include a food processor for mixing ingredients and a measuring cup for accurate water addition. Having these tools ready ensures a smooth and successful crust preparation process.

Preparing the Crust

Preparing Marie Callender’s Pie Crust involves thawing, rolling, and shaping the dough. Ensure the crust is evenly rolled and fitted into the pie dish for a smooth, flaky, and golden finish.

3.1 Thawing the Frozen Crust

Thawing Marie Callender’s frozen pie crust is a crucial first step. Remove the crust from the freezer and let it thaw at room temperature for about 30 minutes. Alternatively, thaw overnight in the refrigerator to prevent condensation. Avoid microwaving, as it can cause uneven thawing and lead to a tough crust. Once thawed, the crust should be pliable but still cool to the touch. If using a pre-made frozen crust, ensure it is completely thawed before rolling or filling to achieve the best results. Proper thawing ensures the crust retains its flaky texture and bakes evenly. Always follow the package instructions for thawing times to maintain quality and flavor.

3.2 Rolling Out the Crust

Once thawed, roll out Marie Callender’s pie crust on a lightly floured surface to your desired thickness, typically about 1/8 inch. Use a rolling pin to evenly distribute the dough, starting from the center and working outward. Ensure the surface is well-floured to prevent sticking. If the crust begins to tear, gently press it back together without overworking the dough. For a perfect fit, roll the dough slightly larger than your pie dish. Carefully transfer the rolled-out crust to the pie dish by draping it over the rolling pin and unfolding it into the dish. Trim any excess dough from the edges, leaving a small border for crimping. Always keep the dough cold during this process to maintain its flaky texture. Avoid stretching the dough, as it can lead to shrinkage during baking. Proper rolling ensures a smooth, even base for your pie filling.

Baking Instructions

Preheat your oven to 375°F (190°C) for optimal results. Place the pie crust on a baking sheet and bake for 12-15 minutes, or until golden brown. Always follow recipe-specific instructions for best outcomes.

4.1 Blind Baking the Crust

Blind baking is essential for pies with fillings that don’t require cooking, like cream or custard. To do this, preheat your oven to 375°F (190°C). Line the crust with parchment paper and fill with pie weights or dried beans. Bake for 12-15 minutes, then remove the parchment and weights. Return the crust to the oven for an additional 5-7 minutes, until lightly golden. This step ensures the crust holds its shape and prevents sogginess. Always follow specific recipe instructions for temperature and timing adjustments. Proper blind baking is key to a crisp, professional finish. Ensure the crust is fully thawed before baking for even results. This method guarantees a sturdy base for your favorite fillings, making it a crucial step in achieving a perfect pie.

4.2 Regular Baking Process

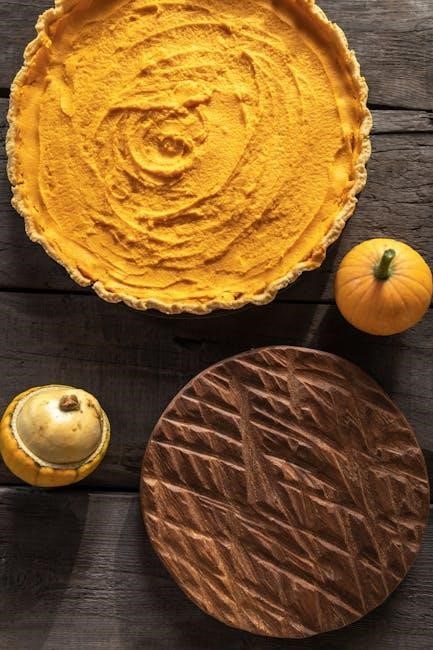
For the regular baking process, preheat your oven to 375°F (190°C). Place the Marie Callender’s pie crust on a baking sheet to ensure even cooking. Fill the crust with your desired filling, making sure to spread it evenly. Bake for 40-50 minutes, or until the crust is golden brown and the filling is bubbly. Avoid opening the oven too early, as this can affect the crust’s structure. If the edges begin to brown too quickly, cover them with foil or a pie shield. Once baked, let the pie cool slightly before serving to allow the filling to set. This method works perfectly for fruit, pumpkin, or other filled pies. Always refer to specific recipe instructions for exact baking times, as fillings can vary. Proper baking ensures a crispy crust and a delicious, well-cooked filling, making your pie a standout dish.

Tips for Achieving a Flaky Crust

For a flaky crust, keep ingredients cold and handle dough gently to prevent toughening. Use the right ratio of flour to shortening and avoid overworking the dough for optimal results.

5.1 Keeping Ingredients Cold

Maintaining cold ingredients is crucial for achieving a flaky crust. Cold butter and shortening create layers in the dough, which expand during baking, resulting in a light, airy texture. Always refrigerate ingredients before mixing and keep the dough chilled during preparation. If the dough becomes too warm, it can lose its flaky texture, so consider chilling it for 10-15 minutes before rolling. Additionally, using ice-cold water when mixing ensures the butter remains solid, preventing the dough from becoming tough. This step is essential for both homemade and store-bought crusts, like Marie Callender’s, to ensure the best results. By keeping ingredients cold, you maintain the integrity of the dough, leading to a perfectly flaky crust every time.

5.2 Handling the Dough Gently

Gentle handling of the dough is essential to preserve its flaky texture. Overworking the dough can cause the butter to melt and the gluten to develop, leading to a tough crust. When rolling out the crust, use light pressure and avoid stretching or pulling it excessively, as this can disrupt the delicate layers. Instead, roll the dough evenly in one direction, folding it back if necessary, but keeping the number of folds minimal. Rough handling can also cause the dough to tear or become misshapen, making it difficult to fit into the pie dish. By treating the dough with care, you ensure that the butter remains in small, intact pieces, which are crucial for creating a light, flaky texture during baking. This step is vital for achieving the perfect crust, whether you’re using a homemade or store-bought option like Marie Callender’s.

Common Mistakes to Avoid

Common mistakes include overworking the dough, incorrect oven temperature, and not thawing the crust properly. These errors can lead to a tough or unevenly baked crust, affecting the final result.

6.1 Overworking the Dough

Overworking the dough is a common mistake that can lead to a tough, dense crust. When the dough is mixed or rolled too much, the gluten in the flour becomes overdeveloped, resulting in a crust that loses its flaky texture. To avoid this, mix the ingredients just until they come together in a shaggy mass, then chill the dough before rolling. Use gentle, light strokes when rolling out the crust, and avoid over-stretching or pulling it. If the dough becomes too warm or sticky, refrigerate it for a few minutes to firm up before continuing. Remember, the key to a flaky crust is minimal handling and keeping the ingredients cold. By being gentle with the dough, you ensure a tender and flaky texture that enhances your pie’s overall quality.

6.2 Incorrect Oven Temperature

Using the wrong oven temperature can significantly affect the quality of your Marie Callender’s pie crust. The recommended temperature is typically 375°F (190°C), but it’s crucial to verify this based on your specific recipe. If the oven is too hot, the crust may burn before the filling is fully cooked, while a temperature that’s too low can result in a soggy or undercooked crust. Always preheat your oven and use an oven thermometer to ensure accuracy. Blind baking requires precise temperature control to prevent the crust from shrinking or bubbling excessively. Additionally, sudden temperature fluctuations can cause uneven baking. To avoid these issues, follow the instructions carefully and adjust the temperature only if necessary. Proper oven temperature ensures a golden, flaky crust that complements your filling perfectly. Remember, consistency in temperature is key to achieving a professional-quality pie crust every time.

Storage and Reheating

Store Marie Callender’s pie crust in an airtight container in the fridge for up to 2 days or freeze for up to 3 months. Reheat at 350°F to maintain crispiness.

7.1 Storing the Crust

Proper storage is essential to maintain the quality of Marie Callender’s pie crust. For short-term storage, place the crust in an airtight container and refrigerate at 40°F or below for up to 2 days. If you prefer to store it longer, wrap the crust tightly in plastic wrap or aluminum foil and place it in a freezer-safe bag. Frozen crusts can be stored for up to 3 months. When you’re ready to use it, thaw the crust overnight in the refrigerator or thaw it at room temperature for a few hours. Always ensure the crust is kept away from direct sunlight and moisture to prevent spoilage. Proper storage will help preserve the crust’s flaky texture and buttery flavor, ensuring it remains fresh and ready for baking whenever you need it.

7.2 Reheating the Crust

Reheating Marie Callender’s pie crust is a straightforward process that helps restore its golden, flaky texture. Preheat your oven to 375°F (190°C). Place the crust on a baking sheet lined with parchment paper to prevent sticking. Bake for 8-10 minutes, or until the crust is lightly golden and warm. Avoid overbaking, as this can cause the crust to dry out or burn. If reheating a filled pie, cover the edges with foil to prevent over-browning. For a crisper texture, you can also bake the crust for an additional 2-3 minutes, but monitor it closely. Once reheated, allow the crust to cool slightly before serving. Note that reheated crusts are best used immediately, as refrigerating them again may affect their texture. This method ensures your pie crust remains delicious and flaky, perfect for serving at any gathering or meal.

Variations and Substitutions

Explore gluten-free and vegan crust options for dietary needs, or substitute ingredients like almond flour or coconut oil for unique flavors, ensuring a delicious and adaptable pie crust experience.

8.1 Gluten-Free Crust Options

For those with gluten intolerance or preferences, creating a gluten-free crust inspired by Marie Callender’s is a great alternative. While Marie Callender’s doesn’t offer a gluten-free version, you can craft one at home using gluten-free flours like almond flour, coconut flour, or a pre-mixed blend. Add xanthan gum for texture and structure. Combine these with cold butter or shortening and a touch of ice water to form the dough. Gently roll it out, ensuring not to overwork, to maintain flakiness. Bake as instructed for a golden, crispy crust. This option allows you to enjoy the classic taste with dietary flexibility, perfect for accommodating all guests at your table.

8.2 Vegan Crust Alternatives

For a vegan version of Marie Callender’s pie crust, substitute traditional butter with vegan alternatives like coconut oil or plant-based butter. Use a flax egg (1 tablespoon ground flax + 3 tablespoons water) as a binding agent. Combine gluten-free or all-purpose flour with cold vegan butter, cutting it into small pieces until a crumbly texture forms. Gradually add ice-cold water or non-dairy milk, mixing gently to avoid overworking the dough. Wrap and chill the dough before rolling it out. This method ensures a flaky, tender crust while accommodating vegan dietary preferences. Perfect for plant-based pies, this alternative maintains the classic taste and texture of Marie Callender’s crust without animal products. Experiment with additional spices or herbs for extra flavor. This option is ideal for those seeking cruelty-free and dairy-free baking solutions, ensuring everyone can enjoy delicious pies regardless of dietary restrictions.

Conclusion

Mastering Marie Callender’s pie crust leads to delicious, flaky results. With proper preparation and care, achieve golden perfection every time. Enjoy experimenting and savoring homemade pies with ease and confidence.

9.1 Final Tips for Perfect Crust

To ensure a flawless Marie Callender’s pie crust, always keep ingredients cold and handle the dough gently to maintain flakiness. Preheat your oven to the recommended 375°F (190°C) for optimal results. Blind baking is essential for fillings that don’t require cooking, using pie weights or parchment to prevent shrinking. Avoid overworking the dough, as it can lead to a tough crust. For an extra golden finish, brush the crust with a little milk or beaten egg before baking. Don’t overbake, as this can dry out the crust. Finally, let the crust cool slightly before adding fillings to prevent sogginess. By following these tips, you’ll achieve a crust that’s both golden and flaky, perfect for any pie creation. Remember, practice makes perfect, so don’t hesitate to experiment and refine your technique for the best results every time.

9.2 Encouragement to Experiment

Experimenting with Marie Callender’s pie crust is a great way to unlock new flavors and textures. Try substituting ingredients or adding unique fillings to create one-of-a-kind pies. For a gluten-free option, explore alternative flours like almond or coconut, ensuring the crust remains flaky and delicious. Vegan bakers can substitute traditional shortening with plant-based alternatives, maintaining the crust’s signature buttery taste. Don’t be afraid to mix in herbs or spices for a savory twist or add a hint of sweetness with vanilla or cinnamon. Remember, baking is an art, and experimentation is key to discovering your perfect crust. Whether you’re making a classic apple pie or an innovative dessert, Marie Callender’s crust offers endless possibilities. Embrace creativity, and don’t hesitate to try new recipes—every batch is an opportunity to refine your skills and delight your family and friends with something truly special.

dyson dc50 operating instructions

Welcome to the Dyson DC50 Operating Instructions․ This guide provides essential information for safe and effective use of your multi-floor vacuum cleaner, ensuring optimal performance and longevity․

Key Features of the Dyson DC50

The Dyson DC50 is a multi-floor vacuum cleaner designed for efficient cleaning with innovative features․ It includes Dyson’s ball technology for easy maneuverability and a lightweight, compact design for portability․ The vacuum offers powerful suction to tackle dust, dirt, and allergens on carpets, hard floors, and hard-to-reach areas․ It features a range of models, including the DC50 Animal and DC50 Multi Floor, catering to different cleaning needs․ With its advanced engineering, the DC50 provides optimal performance for a cleaner home․

  • Lightweight and compact design for easy portability․
  • Powerful suction technology for multi-surface cleaning․
  • Dyson’s innovative ball technology for smooth maneuverability․
  • Available in models tailored for specific cleaning requirements․

Importance of Reading the Operating Manual

Reading the Dyson DC50 operating manual is essential for safe and effective use of your vacuum cleaner․ It provides critical safety precautions, assembly instructions, and maintenance tips to ensure optimal performance․ The manual outlines proper usage of features like suction control and brush bar activation, helping you clean efficiently across different surfaces․ It also guides troubleshooting common issues, such as low suction or blockages, and explains how to maintain the vacuum for longevity․ By following the manual, you can avoid potential damage and ensure your Dyson DC50 operates at its best․

  • Ensures safe operation and avoids potential hazards․
  • Helps you understand and utilize all features effectively․
  • Provides troubleshooting solutions for common issues․
  • Guides proper maintenance for extended lifespan․

Safety Precautions and Warnings

Always read the Dyson DC50 manual before use to ensure safe operation․ Avoid overheating, blockages, and improper assembly, which can cause damage or injury․ Follow all guidelines carefully․

  • Keep children and pets away during operation․
  • Unplug the vacuum before maintenance or cleaning․
  • Avoid vacuuming water or flammable materials․

General Safety Guidelines

Ensure safe operation by following these guidelines․ Always read the Dyson DC50 manual before use․ Keep children and pets away while operating the vacuum․ Avoid overheating by ensuring proper airflow and emptying the dustbin regularly․ Store the vacuum in a dry, cool place, out of reach of children․ Never vacuum water, flammable materials, or sharp objects, as this can damage the machine or cause injury․ Regularly inspect for blockages and ensure all parts are securely attached․ Unplug the vacuum before performing any maintenance or cleaning․ Follow these guidelines to maintain safety and prolong the life of your Dyson DC50․

Electrical Safety Tips

Ensure electrical safety when using your Dyson DC50․ Always read the manual before operating the vacuum․ Avoid exposing the device to water or moisture, as this can cause electrical hazards․ Never use damaged cords or plug the vacuum into overloaded outlets․ Regularly inspect the power cord for signs of wear or damage and replace it if necessary․ Use only genuine Dyson parts to maintain electrical integrity․ Unplug the vacuum before performing any maintenance or cleaning․ Store the appliance in a dry, cool place to prevent electrical issues․ Follow these tips to ensure safe and reliable operation of your Dyson DC50․

Children and Pet Safety

Ensure the Dyson DC50 is used safely around children and pets․ Keep children away while operating the vacuum, as moving parts can cause injury․ Supervise minors during use and teach them proper handling․ Store the vacuum out of reach when not in use to prevent accidental start-ups․ Pets should also be kept at a distance to avoid startling them or causing stress․ Regularly check for loose parts or small accessories that could pose a choking hazard․ By following these guidelines, you can create a safer environment for both children and pets while using your Dyson DC50․

Assembly and Initial Setup

Unpack all components and attach the cleaner head securely․ Ensure all parts are locked in place for stable operation․ Refer to the manual for detailed steps․

Unpacking the Dyson DC50

Carefully unpack the Dyson DC50 from its box, ensuring all components are included․ The package typically contains the main vacuum unit, cleaner head, and additional accessories․ Inspect each part for damage․ Locate the operating manual, which provides detailed assembly and safety instructions․ Place the vacuum on a flat, stable surface to begin the setup process․ Familiarize yourself with the components before proceeding to ensure a smooth assembly experience․ Proper unpacking and initial inspection are crucial for optimal performance and safety․ Follow the manual’s guidance to avoid missing any essential steps․

Understanding the Components

The Dyson DC50 consists of several key components designed for efficient cleaning․ The main unit includes the motor, dustbin, and filters․ The cleaner head features Dyson’s ball technology for easy maneuverability․ Additional tools like the crevice tool and combination tool are provided for versatile cleaning․ The wand allows for extended reach, while the brush bar is designed for effective carpet and hard floor cleaning․ Familiarize yourself with each part to ensure proper assembly and operation․ The lightweight design enhances portability, making it easy to navigate around furniture and stairs․ Understanding these components will help you maximize the vacuum’s performance and maintain its longevity․ Proper use of each part is essential for optimal results․

Attaching the Cleaner Head

To attach the cleaner head, lie the Dyson DC50 on its back․ Locate the connection points underneath the front part of the ball․ Align the cleaner head with these points, ensuring it clicks securely into place․ Gently push down to confirm it is properly attached․ The cleaner head is designed to fit seamlessly, providing optimal cleaning performance․ Once attached, the vacuum is ready for use on various surfaces․ Ensure the connection is secure to avoid any issues during operation․ Proper attachment is crucial for effective cleaning and maintaining the vacuum’s functionality․ Always check the connection before use to ensure stability and performance․ This step ensures smooth maneuverability and efficient cleaning results․

Operating the Dyson DC50

The Dyson DC50 operates efficiently with its innovative ball technology, allowing smooth maneuverability․ Its lightweight design and powerful suction ensure effective cleaning across various surfaces with ease and precision․

Basic Operation and Controls

The Dyson DC50 features a user-friendly design with intuitive controls․ To start, simply plug in the vacuum and press the power button located on the handle․ The vacuum is equipped with a variable suction control, allowing you to adjust power based on the surface type․ For carpets, use the higher suction setting, while hard floors require less power․ The ergonomic handle provides comfortable grip and easy maneuverability․ To move the vacuum, gently push or pull it, utilizing the ball technology for smooth navigation around furniture and obstacles․ Regularly emptying the dustbin and checking for blockages ensures optimal performance․ Always refer to the manual for specific guidance․

Adjusting Suction Power

The Dyson DC50 allows you to adjust suction power to suit different cleaning tasks․ Locate the suction control slider, typically found on the handle or near the base․ For delicate surfaces or hard floors, reduce the suction by sliding the control downward․ For carpets or heavy debris, increase suction by sliding it upward․ This feature ensures efficient cleaning without damaging surfaces․ Regularly check and adjust the suction power to optimize performance for various floor types․ Proper adjustment extends the life of the vacuum and ensures effective cleaning results․ Always refer to the manual for specific guidance on suction control settings․

Using the Brush Bar

The brush bar on the Dyson DC50 is designed to agitate carpets and gently clean hard floors․ To use it effectively, ensure it is properly attached and adjusted․ For carpets, the brush bar should spin freely; for hard floors, it may retract or adjust automatically․ Regularly clean the brush bar to remove tangled hair or debris, which can impede performance․ Refer to the manual for specific instructions on adjusting or maintaining the brush bar․ Proper use ensures efficient cleaning and prolongs the life of the vacuum․ Always check for blockages and ensure the brush bar is free from obstructions for optimal results․

Switching Between Carpet and Hard Floor Modes

To switch between carpet and hard floor modes on the Dyson DC50, adjust the cleaner head․ For carpets, ensure the brush bar is lowered and spinning․ For hard floors, raise the brush bar to prevent scratching․ Use the mode switch located on the cleaner head to transition seamlessly․ Always refer to the manual for specific instructions․ Proper adjustment ensures optimal cleaning performance on both surfaces․ Regularly check and clean the brush bar to maintain efficiency․ This feature enhances versatility, making the Dyson DC50 suitable for various flooring types․ Adjusting the mode correctly prolongs the life of your vacuum and ensures effective cleaning results․

Maintenance and Cleaning

Regular maintenance ensures optimal performance․ Empty the dustbin after each use and clean the filters as instructed․ Check for blockages and replace worn parts promptly․

Emptying the Dustbin

To maintain optimal performance, empty the dustbin after each use․ Press the release button located at the top of the bin, then pull it away from the vacuum․ Hold the bin over a trash can, press the bottom release lever to open the base, and allow the debris to fall out․ Ensure the bin is completely empty and clean before reattaching it to the machine․ Regular emptying prevents dust buildup and maintains strong suction power․ Always handle the dustbin with care to avoid spills and keep your vacuum operating efficiently․

Cleaning the Pre-Filter and Post-Filter

Regularly cleaning the pre-filter and post-filter ensures your Dyson DC50 maintains optimal performance․ To clean the filters, remove them from the vacuum and rinse with cold water only․ Avoid using detergents or hot water, as this may damage the filters․ Gently shake off excess water and allow them to air dry completely for at least 24 hours before reinstalling․ Clean filters improve suction power and prevent dust and allergens from recirculating․ Failure to clean the filters can lead to reduced performance and potentially damage the machine․ Always follow the manufacturer’s guidelines for filter maintenance․

Checking for Blockages

Regularly inspecting your Dyson DC50 for blockages is crucial for maintaining its performance․ Turn off and unplug the vacuum before checking․ Inspect the wand, hose, and cleaner head for any debris or obstructions․ If a blockage is found, carefully remove it to ensure proper airflow․ Check the dustbin and filters as well, as they can also become clogged․ Use a soft brush or your hands to clear any blockages․ After resolving the issue, reassemble the parts and test the vacuum․ Regular checks help prevent reduced suction power and potential damage to the motor․ Always refer to the manual for specific guidance․

Replacing the Belt

To replace the belt on your Dyson DC50, first ensure the vacuum is turned off and unplugged․ Locate the cleaner head and remove it by releasing the clips or screws․ Gently pull off the old belt and discard it; Take the new belt and align it with the motor pulley, ensuring it is properly seated․ Reattach the cleaner head and tighten any fasteners․ Turn the vacuum on to test the brush bar’s rotation․ If the belt slips or breaks again, repeat the process․ Regular belt replacement ensures the brush bar functions correctly, maintaining effective cleaning performance․ Always refer to the manual for specific guidance․

Troubleshooting Common Issues

Troubleshooting common issues with your Dyson DC50 helps maintain its performance․ This section guides you through identifying and resolving problems like low suction or brush bar malfunction, ensuring optimal cleaning results․

Low Suction Power

Low suction power in your Dyson DC50 can be caused by blockages, a full dustbin, or dirty filters․ Regularly check and empty the dustbin to ensure optimal performance․ Clean or replace the pre-filter and post-filter as recommended to maintain airflow․ Inspect the hose and wand for any obstructions and remove them promptly․ If the issue persists, check for blockages in the cleaner head or internal components․ Ensuring all parts are clean and free from debris will help restore the vacuum’s suction power․ Refer to the troubleshooting section for detailed steps to resolve this common issue effectively․

Brush Bar Not Spinning

If the brush bar on your Dyson DC50 stops spinning, check for blockages caused by hair, debris, or large objects․ Turn off the machine and inspect the brush bar for tangled hair or dirt․ Remove any obstructions carefully․ Ensure the belt is intact and not damaged, as a broken belt can prevent the brush bar from spinning․ Also, verify that the brush bar is switched on and properly engaged․ If the issue persists, refer to the troubleshooting section for further guidance or consider consulting a Dyson service center for professional assistance to resolve the problem effectively․

Strange Noises

If your Dyson DC50 is producing strange noises, check for blockages in the hose, wand, or cleaner head․ Foreign objects like coins or screws can cause unusual sounds․ Ensure the brush bar is clear of debris and not obstructed․ If the noise persists, inspect the belt for damage or misalignment․ A worn or loose belt may also cause vibrations or rattling sounds․ Additionally, check the dustbin and filters for blockages, as restricted airflow can lead to abnormal noise․ For persistent issues, refer to the troubleshooting section or contact Dyson customer support for further assistance to resolve the problem effectively․

Overheating

If your Dyson DC50 is overheating, immediately turn it off and unplug it․ Overheating can occur due to blockages in the hose, wand, or cleaner head, restricting airflow; Check for obstructions and ensure the dustbin is empty․ Dirty or clogged filters may also cause overheating, so clean or replace them as needed․ Allow the machine to cool down before restarting․ If the issue persists, inspect for internal blockages or damaged components․ For severe overheating, contact Dyson customer support for professional assistance to prevent further damage and ensure safe operation of your vacuum cleaner․

Accessories and Attachments

The Dyson DC50 comes with versatile accessories like the crevice tool, combination tool, and stair tool, designed to enhance cleaning efficiency across various surfaces and tight spaces․

Crevice Tool

The crevice tool is a slim, narrow attachment designed for cleaning tight spaces, such as between furniture, stairs, and along baseboards․ It allows precise targeting of dust and debris in hard-to-reach areas․ To use, simply attach it to the wand or vacuum cleaner․ Its angled design enables easy maneuverability, making it ideal for corners and crevices․ Regularly cleaning these areas with the crevice tool helps maintain a thorough and efficient cleaning routine․ Always ensure the tool is securely attached before use to avoid accidental detachment․ This accessory is essential for achieving a deeper clean in challenging spaces․

Combination Tool

The combination tool is a versatile attachment designed for multi-surface cleaning․ It features a soft brush for delicate surfaces and a wide nozzle for larger areas․ Ideal for upholstery, stairs, and tight spaces, it adapts to various cleaning needs․ To use, simply attach it to the wand or vacuum․ The brush is perfect for dusting, while the nozzle excels at picking up debris․ Regularly cleaning the tool ensures optimal performance․ This accessory enhances your cleaning versatility, making it a must-have for tackling different surfaces efficiently․ Always store it securely to maintain its condition and ensure it’s ready for use․

Stair Tool

The stair tool is specifically designed for cleaning stairs, upholstery, and tight spaces․ Its lightweight design and angled bristles make it ideal for picking up dust, dirt, and allergens․ Attach it to the wand for extended reach and precise cleaning․ The tool’s shape allows for easy maneuverability, ensuring thorough coverage of each step․ Regularly cleaning the stair tool ensures optimal performance․ Store it securely to maintain its condition․ This accessory is perfect for tackling hard-to-reach areas, making it an essential component for comprehensive cleaning․ Use it to keep your stairs and furniture clean with minimal effort and maximum efficiency․

Additional Accessories

The Dyson DC50 comes with a range of additional accessories to enhance your cleaning experience․ These include specialized tools like the upholstery brush, designed for cleaning fabric surfaces, and the extension wand, which provides extra reach for high areas․ Optional accessories, such as the mattress tool or the flexi crevice tool, can be purchased separately to tackle specific cleaning tasks․ These tools are designed to work seamlessly with the DC50, ensuring versatility and efficiency․ Regularly cleaning and maintaining these accessories will help preserve their performance․ Explore the full range of compatible accessories to maximize your vacuum’s capabilities and keep your home spotless with ease․

Storage and Portability

The Dyson DC50’s compact and lightweight design makes it easy to store in small spaces․ Its portability allows for convenient transport between floors and rooms, ensuring efficient cleaning anywhere․

Storing the Vacuum Cleaner

Proper storage of the Dyson DC50 is essential to maintain its performance and longevity․ After use, ensure the vacuum is clean and dry․ Empty the dustbin and remove any blockages․ Detach accessories and store them separately to avoid damage․ Place the vacuum in a dry, cool environment, away from direct sunlight․ Avoid storing it in extreme temperatures or humid areas, as this may damage electrical components․ For added protection, use the original storage bag if available․ Regular maintenance and proper storage will ensure your Dyson DC50 continues to deliver optimal cleaning results․

Transporting the Dyson DC50

Transporting the Dyson DC50 is straightforward due to its lightweight and compact design․ Always handle the vacuum with care to avoid damage․ When moving the device, ensure the dustbin is empty and all attachments are securely stored․ For extended transport, consider using the original storage bag to protect the machine․ Clean the vacuum before transporting to prevent dust and debris from spreading․ Avoid exposing the Dyson DC50 to extreme temperatures or moisture during transit․ Regularly check for blockages and ensure all components are securely attached before moving․ Proper transportation ensures the longevity and optimal performance of your Dyson DC50 vacuum cleaner․

Additional Resources

Access the Dyson DC50 manual online for detailed instructions․ Visit Dyson’s official website for customer support, troubleshooting guides, and additional maintenance tips to enhance your vacuuming experience․

Downloading the Dyson DC50 Manual

The Dyson DC50 manual is readily available for download from Dyson’s official website and other trusted platforms like ManualsOnline․ This comprehensive guide provides detailed instructions, troubleshooting tips, and maintenance advice to ensure optimal performance․ By downloading the manual, users can access essential information anytime, making it easier to assemble, operate, and maintain their vacuum cleaner․ The PDF format allows for easy navigation and printing of specific sections․ Visit Dyson’s support page to download the manual and explore additional resources for your DC50 upright vacuum cleaner․

Customer Support and Service Centers

Dyson offers comprehensive customer support for the DC50 upright vacuum cleaner․ Visit their official website to access product manuals, troubleshooting guides, and maintenance tips․ Dyson’s support page also provides information on available spares and accessories․ For direct assistance, contact Dyson’s customer service team via phone, email, or live chat․ Additionally, authorized service centers are available for repairs and maintenance, ensuring your Dyson DC50 operates at its best․ For more details, visit Dyson’s support page and explore the resources designed to enhance your user experience․

Online Communities and Forums

Online communities and forums are valuable resources for Dyson DC50 users․ Websites like Dyson’s support page and independent forums offer troubleshooting tips, user experiences, and solutions to common issues․ These platforms allow you to connect with other Dyson DC50 owners, share maintenance advice, and gain insights into optimizing your vacuum’s performance․ Additionally, forums often provide access to downloadable manuals, guides, and accessory recommendations․ Engaging with these communities can enhance your understanding of the product and help you resolve any challenges you may encounter during use․

Thank you for reading the Dyson DC50 operating instructions․ Proper maintenance and regular checks ensure optimal performance․ Always refer to the manual for troubleshooting and care tips․

Final Tips for Optimal Performance

Regular maintenance is key to ensuring your Dyson DC50 performs at its best․ Always empty the dustbin after use and clean the filters as instructed to maintain suction power․ Check for blockages in the hose or wand, and replace the belt if it shows signs of wear․ Store the vacuum in a dry, cool place to prevent damage․ Refer to the manual for specific guidance on troubleshooting and part replacement․ By following these tips, you’ll extend the life of your Dyson DC50 and keep your home clean with ease․ Remember to use genuine Dyson parts for optimal performance and warranty validity․

Importance of Regular Maintenance

Regular maintenance is crucial for ensuring your Dyson DC50 continues to perform efficiently․ Empty the dustbin after each use to prevent dust buildup and maintain suction power․ Clean the pre-filter and post-filter regularly, as clogged filters can reduce performance․ Check for blockages in the hose, wand, or cleaner head, and clear them promptly․ Replace the belt if it becomes worn or damaged to avoid motor strain․ Using genuine Dyson parts ensures compatibility and maintains warranty validity․ Refer to the manual for specific maintenance schedules and procedures․ By keeping your Dyson DC50 well-maintained, you’ll enjoy consistent cleaning results and extend its lifespan․

makita ls1013 instruction manual

Welcome to the Makita LS1013 instruction manual. This guide provides essential information for safe and effective use of your 10″ slide compound saw with electric blade brake. Read carefully to ensure optimal performance and maintain safety standards.

Table of Contents

This manual is designed to guide you through the safe and effective use of your Makita LS1013 slide compound saw. Below is a detailed outline of the sections included in this manual:

  1. Safety Precautions

    • 3.1 Personal Protective Equipment

    • 3.2 Work Area Safety

  2. Key Features

  3. Technical Specifications

  4. How to Read the Manual

    • 6.1 Understanding Symbols

    • 6.2 Interpreting Diagrams

  5. Assembly and Parts Diagram

  6. Operating Instructions

    • 8.1 Pre-Use Checks

    • 8.2 During Operation

    • 8.3 Shutdown Procedures

  7. Maintenance and Care

    • 9.1 Cleaning the Saw

    • 9.2 Lubrication

    • 9.3 Storage Tips

  8. Troubleshooting

  9. Accessories and Attachments

This manual is organized to provide clear and concise information, ensuring you can operate and maintain your Makita LS1013 safely and efficiently. Refer to the relevant sections for detailed guidance.

Safety Precautions

Safety is paramount when using the Makita LS1013. Always read and understand this manual before operation. The tool features double insulation for enhanced safety. Use only Makita replacement parts and authorized accessories to avoid risks and ensure reliability.

3.1 Personal Protective Equipment

Personal protective equipment (PPE) is essential for safe operation of the Makita LS1013. Always wear safety glasses or goggles to protect your eyes from debris. Hearing protection, such as earplugs or earmuffs, is recommended to prevent noise exposure. Wear a dust mask when cutting materials that generate dust or particles. Gloves are also crucial to maintain a firm grip and protect your hands from potential hazards. Ensure loose clothing or jewelry is secured to avoid entanglement with moving parts. Proper footwear and a stable work environment further enhance safety. Always adhere to safety standards and consult the manual for specific PPE recommendations tailored to your tasks.

3.2 Work Area Safety

Maintaining a safe work area is crucial when using the Makita LS1013. Ensure the workspace is clean, well-lit, and free from clutter or obstacles. Keep children and pets away to avoid distractions. Always ensure proper ventilation, especially when cutting materials that release dust or fumes. Avoid wearing loose clothing or jewelry that could get caught in moving parts. Secure the workpiece firmly to prevent movement during operation. Never work in an unstable or uneven environment, as this can lead to accidents. Keep the floor clear of cords, tools, or debris to prevent tripping hazards. Avoid overreaching or stretching while operating the saw, as this can compromise control. Never use the tool near flammable materials or in areas where sparks could ignite fires. Ensure all guards and safety features are in place and functioning properly. Regularly inspect the work area for potential hazards and address them before starting work. By following these guidelines, you can create a safer environment for operating the Makita LS1013. Always refer to the manual for specific safety recommendations.

Key Features

The Makita LS1013 is a high-performance 10″ slide compound saw designed for precision and versatility. It features an advanced electric blade brake system, which stops the blade quickly for enhanced safety. This model is an upgraded version of the LS1011, offering improved functionality and reliability. The saw is equipped with a robust motor and a durable design, making it suitable for demanding tasks. Its compact and ergonomic construction ensures easy portability and comfortable operation. The LS1013 includes a double insulation feature, providing additional protection against electrical hazards. It also supports tool-less blade changes, allowing for quick and convenient maintenance. The saw is ideal for cutting various materials, including wood, metal, and plastic, with high accuracy. Additionally, it comes with a comprehensive 72-page manual, ensuring users have detailed guidance for optimal performance. The LS1013 is a reliable choice for professionals and DIY enthusiasts alike, offering a balance of power, precision, and safety. Regular lubrication with Makita grease N is recommended to maintain its efficiency and longevity.

Technical Specifications

The Makita LS1013 is a 10″ slide compound saw equipped with an electric blade brake for enhanced safety. It operates on a powerful motor designed for high-performance cutting. The saw features a durable construction with double insulation, ensuring reliability and protection against electrical hazards. Weighing in at a manageable size, it is portable and easy to maneuver. The LS1013 is compatible with a 255 mm (10″) blade and is designed for cutting various materials with precision. It supports tool-less blade changes, making maintenance straightforward. The saw is part of Makita’s advanced lineup, offering improved functionality compared to its predecessor, the LS1011. Regular lubrication with Makita grease N is recommended to maintain optimal performance. This model is ideal for both professional and DIY applications, delivering a balance of power, accuracy, and safety. The LS1013 is backed by a comprehensive 72-page manual, ensuring users have detailed guidance for operation and maintenance. Its robust design and advanced features make it a reliable tool for demanding tasks.

How to Read the Manual

This manual provides detailed instructions for the safe and effective use of your Makita LS1013. Start by reviewing the table of contents to locate specific sections quickly. Pay attention to safety symbols and diagrams, as they are crucial for understanding proper operation and maintenance procedures.

6.1 Understanding Symbols

Symbols are used throughout this manual to convey important safety and operational information. Warning symbols indicate potential hazards, such as electrical risks or moving parts. Caution symbols highlight precautions to prevent damage to the tool or workpiece. Information symbols provide helpful tips or clarify specific procedures.

Common symbols include:
– Electrical warning: Indicates live electrical components.
– Personal protective equipment (PPE): Reminds users to wear safety gear like gloves or goggles.
– Do not touch: Warns against contact with hot or sharp surfaces.
– Correct/incorrect actions: Shows proper or improper usage techniques.

These symbols are standardized to ensure clarity and consistency. Always take a moment to understand the meaning of each symbol before proceeding with an operation. Refer to the symbol key in the manual if you are unsure. By following these visual guidelines, you can ensure safe and effective use of your Makita LS1013.

6.2 Interpreting Diagrams

Diagrams in this manual are essential for understanding the assembly, operation, and maintenance of your Makita LS1013 slide compound saw. They provide visual guidance to complement written instructions, ensuring clarity and precision.

Key types of diagrams include:
– Parts diagrams: Identifying components and their locations.
– Assembly diagrams: Step-by-step instructions for tool assembly.
– Operational diagrams: Illustrating proper usage techniques.
– Safety diagrams: Highlighting hazard areas and safe practices.

To interpret diagrams effectively:
Start by reviewing the legend or key to understand symbols and abbreviations.
Focus on highlighted areas, which emphasize critical steps or components.
Cross-reference diagrams with written instructions to ensure comprehension.
Pay attention to color coding, which may indicate specific parts or actions.

Diagrams are designed to be intuitive, but take your time to study them carefully. If a detail is unclear, revisit the corresponding text or consult the symbol key. Accurate interpretation of diagrams is crucial for safe and effective use of your Makita LS1013.

Assembly and Parts Diagram

The assembly and parts diagram is a critical component of this manual, providing a visual representation of your Makita LS1013 slide compound saw. This section helps you identify and understand the location and function of each part, ensuring proper assembly, maintenance, and operation.

The diagram illustrates the tool’s components, including the saw blade, motor housing, fence, miter scale, and other essential parts. Each part is labeled with a reference number, which corresponds to the parts list in this manual. This allows you to quickly locate and identify components when performing maintenance or repairs.

To use the diagram effectively:
Refer to the parts list for detailed descriptions of each component.
Use the callouts to locate specific parts on the tool.
Cross-reference with the maintenance section for guidance on lubrication and storage.

Understanding the assembly and parts diagram is essential for ensuring the longevity and optimal performance of your Makita LS1013. Always verify the accuracy of the assembly before operating the tool to prevent errors or safety hazards.

Operating Instructions

For safe and efficient operation of your Makita LS1013, follow these guidelines:
Ensure the workpiece is securely clamped before cutting.
Align the blade with the marked cutting line.
Use the electric blade brake to stop the blade quickly after each cut.
Keep hands away from the blade during operation.
Always maintain control of the saw.
Check for obstructions before starting.
Use proper stance and grip for stability.

By following these instructions, you can achieve precise cuts while maintaining safety.

8.1 Pre-Use Checks

Before operating the Makita LS1013, perform a thorough pre-use inspection to ensure safety and optimal performance. Start by inspecting the tool for any visible damage or wear. Check the power cord for cuts, frays, or damage, and ensure all connections are secure. Verify that the blade is properly installed, sharp, and free from damage or excessive wear. Ensure the electric blade brake is functioning correctly by testing it before cutting.

Next, inspect the work area to ensure it is clear of debris, loose materials, or obstructions. Secure the workpiece firmly to prevent movement during operation. Check that all safety features, such as guards and fences, are in place and functioning properly. Lubricate moving parts as specified in the manual to maintain smooth operation.

Finally, review the operating instructions and ensure you understand the controls and safety features. If any issues are identified during these checks, address them before proceeding. Regular pre-use inspections help prevent accidents and ensure reliable performance of your Makita LS1013. Always follow the manufacturer’s guidelines for maintenance and safety.

8.2 During Operation

While operating the Makita LS1013, maintain full control of the tool at all times. Ensure the blade reaches full speed before making a cut to avoid kickback or uneven results. Keep your hands away from the blade and avoid overreaching, as this can cause loss of control. Always use a firm, steady grip on the handle, and position yourself to maintain balance and visibility of the cutting area.

Use the electric blade brake to stop the blade quickly after completing a cut. Keep the workpiece securely clamped or held in place to prevent movement during operation. Avoid cutting materials that are too small or improperly supported, as this can lead to accidents. Do not wear loose clothing or jewelry that could get caught in the saw.

If you notice any unusual noise, vibration, or smoke, stop the saw immediately and inspect for issues. Never leave the tool unattended while it is in operation. Always follow the recommended cutting techniques and guidelines provided in this manual for specific materials. By adhering to these operational guidelines, you can ensure safe and efficient use of your Makita LS1013.

8.3 Shutdown Procedures

To safely shut down the Makita LS1013, follow these steps: Release the trigger switch to stop the blade. Allow the blade to come to a complete stop using the electric blade brake, which quickly halts the blade for added safety. Once the blade has stopped, unplug the tool from the power source to ensure it cannot accidentally restart.

After shutting down, inspect the saw and surrounding area for any debris or obstructions. Clean the tool as needed to maintain its performance and longevity. Store the saw in a dry, secure location, out of reach of children or unauthorized users. Always refer to the manual for specific shutdown instructions, as improper procedures can lead to damage or safety risks.

Regularly check the blade for wear or damage before storing the tool. Proper shutdown and storage are crucial for maintaining the reliability and safety of your Makita LS1013. By following these steps, you can ensure the tool remains in optimal condition for future use.

Maintenance and Care

Regular maintenance ensures the Makita LS1013 operates safely and efficiently. Clean the saw thoroughly after each use, removing dust and debris. Lubricate moving parts with Makita grease to prevent wear. Store the tool in a dry, secure location, away from direct sunlight and moisture. Always use Makita replacement parts for repairs to maintain reliability.

9.1 Cleaning the Saw

Regular cleaning is essential to maintain the performance and longevity of your Makita LS1013 saw. Always disconnect the power source before cleaning. Use a soft-bristle brush to remove dust and debris from the saw’s exterior, paying attention to vents and crevices. For tougher residue, dampen a cloth with water, but avoid soaking the tool. Never use harsh chemicals or abrasive cleaners, as they may damage the finish or components. Wipe down the blade and guard with a dry cloth to prevent rust. Inspect the saw for any blockages or damage after cleaning. Lubricate moving parts with Makita grease to ensure smooth operation. Store the saw in a dry, secure location to protect it from moisture and dust. Refer to the manual for detailed cleaning instructions and maintenance tips to keep your Makita LS1013 in optimal condition. Regular cleaning not only enhances safety but also ensures precise cuts and reliable performance over time.

9.2 Lubrication

Proper lubrication is crucial for maintaining the performance and longevity of your Makita LS1013 saw. Use only Makita-approved grease to ensure compatibility and maintain warranty conditions. Apply a small amount to moving parts, such as the gear system, pivot points, and sliding rails, as indicated in the parts diagram. Avoid over-lubrication, as excess grease can attract dust and debris, potentially affecting operation.

Before applying grease, ensure the saw is turned off and cool. Wipe away any excess with a clean, dry cloth to prevent drips. Regular lubrication helps reduce friction, prevents rust, and ensures smooth movement of components. For optimal results, lubricate after cleaning or storing the saw for extended periods.

Never use household oils or inappropriate lubricants, as they may damage the tool or void the warranty. Refer to the manual for specific lubrication points and intervals. Proper maintenance ensures your Makita LS1013 operates efficiently and reliably over time.

9.3 Storage Tips

Proper storage of your Makita LS1013 saw is essential to maintain its performance and longevity. Always store the tool in a clean, dry, and secure location, away from direct sunlight and moisture. Before storage, ensure the saw is clean and free from dust and debris. Use a dry cloth to wipe down the exterior and blade, preventing rust or corrosion.
If storing for an extended period, apply a thin layer of rust-inhibiting oil to exposed metal parts. Remove the battery (if applicable) and store it separately in a cool, dry place. Avoid storing the saw in extreme temperatures or humid environments, as this can damage internal components.

Store the saw in its original case or a sturdy container to protect it from accidental damage. Keep the tool out of reach of children and unauthorized users. For added protection, consider using a blade guard or cover to prevent dust accumulation and potential damage to the blade. Regularly inspect the saw before and after storage to ensure it remains in good condition. Proper storage practices will help maintain your Makita LS1013 saw’s reliability and performance for years to come.

Troubleshooting

This section helps you identify and resolve common issues with your Makita LS1013 saw. If you encounter a problem, refer to the solutions below before contacting a service center.

  • Blade not cutting properly: Check if the blade is dull or damaged. Replace it with a genuine Makita blade suitable for your material. Ensure the blade is correctly aligned and securely installed.
  • Motor overheating: Allow the saw to cool down. Overheating may occur due to prolonged use or cutting dense materials. Ensure proper ventilation and avoid overloading the tool.
  • Electric brake not engaging: Inspect the brake mechanism for dust or debris. Clean it gently with a dry cloth. If the issue persists, contact a Makita Authorized Service Center.
  • Unstable or uneven cuts: Check the blade for alignment and tighten any loose parts. Ensure the workpiece is securely held in place during operation.

If a problem persists after troubleshooting, consult the manual or contact Makita support for assistance. Always use genuine replacement parts to maintain performance and safety.

Accessories and Attachments

To enhance the functionality and performance of your Makita LS1013 saw, consider using recommended accessories and attachments. These are designed to optimize your cutting experience and ensure safety.

  • Blades: Use genuine Makita blades suitable for your material type (e.g., wood, metal, or plastic). Proper blade selection ensures precise cuts and extends tool life.
  • Dust Bag: Attach a dust collection bag to minimize debris and improve visibility during operation. This accessory is ideal for cleaner work environments.
  • Work Stands: Pair your saw with a sturdy work stand for enhanced stability and control, especially for large or heavy workpieces.
  • Safety Accessories: Consider additional safety gear like safety glasses or a dust mask to protect yourself during use.

Always use Makita-approved accessories to maintain the tool’s performance and safety features; Non-recommended attachments may void the warranty or pose safety risks. For more information, refer to the official Makita website or contact an authorized dealer. Genuine accessories ensure compatibility and reliability, helping you achieve professional-grade results with your LS1013 saw.

bissell quicksteamer instructions

The Bissell QuickSteamer is a versatile‚ lightweight deep cleaner designed for carpets and hard floors‚ offering efficient cleaning with advanced features and a comprehensive user guide for optimal performance.

1.1 Overview of the Bissell QuickSteamer

The Bissell QuickSteamer is a lightweight‚ versatile deep cleaner designed for efficient cleaning of carpets‚ rugs‚ and hard floors; It combines advanced features with user-friendly design‚ making it ideal for tackling spills‚ stains‚ and high-traffic areas. The cleaner uses Bissell cleaning formulas to deep clean and protect surfaces‚ ensuring optimal results. Its compact design allows for easy maneuverability‚ while the included tools enhance versatility. The QuickSteamer is backed by a limited one-year warranty and supported by Bissell’s dedicated Consumer Care team. With its robust construction and high-tech features‚ it offers a comprehensive cleaning solution for home care needs.

1.2 Importance of Following Instructions

Following the instructions for the Bissell QuickSteamer is crucial for safe and effective operation. Proper usage ensures optimal cleaning performance and prevents potential hazards such as electric shock or fire. Misuse can damage the machine or void the warranty. Always read and adhere to the safety precautions‚ assembly steps‚ and maintenance tips provided. Using unauthorized cleaning solutions or modifying the appliance can lead to malfunctions. By following the guide‚ you protect your investment and ensure longevity. Bissell’s Consumer Care is available for support‚ but proper adherence to instructions remains key for a seamless experience.

Safety Precautions

Always ground the appliance‚ avoid modifications‚ and use only Bissell-approved cleaning solutions to prevent fire or electric shock. Unplug before maintenance and avoid freezing storage conditions.

2.1 General Safety Guidelines

Always read and follow all safety instructions to ensure safe operation. To reduce risks of fire‚ electric shock‚ or injury‚ use the cleaner only for its intended purpose. Connect to a properly grounded outlet and avoid using adapters or modifying the plug. Never use non-Bissell cleaning solutions‚ as they may damage the machine or void the warranty. Keep the appliance away from water and avoid using it in areas where it may be exposed to moisture. Unplug the cleaner before performing any maintenance or troubleshooting. Store the unit in a dry‚ cool place‚ avoiding freezing temperatures to prevent damage to internal components. Regularly inspect cords and plugs for damage.

2.2 Grounding Instructions

Proper grounding is essential for safe operation. The Bissell QuickSteamer must be connected to a properly grounded electrical outlet to prevent electric shock. Use the appliance only with a grounding-type plug and avoid adapters or modifying the plug. If unsure about the outlet’s grounding‚ consult a qualified electrician. Improper grounding can lead to electrical hazards. Always ensure the cord is securely plugged into a grounded outlet and avoid overloading circuits. Grounding provides a safe path for electrical current‚ reducing shock risks. Never bypass or alter the grounding feature‚ as this can void the warranty and pose serious safety risks.

2.3 Electrical Safety Tips

Always follow electrical safety guidelines when using the Bissell QuickSteamer. Ensure the appliance is plugged into a properly grounded outlet rated for 120 volts. Avoid using extension cords or adapters‚ as they may cause electrical issues. Never operate the cleaner in areas where electrical components could get wet‚ such as near water sources. Keep cords away from hot surfaces and avoid overloading circuits. If the cord is damaged‚ stop use immediately and contact Bissell Consumer Care. Regularly inspect the power cord for signs of wear or damage. Electrical safety is crucial to prevent shocks or malfunctions. Always unplug the unit before performing maintenance or troubleshooting.

Assembly and Setup

Unpack and inventory all components‚ then attach the handle and nozzle securely. Prepare for first use by ensuring all parts are correctly aligned and tightened according to instructions.

3.1 Unpacking and Inventory

Begin by carefully unpacking your Bissell QuickSteamer and inspecting for any damage. Verify all components are included‚ such as the handle‚ nozzle‚ solution tank‚ collection tank‚ and hard floor tool. Ensure the machine is complete with all accessories listed in the manual. If any parts are missing or damaged‚ contact Bissell Consumer Care immediately. Take a moment to familiarize yourself with each part and its purpose. Before proceeding‚ ensure all items are accounted for to avoid delays during assembly. Properly organizing the components will make the setup process smoother and ensure you’re ready to start cleaning efficiently. Always refer to the manual for a detailed inventory list.

3.2 Attaching the Handle and Nozzle

To assemble your Bissell QuickSteamer‚ start by attaching the handle. Align the handle’s hooks with the base unit and snap it securely into place. Ensure it clicks firmly to avoid loose connections. Next‚ attach the nozzle by aligning its four hooks with the base. Slide it into position and snap the top into place until it locks. Verify that both the handle and nozzle are properly secured before use. If the nozzle feels loose‚ re-align and snap it firmly to ensure stability. Proper assembly is crucial for optimal performance and safety. Always refer to the manual for visual guidance if needed.

3.3 Preparing for First Use

Before using your Bissell QuickSteamer‚ ensure the area is clear of large furniture and thoroughly vacuum to remove loose debris. Pre-treat stubborn stains or high-traffic areas with Bissell Boost or pre-treatment solutions. Fill the solution tank with genuine Bissell 2X Formula‚ avoiding non-Bissell products to maintain warranty and performance. Empty the collection tank before first use and ensure all parts are securely attached. For hard floors‚ use the provided Hard Floor Tool with Bissell 2X Hard Floor Solution. Always refer to the manual for specific instructions and safety guidelines. Proper preparation ensures effective cleaning and prolongs the life of your machine.

Operating Instructions

Operating the Bissell QuickSteamer involves filling the solution tank‚ using the deep cleaner for carpets‚ and switching to the hard floor tool for other surfaces effectively.

4.1 Filling the Solution Tank

To fill the solution tank‚ remove it from the Bissell QuickSteamer and add Bissell cleaning formula‚ followed by warm water to the recommended level. Always use genuine Bissell formulas to ensure optimal performance and avoid voiding the warranty. Align the tank properly with the machine and secure it with the side latches. For best results‚ empty and rinse the collection tank before refilling the solution tank. Avoid overfilling‚ as this can cause foam to spit out during use. Regularly cleaning the lint screen and ensuring proper tank alignment will help maintain efficient operation and prevent common issues.

4.2 Using the Deep Cleaner

Before using the deep cleaner‚ pre-treat stubborn stains and high-traffic areas for optimal results. Plug in the machine and ensure the solution tank is properly filled. For enhanced cleaning‚ use Bissell Boost with your cleaning solution. Begin cleaning in slow‚ overlapping passes‚ focusing on dirty areas. Regularly empty the collection tank when it becomes full to maintain performance. For hard floors‚ use the Bissell Hard Floor Tool with Bissell 2X Hard Floor Solutions. Always vacuum thoroughly before deep cleaning and consider moving furniture for better access. Follow these steps to ensure effective cleaning and prolong the life of your carpets and hard floors.

4.3 Cleaning Hard Floors

For hard floors‚ attach the Bissell Hard Floor Tool (model 203-5639) and use Bissell 2X Hard Floor Solutions. Ensure the tool is securely locked to avoid damage. Before cleaning‚ vacuum thoroughly to remove debris. Dampen the floor with clean water‚ then apply the cleaning solution. Use slow‚ overlapping passes to clean evenly; Avoid excessive water to prevent damage. After cleaning‚ rinse the tool and empty the collection tank. Regularly clean the lint screen to maintain performance. Store the machine in a dry‚ cool place to prevent component damage. Always follow safety guidelines and use genuine Bissell products to ensure optimal results and maintain your warranty.

Maintenance and Troubleshooting

Regularly clean the lint screen‚ empty the collection tank‚ and check for proper alignment of parts. Use genuine Bissell products to avoid damage and ensure optimal performance.

5.1 Regular Maintenance Tips

Regular maintenance ensures your Bissell QuickSteamer performs optimally. Clean the lint screen and solution tank cap after each use to prevent clogs. Empty and rinse the collection tank thoroughly to avoid mold and odors. Check all connections and ensure parts are securely aligned. Use only genuine Bissell cleaning formulas to maintain warranty and prevent damage. After cleaning‚ allow the machine to dry completely before storage. Regularly inspect and replace worn belts to maintain suction power. Store the unit in a dry‚ cool place to protect internal components. Following these tips extends the lifespan and efficiency of your deep cleaner.

5.2 Common Issues and Solutions

Common issues with the Bissell QuickSteamer include clogged lint screens and misaligned tanks. To fix a clogged lint screen‚ soak it in warm water and rinse thoroughly. For misaligned tanks‚ ensure they are properly secured with side latches. If the deep cleaner isn’t picking up solution‚ check the nozzle installation—align four hooks first‚ then snap into place. For hard water buildup‚ descale regularly. If the machine isn’t turning on‚ ensure it’s properly plugged into a grounded outlet. Always use genuine Bissell formulas to avoid damaging the machine and voiding the warranty. Regular cleaning and maintenance can prevent most issues and ensure optimal performance.

5.3 Belt Replacement and Care

Regularly inspect the brush belt for wear or damage. If damaged‚ replace it immediately to ensure optimal cleaning performance. To replace the belt‚ turn off the power and unplug the device. Remove the old belt and align the new one with the motor and brush roller‚ ensuring proper fit. Tighten securely but avoid over-tightening‚ which could damage the mechanism. For longevity‚ clean the belt regularly and avoid using harsh chemicals. Never use non-Bissell belts‚ as they may void the warranty or cause malfunction. Proper belt care extends the life of your QuickSteamer and maintains its cleaning efficiency. Always follow the manufacturer’s guidelines for replacement and maintenance.

Additional Features and Accessories

  • The Bissell QuickSteamer includes a hard floor tool for select models‚ compatible with Bissell 2X formulas‚ and offers optional accessories for enhanced cleaning functionality and versatility.

6.1 Hard Floor Tool Usage

The Bissell QuickSteamer’s hard floor tool is designed for select models‚ such as the 2080 and 2090 series‚ and is specifically intended for use with Bissell 2X Hard Floor Solutions. To ensure optimal performance and safety‚ always use the recommended cleaning formula‚ as non-Bissell solutions may damage the machine or void the warranty. The tool is ideal for cleaning hard surfaces effectively without causing damage. For best results‚ follow the instructions provided in the manual and clean the tool regularly to maintain its efficiency. Proper usage enhances cleaning results and prolongs the tool’s lifespan‚ ensuring your hard floors remain spotless and well-maintained.

6.2 Using Bissell Cleaning Formulas

For optimal performance‚ use genuine Bissell cleaning formulas specifically designed for the QuickSteamer. These formulas are safe for your machine and ensure effective cleaning without damaging surfaces. Always follow the recommended dilution ratios and avoid non-Bissell solutions‚ as they may harm the device or void the warranty. Pre-treat stubborn stains with Bissell Boost for enhanced results. Regular use of Bissell formulas protects your floors and maintains the cleaner’s efficiency. For hard floors‚ use Bissell 2X Hard Floor Solutions exclusively. Remember to empty the collection tank when refilling the solution tank to prevent foam buildup and maintain proper function.

6.3 Optional Accessories

Enhance your cleaning experience with optional accessories designed for the Bissell QuickSteamer. The Hard Floor Tool (model 203-5639) is ideal for hard surfaces‚ ensuring effective cleaning with Bissell 2X Hard Floor Solutions. Replacement belts and brush rolls are available to maintain optimal performance. Additional accessories like crevice tools or upholstery brushes can expand your cleaning capabilities. These items are not included with every model but can be purchased separately. Visit the Bissell website or contact Consumer Care at 1-800-237-7691 to explore available options. Using genuine Bissell accessories ensures compatibility and maintains your cleaner’s efficiency‚ providing a comprehensive cleaning solution for your home.

Warranty and Support

Your Bissell QuickSteamer is backed by a limited one-year warranty. Register your product for rewards and maintenance reminders. Contact Consumer Care at 1-800-237-7691 or visit www.BISSELL.com for support.

7.1 Warranty Information

Your Bissell QuickSteamer is protected by a limited one-year warranty‚ covering defects in material and workmanship. The warranty ensures repair or replacement of defective parts at no cost. To maintain warranty validity‚ use only genuine Bissell cleaning formulas‚ as non-Bissell solutions may damage the machine and void coverage. Commercial use of the cleaner also voids the warranty. For warranty claims or service‚ contact Bissell Consumer Care at 1-800-237-7691 or visit www.BISSELL.com. Keep your original sales receipt as proof of purchase for warranty claims. Bissell stands behind its products‚ offering reliable support and service for your cleaning needs.

7.2 Contacting Consumer Care

For assistance with your Bissell QuickSteamer‚ contact Consumer Care at 1-800-237-7691. Support is available Monday-Friday from 8am-10pm ET‚ Saturday from 9am-8pm ET‚ and Sunday from 10am-7pm ET. You can also visit www.BISSELL.com for online support or write to BISSELL Homecare‚ Inc.‚ PO Box 3606‚ Grand Rapids‚ MI 49501‚ ATTN: Consumer Care. Have your model number and purchase date ready for faster service. Bissell’s dedicated team is here to help with repairs‚ parts‚ or warranty questions‚ ensuring you receive prompt and courteous assistance for your cleaning needs.

7.3 Registering Your Product

Registering your Bissell QuickSteamer is quick and easy‚ offering several benefits. By visiting www.BISSELL.com/registration‚ you can earn BISSELL Rewards Points for discounts and free shipping on future purchases. Registration also provides faster service‚ as your information is on file should you need assistance. Additionally‚ you’ll receive product maintenance reminders and alerts‚ ensuring your cleaner stays in optimal condition. Optional email registration allows you to receive special promotions‚ cleaning tips‚ and more. Remember to keep your original sales receipt‚ as it serves as proof of purchase for warranty claims. Registration enhances your ownership experience and keeps you connected to exclusive offers and support.

Proper use and maintenance ensure optimal performance. Regular cleaning and storage prolong the life of your Bissell QuickSteamer‚ keeping your home clean and hygienic effortlessly.

8.1 Final Tips for Optimal Use

For the best results‚ always vacuum thoroughly before deep cleaning and pre-treat stubborn stains. Use genuine Bissell formulas to maintain performance and avoid voiding the warranty. Regularly empty the collection tank to prevent foam buildup. Store the cleaner in a dry‚ cool place to protect internal components. Refer to the manual for maintenance schedules and troubleshooting tips. By following these guidelines‚ you’ll extend the life of your Bissell QuickSteamer and ensure consistent cleaning efficiency. Remember to register your product for warranty benefits and access exclusive support. Happy cleaning!

8.2 Importance of Proper Storage

Proper storage is essential to maintain the performance and longevity of your Bissell QuickSteamer. After use‚ ensure the machine is clean and dry to prevent mold or mildew. Store it in a cool‚ dry place away from direct sunlight and freezing temperatures‚ as this can damage internal components. Always disconnect the power cord and empty the solution and collection tanks before storing. Check for any blockages in the lint screens or tanks and clean them if necessary. For added protection‚ consider using the original packaging or a breathable cover. Proper storage ensures your QuickSteamer remains in optimal condition for future use.

nanit wall mount instructions

Welcome to the Nanit Wall Mount Instructions guide. This comprehensive resource ensures safe and proper installation, providing a clear view of your baby while maintaining safety and peace of mind.

Importance of Proper Installation

Proper installation of the Nanit Wall Mount is essential for ensuring your baby’s safety and optimal monitor performance. A secure setup prevents the monitor from tipping or falling, reducing potential hazards. Correct installation also guarantees a clear, unobstructed view of your baby, allowing you to monitor them effectively. Additionally, proper mounting ensures the durability of the wall mount and camera, avoiding damage from improper alignment or weight distribution. Taking the time to install the mount correctly provides peace of mind and ensures long-term reliability for years to come. Always follow the manufacturer’s instructions precisely to avoid installation errors and ensure a safe, stable, and functional setup for your baby monitor.

Benefits of Using a Wall Mount

Using a Nanit Wall Mount offers numerous benefits for baby monitoring. It provides a clear, unobstructed view of your baby, ensuring optimal visibility and peace of mind. The wall mount keeps the camera out of your baby’s reach, reducing the risk of tampering or accidental damage. Its sleek design blends seamlessly into any nursery decor, maintaining a clean and organized appearance. Additionally, the mount allows for precise camera positioning, capturing the entire crib area for comprehensive monitoring. It also enhances safety by keeping wires secure and out of the way, minimizing tripping hazards. With a wall mount, you can enjoy a stable and reliable setup, ensuring long-term performance and durability. This accessory is a practical and essential addition to your baby monitoring system, offering both functionality and aesthetic appeal.

Tools and Materials Needed

A drill, screws, wall anchors, level, and stud finder are essential. Additional materials like cable covers and elbow connectors ensure a secure and organized installation setup.

Essential Tools for Installation

Installing the Nanit Wall Mount requires specific tools to ensure a secure and proper setup. A drill is necessary for creating holes in the wall, while screws and wall anchors provide stability. A level ensures the mount is straight, and a stud finder helps locate wall studs for optimal support. Additionally, a screwdriver is needed for tightening the screws, and cable covers are essential for organizing wires neatly. Having these tools ready will streamline the process and ensure a safe, professional-grade installation for your baby monitor. Proper tools guarantee a stable and reliable setup, providing peace of mind while monitoring your baby.

Additional Materials for a Secure Setup

Beyond the essential tools, having extra materials ensures a seamless and secure installation. A surge protector safeguards your monitor from power surges, while a power strip manages multiple devices. Adhesive cable strips or hooks keep wires organized without damaging walls. Cable ties and clips prevent tangled cords, enhancing safety. A pencil marks drill spots accurately, and a tape measure ensures proper alignment. Wall plugs may be needed for certain surfaces, and a soft cloth cleans the area before installation. These materials complement the tools, ensuring a secure and neat setup. They help prevent hazards, such as tripping over loose wires, and improve the overall reliability of your Nanit Wall Mount. By using these additional items, you can achieve a professional-grade installation that is both safe and visually appealing.

Preparation for Installation

Plan your setup by ensuring the crib is positioned correctly and the wall is sturdy enough to support the mount. Use a level to ensure proper alignment and stability for a secure installation.

Choosing the Right Location

Choosing the right location for your Nanit Wall Mount is crucial for optimal monitoring and safety. Position the mount at least 6 feet above the crib to ensure it’s out of your baby’s reach. Center the mount directly above the crib to capture a clear, unobstructed view of your baby. Ensure the wall is sturdy and can support the weight of the mount and camera. Use a stud finder to locate wall studs for added stability, especially in drywall or plaster walls. Align the mount with the crib’s center to ensure proper camera alignment. Double-check the wall type and weight limits to avoid installation issues. Proper placement ensures a safe, reliable, and clear view of your baby, providing peace of mind for parents.

Understanding Wall Types and Weight Limits

Understanding your wall type and its weight limits is essential for a secure Nanit Wall Mount installation. Drywall, plaster, and concrete walls have different requirements. For drywall or plaster, use a stud finder to locate wall studs for added stability, as anchors alone may not suffice. Concrete or brick walls require specific anchor screws to ensure a sturdy setup. The Nanit Wall Mount is designed to support up to 5-7 pounds, including the camera and any additional accessories. Always check the weight limits to prevent overloading. Properly securing the mount to the wall type ensures long-term stability and safety. By considering your wall’s structural capacity, you can achieve a reliable and secure installation for your baby monitor, providing peace of mind for years to come.

Step-by-Step Installation Guide

This guide provides a detailed, easy-to-follow process for installing your Nanit Wall Mount. From aligning the mount to drilling holes and securing the bracket, it ensures a safe and stable setup for your baby monitor.

Mounting the Bracket to the Wall

Begin by locating the center of the wall above the crib, ensuring it aligns with the camera’s optimal viewing angle. Use a level to ensure the bracket is straight. Mark the wall with a pencil, then drill pilot holes for the screws or anchors. Insert wall anchors if necessary, especially for drywall, to provide extra stability. Attach the mounting bracket to the wall, tightening the screws firmly. Double-check that the bracket is securely fastened and level. Finally, complete the in-app crib positioning process to ensure accurate camera alignment. This step is crucial for a stable and safe installation, providing a clear view of your baby’s crib and ensuring the monitor functions properly.

Attaching the Camera to the Mount

Once the wall bracket is securely installed, attach the Nanit camera by aligning it with the mounting base. Gently slide the camera onto the bracket, ensuring it clicks into place. Use the provided screws to tighten the camera to the mount, making sure it is firmly secured. Adjust the camera angle to achieve the optimal view of the crib, ensuring no blind spots. Tighten all screws to prevent any movement or wobbling. Use the Nanit app to complete the crib positioning feature, which helps calibrate the camera for accurate monitoring. Finally, secure any cables to the mount using cable clips or elbow connectors to prevent them from interfering with the camera’s movement or creating hazards. This ensures a stable and secure setup for reliable monitoring.

Securing Cables and Wiring

Securing cables and wiring is essential for both safety and aesthetics. Use the provided cable covers or clips to neatly organize the wires, preventing them from becoming a tripping hazard or getting damaged. Route the cables along the wall or behind furniture to keep them out of sight. Attach the cables to the wall mount using the included cable management accessories, such as elbow connectors or adhesive strips, to ensure they remain secure and untangled. This step not only enhances the appearance of your nursery but also prevents accidental tugs on the wires, which could disrupt the camera’s connection. Proper cable management ensures a safe and reliable setup, giving you peace of mind while monitoring your baby. Regularly inspect the cables to ensure they remain securely fastened and free from damage. This attention to detail guarantees optimal performance and long-term durability of your Nanit Wall Mount system.

Positioning the Camera

Position the camera at least 6 feet above the crib for optimal visibility and safety. Center it above the crib and use the in-app feature to adjust the angle accurately.

Optimal Height and Angle for Monitoring

Positioning the Nanit camera at the correct height and angle is crucial for effective monitoring. Mount the camera at least 6 feet above the crib to ensure it is out of your baby’s reach and provides an unobstructed view. This height also allows the camera to capture a wide field of view, covering the entire crib and surrounding area. Adjust the angle to focus on the crib, ensuring the mattress and sides are fully visible. Proper alignment prevents blind spots and ensures accurate monitoring. Use the in-app crib positioning feature to guide the adjustment process and achieve the perfect view. A well-positioned camera enhances safety, reduces hazards, and provides peace of mind for parents. Regularly check and adjust the angle as needed to maintain optimal monitoring conditions.

Using the In-App Crib Positioning Feature

The Nanit app offers a convenient crib positioning feature to ensure your camera is perfectly aligned with your baby’s crib. Open the Nanit app, navigate to the setup section, and follow the prompts to initiate the crib positioning process. The app will guide you through adjusting the camera angle to achieve the best possible view of your baby’s crib. This feature ensures accurate alignment, eliminating blind spots and providing a clear, unobstructed view of your baby. Once the camera is positioned correctly, confirm the setup in the app to calibrate the view. This step is essential for ensuring your baby’s safety and providing you with peace of mind. Regular use of this feature guarantees optimal monitoring conditions and enhances the overall performance of your Nanit Wall Mount setup.

Cable Management and Safety

Organize wires using elbow connectors and cable covers to prevent tripping hazards. Secure cables neatly to maintain a safe and clutter-free nursery environment, enhancing overall safety and functionality.

Organizing Wires with Elbow Connectors

Elbow connectors are essential for managing cables neatly during Nanit Wall Mount installation. Attach the connector to the camera base to route wires at a right angle, minimizing clutter. This ensures wires are securely fastened, reducing tripping hazards and keeping the nursery tidy. Proper cable organization enhances safety and maintains a clean environment. Use cable covers to further secure wires, preventing tangling and damage. This step is crucial for both functionality and aesthetics, ensuring your baby monitor operates smoothly while maintaining a safe and organized space. By organizing wires effectively, you create a reliable and visually appealing setup for long-term use.

Securing Cables to Prevent Hazards

Securing cables is a critical step in ensuring a safe and hazard-free setup for your Nanit Wall Mount. Use cable covers or adhesive strips to neatly route wires along the wall, preventing them from becoming tripping hazards or getting damaged. Cable ties can also be used to bundle wires together, keeping them organized and out of reach of your baby. Properly securing cables not only enhances safety but also maintains a tidy and clutter-free nursery environment. Regularly inspect cables for any signs of damage or fraying and replace them if necessary. By taking these precautions, you can ensure a reliable and secure connection while minimizing potential risks, providing peace of mind for parents and a safe space for your baby.

Troubleshooting Common Issues

Address connectivity problems by checking your Wi-Fi network and restarting the device. For camera alignment issues, adjust the angle and ensure the mount is securely fastened to the wall.

Resolving Connectivity Problems

If you encounter connectivity issues with your Nanit Wall Mount, start by ensuring your Wi-Fi network is stable and the monitor is within range. Restart the device and check for firmware updates in the app. Verify that all cables are securely connected and properly routed using cable covers to prevent interference. If the problem persists, refer to the user manual or in-app troubleshooting guide for additional steps. Regularly inspecting cable connections and ensuring they are tightly secured can help prevent future issues. By addressing these common connectivity challenges, you can restore a reliable connection and enjoy uninterrupted monitoring of your baby.

Adjusting Camera Alignment

Adjusting the camera alignment ensures a clear and unobstructed view of your baby. Start by positioning the camera so it captures the entire crib, including the mattress and sides. Use the elbow connectors to securely fasten the camera to the wall mount, ensuring stability. Fine-tune the angle to avoid any blind spots. Complete the in-app crib positioning process to verify the camera’s alignment and ensure optimal monitoring. Proper adjustment guarantees your baby’s safety and your peace of mind. Regularly check the alignment to ensure it remains accurate, especially if the crib or mount is moved. By following these steps, you can maintain a clear and reliable view of your baby at all times.

Maintenance and Safety Checks

Regularly inspect the mount for stability and tighten any loose screws. Clean the camera lens with a soft cloth to ensure clear visibility. Check cables for damage and secure them properly using cable covers. Perform periodic checks to ensure the mount remains level and firmly attached to the wall. This maintenance ensures optimal performance and longevity of your Nanit Wall Mount, providing continued reliability and peace of mind for monitoring your baby.

Regular Inspections for Stability

Regular inspections are crucial to ensure the Nanit Wall Mount remains stable and secure. Start by checking all screws and bolts to confirm they are tightly fastened. Over time, vibrations or minor shifts can loosen these, so tightening them periodically is essential. Next, examine the wall anchors to ensure they remain firmly embedded and haven’t shifted. If you notice any signs of wear or damage, replace the anchors immediately. Additionally, inspect the mount’s base for any wobbling or unevenness, which could indicate improper alignment. Use a level tool to verify the mount is straight and adjust if necessary. Finally, ensure the camera is securely attached to the mount and that all cables are neatly organized and out of reach. These routine checks help maintain the setup’s integrity and prevent potential hazards, ensuring your baby’s safety and your peace of mind.

Cleaning and Updating Firmware

Regular cleaning and firmware updates are essential for maintaining the Nanit Wall Mount’s performance and security. Start by gently wiping the camera lens with a soft, dry cloth to remove dust or smudges, ensuring clear visibility. Avoid using harsh chemicals or abrasive materials that could damage the lens. Next, check for firmware updates through the Nanit app. Updating the firmware ensures you have the latest features, security patches, and performance improvements. To update, open the app, navigate to the settings menu, and select “Check for Updates.” Follow the on-screen instructions to complete the process. Regular firmware updates help maintain optimal functionality and protect your device from potential vulnerabilities. By keeping your camera clean and up-to-date, you ensure reliable monitoring and enhanced safety for your baby.

Conclusion

Proper installation and maintenance of the Nanit Wall Mount ensure your baby’s safety and optimal monitoring. Follow these steps for a secure, reliable setup and lasting peace of mind.

Final Tips for a Successful Setup

For a successful Nanit Wall Mount installation, ensure the mount is securely fastened to the wall, ideally into studs, and use cable covers to organize wires neatly. Position the camera at least 6 feet above the crib for optimal visibility and safety. Double-check the camera angle using the in-app crib positioning feature to ensure accurate alignment. Regularly inspect the setup for stability and tighten any loose screws. Keep the camera lens clean and update the firmware periodically for the best performance. By following these tips, you’ll achieve a reliable and long-lasting setup, providing peace of mind while monitoring your baby.

Ensuring Long-Term Reliability

To ensure long-term reliability of your Nanit Wall Mount, regular maintenance is essential. Start by inspecting the mount for stability and tightening any loose screws to prevent wobbling. Clean the camera lens with a soft cloth to maintain clear visibility and update the firmware periodically for optimal performance. Check cables for damage and secure them properly using cable covers to prevent tangling or interference. Additionally, verify that the mount remains level and firmly attached to the wall, especially after any adjustments. By following these steps, you can ensure your Nanit Wall Mount continues to function reliably, providing you with uninterrupted monitoring and peace of mind for years to come.

schwarzkopf hair dye instructions

Welcome to Schwarzkopf hair dye instructions. With over 125 years of expertise, this guide provides a comprehensive approach to achieving professional-quality results safely at home.

Overview of Schwarzkopf Hair Dye Products

Schwarzkopf offers a wide range of hair dye products, including pre-treatment, color cream, developer lotion, and conditioner. Each box includes gloves and an instruction leaflet. Their products cater to various hair types and desired results, such as vibrant colors or natural shades. With options like Gliss, ULTIME, and Keratin Color, Schwarzkopf ensures professional-quality outcomes. They emphasize safety and care, providing clear instructions for application and aftercare to maintain color vibrancy and hair health.

Importance of Following Instructions

Following Schwarzkopf hair dye instructions is crucial for achieving desired results and ensuring safety. Proper application prevents allergic reactions, uneven color, and damage. Conducting a patch test and adhering to processing times guarantees optimal outcomes. Ignoring instructions can lead to unsatisfactory results or health risks. Always read and follow the provided guidelines carefully to enjoy vibrant, long-lasting color while maintaining hair health and integrity.

Understanding the Schwarzkopf Hair Dye Kit

Schwarzkopf hair dye kits include pre-treatment, color cream, developer lotion, conditioner, gloves, and an instruction leaflet. These components ensure a complete, safe, and effective coloring experience at home.

Components of the Hair Dye Box

The Schwarzkopf hair dye box includes a pre-treatment, color cream, developer lotion, conditioner, gloves, and an instruction leaflet. These components are designed to provide a complete coloring experience. The pre-treatment prepares hair for dye, while the color cream and developer lotion work together to achieve desired results. The conditioner helps moisturize and lock in color. Gloves protect skin, and the leaflet offers step-by-step guidance. Together, these items ensure a safe and effective at-home hair coloring process.

Pre-Treatment, Color Cream, and Developer Lotion

The pre-treatment prepares hair for coloring by opening cuticles. The color cream contains pigments for desired shade. The developer lotion activates color, ensuring vibrant results. Together, they create a professional finish at home. Proper mixing and application are essential for best outcomes. Always follow instructions for safe, effective use. These components are formulated to work together seamlessly, providing long-lasting color and minimizing damage. Use as directed to achieve optimal results and maintain hair health. Follow guidelines for application and processing times.

Gloves and Instruction Leaflet

The gloves protect your hands from staining and irritation during application. The instruction leaflet provides detailed steps, safety precautions, and tips for achieving desired results. It also includes information about the Try Me Free Rebate and recommendations for specific hair types. Always read the leaflet carefully before starting to ensure a safe and successful experience. The gloves and instructions are essential for proper application and color outcome. Follow the guidelines to maximize results and maintain hair health. Proper use ensures vibrant, long-lasting color.

Safety Precautions Before Application

Conduct a patch test 48 hours before application. Avoid eye contact and rinse immediately if exposed. Keep out of reach of children and follow instructions carefully.

Conducting a Patch Test

A patch test is essential before full application. Apply a small amount of mixed dye behind your ear or on the wrist. Wait 24-48 hours to check for any allergic reactions or irritation. This step ensures your safety, especially if you have sensitive skin or a history of allergies. Even if you’ve used hair dye before, a patch test is crucial to confirm tolerance to the current formula. If any discomfort or rash appears, discontinue use and consult a professional.

Allergy Alert Test

An allergy alert test is crucial before using Schwarzkopf hair dye. Apply a small amount of mixed dye to a discrete area, like behind your ear, 48 hours before full application. Monitor for redness, itching, or swelling. If any irritation occurs, discontinue use. This step is vital for ensuring your safety, especially if you’ve had past allergic reactions. Keep the product out of reach of children and avoid eye contact. Severe reactions, though rare, can occur, as highlighted in reported cases like Leonie Dee’s experience.

Age Restrictions and Special Considerations

Schwarzkopf hair dye is not intended for use on individuals under the age of 16. Special care is needed for bleached, highlighted, or damaged hair. Avoid applying the dye to temporary black henna tattoos. Keep the product out of children’s reach and avoid contact with eyes or sensitive areas. If contact occurs, rinse immediately. Do not use to dye eyelashes or eyebrows. Follow all safety precautions carefully to ensure a safe and effective coloring experience.

Preparation Steps

Preparation is key for a successful hair dye experience. Choose your shade, ensure hair is dry and tangle-free, and wear old clothing. Follow instructions carefully.

Choosing the Right Shade

Selecting the right shade is crucial for achieving desired results. Consider your natural hair color, skin tone, and the shade chart provided. Box dyes often appear darker, so choose a shade lighter than your target color. For example, if you want a medium brown, opt for a lighter shade to avoid overly dark results. Always follow the instructions and perform a patch test to ensure compatibility and desired color outcome. This step ensures a personalized and satisfying hair dye experience.

Preparing Your Hair and Workspace

Before applying Schwarzkopf hair dye, ensure your hair is clean and dry. Wash your hair 24-48 hours prior to application using a clarifying shampoo, but avoid conditioning. Wear old clothing or a cape to protect against stains. Cover your workspace with newspaper or a plastic sheet. Remove any jewelry and tie back long hair. Ensure good ventilation in the room. These steps create an ideal environment for a smooth and mess-free dyeing process, helping you achieve professional-quality results at home.

Wearing Protective Gloves and Clothing

Always wear the provided gloves to protect your hands from staining and potential irritation. Put on old, protective clothing or a cape to avoid dye splatters. Consider applying a thin layer of Vaseline around your hairline, ears, and neck to prevent skin staining. These precautions ensure a safe and mess-free application process, allowing you to focus on achieving the best results with Schwarzkopf hair dye.

Application Steps

Apply Schwarzkopf hair dye evenly, starting at roots and working through ends. Use gloves, follow instructions, and ensure thorough coverage for professional-quality results at home.

Mixing the Hair Dye and Developer

Mix Schwarzkopf hair dye and developer in a well-ventilated area. Pour the color cream into a bowl, add the developer lotion, and mix until smooth. Ensure no lumps remain. Use the recommended developer strength for desired results. Wear gloves to protect your hands. Mix thoroughly to achieve an even consistency. Avoid over-mixing, as this can affect the color outcome. Follow the instructions for the correct ratio to ensure optimal results. Proper mixing is key to achieving vibrant, long-lasting hair color.

Applying the Dye to Roots

Put on gloves and section your hair. Start applying the dye mixture to the roots, working in small sections. Use the applicator bottle or a tint brush for precise application. Gently massage the dye into the scalp to ensure even coverage. Focus on the regrowth area, avoiding overlapping with previously dyed hair. Leave the dye on the roots for the recommended time before applying to the ends. This ensures vibrant, uniform color from root to tip. For best results, work methodically and use a mirror for visibility.

Applying the Dye to Ends

After applying the dye to the roots, use the remaining mixture to coat the ends of your hair. Work in sections, starting from the mid-lengths to the tips. Gently massage the dye into the ends to ensure even coverage. Avoid overlapping the dye on already processed areas. Leave the dye on for 5-10 minutes less than the root processing time. This technique prevents over-depositing color and ensures a natural-looking transition from roots to ends. Rinse thoroughly after the recommended time. Processing times may vary based on developer strength and desired results.

Ensuring Even Coverage

To achieve even coverage, section your hair and clip it using the provided clips. Start applying the dye at the roots and work your way to the ends, ensuring each strand is coated. Gently massage the scalp to distribute the dye evenly. Avoid overlapping previously dyed areas, as this can cause uneven color. For longer hair, use a wide-tooth comb or brush to spread the dye uniformly. This method ensures a professional finish and prevents patchy results, giving you vibrant, consistent color from roots to ends.

Processing and Rinsing

Allow the dye to process for the recommended time based on the developer strength. Rinse thoroughly with warm water until the water runs clear. Use the provided conditioner to lock in color and moisture, ensuring soft and vibrant results.

Processing Time and Developer Strength

Processing time varies depending on the developer strength and desired results. Typically, it ranges from 15 to 45 minutes. For Igora Royal, processing time is 15-20 minutes, while other products may require up to 45 minutes. Always follow the instructions for the correct developer strength to achieve optimal color results. Avoid overprocessing, as it can damage hair. Ensure the product is applied evenly and left on for the recommended duration to achieve vibrant, long-lasting color. Follow instructions carefully to avoid complications.

Rinsing Thoroughly

Rinsing thoroughly is crucial after applying Schwarzkopf hair dye. Use warm water to remove all dye residue, massaging your scalp gently to ensure a clean rinse. Continue until the water runs clear, as leftover dye can cause irritation or uneven color. Avoid using hot water, as it may strip the color. For best results, use a color-protecting shampoo and conditioner after rinsing to lock in the vibrancy and moisture of your newly dyed hair.

Using the Provided Conditioner

After rinsing the dye, apply the conditioner provided in the Schwarzkopf hair dye kit. This conditioner is specifically formulated to lock in color, moisture, and vibrancy. Gently massage it into your hair, focusing on the ends, which tend to be the driest. Leave it on for 1-2 minutes before rinsing thoroughly with warm water. This step ensures your hair feels soft, looks healthy, and retains the color intensity for a longer period. Regular use of Schwarzkopf aftercare products will help maintain your hair’s health and color.

Aftercare and Maintenance

Proper aftercare ensures long-lasting color vibrancy. Use Schwarzkopf’s provided conditioner and color-protecting products. Avoid hot water and harsh shampoos. Regular touch-ups maintain professional results.

Caring for Color-Treated Hair

Proper care is essential for maintaining vibrant, long-lasting color. Use Schwarzkopf’s provided conditioner to lock in color and moisture. Avoid hot water, which can fade color quickly. Opt for color-protecting shampoos and conditioners to preserve vibrancy. Regular touch-ups are necessary to maintain results, especially for root regrowth. Avoid using harsh chemical treatments or heat styling tools without protection. By following these steps, you can enjoy professional-quality color-treated hair for weeks to come.

Using Schwarzkopf Aftercare Products

Enhance and maintain your color-treated hair with Schwarzkopf’s aftercare products. Use the provided conditioner immediately after rinsing to lock in color and moisture. For long-term care, try Schwarzkopf’s Color Save or Gliss lines, designed to preserve vibrancy and protect color-treated hair. These products help repair damage, reduce fade, and keep your hair healthy. Regular use ensures your color stays rich and radiant while maintaining hair health for a professional finish at home.

Maintaining Color Vibrancy

To keep your hair color vibrant, use Schwarzkopf’s color-protecting shampoos and conditioners. Avoid hot water, which can fade color, and minimize use of heat styling tools. For extra care, apply a color-depositing mask once a week. Schwarzkopf’s Color Save range is ideal for preserving color intensity. Regular touch-ups on roots and using products formulated for color-treated hair will ensure your shade remains rich and dynamic. Proper aftercare extends color life and maintains salon-quality results at home.

Tips for Achieving the Best Results

Section your hair for even application, use Vaseline to prevent skin staining, and clip sections to maintain organization. Follow instructions precisely for professional-looking results at home.

Sectioning Hair for Application

Sectioning your hair ensures even dye distribution and a professional finish. Divide your hair into manageable sections, such as top, middle, and bottom layers. Clip each section using the provided clips to keep them organized. Start applying the dye at the roots and work your way to the ends. This method prevents overlapping and ensures consistent color coverage. Use a cape or old shirt to protect clothing, and work in a well-ventilated area for optimal results.

Using Vaseline to Prevent Staining

Apply a thin layer of Vaseline around your hairline, ears, and neck before dyeing. This creates a protective barrier, preventing hair dye from staining your skin. Gently rub a small amount onto these areas using your fingertips. This simple step ensures a cleaner application and easier cleanup. It also helps maintain a professional finish by keeping dye where it belongs—on your hair, not your skin.

Clipping Hair Sections

Clipping your hair into sections helps maintain organization during application. Start by dividing your hair into manageable parts, such as top, middle, and bottom sections. Secure each section with clips to keep them out of the way. This prevents overlapping and ensures even dye distribution. Work methodically from roots to ends for a professional finish. After processing, remove the clips and rinse thoroughly as instructed. This technique is especially useful for longer hair, promoting a neat and efficient application process at home.

Common Mistakes to Avoid

Avoid overlapping dye application, as it can cause uneven color. Always follow instructions precisely and perform a patch test. Ignoring safety precautions and improper mixing can lead to poor results.

Overlapping Dye Application

Overlapping dye application is a common mistake that can lead to uneven color and damage. To avoid this, section your hair and clip it to keep it organized. Work methodically from roots to ends, ensuring each section is treated separately. This prevents applying dye to already-treated areas, which can cause over-processing and unsightly results. Use clips to keep sections apart and focus on one area at a time for a professional finish. Proper sectioning ensures even coverage and avoids unnecessary damage.

Not Following Instructions

Not following the provided instructions can lead to uneven color, damage, or allergic reactions. Always read and adhere to the safety guidelines and application steps. Skipping the patch test or ignoring recommended processing times can result in unsatisfactory outcomes. Ensure to mix the dye and developer correctly and apply the product as directed. Proper timing and technique are crucial for achieving the desired results safely. Deviating from instructions increases the risk of complications, so attention to detail is essential for a successful experience.

Ignoring Safety Precautions

Ignoring safety precautions can lead to serious consequences, such as allergic reactions or skin irritation. Always conduct a patch test 48 hours before application, even if you’ve used hair dye before. Avoid contact with eyes and rinse immediately if exposure occurs. Do not use the product on children under 16 or to dye eyelashes/eyebrows. Proper ventilation and wearing gloves are essential. Failure to follow these guidelines increases the risk of adverse reactions and compromises the desired results. Safety should never be overlooked for optimal outcomes.

Troubleshooting

Troubleshooting common issues ensures optimal results. Address uneven color by reapplying dye to affected areas. For allergic reactions, rinse thoroughly and seek medical advice. If color is too dark, use a color-correcting product. Always perform a patch test 48 hours prior to application to avoid such issues. Follow instructions carefully to minimize risks and achieve desired outcomes.

Dealing with Uneven Color

Uneven color can occur due to improper application or varying hair porosity. To fix this, reapply the dye mixture to the affected areas, following the instructions carefully. Ensure the color cream and developer lotion are mixed in the correct ratio. Apply the dye starting at the roots and work through to the ends for consistent coverage. If the color is too dark, consider using a color-correcting product. Always perform a patch test before reapplying to check the result. This ensures a more even and desired outcome.

Addressing Allergic Reactions

If an allergic reaction occurs, rinse the dye immediately with warm water and mild shampoo. Apply a cold compress to reduce swelling and seek medical attention if symptoms persist. Always perform a patch test 48 hours before application, even if you’ve used hair dye before. If irritation occurs during the test, avoid using the product. Consult a healthcare professional for advice. This ensures your safety and helps prevent severe reactions, such as blisters or swelling, which can require hospitalization.

Fixing Color That Is Too Dark

If the color appears too dark, rinse your hair thoroughly with warm water and a clarifying shampoo to remove excess dye. For mild correction, apply a color-correcting shampoo or toner. For more significant adjustments, wait 7-10 days before reapplying a lighter shade. Avoid using harsh chemicals immediately, as this can damage hair. Always follow instructions carefully to achieve the desired result and prevent over-darkening. This ensures a balanced and vibrant finish without compromising hair health.

By following Schwarzkopf hair dye instructions, you can achieve vibrant, professional-quality results at home. Always prioritize safety, use aftercare products, and follow guidelines for optimal color retention and hair health.

Final Tips for a Successful Hair Dye Experience

  • Apply Vaseline to your forehead, ears, and neck to prevent staining.
  • Section your hair and clip it for organized application.
  • Mix dye and developer in a well-ventilated area, following instructions.
  • Wear gloves to protect your hands and ensure even coverage.
  • Adhere to processing times and rinse thoroughly.
  • Use the provided conditioner to lock in color and moisture.

These tips ensure a safe, satisfying experience with vibrant results.

Encouragement to Follow Instructions

Following Schwarzkopf hair dye instructions ensures a safe and successful experience. Proper steps prevent allergic reactions and uneven color. Always conduct a patch test and read safety guidelines. Adhere to mixing ratios and application times for desired results. Protect your skin with gloves and Vaseline. By following instructions, you achieve professional-quality color at home. Remember, your hair’s health and the outcome depend on careful adherence to the provided guidance.

pioneer gravy mix instructions

Pioneer Gravy Mix offers a quick and easy way to create delicious, homemade-style gravy. Perfect for biscuits, steak, and Southern dishes, it combines quality ingredients for rich, creamy results.

Overview of Pioneer Gravy Mix

Pioneer Gravy Mix is a convenient and flavorful solution for creating delicious, homemade-style gravy. Designed to elevate Southern dishes like biscuits, fried chicken, and mashed potatoes, it offers a rich, creamy texture. The mix is easy to prepare by blending with water or fat, then boiling until thickened. Its versatility allows for customization with spices or different fats, making it a staple in many kitchens. Whether for breakfast, dinner, or a special occasion, Pioneer Gravy Mix delivers consistent results with minimal effort, ensuring a savory and satisfying experience every time.

Importance of Gravy in Southern Cuisine

Gravy is a cornerstone of Southern cuisine, adding depth and richness to iconic dishes like biscuits, fried chicken, and mashed potatoes. It serves as a unifying element, bringing together flavors from meats, vegetables, and seasonings. Pioneer Gravy Mix simplifies this tradition, offering a quick yet authentic way to create creamy, savory gravy. Its role extends beyond mere accompaniment; it enhances the overall dining experience, making it a beloved staple in Southern cooking. By using Pioneer Gravy Mix, home cooks can effortlessly maintain this cherished culinary tradition, ensuring every meal is flavorful and memorable.

History of Pioneer Gravy Mix

Pioneer Gravy Mix has a rich history rooted in Southern cuisine, offering a convenient solution for homemade gravy since its inception. Its popularity grew as it simplified traditional gravy preparation, becoming a staple in many kitchens.

Origins of the Pioneer Brand

The Pioneer brand has its roots in the Southern United States, where gravy is a cornerstone of traditional cuisine. Established with a commitment to quality and convenience, Pioneer Gravy Mix emerged as a trusted name, simplifying the process of making homemade gravy. The brand’s origins reflect a deep understanding of Southern cooking traditions, offering a product that aligns with the region’s love for rich, flavorful dishes. Over time, Pioneer became a household name, celebrated for its ability to deliver authentic, delicious gravy with minimal effort, making it a staple in kitchens across the country.

Evolution of Gravy Mixes Over Time

Gravy mixes have evolved significantly over the years, adapting to changing tastes and culinary needs. Pioneer Gravy Mix has been at the forefront of this evolution, offering convenient and flavorful solutions. Initially, gravy mixes were simple blends of flour and spices, but Pioneer introduced pre-measured ingredients and easy-to-follow instructions, making homemade gravy accessible to everyone. Over time, the brand expanded its range to include variations like sausage and brown gravy mixes, catering to diverse preferences. This evolution reflects a commitment to innovation while maintaining the traditional Southern flavors that define Pioneer Gravy Mix.

Ingredients Required for Pioneer Gravy Mix

Pioneer Gravy Mix typically includes all-purpose flour, dry milk powder, cornstarch, black pepper, salt, onion powder, and other spices. Optional ingredients like bacon fat or sausage can enhance flavor.

Common Ingredients in Pioneer Gravy Mix

Pioneer Gravy Mix typically includes all-purpose flour, dry milk powder, cornstarch, black pepper, salt, onion powder, and garlic powder. These ingredients ensure a smooth, savory gravy texture. The mix is designed to be easy to use, requiring only water or additional fat for preparation. The combination of these common ingredients provides a consistent flavor and thickness, making it a reliable choice for home cooks. Whether for biscuits, meats, or mashed potatoes, these ingredients deliver a delicious, traditional Southern-style gravy experience.

Optional Ingredients for Customization

For added flavor, users can customize Pioneer Gravy Mix with optional ingredients. Herbs like thyme or rosemary, spices such as paprika, or a pinch of cayenne pepper can enhance the taste. Some opt to add garlic powder or onion flakes for extra depth. Additionally, using different fats like butter, bacon drippings, or sausage fat can enrich the gravy’s texture and flavor. These optional additions allow home cooks to tailor the gravy to their preferences, making it a versatile option for various dishes. Experimenting with these ingredients ensures a personalized touch to every meal.

Preparation Instructions for Pioneer Gravy Mix

Bring 1 1/2 cups water to a boil, blend mix with 1/2 cup cool water until smooth, pour into boiling water, and stir until thickened for perfect gravy.

Step-by-Step Guide to Making Pioneer Gravy

  1. Start by bringing 1 1/2 cups of water to a full rolling boil in a saucepan.
  2. In a separate bowl, blend the Pioneer Gravy Mix with 1/2 cup of cool water, whisking until smooth and lump-free.
  3. Pour the gravy mix blend into the boiling water, stirring vigorously with a whisk or fork to ensure even thickening.
  4. Continue stirring until the gravy reaches your desired consistency, then remove from heat.
  5. For added richness, you can melt 2 tablespoons of fat (butter, bacon fat, or sausage fat) before adding the mix.
  6. Customize by adding spices or herbs for extra flavor.

This simple process ensures a delicious, homemade-style gravy in minutes, perfect for pairing with biscuits, steak, or mashed potatoes.

Measuring and Mixing the Gravy Blend

To ensure a smooth and lump-free gravy, start by measuring the Pioneer Gravy Mix accurately. For the standard recipe, combine 1 1/2 cups of boiling water with 1/2 cup of cool water in a separate bowl. Add the gravy mix to the cool water, whisking continuously until the mixture is fully dissolved and free of lumps. This step is crucial for achieving the perfect consistency. If desired, you can also add a small amount of fat (like butter or bacon drippings) to the mix for extra richness before pouring it into the boiling water.

Cooking the Gravy to Perfection

Cooking Pioneer Gravy Mix requires attention to temperature and timing. Once the mix is well combined with water, pour it into a saucepan of rapidly boiling water. Stir vigorously with a whisk or fork to prevent lumps from forming. Reduce the heat to medium-low and allow the mixture to simmer for about 3-5 minutes, or until it thickens to your liking. For an extra-rich texture, you can add 2 tablespoons of fat (such as butter, oil, or bacon drippings) before whisking in the mix. This step enhances the flavor and creates a velvety smooth consistency.

Thickening the Gravy for Desired Consistency

To achieve the perfect thickness, whisk the Pioneer Gravy Mix with cool water until smooth before adding it to boiling water. Stir continuously as you pour the mixture into the boiling water to prevent lumps. Reduce the heat to a simmer and let it cook for 2-3 minutes, allowing the starches to activate and thicken the gravy naturally. For a thicker consistency, cook for an additional minute or add a small amount of extra mix. Avoid over-stirring, as this can thin the gravy. Adjust the heat to maintain a gentle simmer for optimal results.

Serving Suggestions for Pioneer Gravy

Pioneer Gravy is a Southern staple, perfect for drizzling over biscuits, mashed potatoes, or fried chicken. Its rich, creamy flavor enhances any meal, making it a delicious addition to breakfast or dinner dishes.

Traditional Dishes to Pair with Pioneer Gravy

Pioneer Gravy is a perfect complement to classic Southern dishes like biscuits, fried chicken, and mashed potatoes. It’s also delicious drizzled over country fried steak or sausage. For breakfast, pair it with flaky biscuits and crispy bacon or sausage for a hearty start. The rich, creamy texture enhances the flavor of roasted meats and vegetables. Whether served alongside a holiday feast or a cozy family dinner, Pioneer Gravy adds a comforting, homemade touch to traditional meals, making it a staple in many Southern kitchens.

Modern Twists on Classic Gravy Pairings

While Pioneer Gravy shines in traditional dishes, it also pairs surprisingly well with modern twists. Try it over breakfast burritos or eggs Benedict for a savory breakfast boost. Use it as a dipping sauce for crispy fries or roasted vegetables for a unique flavor. For a gourmet touch, drizzle it over smashed Brussels sprouts or sweet potato mash. Pioneer Gravy’s versatility allows it to elevate both classic and contemporary dishes, making it a versatile addition to any meal. Experiment with these modern pairings to discover new ways to enjoy its rich, creamy goodness.

Tips for Customizing Pioneer Gravy Mix

Add herbs, spices, or a splash of milk for extra flavor. Use butter, bacon fat, or sausage drippings for richness. Customize to suit your dish’s needs.

Adding Spices for Extra Flavor

Elevate your Pioneer Gravy Mix by incorporating spices like black pepper, garlic powder, or paprika for a bold twist. For a Southern flair, add a pinch of cayenne or onion powder. Mix herbs like thyme or rosemary into the blend for a savory profile. Experiment with cumin or chili powder for a spicy kick. These additions enhance the flavor without overpowering the dish, allowing you to tailor the gravy to your meal’s theme. Whether it’s breakfast biscuits or a hearty dinner, spices add depth and personalization to your Pioneer Gravy Mix.

Incorporating Different Types of Fat for Richness

Enhance the richness of your Pioneer Gravy by using various fats like butter, shortening, sausage fat, or bacon fat. Melt 2 tablespoons of your chosen fat in a saucepan, then add 3 tablespoons of the mix. Cook on medium-low heat for 3 minutes to create a roux, which deepens the flavor and texture. For a creamier gravy, try using a combination of butter and sausage fat. This step ensures a velvety consistency and adds layers of flavor, making your dish more satisfying and indulgent. Experiment with different fats to find your perfect balance of taste and richness.

Storage and Shelf Life of Pioneer Gravy Mix

Store Pioneer Gravy Mix in an airtight container in a cool, dry place. Shelf life is typically long when stored properly, ensuring freshness for optimal flavor.

Proper Storage Techniques

To maintain the quality and freshness of Pioneer Gravy Mix, store it in an airtight container in a cool, dry place. Avoid exposure to moisture, heat, or direct sunlight, as these can degrade the ingredients. Ensure the container is tightly sealed after each use to prevent air and humidity from affecting the mix. Use a clean, dry scoop or spoon when measuring to avoid contamination. Properly stored, the mix will retain its flavor and texture for a long time, ensuring delicious results whenever you cook.

Understanding Shelf Life and Expiration

Pioneer Gravy Mix typically has a long shelf life when stored properly. The expiration date is usually printed on the packaging, ensuring freshness and quality. To maximize shelf life, keep the mix in a cool, dry place away from moisture and heat. If stored correctly, it can last for several months beyond the purchase date. Always check for visible signs of spoilage, such as rancidity or clumping, before use. If the mix appears stale or develops an off smell, it’s best to discard it and use a fresh batch for optimal flavor and texture.

Troubleshooting Common Issues

  • Lumpy gravy? Whisk continuously while mixing to ensure smoothness.
  • Too thick? Gradually add more water until desired consistency is reached.
  • Too thin? Simmer longer or add a small amount of flour to thicken.

Fixing Lumpy Gravy

Encountering lumpy gravy can be frustrating, but it’s easy to fix. Start by whisking continuously when mixing the gravy blend with water to ensure a smooth consistency. If lumps form, strain the gravy through a fine-mesh sieve to remove any solids. For prevention, make sure the gravy mix is well-blended with cool water before adding it to boiling water. Stir vigorously and consistently to avoid lumps from forming. If the gravy becomes too thick, gradually add a small amount of water while whisking until it reaches the desired texture. A smooth, lump-free gravy is just a whisk away!

Adjusting Gravy Thickness

Adjusting the thickness of Pioneer Gravy Mix is straightforward. If the gravy is too thick, gradually add small amounts of warm water while whisking until it reaches your desired consistency. For thicker gravy, allow it to simmer longer or add a slurry made by mixing 1 teaspoon of cornstarch with a little cold water. Stir the slurry into the gravy and cook for an additional minute. Achieving the perfect texture is easy with these simple adjustments, ensuring your gravy complements your dish flawlessly.

Variations of Pioneer Gravy Mix

Pioneer Gravy Mix offers versatile options, including sausage and brown gravy variations. These blends cater to different tastes, enhancing dishes like biscuits, steak, and mashed potatoes with rich flavors.

Sausage Gravy Variation

The sausage gravy variation of Pioneer Gravy Mix is a hearty option perfect for breakfast dishes. It combines the rich flavors of sausage with a creamy texture, ideal for pairing with biscuits, eggs, or breakfast meats. To prepare, simply mix the sausage gravy blend with water and cook until thickened. This variation is a popular choice for those who enjoy a savory, meaty flavor in their gravy. It’s a great way to add a Southern twist to any meal, making it a staple in many households.

Brown Gravy Variation

The brown gravy variation of Pioneer Gravy Mix is a versatile option for enhancing a variety of dishes. It offers a rich, savory flavor that complements meats, mashed potatoes, and roasted vegetables. To prepare, mix the brown gravy blend with water and cook until thickened. This variation is ideal for those seeking a classic, hearty gravy to accompany their meals. Its robust flavor profile makes it a popular choice for everyday cooking, ensuring a delicious and satisfying addition to any dish.

Health Considerations

Pioneer Gravy Mix offers low-sodium alternatives and gluten-free options, catering to diverse dietary needs. These variations ensure flavorful gravy while supporting health-conscious preferences and restrictions.

Low-Sodium Alternatives

Pioneer Gravy Mix offers low-sodium options, ideal for health-conscious individuals. These mixes cater to those with dietary restrictions while maintaining rich, savory flavors. By reducing sodium content, they provide a heart-healthy alternative without compromising taste. Perfect for home cooks seeking to balance flavor and nutrition, low-sodium Pioneer Gravy Mixes allow for customization to suit various health needs. This option ensures everyone can enjoy delicious, creamy gravy while adhering to their dietary preferences. It’s a thoughtful choice for families and individuals prioritizing wellness without sacrificing culinary satisfaction.

Gluten-Free Options

Pioneer Gravy Mix offers gluten-free alternatives, catering to those with dietary restrictions. These mixes use gluten-free ingredients like rice flour or cornstarch, ensuring a smooth, lump-free texture. For homemade versions, substitute all-purpose flour with gluten-free flours such as almond or coconut flour. Always check the ingredient list for certification to avoid cross-contamination. This option allows individuals with gluten intolerance to enjoy rich, savory gravy without compromising on taste. Perfect for family meals, gluten-free Pioneer Gravy Mixes provide an inclusive solution for everyone to savor delicious, creamy gravies.

Comparison with Other Gravy Mixes

Pioneer Gravy Mix stands out for its rich flavor and creamy texture, offering a superior taste compared to other brands. Its ease of preparation and versatility make it a top choice for home cooks and professionals alike, providing consistent results every time.

Homemade vs. Store-Bought Gravy Mixes

Homemade gravy mixes offer customization and freshness, allowing cooks to tailor flavors to their preferences. However, they require time and effort to prepare. Store-bought mixes, like Pioneer, provide convenience and consistency, with pre-measured ingredients for quick preparation. While homemade mixes avoid preservatives, store-bought options like Pioneer are designed for ease and reliability, making them ideal for busy households. The choice depends on prioritizing flavor customization or time-saving convenience, as both methods deliver delicious results for Southern dishes like biscuits and gravy.

Pioneer Gravy Mix vs. Competitor Brands

Pioneer Gravy Mix stands out among competitors for its rich, creamy texture and authentic Southern flavor. While other brands may offer similar convenience, Pioneer’s unique blend of ingredients ensures a homemade taste. Competitors often lack the same depth of flavor or require additional steps for customization. Pioneer’s ease of use and consistent results make it a top choice for many home cooks. Its ability to pair seamlessly with various dishes, from biscuits to steak, solidifies its reputation as a superior gravy mix in the market.

Pioneer Gravy Mix simplifies cooking with its easy, delicious results. Perfect for Southern dishes, it offers a quick way to enhance meals with rich, homemade flavor effortlessly.

Final Thoughts on Pioneer Gravy Mix

Pioneer Gravy Mix is a versatile and convenient solution for home cooks and professionals alike. Its ease of use and high-quality ingredients make it a staple in Southern cuisine. Whether you’re preparing a hearty breakfast or a comforting dinner, this mix ensures rich, creamy results every time. With options for customization, such as adding spices or different fats, it adapts to various tastes and dietary preferences. Pioneer Gravy Mix is a reliable choice for anyone looking to elevate their meals with authentic, homemade flavor without the hassle of from-scratch preparation. It truly delivers delicious results effortlessly.

Encouragement to Try Pioneer Gravy Mix

Give Pioneer Gravy Mix a try and discover how it can elevate your meals with its rich, savory flavor. Perfect for biscuits, steak, or mashed potatoes, it’s a simple way to add a delicious, homemade touch to any dish. With its easy-to-follow instructions and high-quality ingredients, you’ll achieve restaurant-quality results in minutes. Whether you’re a busy home cook or an experienced chef, Pioneer Gravy Mix is a must-have for enhancing your culinary creations. Don’t miss out on the opportunity to impress your family and friends with a flavorful, creamy gravy that complements your favorite recipes effortlessly.

knex helicopter instructions

Welcome to the world of K’NEX helicopter building! Explore creativity and engineering skills with detailed guides for models like the 40 Model Building Set’s helicopter on page 106 and the 52 Model Set’s attack helicopter. Perfect for all skill levels, these instructions will help you craft an impressive K’NEX helicopter.

Overview of K’NEX Helicopter Models

K’NEX offers a variety of helicopter models, ranging from simple designs to complex builds. The 40 Model Building Set includes a basic helicopter on page 106, while the 52 Model Set features an attack helicopter with 429 pieces. These models cater to different skill levels, from beginners to advanced builders. Each kit provides detailed instructions, ensuring a fun and educational experience. Whether you’re building a classic helicopter or a specialized variant, K’NEX kits deliver hours of creative engineering and learning.

Importance of Following Instructions

Following K’NEX helicopter instructions ensures a stable and functional build. Detailed guides, like those for the 40 Model Set’s helicopter on page 106, help avoid errors and part wastage. Instructions are designed to cater to all skill levels, from beginners to advanced builders. By adhering to the steps, you’ll achieve a durable and visually appealing model. This process also teaches engineering principles, making it an educational and rewarding experience. Properly following instructions guarantees a successful and enjoyable K’NEX helicopter construction.

Materials and Tools Required

Essential K’NEX pieces include rods, connectors, and specialized parts like rotors and landing gear. Tools needed are Allen wrenches and screwdrivers for secure connections.

Essential K’NEX Pieces for Helicopter Construction

The core components include various lengths of rods, connectors, and specialized parts like rotors and landing gear. These pieces are crucial for stability and functionality, ensuring the helicopter’s structure holds together securely. Additional elements such as clips and spacers may be required for specific models, like the attack helicopter in the 52 Model Set. Always refer to the manual for exact quantities and types needed to avoid missing critical parts during assembly.

Optional Components for Customization

Optional K’NEX pieces like additional rods, connectors, and specialized parts can enhance your helicopter’s design. These include decorative elements such as decals or extra details for a personalized look. Some models, like the attack helicopter in the 52 Model Set, may offer unique components for customization. While not essential for basic assembly, these parts allow you to add unique features, such as movable parts or color variations, to make your helicopter stand out and reflect your creativity.

Step-by-Step Assembly Guide

Welcome to the K’NEX helicopter assembly guide! Follow detailed, systematic instructions to build models like the 40 Model Set’s helicopter (page 106) or the 52 Model Set’s attack helicopter, ensuring a smooth and enjoyable building experience.

Preparing the Base Structure

Begin by constructing the base structure, the foundation of your K’NEX helicopter. Start with the central rod, connecting it to the base plate using rod connectors. Attach side panels and support beams to ensure stability. Follow the manual’s guidance for aligning pieces correctly. Tighten all connections firmly to avoid wobbling. Use spacers if needed to maintain proper spacing between components. This step ensures a sturdy base for the rotor and tail sections to be added later. Precision here is key for a balanced build.

Building the Rotor System

Construct the rotor system by attaching rotor blades to the central hub. Use curved connectors to secure the blades evenly, ensuring balance. Follow the manual’s guide for precise alignment. Tighten all connections firmly to prevent movement. For models like the 40 Model Building Set’s helicopter, refer to page 106 for specific blade placement. Test the rotor’s balance by gently spinning it. Adjust if necessary for smooth rotation. A well-built rotor system is essential for your helicopter’s stability and functionality.

Attaching the Tail Section

Connect the tail boom to the main helicopter body using curved connectors. Align the tail fin with the boom, securing it with small rods. Tighten all connections to ensure stability. For models like the 40 Model Building Set’s helicopter, refer to page 106 for specific tail assembly details. Ensure the tail section is straight and properly aligned with the rotor system. This step is crucial for maintaining balance and directional control during operation. Double-check all joints for tightness before proceeding.

Installing the Landing Gear

Attach the landing gear to the helicopter’s base using short rods and angled connectors. Secure the gear to the frame, ensuring stability. For models like the 40 Model Building Set, refer to page 106 for specific landing gear assembly. Tighten all connections firmly to prevent wobbling. Use flat plates to reinforce the gear’s base for added durability. Ensure the helicopter sits evenly on the ground. Double-check alignment to maintain balance and prevent tipping during takeoff or landing maneuvers.

Customization and Modifications

Personalize your K’NEX helicopter with color variations and unique designs. Add moving parts like spinning rotors or adjustable blades for enhanced functionality and visual appeal.

Adding Color Variations

Enhance your K’NEX helicopter’s appearance by incorporating colorful rods and connectors. Use vibrant hues to create a unique design or mimic real-world helicopters. Mix and match different colored pieces to add visual interest. For example, use red rods for the frame and blue connectors for accents. This customization allows you to personalize your build while maintaining structural integrity. Experiment with color coordination to create a cohesive look or go bold with contrasting shades for a standout model.

Incorporating Moving Parts

Add dynamic elements to your K’NEX helicopter with movable components like spinning rotors or opening doors. Use hinges and flexible rods to create realistic motion. For instance, attach the main rotor using a small gear or connector to allow rotation. This feature enhances the model’s functionality and visual appeal. Refer to the 40 Model Building Set or 52 Model Set instructions for inspiration on integrating moving parts seamlessly into your design. These details bring your helicopter to life, making it more interactive and engaging.

Troubleshooting Common Issues

Identify and resolve issues like wobbly rotors or loose joints by checking connections and balancing parts. Refer to the 40 Model or 52 Model Set guides for solutions.

Fixing Imbalanced Rotors

Imbalanced rotors can cause instability. Check for loose connections and ensure all blades are evenly spaced. Tighten any wobbly joints and verify symmetry. If issues persist, rebuild the rotor using the manual’s part list. Proper alignment is key for smooth operation. Refer to page 106 of the 40 Model Building Set or similar guides for detailed instructions. Regularly inspect and adjust for optimal performance.

Adjusting Loose Joints

Loose joints can affect stability. Tighten connections by gently squeezing rods into connectors. Ensure all parts align properly. For models like the 40 Model Building Set (page 106) or 52 Model Set (page 429), refer to specific instructions. Use the included Allen wrench for precise adjustments. Regularly inspect and tighten joints to maintain structural integrity. Proper alignment ensures smooth operation and prevents damage. Follow the manual’s guidance for optimal results.

Safety Tips and Precautions

Ensure safe handling of small K’NEX parts, especially for children under 3. Avoid forcing pieces to prevent breakage. Store components securely to prevent loss. Handle the assembled helicopter gently to maintain stability and prevent accidental damage. Follow these precautions to enjoy a durable and functional K’NEX creation.

Handling Small Parts Safely

Always handle small K’NEX pieces with care to avoid accidents. Keep them out of reach of young children to prevent choking hazards. Organize parts in a container to avoid misplacement. Avoid forcing connections, as this can damage the pieces or cause injury. Ensure clean, dry hands when building to maintain grip and prevent slipping. Supervise children during assembly, especially with intricate components. Store the helicopter securely after use to prevent accidental damage or loss of parts.

Avoiding Accidental Damage

To prevent accidental damage, build your K’NEX helicopter on a flat, stable surface. Avoid applying excessive force, as this can bend or break rods and connectors. Keep the model away from pets or younger siblings who may accidentally knock it over. Clean your hands before handling small parts to prevent dirt or oils from damaging the pieces. Store the helicopter in its original packaging or a protective case when not in use to avoid scratches or misplacement. Regularly inspect for loose connections and tighten them gently to maintain stability.

Tips for Different Skill Levels

Beginners can start with simple models like the 40 Model Building Set’s helicopter, while advanced builders can tackle complex designs like the 52 Model Set’s attack helicopter.

Beginner-Friendly Techniques

Start with simple models like the 40 Model Building Set’s helicopter on page 106. Focus on building a sturdy base structure using larger pieces. Follow step-by-step instructions carefully, ensuring each connection is secure. Use color-coded rods for easier identification and stability. Practice connecting rods at various angles to improve flexibility. Don’t rush—take time to align pieces properly. Celebrate small achievements, like completing the rotor or tail section. These foundational skills will build confidence and prepare you for more complex designs, like the 52 Model Set’s attack helicopter.

Advanced Building Strategies

For experienced builders, try modifying the 40 Model Set’s helicopter design by adding intricate details or adjusting angles for better aerodynamics. Experiment with rod lengths and connector placements to enhance stability. Incorporate moving parts, like adjustable rotors, for added functionality. Use color variations to create a personalized look. Advanced techniques include reinforcing joints with extra connectors and layering pieces for durability. These strategies allow you to push the limits of your creativity while maintaining structural integrity, resulting in a unique and impressive K’NEX helicopter design.

Displaying Your Finished Helicopter

Showcase your K’NEX helicopter using official stands or create a custom diorama with themed backgrounds. Highlight your build with creative displays to make it stand out.

Creating a Diorama

Elevate your K’NEX helicopter display by crafting a detailed diorama. Use themed backgrounds like cityscapes or landscapes, and add miniatures such as trees, buildings, or figures. Incorporate lighting effects for a realistic touch. Arrange the helicopter in a dynamic pose, like mid-flight or on a helipad, to tell a story. Personalize the scene with custom paint or decals for a unique presentation. This creative approach transforms your build into a captivating visual narrative, showcasing your helicopter in an immersive environment.

Using K’NEX Stands for Showcase

Highlight your K’NEX helicopter with official stands designed for display. These sturdy stands allow you to adjust height and angle, showcasing your model from its best angles. Ensure stability and prevent wobbling with secure fittings. Place your helicopter on a shelf, desk, or in a glass case for admiration. Customize stands with additional K’NEX pieces for a personalized display. This is an ideal way to proudly present your finished build, making it a focal point in any room.

Educational Value of K’NEX Helicopters

K’NEX helicopters teach mechanical engineering basics, aerodynamics, and problem-solving skills. Building them enhances hand-eye coordination and creativity, making learning fun and interactive for all ages.

Learning Mechanical Engineering Basics

Building K’NEX helicopters introduces fundamental mechanical engineering concepts. Learners explore gear systems, axles, and rotational motion, understanding how parts interact to create movement. By assembling rotors and transmissions, users grasp torque and energy transfer principles. These hands-on activities simplify complex engineering ideas, making them accessible and engaging. Problem-solving and troubleshooting further enhance critical thinking skills, fostering a deeper appreciation for mechanical design and its real-world applications.

Understanding Aerodynamics

Building a K’NEX helicopter helps you grasp aerodynamic principles like lift, drag, and airflow. The rotor blades’ shape and angle demonstrate how air pressure differences create lift. Observing how the helicopter’s design affects stability and movement introduces you to real-world aerodynamic challenges. This hands-on approach simplifies complex concepts, making them easier to understand and apply. It’s a fun way to explore how aerodynamics influences flight and engineering designs.

Community and Sharing Your Creations

Join K’NEX communities to share your helicopter builds and inspire others. Showcase your designs online, participate in contests, and connect with fellow enthusiasts to exchange ideas and tips.

Joining K’NEX Fan Communities

Engage with K’NEX enthusiasts by joining online forums and social media groups. Share your helicopter creations, participate in contests, and gain inspiration from others. Many fans showcase their builds on YouTube and community websites, fostering creativity and collaboration. Subscribe to channels and follow pages dedicated to K’NEX to stay updated on new ideas and trends. Connecting with fellow builders can enhance your experience and help you refine your helicopter designs.

Sharing Builds Online

Share your K’NEX helicopter creations online to inspire others and gain feedback. Post high-quality photos or videos on platforms like YouTube, Instagram, or dedicated K’NEX forums. Use hashtags to connect with enthusiasts worldwide. Many fans showcase their builds on social media, encouraging likes, comments, and subscriptions. Sharing your work can help others learn and spark new ideas. Consider creating tutorials or time-lapse videos to demonstrate your building process and tips for constructing intricate helicopter designs.

History of K’NEX Helicopter Kits

K’NEX helicopter kits have evolved over the years, introducing detailed models like the 40 Model Building Set’s helicopter and the 52 Model Set’s attack helicopter, captivating builders of all ages with their complexity and creativity.

Evolution of Design

K’NEX helicopter designs have advanced significantly, from basic models to intricate builds like the 40 Model Building Set’s helicopter and the 52 Model Set’s attack helicopter. Early kits focused on simplicity, while modern versions incorporate complex details and moving parts, reflecting advancements in K’NEX piece versatility. These changes cater to diverse skill levels, offering both foundational learning for beginners and challenging projects for experienced builders, while maintaining the core educational value of STEM-based creativity and problem-solving.

Popular Models Over the Years

Over the years, K’NEX has released several iconic helicopter models. The 40 Model Building Set includes a classic helicopter on page 106, while the 52 Model Set features an attack helicopter with 429 pieces. These models remain fan favorites, offering a mix of simplicity and complexity. They cater to various skill levels, from beginners to advanced builders, ensuring a fun and educational experience. These popular kits have stood the test of time, showcasing K’NEX’s commitment to innovative and engaging designs.

Comparison with Other K’NEX Kits

K’NEX helicopter kits share similarities with other vehicle sets in construction techniques but stand out with unique rotor mechanics and aerodynamic designs, offering a distinct building experience.

Similarities with Other Vehicles

K’NEX helicopter kits share construction techniques with other vehicle sets, such as cars, planes, and trains. Both use rods, connectors, and wheels, requiring precision and patience. The 40 Model Building Set includes a helicopter on page 106, while the 52 Model Set features an attack helicopter. These kits, like other vehicles, involve assembling frames, adding moving parts, and ensuring balance. The process of following step-by-step instructions and troubleshooting is consistent across models, making them great for developing universal building skills.

Unique Features of Helicopter Kits

K’NEX helicopter kits offer unique building experiences with intricate rotor systems and tail sections, distinguishing them from other vehicles. They teach aerodynamic principles and mechanical engineering concepts through hands-on assembly. Customization options allow for personalized designs, enhancing creativity and problem-solving skills. Models like the attack helicopter in the 52 Model Set showcase complex, military-inspired designs, making them standout projects for enthusiasts. The process involves balancing rotors and ensuring stability, providing a rewarding experience when completed.

Maintenance and Upkeep

Regularly clean your K’NEX helicopter with a soft cloth to remove dust. Store pieces in a dry, organized space to prevent damage and loss over time.

Cleaning Your K’NEX Helicopter

To keep your K’NEX helicopter in pristine condition, gently wipe it with a soft, dry cloth to remove dust and dirt. For stubborn spots, lightly dampen the cloth with water, but avoid soaking the pieces. Never use harsh chemicals or abrasive cleaners, as they may damage the plastic. Regular cleaning ensures your model remains visually appealing and functional. Allow all parts to air dry completely before reassembling or storing to prevent moisture-related damage.

Storing the Kit Properly

Proper storage ensures your K’NEX helicopter remains intact and ready for future use. Store pieces in the original packaging or a sturdy container with dividers to prevent mixing and damage. Keep the kit away from direct sunlight and moisture to avoid warping or discoloration. Label the container for easy identification. For disassembled models, organize parts by type to streamline reassembly. Store in a cool, dry place, such as a shelf or drawer, to maintain the integrity of your K’NEX creation.

Conclusion

Building a K’NEX helicopter is a rewarding experience that combines creativity and engineering skills. With patience and attention to detail, you’ll create a functional, impressive model to cherish.

Final Thoughts on Building K’NEX Helicopters

Building a K’NEX helicopter is a fun and educational experience that fosters creativity and problem-solving skills. From the 40 Model Building Set’s helicopter on page 106 to the 52 Model Set’s attack helicopter, each model offers unique challenges and rewards. With patience and attention to detail, you’ll create a functional and visually appealing aircraft. Whether you’re a beginner or an advanced builder, the sense of accomplishment is immense. Display your finished model proudly and consider experimenting with custom designs for future projects!

smartheart blood pressure monitor instructions

The Smartheart Blood Pressure Monitor is a vital tool for home health monitoring, offering accurate readings and ease of use with advanced features for better health management and empowerment;

Overview of the Device and Its Importance

The Smartheart Blood Pressure Monitor is a user-friendly device designed for accurate home blood pressure monitoring. It includes a monitor, wide-range cuff, batteries, and multilingual instructions, ensuring ease of use for all users. Regular monitoring helps track cardiovascular health, detect potential issues early, and manage conditions effectively. This device is essential for individuals seeking to maintain optimal health and empower themselves with reliable data to make informed decisions about their well-being.

Key Features of the Smartheart Blood Pressure Monitor

The Smartheart Blood Pressure Monitor boasts a wide-range upper arm cuff for accurate readings, trilingual talking instructions in English, Spanish, and French, and irregular heartbeat detection. It also features a 2-person memory for multiple users, allowing individuals to track their readings separately. These features make it an ideal choice for home use, ensuring convenience, accuracy, and accessibility for users of all languages and needs, while providing essential health insights.

Key Features and Benefits

The Smartheart Blood Pressure Monitor offers a wide-range cuff, trilingual audio instructions, irregular heartbeat detection, and a 2-person memory, ensuring accurate and convenient readings for multiple users.

Wide-Range Upper Arm Cuff for Accurate Readings

The Smartheart Blood Pressure Monitor features a wide-range upper arm cuff, designed to fit arm circumferences from 8.6 to 16.5 inches, ensuring accurate and comfortable readings for most adults. This adjustable cuff accommodates various arm sizes, providing reliable measurements and minimizing errors. Proper fit is essential for precise blood pressure monitoring, making this cuff a key feature for consistent and trustworthy results. Its design ensures ease of use and comfort during measurements.

Talking English, Spanish, and French Instructions

The Smartheart Blood Pressure Monitor offers trilingual audio support, providing clear voice instructions in English, Spanish, and French. This feature ensures easy setup and measurement guidance for users of all language preferences. The audible instructions help users navigate the device seamlessly, making it accessible to a diverse range of individuals. This multilingual capability enhances user experience and ensures accurate blood pressure monitoring for everyone, regardless of their primary language.

Irregular Heartbeat Detection

The Smartheart Blood Pressure Monitor features advanced irregular heartbeat detection, alerting users to any unusual heart rhythms during measurement. This function ensures early detection of potential heart-related issues, promoting timely medical consultation; The monitor’s ability to identify irregular beats enhances its role in comprehensive health monitoring, providing users with crucial insights into their cardiovascular well-being alongside accurate blood pressure readings.

2-Person Memory for Multiple Users

The Smartheart Blood Pressure Monitor includes a convenient 2-person memory feature, allowing two users to store their readings separately. This function ensures personalized tracking and easy access to individual health data. Each user can monitor their progress over time, making it ideal for shared use in households. The memory feature enhances the device’s versatility, catering to multiple users while maintaining accuracy and organization of blood pressure records.

System Requirements and Compatibility

The Smartheart Blood Pressure Monitor is compatible with smartphones and tablets, supporting both iOS and Android operating systems for seamless data syncing and tracking via Bluetooth connectivity.

Compatibility with Smartphones and Tablets

The Smartheart Blood Pressure Monitor seamlessly connects to smartphones and tablets via Bluetooth, ensuring easy data syncing and tracking. Compatible with both iOS and Android operating systems, it allows users to monitor their readings on the go. The device comes with a downloadable app, enabling detailed health tracking and sharing options with healthcare providers. This feature enhances convenience and supports proactive health management, making it a versatile tool for modern users seeking integrated solutions.

Operating System Requirements

The Smartheart Blood Pressure Monitor is compatible with iOS 10.0 and above, as well as Android 5.0 and above. Ensure your smartphone or tablet meets these requirements for optimal app functionality. The device pairs seamlessly with these operating systems, allowing for smooth data synchronization and tracking. Regular updates ensure compatibility with the latest OS versions, providing a reliable and user-friendly experience for managing blood pressure readings effectively.

Unboxing and Accessories

The Smartheart Blood Pressure Monitor comes with a monitor, storage case, batteries, detailed instructions, quick start guide, FAQ, and results charting log for easy setup and use.

What’s Included in the Package

The Smartheart Blood Pressure Monitor package includes the monitor, a wide-range upper arm cuff, storage case, batteries, detailed English/Spanish instructions, quick start guide, FAQ pamphlet, and a blood pressure charting log for tracking readings. Additionally, it comes with a 5-year limited warranty, ensuring reliability and support for long-term use.

Understanding the Components

The Smartheart Blood Pressure Monitor consists of a digital monitor, a wide-range upper arm cuff, and a storage case. The monitor features a clear display and buttons for operation. The cuff is designed for accurate readings and fits various arm sizes. Batteries are included for power, and detailed instructions guide users through setup and use. Additional components like the quick start guide and FAQ pamphlet ensure easy understanding and troubleshooting.

Storage Case and Battery Information

The Smartheart Blood Pressure Monitor comes with a durable storage case to protect the device and cuff when not in use. It is powered by two AAA batteries, which are included in the package. The batteries provide up to 300 readings, ensuring long-lasting use. Proper storage in the case helps maintain the monitor’s condition and prolongs its lifespan. Always store the device in a cool, dry place to preserve battery life and overall functionality.

Initial Setup and Preparation

Unboxing includes the monitor, cuff, batteries, and instructions. Insert batteries, understand components, and prepare for first use following the quick start guide provided.

Preparing for First Use

Before using your Smartheart Blood Pressure Monitor, ensure all components are unpacked and understood. Insert the provided batteries, familiarize yourself with the device, and read the quick start guide. Allow a 15-minute resting period prior to measurement to ensure accurate readings. Properly position yourself with your arm at heart level and select the appropriate cuff size for a comfortable fit. This preparation ensures reliable and precise blood pressure monitoring.

Downloading the Official Manual

Visit the manufacturer’s website to download the official Smartheart Blood Pressure Monitor manual. Models like 01-553 and 01-539 have detailed guides available. The manual covers setup, operation, and troubleshooting, ensuring optimal use. It also includes safety precautions and warranty information. Downloading the manual is essential for understanding all features and proper usage. The guide is available in English and Spanish, providing comprehensive instructions for accurate blood pressure monitoring and maintenance.

How to Take Accurate Blood Pressure Readings

Ensure proper positioning, keep your arm at heart level, and remain still. Use the one-touch operation for automatic inflation. Allow a 15-minute rest before measurement for accurate results.

Proper Positioning and Posture

Sit comfortably with feet flat on the floor, arm resting on a table at heart level. Keep the cuff centered, avoid bending the wrist, and remain still during measurement. Ensure the monitor is at the same height as your heart to ensure accuracy. A 15-minute resting period before measurement is recommended to stabilize your body and provide reliable results. Proper posture and positioning are crucial for obtaining accurate blood pressure readings.

Using the One-Touch Operation

The Smartheart Blood Pressure Monitor features a one-touch operation for effortless use. Simply press the start button, and the device will automatically inflate and deflate the cuff. Ensure the cuff is properly secured and positioned before starting. Sit still and avoid movement during the measurement to ensure accuracy. The monitor will provide clear, audible instructions in English, Spanish, or French, guiding you through the process seamlessly. This feature makes taking readings quick and straightforward for all users.

Understanding the Cuff Size and Fit

Proper cuff size and fit are crucial for accurate blood pressure readings. The Smartheart monitor includes a wide-range upper arm cuff, suitable for arm circumferences between 8.6–16.5 inches (22–42 cm). Ensure the cuff is snug but not too tight, with the edge aligned one inch above the elbow crease. Incorrect sizing can lead to inaccurate readings. The monitor’s talking feature guides you through proper placement, ensuring a comfortable and precise fit for reliable results every time.

Understanding Your Blood Pressure Readings

Understanding your blood pressure readings involves interpreting systolic and diastolic numbers, which indicate heart health. The Smartheart monitor ensures accurate readings, equivalent to professional measurements for reliable health insights.

Interpreting Systolic and Diastolic Numbers

The Smartheart Blood Pressure Monitor provides systolic (top number) and diastolic (bottom number) readings, measuring heart contraction pressure and artery pressure between beats. Normal blood pressure is typically below 120/80 mmHg, while elevated levels begin at 120/80 mmHg. The monitor alerts users to irregular heartbeats during measurement, ensuring accurate and reliable readings. Understanding these numbers helps users track their cardiovascular health effectively and make informed decisions with their healthcare provider.

Recognizing Normal and Elevated Levels

The Smartheart Blood Pressure Monitor helps users identify normal and elevated blood pressure levels. Normal readings are typically below 120/80 mmHg, while elevated levels start at 120/80 mmHg. The device provides clear alerts for irregular heartbeats and high readings, ensuring users can monitor their health effectively. Understanding these levels enables individuals to take proactive steps in managing their blood pressure and maintaining overall cardiovascular well-being with accurate and reliable data from the Smartheart monitor.

Maintenance and Troubleshooting

Regularly clean the monitor with a soft cloth and avoid harsh chemicals. Store it in a dry place to maintain accuracy. Troubleshoot common issues like incorrect cuff placement or low battery by consulting the manual or contacting customer support for assistance.

Cleaning and Storing the Monitor

For optimal performance, clean the Smartheart Blood Pressure Monitor with a soft, dry cloth, avoiding harsh chemicals. Store it in a cool, dry place, away from direct sunlight. Use the provided storage case to protect the device and cuff. Regular cleaning prevents dust buildup and ensures accurate readings. Proper storage maintains the monitor’s longevity and reliability, ensuring it remains a trusted tool for monitoring your health.

Resolving Common Issues

Common issues with the Smartheart Blood Pressure Monitor can often be resolved by restarting the device or replacing batteries. If error messages appear, ensure the cuff is properly fitted and inflated. For inaccurate readings, check arm positioning and cuff size. If problems persist, press and hold the “MEM” button to clear stored data. Refer to the manual for troubleshooting guides or contact customer support for further assistance. Regular maintenance ensures optimal performance and accurate results.

Warranty and Customer Support

The Smartheart Blood Pressure Monitor comes with a 5-year limited warranty, ensuring coverage for defects in materials and workmanship. Customer support is available through the manufacturer’s website, offering troubleshooting guides, downloadable manuals, and assistance for any issues. This comprehensive support system ensures users can rely on the device for accurate and long-term health monitoring.

5-Year Limited Warranty Details

The Smartheart Blood Pressure Monitor is backed by a 5-year limited warranty, covering manufacturing defects in materials and workmanship. This warranty ensures repairs or replacements for faulty devices within the specified period. Registration is recommended to activate extended benefits. The warranty does not cover damage caused by misuse or normal wear and tear. For full details, refer to the official manual or contact customer support.

Accessing Customer Service

For assistance with your Smartheart Blood Pressure Monitor, customer service is readily available. Visit the official website to access support resources, including downloadable manuals, FAQs, and troubleshooting guides. Contact support directly via phone or email for personalized help. Representatives are trained to address technical issues, warranty claims, and usage questions. Additionally, online forums and user communities offer peer-to-peer advice. Ensure to have your device model number handy for efficient support. Always consult healthcare professionals for medical advice.

Advanced Features and Settings

The Smartheart Blood Pressure Monitor offers advanced features like memory storage for multiple users and data tracking. Customizable settings allow users to personalize their monitoring experience for better health management.

Memory Storage and Data Tracking

The Smartheart Blood Pressure Monitor features a 2-person memory system, allowing users to store and track their readings separately. This function enables easy monitoring of progress over time. The device also supports data tracking, providing a clear overview of blood pressure trends. Stored readings can be accessed and managed through the monitor’s interface, making it simple to review and share results with healthcare professionals. This feature enhances personalized health management and ensures accurate tracking for multiple users.

Setting Up Multiple User Profiles

To set up multiple user profiles on the Smartheart Blood Pressure Monitor, press the MEM button to select between two user banks (U1 or U2). Each profile stores readings separately, ensuring personalized tracking. Follow the on-screen instructions to assign and manage profiles. This feature allows shared use while maintaining individual data integrity. Regularly review and clear stored readings to optimize memory usage and ensure accurate tracking for each user. This setup enhances convenience for households with multiple users.

Safety Precautions and Guidelines

Always use the Smartheart Blood Pressure Monitor as directed. Consult a healthcare professional before use, especially for medical conditions. Follow instructions carefully to avoid injury or device damage.

Proper Use to Avoid Injury

Always use the Smartheart Blood Pressure Monitor as directed. Consult a healthcare professional before use, especially for medical conditions. Follow instructions carefully to avoid injury or device damage. Ensure proper cuff placement and avoid over-tightening. Allow a 15-minute resting period before measurement. Improper use may lead to inaccurate readings or potential harm. Adhere to safety guidelines for optimal performance and user well-being.

Important Safety Information

Ensure proper use to maintain safety and accuracy. Avoid over-tightening the cuff, as it may cause discomfort or injury. Use the monitor only on a clean, dry arm. Follow the 15-minute resting period before measurement. Improper use may lead to inaccurate readings or potential harm. Consult a healthcare professional before use, especially if you have medical conditions. The device is designed for home use and should not replace professional medical advice or diagnosis. Always follow the provided guidelines for safe and effective monitoring.

The Smartheart Blood Pressure Monitor is a reliable and user-friendly device designed to empower individuals to manage their health effectively. With its advanced features, clear instructions, and safety guidelines, it provides accurate readings and supports long-term health monitoring. By following the provided instructions and safety precautions, users can ensure optimal performance and safety. This monitor is a valuable tool for anyone seeking to take control of their cardiovascular health with confidence and precision.

gel blaster surge xl instructions

The Gel Blaster Surge XL is an exciting toy blaster designed for fun and safety, using hydrated gellets for ammo. Follow the manual for proper setup and operation to ensure optimal performance and a enjoyable experience.

Overview of the Gel Blaster Surge XL

The Gel Blaster Surge XL is a high-quality toy blaster designed for immersive play experiences. It shoots hydrated gellets, offering a fun and safe alternative to traditional projectiles. Constructed with durable materials, this blaster ensures long-lasting use and reliability. Its design includes an adjustable hop-up system and a high-capacity magazine, providing accuracy and continuous shooting. The Surge XL is suitable for users aged 9 and above, making it a versatile option for both casual and competitive play. Key features include long-range capabilities, adjustable velocity, and multiple firing modes. The blaster is powered by a lithium polymer battery, offering hours of playtime per charge. Always refer to the user manual for proper setup and maintenance to ensure optimal performance and safety.

Importance of Following the Instructions

Following the instructions for the Gel Blaster Surge XL is crucial for ensuring a safe and enjoyable experience. Proper setup and operation prevent accidents and damage to the blaster. The manual provides essential guidelines for charging, loading, and firing, which are vital for optimal performance. Hydrating gellets and installing the hopper correctly are key steps to avoid jams and ensure smooth functionality. Safety precautions, such as wearing eye protection, are emphasized to protect users during play. Ignoring instructions can lead to malfunctions or injuries, so it’s important to read and understand the manual thoroughly. By adhering to the guidelines, users can maximize fun while maintaining the blaster’s longevity and safety.

Key Features of the Gel Blaster Surge XL

The Gel Blaster Surge XL boasts an array of impressive features designed for optimal performance and user satisfaction. Adjustable burst speed and semi-auto modes offer versatility in gameplay, catering to different playstyles. The blaster is powered by a high-capacity lithium polymer battery, providing extended playtime per charge. Its high-capacity hopper ensures continuous shooting without frequent reloads. Additionally, the adjustable hop-up system enhances accuracy and range, making it ideal for both casual and competitive use. The blaster’s durable construction and ergonomic design provide a comfortable grip and long-lasting reliability. These features combine to deliver a fun, immersive, and customizable experience, making the Gel Blaster Surge XL a standout choice for enthusiasts of all ages.

Preparation for Use

Begin by hydrating the gellets and charging the blaster via the USB-C port. Ensure the hopper is properly installed for optimal performance. Always follow the manual for safe and effective preparation.

Unboxing and Initial Setup

When you unbox the Gel Blaster Surge XL, ensure all components are included: the blaster, hopper, gellets, USB-C charging cable, and instruction manual. Inspect for any damage. Begin by hydrating the gellets in water for the recommended time to ensure proper expansion. Next, charge the blaster using the USB-C port, monitoring the battery indicator. Once charged, fill the hopper with hydrated gellets, being careful not to overfill. Install the hopper securely onto the blaster, ensuring it clicks into place. Refer to the manual for detailed diagrams and guidance. Proper setup is crucial for optimal performance and safety. Always follow the instructions carefully to avoid issues and ensure a smooth experience.

Charging the Gel Blaster Surge XL

To charge the Gel Blaster Surge XL, locate the USB-C port at the bottom of the blaster. Use the provided USB-C cable to connect it to a compatible charger or USB port. The battery power indicator on the top will show the charging status. Avoid overcharging, as this can damage the battery. Charge the blaster fully before first use for optimal performance. The charging time is typically 2-3 hours, but refer to the manual for specific instructions. Ensure the blaster is dry before charging to prevent electrical issues. Always use the original cable to maintain safety and efficiency. Proper charging is essential for extended playtime and battery longevity.

Hydrating the Gellets

Hydrating the gellets is a crucial step for optimal performance of the Gel Blaster Surge XL. Soak the gellets in water for 4-6 hours to ensure they expand properly. Avoid overhydration, as this can cause jamming issues. Use distilled water to prevent mineral buildup. After soaking, drain excess water and pat the gellets dry with a cloth to remove moisture. Properly hydrated gellets ensure smooth firing and consistent performance. Always follow the user manual’s guidelines for hydration time and methods. This step is essential for maintaining the blaster’s functionality and longevity. By hydrating the gellets correctly, you can enjoy a seamless and fun experience with your Gel Blaster Surge XL.

Loading the Gel Blaster Surge XL

Loading the Gel Blaster Surge XL involves filling the hopper with hydrated gellets and securing it properly. Ensure the hopper is clicked into place for smooth operation and consistent firing performance.

Filling the Hopper with Gellets

Filling the hopper with gellets is a straightforward process that requires attention to detail. Hydrate the gellets in water for the recommended time to ensure they expand properly. Once hydrated, pour the gellets into the hopper until it is approximately 3/4 full to avoid overfilling. Avoid overfilling, as this can cause jams or uneven feeding. Gently shake the hopper to settle the gellets evenly. After filling, securely attach the hopper to the blaster by aligning it with the mounting points and clicking it into place. Properly filled and installed, the hopper ensures consistent firing performance. Regularly cleaning the hopper prevents blockages and maintains optimal functionality.

Installing the Hopper

Installing the hopper on the Gel Blaster Surge XL is a simple process that ensures proper functionality. Align the hopper with the mounting points on the blaster, making sure it fits securely. Gently push the hopper into place until it clicks, indicating it is locked in position. Do not force the hopper, as this could damage the mounting mechanism. Once installed, check that the hopper is snug and even. If it feels loose, adjust its position and ensure it is properly seated. For visual guidance, refer to the user manual, which provides diagrams to help with installation. Proper installation is crucial for consistent performance and to prevent issues during use.

Troubleshooting Hopper Installation Issues

If you encounter issues installing the hopper, start by ensuring it is properly aligned with the blaster’s mounting points. Check for obstructions or debris that may prevent a secure fit. If the hopper feels stuck, avoid forcing it, as this could damage the mechanism. Instead, gently wiggle the hopper while pushing it into place. If the hopper is overfilled with gellets, remove excess to ensure smooth installation. Verify the hopper is empty before attempting to install it. If problems persist, consult the user manual for diagrams or troubleshooting tips. Proper installation is essential for optimal performance and to avoid malfunctions during use.

Operating the Gel Blaster Surge XL

Operating the Gel Blaster Surge XL involves charging, loading hydrated gellets, and adjusting velocity. Switch between firing modes and always wear eye protection for safe, enjoyable use.

Basic Operation and Firing

Start by ensuring the Gel Blaster Surge XL is fully charged via the USB-C port. Load hydrated gellets into the hopper and install it securely. Wear eye protection and aim carefully. Pull the trigger to fire in semi-auto mode or switch to burst mode for rapid shots. Adjust the velocity knob to control firing power. Always follow safety guidelines and maintain a safe distance from others. Regularly clean the blaster to prevent jams and ensure smooth operation. Proper handling and adherence to instructions will enhance performance and longevity of the Gel Blaster Surge XL, providing hours of fun and safe play.

Switching Between Firing Modes

The Gel Blaster Surge XL offers multiple firing modes for versatile play. To switch modes, locate the mode switch on the blaster and toggle it to select between semi-automatic and burst modes. Semi-automatic mode fires one gellet per trigger pull, ideal for precision shooting. Burst mode releases multiple gellets rapidly, perfect for covering larger areas. Ensure the blaster is fully charged and the hopper is properly installed before switching modes. Adjust the velocity knob to optimize performance in your chosen mode. Always follow safety guidelines and wear eye protection when operating. Refer to the user manual for detailed diagrams and instructions to master mode switching and enhance your play experience.

Adjusting the Velocity

Adjusting the velocity on the Gel Blaster Surge XL allows you to customize its performance. Locate the velocity adjustment knob, typically found near the hopper or on the side of the blaster. Turning the knob clockwise increases the firing power, while counterclockwise reduces it. This feature helps optimize range and accuracy based on your play style. Ensure the blaster is fully charged and the hopper is properly installed before adjusting. For best results, test the velocity in a safe environment. Refer to the user manual for specific guidance on fine-tuning the velocity for different firing modes, such as semi-automatic or burst modes. Proper adjustment ensures consistent and reliable performance during use.

Aiming and Accuracy Tips

For precise aiming with the Gel Blaster Surge XL, ensure a firm grip and stable stance. Align the blaster’s sights with your target, keeping both eyes open for better focus. Use the hop-up system to adjust for long-range shots, ensuring gellets fly straight. Practice firing in short bursts to maintain control and accuracy; Regularly clean the barrel to prevent blockages that could affect aim. Always hydrate the gellets properly for consistent performance. Test different velocities to find the optimal setting for your shooting style. By following these tips, you can enhance your accuracy and enjoy a more rewarding experience with the Gel Blaster Surge XL.

Safety Precautions

Always wear eye protection when using the Gel Blaster Surge XL. Ensure the area is clear of bystanders and fragile objects. Handle the blaster responsibly to avoid accidents.

Importance of Eye Protection

Wearing eye protection is crucial when using the Gel Blaster Surge XL to prevent potential eye injuries. The blaster fires gellets at high velocities, which can accidentally hit the eyes. Always wear goggles or protective eyewear designed for such activities. Ensure the goggles fit securely and provide adequate coverage. Adults should supervise children to guarantee they follow this safety rule. Even though the gellets are soft and biodegradable, they can still cause harm if they strike the eyes. By prioritizing eye protection, users can enjoy a safe and enjoyable experience with the Gel Blaster Surge XL. Remember, safety should never be compromised for fun.

Safe Environments for Use

Using the Gel Blaster Surge XL in a safe environment is essential for a fun and accident-free experience. Choose open, wide spaces away from fragile objects or windows. Ensure the area is clear of bystanders, especially young children or pets, to avoid unintended targets. Avoid aiming at people or animals, even if they are wearing protection. Always use the blaster in well-ventilated areas and avoid direct sunlight, as it may cause glare or misaiming. Supervise children during use and teach them to handle the blaster responsibly. By selecting the right environment and following these guidelines, you can enjoy the Gel Blaster Surge XL safely and effectively.

Handling and Storage Safety

Proper handling and storage of the Gel Blaster Surge XL are crucial for maintaining its performance and ensuring safety. Always handle the blaster with care to avoid dropping or damaging its components; Store the blaster in a cool, dry place, away from direct sunlight and extreme temperatures. Keep it out of reach of children when not in use to prevent accidental discharge. Avoid storing the blaster with the battery fully drained, as this can reduce its lifespan. Clean the blaster regularly to remove dirt or debris that may affect its functionality. By following these storage and handling guidelines, you can extend the life of your Gel Blaster Surge XL and ensure it remains in optimal condition for future use.

Maintenance and Care

Regularly clean the Gel Blaster Surge XL to remove dirt and debris. Store it in a dry, cool place to prevent damage. Charge the battery properly and avoid extreme temperatures to maintain performance and longevity.

Cleaning the Gel Blaster Surge XL

Regular cleaning is essential to maintain the performance and longevity of your Gel Blaster Surge XL. Use a soft, dry cloth to wipe down the exterior, removing dirt and debris. For tougher spots, dampen the cloth with water, but avoid harsh chemicals or abrasive materials that could damage the finish. Pay special attention to the hopper and barrel, where gellet residue may accumulate. Disassemble the blaster as per the manual to clean internal components. Allow all parts to dry completely before reassembly to prevent moisture buildup. Regular cleaning ensures smooth operation and prevents jamming issues. Always refer to the user manual for detailed cleaning instructions.

Storing the Blaster Properly

Proper storage of the Gel Blaster Surge XL is crucial for maintaining its performance and longevity. Store the blaster in a cool, dry place, away from direct sunlight and extreme temperatures. Avoid leaving it in vehicles or humid environments, as this can damage the battery and internal components. When not in use, remove the battery and store it separately in a protective case. Use the original packaging or a soft pouch to protect the blaster from dust and scratches. Ensure the blaster is completely dry before storage to prevent mold or mildew. Always keep it out of reach of children and pets. Follow these steps to ensure your Gel Blaster Surge XL remains in excellent condition for future use.

Battery Care and Maintenance

Proper care of the Gel Blaster Surge XL’s battery is essential for optimal performance and longevity. Charge the battery using the provided USB-C cable, ensuring it is plugged into a reliable power source. Avoid overcharging, as this can damage the battery. Store the battery in a cool, dry place when not in use, and avoid extreme temperatures. If storing for an extended period, discharge the battery to about 50% capacity. Never use a damaged or swollen battery, as it can pose a safety risk. Regularly inspect the battery for signs of wear and follow the manufacturer’s guidelines for maintenance. Refer to the user manual for specific charging and storage instructions to ensure the battery remains in good condition.

Troubleshooting Common Issues

Common issues like jamming or low performance can be resolved by checking for blockages, ensuring proper hydration of gellets, and referring to the manual for guidance.

Resolving Jamming Problems

Jamming issues with the Gel Blaster Surge XL can often be resolved by ensuring the gellets are properly hydrated and not overfilled in the hopper. Regular cleaning of the blaster’s barrel and hopper is essential to prevent blockages. If a jam occurs, remove the hopper and gently clear any obstructions. Always load gellets carefully to avoid overfilling, as this can cause malfunctions. If the issue persists, refer to the user manual for detailed troubleshooting steps or contact customer support for assistance. Proper maintenance and adherence to guidelines can help minimize jamming and ensure smooth operation.

Fixing Charging Issues

If your Gel Blaster Surge XL isn’t charging, ensure the USB-C port is clean and free of debris. Use the provided cable and a compatible charger to avoid damage. Check the battery indicator light on top; a red light typically indicates charging, while green signals it’s fully charged. If issues persist, reset the blaster by turning it off and on. Avoid overcharging, as this can harm the battery. For persistent problems, consult the user manual or contact customer support. Proper charging habits and regular maintenance will help extend the life of your blaster and ensure reliable performance during use.

Addressing Low Performance

If your Gel Blaster Surge XL is underperforming, check if the gellets are properly hydrated. Soak them in water for the recommended time to ensure optimal firing. Inspect the hopper for blockages or misalignment, as this can disrupt gellet flow. Ensure the battery is fully charged, as low power can reduce performance. Adjust the velocity setting to match your playstyle, and clean the blaster regularly to remove debris. If issues persist, consult the user manual for troubleshooting tips or contact support. Proper maintenance and hydration are key to restoring performance and ensuring a fun experience with your Gel Blaster Surge XL.

Advanced Tips for Optimal Use

Optimize your Gel Blaster Surge XL by adjusting settings and customizing for enhanced performance. Experiment with velocity and firing modes to maximize accuracy and fun during play.

Optimizing Firing Performance

To optimize the firing performance of your Gel Blaster Surge XL, ensure the gellets are fully hydrated and the hopper is properly installed. Adjust the velocity to suit your playstyle, as higher settings can improve range and accuracy. Regularly clean the barrel and hopper to prevent blockages, and always use the recommended gellets for consistent results. Experiment with different firing modes to find the best setup for your needs. Proper maintenance, such as lubricating moving parts and storing the blaster correctly, will also enhance performance. By following these tips, you can maximize the efficiency and enjoyment of your Gel Blaster Surge XL during gameplay.

Customizing Your Gel Blaster

Customizing your Gel Blaster Surge XL can enhance its performance and personalize your experience. Adjust the hop-up system for improved accuracy and range, and experiment with different firing modes to suit your playstyle. You can also modify the blaster’s appearance by adding custom decals or paint jobs. For advanced users, upgrading internal components like springs or motors can boost firing power, but ensure modifications align with safety guidelines. Additionally, consider adding tactical accessories such as scopes or grips for better control. Always follow the manufacturer’s instructions when making adjustments to avoid damaging the blaster. Customization allows you to tailor your Gel Blaster to your preferences, making it unique and more enjoyable to use.

The Gel Blaster Surge XL offers a fun and safe experience when used properly. Always follow the manual for optimal performance and to ensure longevity of the product.

Final Thoughts on Safe and Effective Use

The Gel Blaster Surge XL is designed for fun and safety, but proper use is key to maximizing enjoyment. Always wear eye protection and follow the manual’s guidelines to avoid accidents. Ensure gellets are hydrated and the blaster is charged correctly to maintain performance. Regular maintenance, like cleaning and storing the blaster properly, will extend its lifespan. Users aged 9 and above should handle the device responsibly, avoiding misuse. By adhering to these practices, you can enjoy a safe and exciting experience with the Gel Blaster Surge XL while ensuring its longevity and reliability.

Encouragement to Explore More Features

Exploring the Gel Blaster Surge XL’s features can enhance your experience and fun. Discover its adjustable burst speed, semi-auto modes, and customization options for personalized play. By reading the manual, you’ll uncover tips to optimize performance and unlock hidden potentials. Visit the official website for detailed guides and videos to master advanced techniques. Experimenting with different firing modes and velocity settings can make gameplay more dynamic. Don’t hesitate to try new strategies and share your discoveries with friends. Embrace the creativity and versatility of the Surge XL to make every play session unique and exciting. Keep learning and exploring to get the most out of your Gel Blaster Surge XL!