Category title

Autem vel eum iriure dolor in hendrerit in vulputate velit esse molestie consequat, vel illum dolore eu feugiat nulla facilisis at vero eros et dolore feugait.

Category Archive Manuals

lycoming io 320 parts manual

The Lycoming IO-320 Parts Manual is an essential resource for maintaining and repairing IO-320 series engines‚ covering models like IO-320-B1A and AIO-320-B1B. It includes detailed parts catalogs‚ such as PC-103‚ and provides critical information on components like Millennium Cylinder kits and stretched prop flange considerations‚ ensuring compatibility and proper installation for optimal engine performance.

Overview of the Lycoming IO-320 Engine

The Lycoming IO-320 engine is a fuel-injected‚ air-cooled‚ four-cylinder aircraft engine renowned for its reliability and performance in various general aviation aircraft. Designed for efficiency‚ it features a robust design with a displacement of 320 cubic inches and a maximum power output of 180 horsepower. The engine is widely used in aircraft like the Cessna 172 and Piper Cherokee‚ making it a popular choice for both training and recreational flying. Its fuel injection system ensures consistent power delivery and improved fuel efficiency compared to carbureted engines. The IO-320 series includes multiple variants‚ such as the IO-320-B1A‚ IO-320-B1C‚ and AIO-320-B1B‚ each tailored for specific aircraft applications. The engine’s durability and ease of maintenance have made it a favorite among pilots and mechanics‚ supported by comprehensive parts manuals like the PC-103 catalog‚ which details components like Millennium Cylinder kits and stretched prop flange considerations.

Importance of the Parts Manual for Maintenance and Repair

The Lycoming IO-320 Parts Manual is indispensable for effective maintenance and repair‚ providing detailed information on engine components‚ part numbers‚ and compatibility. It serves as a critical reference for identifying and procuring the correct parts‚ ensuring compliance with manufacturer specifications. The manual includes essential catalogs like PC-103‚ which lists components such as Millennium Cylinder Power Assembly Kits (SL32006W-A21P and SL32000Na-A21P) and stretched prop flange considerations. Mechanics rely on this manual to decode part numbers‚ verify compatibility‚ and avoid costly errors. Additionally‚ it offers troubleshooting tips and installation guidance‚ particularly for Superior brand parts‚ which require careful handling to maintain engine performance and longevity. By adhering to the manual’s guidelines‚ technicians can ensure accurate repairs‚ extend engine lifespan‚ and uphold safety standards.

Engine Models and Variants Covered in the Manual

The Lycoming IO-320 Parts Manual covers various engine models‚ including IO-320-B1A‚ IO-320-B1C‚ and AIO-320-B1B‚ providing detailed specifications and parts information for each variant to ensure accurate maintenance and repairs.

IO-320-B1A‚ -B1C‚ -C1A‚ -D1A‚ -D1B‚ -E1A‚ -E1B‚ -E2A‚ -EB

The Lycoming IO-320 series includes multiple variants‚ each tailored for specific aircraft applications. The IO-320-B1A and IO-320-B1C are popular models‚ offering 180 horsepower with a 2‚400 rpm propeller. The IO-320-C1A and IO-320-D1A feature similar power ratings but differ in propeller and engine mount compatibility. The IO-320-D1B and IO-320-E1A are widely used in training aircraft‚ providing reliable performance. The IO-320-E1B and IO-320-E2A are known for their durability and fuel efficiency‚ while the IO-320-EB is a higher-compression variant. Each model’s specifications are detailed in the parts manual‚ ensuring accurate maintenance and repair. The manual also covers Millennium Cylinder kits‚ such as SL32006W-A21P‚ designed for these engines‚ and provides guidance on stretched prop flange installations‚ a common modification for enhanced performance.

AIO-320-B1B‚ -C1B; LIO-320-B1A‚ -C1A; AEIO-320-D1B‚ -E1A‚ -E1B‚ -E2B

The AIO-320-B1B and AIO-320-C1B are fuel-injected variants‚ offering enhanced performance for specific aircraft applications. The LIO-320-B1A and LIO-320-C1A are lightweight versions‚ designed for reduced weight while maintaining reliability. The AEIO-320 series‚ including the D1B‚ E1A‚ E1B‚ and E2B‚ features aerobatic capabilities‚ making them ideal for high-performance aircraft. These models are detailed in the Lycoming parts manual‚ which provides specific part numbers‚ compatibility‚ and maintenance guidelines. The manual also highlights the use of Millennium Cylinder kits‚ such as SL32006W-A21P‚ for these engines‚ ensuring optimal performance and durability. Each variant’s unique specifications are outlined‚ enabling mechanics to perform accurate repairs and upgrades‚ while also addressing considerations for stretched prop flanges and other modifications.

Parts Identification and Cataloging

The Lycoming IO-320 Parts Manual provides detailed parts identification through catalog PC-103‚ enabling precise component recognition. It includes Millennium Cylinder kits like SL32006W-A21P and guides for decoding part numbers accurately.

Understanding the Parts Catalog PC-103

The Lycoming IO-320 Parts Catalog PC-103 is an essential resource for identifying and procuring engine components. It provides a detailed‚ illustrated listing of parts for O-320‚ IO-320‚ and LIO-320 series engines. Organized into sections‚ the catalog covers components like cylinders‚ pistons‚ and valve trains‚ with each part numbered and referenced in corresponding figures. This structure ensures easy navigation and accurate identification. The catalog also includes information on Millennium Cylinder Power Assembly Kits‚ such as SL32006W-A21P and SL32000Na-A21P‚ which are critical for engine overhaul. By referencing PC-103‚ mechanics and pilots can ensure compatibility and correctness when ordering or replacing parts. This catalog is a cornerstone for maintaining Lycoming engines‚ offering a comprehensive guide to keep aircraft operational and performing at their best.

Decoding Part Numbers and Compatibility

Decoding part numbers in the Lycoming IO-320 Parts Manual is crucial for ensuring compatibility and correct component installation. Each part number‚ such as SL32006W-A21P or SL32000Na-A21P‚ follows a specific structure that identifies its application and specifications. For instance‚ Millennium Cylinder Power Assembly Kits are designated for specific engine models‚ such as IO-320-A‚ E‚ and AEIO-320-E‚ with variations like wide deck or spot-faced barrel flanges. Compatibility is determined by engine series‚ model‚ and configuration‚ as outlined in the PC-103 catalog. Mechanics must cross-reference part numbers with engine specifications to avoid mismatches. Additionally‚ stretched prop flange parts require careful handling to prevent damage during installation. Always verify part compatibility with the engine model and configuration before ordering or installing components to ensure proper fitment and performance. This step is vital for maintaining engine integrity and operational safety.

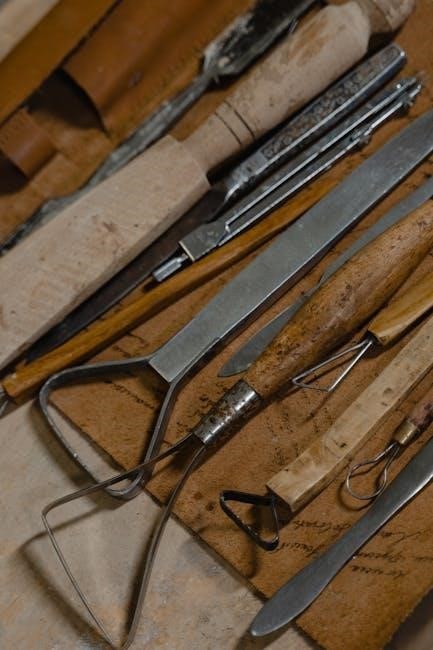
Cylinder Assemblies and Components

The Lycoming IO-320 Parts Manual details Millennium Cylinder Power Assembly Kits‚ such as SL32006W-A21P and SL32000Na-A21P‚ designed for specific engine models like IO-320-A‚ E‚ and AEIO-320-E‚ ensuring proper fitment and performance.

Millennium Cylinder Power Assembly Kit Contents

The Millennium Cylinder Power Assembly Kits‚ such as SL32006W-A21P and SL32000Na-A21P‚ are designed for specific Lycoming IO-320 engine models‚ including IO-320-A‚ IO-320-E‚ and AEIO-320-E. These kits are tailored for engines with wide deck and spot-faced barrel flanges‚ ensuring proper fitment and performance. The SL32006W-A21P kit is intended for wide deck configurations‚ while the SL32000Na-A21P accommodates spot-faced barrel flanges. Both kits include high-quality components like cylinders‚ pistons‚ rings‚ and valves‚ engineered to meet Lycoming’s stringent standards. They are essential for maintaining optimal engine efficiency and reliability. The kits are widely used in aircraft maintenance and overhauls‚ offering a cost-effective solution for replacing worn or damaged components. Proper installation is critical‚ and mechanics often recommend following the manual’s guidelines to ensure longevity and performance.

SL32006W-A21P and SL32000Na-A21P Kits

The SL32006W-A21P and SL32000Na-A21P kits are specialized Millennium Cylinder Power Assembly Kits designed for Lycoming IO-320 and related engine models. The SL32006W-A21P kit is specifically engineered for engines with wide deck configurations‚ such as the IO-320-A‚ IO-320-E‚ and AEIO-320-E‚ ensuring compatibility and optimal performance. The SL32000Na-A21P kit‚ on the other hand‚ is tailored for engines with spot-faced barrel flanges‚ including the O-320-A and O-320-E series. Both kits include high-quality components like cylinders‚ pistons‚ rings‚ and valves‚ all designed to meet Lycoming’s rigorous standards. These kits are widely used in maintenance and overhaul procedures to replace worn or damaged components. Proper installation is crucial‚ and mechanics often recommend following the manual’s guidelines to ensure longevity and performance. The kits are praised for their reliability and cost-effectiveness in keeping engines running smoothly.

Technical Specifications and Drawings

The manual provides detailed engine dimensions‚ propeller flange details‚ and stretched prop flange considerations‚ ensuring accurate measurements and compatibility for proper engine installation and performance.

Engine Dimensions and Propeller Flange Details

The Lycoming IO-320 parts manual provides precise engine dimensions and propeller flange specifications‚ ensuring compatibility and proper installation. It details measurements for various models‚ including IO-320-B1A and AIO-320-B1B‚ to facilitate accurate maintenance and repairs. The manual also covers propeller flange types‚ such as wide and narrow configurations‚ and includes stretched prop flange considerations to prevent damage during installation. These specifications are crucial for mechanics to ensure optimal engine performance and safety. The PC-103 catalog further complements these details‚ offering a comprehensive reference for parts compatibility and technical requirements.

  • Includes detailed propeller flange measurements and types.
  • Provides stretched prop flange installation guidelines.
  • Ensures compatibility across IO-320 engine variants.

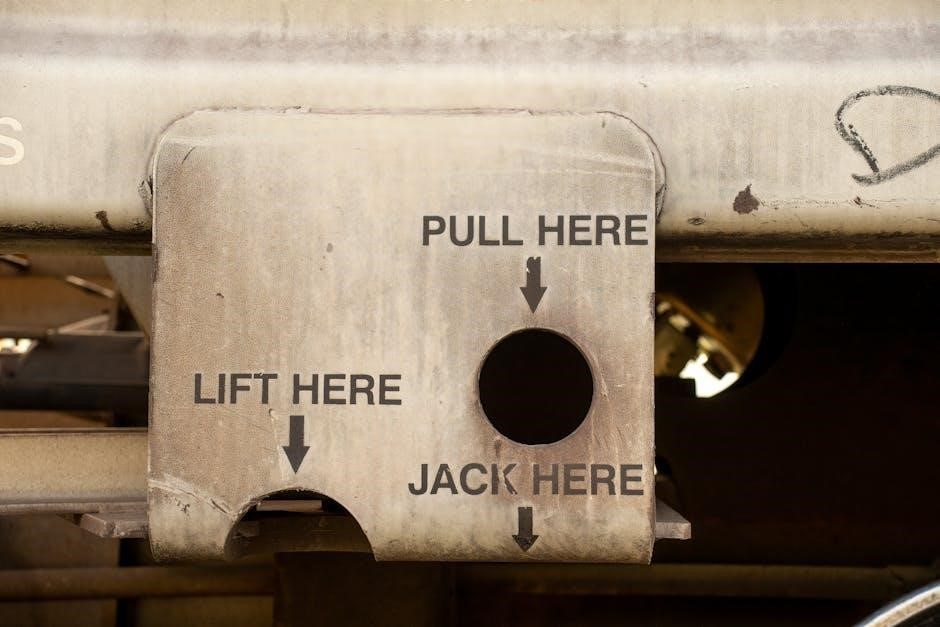
Stretched Prop Flange Considerations

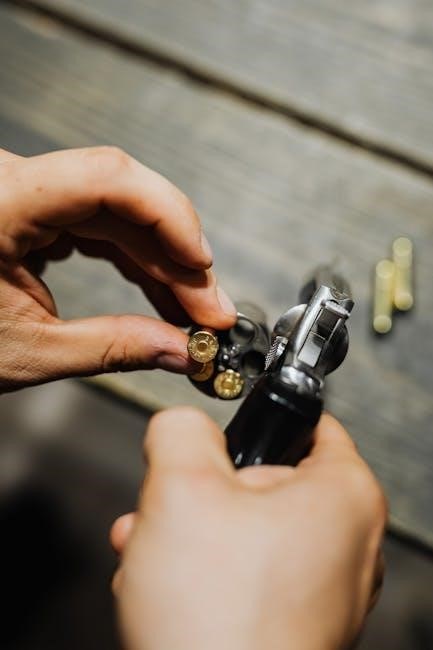
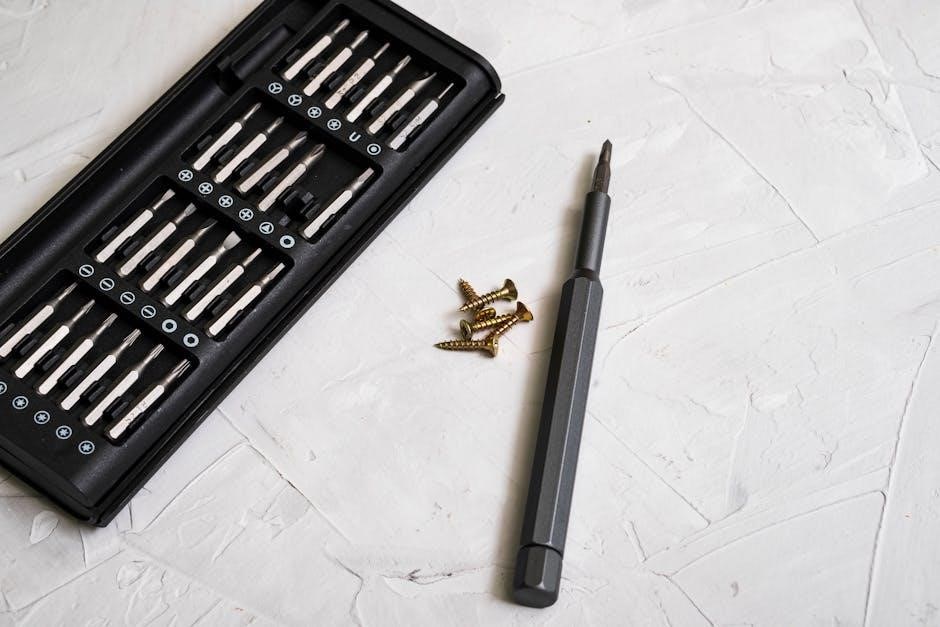
The Lycoming IO-320 parts manual emphasizes the importance of proper handling and installation of stretched prop flanges to avoid damage. When using screwdrivers to pry the flange‚ care must be taken to protect it from potential harm. The manual highlights that stretched prop flanges are compatible with various IO-320 models‚ including IO-320-B1A and AIO-320-B1B‚ ensuring optimal performance. It also provides guidelines for torque specifications and alignment to maintain engine integrity. These considerations are vital for mechanics to ensure safe and efficient engine operation.

  • Protect the flange during installation to prevent damage.
  • Ensure proper alignment and torque specifications.
  • Compatible with multiple IO-320 engine variants;

Maintenance and Overhaul Procedures

The Lycoming IO-320 parts manual provides detailed maintenance schedules and overhaul procedures‚ ensuring engine longevity. It includes a comprehensive parts replacement list and guidelines for proper installation to maintain performance and safety.

Recommended Maintenance Schedules

The Lycoming IO-320 parts manual outlines detailed maintenance schedules to ensure engine longevity and reliability. Regular inspections and replacements‚ as specified in the PC-103 catalog‚ are crucial for optimal performance. The manual emphasizes adherence to recommended timelines for tasks such as cylinder assembly checks‚ gasket replacements‚ and propeller flange inspections. Proper maintenance prevents premature wear and ensures compliance with safety standards. Additionally‚ the manual provides guidelines for installing Superior brand parts‚ which may require extra care compared to Lycoming originals. By following these schedules‚ mechanics can maintain engine efficiency‚ reduce downtime‚ and ensure consistent operation. The manual also highlights the importance of using genuine or approved parts‚ such as Millennium Cylinder kits‚ to uphold engine integrity and performance.

Overhaul Parts Replacement List

The Lycoming IO-320 parts manual provides a comprehensive overhaul parts replacement list‚ ensuring mechanics have clear guidance for engine rebuilds. Key components include Millennium Cylinder Power Assembly Kits‚ such as SL32006W-A21P and SL32000Na-A21P‚ designed for specific engine models like the IO-320 and O-320 series. These kits are essential for overhauls‚ offering pistons‚ rings‚ and gaskets tailored to engine specifications. The manual also lists critical parts like seals‚ gaskets‚ and propeller flange components‚ emphasizing the need for genuine or approved replacements to maintain performance and durability. Proper use of these parts ensures compliance with safety standards and optimal engine operation. Mechanics are advised to refer to the PC-103 catalog for detailed part numbers and compatibility‚ ensuring accurate replacements during overhauls.

Common Parts and Accessories

Common parts include seals‚ gaskets‚ and Millennium Cylinder Power Assembly Kits like SL32006W-A21P and SL32000Na-A21P. Superior brand parts offer a cost-effective alternative to Lycoming originals‚ requiring careful installation.

Seals and Gaskets

Seals and gaskets are critical components in the Lycoming IO-320 engine‚ ensuring proper containment of fluids and gases. The Millennium Cylinder Power Assembly Kits‚ such as SL32006W-A21P and SL32000Na-A21P‚ include high-quality seals designed for durability and leak prevention. These kits are compatible with various IO-320 models‚ including the IO-320-B1A and AIO-320-B1B. Proper installation of these seals is essential to maintain engine performance and prevent damage. Superior brand parts offer a cost-effective alternative to Lycoming originals‚ but they require careful installation to ensure a tight seal. Always refer to the parts manual for specific torque specifications and installation guidelines to avoid compromising engine integrity. Regular inspection and replacement of seals and gaskets are vital for maintaining the engine’s efficiency and longevity.

Superior Brand vs. Lycoming Parts

When comparing Superior brand parts to Lycoming parts for the IO-320 engine‚ both options offer high-quality solutions‚ but they cater to different needs and budgets. Lycoming parts are original equipment manufacturer (OEM) components‚ ensuring precise fitment and reliability‚ often preferred by mechanics and pilots who prioritize authenticity and warranty compliance. Superior brand parts‚ on the other hand‚ provide a cost-effective alternative without compromising on performance. They are widely used for overhauls and repairs due to their affordability and compatibility with models like the IO-320-B1A and AIO-320-B1B. While Superior parts require slightly more care during installation‚ they are a viable choice for those seeking value. Both brands meet stringent aviation standards‚ making them reliable options for maintaining the IO-320 engine’s optimal performance.

Troubleshooting and Repair Tips

Identifying common issues early is crucial for maintaining the IO-320 engine. Millennium Cylinder kits and stretched prop flange adjustments are key repair areas. Proper installation of Superior brand parts and seals ensures reliability and performance.

Identifying Common Issues

Identifying common issues in the Lycoming IO-320 engine is critical for maintaining reliability and performance. One frequent problem involves the Millennium Cylinder Power Assembly Kits‚ particularly SL32006W-A21P and SL32000Na-A21P‚ which may require careful installation to avoid damage. Stretched prop flanges‚ while durable‚ demand attention during repairs to prevent misalignment or stress. Mechanics often encounter challenges with cylinder head drain tubes and intercylinder baffles‚ which can lead to overheating if not properly maintained. Additionally‚ the compatibility of Superior brand parts‚ such as seals and gaskets‚ must be verified to ensure they meet Lycoming specifications. Regular inspection of these components and adherence to the PC-103 parts catalog guidelines can help mitigate these issues‚ ensuring the engine operates efficiently and safely. Proper troubleshooting techniques‚ as outlined in the manual‚ are essential for diagnosing and resolving these common problems effectively.

Installation Tips for Superior Brand Parts

Installing Superior Brand parts in the Lycoming IO-320 engine requires careful attention to detail to ensure optimal performance and longevity. Always handle parts with care to avoid damage‚ especially when dealing with components like Millennium Cylinder Power Assembly Kits (SL32006W-A21P and SL32000Na-A21P). When installing stretched prop flanges‚ use proper tools to avoid misalignment or stress. For cylinder assemblies‚ ensure all seals and gaskets meet Lycoming specifications‚ as Superior Brand parts may require slightly different installation techniques. Torque specifications should be followed precisely‚ and all connections should be double-checked for tightness. Proper installation of Superior Brand parts can enhance engine efficiency and reliability‚ making them a cost-effective alternative to Lycoming parts. Always consult the PC-103 parts catalog for compatibility and specific installation guidelines to ensure a smooth process.

Suppliers and Availability

Aircraft Spruce is a leading authorized dealer for Lycoming IO-320 parts‚ offering Millennium Cylinder kits and PC-103 catalog components. Online resources like eBay and Piper Aviation forums also provide access to genuine and aftermarket parts‚ ensuring availability for maintenance and repair needs.

Aircraft Spruce and Other Authorized Dealers

Aircraft Spruce is a premier supplier of Lycoming IO-320 parts‚ offering a wide range of components‚ including Millennium Cylinder Power Assembly Kits (SL32006W-A21P and SL32000Na-A21P). These kits are specifically designed for models like the IO-320-B1A‚ IO-320-E1A‚ and AEIO-320-D1B‚ ensuring compatibility and performance. Other authorized dealers‚ such as Piper Aviation and Textron-Lycoming‚ also provide genuine parts and accessories‚ adhering to Lycoming’s high standards. Online platforms like eBay and specialized aviation forums often list these parts‚ making them easily accessible for mechanics and pilots. Purchasing from authorized dealers guarantees authenticity and compliance with engine specifications‚ which is crucial for maintaining safety and efficiency. Additionally‚ these suppliers offer technical support and resources‚ such as the PC-103 parts catalog‚ to aid in identification and installation. This ensures that users can rely on consistent quality and availability for their maintenance and repair needs.

Online Resources for Parts Catalogs

Online resources provide convenient access to Lycoming IO-320 parts catalogs‚ such as the PC-103 and PC-203 series. Websites like Aircraft Spruce and eBay offer detailed listings‚ including Millennium Cylinder Power Assembly Kits (SL32006W-A21P and SL32000Na-A21P) for models like IO-320-B1A and AEIO-320-D1B. Piper Aviation forums and specialized aviation communities also share downloadable PDF manuals‚ such as the 1970 PC-103 catalog‚ which covers O-320‚ IO-320‚ and LIO-320 series engines. These platforms allow users to search‚ compare‚ and purchase parts directly‚ ensuring easy access to genuine Lycoming components. Additionally‚ online marketplaces often include customer reviews and technical specifications‚ aiding in informed decision-making. These resources are invaluable for mechanics and pilots seeking reliable parts and detailed engine information for maintenance and repair tasks.

instruction manual for jack lalanne power juicer

The Jack LaLanne Power Juicer is a versatile and efficient appliance designed to help users achieve optimal health through fresh juicing. With its powerful motor and easy-to-use design, it makes juicing convenient for everyone. The included instruction manual provides step-by-step guidance, ensuring users can operate, clean, and maintain the juicer effectively. Whether you’re a beginner or a health enthusiast, this juicer empowers you to create delicious and nutritious juices at home, supporting your wellness journey effortlessly.

1.1 Overview of the Jack LaLanne Power Juicer

The Jack LaLanne Power Juicer is a high-performance appliance designed for efficient juicing. Featuring a powerful motor and durable construction, it extracts maximum nutrients from fruits and vegetables. Its user-friendly design makes it easy to assemble and operate, while the stainless steel components ensure longevity. The juicer is ideal for both beginners and experienced users, offering a versatile and reliable way to prepare healthy juices. With its compact size and robust engineering, it is a practical addition to any kitchen, helping users achieve their wellness goals through fresh, homemade juices.

1.2 Importance of Juicing for Health

Juicing is a powerful way to enhance overall health by extracting essential nutrients from fruits and vegetables. It promotes better nutrient absorption, boosting energy levels and supporting immune function. Juicing also aids in digestion, making it easier for the body to process vitamins and minerals. Regular juicing can help detoxify the body, improve skin health, and even support weight management. By incorporating fresh juices into your diet, you can enhance your well-being and maintain a balanced lifestyle. The Jack LaLanne Power Juicer makes this process simple and efficient, helping you prioritize your health effortlessly.

1.3 Brief History of Jack LaLanne and His Juicer

Jack LaLanne, a pioneer in fitness and nutrition, revolutionized healthy living with his iconic Power Juicer. A passionate advocate for wellness, LaLanne introduced the juicer to make fresh, nutrient-rich juices accessible to everyone. His invention gained popularity for its efficiency and ease of use, aligning with his philosophy of empowering individuals to take control of their health. Over the years, the Jack LaLanne Power Juicer has become a trusted tool for those seeking to incorporate juicing into their daily routines, reflecting LaLanne’s enduring legacy in the health and wellness community.

Unboxing and Initial Setup

Unboxing the Jack LaLanne Power Juicer reveals the main unit, instruction manual, and additional components. Assembly is straightforward, requiring minimal effort to prepare for first use. Ensure all parts are washed before initial operation for optimal safety and performance.

2.1 What’s Included in the Box

The Jack LaLanne Power Juicer box includes the main juicer unit, motor base, juicer cover, pulp container, and a comprehensive instruction manual. Additional components may vary by model but often feature a recipe guide and cleaning brush. Some versions include a DVD with instructional videos and tips for getting started. Ensure all parts are accounted for before assembly to guarantee proper function and safety. The manual provides detailed descriptions of each component, helping users understand their purpose and assembly requirements. This ensures a smooth setup process for first-time users.

2.2 Assembling the Juicer for the First Time

Assembling the Jack LaLanne Power Juicer is straightforward when following the instruction manual. Begin by placing the motor base on a stable surface. Next, align the juicer cover with the base and secure it firmly. Attach the pulp container to the side of the motor base to collect pulp during juicing. Ensure all parts are locked into place for safe operation. Plug in the juicer and refer to the manual for final checks. Proper assembly ensures optimal performance and safety. If unsure, consult the included guide or instructional videos for clarification.

2.3 Understanding the Parts and Components

The Jack LaLanne Power Juicer consists of several key components. The motor base houses the powerful engine, while the juicer cover contains the extraction mechanism. The feed chute allows produce to enter, and the pulp container collects leftover fiber. Additional parts include the juice jug for collecting fresh juice and a pusher to guide ingredients. Familiarizing yourself with these components ensures proper assembly and operation. Refer to the instruction manual for detailed descriptions and diagrams to understand each part’s function and importance in the juicing process.

Safety Precautions

Always turn off and unplug the juicer before cleaning. Use the provided pusher to guide produce, avoiding direct hand contact with moving parts. Keep children away.

3.1 General Safety Guidelines

Always read the instruction manual before using the Jack LaLanne Power Juicer. Ensure the juicer is placed on a stable, flat surface and unplugged when not in use. Avoid touching moving parts during operation, and never insert hands or utensils into the juicer. Use the provided pusher to guide produce, as direct contact can cause injury. Keep the appliance out of reach of children and pets. Regularly inspect the juicer for wear and tear, and avoid overloading it with excessive produce. Proper maintenance and adherence to these guidelines ensure safe and effective juicing.

3.2 Safety Tips for Handling the Juicer

Always handle the Jack LaLanne Power Juicer with care to ensure safe operation. Never submerge the motor in water or expose it to excessive moisture. Avoid using harsh chemicals or abrasive cleaners, as they may damage the components. When handling blades or sharp parts, wear protective gloves to prevent injuries. Keep the juicer away from direct sunlight and heat sources. Regularly inspect the power cord for damage and avoid overloading the juicer. Store the appliance in a dry, secure location when not in use. Proper handling ensures longevity and safe performance of the juicer.

3.3 Precautions for Children and Pets

Keep the Jack LaLanne Power Juicer out of reach of children and pets to avoid accidents. Never allow children to operate the juicer unsupervised, as the sharp blades and moving parts can cause injury. Pets may accidentally knock over the appliance, leading to damage or hazards. Store the juicer in a secure location when not in use to prevent unauthorized access. Always ensure the juicer is turned off and unplugged before leaving it unattended. This will help create a safer environment for everyone while maintaining the appliance’s functionality and longevity.

Operating the Jack LaLanne Power Juicer

Operating the Jack LaLanne Power Juicer is straightforward. Simply add your desired produce, turn it on, and let the powerful motor extract fresh juice effortlessly. Follow the manual’s guidelines for optimal performance and safety. Ensure all components are securely locked before use. The juicer’s design makes it easy to feed produce and monitor the juicing process. Always operate on a stable, flat surface for best results and to prevent accidents.

4.1 Step-by-Step Guide to Juicing

Start by assembling the juicer according to the manual. Ensure all parts are securely locked before use. Add your prepared fruits and vegetables through the feeder chute. Turn on the juicer and slowly feed produce, allowing the motor to pull it in. Use the provided pusher for safe and efficient feeding. Collect the juice in the provided container. Once done, turn off the juicer and unplug it. For optimal results, cut produce to fit the chute and alternate between hard and soft items to avoid clogging. Always clean immediately after use for easy maintenance.

4.2 Tips for Feeding Produce into the Juicer

For optimal performance, cut produce to fit the feeder chute and remove seeds, pits, and hard skins. Alternate between hard and soft items to prevent clogging. Use the provided pusher to guide produce safely and avoid overloading the chute. Avoid feeding large or fibrous pieces without cutting them first. For leafy greens, roll them into tight bunches before feeding. Always feed produce slowly and evenly to allow the motor to process effectively. This ensures smooth operation and maximizes juice extraction while maintaining the juicer’s longevity.

4.3 Adjusting the Juicer Settings for Optimal Juice Extraction

To achieve the best results, adjust the juicer settings based on the type of produce. For harder fruits and vegetables, like apples or carrots, use a higher speed setting to ensure thorough extraction. For softer items, such as berries or leafy greens, a lower speed is sufficient to prevent waste. The juicer may feature a reverse function to clear blockages and optimize yield. Always refer to the instruction manual for specific guidance on speed adjustments and produce compatibility. Proper setting adjustments ensure maximum juice extraction and minimal pulp, making your juicing experience more efficient and enjoyable.

Cleaning and Maintenance

Regular cleaning and maintenance are essential for the longevity of your Jack LaLanne Power Juicer. Immediate cleaning after use prevents pulp buildup, while deep cleaning ensures optimal performance. Refer to the instruction manual for detailed maintenance tips to keep your juicer in top condition and extend its lifespan.

5.1 Immediate Cleaning After Use

Immediate cleaning after each use is crucial for maintaining your Jack LaLanne Power Juicer. Use a damp cloth to wipe the motor base and rinse all detachable parts with warm water. Soak stubborn pulp in warm water for easier removal. Avoid using abrasive cleaners or scrubbers, as they may damage the surfaces. Dry all components thoroughly to prevent water spots and bacterial growth. Regular cleaning ensures optimal performance and extends the juicer’s lifespan. Refer to the instruction manual for detailed cleaning instructions tailored to your model.

5.2 Deep Cleaning the Juicer Components

For a thorough clean, disassemble the juicer and soak all parts in warm, soapy water for 10-15 minutes. Use a soft brush to scrub areas with dried pulp. Mix equal parts water and white vinegar in the juicer to remove any residual buildup. Rinse all components thoroughly and dry with a clean cloth. Regular deep cleaning prevents mold growth and ensures optimal performance. Refer to the instruction manual for specific deep-cleaning instructions tailored to your Jack LaLanne Power Juicer model. This routine will keep your juicer in excellent condition for years.

5.3 Maintenance Tips for Longevity

Regular maintenance ensures your Jack LaLanne Power Juicer performs optimally and lasts longer. After each use, clean the juicer immediately to prevent pulp buildup. Lubricate moving parts periodically with food-grade oil to reduce friction. Check and replace worn-out components like the cutting blade or strainer as needed. Store the juicer in a dry place to avoid rust. Refer to the instruction manual for specific maintenance recommendations. By following these tips, you can extend the lifespan of your juicer and enjoy consistent performance for years to come. Proper care will keep your appliance in great working condition.

Troubleshooting Common Issues

The Jack LaLanne Power Juicer may face issues like jamming or low juice yield. Consult the manual for solutions, such as cleaning pulp buildup or adjusting settings. Regular maintenance and proper assembly can prevent many problems. Refer to the troubleshooting section in the guide for detailed fixes and ensure optimal performance. Addressing issues promptly will extend the juicer’s lifespan and maintain its efficiency. Always follow the instruction manual for specific solutions to common challenges. This ensures smooth operation and consistent juice quality over time.

6.1 Jamming or Clogging of the Juicer

Jamming or clogging in the Jack LaLanne Power Juicer often occurs due to pulp buildup or improper feeding of produce. Immediate cleaning is crucial, as dried pulp can harden and cause blockages. To resolve this, disassemble the juicer and rinse components under warm water. Use a soft brush to remove stubborn residue. Ensure all parts are dry before reassembling. For prevention, feed produce slowly and avoid overloading the chute. Regular maintenance, as outlined in the manual, will help maintain smooth operation and prevent future clogs. Addressing jams promptly ensures optimal performance and longevity of the juicer.

6.2 Low Juice Yield or Poor Extraction

Low juice yield or poor extraction can result from improper produce preparation or juicer settings. Ensure fruits and vegetables are chopped into manageable sizes and fed steadily. Avoid overloading the chute, as this can hinder efficient extraction. Check the juicer’s filter for blockages and clean it regularly, as pulp buildup can reduce yield. Additionally, verify the juicer’s settings to ensure they are optimized for the type of produce being used. Proper maintenance, as outlined in the manual, will help maintain peak performance and maximize juice extraction for better flavor and nutrition.

6.3 Noise or Vibration During Operation

Noise or vibration during operation can occur due to improper assembly or imbalance. Ensure all parts are securely locked and aligned correctly before use. Excessive pulp buildup or uneven produce feeding may also cause vibration. Regular cleaning of the juicer, especially the filter and pulp container, can help reduce noise. If issues persist, check the manual for troubleshooting steps or contact customer support. Proper maintenance and balanced usage will minimize vibrations and ensure smooth, quiet operation for optimal juicing results and longevity of the appliance.

Recipes and Juice Combinations

Explore a variety of delicious and nutritious juice recipes tailored for the Jack LaLanne Power Juicer. From beginner-friendly blends to advanced health-focused combinations, the manual offers inspiration for every taste and dietary need. Discover recipes that highlight specific fruits, vegetables, and their benefits, helping you maximize nutrition and flavor in every glass.

7.1 Beginner-Friendly Juice Recipes

The instruction manual provides simple, nutritious recipes perfect for newcomers to juicing. Start with the Classic Sunrise: combine 2 oranges, 1 apple, and a carrot for a refreshing blend. Try the Green Goddess by mixing 2 cups spinach, 1 green apple, and a cucumber for a healthy boost. For a sweet treat, the Berry Delight blends 1 cup mixed berries, 1/2 banana, and a handful of mint. These recipes are easy to follow and require minimal ingredients, making juicing approachable and enjoyable for everyone.

7.2 Advanced Juice Recipes for Health Enthusiasts

For those seeking more complex and nutrient-dense options, the manual offers advanced recipes. Try the Turmeric Ginger Zinger: juice 2 inches turmeric, 1-inch ginger, 2 apples, and 1 lemon for anti-inflammatory benefits. The Green Powerhouse combines 3 cups kale, 1 cucumber, 1 pear, and 1 lime for a vitamin-packed drink. For a detox boost, the Beet Bliss blends 2 beets, 2 carrots, 1 apple, and a handful of parsley. These recipes cater to health enthusiasts looking to maximize nutritional intake and explore diverse flavor profiles.

7.3 Juice Recipes for Specific Health Benefits

The manual provides targeted recipes for various health goals. The Immunity Boost combines 4 oranges, 2 grapefruits, and 1-inch ginger to fight off illnesses. For digestion, try the Digestive Aid: 2 apples, 1 cucumber, and 1/2 lemon. The Anti-Inflammatory Blend features 2 beets, 2 carrots, and 1-inch turmeric to reduce inflammation. These recipes are designed to address specific health needs, ensuring users can tailor their juicing routine to achieve desired wellness outcomes. Each recipe is crafted to maximize nutrient absorption and deliver focused benefits.

Tips and Tricks for Better Juicing

For optimal results, feed produce evenly and alternate between hard and soft ingredients. Use the manual’s guide to avoid clogging. Experiment with combinations for enhanced flavor and nutrition.

8.1 Choosing the Right Produce for Juicing

Selecting the right fruits and vegetables is crucial for optimal juicing. Opt for fresh, ripe, and organic produce to ensure maximum flavor and nutrition. Avoid wilted or bruised items, as they can compromise juice quality. Hard produce like apples and carrots work well, while softer options like berries may require straining. The instruction manual suggests alternating between hard and soft ingredients to prevent clogging. Experiment with combinations to balance sweetness and acidity. Peel citrus fruits and remove seeds or pits before juicing to enhance taste and safety. Proper produce selection ensures better taste and nutrition in every glass.

8.2 Storing Juice for Later Consumption

For optimal freshness, store juice in an airtight container in the refrigerator immediately after juicing. Use glass containers to prevent chemical leaching and maintain flavor. Juice can typically be stored for up to 24 hours, but consuming it fresh is best for nutrition. If freezing, pour into ice cube trays or sealed containers and store for up to 3 days. Label containers with dates to ensure you use the oldest ones first. Before drinking, shake well to redistribute nutrients. Avoid storing juice in plastic containers for extended periods to preserve quality and health benefits.

8.3 Enhancing Juice Flavor and Nutrition

Experiment with ingredients to elevate your juice’s flavor and nutritional value. Add a splash of citrus like lemon or lime for brightness, or incorporate herbs like mint or ginger for a refreshing twist. Incorporate superfoods such as spinach, kale, or protein powder to boost nutrition. For sweetness, use apples or carrots in moderation. Consider the ripeness of fruits to ensure optimal taste and juice extraction. Balancing flavors and nutrients creates delicious, healthy juices that cater to your dietary needs and preferences, making every sip both enjoyable and beneficial for your well-being.

Warranty and Customer Support

The Jack LaLanne Power Juicer comes with a warranty covering defects in materials and workmanship. Dedicated customer support is available for inquiries and assistance. Online resources and manuals provide additional guidance for troubleshooting and maintenance, ensuring a smooth user experience and addressing any concerns promptly and effectively.

9.1 Understanding the Warranty Terms

The Jack LaLanne Power Juicer is backed by a warranty that covers defects in materials and workmanship. The warranty period varies depending on the model, typically ranging from 1 to 5 years. It ensures that any faulty parts or issues arising from manufacturing defects will be repaired or replaced free of charge. To maintain warranty validity, users must follow the operating and maintenance guidelines outlined in the manual. Registration of the product is often required, and proof of purchase may be needed for warranty claims. This coverage provides peace of mind and protects your investment in the juicer.

9.2 Contacting Customer Support

For any inquiries or issues with your Jack LaLanne Power Juicer, customer support is readily available to assist. You can reach them via phone or email, with support teams operating during specific hours. Additionally, the official website often features an online contact form for convenience. Before contacting support, ensure you have your model number and purchase details handy. Representatives are trained to address concerns, from troubleshooting to warranty-related questions. For non-urgent matters, online resources like FAQs or community forums may provide quick answers, saving you time and effort.

9.3 Online Resources and Community Support

For additional guidance, numerous online resources and community support options are available. The official Jack LaLanne website offers downloadable manuals, instructional videos, and troubleshooting guides. Online forums and social media groups dedicated to juicing provide a space to share recipes and tips. Many users find value in community support, where experienced juicers offer advice and solutions. These resources not only enhance your juicing experience but also help you maximize the potential of your Power Juicer. Whether you’re seeking technical help or inspiration, these platforms are invaluable for ongoing support and education.

Additional Resources

The Jack LaLanne Power Juicer comes with instructional videos and downloadable manuals for easy reference. Online communities and forums also offer valuable support and tips for users. These resources enhance your juicing experience and provide ongoing guidance for optimal use.

10.1 Instructional Videos and Tutorials

The Jack LaLanne Power Juicer is supported by instructional videos and tutorials available online. These resources provide a visual guide to assembling, operating, and maintaining the juicer. Videos cover topics like getting started, tips and tricks, and troubleshooting common issues. They are designed to help users maximize their juicing experience. Additionally, some videos have been upscaled to 4K for better clarity, ensuring users can follow along easily. These tutorials are a great supplement to the instruction manual, offering hands-on guidance for optimal use of the Power Juicer.

10.2 Downloadable Manuals and Guides

Downloadable manuals and guides for the Jack LaLanne Power Juicer are readily available online, ensuring easy access to detailed instructions. These resources include PDF manuals for specific models like the E-1188-1 and E-1189, as well as comprehensive guides such as “Secrets of Power Juicing.” Users can download these files in various formats, including PDF and text, making them accessible on multiple devices. These guides provide in-depth information on operation, maintenance, and troubleshooting, serving as a valuable resource for both new and experienced users to maximize their juicing experience effectively.

10.3 Online Communities and Forums

Online communities and forums dedicated to the Jack LaLanne Power Juicer offer a wealth of knowledge and support for users. Platforms like Facebook groups and specialized juicing forums provide spaces to share tips, ask questions, and troubleshoot issues. Many users post their experiences, favorite recipes, and maintenance tips, creating a collaborative environment. These communities often include links to instructional videos and downloadable manuals, making them a valuable resource for both new and experienced juicers. Engaging with these forums can enhance your juicing journey and help you make the most of your Jack LaLanne Power Juicer.

Conclusion

The Jack LaLanne Power Juicer is a powerful tool for enhancing health through fresh juicing. By following the manual, users can maximize its potential and enjoy nutritious juices consistently.

11.1 Summary of Key Points

The Jack LaLanne Power Juicer is a powerful and user-friendly appliance designed to make juicing easy and efficient. It comes with a comprehensive manual that guides users through assembly, operation, and maintenance. Key features include a strong motor, easy-to-clean parts, and a sleek design. The manual emphasizes immediate cleaning to prevent pulp buildup and offers tips for optimal juice extraction. Beginners and health enthusiasts alike can benefit from its simplicity and versatility. By following the manual, users can maximize the juicer’s potential and enjoy fresh, nutritious juices consistently. Regular maintenance ensures longevity, making it a valuable addition to any kitchen.

11.2 Encouragement for Consistent Use

Consistency is key to unlocking the full benefits of juicing with the Jack LaLanne Power Juicer. By incorporating fresh juices into your daily routine, you can experience improved energy levels, better digestion, and enhanced overall health. The juicer’s ease of use and quick cleanup make it simple to maintain a regular juicing habit. Stay motivated by experimenting with new recipes and exploring the variety of flavors and nutrients different produce offers. Remember, small, consistent steps lead to lasting health improvements. Keep juicing and enjoy the transformative power of fresh, homemade juices every day!

11.3 Final Tips for Maximizing Juicer Potential

To fully maximize your Jack LaLanne Power Juicer, explore its capabilities by experimenting with diverse recipes and techniques. Regularly refer to the instructional videos and manuals for tips on optimal use and maintenance. Clean the juicer immediately after each use to prevent pulp buildup and ensure longevity. Experiment with different produce combinations to discover flavors and nutrients that suit your taste and health goals. By staying consistent and exploring new possibilities, you can unlock the full potential of your juicer and enjoy a healthier, more vibrant lifestyle with fresh, homemade juices.

craftsman lt 1500 manual

The Craftsman LT 1500 manual is an essential guide for operating and maintaining your 18․5 HP, 42-inch mower deck lawn tractor; It provides detailed instructions, safety tips, and troubleshooting solutions to ensure optimal performance and longevity of your machine․ Whether you’re a seasoned user or a new owner, this manual offers clarity and utility, helping you navigate routine maintenance, repairs, and upgrades with confidence․

1․1 Overview of the Craftsman LT 1500 Lawn Tractor

The Craftsman LT 1500 is a versatile lawn tractor designed for efficient mowing and yard maintenance; It features an 18․5 HP engine, a 42-inch mower deck, and a 6-speed transaxle for smooth operation․ With an electric start and automatic transmission, it offers ease of use and reliability․ The tractor is built with a low emission engine, making it environmentally friendly․ Its compact design and robust construction make it suitable for various yard sizes and terrains, providing a balance of power and maneuverability for homeowners seeking a dependable mowing solution․

1․2 Importance of the Manual for Proper Operation and Maintenance

The manual is crucial for safe and effective use of the Craftsman LT 1500․ It provides detailed instructions for operation, maintenance, and troubleshooting, ensuring optimal performance and longevity․ By following the manual, users can prevent accidents, avoid costly repairs, and maintain warranty compliance․ It serves as a comprehensive guide, covering essential procedures and safety precautions, making it indispensable for both new and experienced users to get the most out of their lawn tractor while minimizing risks and ensuring proper care․

Safety Guidelines and Precautions

Safety is paramount when operating the Craftsman LT 1500․ Always wear protective gear, ensure the area is clear of obstacles, and follow proper startup and shutdown procedures․

2․1 General Safety Tips for Operating the LT 1500

Safety is crucial when operating the Craftsman LT 1500․ Always wear protective gear, including gloves, safety glasses, and sturdy footwear․ Ensure the area is clear of obstacles, children, and pets before mowing․ Never operate the tractor on steep slopes or unstable terrain․ Keep loose clothing tied back and avoid jewelry that could catch on controls․ Familiarize yourself with the tractor’s controls and functions before use․ Never leave the tractor unattended while it’s running, and always turn it off when walking away․ Properly follow all startup and shutdown procedures to avoid accidents․

2․2 Protective Gear and Pre-Operation Checks

Always wear protective gear, including gloves, safety glasses, and sturdy footwear, when operating the LT 1500․ Conduct pre-operation checks to ensure the mower deck is clear of debris and all guards are securely in place․ Check oil and fuel levels, and verify that all controls function properly․ Inspect the tires and ensure proper inflation․ Test the brakes and steering for responsiveness․ Never operate the tractor with loose clothing or jewelry that could get caught in moving parts․ Ensure the area is clear of obstacles and bystanders before starting the engine․

Operating the Craftsman LT 1500

Learn to start, drive, and adjust the LT 1500 safely․ Understand engine controls, steering mechanisms, and speed adjustments for efficient mowing․ Follow proper operating procedures․

3․1 Starting and Stopping the Engine

To start the engine, ensure the transmission is in neutral and the parking brake is engaged․ Turn the key to the “start” position and allow the engine to warm up briefly․ For cold engines, use the choke to aid starting․ Once running, gradually release the choke as the engine warms up․ To stop the engine, reduce speed, disengage the mower deck, and let the engine idle for a few seconds before turning the key to “off․” Always apply the parking brake after stopping for safety․

3․2 Driving and Steering the Lawn Tractor

Driving the Craftsman LT 1500 involves using the foot pedal for forward and reverse movement․ Ensure the tractor is on level ground and the mower deck is disengaged before moving․ Steering is managed via the wheel, similar to a car, but requires more force due to the tractor’s size․ For smooth operation, accelerate gradually and avoid sharp turns․ Always maintain control, especially on uneven terrain, and be cautious of obstacles․ Adjust your speed according to the terrain to ensure safe and efficient mowing․

3․3 Adjusting Speed and Using the Transaxle

The Craftsman LT 1500 features a 6-speed transaxle, allowing manual gear selection for optimal mowing; To adjust speed, stop the tractor completely, engage the clutch, and shift gears using the selector․ Always ensure the tractor is stationary before changing gears․ The transaxle provides variable speed control, enabling smooth operation on different terrains․ For precise cutting, adjust the mower deck speed separately to match your mowing needs․ Proper use of the transaxle ensures efficient performance and extends the lifespan of the tractor’s transmission system․

Maintenance and Upkeep

Regular maintenance ensures the Craftsman LT 1500 runs efficiently․ Check oil, filters, and blades routinely․ Sharpen or replace blades as needed, and monitor tire pressure for optimal performance․

4․1 Routine Maintenance Schedule

A well-structured maintenance schedule is crucial for the longevity of your Craftsman LT 1500․ Begin with daily checks: inspect the oil level, air filter, and mower blades before use․ Weekly, clean the mower deck and check tire pressure․ Monthly, change the engine oil, replace the air filter, and sharpen the blades․ Every 50 hours, inspect and replace the spark plug․ Seasonally, drain fuel if storing for winter and lubricate moving parts․ Adhere to this schedule to ensure optimal performance and prevent costly repairs․

4․2 Oil and Fluid Checks

Regular oil and fluid checks are vital for the smooth operation of your Craftsman LT 1500․ Always use the recommended SAE 30 oil for optimal engine performance․ Check the oil level before each use by locating the dipstick near the engine․ Wipe it clean, insert it, and ensure the level is between the “MIN” and “MAX” marks․ Additionally, inspect the hydraulic fluid level, located under the seat, and top it off if necessary․ Never overfill, as this can damage the system․ Regular oil changes every 50 hours and fluid checks will prevent engine wear and ensure longevity․

4․3 Blade Maintenance and Sharpening

Regular blade maintenance is crucial for optimal cutting performance and longevity․ Inspect the mower blades before each use for damage or wear․ Dull or damaged blades can tear grass, leaving it vulnerable to disease․ Sharpen blades using a grinder or file, ensuring the cutting edge remains sharp and balanced․ Replace bent or excessively worn blades immediately․ Always disconnect the spark plug before performing blade maintenance to ensure safety․ Sharpening should be done evenly on both sides to maintain balance and prevent vibration․ Properly maintained blades will deliver a clean, even cut every time․

Troubleshooting Common Issues

This section addresses frequent problems like oil leaks, starter solenoid malfunctions, and electrical issues․ It provides step-by-step solutions and tips for diagnosing and resolving these common concerns effectively․

5․1 Oil Leaking from the Exhaust

Oil leaking from the exhaust on your Craftsman LT 1500 can indicate issues with engine operation․ This may occur due to excessive engine oil or a faulty PCV system․ Inspect the exhaust manifold and connections for cracks or loose fittings․ Check the oil level to ensure it’s within the recommended range․ If the problem persists, consult the manual or a professional mechanic to address potential internal engine issues or gasket failures․ Regular maintenance, as outlined in the manual, can help prevent such leaks and ensure optimal engine performance over time․

5․2 Issues with the Starter Solenoid

Issues with the starter solenoid on your Craftsman LT 1500 can prevent the engine from starting․ Common symptoms include a clicking sound when turning the key or the engine failing to crank․ Check the solenoid for corrosion or loose connections․ Clean or replace the battery terminals and ensure the ignition switch is functioning properly․ If the problem persists, test the solenoid for continuity or replace it․ Refer to the manual for step-by-step instructions or consult a professional mechanic for assistance․ Regular electrical system checks can help prevent such issues and ensure reliable starting performance․

5․3 Common Electrical System Problems

Common electrical system issues on the Craftsman LT 1500 include faulty wiring, bad fuses, or corroded connections․ Symptoms may involve intermittent power loss, non-working dashboard lights, or failure of electrical accessories․ To troubleshoot, inspect the wiring harness for damage, check fuses, and clean corroded terminals․ Refer to the wiring diagram in your manual for guidance․ If problems persist, test components like the ignition switch or solenoid․ For complex issues, consult a professional mechanic to ensure proper repairs and maintain your tractor’s reliability and safety․ Regular inspections can help prevent electrical system malfunctions․

Repair and Replacement Parts

Identifying the correct parts for your Craftsman LT 1500 is crucial for repairs․ Use official diagrams and manuals to ensure compatibility․ Downloadable resources and repair guides are available online to help you find and replace components efficiently, maintaining your tractor’s performance and longevity․

6․1 Identifying and Ordering Replacement Parts

To identify and order replacement parts for your Craftsman LT 1500, refer to the official Sears PartsDirect website or consult the downloadable parts diagram specific to your model number (e․g․, 247․289010 or 247․288820)․ Use the detailed diagrams to locate the exact part you need․ Ensure compatibility by cross-referencing the part number with your tractor’s serial number․ Once identified, order directly from authorized dealers or online retailers․ Always verify the part number and compatibility before making a purchase to avoid errors․ This ensures your tractor operates efficiently and safely․

6․2 DIY Repairs for the LT 1500

DIY repairs for the Craftsman LT 1500 can save time and money․ Start by identifying the issue using the troubleshooting guide in your manual․ For common fixes like replacing the starter solenoid or repairing electrical systems, follow step-by-step video tutorials or detailed repair guides․ Always refer to the wiring diagram and parts list specific to your model․ Use genuine or compatible replacement parts to ensure reliability․ Consult online forums or community discussions for tips from experienced users; Remember to follow safety precautions and disconnect the battery before starting any repair․ If unsure, consider consulting a professional mechanic․

6․3 When to Consult a Professional Mechanic

Consult a professional mechanic if you encounter complex issues beyond basic DIY repairs․ This includes major engine problems, transmission failures, or intricate electrical system malfunctions․ If you’re unsure about troubleshooting steps or lack the tools for advanced repairs, seek expert help․ Additionally, for warranty-related fixes or critical safety concerns, a certified mechanic is recommended․ They can ensure proper diagnostics and prevent further damage, saving you time and potential risks․ Always prioritize safety and efficiency when dealing with your Craftsman LT 1500․

Wiring and Electrical Systems

Understanding the wiring and electrical systems of your Craftsman LT 1500 is crucial for troubleshooting and repairs․ Always refer to the wiring diagram for clarity and safety․

7․1 Basic Wiring Diagram for the LT 1500

A basic wiring diagram for the Craftsman LT 1500 provides a visual representation of the electrical system, including the battery, starter solenoid, ignition switch, and safety switches․ It helps identify connections between components like the ignition coil, spark plug, and charging system․ The diagram is essential for troubleshooting issues such as no-start conditions or electrical malfunctions․ Always refer to the official manual or a certified parts diagram for accuracy․ Use this guide to trace circuits safely and efficiently, ensuring proper repairs and maintaining your tractor’s reliability․

7․2 Troubleshooting Electrical Issues

Troubleshooting electrical issues on the Craftsman LT 1500 involves identifying common problems like faulty starter solenoids, bad fuses, or corroded connections․ Start by consulting the wiring diagram to trace circuits and locate potential faults․ Check the battery terminals for corrosion and ensure all connections are secure․ Use a multimeter to test voltage at key points, such as the ignition switch and solenoid․ Replace any blown fuses or damaged wires․ Addressing these issues promptly prevents further damage and ensures reliable operation of your lawn tractor’s electrical system․

7․3 Safe Practices for Electrical Repairs

When performing electrical repairs on the Craftsman LT 1500, always disconnect the battery to prevent accidental starts․ Use a multimeter to test circuits safely․ Avoid touching live wires and wear insulated gloves․ Ensure all components are grounded properly to prevent shocks․ Never bypass safety switches or fuses․ Consult the wiring diagram for accurate connections․ If unsure, refer to the manual or seek professional assistance․ Following these practices ensures your safety and prevents damage to the electrical system․

Engine and Transmission

The Craftsman LT 1500 features an 18․5 HP engine with low emission technology, paired with a reliable automatic transmission for smooth operation․ Regular maintenance ensures optimal performance and longevity․

8․1 Understanding the 18․5 HP Engine

The Craftsman LT 1500 is powered by an 18․5 HP engine, designed for efficient performance and reliability․ This low-emission engine operates differently from older models, emphasizing environmental friendliness․ It features a robust design to handle demanding tasks while maintaining fuel efficiency․ Regular maintenance, as outlined in the manual, is crucial to ensure optimal performance and extend the engine’s lifespan․ Understanding its operation and care is essential for maximizing productivity and keeping your lawn tractor running smoothly for years․

8․2 Transmission Types and Maintenance

The Craftsman LT 1500 features a 6-speed transaxle transmission, designed for smooth operation and efficient power delivery․ Regular maintenance, such as checking transmission fluid levels and replacing filters, is crucial to ensure optimal performance․ Proper lubrication and timely inspections help prevent wear and tear, extending the transmission’s lifespan․ The manual provides detailed guidance on transmission care, ensuring your lawn tractor runs smoothly and maintains its reliability over time․ Adhering to these maintenance routines is essential for maximizing the durability and functionality of your LT 1500․

8․3 Low Emission Engine Features

The Craftsman LT 1500’s engine features advanced low emission technology, designed to reduce environmental impact while maintaining performance․ This engine operates differently from older models, incorporating specialized components to minimize emissions․ The manual provides insights into these features, ensuring users understand how to maintain and optimize the engine’s eco-friendly performance․ Regular maintenance, as outlined, helps preserve the engine’s efficiency and compliance with emission standards, making it a reliable choice for environmentally conscious users․

Mower Deck and Attachments

The Craftsman LT 1500 features a durable 42-inch mower deck designed for efficient cutting․ This section covers maintenance tips, attachment options, and upgrade possibilities to enhance performance․

9․1 42-Inch Mower Deck Maintenance

Regular maintenance of the 42-inch mower deck ensures optimal performance․ Check deck belts for wear and replace as needed․ Sharpen blades monthly to maintain cutting efficiency․ Clean debris from the deck after each use to prevent rust and clogging․ Lubricate pivot points seasonally․ Refer to the manual for specific torque settings and blade sharpening techniques․ Proper upkeep extends the life of your mower deck and ensures a clean, even cut every time․ Always follow safety guidelines when performing maintenance tasks․

9․2 Attaching and Detaching Accessories

Attaching and detaching accessories on the Craftsman LT 1500 is straightforward when following the manual’s guidelines․ For baggers, mulch kits, or snow plows, ensure the tractor is on level ground and the engine is off․ Align the accessory with the mounting points and secure it using the provided hardware․ Tighten bolts to the specified torque to avoid damage․ Detaching involves reversing the process, ensuring all connectors and brackets are clear․ Always refer to the manual for specific instructions to prevent errors and ensure safe operation․

9․3 Upgrading or Replacing the Mower Deck

Upgrading or replacing the mower deck on your Craftsman LT 1500 requires careful planning and compatibility checks․ Ensure the new deck matches your tractor’s model, such as the 42-inch option for model 917․274751․ Refer to the manual or downloadable parts diagrams for precise measurements and bolt patterns․ Disconnect the drive system and remove mounting hardware before installing the new deck․ Use the provided diagrams to align and secure the deck properly․ For upgrades, consider high-performance blades or mulching kits․ Always follow safety guidelines and torque specifications to ensure a secure and functional installation․

Manual Structure and Content

The Craftsman LT 1500 manual is structured for clarity, utility, and longevity, spanning 58 pages․ It offers downloadable and printed options, ensuring easy access to key sections like parts diagrams and repair guides․

10․1 Navigating the Manual for Clarity

The Craftsman LT 1500 manual is designed for easy navigation, with clear sections and detailed diagrams․ Users can quickly locate information using the table of contents or index․

Key sections include operation, maintenance, and troubleshooting․ The manual also provides step-by-step instructions for common tasks, ensuring users can efficiently find and understand the information they need․

10․2 Key Sections Every User Should Know

The manual features essential sections like safety guidelines, operation instructions, and maintenance schedules․ Users should familiarize themselves with the table of contents and index for quick access to specific topics․ Key areas include troubleshooting common issues, routine maintenance, and electrical system diagnostics․ Additionally, the manual highlights downloadable resources and video tutorials for further assistance․ Understanding these sections ensures optimal use and longevity of the Craftsman LT 1500, making it a valuable resource for both new and experienced users․

10․3 Downloadable vs․ Printed Manuals

The Craftsman LT 1500 manual is available in both downloadable and printed formats, catering to user preferences․ Downloadable versions offer instant access, easy searchability, and environmental benefits, while printed manuals provide a tactile experience for those who prefer physical copies․ Both formats ensure clarity and utility, with downloadable options often being more cost-effective and readily accessible․ Users can choose based on convenience, ensuring they have the necessary guidance for their lawn tractor․ This flexibility enhances the manual’s usability and longevity for all users․

Additional Resources

Explore online parts diagrams, repair guides, and video tutorials for the Craftsman LT 1500․ Community forums and discussions offer valuable insights and solutions from experienced users․

11․1 Online Parts Diagrams and Repair Guides

Access detailed online parts diagrams and repair guides for the Craftsman LT 1500, including model-specific resources like the 247․289010 and 247․288820 diagrams․ These tools help identify and order replacement parts, ensuring accurate repairs․ Additionally, downloadable PDF manuals, such as the Manual de partes CRAFTSMAN Lt_1500․pdf, provide comprehensive schematics․ Video tutorials and step-by-step guides, like those for wiring and starter solenoid replacement, further assist in troubleshooting and DIY fixes, making maintenance and repairs more manageable for users of all skill levels․

11․2 Video Tutorials for Common Repairs

Video tutorials are invaluable for addressing common repairs on the Craftsman LT 1500․ Step-by-step guides, such as those for replacing the starter solenoid or wiring the electrical system, provide clear visual instructions․ These tutorials cover essential tasks like troubleshooting the starting system and understanding the wiring diagram․ They are particularly useful for DIY enthusiasts, offering detailed insights into complex repairs․ By following these videos, users can confidently tackle issues, ensuring their lawn tractor runs smoothly․ These resources are readily available online, making repairs more accessible and manageable for all skill levels․

11․3 Community Forums and User Discussions

Community forums and user discussions are invaluable resources for Craftsman LT 1500 owners․ These platforms allow users to share experiences, ask questions, and receive advice from experienced operators and professionals․ Topics range from troubleshooting common issues like oil leaks and starter problems to tips for maintaining and upgrading the mower․ Many forums also provide access to downloadable repair guides and parts diagrams, fostering a supportive environment for DIY enthusiasts․ Engaging with these communities can help users resolve problems efficiently and gain insights into optimizing their lawn tractor’s performance․

keeley halo manual

The Keeley Halo manual is your gateway to mastering Andy Timmons’ signature dual echo sound. This guide unlocks features, customization, and troubleshooting, ensuring you get the most from your pedal.

1.1 Overview of the Keeley Halo Pedal

The Keeley Halo pedal is a cutting-edge dual echo effects unit designed in collaboration with renowned guitarist Andy Timmons. It combines two independent delay circuits, offering a wide range of tonal possibilities. The pedal features intuitive controls, including Time, Feedback, and Tone knobs, allowing precise shaping of your sound. A High Pass Filter (HPF) is also integrated to refine the feedback loop. The Halo is known for its modulated dual echo sound, which creates a rhythmic, almost reverb-like diffusion. This pedal is versatile, catering to both live performance and studio recording needs. Its compact design houses advanced features like tap tempo functionality and expression pedal compatibility. The Keeley Halo is a testament to Andy Timmons’ signature tone and Robert Keeley’s engineering prowess, making it a must-have for guitarists seeking unique, professional-grade delay effects.

1.2 Importance of the Manual

The Keeley Halo manual is essential for unlocking the pedal’s full potential. It provides detailed instructions for navigating the dual echo functionality, customizing settings, and troubleshooting common issues. Whether you’re a seasoned guitarist or a beginner, the manual ensures you understand how to harness the pedal’s advanced features. It explains the role of each control, such as the Time, Feedback, and Tone knobs, and how they interact to create unique sounds. The manual also covers the High Pass Filter (HPF) and its impact on the feedback loop. By following the guide, users can master the Halo’s modulated dual echo sound, achieve Andy Timmons’ signature tone, and explore the pedal’s versatility. This resource is indispensable for optimizing your musical experience and ensuring you get the most out of your investment in the Keeley Halo pedal.

1.3 Target Audience

The Keeley Halo manual is designed for musicians, particularly guitarists, seeking to master advanced delay and echo effects. It caters to professional players and enthusiasts alike, especially those familiar with Andy Timmons’ signature sound. The manual is ideal for intermediate to advanced users who want to explore the pedal’s dual echo functionality, modulation capabilities, and customization options. It also appeals to sound engineers and tech-savvy musicians interested in understanding the technical aspects of the pedal. Whether you’re a seasoned tone wizard or a player looking to expand your sonic palette, this manual provides the insights needed to unlock the Halo’s full potential. Additionally, it serves as a valuable resource for troubleshooting and maintenance, ensuring optimal performance for years to come. This guide is a must-have for anyone serious about getting the most out of their Keeley Halo pedal.

1.4 How to Use This Manual

This manual is structured to guide you through every aspect of the Keeley Halo pedal, from basic operations to advanced features. Start with the introduction to understand the pedal’s overview and importance. The target audience section ensures you identify if this manual is tailored to your needs. Proceed to the features and controls chapter to familiarize yourself with the pedal’s components. The “How to Use the Keeley Halo” section provides step-by-step instructions for basic and advanced operations, including expression pedal usage. Troubleshooting and maintenance sections help resolve common issues and ensure longevity. For deeper understanding, explore the dual echo functionality, collaboration background, and customization options. Advanced features like tap tempo and feedback loops are explained in detail. Use the FAQs and user testimonials for real-world insights. Refer to the index or table of contents to navigate easily. This manual is designed to enhance your experience, so explore it thoroughly to unlock the Halo’s full potential.

Features and Controls of the Keeley Halo

The Keeley Halo features Time, Feedback, Tone, and High Pass Filter controls, each designed to shape and refine your delay sounds with precision and clarity.

2.1 Time Control

The Time control on the Keeley Halo allows you to set the delay length from 1ms to 1500ms. This range offers versatility, from subtle slapback echoes to expansive, ambient soundscapes. Turning the knob clockwise increases the delay time, while counterclockwise decreases it. This control is essential for tailoring the delay to match your musical style, whether you’re playing intricate rhythms or creating lush, atmospheric layers. The Time control works seamlessly with other features like Feedback and Tone to craft unique delay textures. By adjusting this control, you can achieve the perfect balance between clarity and depth in your sound. Experimenting with different settings will help you unlock the full potential of the Halo’s delay capabilities.

2.2 Feedback Control

The Feedback control on the Keeley Halo determines the number of repeats in your delay signal. Turning the knob clockwise increases the feedback, creating more echoes, while counterclockwise reduces it for fewer repeats. This control is crucial for shaping the decay of your delayed sound, allowing you to achieve anything from a single, clean repeat to infinite, ambient loops. When used in conjunction with the Time control, the Feedback knob enables you to craft intricate delay textures. For example, lower feedback settings are ideal for subtle, rhythmic delays, while higher settings can create lush, atmospheric soundscapes. Experimenting with this control will help you find the perfect balance between clarity and complexity in your tone.

2.3 Tone Control

The Tone control on the Keeley Halo adjusts the high-frequency response of the delayed signal, allowing you to shape its brightness and clarity. With a range of 1000Hz to 8750Hz, this control enables you to tailor the tone to suit your playing style and musical context. Turning the knob clockwise increases the high-frequency cutoff, resulting in a brighter, more articulate sound, while counterclockwise reduces it for a warmer, smoother tone. This control is particularly useful for ensuring that the delayed signal complements your guitar’s natural tone without sounding overly harsh or muddy. By fine-tuning the Tone control, you can achieve a balanced blend of clarity and warmth, making your delays sound more cohesive in the mix. Experimenting with this control will help you find the perfect tonal balance for your music.

2.4 High Pass Filter (HPF)

The High Pass Filter (HPF) on the Keeley Halo is a crucial feature that allows you to set the cutoff frequency for the feedback loop, ranging from 10Hz to 300Hz. This control is essential for shaping the low-end response of your delayed signals. By adjusting the HPF, you can remove unwanted low-frequency buildup, ensuring your delays remain clear and defined. Turning the knob clockwise increases the cutoff frequency, allowing more high-frequency content to pass through, while counterclockwise reduces it, preserving lower frequencies. This feature is particularly useful for maintaining clarity in complex musical passages or for creating a tighter, more focused sound. The HPF works in conjunction with the feedback control, enabling you to craft a wide range of tonal textures. Whether you’re playing clean chords or intricate solos, the HPF helps you achieve the perfect balance of depth and articulation in your delay effects.

How to Use the Keeley Halo

Mastering the Keeley Halo involves understanding its intuitive controls and features. Start with basic operations, then explore advanced functions like the expression pedal and tap tempo for precise control over your sound.

3.1 Basic Operations

Mastering the Keeley Halo begins with understanding its core functions. Start by setting the TIME control to adjust delay length from 1ms to 1500ms. Use the FEEDBACK knob to control the number of repeats, creating subtle echoes or infinite loops. The TONE control shapes the delayed signal, allowing you to darken or brighten the sound. Engage the HPF to remove low frequencies in the feedback loop, preventing mud. Press the TAP/HOLD footswitch to set tempo or hold for infinite repeats. For expression pedal users, hold the FDBK knob to enter Expression Mode, enabling external control over parameters. These basic operations form the foundation for crafting unique sounds with the Halo, making it easy to dial in the perfect echo for any musical situation.

3.2 Using the Expression Pedal

The Keeley Halo supports external control via an optional expression pedal, enhancing real-time parameter adjustments. To engage Expression Mode, hold the FDBK knob for 1 second. Once active, the expression pedal can control parameters like TIME, FEEDBACK, or TONE, allowing dynamic, hands-free adjustments during performance. Assign the desired parameter by rotating the corresponding knob while in Expression Mode. This feature adds versatility, enabling seamless transitions and expressive soundscapes. For factory reset, hold the TAP/HOLD footswitch and FDBK knob simultaneously. The expression pedal integration elevates the Halo’s functionality, making it a powerful tool for live musicians and studio artists alike. This section guides you through setup and usage, ensuring you maximize the pedal’s potential.

Troubleshooting Common Issues

Experiencing issues with your Keeley Halo? Start by ensuring proper power supply and connection. If delay isn’t working, check input/output cables and verify pedal placement in your signal chain. For distorted audio, adjust the input level or consult the manual for optimal settings. If the expression pedal isn’t responding, ensure it’s properly calibrated and assigned to the correct parameter. Resetting the pedal to factory settings can resolve unexpected behavior—hold the TAP/HOLD footswitch and FDBK knob simultaneously. For persistent problems, refer to the troubleshooting section in the manual or contact Keeley support. Regular maintenance, like cleaning jacks and updating firmware, can prevent many issues. This guide helps you identify and resolve common problems, ensuring uninterrupted use of your Keeley Halo.

Maintenance and Care

Proper maintenance ensures the Keeley Halo performs optimally. Regularly clean the pedal’s surface with a soft cloth and avoid harsh chemicals. Keep the jacks free from dust and debris by gently brushing them. For stubborn dirt, use a dry contact cleaner. Avoid exposing the pedal to extreme temperatures or moisture, as this can damage internal components. Store the Halo in a protective case when not in use to prevent scratches or damage. Check all cables and connections periodically to ensure they are secure and free from wear. If you notice any unusual noise or malfunction, refer to the troubleshooting section or contact Keeley support. By following these care tips, you’ll extend the life of your Keeley Halo and maintain its exceptional tone and performance.

Understanding the Dual Echo Functionality

The Keeley Halo’s dual echo functionality is its core feature, designed to deliver Andy Timmons’ signature modulated dual echo sound. This innovative design combines two delay engines, allowing for intricate, rhythmic patterns that create a sense of depth and movement. The echoes are enhanced by tape-style effects like modulation, saturation, and compression, which bind the sounds together seamlessly. The feedback control plays a crucial role, enabling you to shape the decay and texture of the echoes. Additionally, the high pass filter in the feedback loop ensures clarity, preventing low-end buildup. This dual echo system is highly versatile, catering to a wide range of musical styles. Whether you’re crafting ambient soundscapes or tight, rhythmic delays, the Halo’s dual echo functionality offers unparalleled control and creativity, making it a standout tool for guitarists seeking unique tonal possibilities.

The Collaboration Between Andy Timmons and Keeley Electronics

The collaboration between Andy Timmons and Keeley Electronics resulted in the creation of the Keeley Halo, a pedal that embodies Andy’s signature modulated dual echo sound. This partnership brought together Andy’s decades of experience in crafting unique delay tones and Robert Keeley’s expertise in pedal design. The Halo is a testament to their shared vision of creating a tool that empowers musicians to achieve exceptional sonic clarity and versatility. Andy Timmons, known for his mysterious and rhythmic delay effects, worked closely with Keeley to ensure the pedal captured his iconic “Halo” sound. Robert Keeley, renowned for his innovative approach to effects, dedicated over three years to refining the design. This collaboration not only honors Andy’s tonal legacy but also sets a new standard for delay pedals in the music industry.

Customization Options

The Keeley Halo offers extensive customization options to tailor the pedal to your unique sound preferences. The High Pass Filter (HPF) allows you to set the cutoff frequency in the feedback loop, ranging from 10Hz to 300Hz, ensuring your delays remain clear and defined. The Tone control adjusts the delayed signal’s frequency response, spanning from 1000Hz to 8750Hz, enabling precise tonal shaping. Additionally, the Expression Pedal provides real-time control over parameters like delay time or feedback, offering dynamic performance flexibility. Users can also customize the pedal’s behavior through the Factory Reset option, restoring default settings for a fresh start. These features empower musicians to craft a sound that is truly their own, making the Halo a versatile tool for both live performances and studio recordings. The customization options ensure that the pedal adapts to your creative vision, delivering unparalleled sonic versatility.

Advanced Features

The Keeley Halo features advanced options like Tap Tempo for precise delay timing and Feedback Loop for adding depth. These tools enhance versatility, offering precise control and rich sonic possibilities.

9.1 Tap Tempo Function

The Tap Tempo function on the Keeley Halo allows for precise control over delay timing. By pressing the Tap Tempo footswitch, you can set the delay time to match your playing tempo. This feature is especially useful during live performances, where maintaining a consistent rhythm is crucial. The Tap Tempo function ensures that your delays are perfectly synchronized with your music, providing a professional and polished sound. Additionally, this feature enhances the overall versatility of the pedal, making it adaptable to various musical genres and styles. With the Tap Tempo, you can achieve dynamic and expressive delay effects that elevate your guitar playing to new heights.

9.2 Feedback Loop Options

The Keeley Halo features a robust feedback loop system, allowing for extensive control over delay repetitions. The Feedback Control (FDBK) knob adjusts the number of repeats in the feedback loop, enabling everything from subtle, natural echoes to chaotic, experimental soundscapes. This feature is particularly useful for creating ambient textures or adding depth to your guitar tone. The feedback loop can also be fine-tuned using the High Pass Filter (HPF), which reduces low-frequency buildup and prevents the sound from becoming muddy. Additionally, the manual explains how to engage the feedback loop in various modes, including infinite repeats when the FDBK knob is turned fully clockwise. This versatility makes the Halo an indispensable tool for both live performances and studio recordings, offering endless possibilities for creative expression and tonal exploration.

High Pass Filter (HPF) Explained

The High Pass Filter (HPF) on the Keeley Halo is a crucial feature that refines your delay sound by setting a cutoff frequency in the feedback loop. This filter ranges from 10Hz at full counterclockwise to 300Hz at full clockwise, allowing you to remove unwanted low-frequency buildup. By adjusting the HPF, you can achieve a cleaner, more defined echo that cuts through the mix without muddying your tone.

Using the HPF effectively prevents low-end frequencies from overwhelming the delay repetitions, ensuring clarity even with complex or layered sounds. This feature is especially beneficial for maintaining a polished sound in both live and studio settings, making the Halo a versatile tool for musicians seeking precision and control over their delay effects.

Tone Controls and Their Impact

The Tone control on the Keeley Halo allows you to shape the frequency response of the delayed signal, ensuring it complements your guitar tone perfectly. This control adjusts the cutoff frequency of the delayed signal, ranging from 1000Hz at full counterclockwise to 8750Hz at full clockwise. By tweaking this knob, you can darken or brighten the repeats, tailoring them to your musical needs.

A lower Tone setting produces warmer, more mellow echoes, while a higher setting yields brighter, more articulate delays. This feature is particularly useful for matching the Halo’s sound to your guitar and amp setup or for creating distinct tonal textures in your music. The Tone control works in harmony with the HPF and Feedback controls, enabling precise sculpting of your delay sound for a wide range of musical applications.

Factory Reset and Expression Pedal Setup

To restore the Keeley Halo to its default settings, perform a factory reset by holding the TAP/HOLD footswitch while powering on the pedal. This will reset all parameters to their original configuration, ensuring a clean slate for your tone-shaping journey.

The Expression Pedal Setup allows for advanced control over the Halo’s features. By entering Expression Mode—accessed by holding the FDBK knob for 1 second—you can assign parameters like Time or Feedback to an external expression pedal. This enables real-time, dynamic adjustments during performance, enhancing your creative expression. The mini toggle can also be used to advance through settings, providing flexibility in how you customize your sound. This feature is ideal for musicians seeking precise control and versatility in their delay effects.

User Testimonials and Reviews

Users and professional musicians alike have praised the Keeley Halo for its versatility and tone-shaping capabilities. Many highlight its ability to deliver Andy Timmons’ signature modulated dual echo sound with ease. Guitarists appreciate the intuitive controls and the depth of customization offered by the pedal. The Expression Pedal Setup has been particularly well-received, allowing for dynamic, real-time adjustments during performances. One user noted, “The Halo has become my go-to delay pedal—it’s the only one I need on my board.” Another praised its “rich, immersive soundscapes” and “seamless integration with other effects.” The collaboration between Andy Timmons and Keeley Electronics has been celebrated, with many calling it a game-changer for delay enthusiasts. Overall, the Keeley Halo has earned a reputation as a must-have tool for musicians seeking professional-grade delay effects.

Frequently Asked Questions (FAQs)

Q: How do I achieve Andy Timmons’ signature Halo sound?
A: Use the dual echo functionality and modulated delay settings as outlined in the manual. Adjust the Time, Feedback, and Tone controls to match his tone.

Q: What is the purpose of the High Pass Filter (HPF)?
A: The HPF reduces low-frequency buildup in the feedback loop, ensuring clarity in your delay repetitions. Adjust it to suit your desired tone.

Q: Can I customize the Tone control?
A: Yes, the Tone control allows you to shape the delayed signal’s high-frequency response, from 1000Hz to 8750Hz, enabling precise tonal adjustments.

Q: How do I perform a factory reset?
A: Hold the TAP/HOLD footswitch while powering on the pedal. This restores all settings to their default configuration.

Q: Is the expression pedal optional?
A: Yes, the expression pedal is optional but recommended for dynamic control over parameters like delay time or feedback during performances.

Conclusion

The Keeley Halo manual serves as a comprehensive guide to unlocking the full potential of this innovative dual echo pedal. Designed in collaboration with Andy Timmons, the Halo offers a unique blend of signature tones and customizable features. By following the manual, users can master the pedal’s advanced functionalities, including the dual echo mode, high pass filter, and tone controls. The manual also provides essential troubleshooting tips and maintenance advice to ensure optimal performance. Whether you’re a seasoned musician or a beginner, this guide equips you with the knowledge to craft your sound with precision. With its clear instructions and detailed explanations, the Keeley Halo manual is an indispensable resource for anyone seeking to elevate their music with this exceptional pedal.

manual wheelchair lift

Manual wheelchair lifts are cost-effective, easy-to-use solutions designed to transport wheelchairs securely and efficiently, reducing physical strain on caregivers while ensuring safe and reliable mobility for users․

What Are Manual Wheelchair Lifts?

Manual wheelchair lifts are non-electric devices designed to assist in transferring and transporting wheelchairs․ They operate using hydraulic or mechanical systems, eliminating the need for electricity․ These lifts are lightweight, portable, and easy to install, making them ideal for vehicles like cars, vans, and SUVs․ They are designed to reduce physical strain on caregivers by simplifying the process of loading and unloading wheelchairs․ Manual lifts are cost-effective, space-efficient, and reliable, offering a practical solution for individuals seeking independence and mobility without the complexity of powered systems․

Importance of Manual Wheelchair Lifts for Mobility and Accessibility

Manual wheelchair lifts play a vital role in enhancing mobility and accessibility for individuals with disabilities․ They enable safe and efficient transfers of wheelchairs, reducing physical strain on caregivers and promoting independence for users․ These lifts are particularly beneficial for those who require frequent transportation, as they simplify the process of loading and unloading wheelchairs into vehicles․ By providing a reliable and cost-effective solution, manual wheelchair lifts ensure that users can maintain their mobility without relying on complex or expensive systems, making them an essential tool for everyday accessibility needs․

Types of Manual Wheelchair Lifts

Manual wheelchair lifts include Tilt-N-Tote, SwiftLift, and Universal models, each offering unique features for easy, durable, and cost-effective wheelchair transportation solutions․

Tilt-N-Tote Manual Wheelchair Carrier Lift

The Tilt-N-Tote Manual Wheelchair Carrier Lift is an economical solution for transporting folding manual wheelchairs․ It operates without electricity, relying on manual effort to load and secure the chair․ Designed for simplicity, it folds up when not in use, saving space and reducing storage hassles․ The lift is compatible with most vehicles, including cars, SUVs, and trucks, and requires minimal installation․ Its adjustable hold-down arm ensures the wheelchair remains secure during transport․ This lift is ideal for users seeking a low-cost, reliable option to transport their wheelchairs effortlessly, eliminating the need to fold or lift the chair manually․

SwiftLift Manual Wheelchair Carrier

The SwiftLift Manual Wheelchair Carrier is a practical and affordable solution for transporting folding manual wheelchairs․ Designed for ease of use, it accommodates wheelchairs up to 15․5 inches wide and does not require tilting for loading․ This carrier is lightweight and compact, making it easy to install on vehicles such as cars, trucks, and SUVs․ Priced at $689․95, it offers a cost-effective way to transport wheelchairs without the need for complex mechanical systems․ Its straightforward design ensures reliability and convenience, making it an excellent choice for users seeking a simple, no-frills wheelchair transport solution․

Universal Manual Wheelchair Lifts

Universal manual wheelchair lifts are versatile and compatible with a wide range of vehicles, including cars, SUVs, and vans․ Designed to accommodate various wheelchair types, these lifts are durable and easy to install, offering a practical solution for wheelchair transport․ They often feature adjustable straps and secure hold-down systems to ensure safe loading and unloading․ With a focus on portability and space efficiency, universal lifts are ideal for users seeking a reliable, cost-effective option for their mobility needs without compromising on functionality or performance․

How Manual Wheelchair Lifts Work

Manual wheelchair lifts operate using hydraulic or mechanical systems, enabling smooth and secure transfers of wheelchairs into vehicles, reducing physical strain and ensuring safe, efficient mobility solutions․

Hydraulic vs․ Mechanical Systems

Manual wheelchair lifts utilize either hydraulic or mechanical systems for operation․ Hydraulic systems provide smooth, effortless lifting, reducing strain on users, while mechanical systems offer simplicity and reliability․ Hydraulic lifts are ideal for heavier wheelchairs, as they distribute weight evenly, ensuring controlled movement․ Mechanical systems, often more affordable, rely on manual effort but are durable and require minimal maintenance․ Both systems ensure safe and efficient transfers, catering to different user needs and preferences․ Understanding these differences helps in selecting the most suitable option for individual mobility requirements․

Step-by-Step Operation of Manual Lifts

Operating a manual wheelchair lift involves a straightforward process to ensure safety and efficiency․ First, prepare the lift by ensuring it is properly installed and secured to the vehicle․ Position the wheelchair on the lift platform, aligning it with the designated straps or hold-downs․ Secure the wheelchair firmly to prevent movement during transport․ Engage the lifting mechanism, either by cranking or using the manual lever, to raise the wheelchair into the vehicle․ Once loaded, ensure the lift is folded or stored securely to save space․ Always follow the manufacturer’s instructions for smooth operation․

Key Features of Manual Wheelchair Lifts

Manual wheelchair lifts offer durable construction, high weight capacity, and space-saving designs․ They are portable, easy to install, and require minimal maintenance, ensuring reliable performance and longevity․

Weight Capacity and Durability

Manual wheelchair lifts are built to withstand regular use, offering weight capacities typically ranging from 100 to 400 pounds, depending on the model․ Constructed from robust materials like steel, these lifts ensure durability and reliability․ Their sturdy designs minimize wear and tear, providing long-term performance; Many models feature reinforced straps and secure hold-down systems to safely support the wheelchair during transport․ With proper maintenance, manual wheelchair lifts can endure harsh weather conditions and heavy use, making them a dependable solution for mobility needs․ Their durability ensures consistent functionality over time, offering peace of mind for users and caregivers alike․

Portability and Space Efficiency

Manual wheelchair lifts are designed to be compact and lightweight, ensuring easy transport and storage․ Many models fold up when not in use, saving valuable space in vehicles․ Their sleek designs allow for minimal footprint, making them ideal for cars, SUVs, and vans․ Lightweight materials and foldable mechanisms enhance portability, enabling users to move the lift between vehicles effortlessly․ This space-saving feature is particularly beneficial for smaller vehicles, ensuring ample room for passengers and other essentials while securely transporting the wheelchair․

Ease of Installation and Maintenance

Manual wheelchair lifts are designed for straightforward installation and minimal maintenance․ Many models are self-installable, with clear instructions provided, eliminating the need for professional assistance․ Regular cleaning and lubrication of moving parts ensure smooth operation․ Maintenance is simple, with durable materials reducing wear and tear․ This ease of upkeep makes manual lifts a practical choice for users seeking a hassle-free solution for wheelchair transport, ensuring reliability and longevity without requiring extensive technical expertise or frequent servicing․

Benefits of Using Manual Wheelchair Lifts

Manual wheelchair lifts offer a cost-effective, easy-to-use solution, reducing physical strain on caregivers while providing reliable transport․ They are space-efficient, ensuring versatility for various vehicles and needs․

Reduced Physical Strain on Caregivers

Manual wheelchair lifts significantly reduce the physical strain on caregivers by eliminating the need for manual lifting․ These lifts operate using hydraulic or mechanical systems, allowing for smooth and secure transfers․ They enable caregivers to load and unload wheelchairs with minimal effort, preventing back injuries and fatigue․ Many users have reported increased independence and comfort, as caregivers are more willing to assist without the risk of physical discomfort․ This makes manual wheelchair lifts an essential tool for enhancing mobility while protecting the well-being of both users and caregivers․

Cost-Effective Solution for Wheelchair Transport

Manual wheelchair lifts offer a budget-friendly solution for transporting wheelchairs, eliminating the need for expensive electrical systems․ They are a low-cost option for individuals seeking to save space and money while ensuring reliable mobility․ Without the need for complex installations or high maintenance, these lifts provide long-term savings․ Their durability and ease of use make them a practical choice for both personal and professional use, offering excellent value for their price․ This makes manual wheelchair lifts an economical and efficient option for wheelchair transport needs․

Space-Saving Design for Vehicles

Manual wheelchair lifts are designed to be compact and lightweight, making them ideal for vehicles with limited space․ Many models fold up when not in use, allowing for maximum cargo space․ Their slim profiles ensure they don’t obstruct vehicle access, such as tailgates or trunks․ This space efficiency is particularly beneficial for smaller cars, SUVs, and vans․ By taking up minimal room, these lifts provide a practical solution for transporting wheelchairs without sacrificing vehicle utility․ Their portability and foldable designs make them a convenient choice for everyday use․

Ease of Use and Reliability

Manual wheelchair lifts are designed for straightforward operation, requiring minimal effort to load and unload wheelchairs․ Their intuitive mechanisms ensure smooth, secure transfers, reducing physical strain on caregivers․ Built with durable materials, these lifts are reliable and long-lasting, providing consistent performance․ Many models feature simple, mechanical systems with no complex electronics, making them easy to maintain and operate․ This reliability ensures users can depend on the lift for daily use, offering peace of mind and enhancing overall mobility․ Their ease of use and robust construction make them a practical choice for caregivers and wheelchair users alike․

Installation and Maintenance

Manual wheelchair lifts often require self-installation, with clear instructions provided․ Regular maintenance involves checking hardware and lubricating moving parts to ensure smooth, long-lasting operation and reliability․

Where to Mount the Lift

Manual wheelchair lifts can be mounted in various locations depending on the vehicle and user needs․ Common mounting options include the rear cargo area, side entry, or pickup truck beds․ For sedans, minivans, SUVs, and trucks, hitch-mounted lifts are popular due to their compatibility with class I, II, or III hitches․ Inside mounting is also possible for vehicles with sufficient space, ensuring the lift does not obstruct other functions․ The choice of mounting location should consider ease of access, vehicle type, and available space to ensure optimal functionality and convenience for the user․

Installation Steps for Manual Wheelchair Lifts

Installing a manual wheelchair lift typically begins with selecting a suitable mounting location, such as a vehicle’s hitch or cargo area․ Ensure the lift is compatible with your vehicle’s class of hitch․ Attach the lift to the hitch or designated area using the provided hardware․ Secure the lift firmly to prevent movement during use․ Test the lift by loading and unloading the wheelchair to ensure proper function․ Follow the manufacturer’s instructions for specific installation requirements․ If unsure, consult a professional for assistance to guarantee safety and reliability․

Maintenance Tips for Longevity

Regular maintenance is crucial to ensure the longevity and reliability of manual wheelchair lifts․ Lubricate moving parts to prevent rust and friction․ Clean the lift thoroughly, removing dirt and debris that could interfere with its operation․ Inspect straps, hinges, and bolts for wear and tear, replacing them as needed․ Store the lift in a dry, protected area when not in use to avoid exposure to harsh weather․ Follow the manufacturer’s maintenance schedule and guidelines for optimal performance․ Addressing issues promptly helps prevent breakdowns and ensures the lift remains safe and functional for years to come․

Safety Considerations

Manual wheelchair lifts include safety features like secure straps and weight limits to ensure safe transfers, while proper usage and adherence to guidelines prevent accidents and injuries․

Safety Features of Manual Wheelchair Lifts

Manual wheelchair lifts are equipped with secure straps, stable platforms, and weight capacity limits to ensure safe transfers․ They are designed to prevent accidents and injuries, offering reliable support for both users and caregivers․ These lifts often include adjustable hold-down arms and reinforced materials to maintain stability during operation․ Proper installation and adherence to weight guidelines further enhance safety, making manual lifts a secure solution for wheelchair transportation․ Regular maintenance is recommended to uphold their safety features and ensure long-term reliability․

Guidelines for Safe Usage

Always follow manufacturer instructions for proper operation and weight limits․ Ensure the lift is securely installed and regularly inspected for wear․ Load the wheelchair correctly, using straps to stabilize it․ Avoid exceeding the weight capacity to prevent accidents․ Operate the lift on level surfaces and ensure the area is clear of obstacles․ Caregivers should maintain control during transfers, and users should remain seated and secure․ Regular maintenance, such as checking straps and hinges, is essential for safe and reliable performance․ Adhere to these guidelines to minimize risks and ensure smooth operation․

Choosing the Right Manual Wheelchair Lift

Selecting the right manual wheelchair lift involves considering weight capacity, vehicle compatibility, and budget․ Research brands and features to ensure the lift meets your specific mobility needs effectively․

Factors to Consider: Weight Capacity, Vehicle Compatibility, and Budget

When selecting a manual wheelchair lift, consider the weight capacity to ensure it can handle the wheelchair’s load․ Check vehicle compatibility to match your car, truck, or SUV’s specifications․ Budget is crucial, as lifts vary in price from affordable options to more advanced models․ Assessing these factors ensures the lift meets your mobility needs without compromising safety or functionality․ Proper alignment of these elements guarantees a practical and reliable solution for transporting wheelchairs efficiently․

Top Brands and Their Features

Leading brands like Harmar and SwiftLift offer high-quality manual wheelchair lifts․ Harmar’s Tilt-N-Tote is known for its durability and easy operation, while SwiftLift emphasizes portability and space efficiency․ Universal lifts are versatile, fitting various vehicles and wheelchair types․ These brands prioritize safety, ease of use, and reliability, ensuring a seamless experience for users․ Their innovative designs cater to different needs, making them top choices for both personal and professional use, with features like adjustable arms and compact designs to enhance functionality and convenience․

Customer Reviews and Testimonials

Customers praise manual wheelchair lifts for their ease of use, reliability, and space-saving design․ Many highlight how these lifts have improved mobility and reduced physical strain, offering a life-changing solution for users and caregivers alike․

Real-Life Experiences with Manual Wheelchair Lifts

Users share positive experiences with manual wheelchair lifts, highlighting their ease of use and reliability․ One customer mentioned using the Tilt-N-Tote lift for a family road trip, praising its space-saving design and affordability․ Another user noted how the lift reduced their husband’s back pain from manually lifting wheelchairs, making outings more frequent and enjoyable․ These testimonials underscore the practical benefits and emotional impact of manual wheelchair lifts in enhancing mobility and independence for both users and caregivers․

Customer Satisfaction and Feedback

Customers consistently praise manual wheelchair lifts for their reliability and ease of use․ Many highlight how these lifts have improved their quality of life, offering independence and convenience․ Feedback often mentions the space-saving design and affordability as key advantages․ Users appreciate the reduction in physical strain for caregivers, enabling more frequent outings․ Testimonials also emphasize the durability and straightforward installation process․ Overall, manual wheelchair lifts receive high satisfaction ratings for their practicality and ability to enhance mobility without compromising on performance or budget․

Applications of Manual Wheelchair Lifts

Manual wheelchair lifts are widely used in private vehicles, healthcare facilities, and public transport, offering efficient, safe, and reliable transportation solutions for users across various settings daily․

Use in Private Vehicles

Manual wheelchair lifts are ideal for private vehicles, enabling easy transportation of wheelchairs without occupying excessive space․ They are lightweight, portable, and simple to install, making them perfect for cars, SUVs, and vans․ These lifts eliminate the need for physical strain, allowing users to load and unload wheelchairs effortlessly․ Models like the Tilt-N-Tote and SwiftLift are popular choices, offering durability and ease of use․ They are cost-effective solutions for families or individuals needing reliable wheelchair transport, ensuring independence and convenience for daily commutes or road trips․

Use in Healthcare Facilities

Manual wheelchair lifts are essential in healthcare settings, providing efficient patient transfers between beds, wheelchairs, and other surfaces․ They are cost-effective, reliable, and easy to operate, reducing caregiver strain․ Hydraulic or mechanical systems ensure smooth, secure transfers, while their compact design saves space in clinics and hospitals․ These lifts are ideal for rehabilitation centers, enabling therapists to assist patients safely․ Their durability and low maintenance make them a practical choice for busy healthcare environments, ensuring patient comfort and staff efficiency without the need for electricity․

Use in Public Transport

Manual wheelchair lifts are widely used in public transport to enhance accessibility for passengers with mobility challenges․ They are installed in buses, trains, and ferries to facilitate safe and efficient boarding and alighting․ These lifts are designed to be lightweight and compact, ensuring they do not obstruct passenger flow․ Their ease of operation and minimal maintenance make them ideal for high-traffic environments․ By integrating manual wheelchair lifts, public transport systems can comply with accessibility standards, providing equal mobility opportunities for all users while maintaining operational efficiency and passenger comfort․

Comparison with Other Types of Lifts

Manual wheelchair lifts are lightweight, portable, and cost-effective compared to power lifts, offering reliability without electricity, though they may require more physical effort for operation․

Manual vs․ Power Wheelchair Lifts

Manual wheelchair lifts are cost-effective, lightweight, and portable, ideal for those seeking simplicity without electricity․ They require physical effort but are affordable and easy to maintain․ Power lifts, while more convenient, are heavier, pricier, and depend on vehicle power․ Manual lifts suit casual users, while power lifts are better for frequent or heavy use․ Both ensure safe transport, but the choice depends on budget, strength, and lifestyle needs, making manual lifts a practical option for many wheelchair users seeking reliability without added complexity or expense․

Pros and Cons of Manual Lifts

Manual lifts are cost-effective, lightweight, and portable, making them ideal for casual use․ They require no electricity, reducing dependency on vehicle power, and are easy to install and maintain․ However, they demand physical effort, which can strain caregivers, and may not suit heavy wheelchairs or frequent transfers․ While they offer simplicity and affordability, their limitations in handling larger loads or providing convenience for daily use make them less versatile than power lifts․ Despite this, manual lifts remain a practical choice for those prioritizing budget and portability over ease of operation․

Future Trends in Manual Wheelchair Lift Technology

Advancements in design and functionality are expected, with integration of smart technology for enhanced ease of use and improved durability, ensuring better accessibility and user experience․

Advancements in Design and Functionality

Manual wheelchair lifts are evolving with innovative designs, such as lightweight materials and ergonomic features, enhancing portability and ease of use․ Future models may integrate smart technology, like remote controls or sensors, to streamline operation․ These advancements aim to improve user experience while maintaining affordability and reliability․ Manufacturers are also focusing on universal compatibility, ensuring lifts can accommodate various wheelchair types and vehicle models․ Such innovations are expected to reduce physical strain further and increase independence for users, making manual wheelchair lifts more accessible and efficient than ever․

Integration with Smart Technology

Manual wheelchair lifts are increasingly integrating smart technology to enhance functionality․ Features like remote controls, sensors, and app connectivity allow users to operate lifts seamlessly․ Smart systems can detect weight limits, ensuring safe loading, and provide real-time maintenance alerts․ This integration improves ease of use, safety, and efficiency․ Future models may include voice command capabilities or automated folding mechanisms․ Such advancements aim to create a more user-friendly experience while maintaining the reliability and affordability that manual lifts are known for, catering to a wider range of needs and preferences․

Troubleshooting Common Issues

Common issues with manual wheelchair lifts include mechanical malfunctions, weight overload, and improper installation․ Regular maintenance and adherence to usage guidelines can prevent most problems, ensuring reliability and safety․

Common Problems and Solutions

Common issues with manual wheelchair lifts include mechanical malfunctions, weight overload, and improper installation․ Solutions involve regular maintenance, ensuring weight limits are not exceeded, and following installation guidelines․ Proper lubrication of moving parts and tightening loose components can prevent mechanical failures․ Additionally, users should always follow the manufacturer’s instructions for operation and loading to avoid damage․ Addressing these issues promptly ensures the lift’s longevity and reliability, providing safe and efficient wheelchair transportation for users․

When to Seek Professional Help

If you encounter complex mechanical issues, improper installation, or safety concerns with your manual wheelchair lift, it’s essential to seek professional assistance․ Experts can address advanced repairs, ensure proper installation, and guarantee compliance with safety standards․ Additionally, if you’re unsure about maintenance or troubleshooting, consulting a professional can prevent further damage and ensure the lift operates efficiently․ Their expertise will provide peace of mind and maintain the reliability of your manual wheelchair lift for years to come․

Manual wheelchair lifts offer a practical, cost-effective solution for enhancing mobility and accessibility, providing reliable support for users and caregivers while ensuring safe and efficient transportation of wheelchairs․

Manual wheelchair lifts are practical solutions for transporting wheelchairs, offering cost-effectiveness, ease of use, and reduced physical strain for caregivers․ They are compatible with various vehicles, including cars, trucks, and SUVs, and are ideal for both private and public use․ Key features include portability, durability, and space-saving designs, with options like the Tilt-N-Tote and SwiftLift models․ These lifts ensure safe and efficient transfers, making them essential for enhancing mobility and accessibility․ Their reliability and low maintenance requirements make them a preferred choice for users seeking hassle-free transportation of manual wheelchairs․

Final Thoughts on Manual Wheelchair Lifts

Manual wheelchair lifts are indispensable for enhancing mobility and accessibility, offering a practical, cost-effective solution for wheelchair transportation․ Their ease of use, durability, and space-saving designs make them ideal for various vehicles and settings․ By reducing physical strain on caregivers and providing reliable performance, these lifts improve overall quality of life for users․ With advancements in design and functionality, manual wheelchair lifts continue to be a vital tool for promoting independence and convenience, ensuring safe and efficient transfers for years to come․

wagner control pro 130 manual

Welcome to the Wagner Control Pro 130 manual, your comprehensive guide to mastering this powerful paint sprayer. Designed for both professionals and DIYers, this manual provides detailed instructions for setup, operation, and maintenance, ensuring optimal performance and safety. Available in multiple languages, it offers troubleshooting tips and best practices to help you achieve professional-grade results effortlessly.

Overview of the Wagner Control Pro 130 Paint Sprayer

The Wagner Control Pro 130 is a high-performance paint sprayer designed for large interior and exterior projects. It features a 1.5-gallon tank and a 25-foot hose, offering flexibility and mobility, even when working at heights. Equipped with the HEA (High Efficiency Airless) spray gun and 515 HEA spray tip, it delivers precise control and consistent results. This sprayer is compatible with a wide range of unthinned paints and stains, making it ideal for professional-grade applications. Its user-friendly design ensures quick setup and operation, while the durable construction withstands demanding projects. Perfect for homeowners and professionals seeking efficiency and reliability in painting tasks.

Importance of Reading the Manual

Reading the Wagner Control Pro 130 manual is essential for safe and effective use of the paint sprayer. It provides detailed instructions for assembly, operation, and maintenance, ensuring you understand all features and functions. The manual includes safety guidelines, troubleshooting tips, and optimal usage practices to prevent accidents and maintain performance. By following the manual, you can avoid common mistakes, extend the product’s lifespan, and achieve professional-grade results. Available in English, Spanish, and French, the manual is a comprehensive resource for maximizing your painting experience. Take the time to review it thoroughly before starting your project.

Manual Availability in Multiple Languages

The Wagner Control Pro 130 manual is available in multiple languages, including English, Spanish, and French, ensuring accessibility for a diverse range of users. This comprehensive guide can be downloaded for free in PDF format, providing easy access to detailed instructions, troubleshooting tips, and safety guidelines. Whether you’re setting up, operating, or maintaining the sprayer, the manual offers clear, language-specific guidance. Its availability in multiple languages ensures that users worldwide can benefit from its expertise, making it a valuable resource for both professionals and DIY enthusiasts. This multilingual support underscores Wagner’s commitment to user convenience and global accessibility.

Key Features of the Wagner Control Pro 130

The Wagner Control Pro 130 features a 1.5-gallon tank, 25-foot hose, HEA spray gun, and 515 HEA spray tip, ideal for unthinned paints and stains, ensuring versatility and efficiency.

1.5 Gallon Tank and 25 Ft. Hose

The Wagner Control Pro 130 is equipped with a 1.5-gallon tank and a 25-foot hose, offering exceptional flexibility for large projects. The tank’s capacity allows for extended painting sessions without frequent refills, while the long hose enables easy movement around obstacles, including up ladders. This setup is ideal for covering extensive areas efficiently, making it suitable for both interior and exterior tasks. The hose’s durability and flexibility ensure consistent performance, while the tank’s design promotes easy filling and cleaning. Together, these features enhance productivity and convenience, making the Control Pro 130 a reliable choice for professionals and DIY enthusiasts alike.

HEA Spray Gun and 515 HEA Spray Tip

The Wagner Control Pro 130 features the High Efficiency Airless (HEA) spray gun and a 515 HEA spray tip, designed for superior performance and precision. The HEA technology minimizes overspray, ensuring a smooth, even finish with less material waste. The 515 tip is ideal for latex paints, offering a balanced spray pattern that adapts to various project needs. Together, these components deliver consistent results, making them perfect for both small and large-scale applications. The spray gun’s ergonomic design enhances comfort during extended use, while the tip’s durability ensures long-lasting performance. This combination is a key factor in the sprayer’s ability to handle unthinned paints and stains efficiently.

Suitability for Unthinned Paints and Stains

The Wagner Control Pro 130 is specifically designed to handle a wide range of unthinned paints and stains, making it a versatile tool for various projects. Its advanced HEA technology ensures smooth, consistent coverage without the need for thinning materials, saving time and effort. Whether working with latex, acrylics, or oil-based products, the sprayer delivers professional-grade results. This feature is particularly beneficial for large-scale interior and exterior jobs, where efficiency and durability are essential. The ability to use unthinned materials also maintains the integrity of the paint’s finish, ensuring optimal results for both DIY enthusiasts and professionals.

Assembly and Setup

The Wagner Control Pro 130 requires careful assembly and setup to ensure proper function. Begin by attaching the spray hose to the tank and gun, then connect the HEA tip. Follow the manual’s step-by-step guide to avoid errors and ensure all components are securely fitted before use.

Step-by-Step Assembly Instructions

Begin by unboxing and preparing all components, including the tank, spray hose, HEA spray gun, and 515 HEA tip. Attach the spray hose to the tank port, ensuring a secure connection. Next, connect the other end of the hose to the HEA spray gun. Install the 515 HEA tip by aligning it with the gun’s tip holder and twisting until it clicks. Ensure all connections are tight to prevent leaks. Do not plug in the power cord until assembly is complete. Refer to the manual for diagrams and detailed instructions. Proper assembly is crucial for safe and efficient operation of the Wagner Control Pro 130.

Parts and Components Overview

The Wagner Control Pro 130 includes a 1.5-gallon tank, 25-foot spray hose, HEA spray gun, and 515 HEA spray tip. Additional components include the tank spray hose port, power cord, and spray guard. The HEA spray gun and tip are designed for high-efficiency performance with unthinned paints and stains. The 25-foot hose provides flexibility for large projects, allowing easy movement around obstacles. Each part is engineered for durability and ease of use, ensuring optimal performance. Familiarize yourself with these components to understand their functions and proper assembly. Refer to the manual for detailed diagrams and descriptions to ensure correct identification and usage of each part.

Operating the Wagner Control Pro 130

Operate the Wagner Control Pro 130 with ease using its 25-foot hose and HEA spray gun. Ideal for large projects, it delivers smooth, consistent results with minimal effort.

Using the Spray Hose and Gun

The Wagner Control Pro 130 features a 25-foot spray hose and an HEA spray gun, designed for flexibility and precision. The hose allows easy movement around large projects, even up ladders, while the HEA gun ensures minimal overspray and a smooth finish. To use, connect the hose to the tank and gun, ensuring all connections are secure. Hold the gun at a 90-degree angle to the surface and maintain consistent pressure for even coverage. The spray tip can be rotated to suit your spraying motion, enhancing control and efficiency. Regularly clean the gun and tip to prevent clogs and maintain optimal performance.

Adjusting the Spray Tip for Optimal Results

Adjusting the spray tip on the Wagner Control Pro 130 is crucial for achieving professional-grade finishes. The HEA spray tip is designed to minimize overspray and deliver a smooth, even coat. To optimize results, ensure the tip is properly aligned with the spray gun and the surface being painted. Rotate the spray guard to match your spraying motion, improving control and reducing fatigue. For different materials, refer to the tip recommendation chart to select the correct size and type. Regularly clean the tip to prevent clogs and maintain consistent performance. Proper adjustment ensures efficient paint flow and superior coverage, making your projects look their best.

Maintenance and Cleaning

Regular maintenance ensures optimal performance. Clean the spray tip and gun after each use to prevent clogs. Store the unit in a dry, protected area to maintain longevity.

Proper Cleaning Techniques

Regular cleaning is essential for maintaining the Wagner Control Pro 130’s performance. After each use, flush the system with a suitable solvent to remove paint residue. Use a soft brush to clean the spray tip and gun, ensuring no dried paint remains. For stubborn clogs, soak the tip in paint thinner or water, depending on the material used. Store the sprayer in a dry, protected area to prevent rust and damage. Always refer to the manual for specific cleaning solutions tailored to the type of paint or stain used. Proper maintenance ensures longevity and optimal spraying results.

Storage Recommendations

Proper storage of the Wagner Control Pro 130 ensures its longevity and performance. After cleaning, store the sprayer in a dry, protected area away from direct sunlight and moisture. Use the original packaging or a sturdy cover to shield it from dust and damage. Keep the tank empty and the hose detached to prevent residual paint from hardening. Store the spray gun and tip in a separate, clean container to avoid contamination. Avoid extreme temperatures and humidity, as they can affect the equipment’s functionality. Regularly inspect stored parts for signs of wear or corrosion. Proper storage maintains the sprayer’s efficiency and readiness for future projects.

Troubleshooting Common Issues

Address common issues like clogged spray tips or uneven paint flow by referencing the manual’s detailed troubleshooting section. Solutions include cleaning tips, checking for blockages, and adjusting settings for optimal performance.

Clogged Spray Tip Solutions

A clogged spray tip is a common issue that can disrupt your painting workflow. To resolve this, turn off the sprayer and relieve pressure in the system. Remove the spray tip and soak it in a solvent recommended by Wagner, such as mineral spirits, to dissolve dried paint. Use a soft brush to gently scrub away debris. For stubborn clogs, replace the tip with a new one if cleaning is ineffective. Regular maintenance, like cleaning the tip after each use, can prevent clogs. Refer to the manual for detailed instructions and troubleshooting guides to ensure optimal performance and extend the lifespan of your sprayer.

Other Common Problems and Solutions

Beyond clogged tips, users may encounter low pressure, uneven spraying, or motor issues. For low pressure, check the spray tip size and ensure the hose isn’t kinked. Uneven spraying can result from improper tip alignment or worn-out tips; adjust or replace the tip as needed. If the motor overheats, allow it to cool down and ensure you’re using compatible, unthinned paints. Regularly cleaning the pump and hose can prevent such issues. For persistent problems, consult the manual or contact Wagner’s customer support for assistance. Proper maintenance and adherence to guidelines will help maintain optimal performance and extend the sprayer’s lifespan.

Safety Guidelines

Always wear protective gear, including gloves and eyewear, when operating the Wagner Control Pro 130. Ensure good ventilation and avoid spraying near open flames or sparks. Keep children and pets away during operation; Follow all safety precautions outlined in the manual to prevent accidents and ensure safe usage of the sprayer.

Precautions During Operation

Always wear protective gear, including gloves and eyewear, when operating the Wagner Control Pro 130. Ensure the area is well-ventilated to avoid inhaling paint fumes. Keep the spray gun away from open flames, sparks, or hot surfaces. Never point the spray gun at people or animals. Maintain a safe distance from flammable materials. Avoid overreaching or using unstable ladders, as this could lead to accidents. Keep children and pets away from the work area. Regularly inspect the hose and connections for damage. If you notice any issues, stop operation immediately. Follow all safety guidelines in the manual to ensure a safe and efficient painting experience.

Emergency Procedures

In case of an emergency, immediately turn off the Wagner Control Pro 130 and disconnect the power source. If a paint spill occurs, contain it quickly to prevent slipping hazards. Evacuate the area if fumes become overwhelming. For skin or eye exposure, flush with water and seek medical attention if irritation persists. If the spray gun or hose is damaged, stop use and contact customer support. Keep a fire extinguisher nearby, as paint fumes can be flammable. Always follow proper shutdown procedures to release pressure in the system. Refer to the manual for specific guidance on handling emergencies safely and effectively.

Accessories and Compatible Products

The Wagner Control Pro 130 supports various accessories, including the HEA spray gun and 515 HEA spray tip, designed for optimal performance with unthinned paints and stains.

Recommended Accessories

To enhance your painting experience with the Wagner Control Pro 130, consider these recommended accessories. The HEA spray gun and 515 HEA spray tip are essential for optimal performance, especially with unthinned paints and stains. Additional tips, such as the 515 HEA, are available for different spray patterns and material viscosities. A 25-foot airless spray hose extension can provide greater flexibility for large projects. Cleaning kits, including a spray tip cleaning brush, are crucial for maintaining the sprayer’s efficiency. Extra paint filters and a storage case for the spray gun and tips are also highly recommended to keep your equipment organized and protected. These accessories ensure longevity and peak performance of your Wagner Control Pro 130.

Compatible Paints and Materials

The Wagner Control Pro 130 is designed to work seamlessly with a wide range of unthinned paints and stains, including latex, acrylic, and oil-based coatings. Its HEA technology ensures efficient spraying of thick materials without the need for thinning, making it ideal for both interior and exterior projects. The sprayer is compatible with standard paint materials, including primers, varnishes, and epoxy coatings. For best results, use high-quality paints recommended for airless sprayers. Always refer to the manual for specific material compatibility and viscosity guidelines to ensure optimal performance and avoid clogging. This versatility makes the Control Pro 130 a reliable choice for various painting tasks.

Warranty and Support

The Wagner Control Pro 130 is backed by a comprehensive warranty, ensuring protection for your investment. Dedicated customer support is available for troubleshooting, parts, and maintenance guidance, providing peace of mind and assistance whenever needed.

Warranty Information

The Wagner Control Pro 130 is supported by a robust warranty program, ensuring your investment is protected. The warranty covers defects in materials and workmanship for a specified period, providing peace of mind. Detailed terms and conditions, including warranty duration and coverage specifics, are outlined in the manual. Additionally, Wagner offers dedicated customer support to address any warranty-related inquiries or claims. This comprehensive coverage ensures that your paint sprayer operates efficiently, with support available to resolve any issues promptly. Refer to the manual for full warranty details and to understand the protections available for your device.

Customer Support Options

Wagner offers comprehensive customer support to ensure a seamless experience with the Control Pro 130. Online resources include downloadable manuals, troubleshooting guides, and FAQs. For direct assistance, customers can contact Wagner’s support team via phone, email, or live chat. Additionally, Wagner’s website provides access to how-to videos and material compatibility charts. For repairs or maintenance, authorized service centers are available to assist. The support team is dedicated to resolving issues promptly, ensuring minimal downtime. Whether you need technical guidance or parts replacement, Wagner’s customer support options are designed to keep your projects moving forward efficiently.

The Wagner Control Pro 130 is a versatile and efficient tool designed for professional results. Refer to this manual for optimal performance and troubleshooting tips.

Final Thoughts on the Wagner Control Pro 130

The Wagner Control Pro 130 is a powerful and versatile paint sprayer designed for both professionals and DIY enthusiasts. Its 1.5-gallon tank and 25-foot hose provide flexibility for large projects, while the HEA spray gun ensures efficient painting with minimal waste. Suitable for unthinned paints and stains, it delivers professional-grade results with ease. Regular maintenance and proper cleaning are essential to extend its lifespan. By following the manual’s guidelines, users can optimize performance and troubleshoot common issues effectively. Whether for interior or exterior projects, the Control Pro 130 is a reliable tool for achieving smooth, even finishes every time.

Encouragement to Use the Manual Effectively

Maximize your experience with the Wagner Control Pro 130 by thoroughly utilizing its manual. This comprehensive guide provides step-by-step instructions, troubleshooting tips, and maintenance advice to ensure optimal performance. By following the manual, you can avoid common mistakes, achieve professional-grade results, and extend the lifespan of your sprayer. Whether you’re a DIY enthusiast or a professional, the manual offers valuable insights to enhance your painting projects. Refer to it regularly for setup, operation, and maintenance tips, ensuring safety and efficiency. Make the most of your Wagner Control Pro 130 by embracing the manual as your go-to resource for success;

pit boss manual pdf free download

Welcome to the Pit Boss Manual, your ultimate guide to mastering pellet grilling and smoking. This comprehensive resource offers detailed assembly instructions, operating tips, and troubleshooting solutions to ensure optimal performance. Discover safety guidelines, maintenance advice, and expert techniques to enhance your grilling experience. Download the PDF now for instant access to everything you need to get the most out of your Pit Boss Grill.

1.1 Overview of the Pit Boss Grill and Smoker

The Pit Boss Grill and Smoker is a versatile cooking solution designed for both grilling and smoking. Known for its durability and advanced features, it combines the convenience of a pellet grill with the rich flavor of traditional smoking. The grill features a digital control board for precise temperature management and a robust construction that ensures long-lasting performance. Whether you’re a novice or an experienced griller, the Pit Boss offers a user-friendly experience. Its ability to handle a wide range of cooking techniques makes it a popular choice for outdoor enthusiasts. Download the manual to explore its full potential.

1.2 Importance of the Pit Boss Manual

The Pit Boss Manual is essential for maximizing the performance and longevity of your grill. It provides detailed assembly instructions, operating guidelines, and troubleshooting tips to ensure a seamless grilling experience. The manual also includes safety precautions and maintenance advice to prevent common issues. By following the guide, users can avoid costly mistakes and optimize their cooking results. Whether you’re assembling, operating, or maintaining your Pit Boss Grill, the manual serves as an invaluable resource. Download the PDF to unlock expert tips and ensure your grill operates at its best for years to come.

1.3 Benefits of Downloading the Pit Boss Manual PDF

Downloading the Pit Boss Manual PDF offers unparalleled convenience and accessibility. It provides instant access to detailed assembly instructions, operating guidelines, and troubleshooting tips. The digital format allows for easy navigation and quick reference, ensuring you can address any issue swiftly. Additionally, the PDF includes expert grilling techniques and maintenance advice to enhance your cooking experience. By downloading the manual, you gain a comprehensive resource that helps you maximize your grill’s potential, avoid common mistakes, and enjoy optimal performance for years to come.

Assembly and Operation Instructions

This section provides a detailed guide to assembling and operating your Pit Boss Grill. It includes lists of required tools, step-by-step assembly instructions, and essential operation tips.

2.1 Tools and Materials Required for Assembly

Assembling your Pit Boss Grill requires specific tools and materials to ensure a smooth process. Essential tools include a screwdriver, wrench, and pliers, while materials like screws, bolts, and washers are provided. Additional items such as a power source, wood pellets, and protective gloves are recommended. Refer to the manual for a detailed list to avoid missing any components. Proper preparation ensures a hassle-free assembly experience and optimal grill performance. Make sure all parts are accounted for before starting the assembly process.

2.2 Step-by-Step Assembly Guide for Pit Boss Grills

Begin by unpacking and organizing all components. Follow the manual’s visual guide to attach legs, wheels, and handles securely. Next, connect the hopper to the main grill unit, ensuring proper alignment. Install the heat deflector and flame broiler, then connect electrical components like the control panel. Tighten all bolts and screws firmly. Finally, test the ignition and auger system to ensure everything functions correctly. Refer to the PDF manual for detailed diagrams and step-by-step instructions to complete the assembly efficiently and safely.

2.3 Operating Instructions for Pit Boss Pellet Grills

Start by powering on the grill and setting your desired temperature using the control panel. Allow the grill to preheat for 10-15 minutes. Load the hopper with recommended wood pellets, ensuring proper flow; Select smoke or grill mode based on your preference. Adjust temperature settings as needed and monitor the internal temperature gauge. Place food on the grates, leaving space for even cooking. Use the digital controls to maintain consistent heat. After cooking, turn off the grill and let it cool before cleaning. Refer to the manual for detailed operating tips and safety precautions.

Safety Tips and Precautions

Always use natural BBQ wood pellets and ensure proper ventilation. Keep the grill clean and avoid modifications. Monitor temperature and follow manual guidelines for safe operation.

3.1 General Safety Guidelines for Pit Boss Grills

Always read the manual before use. Ensure proper ventilation and keep the grill away from flammable materials. Use only natural BBQ wood pellets designed for pellet grills. Regularly clean and maintain the grill to prevent grease buildup. Never leave the grill unattended while in operation. Monitor temperature settings to avoid overheating. Keep children and pets away from the grill. Avoid modifications to the grill, as this can void the warranty and create safety hazards. Follow all guidelines in the Pit Boss manual to ensure safe and enjoyable grilling experiences.

3.2 Proper Use of Wood Pellets in Pit Boss Grills

Use only 100% natural BBQ wood pellets specifically designed for pellet grills. Avoid using treated or softwoods, as they can release harmful chemicals. Store pellets in a dry, cool place to maintain quality. Ensure the hopper is filled correctly, and always clean out old pellets before adding new ones. Proper pellet usage enhances flavor and ensures efficient burning. Follow the manual’s guidelines for pellet storage and handling to optimize performance and safety. Experiment with different wood pellet flavors to achieve unique and delicious results for your grilling and smoking needs.

3.3 Maintenance and Cleaning for Safe Operation

Regular cleaning and maintenance are crucial for safe and efficient operation of your Pit Boss Grill. Clean the grates, burn pot, and grease traps after each use to prevent residue buildup. Inspect and clear the auger and fire pot regularly to ensure proper pellet flow. Always unplug the grill before cleaning and avoid using abrasive materials that could damage surfaces. Proper maintenance prevents rust, reduces fire risks, and maintains optimal performance. Follow the manual’s cleaning guidelines to extend the life of your grill and ensure a safe grilling experience. Regular upkeep is key to achieving consistent results and longevity.

Troubleshooting Common Issues

Identify and resolve common Pit Boss Grill issues like auger jams, ignition failures, and temperature fluctuations. Refer to the manual for step-by-step solutions and expert advice.

4.1 Common Problems with Pit Boss Grills

Pit Boss grills may encounter issues like auger jams, ignition failures, and temperature fluctuations. These problems often arise from improper assembly, pellet quality, or lack of maintenance. Regular cleaning of the auger and burn pot can prevent jams. Ignition issues may stem from faulty wiring or a clogged fire pot. Temperature fluctuations can be addressed by ensuring proper airflow and using high-quality pellets. Refer to the manual for troubleshooting steps to resolve these common problems and maintain optimal grill performance.

4.2 Solutions for Auger and Ignition Issues

To address auger jams, clean the auger and ensure pellets are dry. For ignition problems, check the fire pot for blockages and verify proper power supply. If issues persist, perform a manual start-up by lighting the pellets with a torch. Regularly inspect and clean the auger motor and ignition components. Ensure the grill is on a level surface and pellets are of high quality. Refer to the Pit Boss manual for detailed troubleshooting steps to resolve these issues effectively and maintain smooth operation.

4.3 Troubleshooting Temperature Control Problems

Temperature fluctuations can often be resolved by ensuring the grill is clean and free of debris. Check the RTD sensor for accuracy and clean it if necessary. Verify that the pellet hopper is filled with high-quality pellets, as poor pellet quality can disrupt temperature control. Ensure proper airflow by keeping the lid closed during cooking and checking for blockages in the chimney or vents. If issues persist, reset the grill to factory settings or consult the Pit Boss manual for advanced troubleshooting steps to restore precise temperature management.

Pellet Management and Usage

Proper pellet management ensures optimal grilling performance. Use only high-quality, all-natural wood pellets designed for pellet grills. Store pellets in a dry, cool place to maintain flavor and burn efficiency. Regularly clean the hopper and auger to prevent jams. The priming function helps initialize pellet flow, ensuring smooth startups. Always follow the manual’s guidelines for pellet usage to achieve consistent results and enhance your grilling experience.

5.1 Choosing the Right Wood Pellets for Your Grill

Selecting the right wood pellets is crucial for optimal grilling performance. Use only 100% natural, food-grade pellets specifically designed for pellet grills. Avoid additives or fillers, as they can compromise flavor and grill efficiency. Hardwood pellets like hickory, oak, and maple are popular for their rich, smoky flavors. Softwoods, however, are not recommended due to resin content. Store pellets in a dry, cool place to preserve quality. Experiment with different wood types to find the perfect flavor profile for your dishes. Proper pellet selection enhances both taste and grill longevity.

5.2 Understanding the Priming Function on Pit Boss Grills

The Priming function on Pit Boss grills allows manual control of the auger speed, ensuring consistent pellet flow. This feature is essential for starting the grill, especially when cold, as it helps establish a steady flame. Proper priming prevents stalls and maintains optimal temperature. Regular use of this function ensures efficient pellet burning and even heat distribution. It also serves as a diagnostic tool to check auger performance. Mastering the priming process enhances your grilling experience and guarantees reliable operation of your Pit Boss grill.

5.3 Tips for Efficient Pellet Burning

For efficient pellet burning, use only all-natural BBQ wood pellets designed for pellet grills; Ensure pellets are dry and stored properly to maintain quality. Regularly clean the grill, including the burn pot and auger, to prevent blockages. Proper priming of the auger before cooking ensures consistent pellet flow. Monitor pellet consumption and adjust cooking times based on pellet quality. Always follow the manufacturer’s guidelines for pellet usage and maintenance to optimize performance and flavor. These practices ensure your Pit Boss grill operates efficiently and delivers exceptional results every time.

Advanced Grilling Techniques

Master advanced grilling techniques with Pit Boss, focusing on smoke and temperature control. Explore expert tips for achieving perfect flavors and discovering new cooking possibilities.

6.1 Mastering Smoke and Temperature Control

Mastering smoke and temperature control is key to achieving perfect grilling results. The Pit Boss Manual provides detailed insights into optimizing your grill’s performance. Learn how to use the digital control system for precise temperature management and understand the role of wood pellets in generating consistent smoke. Discover tips for maintaining steady heat during long cooks and how to adjust settings for different types of meat. Proper pellet management and regular cleaning ensure efficient smoke production. Experiment with various pellet flavors to enhance your dishes and explore advanced techniques for smoke infusion.

6.2 Advanced Cooking Methods with Pit Boss Grills

Take your grilling skills to the next level with advanced cooking methods tailored for Pit Boss Grills. Explore techniques like low-and-slow cooking, pellet blending, and precision temperature control. Learn how to achieve tender, flavorful meats by mastering the art of smoke layering. The Pit Boss Manual guides you through advanced pellet management, ensuring consistent results. Discover how to utilize the priming function for optimal startup and temperature stability. Experiment with indirect and direct heat cooking to diversify your culinary creations. Elevate your grilling game with these expert methods and unlock new possibilities for delicious, restaurant-quality dishes at home.

6.3 Expert Tips for Achieving Perfect Grilled Flavors

Elevate your grilling game with expert tips for achieving mouthwatering flavors. Start by selecting high-quality, all-natural wood pellets that complement your dish. Preheat your Pit Boss Grill to the ideal temperature for even cooking. Experiment with pellet blending to create unique smoke profiles. Don’t forget to clean and maintain your grill regularly to prevent residue from altering flavors. Master the balance between smoke and heat for a perfect sear. Finally, explore advanced pellet management techniques to ensure consistent fuel flow and optimal flavor distribution. These tips will help you craft unforgettable, professionally grilled meals every time.

Accessories and Replacement Parts

Enhance your Pit Boss Grill with genuine accessories and replacement parts. Explore options like grill covers, pellet storage solutions, and upgraded features to optimize performance and longevity. Visit the official Pit Boss website for authentic products designed to elevate your grilling experience. Ensure compatibility and quality by choosing verified accessories tailored for your specific model. Upgrading your grill has never been easier with a wide range of available enhancements. Maintain peak performance with durable, long-lasting replacement parts. Discover the perfect additions to take your grilling to the next level.

7.1 Recommended Accessories for Pit Boss Grills

Enhance your grilling experience with Pit Boss-approved accessories. Essential items include durable grill covers, pellet storage solutions, and flavor-enhancing wood pellet varieties. Upgrade your setup with a grill cart, front shelf, or smokebox for added convenience. Maintenance kits, including brushes and cleaning tools, help keep your grill in top condition. Explore Pit Boss’s official range of accessories to find the perfect additions for your model. These products are designed to optimize performance, durability, and versatility, ensuring your grill continues to deliver exceptional results for years to come. Elevate your grilling game with these must-have accessories.

7.2 Finding Replacement Parts for Your Pit Boss Grill

Locating replacement parts for your Pit Boss Grill is straightforward. Visit the official Pit Boss website or authorized retailers to find genuine components. Use your grill’s model number to search for specific parts, such as burn pots, heat deflectors, or igniter kits. The Pit Boss manual PDF also provides part diagrams and descriptions to help identify what you need. Ensure compatibility by purchasing only Pit Boss-approved parts to maintain safety and performance. For assistance, contact Pit Boss customer support or refer to their online resources for guidance.

7.3 Upgrading Your Pit Boss Grill with Additional Features

Enhance your grilling experience by upgrading your Pit Boss Grill with accessories like grill covers, pellet hoppers, or temperature control systems. The Pit Boss manual PDF highlights compatible upgrades to improve performance and versatility. Visit the official Pit Boss website or authorized retailers to explore options tailored to your model. Upgrades like smoke boxes or grill mats can also elevate your cooking capabilities. Always ensure compatibility and follow installation guidelines to maintain warranty and safety standards. Upgrading is a great way to customize your grill and achieve even better results.

Downloading the Pit Boss Manual

Access the Pit Boss Manual PDF for free, offering detailed guides, troubleshooting, and expert tips. Download instantly for easy-to-follow instructions to enhance your grilling experience.

8.1 How to Download the Pit Boss Manual PDF

To download the Pit Boss Manual PDF, visit the official Pit Boss website and navigate to the “Support” or “Manuals” section. Select your specific grill model from the list to access the corresponding PDF. Click the download link to save the manual to your device. Ensure you have a PDF reader installed to view the guide. This free resource provides detailed assembly instructions, operating tips, and troubleshooting solutions. Download now to unlock expert grilling techniques and maintain your grill’s optimal performance effortlessly.

8.2 Navigating the Pit Boss Official Website

Navigating the Pit Boss official website is straightforward and user-friendly. Start by visiting pitboss-grills.com and explore the menu options. Click on “Support” or “Manuals” to find downloadable resources. Use the search bar to quickly locate your specific grill model. Browse through product categories or visit the “Products” section for detailed information. The website also offers a “Where to Buy” feature and access to customer support. Easily find replacement parts, accessories, and guides to enhance your grilling experience. The site is designed to provide a seamless experience for Pit Boss users.

8.3 Benefits of Having a Digital Copy of the Manual

A digital copy of the Pit Boss manual offers unparalleled convenience. Access it instantly from any device, eliminating the need for physical storage. Easily search for specific topics using keywords, saving time and effort. The PDF format ensures clarity and readability on screens of all sizes. Plus, digital copies are environmentally friendly and can be shared or printed as needed. Having a digital manual ensures you always have critical information at your fingertips, making grilling and troubleshooting effortless and efficient.

Mastering your Pit Boss Grill is now within reach. With the manual, ensure safety, efficiency, and delicious results. Happy grilling and enjoy your culinary adventures!

9.1 Summary of Key Points

The Pit Boss Manual is a comprehensive guide designed to help users maximize their grilling experience. It covers assembly, operation, safety, and maintenance, ensuring safe and efficient use. The manual also provides troubleshooting tips and pellet management advice, while offering advanced techniques for mastering smoke and temperature control. By following the guidelines, users can achieve perfect grilled flavors and extend the lifespan of their grill. Downloading the PDF ensures easy access to expert tips and solutions, making it an essential resource for both beginners and experienced grillers.

9.2 Final Tips for Getting the Most Out of Your Pit Boss Grill

To maximize your Pit Boss Grill experience, always use high-quality, all-natural wood pellets for optimal flavor. Regularly clean and maintain your grill to prevent damage and ensure smooth operation. Experiment with different cooking techniques and pellet flavors to explore new recipes. Utilize the priming function to control the auger speed for consistent fuel flow. Keep the manual handy for troubleshooting and guidance. By following these tips, you’ll achieve professional-grade results and extend the lifespan of your grill, making every grilling session a success.

9.3 Encouragement to Explore More Grilling Possibilities

Embrace the endless possibilities your Pit Boss Grill offers! Experiment with new recipes, pellet flavors, and cooking techniques to elevate your grilling game. From smoking tender brisket to searing perfect steaks, your creativity is the limit. Don’t hesitate to try unconventional dishes like smoked desserts or roasted vegetables. Share your creations and learn from the grilling community to inspire fresh ideas. With the Pit Boss Manual as your guide, keep exploring, innovating, and enjoying the art of grilling. The journey to culinary mastery is just beginning!

kemper stage manual

Welcome to the Kemper Stage Manual‚ your comprehensive guide to mastering the Kemper Profiler Stage. This manual helps musicians and producers unlock the full potential of this powerful tool‚ designed to deliver exceptional tone and versatility for both live performances and studio recordings.

1.1 Overview of the Kemper Profiler Stage

The Kemper Profiler Stage is a revolutionary‚ all-in-one solution for guitarists‚ offering unparalleled versatility and tone-shaping capabilities. Designed for both studio and live performance‚ it combines cutting-edge profiling technology with a powerful‚ lightweight amplifier. The Profiler Stage captures the sonic DNA of any guitar amp‚ allowing you to carry a vast collection of legendary tones in a single unit. With its compact design and built-in power amp‚ it’s ideal for touring musicians. The Stage model supports external cabinets and is compatible with the Kemper Remote for seamless control. Its intuitive interface and robust feature set make it a favorite among professionals and hobbyists alike‚ ensuring exceptional sound quality and flexibility for any musical scenario.

1.2 Importance of the Manual for Musicians and Producers

The Kemper Stage Manual is an essential resource for musicians and producers seeking to maximize their creative potential. This guide provides detailed insights into the Profiler Stage’s features‚ ensuring users can navigate its advanced capabilities with confidence. From understanding profiling technology to optimizing signal flow‚ the manual offers step-by-step instructions to unlock the unit’s full potential. For producers‚ it simplifies studio integration‚ while musicians benefit from tips for live performances. The manual also covers troubleshooting and customization‚ making it indispensable for achieving professional-grade sound. Whether you’re a seasoned pro or a new user‚ this manual is your key to harnessing the Kemper Profiler Stage’s versatility and delivering exceptional results in any setting.

Understanding Kemper Profiler Technology

The Kemper Profiler Technology captures the sonic DNA of guitar amps‚ delivering dynamic‚ multi-dimensional sound reproduction. It goes beyond static models‚ offering precise control and authentic tone shaping.

2.1 What is Profiling and How Does it Work?

Profiling is Kemper’s proprietary technology that captures the sound and feel of a tube amplifier. By sending a signal through the amp‚ the Profiler creates a dynamic‚ multi-dimensional digital model. This process involves playing chords or notes to capture the amp’s behavior‚ dynamics‚ and tone. The resulting Profile preserves the amp’s sonic DNA‚ allowing for precise tone shaping. Unlike static models‚ Profiles adapt to your playing style‚ maintaining the amp’s natural response. This technology enables musicians to access legendary tones with unmatched accuracy and flexibility‚ making it a revolutionary tool for both studio and live performances.

2.2 Key Features of the Kemper Profiler Stage

The Kemper Profiler Stage is a powerful‚ all-in-one solution for guitarists and bassists. It features a built-in 600W power amp‚ enabling it to drive cabinets directly. The unit includes a vast array of effects‚ such as studio-grade reverbs‚ delays‚ and pitch shifters‚ with MIDI control for enhanced flexibility. The Stack section allows customization of amp‚ EQ‚ and cabinet settings‚ while the Profiler Remote offers seamless foot control. With its robust signal chain and intuitive interface‚ the Profiler Stage supports gapless rig transitions and spillover effects‚ ensuring smooth performances. Its versatility and tone-shaping capabilities make it ideal for both studio and live applications‚ catering to a wide range of musical styles and preferences.

Signal Chain and Signal Flow

The Kemper Profiler Stage processes signals through an analog input stage‚ A/D conversion‚ digital processing‚ and D/A conversion‚ ensuring high-quality sound reproduction at every stage.

3.1 Overview of the Signal Chain in the Kemper Stage

The Kemper Profiler Stage processes your guitar signal through a carefully designed signal chain. It begins with the analog input stage‚ which ensures optimal sound capture. Next‚ the A/D stage converts the analog signal to digital‚ maintaining high fidelity. The digital signal then passes through the Profiler’s processing engine‚ where amp profiling‚ effects‚ and EQ adjustments are applied. Finally‚ the D/A stage converts the processed signal back to analog for output. This seamless flow ensures that your tone remains pristine throughout. The Kemper’s signal chain is designed to be both flexible and intuitive‚ allowing for deep customization while maintaining professional-grade sound quality.

3.2 Input Stage‚ A/D Stage‚ and D/A Stage Explained

The Kemper Profiler Stage’s signal processing begins with the input stage‚ optimized for passive guitar pickups. This stage ensures a clean and clear signal path. The A/D (Analog-to-Digital) stage then converts this signal with high precision‚ capturing every nuance of your playing. The D/A (Digital-to-Analog) stage converts the processed signal back to analog‚ maintaining the highest sound quality. Each stage is engineered to preserve the integrity and dynamics of your guitar tone‚ ensuring that the final output is faithful to your original sound. This meticulous design allows the Kemper to deliver studio-grade audio performance‚ whether in the studio or on stage.

The Stack Section

The Stack Section is the heart of the Kemper Profiler Stage‚ allowing you to customize your tone with amp‚ EQ‚ and cabinet components. It enables precise tone shaping and flexibility to mix and match amps with cabinets‚ unlocking endless sonic possibilities for musicians and producers.

4.1 Amp‚ EQ‚ and Cabinet Components

The Kemper Profiler Stage’s Stack Section includes three core components: Amp‚ EQ‚ and Cabinet. The Amp section captures the essence of your guitar amplifier‚ preserving its unique tone and dynamics. The EQ offers a 4-band parametric equalizer‚ allowing precise tone shaping to suit your playing style. The Cabinet component provides authentic representations of speaker cabinets‚ ensuring a realistic and immersive sound. Together‚ these components enable you to mix and match amps with cabinets‚ creating a customized rig that meets your artistic vision. This flexibility allows for endless experimentation‚ making the Stack Section a powerful tool for achieving your desired sound.

4.2 Customizing Your Tone with the Stack Section

The Stack Section offers unparalleled flexibility for tailoring your sound. By adjusting the Amp‚ EQ‚ and Cabinet components‚ you can craft a tone that perfectly matches your musical style. The Amp section allows you to tweak gain‚ bass‚ middle‚ treble‚ and presence‚ while the EQ provides precise control over your frequency response. The Cabinet component lets you choose from a variety of speaker simulations‚ ensuring your sound is both authentic and versatile. With the ability to mix and match amps and cabinets‚ you can create unique combinations that go beyond traditional setups. This level of customization ensures your tone is dynamic‚ responsive‚ and truly personalized‚ making the Stack Section a cornerstone of your sound design process.

Effects Modules

The Kemper Stage offers a wide range of effects‚ from classic drive pedals and wahs to advanced pitch shifters and reverbs. With MIDI control and ducking parameters‚ these effects can be seamlessly integrated into your sound‚ providing endless tonal possibilities for both studio and live performances.

5.1 Types of Effects Available on the Kemper Stage

The Kemper Stage offers an extensive array of effects‚ catering to diverse musical needs. These include traditional drive pedals‚ wahs‚ and EQs‚ as well as advanced options like pitch shifters and frequency shifters. Studio-grade reverbs‚ delays‚ and modulation algorithms provide rich‚ immersive soundscapes. Many effects feature a built-in ducking parameter for dynamic control and can be MIDI-controlled for seamless integration into live performances. Additionally‚ the Kemper supports external hardware effects loops‚ allowing users to incorporate their favorite pedals or rack units into the signal chain. This versatility ensures that musicians and producers can craft unique tones tailored to their artistic vision‚ whether in the studio or on stage.

5.2 Assigning and Controlling Effects

The Kemper Stage allows for intuitive assignment and control of effects‚ enhancing your workflow. Using the Profiler Remote‚ you can easily assign effects to footswitches‚ enabling seamless live performance control. The remote features a large‚ sunlight-proof display and four pedal inputs‚ making it simple to navigate and customize your effects setup. Effects can also be controlled via MIDI‚ offering flexibility for complex rigs. The Profiler Remote’s double-click assignment feature streamlines the process of assigning effects‚ while its built-in looper provides additional creative possibilities. This robust control system ensures that you can access and manipulate your effects effortlessly‚ whether you’re fine-tuning tones in the studio or delivering dynamic performances on stage.

Hardware Setup and Connections

The Kemper Stage connects seamlessly with the Power Kabinet and Profiler Remote‚ featuring a built-in power amp for reliable hardware integration and optimal performance.

6.1 Connecting the Kemper Power Kabinet

Connecting the Kemper Power Kabinet is straightforward. Use the supplied cable to plug it into a power outlet‚ ensuring compatibility with voltages between 100-240V. This ensures reliable operation worldwide. The Power Kabinet is specifically designed to pair with the Kemper Stage‚ delivering high-quality sound reproduction. Proper connection guarantees optimal performance‚ whether for live gigs or studio sessions. Always follow the manual’s guidelines for a secure setup.

6.2 Setting Up the Profiler Remote

Setting up the Profiler Remote enhances your Kemper Stage experience. Connect it using the included single cable‚ ensuring seamless integration. The Remote features a sturdy design‚ sunlight-proof display‚ and four pedal inputs for easy control. Double-click assignment simplifies effect management‚ while the built-in looper adds versatility. This foot-controller is ergonomically designed for intuitive navigation during performances. It allows effortless switching between Rigs and Performances‚ making it indispensable for live shows. Proper setup ensures smooth operation‚ maximizing your creative potential with the Kemper Stage.

Using the Kemper Stage for Bass

The Kemper Stage is a top choice for bassists‚ offering dedicated features like a direct output‚ flexible splitting options‚ and a 4-band parametric EQ; Its Analog Octaver and Pitch Shifter are optimized for bass‚ ensuring precise tone shaping. With a built-in 600W power amp‚ it delivers ample power for live performances‚ making it ideal for handling demanding basslines and double-kick drum kits. The Profiler’s versatility and studio-grade sound quality make it a powerful tool for bassists seeking exceptional tone and control.

7.1 Dedicated Features for Bassists

The Kemper Profiler Stage offers tailored solutions for bassists‚ ensuring exceptional tone and versatility. It features a direct output for seamless DI recording and live sound integration. The 4-band parametric EQ provides precise control over your bass frequencies‚ allowing for detailed tone shaping. Additionally‚ the Analog Octaver and Pitch Shifter are optimized for bass‚ delivering accurate and dynamic effects. The Profiler also includes a collection of studio-grade bass amps‚ giving you access to a wide range of tones. With its flexible signal routing and powerful 600W power amp option‚ the Kemper Stage is ideal for both studio and live performances‚ catering to the unique needs of bass players.

7.2 Optimizing Your Bass Tone

Optimizing your bass tone with the Kemper Profiler Stage is straightforward and intuitive. Start by selecting from the pre-installed studio-grade bass amps‚ each capturing the essence of iconic bass tones. Use the 4-band parametric EQ to fine-tune your low-end‚ midrange‚ and high frequencies‚ ensuring clarity and punch. The Analog Octaver adds depth and weight to your sound‚ while the Pitch Shifter provides creative possibilities. Adjust the gain structure to maintain dynamics‚ and utilize the direct output for a clean DI signal. Experiment with effects like compression and reverb to enhance your sound further. By leveraging these features‚ you can craft a bass tone that stands out in any mix‚ whether in the studio or on stage.

On-Stage Monitoring and Performance

The Kemper Profiler Stage ensures seamless on-stage monitoring and performance with gapless rig transitions and FX spillover‚ maintaining your tone integrity during live shows.

8.1 Seamless Rig Transitions and FX Spillover

The Kemper Profiler Stage excels in live performances with seamless rig transitions and FX spillover. This feature ensures that reverb and delay effects continue uninterrupted‚ even when switching rigs‚ eliminating abrupt sound drops. Musicians can transition between sounds effortlessly‚ maintaining a professional and polished performance. The Profiler Stage automatically handles these transitions‚ requiring no additional setup or preparation. This capability is particularly valuable during live gigs‚ where maintaining a consistent tone and smooth flow is essential. By preserving the natural decay of effects‚ the Kemper Profiler Stage enhances the overall musical experience‚ making it a reliable choice for artists seeking flawless on-stage performance.

8.2 Monitoring Options for Live Performances

The Kemper Profiler Stage offers versatile monitoring options tailored for live performances. Musicians can utilize the built-in 600W power amp to drive guitar cabinets‚ ensuring powerful sound reproduction on stage. Additionally‚ the Profiler Stage allows for simultaneous monitoring through both the cabinet and the front-of-house system‚ providing a studio-grade sound for the audience while maintaining clear on-stage monitoring. This dual-monitoring capability ensures that the artist and the audience experience the same high-quality tone. The system also supports gapless rig transitions‚ preventing any loss of sound during performance. These features make the Kemper Profiler Stage an ideal choice for live settings‚ offering reliability and exceptional audio quality.

Software Integration

The Kemper Profiler Stage seamlessly integrates with software tools like Kemper Rig Manager‚ enabling easy organization‚ backup‚ and sharing of rigs. Access thousands of rigs via Rig Exchange.

9.1 Kemper Rig Manager Overview

Kemper Rig Manager is a powerful software tool designed to help users organize‚ backup‚ and share their Kemper Profiler rigs. It provides a user-friendly interface to manage your entire library of tones‚ allowing you to preview and organize rigs with ease. The software also integrates seamlessly with the Kemper Rig Exchange‚ granting access to thousands of additional rigs created by musicians and producers worldwide. Rig Manager is compatible with both Windows and Mac systems‚ making it a versatile solution for all users. This librarian software is essential for maintaining and expanding your Kemper Profiler’s capabilities‚ ensuring your tones are always accessible and up-to-date.

9.2 Accessing and Sharing Rigs via Rig Exchange

Rig Exchange is a cloud-based platform that allows Kemper Profiler users to access and share thousands of rigs created by musicians and producers worldwide. This feature‚ integrated with Kemper Rig Manager‚ enables seamless browsing‚ previewing‚ and downloading of rigs directly to your Profiler. Users can search for rigs based on specific criteria like genre‚ gain level‚ or equipment type‚ making it easy to find the perfect tone. Additionally‚ Rig Exchange allows you to share your own rigs with the community‚ fostering collaboration and inspiration. This resource is a valuable tool for expanding your tonal palette and discovering new sounds‚ all within a user-friendly environment.

Troubleshooting Common Issues

Resolve clipping by adjusting input levels or cleaning the pickup selector switch. For unclear manual sections‚ refer to YouTube tutorials or seek specific guidance from the community.

10.1 Resolving Clipping Issues

Clipping issues in the Kemper Stage often stem from excessive input levels. To address this‚ start by lowering the input gain on the device. Ensure your guitar’s volume is adjusted appropriately to avoid overdriving the signal. Clean the pickup selector switch‚ as dirt or debris can cause unexpected signal spikes. If using external effects‚ verify their output levels are compatible with the Kemper’s input stage. Additionally‚ check the A/D stage settings to ensure optimal signal conversion. For persistent issues‚ refer to the Kemper manual or online resources for detailed troubleshooting steps and best practices to maintain pristine audio quality.

10.2 Understanding and Solving Common Problems

Common issues with the Kemper Stage often relate to connectivity or signal flow. Start by ensuring all cables are securely connected and ports are clean. If experiencing audio dropouts‚ check your USB or MIDI connections. For firmware-related problems‚ update to the latest version using Kemper Rig Manager. Signal chain misconfigurations can cause unexpected results; review your settings to ensure proper routing. If the Profiler Remote isn’t responding‚ restart both devices and verify MIDI settings. For persistent issues‚ consult the Kemper manual or online forums for troubleshooting guides. Regular backups via Rig Manager can prevent data loss. Always refer to official resources for accurate solutions.

Mastery of the Kemper Stage Manual empowers musicians and producers to unlock its full potential‚ ensuring versatile and professional sound shaping for any musical endeavor.

11.1 Final Thoughts on the Kemper Stage Manual

The Kemper Stage Manual is an indispensable resource for musicians and producers‚ offering deep insights into unlocking the Profiler Stage’s full potential. By mastering its features‚ users can achieve professional-grade tones and seamless integration into both live and studio workflows. The manual’s detailed guidance on profiling‚ effects customization‚ and signal flow ensures that every aspect of the Kemper Stage is utilized effectively. Whether you’re a seasoned professional or an aspiring artist‚ this manual empowers you to craft unique sounds and perform with confidence. With its comprehensive coverage‚ the Kemper Stage Manual remains a vital companion for anyone seeking to elevate their musical creativity and production quality.

11.2 Encouragement to Explore the Kemper Stage

Embrace the Kemper Stage as your ultimate creative partner‚ designed to inspire and empower your musical journey. With its groundbreaking profiling technology‚ you can capture and shape tones with unprecedented precision‚ whether in the studio or on stage. The Profiler Remote offers effortless control‚ while the Rig Manager and Rig Exchange open doors to a vast library of sounds. Experiment with the Stack Section‚ Effects Modules‚ and signal chain to craft unique tones that reflect your artistic vision. Join a community of musicians who swear by the Kemper Stage for its versatility and reliability. Dive in‚ explore‚ and unlock the endless possibilities this incredible tool has to offer.

magic bullet user manual

The Magic Bullet blender is a versatile kitchen appliance designed for effortless blending, chopping, and mixing. This manual guides users through setup, operation, and maintenance for optimal performance.

1.1 Overview of the Magic Bullet Blender

The Magic Bullet Blender is a compact, versatile kitchen appliance designed for quick and efficient food preparation. It excels at blending, chopping, and mixing ingredients with ease. The blender features a sleek design and durable construction, making it a practical addition to any kitchen. Its powerful motor and sharp blades ensure smooth results, whether you’re making smoothies, pureeing soups, or crushing ice. The Magic Bullet is user-friendly, with a simple interface that allows for hassle-free operation. It comes with BPA-free cups and lids, perfect for preparing and storing meals on the go. This blender is ideal for both beginners and experienced cooks, offering endless possibilities for creative recipes and everyday tasks.

1.2 Importance of the User Manual

The Magic Bullet User Manual is an essential resource for mastering your blender’s features and ensuring safe, effective use. It provides detailed instructions for setup, operation, and maintenance, helping you maximize the appliance’s potential. The manual includes safety precautions, troubleshooting tips, and creative recipes to enhance your blending experience. By following the guidelines, you can prevent accidents, resolve common issues, and explore new culinary possibilities. The manual also serves as a reference for understanding warranty terms and accessing customer support. Whether you’re a novice or an experienced user, the manual is your go-to guide for optimizing performance and enjoying your Magic Bullet blender to the fullest.

Safety Precautions

Always operate the Magic Bullet on a level surface, avoiding flammable materials; Ensure proper air circulation and follow guidelines to prevent accidents and ensure safe usage.

2.1 General Safety Guidelines

Always prioritize safety when using the Magic Bullet. Ensure the appliance is placed on a stable, heat-resistant surface, away from flammable materials like curtains or towels. Avoid operating it near water or in humid environments to prevent electrical hazards. Keep children away and never leave the blender unattended while in use. Ensure all components are securely assembled before blending. Avoid touching sharp edges, such as the cross blade, and handle hot ingredients with care. Never insert utensils or hands into the cup while the motor is running. Follow all instructions carefully to avoid accidents and ensure safe, effective operation.

2.2 Placement and Storage Tips

Proper placement and storage of your Magic Bullet are essential for safety and longevity. Always position the blender on a stable, level surface, ensuring good airflow around the motor base. Avoid placing it near flammable materials like curtains, towels, or newspapers. Store the appliance in a cool, dry location when not in use, away from direct sunlight. Clean all components thoroughly before storage to prevent residue buildup. For extended storage, keep the power base and accessories in separate, secure containers to avoid damage. Regularly inspect storage areas to ensure they remain dry and free from pests. Proper storage helps maintain performance and ensures your Magic Bullet remains in excellent condition for years.

2.3 Electrical Safety Considerations

Ensure electrical safety when using your Magic Bullet blender. Always operate it on a stable, level surface, avoiding contact with water or moisture. Never submerge the power base or motor in water, as this can cause electrical damage or shock. Use the blender with the original power cord provided, avoiding damaged or frayed cords. Keep the appliance away from children and pets to prevent accidental electrical incidents. If the cord is damaged, discontinue use and contact customer support. Avoid overloading outlets or using extension cords that may not support the blender’s power requirements. Regularly inspect the power cord for signs of wear and tear. Proper electrical safety practices ensure safe and reliable operation of your Magic Bullet.

Setting Up Your Magic Bullet

Setting up your Magic Bullet begins with unboxing and inventorying all components. Assemble the blender by attaching the cross blade and cups to the power base. Ensure all parts are clean and dry before first use. Place the blender on a stable, flat surface for optimal performance.

3.1 Unboxing and Inventory of Components

Welcome to your new Magic Bullet! Upon unboxing, carefully inspect all components to ensure nothing is damaged. Your package should include the power base, blending cups, cross blade, milling blade, and a recipe book. Take a moment to familiarize yourself with each part. The power base is the core of your blender, while the cups and blades are interchangeable for different tasks. Before first use, wash all detachable parts with warm, soapy water and rinse thoroughly. This ensures cleanliness and prepares your Magic Bullet for optimal performance. Refer to the user manual for a detailed inventory list and assembly instructions to get started seamlessly.

3.2 Assembling the Magic Bullet

Assembling your Magic Bullet is straightforward and requires attention to detail. Start by placing the power base on a stable, flat surface. Next, attach the cross blade or milling blade to the bottom of the blending cup by aligning the threads and twisting clockwise until secure. Ensure the blade is tightly fitted to avoid any movement during operation. Now, place the cup onto the power base by aligning the tabs on the cup with the slots on the base. Gently twist the cup clockwise until it clicks into place, confirming a proper connection. Always refer to the user manual for visual guidance and to ensure all parts are correctly assembled before use. Proper assembly is crucial for safe and efficient blending.

3.3 Initial Setup and Preparation

After unboxing and inventorying your Magic Bullet components, begin by washing all parts with warm, soapy water to ensure cleanliness. Place the power base on a stable, flat surface, ensuring the area around it is clear of clutter. Plug in the power cord, keeping it away from heat sources or flammable materials. Familiarize yourself with the user manual to understand basic operations and safety guidelines. Before first use, ensure all components are dry and properly assembled. This initial setup ensures safe and efficient operation, preparing you to make the most of your Magic Bullet blender.

Operating the Magic Bullet

The Magic Bullet operates with ease, blending ingredients efficiently. Use the pulse function for tough items and ensure the lid is secure for safe operation.

4.1 Basic Blending Operations

For basic blending, ensure the Magic Bullet is placed on a level surface. Add ingredients to the blending cup, leaving space for expansion. Secure the blade assembly firmly. Press down on the cup to start blending. Monitor the process and adjust as needed. For tougher ingredients, use the pulse function. Avoid overloading the cup, as this may stop the blade. If this occurs, unplug the unit, check ingredients, and resume. Always ensure the lid is tightly sealed to prevent leaks. For optimal results, blend in short intervals and shake or stir if necessary. This ensures even blending and prevents motor strain.

4.2 Using the Pulse Function

The pulse function on the Magic Bullet is ideal for controlling blending intensity, especially for tough ingredients like ice or frozen items. To activate, press and release the cup in short intervals. This prevents over-processing and ensures even results. For best outcomes, pulse in short bursts, allowing the blades to clear debris between pulses. This method is particularly effective for chopping nuts, herbs, or ice without over-blending. Always monitor the consistency and adjust as needed. The pulse feature enhances precision, making it easier to achieve your desired texture. Regular use of this function extends the blender’s longevity by reducing strain on the motor during heavy-duty tasks.

4.3 Specialized Functions (e.g., Ice Crushing)

The Magic Bullet excels at specialized tasks like ice crushing, thanks to its powerful motor and sharp blades. For ice crushing, add ice cubes to the cup, twist it into the base, and pulse in short bursts. This ensures even breaking without over-processing. The pulse function is key for tough ingredients, allowing precise control. Always leave space at the top for proper airflow. After crushing, rinse the blades and cup with warm water for easy cleaning. Regular ice crushing maintains blade sharpness and prevents dulling. For best results, avoid overloading the cup and monitor consistency during operation. This feature makes the Magic Bullet a versatile tool for both frozen treats and everyday blending needs.

Cleaning and Maintenance

Cleaning the Magic Bullet is straightforward. Most parts are dishwasher-safe, except the power base and cross blade. Hand wash with warm, soapy water for optimal care.

5.1 Cleaning Procedures for All Parts

Cleaning your Magic Bullet is essential for maintaining its performance and longevity. Most components, such as the cups, lids, and blades, are dishwasher-safe and can be placed on the top rack. For manual cleaning, wash these parts with warm, soapy water and rinse thoroughly. Avoid using abrasive cleaners or scrubbers, as they may damage the surfaces. The power base and cross blade should not be submerged in water; instead, wipe them clean with a damp cloth. Regularly cleaning after each use prevents residue buildup and ensures optimal blending results. Always dry all parts thoroughly before storing to avoid water spots and bacterial growth.

5.2 Dishwasher Safety Information

For convenient cleaning, most Magic Bullet components are dishwasher-safe. Place cups, lids, and blades on the top rack to avoid damage from high heat. Avoid using abrasive detergents, as they may dull surfaces. The power base and cross blade are not dishwasher-safe; clean them with a damp cloth. After washing, dry all parts thoroughly to prevent water spots and bacterial growth. Regular dishwasher use helps maintain hygiene and performance. Always refer to your dishwasher’s guidelines for optimal results. Proper care ensures your Magic Bullet remains in excellent condition for years of reliable service.

5.3 Regular Maintenance Tips

Regular maintenance ensures your Magic Bullet performs optimally. After each use, clean all parts thoroughly to prevent residue buildup. Check blades for dullness and replace if necessary. Lubricate moving parts occasionally to maintain smooth operation. Store components in a dry place to avoid rust. Inspect the power base for dust and wipe it clean with a damp cloth. Avoid using abrasive cleaners or scrubbers, as they may damage surfaces. For tough stains, soak parts in warm, soapy water before cleaning. Regularly drying all components prevents water spots and bacterial growth. By following these tips, you can extend the lifespan of your Magic Bullet and ensure consistent performance.

Troubleshooting Common Issues

Identify and resolve common problems with your Magic Bullet by consulting the manual. Check for loose parts, ensure proper assembly, and verify power connections for optimal performance.

6.1 Identifying and Solving Common Problems

Common issues with the Magic Bullet often relate to improper assembly or blade obstruction. Ensure all parts are securely locked and blades are free from blockages. If the motor fails to start, check the power cord connection and ensure the base is placed on a stable surface. For jammed blades, pulse the blender a few times to dislodge ingredients. Refer to the manual for specific troubleshooting steps. Regularly cleaning the blades and base can prevent many issues. If problems persist, consult the warranty or contact customer support for assistance. Proper maintenance and adherence to guidelines will extend the life of your Magic Bullet.

6.2 Addressing Noise or Vibration Issues

Noise or vibration issues with the Magic Bullet can often be resolved by ensuring proper placement and assembly. Always operate the blender on a stable, level surface to minimize vibration. Check that all components are securely locked into place, as loose parts can cause excessive noise. If the motor base is not clear of obstructions, it may vibrate more than usual. Ensure the blades are free from food residue, as buildup can create imbalance. For persistent noise, clean the blades and base thoroughly. If issues remain, refer to the manual or contact customer support for further assistance. Proper maintenance and usage will help maintain smooth operation and reduce noise.

6.3 Resolving Performance-Related Concerns

If your Magic Bullet isn’t performing as expected, check for common issues like dull blades or improper food placement. Ensure blades are sharp and free from food residue, as buildup can hinder performance. Verify that all components are correctly assembled and that the motor base is secure. Avoid overloading the blender, as this can strain the motor. For tough ingredients, use the pulse function to break them down gradually. If the blender struggles with ice or hard foods, ensure they are properly sized and balanced. Regular cleaning and maintenance, as outlined in the manual, will help maintain optimal performance. If issues persist, consult the troubleshooting section or contact customer support for assistance.

Warranty and Support

The Magic Bullet is backed by a one-year limited warranty covering defects in materials and workmanship. For support, refer to the user manual or visit the official website for FAQs and assistance.

7.1 Understanding the One-Year Limited Warranty

The Magic Bullet blender is covered by a one-year limited warranty, ensuring protection against defects in materials and workmanship. This warranty applies to products distributed by Homeland Housewares, LLC, identifiable by the Magic Bullet trademark and barcode. It is essential to review the warranty terms in the user manual to understand what is covered and what is excluded. The warranty does not cover damage resulting from misuse, normal wear and tear, or improper maintenance. To make a claim, users must provide proof of purchase and contact customer support. This warranty provides peace of mind, knowing your investment is protected for a year from the date of purchase.

7.2 Registering Your Magic Bullet

Registering your Magic Bullet is a straightforward process that ensures you receive updates, exclusive offers, and enhanced customer support. To register, visit the official Magic Bullet website and fill out the registration form with your product details, including the serial number and purchase date. Alternatively, you can register by phone or mail using the contact information provided in the user manual. Registration helps verify your product’s authenticity and activates your warranty. It also grants access to special promotions and recipes. Keep your registration confirmation for future reference. This step ensures you maximize the benefits of owning your Magic Bullet blender.

Creative Recipes and Tips

Unleash your culinary creativity with the Magic Bullet! Explore smoothies, dips, and frozen treats. Experiment with ingredients and techniques to craft delicious, healthy meals effortlessly at home.

8.1 Beginner-Friendly Recipes

Welcome to the world of easy cooking with the Magic Bullet! Start your journey with simple, delicious recipes perfect for newcomers. Try a classic fruit smoothie by blending your favorite fruits, yogurt, and milk. For a quick snack, mix chickpeas, tahini, garlic, and lemon juice to create creamy hummus. Another easy option is homemade tomato sauce by blending cooked tomatoes, garlic, and herbs. These recipes are designed to help you get comfortable with your blender while enjoying tasty results. Follow the manual’s guidelines for measurements and blending times to ensure success. Experiment with fresh ingredients and flavors to discover your new favorite dishes. Happy blending!

8.2 Advanced Blending Techniques

Elevate your blending skills with advanced techniques tailored for the Magic Bullet. Master layering ingredients to ensure even blending, starting with liquids, then solids, and finishing with ice or frozen items. Utilize the pulse function to break down tough ingredients like seeds or ice without over-processing. For smoother results, pre-chop fibrous vegetables or fruits before blending. Experiment with temperature control by blending hot soups or cold desserts for unique textures. Don’t forget to adjust blending times and speeds based on the recipe. These techniques will help you achieve professional-quality blends and expand your culinary creativity. Explore new flavors and textures with confidence using your Magic Bullet.

8.3 Tips for Optimal Blending Results

For the best blending outcomes with your Magic Bullet, always fill the cup to the recommended level to avoid overloading. Add liquids first, followed by solids, to ensure smooth blending. Use the pulse function for tough ingredients like ice or seeds. Avoid over-blending to maintain texture and prevent overheating. For frozen items, pre-chop them into smaller pieces for even results. Clean the blades and cups regularly to maintain efficiency. Experiment with layering ingredients to achieve desired consistencies. Store leftovers in airtight containers to preserve freshness. By following these tips, you’ll unlock the full potential of your Magic Bullet and enjoy perfectly blended creations every time.

Additional Resources

Access online support, FAQs, and the Magic Bullet user community for troubleshooting, tips, and creative recipe ideas. Enhance your blending experience with these valuable resources.

9.1 Online Support and FAQs

The official Magic Bullet website offers extensive online support and FAQs to address common questions and concerns. Users can find troubleshooting guides, blending tips, and maintenance advice. Additionally, the platform provides direct links to customer support for personalized assistance. The FAQs section covers topics such as warranty information, cleaning procedures, and operational tips. For further convenience, users can access instructional videos and downloadable resources. This comprehensive online support ensures that Magic Bullet owners can resolve issues quickly and efficiently; By leveraging these resources, users can maximize their appliance’s performance and longevity. Explore the official website to discover more about how to get the most out of your Magic Bullet.

9.2 Magic Bullet User Community

The Magic Bullet User Community is a vibrant platform where users share experiences, recipes, and tips. This community serves as a valuable resource for troubleshooting, learning new techniques, and discovering creative ways to use the blender. Members can engage in forums, social media groups, and special events to connect with fellow Magic Bullet enthusiasts. The community also features contributions from experienced users and experts, offering insights and advice to help you get the most out of your appliance. Whether you’re seeking inspiration for new recipes or solutions to common issues, the Magic Bullet User Community is a great place to learn and grow. Join today and become part of a supportive and innovative group dedicated to enhancing your blending experience.

ms440 service manual

This comprehensive guide provides detailed instructions for servicing the STIHL MS 440 chainsaw, covering repairs, maintenance, safety, and technical specifications. It is a 92-page manual designed for professionals and DIY enthusiasts alike, ensuring optimal performance and longevity of the equipment.

1.1 Overview of the MS 440 Chainsaw

The STIHL MS 440 is a high-performance chainsaw designed for demanding tasks, offering reliability and durability. It is widely used by professionals and DIY enthusiasts for heavy-duty cutting jobs. Known for its powerful engine and robust construction, the MS 440 is ideal for logging, woodworking, and large-scale landscaping projects. Its ergonomic design and advanced features make it a versatile tool for various applications. This chainsaw is built to withstand rigorous use, making it a favorite among users who require consistent performance. The MS 440 is a testament to STIHL’s commitment to quality and innovation in outdoor power equipment.

1.2 Importance of the Service Manual

The service manual for the MS 440 is essential for maintaining optimal performance and longevity of the chainsaw. It provides detailed repair procedures, maintenance schedules, and troubleshooting guides, ensuring users can address issues effectively. The manual is a critical resource for both professionals and DIY enthusiasts, offering clear instructions to prevent damage and reduce repair costs. By following the guidelines, users can ensure safety, efficiency, and proper functionality of the chainsaw. This comprehensive guide is a must-have for anyone serious about maintaining their MS 440 chainsaw in top working condition.

Safety Precautions and Guidelines

Always follow safety guidelines to prevent serious injury. The manual emphasizes proper handling, protective gear, and adherence to safety protocols when operating or servicing the MS 440 chainsaw.

2.1 General Safety Information

The MS 440 service manual emphasizes critical safety measures to prevent accidents. Proper handling and maintenance are essential to avoid injuries. Always wear protective gear, including gloves, safety glasses, and a helmet. Ensure the chainsaw is in good working condition before use. Follow all safety guidelines outlined in the manual to minimize risks. Improper use can lead to severe or fatal injuries. Regularly inspect the saw for damage or wear. Keep loose clothing and long hair tied back. Avoid operating the saw in hazardous conditions. Familiarize yourself with kickback precautions and emergency shutdown procedures. Safety should never be compromised during operation or servicing.

2.2 Personal Protective Equipment (PPE)

The MS 440 service manual strongly emphasizes the use of Personal Protective Equipment (PPE) to ensure operator safety. Essential gear includes gloves for grip and protection, safety glasses with impact-resistant lenses, and a helmet to prevent head injuries. Additionally, wear chainsaw chaps or cut-resistant pants and steel-toe boots for leg and foot protection. Proper PPE minimizes risks of injury from kickback, flying debris, or accidental contact with the chain. Always ensure PPE is in good condition and meets safety standards. Neglecting PPE can lead to severe harm, making it a critical component of safe chainsaw operation and maintenance.

Key Specifications of the MS 440

The MS 440 features a powerful engine, robust design, and advanced technical specifications, making it a high-performance chainsaw for professional and heavy-duty applications. Its engine specifications include a strong power output, while its technical details ensure reliability and efficiency in challenging environments.

3.1 Engine Specifications

The MS 440 chainsaw is equipped with a powerful engine designed for high-performance cutting tasks. Its engine specifications include a robust design, ensuring reliability and efficiency. The manual provides detailed information on engine power, displacement, and fuel requirements, essential for optimal performance. Understanding these technical details helps users maintain and service the engine effectively, ensuring longevity and peak functionality. The engine’s specifications are tailored for professional use, making it suitable for demanding environments and heavy-duty applications. This section is crucial for anyone looking to service or repair the MS 440’s engine accurately.

3.2 Technical Details and Features

The MS 440 chainsaw boasts advanced technical details and features designed for high-performance cutting. It includes a robust engine, an efficient cooling system, and a high-quality air filter for optimal performance. The chainsaw features an advanced combustion system, reducing emissions and improving fuel efficiency. Its ergonomic design enhances user comfort during extended use. Additionally, the MS 440 incorporates a reliable chain lubrication system, ensuring smooth operation and minimizing wear. These technical details and features make the MS 440 a reliable choice for professionals and demanding applications, ensuring precise and efficient cutting in various environments.

Regular Maintenance Procedures

Regular maintenance is crucial for optimal performance. Follow the schedule for tasks like air filter cleaning, chain sharpening, and oil system checks to ensure reliability and longevity.

4.1 Routine Maintenance Tasks

Regular maintenance ensures the MS 440 operates efficiently. Clean or replace the air filter frequently, as a clogged filter can reduce performance. Check and replace the chain sharpness and tension regularly. Inspect the oil system for leaks or blockages and ensure proper lubrication. Sharpen the chain according to specifications to maintain cutting efficiency. Clean the guide bar and chain sprocket to prevent wear. Replace spark plugs as recommended to avoid engine issues. Follow the maintenance schedule outlined in the manual to prevent breakdowns and extend the saw’s lifespan. Proper upkeep ensures safety and optimal functionality.

4.2 Maintenance Schedule

Adhering to the MS 440 maintenance schedule ensures optimal performance and longevity. Clean or replace the air filter every 10 hours of use. Sharpen the chain and check its tension daily. Inspect the oil system for leaks or blockages every 50 hours. Replace the spark plug annually or as specified. Lubricate moving parts regularly to prevent wear. Follow the recommended schedule for guide bar and chain sprocket maintenance. Annual professional servicing is advised to address complex issues. By sticking to this routine, you ensure the chainsaw operates safely and efficiently, reducing the risk of unexpected breakdowns and extending its service life.

Troubleshooting Common Issues

Identify symptoms, refer to diagnostic guides, and address issues like air filter blockages or oil system failures. Use the manual’s troubleshooting section for detailed repair solutions.

5.1 Identifying Common Problems

The MS 440 service manual highlights common issues such as air filter blockages, oil system failures, and poor engine performance. These problems often arise from improper maintenance or worn parts. Users may notice reduced power, excessive vibration, or failure to start. The manual provides diagnostic techniques to identify these issues, emphasizing the importance of regular inspections. By addressing these problems early, users can prevent major repairs and ensure optimal chainsaw performance. Always refer to the troubleshooting section for detailed solutions and repair guidance specific to the MS 440 model.

5.2 Diagnostic Techniques

The MS 440 service manual outlines systematic diagnostic techniques to identify issues efficiently. Start by checking the air filter for blockages, as a dirty filter can cause poor engine performance. Inspect the oil system for leaks or clogs, as oil starvation can damage the engine. Examine the chain and bar for wear or damage, ensuring proper lubrication. Use the manual’s troubleshooting guide to isolate problems, such as hard starting or rough running. Always follow safety precautions when diagnosing issues, and refer to the manual for specific repair procedures. Regular diagnostics help prevent major breakdowns and extend the chainsaw’s lifespan.

Repair and Servicing Procedures

The MS 440 service manual provides detailed repair and servicing procedures, including disassembly, reassembly, and component replacement. It ensures proper maintenance and extends the chainsaw’s lifespan.

6.1 Disassembly and Reassembly

The MS 440 service manual provides detailed step-by-step instructions for disassembling and reassembling the chainsaw. It includes guidance on removing the engine, clutch, and other components safely. Proper tools and techniques are emphasized to avoid damage. The manual also outlines reassembly procedures, ensuring all parts are correctly aligned and secured. Torque specifications and lubrication requirements are highlighted for optimal performance. Clear diagrams and illustrations are included to aid in understanding complex steps. Following these instructions carefully ensures the chainsaw operates efficiently after servicing. This section is essential for both professionals and DIY enthusiasts performing repairs.

6.2 Repairing Major Components

This section of the MS 440 service manual focuses on repairing key components such as the engine, clutch, and oil system. Detailed instructions guide users through diagnosing and fixing issues like worn piston rings or faulty crankshafts. Step-by-step procedures ensure proper disassembly, inspection, and reassembly of critical parts. The manual emphasizes using genuine STIHL replacement parts for reliability. Special tools and techniques are highlighted to prevent further damage. Clear diagrams assist in understanding complex repairs. By following these guidelines, users can restore their chainsaw to optimal performance. Regular maintenance and timely repairs are stressed to extend the tool’s lifespan.

Parts and Accessories

The MS 440 service manual includes a comprehensive spare parts list, detailing part numbers and descriptions. Genuine STIHL components ensure compatibility and reliability. Accessories like air filters and chains are highlighted for easy replacement. The manual directs users to authorized dealers for authentic parts, ensuring optimal performance and safety. Proper maintenance and timely part replacement are emphasized to extend the chainsaw’s lifespan and maintain its efficiency. This section is essential for users seeking to keep their MS 440 in peak condition. Always refer to the manual for specific part recommendations and ordering guidance.

7.1 Spare Parts List

The MS 440 service manual includes a detailed spare parts list, ensuring easy identification of components. It covers engine parts, chains, bars, and maintenance items. Each part is listed with specific numbers and descriptions, aiding in accurate ordering. The list is organized by category, making it user-friendly for quick reference. Genuine STIHL parts are recommended to maintain performance and safety. This section is invaluable for technicians and users seeking to replace worn or damaged components efficiently. The manual emphasizes the importance of using authentic parts to uphold the chainsaw’s reliability and operational integrity.

7.2 Ordering and Replacing Parts

Ordering and replacing parts for the MS 440 is streamlined with the manual’s detailed guidance. Use the spare parts list to identify exact components needed. Genuine STIHL parts are recommended to ensure compatibility and performance. When replacing parts, follow the manual’s step-by-step instructions to avoid errors. Safety precautions, such as disconnecting the spark plug, must be observed. Proper tools and torque specifications are highlighted to ensure secure and correct installations. Regularly updating worn or damaged parts prevents premature wear and maintains the chainsaw’s efficiency. This section emphasizes best practices for a seamless repair process.

Downloading and Using the Manual

The MS 440 service manual is available as a PDF download from official STIHL websites or authorized dealers. It is user-friendly, covering essential repair and maintenance details.

8.1 Sources for the Service Manual

The MS 440 service manual can be downloaded from official STIHL websites, authorized dealers, or trusted third-party platforms. Ensure authenticity by verifying the source to avoid counterfeit documents. Always check for the latest version to access updated information and guidelines. Additionally, some forums and communities share reliable links for downloading the manual. Be cautious of unauthorized sites to maintain compliance with STIHL’s terms and conditions. Downloading from reputable sources ensures you receive a complete and accurate manual tailored for your chainsaw model.

8.2 Navigating the Manual

The MS 440 service manual is structured for easy navigation, with clear sections and detailed indexing. Start with the table of contents to locate specific topics, such as maintenance, troubleshooting, or repair procedures. Use the index to quickly find parts or tools referenced in the manual. Digital versions often include bookmarks and search functions for added convenience. Familiarize yourself with the layout to efficiently access information, ensuring you can perform tasks safely and effectively. This organized approach helps users of all skill levels navigate the manual with ease and precision.

Common Problems and Solutions

The MS 440 service manual addresses common issues like air filter clogs and oil system failures, providing step-by-step solutions to ensure optimal performance and extend equipment lifespan.

9.1 Air Filter Issues

Air filter problems are common in the MS 440, often caused by dust buildup or damage. A clogged filter reduces engine performance and can lead to increased fuel consumption. Inspect the filter regularly and clean or replace it as needed. A missing or improperly installed filter can allow debris to enter the engine, causing severe damage. Always ensure the air filter is securely fitted and aligned correctly. Refer to the service manual for detailed cleaning and replacement procedures to maintain optimal engine function and prevent potential issues. Proper maintenance ensures reliable operation and extends the chainsaw’s lifespan.

9.2 Oil System Failures

Oil system failures in the MS 440 can lead to inadequate lubrication, causing wear on moving parts and potential engine damage. Common issues include clogged oil lines, faulty pumps, or incorrect oil viscosity. Regularly inspect the oil reservoir and lines for blockages or leaks. Clean or replace components as needed. Ensure the oil pump is functioning correctly and that the bar and chain are receiving sufficient lubrication. Refer to the service manual for diagnostic steps and repair procedures. Proper maintenance of the oil system is crucial for optimal performance and longevity of the chainsaw. Addressing issues promptly prevents costly repairs.

Professional Tips and Advice

Adhere to the service manual’s guidelines, use correct tools, and follow safety protocols. Stay organized, refer to the manual frequently, and ensure all repairs are done systematically.

10.1 Best Practices for Servicing

Always follow the service manual’s instructions precisely, ensuring the use of correct tools and adherence to safety guidelines. Regularly clean the chainsaw before servicing to prevent contamination. Organize all parts and refer to the manual for torque specifications and assembly procedures. Test the saw after repairs to ensure proper function. Keep a record of maintenance activities for future reference. Avoid shortcuts and double-check all adjustments for optimal performance and safety. Proper servicing extends the lifespan and reliability of the MS 440, ensuring it operates at peak efficiency.

10.2 Avoiding Common Mistakes

Common mistakes when servicing the MS 440 include ignoring safety precautions, using incorrect tools, and skipping steps in the manual. Always refer to the service manual for torque specifications and assembly procedures. Avoid over-tightening or under-tightening components, as this can damage the engine or other parts. Never operate the saw without proper protective equipment. Ensure all parts are clean and free from debris before reassembly. Ignoring routine maintenance, such as air filter cleaning, can lead to poor performance. Properly follow diagnostic procedures to avoid misidentifying issues. By adhering to these guidelines, you can prevent costly repairs and ensure the saw operates safely and efficiently.

The MS 440 service manual is an essential resource for maintaining and repairing your chainsaw. It ensures safety, optimal performance, and extends the lifespan of your equipment.

11.1 Summary of Key Points

The MS 440 service manual is a crucial resource for maintaining and repairing your chainsaw. It emphasizes safety precautions, routine maintenance, and troubleshooting common issues. The manual provides detailed engine specifications, technical features, and diagnostic techniques to ensure optimal performance. Regular maintenance tasks, such as air filter cleaning and oil system checks, are highlighted to prevent malfunctions. Additionally, it covers disassembly, repair of major components, and ordering spare parts. By following the guidelines, users can extend the lifespan of their chainsaw and ensure safe, efficient operation. This comprehensive guide is essential for both professionals and DIY enthusiasts.

11.2 Final Recommendations

Always adhere to the guidelines outlined in the MS 440 service manual for optimal performance and safety. Regular maintenance, such as air filter cleaning and oil system checks, is essential to prevent issues. Use genuine STIHL parts and follow proper tools and techniques during repairs. Ensure all safety precautions are observed to avoid accidents. For complex problems, consult a certified professional. By following these recommendations, you can extend the lifespan of your chainsaw and ensure reliable operation. Proper servicing will also maintain the chainsaw’s efficiency and reduce the risk of costly repairs.