Category title

Autem vel eum iriure dolor in hendrerit in vulputate velit esse molestie consequat, vel illum dolore eu feugiat nulla facilisis at vero eros et dolore feugait.

Category Archive Manuals

canon program ae 1 manual

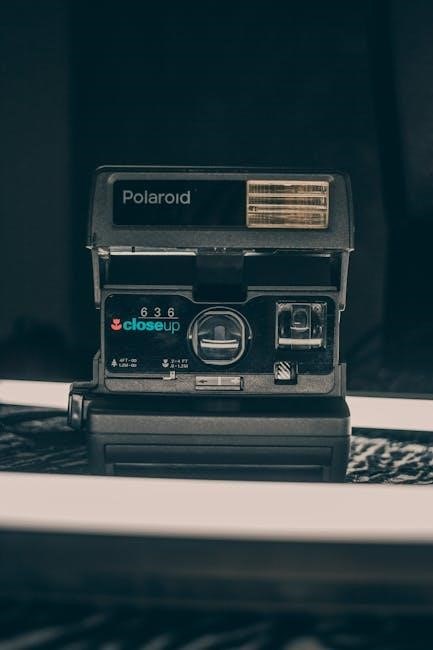
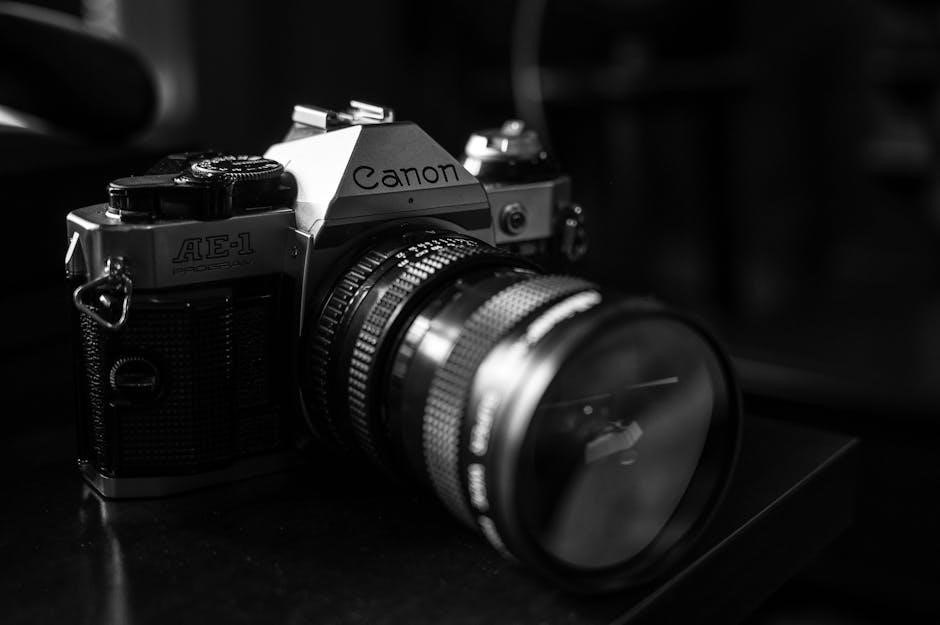
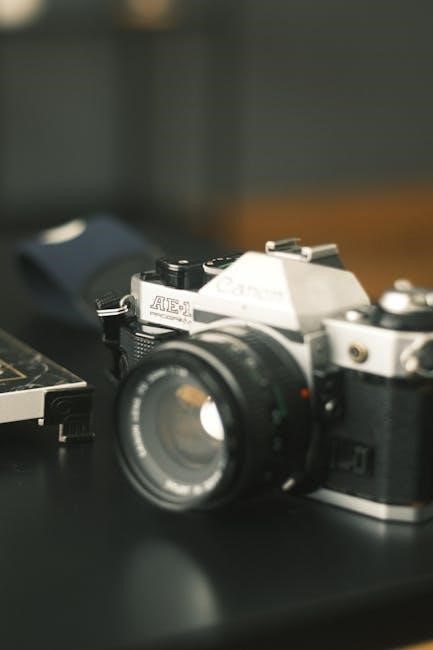
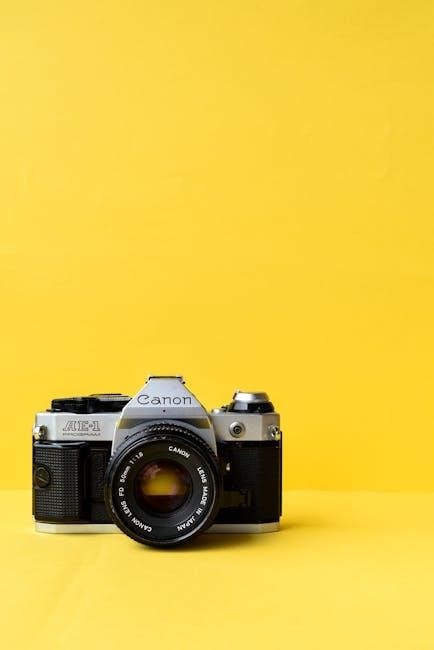
The Canon AE-1 Program is a 35mm film SLR introduced in 1981‚ offering Program‚ Shutter Priority‚ and Manual modes. Its comprehensive manual guides users through features‚ operation‚ and maintenance‚ ensuring optimal photography experiences.

Overview of the Canon AE-1 Program Camera

The Canon AE-1 Program is a 35mm film SLR camera introduced in 1981‚ known for its versatility and ease of use. It features three operation modes: Program‚ Shutter Priority‚ and Manual‚ catering to both beginners and advanced photographers. The camera offers a wide ISO range of 25 to 3200‚ fast shutter speeds up to 1/1000th of a second‚ and a durable build. Its manual provides detailed guidance on specifications‚ operation‚ and maintenance‚ ensuring users can fully utilize its capabilities. The AE-1 Program remains a popular choice for film photography enthusiasts due to its balance of simplicity and professional-grade features.

Importance of the Manual for Optimal Camera Use

The manual is essential for unlocking the full potential of the Canon AE-1 Program. It provides detailed instructions on operating modes‚ exposure control‚ and maintenance‚ ensuring users understand each feature. By reading the manual‚ photographers can master techniques like bracketing shots‚ adjusting aperture‚ and managing ISO settings. It also offers troubleshooting tips for common issues‚ such as underexposure and shutter malfunctions. The manual serves as a comprehensive guide‚ helping users improve their photography skills and maintain the camera’s performance over time. Regular reference to the manual ensures optimal use and enhances the overall photography experience with the AE-1 Program.

Key Features of the Canon AE-1 Program

The Canon AE-1 Program features a 35mm film SLR design‚ three operation modes‚ a built-in light meter‚ ISO range of 25-3200‚ and shutter speeds from 2s to 1/1000s. It uses a 4LR44 battery‚ offering up to a year of use‚ and includes aperture control for depth of field management. These features make it versatile for both automatic and manual photography‚ catering to various lighting conditions and creative needs.

35mm Film SLR Design and Build Quality

The Canon AE-1 Program features a durable 35mm film SLR design with a solid metal body‚ ensuring long-lasting performance. Its ergonomic build provides comfortable handling‚ while the interchangeable lenses offer versatility for various photography needs. The camera operates on a 4LR44 battery‚ supporting its electronic controls and metering system. The design balances simplicity with functionality‚ making it accessible to both amateur and professional photographers. Its robust construction and intuitive layout have made it a favorite among film enthusiasts‚ ensuring reliable use in diverse shooting conditions.

Three Operation Modes: Program‚ Shutter Priority‚ and Manual

The Canon AE-1 Program offers three versatile operation modes to cater to different photography styles. Program mode provides automatic settings for shutter speed and aperture‚ ideal for quick and easy shooting. Shutter Priority mode allows users to set the shutter speed manually‚ with the camera adjusting the aperture for proper exposure. Manual mode grants full control over both shutter speed and aperture‚ enabling advanced photographers to fine-tune their shots. These modes are indicated by LEDs in the viewfinder‚ ensuring users are aware of their current settings. This flexibility makes the AE-1 Program adaptable to various lighting conditions and creative preferences.

Built-in Light Meter for Accurate Exposure

The Canon AE-1 Program is equipped with a built-in light meter‚ essential for achieving accurate exposures. This meter measures ambient light to determine the optimal aperture and shutter speed settings‚ ensuring balanced results in various lighting conditions. In Program mode‚ it automates these adjustments‚ while in Shutter Priority‚ it calculates the aperture based on the selected shutter speed. In Manual mode‚ it provides reference readings‚ allowing photographers to make informed decisions. The light meter’s accuracy is crucial for capturing images with the desired aesthetic‚ making it a cornerstone of the camera’s functionality and a key feature for both automatic and manual shooting.

ISO Range and Shutter Speed Capabilities

The Canon AE-1 Program offers a versatile ISO range of 25 to 3200‚ catering to diverse lighting conditions. Shutter speeds span from 2 seconds to 1/1000th of a second‚ providing flexibility for creative control. Lower ISO settings (e.g.‚ 25-400) are ideal for bright lighting‚ while higher ISOs (800-3200) excel in low-light scenarios. The camera allows manual adjustment of these settings‚ enabling photographers to balance exposure and artistic intent. This range ensures adaptability‚ whether capturing sharp action with fast shutter speeds or creating motion blur with slower ones‚ making the AE-1 Program a robust tool for various photographic situations.

Battery Life and Power Management

The Canon AE-1 Program uses a 4LR44 battery‚ offering up to a year of operation under normal use. Despite its power-efficient design‚ the camera is known to consume batteries relatively quickly. To conserve energy‚ users can turn off the camera when not in use. The battery powers essential functions like the light meter and shutter operation. Proper storage and avoiding extreme temperatures help maintain battery performance. For extended use‚ keeping spare batteries handy is recommended. This ensures uninterrupted photography sessions‚ especially during long shoots or travel. Regularly checking battery levels is advised to prevent unexpected power loss.

Understanding the Canon AE-1 Program Manual

The manual provides detailed guidance on camera operation‚ maintenance‚ and troubleshooting. It includes sections on specifications‚ features‚ and best practices for optimal photography results and camera care.

Structure and Content of the Manual

The Canon AE-1 Program manual is organized into clear sections‚ including specifications‚ operation‚ and maintenance. It details the camera’s features‚ such as its three operation modes‚ ISO range‚ and shutter speeds. The manual also covers troubleshooting common issues like underexposure and sticky shutter syndrome. Additionally‚ it provides guidance on proper camera care‚ including lens cleaning and light meter maintenance. The manual is designed to help users master the camera’s capabilities‚ ensuring optimal performance and longevity. By following the manual‚ photographers can enhance their skills and achieve better results in various shooting conditions.

Key Sections: Specifications‚ Operation‚ and Maintenance

The manual begins with detailed specifications‚ outlining the camera’s technical capabilities‚ such as its 35mm film format‚ ISO range of 25-3200‚ and shutter speeds from 2 seconds to 1/1000th of a second. The operation section guides users through loading film‚ setting ISO‚ and using the three modes: Program‚ Shutter Priority‚ and Manual. Maintenance tips include cleaning the lens‚ checking the light meter‚ and proper storage. These sections ensure users understand the camera’s features‚ operate it effectively‚ and maintain its performance over time‚ making it an indispensable resource for photographers of all skill levels.

Importance of Reading the Manual for Better Photography

Reading the Canon AE-1 Program manual is essential for mastering its features and improving photography skills. It explains how to use ISO‚ aperture‚ and shutter speed effectively‚ ensuring optimal exposure. The manual also highlights troubleshooting tips‚ such as resolving underexposure in bright conditions and addressing the sticky shutter syndrome. By understanding the camera’s operation‚ photographers can avoid common mistakes and explore creative possibilities. The manual serves as a comprehensive guide‚ offering insights into photography fundamentals like the exposure triangle and depth of field‚ making it a vital resource for both beginners and experienced photographers aiming to enhance their craft.

Operating the Canon AE-1 Program

Mastering the Canon AE-1 Program involves loading film‚ setting ISO‚ and using Program‚ Shutter Priority‚ or Manual modes for precise control over exposure and creativity.

Loading Film and Initial Setup

Loading film into the Canon AE-1 Program is straightforward. Ensure the camera is turned off before opening the back. Align the film leader with the red mark inside the camera‚ then gently advance the film until it seats securely. Close the back and advance the film to the first frame using the rapid rewind knob. Set the ISO by rotating the dial to match your film speed. Perform a quick check to ensure all settings are reset and the light meter is functioning. This initial setup ensures your camera is ready for optimal performance and accurate exposures.

Setting the ISO and Understanding Film Speed

Setting the ISO on the Canon AE-1 Program is essential for proper exposure. The ISO dial‚ located on the top of the camera‚ allows you to select sensitivities from 25 to 3200. Match the ISO to your film speed for accurate exposures; Film speed determines how sensitive the film is to light: lower ISOs (e.g.‚ 100) are best for bright conditions‚ while higher ISOs (e.g.‚ 400‚ 800) suit low-light situations. Always set the ISO before loading film to ensure consistent results. Understanding film speed helps you adapt to various lighting conditions and achieve optimal image quality. Proper ISO settings are crucial for mastering exposure control.

Using the Program Mode for Automatic Shooting

The Program mode on the Canon AE-1 Program offers automatic shooting‚ ideal for beginners or quick shots. To activate it‚ set the aperture ring to “Auto” and the mode dial to “Program.” The camera automatically adjusts both shutter speed and aperture for optimal exposure. This mode is user-friendly‚ allowing you to focus on composition while the camera handles technical settings. The P LED in the viewfinder confirms Program mode activation. While it simplifies photography‚ understanding basic exposure principles can still help refine your results. This mode is perfect for capturing moments without manual adjustments‚ making it a versatile option for various lighting conditions.

Shutter Priority Mode for Creative Control

Shutter Priority mode on the Canon AE-1 Program allows photographers to manually set the shutter speed‚ giving creative control over motion effects. With this mode‚ the camera automatically adjusts the aperture to maintain proper exposure. Ideal for capturing dynamic scenes‚ it lets you freeze fast-moving subjects or create artistic blur. To activate‚ turn the mode dial to “Tv” (Time Value) and select your desired shutter speed. This mode is perfect for experimenting with motion and light‚ offering a balance between creativity and automation. Understanding shutter speed’s impact on exposure is key to mastering this feature for stunning results in various lighting conditions.

Manual Mode for Advanced Photography

Manual mode on the Canon AE-1 Program offers full creative control‚ allowing photographers to set both aperture and shutter speed independently. This mode is ideal for advanced users who want precise control over exposure. To use Manual mode‚ set the mode dial to “M” and adjust the aperture ring and shutter speed dial to achieve the desired exposure. The built-in light meter provides guidance‚ but the photographer has complete freedom to override settings. Manual mode is perfect for challenging lighting conditions or when a specific artistic effect is desired. It requires a good understanding of the exposure triangle and practice to master effectively.

Exposure Control and Techniques

Exposure control is crucial for capturing images with the Canon AE-1 Program. Techniques like bracketing shots and understanding depth of field help achieve optimal results in various lighting conditions.

Aperture‚ Shutter Speed‚ and ISO: The Exposure Triangle

The exposure triangle—aperture‚ shutter speed‚ and ISO—is fundamental for controlling light in photography. Aperture regulates depth of field‚ with smaller f-stops (e.g.‚ f/1.8) creating a shallower focus; Shutter speed affects motion capture‚ with faster speeds freezing action and slower speeds blurring it. ISO sensitivity impacts light intake‚ with lower values (e.g.‚ ISO 100) suited for bright conditions and higher values (e.g.‚ ISO 3200) for low light. Balancing these elements ensures proper exposure. For handheld shooting‚ keep shutter speeds above 1/60 to avoid blur. Mastering the exposure triangle enhances creative control and image quality in various lighting scenarios.

Bracketing Shots for Optimal Exposure

Bracketing involves capturing multiple shots of the same scene at different exposures to ensure the best result. Start with the metered exposure‚ then take one shot with a faster shutter speed and another with a slower speed. This helps identify overexposure or underexposure issues. By analyzing these variations‚ you can adjust settings for future shots. Bracketing is especially useful in challenging lighting conditions‚ such as bright skies or low-light environments. It allows you to capture a wider dynamic range and select the optimal exposure for your final image. This technique enhances precision and consistency in your photography.

Understanding Depth of Field and Aperture

Depth of field refers to the area in focus within a photo‚ controlled by the aperture. A smaller f-stop (e.g.‚ f/1.8) creates a shallower depth of field‚ blurring the background and isolating the subject. A larger f-stop (e.g.‚ f/22) keeps more of the image in focus‚ ideal for landscapes. Aperture adjustments allow photographers to emphasize subjects or capture detailed scenes. Understanding this relationship is key to creative control‚ enabling precise focus effects and enhancing visual storytelling in photography.

Common Issues and Solutions

Common issues include underexposure in bright conditions and sticky shutter syndrome. Adjusting exposure compensation and cleaning the shutter mechanism can resolve these problems effectively.

Troubleshooting Underexposure in Bright Conditions

Underexposure often occurs in bright conditions‚ especially when shooting scenes with snow or bright skies‚ as the light meter may be deceived. To address this‚ bracket your shots by taking the first photo at the metered exposure‚ the next with a faster shutter speed‚ and the third with a slower one. This helps identify the correct exposure. Additionally‚ using a smaller aperture (higher f-stop) can reduce overexposure in bright light. Ensure the ISO is set appropriately for the film‚ and consider using a lens hood to reduce glare. Regularly cleaning the lens and ensuring proper film loading can also prevent underexposure issues.

Dealing with the Sticky Shutter Syndrome

The Canon AE-1 Program may experience “sticky shutter syndrome‚” where the shutter becomes slow or hesitant due to aged lubricants. This can cause underexposure or inconsistent shutter speeds. To address this‚ clean the shutter area gently with compressed air or a soft brush to remove debris. Avoid harsh chemicals or force‚ as they may damage the mechanism. If the issue persists‚ consider professional servicing. Regular use and maintenance can help prevent this problem. Always ensure the camera is properly stored and handled to minimize wear and tear. Addressing this issue promptly ensures optimal performance and image quality.

Maintenance and Care

Regularly clean the lens and camera body with soft materials to prevent dust buildup. Check the light meter for accuracy and store the camera in a dry‚ cool place to maintain functionality.

Cleaning the Lens and Camera Body

Regular cleaning is essential for maintaining the Canon AE-1 Program’s performance. Use a soft‚ dry microfiber cloth to gently wipe the lens and camera body‚ removing dust and fingerprints. For stubborn smudges‚ lightly dampen the cloth with distilled water‚ but avoid harsh chemicals or tissues that may scratch the surfaces. Clean the lens in circular motions‚ starting from the center and working outward. The camera body can be cleaned with a dry cloth‚ paying attention to areas around buttons and dials. Regular maintenance prevents dust buildup and ensures sharp‚ clear images. Always store the camera in a protective case when not in use.

Checking and Maintaining the Light Meter

The Canon AE-1 Program’s light meter is a critical component for accurate exposures. To ensure proper function‚ always use a fresh battery‚ as a weak one can cause incorrect readings. The meter operates in all modes‚ providing precise measurements for Program‚ Shutter Priority‚ and Manual settings. Regularly clean the lens and aperture blades‚ as dirt can interfere with light measurement. If the meter malfunctions‚ check the battery or consult a professional for servicing. Proper maintenance ensures reliable performance‚ helping you achieve consistent and optimal exposures in various lighting conditions. Regular checks and cleanings are essential for long-term functionality and photographic success.

Proper Storage and Handling of the Camera

Store the Canon AE-1 Program in a cool‚ dry place to prevent moisture damage. Use a protective case or pouch to shield it from dust and scratches. Avoid extreme temperatures and humidity‚ as they can harm the camera’s internal mechanisms. Clean the lens and body regularly with a soft cloth to maintain optical clarity. Handle the camera with care‚ ensuring it is secure when carrying to prevent drops. Store the camera without batteries to avoid corrosion. Regular inspections and maintenance will ensure the camera remains in excellent condition for years of reliable use and high-quality photography.

Troubleshooting Common Problems

Address underexposure by adjusting ISO or using bracketing. Fix overexposure by lowering ISO or using a faster shutter speed. Clean the shutter to resolve speed malfunctions.

Resolving Underexposure Issues

Underexposure often occurs in bright conditions or when shooting scenes with high contrast. To resolve this‚ ensure the ISO is set correctly for the film. Bracketing shots by adjusting shutter speed can help find the optimal exposure. If using Program mode‚ switch to Manual or Shutter Priority for more control. A smaller aperture (lower f-stop) allows more light‚ while a slower shutter speed can brighten the image. Clean the lens and ensure the light meter is functioning properly. Adjusting the film speed or using external light meters can also improve results. Experiment with these settings to achieve balanced exposures.

Fixing Overexposure Problems

Overexposure occurs when too much light reaches the film‚ resulting in washed-out images. To fix this‚ increase the shutter speed or use a smaller aperture (higher f-stop). Bracketing shots by adjusting the shutter speed can help identify the correct exposure. In Program mode‚ switching to Shutter Priority or Manual mode allows for precise control. Lowering the ISO or using a neutral density filter can also reduce light intake. Ensure the light meter is clean and functioning properly. Reviewing the manual’s exposure guidelines can provide additional solutions. Experimenting with these adjustments will help achieve well-balanced exposures in bright lighting conditions.

Addressing Shutter Speed Malfunctions

Shutter speed malfunctions can cause inconsistent exposures or stuck shutters. Start by cleaning the shutter mechanism with compressed air to remove dirt or debris. If issues persist‚ try using an external shutter release to rule out camera button problems. For persistent malfunctions‚ inspect and replace faulty components like the shutter curtain or speed regulator. Regular maintenance‚ such as lubricating moving parts‚ can prevent these issues. Refer to the manual for detailed repair guidance or consult a professional if needed. Ensuring proper shutter function is crucial for achieving accurate exposures and maintaining the camera’s performance over time.

Additional Resources

Download the Canon AE-1 Program manual PDF for detailed guidance. Explore online forums and communities for troubleshooting and expert advice. Visit websites like madicfilms.com for instructional videos and tips.

Downloading the Canon AE-1 Program Manual PDF

To access the Canon AE-1 Program manual‚ visit the official Canon website or trusted third-party sources like ManualsLib or Archive;org. These platforms offer free PDF downloads‚ ensuring you have comprehensive guidance for your camera; The manual covers specifications‚ operation modes‚ and maintenance tips‚ helping you master the AE-1 Program. Additionally‚ online forums and communities provide supplementary resources and troubleshooting advice. Downloading the manual is essential for understanding your camera’s full potential and resolving common issues like underexposure or shutter malfunctions. It’s a valuable tool for both beginners and experienced photographers.

Online Communities and Forums for Support

Online communities and forums are invaluable resources for Canon AE-1 Program users. Platforms like Facebook groups‚ Reddit‚ and specialized photography forums connect enthusiasts‚ offering advice‚ troubleshooting‚ and shared experiences. These spaces allow users to ask questions‚ learn from experts‚ and gain insights into optimizing their camera use. Many forums feature detailed discussions on common issues‚ such as resolving underexposure or addressing shutter malfunctions. Additionally‚ these communities often share tips for experimenting with film types and maintaining the camera. Engaging with these groups can enhance your photography skills and foster a sense of camaraderie among AE-1 Program enthusiasts.

Best Practices for Using the Canon AE-1 Program

Regular practice and learning from each shot are essential. Experiment with different film types to enhance creativity and maintain the camera properly for optimal performance and longevity.

Practicing and Learning from Each Shot

Consistent practice is key to mastering the Canon AE-1 Program. Each shot offers a learning opportunity to refine techniques and understand exposure‚ composition‚ and film behavior. By reviewing your photos‚ you can identify patterns in under or overexposure‚ allowing adjustments in future shoots. Keeping a photography journal helps track progress and reflect on improvements. Experimenting with different film speeds and modes enhances versatility. Regular use builds familiarity with the camera’s mechanics‚ ensuring intuitive operation during critical moments. Over time‚ this dedication leads to a deeper understanding of photography fundamentals and the AE-1’s capabilities.

Using the Camera in Different Lighting Conditions

Adapting to various lighting conditions is crucial for optimal results with the Canon AE-1 Program. In bright light‚ use lower ISO settings and faster shutter speeds to prevent overexposure. For low-light scenarios‚ increase the ISO or use slower shutter speeds‚ ensuring a tripod is used to avoid blur. When shooting in mixed lighting‚ bracket your shots to capture a range of exposures. Pay attention to the built-in light meter for accurate readings. Experimenting with different film speeds and modes helps master lighting challenges. Practice in diverse environments to refine your skills and understand how the camera performs in varying conditions.

Final Tips for Mastering the Canon AE-1 Program

Experiment with different film types to explore their unique characteristics. Keep a photography journal to track your progress and refine your techniques. Practice consistently to master the camera’s capabilities and enhance your creative vision.

Experimenting with Different Film Types

Exploring various film types with the Canon AE-1 Program enhances your photography experience. Start with versatile films like Ilford HP5‚ known for its wide exposure latitude‚ ideal for learning. Experiment with color films like Kodak Portra for vibrant‚ lifelike tones or black-and-white options like Tri-X for a classic aesthetic. Each film offers unique characteristics‚ allowing you to tailor your style. Keep a journal to track results‚ noting how different films perform under varying conditions. This practice helps refine your technique and deepen your understanding of the camera’s capabilities‚ ensuring you capture images that reflect your creative vision.

Keeping a Photography Journal for Improvement

Maintaining a photography journal is a powerful tool for growth. Document each shoot‚ noting settings‚ lighting conditions‚ and outcomes. Reflect on successes and areas for improvement‚ tracking your progress over time. Record film types‚ ISO settings‚ and techniques used‚ allowing you to refine your approach. This practice fosters a deeper understanding of your camera and personal style. Reviewing your journal regularly helps identify patterns and mistakes‚ enabling you to make informed adjustments. Over time‚ this habit will enhance your skills and inspire new creative directions‚ making it an invaluable companion in mastering the Canon AE-1 Program.

mark ii 5d canon manual

The Canon EOS 5D Mark II, released in 2008, revolutionized photography with its 21.1-megapixel full-frame sensor and Full HD video capabilities. This manual provides comprehensive guidance for mastering its features, ensuring optimal performance in both still photography and video recording.

Key Features of the Canon EOS 5D Mark II

The Canon EOS 5D Mark II boasts a 21.1-megapixel full-frame sensor, DIGIC 4 processor, and 1080p HD video recording. It features a 9-point AF system, weather-sealing, and compatibility with EF lenses, making it a versatile tool for professionals and enthusiasts alike.

Image Quality and Sensor

The Canon EOS 5D Mark II features a 21.1-megapixel full-frame CMOS sensor, delivering exceptional image quality with rich detail and vibrant colors. The sensor’s large size enables excellent low-light performance, minimizing noise even at higher ISO settings (100-6400, expandable to 25600). Paired with the DIGIC 4 image processor, it ensures fast processing and accurate color reproduction. The camera’s sensor design, without an optical low-pass filter, captures sharp images, making it ideal for professional photography and high-end applications.

Autofocus System

The Canon EOS 5D Mark II features a 9-point autofocus system, with all points being cross-type for enhanced accuracy and sensitivity. This system excels in still photography, offering quick and precise focus acquisition. However, during video recording, the autofocus is less effective, often requiring manual focus adjustments. While the AF system was advanced for its time, newer models like the 6D Mark II and 5D Mark IV have surpassed it with improved focus tracking and speed, making the 5D Mark II’s AF system somewhat outdated for modern standards.

Video Capabilities

The Canon EOS 5D Mark II was a pioneer in DSLR video recording, offering Full HD (1080p) video capture at 30fps. It introduced filmmakers to a cinematic look with shallow depth of field and high image quality. The camera supports 24fps for a more film-like aesthetic and features manual exposure control during recording. However, autofocus during video is limited, often requiring manual adjustments. Despite its age, the 5D Mark II remains popular for its video capabilities, though newer models like the 5D Mark IV have surpassed it with 4K resolution and improved autofocus in video mode.

Canon EOS 5D Mark II Manual Availability

The Canon EOS 5D Mark II manual is readily available online as a downloadable PDF or on the provided CD. It offers detailed guidance and troubleshooting tips.

Downloading the Manual

The Canon EOS 5D Mark II manual can be downloaded from Canon’s official website in PDF format. It is available in multiple languages and includes detailed instructions for camera operation, settings, and troubleshooting. The manual is compatible with firmware version 2.0 and later. Users can access it by visiting the Canon support page, selecting their camera model, and navigating to the manuals section. The PDF is searchable, making it easy to find specific features or error messages. Ensure to download the correct version for your firmware to avoid compatibility issues.

Manual Highlights

The Canon EOS 5D Mark II manual is a comprehensive guide covering camera setup, shooting modes, and advanced features. It details aperture, shutter speed, and ISO controls, as well as video recording options. The manual also includes troubleshooting tips and firmware update instructions. Key sections highlight autofocus customization and image quality optimization. Designed for both beginners and professionals, it provides clear instructions for mastering the camera’s capabilities. The manual is available in multiple languages and is accessible in PDF format for easy reference, ensuring users can fully utilize their camera’s potential.

Firmware Updates and Installation

The Canon EOS 5D Mark II’s firmware updates enhance camera performance and add new features. Regular updates ensure optimal functionality and compatibility with accessories. Visit Canon’s official website to download the latest version and follow the installation guide for a seamless upgrade process.

Latest Firmware Version

The latest firmware version for the Canon EOS 5D Mark II is 2.3.4, which improves camera functionality and resolves issues. This update enhances autofocus accuracy, reduces noise, and ensures compatibility with newer lenses and accessories. It also addresses bugs related to video recording and Live View mode. Regular firmware updates are essential for maintaining optimal camera performance and unlocking new features. Visit Canon’s official website to download the firmware and follow the installation instructions carefully to ensure a smooth update process.

Update Process

Updating the Canon EOS 5D Mark II’s firmware is a straightforward process. Download the latest firmware version (2.3.4) from Canon’s official website. Ensure your camera’s battery is fully charged and use a compatible memory card. Extract the downloaded file and copy it to the memory card’s root directory. Insert the card into the camera, navigate to the firmware update option in the menu, and follow the on-screen instructions. Avoid interrupting the update process to prevent potential damage. Visit Canon’s support page for detailed step-by-step guidance.

Build Quality and Ergonomics

The Canon EOS 5D Mark II features a durable magnesium alloy body with weather sealing, ensuring robust performance in harsh conditions. Its ergonomic design, including a contoured grip, enhances comfort during extended use, making it ideal for professional photographers seeking reliability and ease of handling.

Design and Comfort

The Canon EOS 5D Mark II boasts a sleek, magnesium alloy body with weather sealing, ensuring durability in challenging environments. Its ergonomic design features a contoured grip, providing a comfortable hold for extended shooting sessions. The camera’s balanced weight distribution and intuitive button layout enhance usability, while the 3.0-inch LCD screen offers crisp previews and menu navigation. These design elements combine to deliver a professional-grade tool that prioritizes both functionality and user comfort, making it a reliable choice for photographers seeking long-term performance and ease of use.

Durability

The Canon EOS 5D Mark II is built with a robust magnesium alloy body, offering excellent durability and resistance to harsh conditions. Its weather-sealed design protects against moisture and dust, making it suitable for outdoor and challenging environments. The camera’s solid construction ensures longevity, withstanding heavy use over time. While not indestructible, its high-quality build and materials provide reliable performance, even after years of service. This durability makes it a trusted choice for professionals and enthusiasts alike, ensuring consistent results in various shooting scenarios.

Comparison with Newer Models

The Canon EOS 5D Mark II remains a solid choice, though newer models like the 6D Mark II and 5D Mark IV offer improved autofocus and video features.

5D Mark II vs. 6D Mark II

The Canon EOS 6D Mark II, released in 2017, offers several upgrades over the 5D Mark II. It features a 24.2MP sensor, Dual Pixel AF for improved autofocus, and a vari-angle touchscreen. The 6D Mark II also includes Wi-Fi, NFC, and Bluetooth for enhanced connectivity. While the 5D Mark II excels in build quality and durability, the 6D Mark II provides better low-light performance with an ISO range up to 40,000. However, the 5D Mark II remains popular for its robust construction and timeless image quality.

5D Mark II vs. 5D Mark IV

The Canon EOS 5D Mark IV, released in 2016, offers significant upgrades over the 5D Mark II. It features a 30.2MP sensor, 61-point autofocus with expanded vertical coverage, and 4K video recording. The Mark IV also includes Dual Pixel RAW, improved ISO performance up to 32,000, and enhanced dynamic range. While the 5D Mark II remains a solid choice for still photography, the Mark IV excels in autofocus accuracy, video capabilities, and low-light performance, making it a better option for modern photographers and videographers seeking advanced features.

How to Use Manual Mode Effectively

Master manual mode by understanding aperture, shutter speed, and ISO. Use the exposure level indicator to balance settings and achieve desired effects in your photography.

Understanding Aperture, Shutter Speed, and ISO

Aperture controls depth of field, with lower f-stops (e.g., f/2.8) creating a shallower focus and higher f-stops (e.g., f/16) sharpening the entire image. Shutter speed regulates motion capture, with faster speeds (1/1000th of a second) freezing action and slower speeds (30 seconds) blurring movement. ISO adjusts sensitivity to light, with lower values (ISO 100) suited for bright conditions and higher values (ISO 6400) for low light, though risking noise. Balancing these elements is key to achieving desired photographic effects and optimizing image quality in various lighting scenarios.

Practical Tips for Shooting in Manual

Start by using the camera’s built-in metering system to gauge exposure, then adjust aperture, shutter speed, and ISO accordingly. For bright lighting, begin with the “Sunny 16” rule (f/16 at ISO 100). In low light, lower the aperture or increase ISO. Use the Q menu for quick access to settings. Shoot in RAW format for greater post-processing flexibility. Bracket shots to capture a range of exposures. Experiment with depth of field by adjusting aperture. Practice in different lighting conditions to refine your manual shooting skills and achieve consistent results.

Accessories for Enhanced Functionality

Enhance your Canon EOS 5D Mark II with compatible EF lenses, external flash units, and tripods for stability. Use high-speed memory cards for efficient storage and long-lasting batteries for extended shooting sessions.

Compatible Lenses

The Canon EOS 5D Mark II is compatible with EF-mount lenses, offering a wide range of creative possibilities. EF lenses, including primes like the EF 50mm f/1.8, provide exceptional image quality. While EF-S lenses are designed for APS-C sensors and won’t work on the 5D Mark II, the EF lineup ensures versatility for both portraits and landscapes. Investing in high-quality EF glass is a smart choice, as it remains compatible with future full-frame upgrades, maximizing your investment in photography gear.

External Flash and Tripods

Enhance your Canon EOS 5D Mark II’s functionality with external flashes and tripods. The camera’s hot shoe mount supports Speedlite flashes, enabling advanced lighting control for professional results. Tripods are essential for stability, especially in low-light conditions or when using long lenses. They prevent camera shake and ensure sharp images. For video recording, a tripod is crucial for smooth, steady footage. Additionally, consider a remote shutter release to minimize vibrations during shooting, further improving image quality and versatility in various photographic scenarios.

Memory Cards and Batteries

The Canon EOS 5D Mark II supports CF memory cards, including UDMA Mode 6 for faster data transfer. Using high-capacity cards (e.g., 32GB) is recommended for extended shooting sessions. The camera uses the LP-E6 battery, known for its long life, and is compatible with the optional BG-E6 battery grip for extended shooting. Ensure to carry spare batteries and memory cards for reliability. Regularly format cards in the camera to maintain performance and avoid data corruption. This setup ensures uninterrupted photography and video recording, even during prolonged use.

Maintenance and Care Tips

Regularly clean the sensor and lens to prevent dust and smudges. Use a soft cloth and avoid harsh chemicals. Store the camera in a dry place and check for fungus or damage. Proper maintenance ensures optimal performance and longevity of your Canon EOS 5D Mark II.

Cleaning the Sensor

Cleaning the sensor is crucial for maintaining image quality. Use a soft, dry cloth to gently wipe the sensor. Avoid harsh chemicals or abrasive materials. For stubborn dust, use a blower or Canon-approved cleaning solutions. Enable the camera’s mirror lock-up feature to access the sensor. Regular cleaning prevents dust spots and ensures sharp images. Always handle the camera with care to minimize contamination. Proper sensor maintenance is essential for optimal performance and longevity of your Canon EOS 5D Mark II.

Extending Camera Life

Proper care and maintenance are key to extending the life of your Canon EOS 5D Mark II. Store the camera in a cool, dry place away from direct sunlight. Avoid extreme temperatures and humidity, as these can damage internal components. Regularly clean the sensor and exterior to prevent dust buildup. Use genuine Canon accessories to ensure compatibility and avoid damage. Update firmware periodically to maintain performance. Handle the camera with care, and consider using a protective case for transportation. Proper maintenance ensures your camera remains functional and reliable for years.

Troubleshooting Common Issues

Common issues with the Canon EOS 5D Mark II include error messages and autofocus problems. Refer to the manual for solutions, such as firmware updates or manual adjustments.

Resolving Error Messages

Common error messages on the Canon EOS 5D Mark II, such as “Err 01” or “Err 02,” often indicate issues with the camera’s communication or hardware. These errors can stem from faulty memory cards, lens problems, or outdated firmware. To resolve these, ensure all components are clean and functioning properly. Updating the firmware to the latest version, such as 2.0 or higher, can also address many software-related issues. Refer to the manual’s troubleshooting section for detailed solutions and guidelines to restore optimal camera performance.

Dealing with Autofocus Problems

The Canon EOS 5D Mark II’s autofocus system, featuring 9 AF points, can sometimes struggle with accuracy or speed. Common issues include slow focus acquisition or inconsistent performance in low-light conditions. To address this, ensure the camera and lens are clean, and check that the AF mode is set appropriately for your subject. Using the center AF point for initial focus and then recomposing can improve accuracy. Additionally, updating the firmware to the latest version may enhance AF performance. For video, manual focus is often preferred due to limited AF functionality during recording.

Optimizing Video Shooting

For optimal video results, use manual focus, ensure proper lighting, and stabilize the camera. Avoid auto ISO and use external microphones for better audio quality and clarity.

Best Practices for Video

For optimal video capture with the Canon EOS 5D Mark II, use manual focus to avoid autofocus issues during recording. Ensure proper lighting to minimize noise and maintain low ISO settings. Stabilize the camera using a tripod or handheld rig for smooth footage. Record in 1080p at 24fps or 30fps for cinematic results. Utilize external microphones for high-quality audio. Avoid auto ISO and adjust settings manually for consistent exposure. Monitor white balance and exposure compensation to enhance video quality and achieve desired aesthetics.

Recommended Settings

For the Canon EOS 5D Mark II, set video mode to 1080p at 24fps or 30fps for cinematic results. Use the Movie mode and select appropriate Picture Styles for desired color profiles. Enable manual focus to avoid autofocus issues during recording. Set ISO between 100-1600 for optimal low-light performance. Use external microphones for better audio quality. Stabilize the camera with a tripod or rig for smooth footage. Adjust white balance and exposure compensation to match lighting conditions. These settings ensure high-quality video output, leveraging the camera’s capabilities effectively for professional results.

Technical Support and Resources

Canon offers extensive support for the EOS 5D Mark II, including downloadable manuals, firmware updates, and troubleshooting guides. Visit Canon’s official website for detailed resources and assistance.

Canon Support Options

Canon provides comprehensive support for the EOS 5D Mark II through its official website. Users can access downloadable manuals, firmware updates, and technical support resources. Additionally, Canon offers online troubleshooting guides and FAQs to address common issues. For personalized assistance, customers can contact Canon’s support team via phone, email, or live chat. While the 5D Mark II is an older model, Canon still maintains dedicated support pages to ensure users can optimize their camera’s performance and resolve any technical difficulties effectively.

Online Communities and Forums

Online communities and forums dedicated to the Canon EOS 5D Mark II offer valuable resources for users. Platforms like Reddit and specialized photography forums provide spaces for discussing tips, troubleshooting, and sharing experiences. These communities are active, with many enthusiasts still using and appreciating the camera. Users can find advice on manual mode, video settings, and accessories, as well as inspiration from shared photos. These forums also serve as hubs for collaboration and learning, making them indispensable for optimizing the camera’s capabilities and resolving common issues.

Conclusion

The Canon EOS 5D Mark II remains a legendary camera, offering exceptional image quality and versatility. Despite newer models, its manual provides essential tools for mastering photography and video. By understanding its features and maintaining proper care, users can extend its lifespan. Online communities and forums further enhance the learning experience. While technology advances, the 5D Mark II’s capabilities ensure it remains a valuable asset for creatives. This guide has covered key aspects, from operation to troubleshooting, empowering users to unlock its full potential and continue creating stunning visuals.

a type of manual medicine

Manual medicine, a hands-on approach, focuses on improving mobility and reducing pain through techniques like joint mobilization and soft tissue work, supported by clinical studies.

1.1 Definition and Scope

Manual medicine is a hands-on therapeutic approach focusing on joint mobilization, soft tissue techniques, and spinal manipulation. It is applied by osteopaths, physiotherapists, and chiropractors to address musculoskeletal disorders, enhancing mobility and reducing pain. This method is used to treat various conditions, including chronic pain, sports injuries, and postural imbalances. By targeting the body’s structure and function, manual medicine aims to restore balance and promote overall well-being, often combined with exercise and patient education for comprehensive care.

1.2 Historical Background

Manual medicine traces its roots to ancient practices, with early civilizations using techniques like massage and spinal manipulation for therapeutic purposes. The modern foundation was laid in the late 19th century with the development of osteopathy by Andrew Taylor Still, emphasizing the body’s self-healing potential. Chiropractic care emerged shortly after, introduced by Daniel David Palmer, focusing on spinal adjustments. These pioneering approaches have evolved, blending with physiotherapy and other modalities to form the diverse field of manual medicine practiced today, integrating evidence-based methods with traditional techniques.

1.3 Importance in Modern Healthcare

Manual medicine plays a vital role in modern healthcare by addressing musculoskeletal disorders, chronic pain, and mobility issues. Its non-invasive nature makes it a preferred option for patients seeking alternatives to surgery or medication. Evidence-based practices, such as osteopathy and chiropractic care, have shown effectiveness in treating conditions like low back pain and osteoarthritis. By improving joint function and reducing pain, manual medicine enhances quality of life and supports overall well-being, aligning with contemporary healthcare’s focus on holistic, patient-centered care.

Types of Manual Therapy

Manual therapy includes osteopathy, physiotherapy, chiropractic care, and craniosacral therapy, each employing unique techniques to address musculoskeletal issues and improve mobility and function.

2.1 Osteopathy

Osteopathy is a form of manual therapy that uses stretching, massaging, and manipulation to adjust the body’s structure, aiming to improve function and overall well-being. It focuses on enhancing mobility, reducing pain, and restoring balance within the musculoskeletal system. Osteopathic techniques target joints, muscles, and soft tissues to promote healing and maintain health. This holistic approach emphasizes the interconnectedness of the body’s systems, making it a popular choice for addressing a wide range of musculoskeletal and systemic conditions.

2.2 Physiotherapy

Physiotherapy, a key component of manual therapy, employs exercises and hands-on techniques to aid recovery from injuries and manage health conditions. It focuses on improving mobility, strength, and function. Techniques include joint mobilization, soft tissue work, and tailored exercises to address specific needs. Physiotherapy is widely used to treat musculoskeletal disorders, helping patients regain independence and reduce pain. It is a versatile approach that combines manual methods with active participation from the patient, making it effective for both acute and chronic conditions.

2.3 Chiropractic Care

Chiropractic care is a specialized form of manual therapy focusing on the diagnosis and treatment of musculoskeletal disorders, particularly those affecting the spine. It emphasizes the use of spinal adjustments and manipulations to restore proper alignment and function. Chiropractors employ high-velocity, low-amplitude thrusts to relieve pressure on joints and nerves, addressing issues like back pain and improving mobility. This non-invasive approach aims to enhance the body’s natural healing processes, promoting overall well-being without surgical intervention.

2.4 Craniosacral Therapy

Craniosacral therapy is a gentle, non-invasive form of manual medicine focusing on the cranial joints and central nervous system. It involves soft tissue techniques to release tension in the cranial sacral system, enhancing nervous system function and reducing stress. Practitioners use light pressure to improve cerebrospinal fluid flow, alleviating pain and promoting relaxation. This therapy is particularly effective for conditions like headaches and neck pain, offering a holistic approach to restoring balance and improving overall well-being.

Techniques Used in Manual Therapy

Manual therapy employs techniques like joint mobilization, soft tissue work, and spinal manipulation to enhance mobility, reduce pain, and improve overall musculoskeletal function effectively.

3.1 Joint Mobilization

Joint mobilization involves gentle, targeted movements to improve joint range of motion, reduce stiffness, and enhance function. Techniques vary from slow, sustained stretches to dynamic movements, tailored to patient needs. This method is particularly effective for addressing joint-related pain and stiffness, often seen in conditions like arthritis or post-injury recovery. By applying controlled forces, therapists can restore joint mobility, promoting better movement patterns and reducing discomfort. Joint mobilization is a cornerstone of manual therapy, offering a non-invasive approach to improving musculoskeletal health and functional ability.

3.2 Soft Tissue Mobilization

Soft tissue mobilization targets muscles, tendons, and ligaments to alleviate pain, improve circulation, and reduce muscle tension. Techniques include massage, stretching, and myofascial release. This method enhances flexibility, breaks down scar tissue, and promotes healing. It is particularly effective for conditions like carpal tunnel syndrome and chronic muscle strain. By addressing soft tissue restrictions, mobilization restores normal movement patterns and reduces discomfort, making it a key component of manual therapy for musculoskeletal disorders and post-injury rehabilitation.

3.3 Spinal Manipulation

Spinal manipulation is a core technique in manual medicine, involving the application of controlled force to spinal joints to improve mobility and reduce pain. It is commonly used in chiropractic care and osteopathy. This method helps restore joint mobility, relieve pressure on muscles and nerves, and enhance overall spinal function. Evidence supports its effectiveness in treating low back pain, neck pain, and other musculoskeletal conditions, making it a widely recognized and evidence-based approach in modern healthcare.

3.4 High Velocity, Low Amplitude (HVLA) Thrust

A High Velocity, Low Amplitude (HVLA) thrust is a precise manual technique used to restore joint mobility and reduce stiffness. It involves a quick, controlled force applied to a specific joint, often used in chiropractic care. This method targets restricted movement and can relieve pressure on surrounding muscles and nerves. HVLA thrusts are commonly used for spinal manipulation and are supported by evidence showing their effectiveness in treating musculoskeletal conditions. Proper training is essential to ensure safety and avoid potential side effects.

3.5 Joint Oscillation

Joint oscillation is a manual therapy technique involving gentle, rhythmic movements applied to a joint to improve mobility and reduce stiffness. It targets the synovial joints, enhancing synovial fluid circulation and breaking down adhesions. This method is particularly effective for conditions like arthritis and chronic joint pain. By applying controlled oscillations, therapists can restore normal joint function and alleviate discomfort. Joint oscillation is often combined with other manual techniques for comprehensive treatment, making it a versatile and non-invasive approach in manual medicine.

Applications of Manual Therapy

Manual therapy effectively addresses musculoskeletal disorders, low back pain, carpal tunnel syndrome, and osteoarthritis, enhancing mobility and reducing discomfort through targeted techniques.

4.1 Treatment of Musculoskeletal Disorders

Manual therapy is highly effective in treating musculoskeletal disorders, reducing pain and inflammation through techniques like joint mobilization and soft tissue manipulation. Studies by Childs et al. (2004) and Licciardone et al. (2003) highlight its success in addressing conditions such as low back pain and osteoarthritis. By improving joint mobility and function, manual therapy enhances overall musculoskeletal health, offering a non-invasive alternative to traditional treatments.

4.2 Management of Low Back Pain

Manual therapy is a proven approach for managing low back pain, offering significant relief through techniques like spinal manipulation and joint mobilization. Studies by Childs et al. (2004) and Licciardone et al. (2003) demonstrate its effectiveness in reducing pain and improving function. By addressing musculoskeletal imbalances and enhancing mobility, manual therapy provides a non-invasive solution, often reducing the need for medication or surgery. This approach is particularly beneficial for chronic cases, promoting long-term recovery and improved quality of life.

4.3 Relief from Carpal Tunnel Syndrome

Manual therapy offers effective relief for carpal tunnel syndrome by addressing wrist and hand mobility. Techniques like joint mobilization and soft tissue work reduce pressure on the median nerve, alleviating numbness and tingling. Studies by Akalin et al. (2002) and Rozmaryn et al. (1998) highlight its benefits in improving function and reducing symptoms. This non-invasive approach is particularly valuable for avoiding surgical interventions, providing a natural path to recovery and enhanced hand functionality.

4.4 Treatment of Knee and Hip Osteoarthritis

Manual therapy effectively addresses knee and hip osteoarthritis by improving joint mobility and reducing stiffness. Techniques like joint mobilization and soft tissue work enhance movement and alleviate pain. Studies by Deyle et al. (2000) and MacDonald et al. (2006) demonstrate its efficacy in managing osteoarthritis symptoms, delaying surgical interventions. This approach focuses on restoring function and reducing discomfort, offering a non-invasive solution for patients seeking to maintain active lifestyles while managing their condition effectively.

Benefits of Manual Therapy

Manual therapy enhances joint mobility, alleviates pain, and improves blood circulation, promoting overall musculoskeletal health and facilitating recovery through targeted, hands-on techniques.

5.1 Improved Range of Motion

Manual therapy significantly enhances joint mobility by addressing stiffness and restrictions. Techniques like joint mobilization and soft tissue work restore flexibility, allowing for smoother, more natural movement. This improvement reduces strain on surrounding muscles and ligaments, promoting better overall musculoskeletal function. Patients often experience increased ease in performing daily activities and physical tasks, making it a cornerstone of rehabilitation and preventive care. Improved range of motion also supports long-term joint health, reducing the risk of further injuries or degenerative conditions.

5.2 Pain Alleviation

Manual therapy effectively reduces pain by targeting the source of discomfort. Techniques like joint mobilization and soft tissue work release tension, decreasing inflammation and irritation. Studies show that methods such as spinal manipulation and craniosacral therapy can significantly alleviate chronic pain conditions, including low back pain and carpal tunnel syndrome. The hands-on approach stimulates neurophysiological responses, modulating pain perception and promoting relaxation. This makes manual therapy a valuable option for patients seeking non-invasive, drug-free pain relief, enhancing their quality of life and functional abilities.

5.3 Enhanced Blood Circulation

Manual therapy improves blood circulation by releasing tension in soft tissues and joints. Techniques like soft tissue mobilization and joint oscillation promote venous return, reducing inflammation. Enhanced circulation delivers oxygen and nutrients to damaged areas, aiding repair. This reduction in muscle tension and scar tissue adhesions fosters a healthier environment for recovery. Improved blood flow also supports the removal of metabolic waste, further enhancing tissue health and overall well-being. Regular manual therapy sessions can maintain optimal circulatory function, benefiting both acute and chronic conditions.

5.4 Strengthening and Stretching Exercises

Strengthening and stretching exercises complement manual therapy by enhancing muscle function and flexibility. Tailored exercises target specific areas, improving mobility and strength. These exercises, often prescribed as homework, help maintain progress made during therapy sessions. Regular practice promotes long-term recovery, reducing the risk of future injuries. Stretching improves range of motion, while strengthening builds stability, both essential for optimal musculoskeletal health. This integrated approach ensures sustained benefits, empowering patients to manage their conditions effectively and independently.

Effectiveness and Evidence-Based Practice

Manual therapy’s effectiveness is supported by clinical studies showing improved outcomes for musculoskeletal disorders, low back pain, and osteoarthritis, with fMRI confirming pain reduction.

6.1 Clinical Outcomes and Studies

Studies demonstrate manual therapy’s effectiveness in treating musculoskeletal disorders, with significant improvements in low back pain, carpal tunnel syndrome, and knee and hip osteoarthritis. Research by Childs et al. (2004) and Licciardone et al. (2003) highlights its benefits for low back pain. Akalin et al. (2002) and Rozmaryn et al. (1998) show positive outcomes for carpal tunnel syndrome. Deyle et al. (2000) and MacDonald et al. (2006) confirm its efficacy for knee and hip osteoarthritis, respectively. These findings underscore manual therapy’s role in enhancing mobility and reducing pain across various conditions.

6.2 Neurophysiological Responses

Manual therapy initiates neurophysiological responses, with mechanical forces affecting the peripheral and central nervous systems. These responses contribute to clinical outcomes, such as pain reduction. Studies using functional MRI show changes in brain connectivity related to pain processing after techniques like spinal manipulation. Each method results in reduced pain reports, indicating a direct impact on neurophysiological pathways. This evidence supports the role of manual therapy in modulating pain perception and improving functional outcomes through neural mechanisms.

6.3 Functional Magnetic Resonance Imaging (fMRI) Findings

Functional MRI studies reveal that manual therapy alters brain connectivity in regions processing pain. Techniques like spinal manipulation and mobilization reduce clinical pain reports by modulating these pathways. Immediate changes in functional connectivity suggest that manual therapy influences both peripheral and central nervous system responses. These findings provide evidence of manual therapy’s role in pain modulation, supporting its effectiveness in managing musculoskeletal disorders and enhancing patient outcomes through neurophysiological mechanisms.

Risks and Contraindications

Manual therapy is generally safe but may cause temporary discomfort. Certain conditions, like fractures or severe osteoporosis, are contraindications due to increased injury risk.

7.1 Potential Side Effects

Manual therapy is generally safe, but temporary side effects may include mild soreness, stiffness, or discomfort at the treatment site. These effects typically resolve within 24-48 hours. In rare cases, patients might experience dizziness or nausea, especially after spinal manipulation. It is crucial to ensure treatments are performed by skilled, licensed practitioners to minimize risks. Open communication with the therapist about any discomfort is essential for a safe and effective treatment experience.

7.2 Conditions Unsuitable for Manual Therapy

Manual therapy is contraindicated in certain conditions, such as acute fractures, severe osteoporosis, or inflammatory arthritis. Patients with recent injuries, ligament sprains, or muscle strains should avoid manual therapy until healed. Conditions like spinal instability, herniated discs, or severe joint degeneration may also require caution. A thorough medical evaluation is essential to determine suitability for manual therapy, ensuring safe and effective treatment. Specific contraindications vary depending on the technique and patient health status, emphasizing the need for personalized assessment.

Future Directions in Manual Therapy

Future directions include integrating advanced research methodologies and innovative techniques, focusing on personalized treatment plans and evidence-based practices to enhance clinical outcomes and patient care.

8.1 Emerging Trends

Emerging trends in manual therapy include the integration of advanced imaging techniques, like fMRI, to better understand neurophysiological responses. Research is also focusing on personalized treatment plans, leveraging AI to predict patient outcomes. Additionally, there is a growing emphasis on combining manual therapy with other modalities, such as exercise and mindfulness, to enhance recovery. These advancements aim to optimize clinical outcomes and improve patient care, ensuring manual therapy remains a cornerstone of modern healthcare.

8.2 Advances in Research and Methodology

Research in manual therapy is evolving, with studies utilizing functional MRI to explore brain connectivity changes post-treatment. Neurophysiological models now link mechanical forces to clinical outcomes, guiding future study designs. Advances in methodology include randomized controlled trials and longitudinal studies, enhancing evidence-based practices. These developments aim to refine treatment protocols, ensuring manual therapy remains effective and patient-centered, while addressing the complexity of musculoskeletal conditions through robust scientific inquiry.

Conclusion

Manual medicine offers a comprehensive approach to treating musculoskeletal disorders, emphasizing hands-on techniques to restore function and alleviate pain. Its effectiveness is supported by clinical studies showing improvements in mobility and pain reduction. As research advances, the understanding of neurophysiological responses and imaging findings continues to refine treatment methods. With a focus on evidence-based practices, manual medicine remains a vital component of modern healthcare, providing personalized care and enhancing patient outcomes through skilled, non-invasive interventions.

snap polaroid manual

Welcome to the Polaroid Snap Manual! This guide helps you master the camera’s features, from capturing photos to printing instantly. Essential for troubleshooting and optimizing your Polaroid experience.

1.1 Overview of the Polaroid Snap Camera

The Polaroid Snap is a hybrid instant camera that combines digital technology with classic instant film printing. Compact and user-friendly, it captures and prints 2×3″ photos instantly. Featuring a built-in printer, color screen, and intuitive controls, it offers a modern twist on traditional Polaroid photography, making it ideal for casual shooters and instant photo enthusiasts alike.

1.2 Importance of Reading the Manual

Reading the Polaroid Snap manual is crucial for understanding its features, troubleshooting common issues, and optimizing photo quality. It provides detailed guidance on camera setup, film handling, and advanced functions, ensuring you make the most of your instant photography experience. The manual also helps prevent errors and enhances your ability to capture memorable moments effectively.

Features and Benefits of the Polaroid Snap

The Polaroid Snap combines digital and instant film capabilities, offering a unique hybrid design. It features a built-in printer, color screen, and versatile shooting modes for creative photography.

2.1 Key Specifications of the Polaroid Snap

The Polaroid Snap features a 10MP digital camera, 3.5-inch touchscreen LCD, and built-in printer. It supports 2×3-inch instant film, has 32GB internal storage, and includes a rechargeable battery. The camera also offers various shooting modes and a self-timer, making it versatile for creative photography. It prints photos in under a minute, combining modern technology with the charm of instant film.

2.2 Unique Selling Points of the Camera

The Polaroid Snap stands out for its hybrid design, blending digital photography with instant printing. It captures 10MP photos and prints them instantly on 2×3-inch paper. The camera features a 3.5-inch touchscreen, microSD card support, and a rechargeable battery. Its portability and user-friendly interface make it ideal for casual and creative shooters alike, offering a modern twist on classic instant photography.

Unboxing and Accessories

The Polaroid Snap comes with the camera, USB cable, and quick start guide; For enhanced use, consider additional accessories like cases, extra film, and cleaning tools.

3.1 What’s Included in the Box

The Polaroid Snap box includes the camera, a USB cable for charging, and a quick start guide. Ensure all items are present before initial use. Additional film packs and accessories, like cases or cleaning tools, may be purchased separately to enhance your experience. Always verify the contents match the product description for a complete setup.

3.2 Recommended Accessories for Enhanced Use

Enhance your Polaroid Snap experience with a protective case or bag for safe transport. Additional film packs ensure you never run out of shots. Cleaning tools, like microfiber cloths, help maintain lens clarity. A USB-C charger is handy for on-the-go power. These accessories optimize functionality and protect your investment, ensuring lasting performance and creativity with your instant camera.

Setting Up Your Polaroid Snap

Setting up your Polaroid Snap is straightforward. Insert film, charge the battery, and navigate initial settings to start capturing instant photos with ease and creativity.

4.1 Inserting Film into the Camera

To insert film into your Polaroid Snap, open the film compartment located on the camera’s rear. Gently remove any old photo paper and clean the black roller with a moist q-tip using rubbing alcohol. Insert the new film pack, ensuring it aligns properly. Close the compartment securely and allow the camera to initialize. Proper film insertion ensures smooth operation and high-quality instant prints.

4.2 Charging the Battery

To charge your Polaroid Snap, use the provided USB-C cable and connect it to a compatible charger or computer. Ensure the camera is turned off during charging for optimal performance. The battery typically takes 2-3 hours to fully charge. Avoid overcharging, as it may reduce battery life. A full charge provides enough power for multiple film packs and extended use.

4.3 Initial Camera Settings

Turn on your Polaroid Snap and navigate to the settings menu using the control buttons. Set the date and time for proper photo organization. Adjust brightness and contrast to your preference. Familiarize yourself with default settings for optimal performance. These initial configurations ensure your camera is ready for capturing high-quality instant photos with ease and precision.

Understanding the Camera Controls

The Polaroid Snap features intuitive buttons and dials for easy navigation. Mastering these controls enhances your photography experience, allowing quick access to settings and functions.

5.1 Layout of the Camera Buttons and Dials

The Polaroid Snap features a user-friendly layout with a mode button, 4-way directional pad, OK button, print button, and power button. The USB port is located on the side for easy charging and file transfers, ensuring intuitive navigation and quick access to essential functions.

5.2 Functions of Each Control

The mode button cycles through shooting options, while the 4-way directional pad navigates settings. The OK button confirms selections, and the print button triggers photo printing. The power button turns the camera on/off, and the USB port enables charging and file transfers, ensuring seamless functionality and control for a smooth user experience with the Polaroid Snap.

Shooting Modes and Options

Explore versatile shooting modes, including double exposure and self-timer, to enhance creativity. Adjust settings for optimal results, ensuring every shot captures life’s fleeting moments perfectly.

6.1 Exploring Different Shooting Modes

The Polaroid Snap offers versatile shooting modes to enhance your photography experience. Double exposure allows artistic layering of images, while the self-timer enables group shots. Experiment with manual mode for precise control over brightness and contrast, ensuring each photo captures the moment perfectly. These modes empower creativity, making every shot unique and tailored to your vision.

6.2 Adjusting Settings for Optimal Photos

Adjust brightness and contrast to refine your images, ensuring vibrant colors and clarity. Use the self-timer for sharp group shots and experiment with composition for visually appealing frames. Natural lighting enhances results, while reviewing photos helps refine techniques. These tweaks elevate image quality, making every snapshot memorable and professionally finished.

Loading and Using Film

Ensure compatibility with Polaroid Snap by using recommended film types. Handle film gently, avoiding exposure to light. Load film correctly to prevent jams and ensure proper function.

7.1 Types of Film Compatible with the Polaroid Snap

The Polaroid Snap is designed to work with Polaroid i-Type and 600 series films. These films ensure vibrant colors and sharp images. Avoid using non-Polaroid films, as they may cause compatibility issues. For best results, use genuine Polaroid film to achieve optimal photo quality and performance. Explore color and monochrome options to enhance your creative photography experience with the Polaroid Snap.

7.2 Best Practices for Film Handling

Always handle Polaroid film gently to avoid exposure to light and moisture. Store film in a cool, dry place away from direct sunlight. Clean the camera’s black roller with a moist q-tip and rubbing alcohol to prevent jams. Ensure film is properly inserted and aligned. Avoid touching the film surface to maintain image quality. Regular maintenance ensures optimal performance and extends the life of your Polaroid Snap.

Printing Photos with the Polaroid Snap

The Polaroid Snap instantly prints your photos using self-contained film. Each print develops automatically, capturing memories with classic white borders and vibrant colors for lasting keepsakes.

8.1 The Printing Process Explained

The Polaroid Snap prints photos instantly using self-contained film. After capturing, the camera processes the image and ejects the photo; The film develops automatically, revealing your picture over minutes. Ensure proper film handling and avoid shaking the photo for best results. This process combines classic instant photography with modern convenience, making every shot a unique, tangible memory.

8.2 Troubleshooting Printing Issues

If your Polaroid Snap isn’t printing, check for paper jams or empty film. Clean the black roller with a moist q-tip and rubbing alcohol. Reset the camera using a toothpick on the reset button. Ensure all paper and calibration sheets are properly inserted; If issues persist, refer to the manual or contact Polaroid support for assistance. Proper maintenance ensures smooth operation.

Customizing Your Camera Settings

Adjust brightness and contrast for personalized photos. Use the self-timer for hands-free shots. Explore additional features to enhance creativity and tailor your Polaroid Snap experience perfectly.

9.1 Adjusting Brightness and Contrast

Adjust brightness and contrast to enhance your photos. Access these settings via the menu. Increase brightness for lighter images or decrease for darker tones. Contrast adjusts color intensity. Experiment to find your preferred balance. These adjustments ensure optimal image quality before printing. Fine-tune to match your creative vision or lighting conditions for the best results with your Polaroid Snap.

9.2 Using the Self-Timer and Other Features

Activate the self-timer for hands-free shooting, ideal for group photos or steady shots. Set the timer via the menu, choosing from 10-second intervals. Additionally, explore features like remote triggering through the Polaroid app, enabling wireless control. Pair the camera with your smartphone to access advanced settings and instantly share your photos, enhancing your creative workflow and connectivity options seamlessly.

Maintenance and Care Tips

Regularly clean the lens with a soft cloth and avoid harsh chemicals. Store the camera in a dry, cool place away from direct sunlight to preserve functionality and film quality. Use a protective case to prevent scratches and extend the camera’s lifespan, ensuring optimal performance for years to come.

10.1 Cleaning the Camera and Lens

To maintain your Polaroid Snap, gently clean the camera body with a soft cloth. For the lens, use a microfiber cloth lightly dampened with rubbing alcohol on a q-tip. Avoid harsh chemicals or water, which can damage the lens coating. Regular cleaning prevents smudges and ensures sharp photos. Store the camera in a dry, cool place away from direct sunlight to preserve functionality and film quality. Use a protective case to prevent scratches and extend the camera’s lifespan, ensuring optimal performance for years to come.

10.2 Storing the Camera Properly

Store your Polaroid Snap in a cool, dry place away from direct sunlight. Avoid extreme temperatures and humidity to preserve film quality. Keep the camera in a protective case when not in use to prevent scratches. Store film separately in its original packaging to maintain its sensitivity. Always ensure the camera is turned off and film is removed before storing for extended periods to extend its lifespan and functionality.

Troubleshooting Common Issues

Troubleshooting common issues with your Polaroid Snap? Address problems like film jams, blinking lights, or error codes by cleaning the black roller with a moist q-tip and resetting the camera using a toothpick. Proper handling ensures optimal performance and extends the camera’s lifespan.

11.1 Resolving Film Jamming Problems

To resolve film jamming issues, remove all photo paper and gently clean the black roller inside the camera with a moist q-tip using rubbing alcohol. Avoid water to prevent damage. Use a toothpick or wire to press the reset button, located on the left side beneath the USB port. Reinsert all photo paper and blue calibration paper properly. If issues persist, gently assist the camera by guiding the film through. Regular maintenance ensures smooth operation and prevents future jams.

11.2 Fixing Blinking Lights and Error Codes

If your Polaroid Snap displays blinking lights or error codes, start by turning off the camera and waiting a few seconds before restarting it. This often resolves temporary glitches. If the issue persists, clean the black roller with a moist q-tip and rubbing alcohol, then reset the camera using the reset button. Consult the troubleshooting guide for specific error code solutions or contact Polaroid support for further assistance.

Advanced Features and Techniques

Explore creative modes like double exposure and manual controls to enhance your instant photography. Experiment with self-timer and remote controls for unique, professional-grade shots effortlessly.

12.1 Using Double Exposure and Other Creative Modes

Double exposure allows you to layer two images, creating unique, artistic effects. Experiment with manual mode for precise control over brightness and contrast. Use the self-timer for hands-free shots and explore remote triggering through the Polaroid app. These features empower you to push creative boundaries, capturing distinctive instant photos that stand out.

12.2 Tips for Taking Better Instant Photos

Master composition by focusing on your subject and balancing elements. Natural light enhances colors, while low light creates moody effects. Experiment with double exposure and creative modes for unique results. Review your shots to refine settings and techniques. Practice patience, as instant film rewards thoughtful, intentional photography. Embrace imperfections for authentic, timeless captures.

Accessories for Enhanced Functionality

Enhance your Polaroid Snap experience with essential accessories like protective cases, stylish bags, and extra film packs. These additions ensure convenience, creativity, and longevity for your instant photography journey.

13.1 Recommended Cases and Bags

Protect your Polaroid Snap with stylish and durable cases or bags. The Polaroid Eva case is a popular choice, offering sleek designs and robust protection. Look for water-resistant options or padded bags to ensure your camera stays safe during travel. These accessories not only enhance portability but also maintain the camera’s pristine condition, allowing you to capture memories without worrying about damage.

13.2 Additional Film and Paper Options

Explore a variety of film options for your Polaroid Snap, including i-Type, 600, and Impossible Project films. Each offers unique color tones and finishes, enhancing your creative output. For best results, use genuine Polaroid products to ensure compatibility and quality. Stock up on extra film packs or try specialty paper for diverse photographic effects, available at Polaroid stores or authorized retailers.

Warranty and Support Information

Your Polaroid Snap is backed by a limited warranty. For inquiries or issues, contact Polaroid Support directly. Ensure to use genuine products for optimal performance and warranty validity.

14.1 Understanding Your Warranty Coverage

Your Polaroid Snap is covered by a limited warranty, ensuring protection against manufacturing defects. The warranty period varies by region, typically covering one year from purchase. It includes repairs or replacements for faulty components. For details, refer to the warranty document provided with your camera. Keep your proof of purchase and register your product for seamless support. Genuine accessories are recommended to maintain warranty validity.

14.2 Contacting Polaroid Support

For assistance, visit the official Polaroid website and navigate to the support section. Use the contact form or live chat for inquiries. You can also email support@polaroid.com or call the regional customer service number. Ensure to have your camera’s serial number ready for efficient help. Check the website for updated contact details and support options.

The Polaroid Snap offers a unique blend of instant photography and modern convenience. Experiment with its features, enjoy the creative process, and capture life’s fleeting moments with joy.

15.1 Summary of Key Features and Benefits

The Polaroid Snap combines instant printing with a compact, user-friendly design. It supports various film types, offering vibrant, tactile photos. Creative modes and intuitive controls enhance your shooting experience, making it ideal for capturing memories and experimenting with instant photography. Its portability and simplicity encourage spontaneous creativity, ensuring every moment is preserved with unique charm and instant gratification.

15.2 Encouragement to Experiment and Enjoy

Embrace the joy of instant photography with the Polaroid Snap! Experiment with creative modes, capture spontaneous moments, and enjoy the tactile experience of watching your photos develop. Don’t hesitate to try new techniques—every shot is a unique opportunity to create lasting memories. Let the camera’s portability and simplicity inspire you to explore, innovate, and cherish the magic of instant photography.

kindle fire 10 hd manual

Device Overview

The Kindle Fire 10 HD features a 10.1-inch display, running on Fire OS with Alexa hands-free functionality, designed for seamless reading, streaming, and browsing experiences.

1.1 Key Features of the Kindle Fire 10 HD

The Kindle Fire 10 HD boasts a vibrant 10.1-inch display, enhanced performance, and up to 12 hours of battery life. It features Alexa hands-free for voice commands, a powerful processor, and ample storage options. The device supports Wi-Fi connectivity, Bluetooth pairing, and offers a user-friendly Fire OS interface. Its sleek design and robust features make it ideal for reading, streaming, and multitasking on the go.

1.2 Technical Specifications

The Kindle Fire 10 HD features a 10.1-inch display, powered by a robust processor for smooth performance. It offers up to 12 hours of battery life and comes with storage options ranging from 32GB to 64GB. The device runs on Fire OS, supports Wi-Fi connectivity, and includes Bluetooth for wireless accessories. Its lightweight design and long-lasting battery make it a versatile choice for everyday use.

Setting Up Your Kindle Fire 10 HD

The setup process includes unboxing, charging, and activating your device. Follow on-screen instructions to connect to Wi-Fi and register your device for a seamless start.

2.1 Unboxing and Initial Setup

Carefully unpack your Kindle Fire 10 HD from the box, ensuring all accessories are included. Gently remove the protective covering from the screen. Locate the power button, typically on the top edge, and press it to turn on the device. Follow the on-screen instructions to select your language, connect to a Wi-Fi network, and register or sign in with your Amazon account. This completes the initial setup process.

2.2 Charging the Device

To charge your Kindle Fire 10 HD, use the provided USB cable and charger. Connect the cable to the device’s port and plug the charger into a power source. The device typically takes about 3.5 hours to fully charge. Avoid using the device while charging to speed up the process. The LED indicator will notify you when charging is complete. Always use original accessories for optimal performance and longevity.

2.3 Activating Your Kindle Fire 10 HD

To activate your Kindle Fire 10 HD, start by turning it on and selecting your preferred language. Connect to a Wi-Fi network and sign in with your Amazon account. Follow the on-screen instructions to complete the setup process. If you don’t have an Amazon account, create one during activation. Once activated, your device is ready to use, with access to Amazon services and content. Ensure your device is fully charged before starting the activation process.

Navigating the Interface

The Kindle Fire 10 HD features an intuitive touchscreen interface with a home screen, app grid, and navigation bar. Swipe left/right to access apps, and up/down to scroll.

3;1 Understanding the Touchscreen Interface

The Kindle Fire 10 HD features a responsive touchscreen interface designed for easy navigation. Users can interact by tapping, swiping, or pinching to zoom. The home screen displays apps and content, while gestures like swiping left/right access different screens. The interface is intuitive, allowing seamless browsing and app management. Accessibility features like text resizing enhance usability, making the device user-friendly for all skill levels.

3.2 Navigating Home Screen and Menus

The Kindle Fire 10 HD home screen is organized with a dock for favorite apps and a carousel showing recently used items; Swipe left or right to explore content categories like Books, Video, and Apps. Tap the menu icon to access additional options, such as settings or help. The interface allows easy switching between apps and content libraries, ensuring a smooth and intuitive user experience. Customize your home screen by adding or removing items as needed.

Connectivity Options

The Kindle Fire 10 HD supports Wi-Fi for internet access and Bluetooth for pairing devices. Troubleshooting tools help resolve connectivity issues, ensuring stable and reliable device performance.

4.1 Connecting to Wi-Fi

To connect your Kindle Fire 10 HD to Wi-Fi, go to Settings, select Wi-Fi, and choose your network. Enter the password if prompted. Ensure your network is visible and functioning. If issues arise, restart your device or check your router. For further assistance, refer to the on-device user guide or troubleshooting section. This ensures a stable internet connection for streaming, browsing, and downloading content.

4.2 Bluetooth Pairing and Management

To pair a Bluetooth device with your Kindle Fire 10 HD, go to Settings, select Bluetooth, and enable it. Put your device in pairing mode, then select it from the list. Once connected, manage paired devices under Bluetooth Settings. If issues occur, restart your device or forget the problematic connection. This feature allows seamless connectivity with speakers, headphones, or other compatible devices for enhanced functionality.

4.3 Troubleshooting Connectivity Issues

If experiencing connectivity problems, restart your Kindle Fire 10 HD and ensure Wi-Fi or Bluetooth is enabled. Check your network settings and confirm the connection. Resetting network configurations or forgetting problematic connections can resolve issues. Ensure your device is updated to the latest software. If problems persist, clear the cache in Settings or perform a factory reset as a last resort.

Alexa Hands-Free Feature

The Kindle Fire 10 HD supports Alexa hands-free, enabling voice commands to control smart home devices, set reminders, or play music without manual input.

5.1 Enabling Alexa Hands-Free

To enable Alexa hands-free on your Kindle Fire 10 HD, go to Settings, select Alexa, and toggle on Hands-Free Mode. This allows voice commands without waking the device. Ensure your device is connected to the internet and has the latest software. You can also customize settings like wake word sensitivity for improved performance. This feature enhances accessibility and convenience, making it easier to interact with your device.

5.2 Using Voice Commands

With Alexa hands-free enabled, you can use voice commands to control your Kindle Fire 10 HD. Simply say “Alexa,” followed by commands like “play music,” “open apps,” or “set reminders.” You can also ask for news, weather, or book recommendations. For better results, speak clearly and ensure you’re in a quiet environment. Customize settings like wake word sensitivity in the Alexa section of Settings for improved performance.

Managing Your Content

The Kindle Fire 10 HD allows easy management of books, apps, and files. Use the built-in storage or transfer content via USB for convenient organization and access.

6.1 Downloading and Managing Books

The Kindle Fire 10 HD simplifies book management. Download books from the Kindle Store directly to your device or transfer them via USB. Organize books into collections for easy access. Use the built-in reader to adjust fonts and brightness for a comfortable reading experience. Access your library wirelessly, and sync your progress across devices using Amazon’s cloud storage. Manage downloads and storage settings to optimize your reading experience.

6.2 Installing and Managing Apps

To install apps on your Kindle Fire 10 HD, visit the Amazon Appstore. Browse or search for apps, then select and download. Once installed, apps appear on your home screen. Manage apps by organizing them into folders or removing unused ones to free up storage. Regularly update apps via the Appstore settings to ensure optimal performance. Uninstalling apps is straightforward, helping you maintain device efficiency and storage space.

6.3 Transferring Files to Your Kindle Fire 10 HD

Transfer files to your Kindle Fire 10 HD using a USB cable, email, or the Send-to-Kindle feature. Connect your device to a computer via USB to drag and drop files. For email, send documents to your Kindle email address. The Send-to-Kindle feature allows direct transfers from compatible apps. Ensure your device is connected to Wi-Fi for email and cloud-based transfers. This makes managing documents, photos, and other media straightforward and efficient.

6.4 Managing Storage Space

To free up space on your Kindle Fire 10 HD, delete unused apps, clear cached data, and remove downloaded content. Use the Storage section in Settings to monitor usage. Regularly transfer files to cloud storage or your computer to optimize space. This ensures smooth performance and allows for more downloads of books, apps, and media. Keep your device organized for a better user experience.

Reading on Your Kindle Fire 10 HD

The Kindle Fire 10 HD offers an enhanced reading experience with its 10.1-inch display and customizable settings. Use Blue Shade to reduce eye strain and adjust brightness for comfort.

7.1 Adjusting Reading Settings

To enhance your reading experience, adjust font size, brightness, and line spacing in the Display Settings menu. Enable Blue Shade to reduce eye strain by filtering blue light, especially in low-light conditions. Access these settings by swiping down from the top of the screen and selecting Quick Settings, then Display. Customize your reading preferences for a more comfortable and enjoyable experience on your Kindle Fire 10 HD.

7.2 Using Blue Shade for Better Reading

Enable Blue Shade to reduce eye strain by filtering blue light, ideal for reading in low-light conditions. Swipe down from the top of the screen, select Quick Settings, and toggle Blue Shade on. Adjust the brightness and color tone to optimize your reading experience. This feature minimizes screen glare and helps maintain natural sleep patterns by reducing blue light emission during evening reading sessions.

Entertainment Features

The Kindle Fire 10 HD offers enhanced entertainment with video streaming, music playback, and access to apps like Amazon Prime Video and Amazon Music for an immersive experience.

8.1 Watching Videos and Movies

The Kindle Fire 10 HD delivers an exceptional video experience with its 10.1-inch display, perfect for streaming movies and shows via Amazon Prime Video and other apps. Users can access their video library, stream content, or download titles for offline viewing. The device supports high-quality video playback and features customizable display settings to enhance the viewing experience. Bluetooth connectivity also allows wireless headphone use for immersive entertainment.

8.2 Listening to Music

The Kindle Fire 10 HD offers a seamless music experience through Amazon Music and other streaming apps. Users can access their music library, create playlists, and stream songs. The device supports Bluetooth pairing for wireless headphones, enhancing portability. With built-in speakers or headphone support, you can enjoy high-quality audio. The equalizer in settings allows customization of sound preferences, ensuring an optimal listening experience. Hands-free Alexa enables voice control for music playback.

Customizing Your Device

Personalize your Kindle Fire 10 HD with display settings, themes, and wallpapers. Accessibility features like font size and screen brightness ensure a tailored experience for all users.

9.1 Personalizing Display Settings

Adjust your Kindle Fire 10 HD display to suit your preferences. Modify brightness, contrast, and font size for optimal readability. Enable Blue Shade to reduce eye strain in low-light conditions. Customize screen orientation and auto-rotate settings for a seamless viewing experience. These adjustments ensure your device adapts to your environment and usage habits, enhancing comfort and accessibility.

9.2 Changing Themes and Wallpapers

Easily customize your Kindle Fire 10 HD by changing themes and wallpapers. Access the Settings menu, select Display, and choose from various options. Personalize your home screen with vibrant wallpapers or opt for a minimalistic theme. For more options, visit the Amazon Appstore. This feature enhances your device’s appearance and user experience.

9.3 Accessibility Features

The Kindle Fire 10 HD offers a range of accessibility features to enhance usability. Enable Screen Reader for voice assistance, adjust Font Size for readability, or use High Contrast Mode for better visibility. These features can be accessed through the Settings menu under Accessibility. Customize your device to suit your needs, ensuring an inclusive and user-friendly experience for everyone.

Maintenance and Care

Regularly update your software, monitor battery health, and reset your device when needed to ensure optimal performance and longevity of your Kindle Fire 10 HD.

10.1 Battery Care and Optimization

To prolong battery life, charge your Kindle Fire 10 HD using the provided cable and avoid extreme temperatures. Enable power-saving features, adjust screen brightness, and turn off Bluetooth and Wi-Fi when not in use. Avoid overcharging, as it can degrade battery health. Regular software updates also improve battery efficiency. For optimal performance, ensure your device is fully charged before extended use.

10.2 Updating Your Software

Regular software updates ensure your Kindle Fire 10 HD runs smoothly and securely. To update, go to Settings, select System, and choose System Update. Ensure your device is connected to Wi-Fi and has sufficient battery life. Updates may take a few minutes to download and install. Always restart your device after an update to apply changes. Keep your Fire OS up to date for the latest features and improvements.

10.3 Resetting Your Kindle Fire 10 HD

To reset your Kindle Fire 10 HD, go to Settings, select System, and choose Reset. Select Factory Reset to restore default settings. Ensure your device is charged and connected to Wi-Fi. This process erases all data, so back up important files first. The reset takes a few minutes, and your device will restart with original settings. Use this option to resolve persistent issues or prepare for a new user.

Troubleshooting Common Issues

The Kindle Fire 10 HD may face issues like slow performance or connectivity problems. Restarting the device, clearing cache, or performing a factory reset can often resolve these issues.

11.1 Resolving Performance Issues

To address performance issues on your Kindle Fire 10 HD, restart the device to clear temporary glitches. Clearing app cache or uninstalling unused apps can free up storage and improve speed. If problems persist, perform a factory reset via Settings > Device Options > Reset. Ensure your device is updated to the latest software version for optimal performance. Regularly managing storage and closing background apps also helps maintain efficiency.

11.2 Fixing Connectivity Problems

To resolve connectivity issues on your Kindle Fire 10 HD, restart your device and ensure Wi-Fi is enabled. Check your network settings and confirm the password. If issues persist, restart your router or switch to a different network. For Bluetooth problems, ensure your device is discoverable and paired correctly. Resetting network settings or performing a factory reset via Settings > Device Options > Reset can also resolve persistent connectivity problems.

11.3 Addressing Battery Drain Concerns

To address battery drain on your Kindle Fire 10 HD, ensure your device is running the latest software. Adjust screen brightness, disable unnecessary background apps, and limit Bluetooth and Wi-Fi usage when not needed. Enable Blue Shade or Power-Saving Mode to reduce power consumption. Close unused apps and avoid overcharging, as this can degrade battery health. Regularly clearing cached data and optimizing settings can also improve battery performance.

Additional Support and Resources

Access the on-device User Guide via Settings > Help > User Guide. Download the PDF manual or contact Amazon Support for further assistance and troubleshooting.

12.1 Accessing the On-Device User Guide

To access the on-device User Guide, go to the Settings menu, select Help & Support, and choose User Guide. This guide provides detailed instructions and tips for using your Kindle Fire 10 HD. Additionally, you can download the PDF manual from Amazon’s official website for offline access, ensuring you have comprehensive support whenever you need it. This resource covers all aspects of device operation and troubleshooting.

12.2 Downloading the PDF Manual

The PDF manual for the Kindle Fire 10 HD is available for download from Amazon’s official website. Visit the support page, select your device model, and click on the PDF manual link to download. This comprehensive guide covers all features, troubleshooting, and tips for optimal use. It’s ideal for offline access, ensuring you always have detailed instructions at your fingertips.

12.3 Contacting Amazon Support

For assistance with your Kindle Fire 10 HD, visit Amazon’s official support website; Navigate to the Help & User Guide section, where you can find troubleshooting tips, FAQs, and contact options. You can reach Amazon Support via email, live chat, or phone. Support is available 24/7 to address device-related queries, ensuring a smooth experience with your Kindle Fire 10 HD. Visit Amazon Support for help.

honeywell timer switch manual pdf

The Honeywell Timer Switch Manual PDF provides a comprehensive guide for installing, programming, and troubleshooting your timer switch, ensuring efficient and convenient control of your lighting systems.

Overview of the Honeywell Timer Switch

The Honeywell Timer Switch is a programmable device designed to control lighting and other electrical systems efficiently. It offers flexible scheduling options, allowing users to set specific on/off times for their appliances. The switch supports both single-pole and 3-way installations, making it versatile for various electrical setups. With universal wiring compatibility, it ensures seamless integration into existing systems. The timer switch also features a manual override function, enabling users to bypass programmed settings temporarily. Its sleek design mounts flush with wall plates, maintaining a modern aesthetic. The device is user-friendly, with a 3-button interface for easy operation and programming. This switch is ideal for homeowners seeking to automate lighting control while retaining manual flexibility, ensuring convenience and energy efficiency. Its robust features make it a reliable choice for smart home solutions.

Importance of the Manual for Proper Usage

The Honeywell Timer Switch Manual PDF is essential for ensuring proper installation, programming, and operation of the device. It provides step-by-step instructions to guide users through setting up schedules, understanding modes, and troubleshooting common issues. Without the manual, users may struggle to unlock the full potential of the timer switch, potentially leading to incorrect installations or programming errors. The manual also highlights safety precautions and warranty information, protecting both the user and the product. By following the guidelines outlined in the manual, users can optimize energy efficiency, extend the lifespan of the switch, and enjoy seamless control over their lighting systems. Referencing the manual ensures a smooth and hassle-free experience, making it an indispensable resource for homeowners and installers alike.

Key Features and Benefits of the Honeywell Timer Switch

The Honeywell Timer Switch offers programmable scheduling, manual override, and universal wiring compatibility, ensuring energy efficiency and seamless control over lighting systems for enhanced convenience and flexibility.

Programmable Scheduling Options

The Honeywell Timer Switch offers advanced programmable scheduling, allowing users to set custom on/off times for their lighting systems. With a 7-day programming feature, you can create unique schedules for each day of the week, ensuring your lights operate exactly when needed; The timer supports multiple on/off events per day, providing flexibility for varying routines. It is compatible with incandescent, halogen, and other lighting types, making it versatile for different setups. The programmable scheduling options are easy to navigate using the 3-button interface, and the menu flowchart guide helps users manage their settings efficiently. This feature not only enhances convenience but also promotes energy efficiency by automating lighting control. Additionally, the manual override function allows for temporary adjustments without disrupting programmed schedules, while memory protection ensures settings remain intact during power outages.

Manual Override Functionality

The Honeywell Timer Switch features a manual override option, enabling users to temporarily control their lighting without altering programmed schedules. In manual mode, the switch functions like a regular light switch, allowing you to turn lights on or off with a simple button press. This feature is ideal for unexpected situations or when you need immediate control. The manual override does not affect the programmed settings, ensuring your scheduled times remain intact. A visual icon appears on the display when the switch is in manual mode, providing clear confirmation of the current operation. This functionality enhances flexibility and convenience, making it easy to manage your lighting needs outside of automated schedules. The override feature is straightforward to use, with intuitive button controls that ensure seamless transitions between manual and automatic modes.

Universal Wiring Compatibility

The Honeywell Timer Switch is designed with universal wiring compatibility, supporting both single-pole and 3-way installations. This flexibility allows it to work seamlessly with various wiring configurations, making it suitable for different household setups. The switch is compatible with 2-wire and 3-wire connections, ensuring easy installation regardless of your home’s electrical system. It also supports a wide range of lighting types, including incandescent, halogen, LED, and fluorescent, providing versatile control over your lighting needs. This universal compatibility simplifies the installation process and ensures reliable performance across diverse electrical environments. Whether you’re upgrading an existing switch or installing a new one, the Honeywell Timer Switch adapts effortlessly to your wiring setup, offering a hassle-free solution for lighting control. This feature makes it a practical choice for homeowners seeking a versatile and efficient timer switch.

Installation Steps for the Honeywell Timer Switch

Begin by turning off the power supply and removing the old switch. Connect the wires according to the manual, ensuring proper alignment with terminals. Mount the new switch securely and restore power to test functionality. Always refer to the manual for specific wiring instructions and safety precautions.

Preparation and Tools Required

Before installing the Honeywell Timer Switch, ensure the power supply is turned off at the circuit breaker. Gather essential tools, including a screwdriver, wire strippers, and a voltage tester. Refer to the manual for specific wiring diagrams and instructions tailored to your switch model. Prepare the area by removing the old switch and ensuring all wires are properly labeled. Familiarize yourself with the timer’s components, such as the PGM button and mode indicators. Always follow safety guidelines to avoid electrical hazards. The manual provides detailed step-by-step guidance to ensure a smooth installation process. Proper preparation is key to a successful and safe setup of your Honeywell Timer Switch.

Wiring Instructions for Single-Pole and 3-Way Installations

For a single-pole installation, connect the line (hot) wire to the “LINE” terminal and the load (to light) wire to the “LOAD” terminal. In a 3-way installation, connect the line wire to the “LINE” terminal, one traveler wire to the “1WAY/3WAY” terminal, and the other traveler wire to the “LOAD” terminal. Ensure the neutral wire is securely connected to the neutral terminal. Refer to the manual’s wiring diagram for clarity. Always turn off the power supply at the circuit breaker before starting. Properly secure all connections to avoid loose wires. If unsure, consult a licensed electrician. The Honeywell Timer Switch supports both configurations, making it versatile for various lighting setups.

MOUNTING the Switch and Final Connections

Mount the Honeywell Timer Switch in a standard electrical box, ensuring it is flush with the wall plate for a sleek appearance. Before mounting, confirm the switch door is closed to prevent damage. Use the provided screws to secure the switch firmly to the electrical box. Once mounted, double-check all wire connections for accuracy and security. Ensure the neutral wire is properly connected to the neutral terminal, as specified in the wiring instructions. Finally, close the switch door and test the timer by turning the power on at the circuit breaker. Proper mounting and secure connections are crucial for safe and reliable operation of the timer switch.

Programming the Honeywell Timer Switch

Set the time and date before first use. Use the PGM button to navigate and display programs, showing On/Off times. Refer to the menu flowchart for guidance.

Setting the Time and Date

Before using the Honeywell Timer Switch, set the time and date to ensure proper functionality. Press the PGM button to display programs and their On/Off times. Use the UP and DOWN buttons to navigate and adjust settings. The manual override feature allows you to turn the load on/off without affecting programming. Confirm the mode with icon indicators. Refer to the menu flowchart for guidance on navigating the menus. This step is crucial for programming accuracy and ensures your timer operates correctly. Follow the instructions carefully to avoid errors and make the most of your timer’s features.

Creating and Editing Programs

Creating and editing programs on the Honeywell Timer Switch is straightforward. Press the PGM button to access programming mode. Use the UP and DOWN arrows to select the desired program number. Set the On and Off times using the time-setting buttons. For 7-day programming, ensure each day’s schedule is customized. To edit an existing program, navigate to the program number, adjust the times, and save. The timer allows for flexible scheduling, enabling you to tailor lighting control to your daily routines. After setting, press the PGM button to save and exit. This feature ensures precise control over your lighting systems, enhancing convenience and energy efficiency. Regularly review and update programs to maintain optimal performance.

Understanding Automatic and Manual Modes

The Honeywell Timer Switch operates in two primary modes: Automatic and Manual. In Automatic mode, the switch follows the programmed schedule, turning lights on/off at set times. This mode is ideal for maintaining consistent lighting patterns without manual intervention. In Manual mode, the switch functions like a regular toggle switch, allowing you to turn lights on/off manually. To switch modes, press and hold the switch door for 3 seconds. The Manual mode is indicated by an icon, ensuring you always know the current mode. This dual-mode functionality offers flexibility, enabling you to choose between automated control and manual operation based on your needs. Understanding these modes is essential for maximizing the timer’s efficiency and convenience in your daily routine.

Understanding Manual Mode Operation

In Manual mode, the Honeywell Timer Switch operates like a standard toggle switch, allowing manual control by pressing the main button. An icon indicates Manual mode, ensuring operations remain independent of programmed schedules.

Switching Between Manual and Automatic Modes

Switching between Manual and Automatic modes on the Honeywell Timer Switch is straightforward. To toggle modes, press and hold the switch door for 3 seconds. In Manual mode, the switch functions like a regular toggle, allowing you to turn lights on or off without affecting programmed schedules. The Automatic mode, however, follows the pre-set programs. The switch displays an icon when in Manual mode, providing clear visual confirmation. This feature ensures flexibility, letting you choose between manual control and automated operation based on your needs. The seamless transition between modes enhances user convenience, making it easy to manage lighting systems efficiently. This functionality is a key benefit of the Honeywell Timer Switch, offering both reliability and adaptability for various lighting scenarios.

Using the Manual Override Feature

The Manual Override feature on the Honeywell Timer Switch allows you to temporarily control your lights without disrupting programmed schedules. To use this feature, simply press the main button briefly to turn the lights on or off. This mode operates like a standard switch, providing immediate control over your lighting. The Manual Override does not alter any pre-set programs, ensuring your automated schedule remains intact. A visual icon appears on the display to confirm Manual mode, giving you clear feedback. This feature is particularly useful for unexpected situations or when you need temporary adjustments. It offers flexibility while maintaining the convenience of automated control, making it a practical solution for managing your lighting needs effectively. The Manual Override ensures seamless interaction between manual and automatic operations, enhancing overall user experience.

Icon Indicators for Mode Confirmation

The Honeywell Timer Switch features icon indicators that provide clear visual confirmation of the current operating mode. When in Manual mode, a specific icon appears on the display, ensuring you know the switch is functioning like a regular toggle. Similarly, in Automatic mode, a different icon indicates that the programmed schedule is active. These visual cues eliminate confusion and help you verify the switch’s status at a glance. Additionally, error indicators may appear if there are issues with programming or power outages, offering immediate feedback for troubleshooting. The intuitive design of these icons enhances user experience, making it easy to understand and manage the switch’s operation without consulting the manual. This feature ensures seamless interaction and confidence in the switch’s functionality.

Troubleshooting Common Issues

The manual addresses common issues like power outages, programming errors, and installation problems, offering step-by-step solutions to ensure your timer switch operates smoothly and efficiently.

Power Outage Recovery and Memory Protection

The Honeywell Timer Switch is designed with memory protection, ensuring programmed settings are retained during power outages. Once power is restored, the timer automatically resumes its schedule, eliminating the need to reprogram. This feature provides convenience and reliability, especially for users with complex programming setups. The manual outlines troubleshooting steps for post-outage issues, ensuring seamless recovery. With this built-in protection, users can trust their timer switch to maintain consistency and functionality, even after unexpected interruptions. This robust memory protection enhances overall user experience, making the Honeywell Timer Switch a dependable choice for smart home automation.

Resolving Programming Errors

If programming errors occur, the Honeywell Timer Switch Manual provides clear troubleshooting steps. Pressing the PGM button displays programs, helping identify issues. Ensure the time and date are correctly set, as incorrect settings can cause errors. If programs fail to activate, check for conflicts in scheduling. Resetting the timer by removing power for 10 seconds can resolve many issues. The manual also advises verifying wire connections and ensuring the switch is in the correct mode (Auto or Manual). By following these steps, users can quickly resolve programming errors and restore proper functionality. This section ensures users can troubleshoot confidently, maintaining their customized schedules without frustration.

Addressing Installation-Related Problems

The Honeywell Timer Switch Manual PDF offers detailed solutions for common installation issues. Ensure proper wiring by checking connections for single-pole and 3-way setups. Verify compatibility with your lighting type, such as incandescent or halogen. If the switch doesn’t mount flush, consult the manual for adjustment tips. Power supply issues? Confirm a 120-volt connection. For 3-way installations, ensure the traveler wires are correctly configured. If the switch doesn’t respond, review the wiring diagram in the manual. Testing the switch after installation is crucial to identify and fix any issues early. By following these guidelines, users can resolve installation-related problems efficiently, ensuring smooth operation of their Honeywell Timer Switch.

The Honeywell Timer Switch Manual PDF is an essential resource, offering clear guidance for optimal use. Explore its features and troubleshooting tips to maximize efficiency and convenience in your home.

The Honeywell Timer Switch offers programmable scheduling, manual override functionality, and universal wiring compatibility, making it versatile for various lighting setups. Its sleek design mounts flush with wall plates, ensuring a modern appearance. The switch supports single-pole (2-wire) or 3-way installations, catering to different electrical configurations. Manual mode allows users to operate it like a regular switch, while automatic mode follows programmed schedules. Programming is protected during power outages, ensuring settings remain intact. The timer is easy to use with a 3-button interface and provides clear icon indicators for mode confirmation. These features combine to offer convenience, energy efficiency, and reliable performance, making the Honeywell Timer Switch a practical solution for home automation needs.

Encouragement for Further Exploration

Exploring the Honeywell Timer Switch Manual PDF is essential to unlock its full potential. Dive into the detailed instructions to discover how programmable scheduling, manual override, and universal wiring compatibility can enhance your home automation experience. Experiment with creating and editing programs to tailor lighting schedules to your lifestyle. Familiarize yourself with troubleshooting tips to address common issues confidently. For visual learners, YouTube tutorials and installation videos provide hands-on guidance. Visit the official Honeywell website or forums for additional resources and user insights. By fully understanding your timer switch, you can maximize energy efficiency, customize settings, and enjoy a seamless smart home experience. Embrace the opportunity to explore and optimize your Honeywell Timer Switch for years of reliable performance.

magegee keyboard manual

Welcome to the MAGEGEE keyboard manual! This guide provides essential information to help you understand and maximize the potential of your premium mechanical keyboard․

Product Overview

The MAGEGEE mechanical keyboard is a premium product designed for both gaming and typing enthusiasts․ It features double-shot injection molded keycaps, ensuring durability and clear backlighting․ The keyboard offers multiple LED backlighting modes, with adjustable brightness and speed controlled by arrow keys․ Pressing function keys like Fn+Ins, HM, Pg, Del, or End allows users to customize lighting effects․ Built with high-quality materials, the keyboard is designed for long-lasting performance․ It supports plug-and-play functionality, making it easy to connect and use without additional software․ Whether for gaming or everyday use, the MAGEGEE keyboard delivers a seamless and enjoyable experience․ Its sleek design and customizable features make it a standout choice for those seeking a reliable and stylish mechanical keyboard․

Installation and Setup

The MAGEGEE keyboard is plug-and-play, requiring no additional software․ Simply connect it to a USB port, and your system will automatically recognize the device for immediate use․

3․1 Plug-and-Play Setup

The MAGEGEE keyboard offers a seamless plug-and-play experience, eliminating the need for complex installations․ Simply connect the keyboard to your computer’s USB port, and it will automatically be recognized by your system․ This feature ensures that you can start typing or gaming immediately without any delays․ The plug-and-play functionality is compatible with most operating systems, including Windows and macOS, making it universally accessible․ No additional drivers or software are required, which simplifies the setup process․ This convenience is particularly beneficial for users who prefer a hassle-free experience․ By plugging in the keyboard, you can instantly enjoy its premium features, such as customizable backlighting and responsive mechanical switches․ This straightforward setup ensures that you can focus on your tasks without any technical hurdles․

3․2 Mode Switching

The MAGEGEE keyboard allows users to switch between different modes seamlessly, enhancing functionality for various tasks․ To toggle between modes, locate the mode switch key or combination, often the Fn key paired with a function key․ This feature enables switching between gaming, multimedia, or normal typing modes․ Gaming mode optimizes the keyboard for competitive play, while multimedia mode prioritizes media controls․ Normal mode is ideal for everyday typing․ The process is straightforward and requires no additional software․ Simply press the designated keys to change modes․ This versatility ensures the keyboard adapts to your needs, whether you’re gaming, working, or enjoying multimedia content․ The mode switching feature is designed to be intuitive, providing a smooth transition between tasks․ Refer to the user manual for specific key combinations, as they may vary slightly between models․ This feature enhances the overall user experience, making the keyboard highly adaptable․

Key Features

Discover the standout features of the MAGEGEE keyboard, including customizable LED backlighting, premium switch types, and N-Key Rollover for enhanced performance and typing accuracy․

4․1 LED Backlighting Modes

The MAGEGEE keyboard offers stunning LED backlighting modes, designed to enhance your typing experience․ With double-shot injection molded keycaps, the backlighting is clear and vibrant, ensuring optimal visibility․ Users can press specific keys like Fn, Ins, or PgUp to adjust lighting effects․ The keyboard features multiple preset modes, including wave, breathing, and static backlighting, allowing you to customize the visual appeal․ Additionally, the arrow keys enable brightness and speed adjustments, providing full control over the lighting․ Whether you’re gaming, typing, or working in low-light environments, the LED backlighting modes ensure a seamless and visually appealing experience․ This feature is both functional and aesthetic, making the MAGEGEE keyboard a standout choice for enthusiasts and professionals alike;

4․2 Switch Types

The MAGEGEE keyboard features high-quality mechanical switches, designed for precise and responsive typing․ Available in blue, brown, and red switch types, each offers distinct characteristics to suit user preferences․ Blue switches provide a tactile bump and audible click, ideal for typists who prefer feedback․ Brown switches deliver a smoother, quieter experience with a subtle tactile bump, making them versatile for both gaming and typing․ Red switches are linear and smooth, with no tactile bump, catering to gamers who prioritize fast actuation․ All switches are built to last, with a lifespan of millions of keystrokes․ This variety ensures users can choose the switch type that best matches their typing style and preferences, enhancing both performance and comfort; The MAGEGEE keyboard’s switch options are a testament to its commitment to quality and customization․

4․3 N-Key Rollover

The MAGEGEE keyboard supports N-Key Rollover (NKRO), a feature that ensures every keystroke is registered accurately, even when multiple keys are pressed simultaneously․ This technology is particularly beneficial for gamers and typists who require precise and reliable input․ With NKRO, the keyboard can handle complex combinations without ghosting or lag, making it ideal for fast-paced gaming sessions or intensive typing tasks․ The feature is seamlessly integrated into the keyboard’s design, providing a smooth and responsive experience․ Whether you’re executing intricate commands in a game or typing at high speeds, NKRO ensures your inputs are captured with utmost accuracy․ This advanced functionality underscores the MAGEGEE keyboard’s commitment to delivering high-performance tools for both productivity and gaming enthusiasts․

Design and Build Quality

The MAGEGEE keyboard is crafted with premium materials, ensuring durability and a sleek aesthetic․ Its robust construction and ergonomic design provide a comfortable typing experience for extended use․

5․1 Materials Used

The MAGEGEE keyboard is constructed using high-quality materials to ensure durability and optimal performance․ The keycaps are made from double-shot injection molded plastic, providing a clear backlight and extreme durability; The keyboard’s frame is built with a sturdy, high-grade aluminum alloy, ensuring a solid and premium feel․ The switches, available in various types such as blue and brown, are designed for longevity and consistent tactile feedback․ The USB cable is braided for added strength and resistance to wear and tear․ Additionally, the keyboard features a sleek and professional design with a matte finish, enhancing both aesthetics and functionality․ These materials are carefully selected to provide a seamless typing and gaming experience while maintaining a sophisticated appearance․

5․2 Ergonomics and Comfort

The MAGEGEE keyboard is designed with ergonomics in mind, ensuring a comfortable typing and gaming experience․ Its compact layout reduces finger movement, while the key switches provide a smooth, tactile response․ The keyboard’s height and angle are optimized to promote natural hand positioning, reducing strain during long sessions․ The double-shot injection molded keycaps are designed for clarity and durability, with a textured surface for better grip․ Additionally, the customizable LED backlighting allows users to adjust brightness and lighting effects, enhancing visibility without causing eye strain․ The keyboard’s build quality and ergonomic design make it suitable for both gaming and productivity, offering a balance of performance and comfort․ Whether you’re typing or gaming, the MAGEGEE keyboard is crafted to deliver a seamless and enjoyable experience․

Customization Options

The MAGEGEE keyboard offers a wide range of customization options to tailor your typing and gaming experience․ Users can personalize their keyboard with interchangeable keycaps, allowing for a unique aesthetic or optimized tactile feedback․ The keyboard also supports programmable keys, enabling macros and custom shortcuts for enhanced productivity or gaming efficiency․ Additionally, the customizable LED backlighting modes provide a visually appealing experience, with adjustable brightness and lighting effects․ The device also allows for cable management customization, ensuring a clutter-free setup․ With these features, users can adapt the keyboard to their specific needs, whether for professional tasks or immersive gaming sessions․ The MAGEGEE keyboard is designed to be versatile, offering a seamless blend of functionality and personalization․

Troubleshooting Common Issues

If you encounter any issues with your MAGEGEE keyboard, this section will help you identify and resolve them․ One common problem is key malfunction, which can often be fixed by cleaning the keys or checking for dust buildup․ If the keyboard fails to connect, ensure the USB port is functional and the cable is securely plugged in․ For software-related issues, reinstalling the drivers or updating the firmware may resolve the problem․ Additionally, some users have reported unexpected behavior with the FN key commands, which can be reset by following the instructions in the manual․ If backlighting modes are not working, check the LED settings or adjust the brightness using the designated keys․ For persistent issues, refer to the warranty information or contact customer support for assistance․ Regular maintenance and proper care can prevent many of these problems․

Maintenance and Care

To ensure your MAGEGEE keyboard performs optimally, regular maintenance is essential․ Start by cleaning the keys and switches with compressed air to remove dust and debris․ Avoid using liquids or harsh chemicals, as they may damage the components․ For spills, immediately unplug the keyboard and wipe it dry with a soft cloth․ Protect the keyboard from direct sunlight and extreme temperatures to prevent warping or discoloration․ Store the keyboard in a protective case when not in use to avoid scratches․ Additionally, clean the USB port regularly to ensure a stable connection․ For optimal comfort, consider using a wrist rest to maintain proper hand positioning․ By following these care tips, you can extend the lifespan of your MAGEGEE keyboard and maintain its premium performance․ Regular maintenance ensures your keyboard remains in excellent condition for years to come․

Warranty Information

MAGEGEE keyboards are backed by a comprehensive warranty designed to protect your investment․ The standard warranty period is one year from the date of purchase, covering manufacturing defects and ensuring your keyboard performs as expected․ To obtain warranty service, register your product on the MAGEGEE website and retain your proof of purchase․ If issues arise, contact MAGEGEE support with your product details for assistance․ The warranty does not cover damage caused by misuse, tampering, or normal wear and tear․ For more details, refer to the official MAGEGEE website or the provided user manual․ MAGEGEE is committed to delivering high-quality products and stands behind their reliability․

User Guides and Manuals

MAGEGEE provides detailed user guides and manuals to ensure a seamless experience with their mechanical keyboards․ These resources are available on the official MAGEGEE website and platforms like ManualsLib․ Users can download PDF versions of manuals for specific models, such as the MK-Star75-BW, to access setup instructions, troubleshooting tips, and feature overviews․ The manuals cover topics like plug-and-play functionality, mode switching, and LED backlighting customization․ Additionally, video tutorials and FAQs are available to address common questions and enhance user understanding․ For optimal performance, MAGEGEE recommends reviewing the manual before first use․ If you encounter issues, refer to the troubleshooting section or contact customer support for assistance․ MAGEGEE is committed to providing clear, comprehensive documentation to help users make the most of their keyboard․

Advanced Features

MAGEGEE keyboards are designed to deliver a premium typing and gaming experience, offering a range of advanced features․ One standout feature is the customizable LED backlighting, which allows users to adjust lighting effects, brightness, and speed using function keys like Fn, Ins, and arrow keys․ Additionally, the keyboards support N-Key Rollover (NKRO), ensuring every key press is registered simultaneously, which is essential for fast-paced gaming and accurate typing․ The mechanical switches provide tactile feedback and durability, while the programmable keys enable users to set macros and shortcuts for enhanced productivity․ These features make MAGEGEE keyboards versatile for both gamers and typists, offering a blend of performance and personalization․

Software and Driver Installation

To enhance your MAGEGEE keyboard experience, proper software and driver installation is essential․ Most MAGEGEE keyboards are plug-and-play, requiring no additional drivers for basic functionality․ However, for advanced features like customizable backlighting, macro settings, and mode switching, downloading the official software is recommended․ Visit the MAGEGEE support website, navigate to the “SUPPORT–DRIVERS” section, and select your specific keyboard model to download the latest drivers․ Once downloaded, follow the on-screen instructions to install the software․ Ensure your keyboard is connected via USB during the installation process․ This will unlock features like LED lighting control, key remapping, and mode switching․ For troubleshooting or optimizing performance, refer to the user manual or online guides․ Proper installation ensures seamless operation and maximizes your keyboard’s potential․

FAQs

Q: Why is my backspace key malfunctioning?
A: Ensure your keyboard is properly connected and drivers are updated․ If issues persist, refer to the troubleshooting section in the user manual․

Q: How do I adjust the backlighting?
A: Use the Fn key combinations to cycle through lighting modes and adjust brightness․ Detailed instructions are available in the LED backlighting section․

Q: Can I customize the keyboard settings?
A: Yes, download the official MAGEGEE software from their support website to customize key mappings, lighting, and other features․

Q: What if my keyboard isn’t recognized?
A: Restart your computer, ensure the USB connection is secure, and reinstall drivers if necessary․ Contact support if the issue persists․
Q: Is there a warranty for MAGEGEE keyboards?
A: Yes, MAGEGEE offers warranty coverage for defects in materials and workmanship․ Visit their official website for detailed warranty terms․

Q: Where can I find more information?
A: Refer to the user manual, official website, or contact MAGEGEE support for assistance․

The MAGEGEE keyboard manual is designed to provide a comprehensive guide for users to maximize their experience with these premium mechanical keyboards․ From setup and customization to troubleshooting, this manual covers all essential aspects to ensure smooth operation․ Whether you’re a seasoned typist or a gaming enthusiast, the MAGEGEE keyboard offers unparalleled performance and durability․ By following the instructions and tips outlined in this guide, you can unlock the full potential of your keyboard and enjoy a seamless typing or gaming experience․ For further assistance, visit the official MAGEGEE website or contact their customer support team․ Happy typing!

References

For further information and support, refer to the official MAGEGEE website and user manuals․ The MAGEGEE MK-Star75-BW User Manual is available for free download on ManualsLib and provides detailed instructions for setup, customization, and troubleshooting․ Additional resources include the Captain87 Mechanical Keyboard Manual, which covers LED backlighting modes and switch types․ Visit the MAGEGEE Support page for driver downloads, FAQs, and warranty details․ For visual guidance, check out the YouTube Help channel, which offers tutorials on keyboard setup and advanced features․ Ensure to consult these resources for optimal performance and maintenance of your MAGEGEE keyboard;

northwest territory tent instruction manual

This manual provides a detailed guide for setting up and maintaining Northwest Territory tents, including models like the Front Porch and Vacation Cottage. With step-by-step instructions, safety tips, and troubleshooting advice, it ensures a seamless camping experience. Whether you’re assembling poles or securing guy ropes, this guide offers practical solutions to common challenges, helping you enjoy the outdoors with confidence.

Understanding the Tent Models

Northwest Territory offers various tent models, including the Front Porch and Vacation Cottage designs. The Front Porch model features a spacious interior and a convenient porch area, ideal for camping comfort. The Vacation Cottage tent boasts a cabin-style structure with ample room for furniture and storage, perfect for extended outdoor stays. Both models prioritize durability and ease of assembly.

Front Porch Tent

The Northwest Territory Front Porch Tent is a popular choice among campers due to its unique design and practical features. This model is known for its spacious interior and a convenient front porch area, which provides additional shelter and storage space. The tent is designed to accommodate comfort and functionality, making it ideal for both short and extended camping trips.

One of the standout features of the Front Porch Tent is its sturdy construction. It comes with pre-attached poles and a straightforward assembly process, which simplifies setup even for those new to camping. The tent also includes large windows for ventilation and natural light, ensuring a comfortable environment inside. The front porch area is perfect for relaxing or storing gear, keeping the main living space clutter-free.

The Front Porch Tent is part of Northwest Territory’s lineup of user-friendly camping products. It is backed by a 6-month replacement parts warranty, offering peace of mind for campers. The model KMT162010 is particularly noted for its durability and ease of use, with many users praising its ability to withstand various weather conditions. Proper assembly and maintenance are key to ensuring the tent’s longevity, and the provided manual offers clear instructions for both.

Overall, the Northwest Territory Front Porch Tent is a reliable option for campers seeking a balance of comfort, functionality, and affordability. Its thoughtful design and robust build make it a great choice for outdoor enthusiasts looking to enjoy nature without compromising on convenience.

Vacation Cottage Tent

The Northwest Territory Vacation Cottage Tent is a spacious and versatile camping shelter designed for comfort and convenience. This cabin-style tent features a stand-up design, allowing campers to move freely inside. It is ideal for families or groups, offering ample interior space and practical amenities for an enjoyable outdoor experience.

One of the key highlights of the Vacation Cottage Tent is its large interior, which can accommodate two queen-sized air mattresses and still leave room for additional gear. The tent also includes an 8-foot table in the entry area, perfect for dining or organizing supplies. Setup can be a bit challenging without clear instructions, but online resources and video guides are readily available to help users navigate the process.

The Vacation Cottage Tent is part of Northwest Territory’s premium lineup, known for its durability and weather resistance. Models like the Vacation Cottage III are particularly popular, offering a 10-person capacity and robust construction. While the tent is designed for ease of use, proper assembly and maintenance are crucial to ensure its longevity. The manual provides detailed steps for setting up the tent, including attaching guy ropes and securing the structure for stability in windy conditions.

Overall, the Northwest Territory Vacation Cottage Tent is a great choice for campers seeking a spacious and feature-rich shelter. Its combination of comfort, practicality, and durability makes it a standout option for outdoor adventures. By following the provided instructions, users can enjoy a hassle-free camping experience with this high-quality tent.

Assembly Process

Assembling your Northwest Territory tent involves several key steps. Start with unboxing and verifying all parts. Next, assemble the poles by connecting fiberglass sections into metal ferrules. Attach the tent fabric to the frame, ensuring it is securely fastened. Finally, stake down the tent and tighten guy ropes for stability. Follow the manual for a smooth setup.

Unboxing and Inventory

Unboxing and inventory are the first critical steps in setting up your Northwest Territory tent. Carefully open the package and verify that all components are included. For models like the Front Porch or Vacation Cottage, this typically includes the tent fabric, poles, stakes, guy ropes, and rainfly. Check for any damage or missing parts immediately.

Organize the parts by type to streamline the assembly process. Poles are usually color-coded or labeled, while stakes and ropes should be stored separately to avoid confusion. Refer to the instruction manual for a detailed list of included items and their quantities. If any parts are missing, contact the manufacturer promptly to resolve the issue under the warranty.

Take a moment to familiarize yourself with the components. The main frame is often pre-attached to the tent, while additional poles are provided for the entrance or extensions. Ensure all hardware, such as connectors and ferrules, is accounted for. Proper inventory ensures a smooth setup and prevents delays; If you notice any discrepancies, consult the Northwest Territory tent manual or contact customer support for assistance.

By carefully unboxing and organizing your tent, you set the foundation for a successful assembly. This step is crucial for avoiding frustration and ensuring all parts are ready when needed. Remember, a well-prepared setup leads to a safer and more enjoyable camping experience. Always double-check your inventory before proceeding to the next step.

Pole Assembly

Pole assembly is a crucial step in setting up your Northwest Territory tent. Begin by identifying the various pole sections, which are typically color-coded or labeled for easy identification. For models like the Front Porch or Vacation Cottage, the main frame is often pre-attached to the tent, simplifying the process. Start by connecting the fiberglass pole sections into the metal ferrules, ensuring they snap securely into place.

Next, attach the main frame to the tent by aligning the pole ends with the corresponding connectors on the tent fabric. Gently push the poles into the connectors until they click. For larger tents, such as the Vacation Cottage, you may need to assemble the roof and side poles separately before attaching them to the main frame. Always refer to the instruction manual for specific guidance on pole configuration.

Once the poles are connected, stand the tent upright and ensure all sections are fully extended. Tighten the poles by hand to create tension in the frame. For added stability, attach the roof poles to the top of the tent and secure them to the sides using the provided clips or hooks. If your model includes a front porch or extension, follow the same process to assemble and attach these sections.

Finally, double-check that all poles are securely connected and the tent is standing straight. If any section feels loose, tighten the connections or consult the Northwest Territory tent manual for troubleshooting tips. Proper pole assembly ensures a sturdy structure that can withstand wind and weather conditions, making your camping experience safe and enjoyable.

Attaching the Tent Fabric

Once the pole frame is fully assembled, the next step is to attach the tent fabric. Start by locating the tent’s sleeves, which are sewn into the fabric to accommodate the poles. Slide the fabric over the poles, ensuring it aligns with the frame. For models like the Front Porch or Vacation Cottage, the fabric may have color-coded tabs or labels to guide proper alignment.

Secure the fabric to the poles using the clips or hooks provided. These are typically attached to the tent’s corners and sides. Make sure each clip is tightly fastened to prevent the fabric from shifting in the wind. For larger tents, such as the Vacation Cottage, you may need to attach additional panels or extensions, like the front porch, following the same process.

After attaching the fabric, tighten the tent by adjusting the guy ropes. These ropes are connected to the tent’s exterior and should be staked into the ground to create tension. Ensure the fabric is taut and evenly spread to avoid sagging or wrinkles. For models with a front porch, attach the porch roof separately and secure it to the main tent using the provided connectors.

Finally, inspect the tent to ensure all sections are properly attached and the fabric is securely fastened. If any part feels loose, tighten the clips or adjust the guy ropes. Properly attaching the tent fabric ensures a sturdy and weather-tight structure, essential for a comfortable camping experience. Always refer to the Northwest Territory tent manual for model-specific instructions.

Securing with Guy Ropes

Securing your Northwest Territory tent with guy ropes is a critical step to ensure stability and protection from wind and rain. Start by identifying the guy rope attachment points on the tent fabric, usually marked with reinforced loops or tabs. These are strategically placed to distribute tension evenly across the tent.

Thread the guy ropes through the loops and attach them to the corresponding stakes. Drive the stakes into the ground at a 45-degree angle, ensuring they are firmly embedded. For added stability, extend the ropes to the outer edges of the tent and secure them to additional stakes. Tighten the ropes by pulling them taut and tying them off with the provided cord locks or knots.

For models like the Vacation Cottage or Front Porch, pay special attention to the larger surface areas, as they may require more guy ropes to maintain structural integrity. Use the included rope tighteners to adjust tension and eliminate any slack. If the tent fabric sags, tighten the ropes further or reposition the stakes for better support.

Regularly inspect the guy ropes during your camping trip, especially after rain or high winds, to ensure they remain secure. If a rope becomes loose, tighten it immediately to prevent damage to the tent poles or fabric. Properly securing the tent with guy ropes not only enhances its durability but also ensures a safe and comfortable camping experience. Always refer to the Northwest Territory tent manual for model-specific guidance on guy rope placement and tensioning.

Maintenance Tips

Regularly clean your Northwest Territory tent to prevent dirt buildup. Use mild soap and water, avoiding harsh chemicals. Allow the tent to dry completely before storage to prevent mold. Inspect for wear and tear, replacing damaged parts promptly. Store the tent in a cool, dry place, following the manual’s guidelines for proper care and longevity.

Cleaning the Tent

Cleaning your Northwest Territory tent is essential to maintain its durability and performance. Start by brushing off loose dirt and debris from the fabric using a soft-bristled brush. For more thorough cleaning, mix mild soap with lukewarm water and gently scrub the tent using a sponge or cloth. Avoid using harsh chemicals, abrasive cleaners, or bleach, as they can damage the waterproof coating or fabric.

Rinse the tent thoroughly with clean water to remove any soap residue. Allow it to air dry completely, ensuring no moisture remains, as this can lead to mold or mildew. Never machine wash or dry the tent, as this can cause irreparable damage to the fabric and seams. For stubborn stains or mud, apply a small amount of soap directly and rinse carefully.

Regular cleaning also includes inspecting and cleaning the tent poles, zippers, and guy ropes. Lubricate zippers with silicone spray to ensure smooth operation. Store the tent in a cool, dry place, away from direct sunlight, to prevent fading or deterioration. By following these steps, you can keep your Northwest Territory tent in excellent condition for future camping adventures.

Spot cleaning is recommended after each use to prevent dirt buildup. Always refer to the manual for specific care instructions tailored to your tent model. Regular maintenance ensures your tent remains waterproof, sturdy, and ready for years of outdoor use.

Proper Storage

Proper storage of your Northwest Territory tent is crucial to maintain its quality and longevity. Before storing, ensure the tent is completely dry to prevent mold and mildew. If the tent is damp, set it up in a shaded, well-ventilated area to air dry. Once dry, fold or roll the tent neatly to avoid creasing or damaging the fabric.

Store the tent in a cool, dry place away from direct sunlight, which can cause fading or deterioration. Use the original storage bag or a breathable, moisture-resistant bag to protect the tent from dust and pests. Avoid compressing the tent tightly, as this can cause unnecessary stress on the fabric and seams.

Keep the tent poles, stakes, and guy ropes in separate, labeled bags to avoid misplacement. Store these accessories in a dry, secure location to prevent rust or damage. Never store the tent in a damp basement, garage, or outdoor shed, as moisture can lead to mildew or structural issues.

For long-term storage, consider cleaning the tent before storing it to remove dirt and stains that may worsen over time. Avoid using plastic bins or airtight containers, as they can trap moisture. Instead, opt for a well-ventilated storage solution to ensure the tent remains dry and fresh.

Regularly inspect the tent before and after storage to check for signs of wear or damage. Address any issues promptly to prevent them from worsening. By following these storage guidelines, you can ensure your Northwest Territory tent remains in excellent condition for future camping trips.

Remember, proper storage is an essential part of tent maintenance, helping to preserve its waterproof coating, fabric integrity, and overall performance. Always refer to the manual for model-specific storage recommendations.

Troubleshooting Common Issues

When setting up or using your Northwest Territory tent, you may encounter common issues that can be easily resolved with the right approach. Leaks, damaged poles, and torn fabric are among the most frequent problems reported by users. To address these, start by identifying the root cause and applying the appropriate solution.

Leaks: If water is seeping through the tent fabric, check the seams and any areas around poles or vents. Ensure the tent is properly sealed using a waterproofing spray or seam sealer. If the issue persists, inspect for pinholes or small tears and repair them with a patch kit. Regular maintenance can prevent leaks by reinforcing the tent’s waterproof coating.

Damaged Poles: Bent or broken poles can make assembly difficult. Inspect the poles for any visible damage and replace them if necessary. If a pole section is bent but not broken, gently straighten it and secure it with a pole sleeve or splint. Always handle poles with care to avoid further damage during setup or takedown.

Torn Fabric: Small tears in the tent fabric can be repaired using a fabric repair kit. Apply a patch to both sides of the tear for added strength. For larger tears, consider professional repair or contact the manufacturer for replacement parts. Regular inspections can help catch minor damage before it becomes a major issue.

Stake Issues: If stakes are bending or not holding the tent securely, ensure the ground is soft and free of rocks. Use a mallet to drive stakes in at an angle for better grip. Replace any bent or rusted stakes to maintain the tent’s stability, especially in windy conditions.

By addressing these common issues promptly, you can extend the life of your Northwest Territory tent and ensure a safe and enjoyable camping experience. Always refer to the manual for specific guidance tailored to your tent model.

sandisk manuals for mp3 players

SanDisk is a leader in portable audio solutions‚ offering innovative MP3 players known for durability and quality. This guide provides essential information for optimizing your device’s features‚ troubleshooting‚ and maintenance‚ ensuring you get the most out of your SanDisk MP3 player.

Overview of SanDisk as a Brand

SanDisk‚ founded in 1988‚ is a global leader in flash memory storage solutions. Known for innovation and quality‚ the brand has expanded into portable audio devices‚ including MP3 players. SanDisk’s expertise in flash memory technology enables the production of high-capacity‚ durable‚ and user-friendly MP3 players. Their product lineup‚ such as the Sansa series‚ offers versatile features like Bluetooth connectivity‚ sport modes‚ and customizable listening options. SanDisk’s commitment to delivering reliable and affordable audio solutions has made them a trusted name in the tech industry. By providing detailed user manuals‚ SanDisk ensures customers can fully utilize their devices’ capabilities‚ from basic functions to advanced features.

Importance of User Manuals for SanDisk MP3 Players

User manuals are essential for maximizing the functionality and longevity of SanDisk MP3 players. They provide detailed instructions for operating the device‚ ensuring users understand both basic and advanced features. Manuals include safety precautions‚ such as avoiding headphone use while driving‚ and troubleshooting tips for common issues like device malfunctions or file playback problems. Additionally‚ they guide users through firmware updates‚ which are crucial for maintaining optimal performance and accessing new features. By reading the manual‚ users can customize settings‚ like sport mode or timer functions‚ to enhance their listening experience. SanDisk manuals are available for free as PDF downloads‚ making it easy for users to access and reference them whenever needed.

Downloading and Accessing SanDisk MP3 Player Manuals

SanDisk MP3 player manuals are available for free download from official sources and trusted websites. Users can easily find and access model-specific guides in PDF format online.

Official Sources for Manual Downloads

The official SanDisk website is the primary source for downloading MP3 player manuals. Users can visit the SanDisk support page‚ select their specific model‚ and download the manual in PDF format. Trusted third-party websites like ManualsLib and Manual.co.uk also provide free access to SanDisk MP3 player manuals. These sources ensure that users receive accurate and up-to-date information. Additionally‚ platforms like SanDisk’s official forums and customer support portals offer direct links to manuals. Always verify the authenticity of the source to avoid downloading incorrect or malicious files. Official manuals are essential for understanding device features‚ troubleshooting‚ and maintaining optimal performance. They are freely available and easily accessible online.

How to Find Your Specific Model Manual

To find your specific SanDisk MP3 player manual‚ visit the official SanDisk website and navigate to the support section. Enter your device’s model number in the search bar to locate the corresponding manual. The model number can typically be found on the device‚ its packaging‚ or in the product documentation. Once found‚ click the download link to access the PDF manual. Ensure the model number matches exactly to avoid downloading the wrong manual. For users unsure of their model‚ the SanDisk website often provides a list of popular MP3 players or a dropdown menu for easy selection. Additional resources‚ such as FAQs and troubleshooting guides‚ may also be available alongside the manual. Always verify the source to ensure authenticity and avoid malicious files.

Free PDF Downloads and Viewing Options

SanDisk MP3 player manuals are available for free download in PDF format from the official SanDisk website and trusted sources like ManualsLib or Manual.co.uk. To access these manuals‚ visit the official support page‚ select your specific model‚ and download the PDF directly. Ensure you choose the correct model to get accurate information. Once downloaded‚ you can view the manual using popular PDF readers like Adobe Acrobat or Foxit Reader. The PDF format allows easy navigation‚ printing‚ and searching for specific topics. Always download from verified sources to avoid malicious files. Free PDF downloads provide convenient access to user guides‚ ensuring you can troubleshoot‚ operate‚ and maintain your SanDisk MP3 player effectively.

Installation and Setup

SanDisk MP3 players require minimal setup. Unbox‚ charge‚ and connect to your computer to install necessary software. Follow manual instructions for a seamless experience.

Unboxing and Initial Setup

Unboxing your SanDisk MP3 player is straightforward. Carefully remove the device from the packaging and ensure all accessories‚ such as the USB cable and user manual‚ are included. Before first use‚ charge the player using the provided cable. Connect it to your computer to install any necessary software‚ following the manual’s instructions. Once charged and set up‚ familiarize yourself with the controls and menu navigation. The manual provides detailed guidance for initial setup‚ ensuring a smooth start with your device. Proper setup is crucial for optimal performance and to access all features effectively. Refer to the manual for troubleshooting any initial issues.

Installing Necessary Software

Installing the necessary software for your SanDisk MP3 player is a crucial step for optimal functionality. Connect your device to a computer using the provided USB cable. The computer may automatically install the required drivers‚ but if not‚ visit the official SanDisk support website to download the latest software. Follow the on-screen instructions to complete the installation. Ensure you select the correct model‚ such as the Sansa Clip Sport Go or Sansa Fuze‚ to download the appropriate software. Once installed‚ launch the program to manage your device‚ transfer files‚ and update firmware. Refer to the user manual for detailed guidance. Proper software installation ensures seamless operation and access to advanced features.

Connecting to a Computer

To connect your SanDisk MP3 player to a computer‚ use the provided USB cable. Plug one end into the device and the other into a free USB port on your computer. Ensure the port is directly connected to the computer‚ not a hub‚ for a stable connection. The computer should automatically recognize the device and install necessary drivers. If not‚ download the latest drivers from the official SanDisk support website. Once connected‚ your device will appear in your computer’s file explorer‚ allowing you to transfer music‚ audiobooks‚ and other files. For models like the Sansa Clip Sport Go or Sansa Fuze‚ ensure the device is in the correct mode (e.g.‚ MSC or MTP) for proper detection. Refer to your user manual for specific instructions.

Basic Operations

Basic operations include navigating menus‚ adjusting settings‚ and managing files‚ ensuring a smooth and intuitive user experience with your SanDisk MP3 player for optimal daily functionality.

Turning the Device On/Off

To turn your SanDisk MP3 player on‚ locate the power button‚ typically found on the top or side of the device. Press and hold it until the LED indicator lights up or the screen displays the startup menu. For models like the Sansa Clip Sport Go‚ this process may vary slightly. To turn the device off‚ press and hold the same button until the screen goes dark or the LED turns off. Ensure the battery is charged if the device does not power on. Always refer to your specific model’s manual for exact instructions‚ as some players may have additional power-saving features or alternate button configurations.

Navigating the Menu

Navigating the menu on your SanDisk MP3 player is straightforward. Use the directional buttons (Up‚ Down‚ Left‚ Right) to scroll through options. Press the Select button to choose a menu item. The Home button returns you to the main menu. For models like the Sansa Clip Sport Go‚ the navigation pad allows easy access to music‚ settings‚ and playlists. To access playlists‚ navigate to the Music menu and select your desired category. For settings‚ scroll to the System Settings option and adjust preferences like equalizer or brightness. Refer to your specific model’s manual for any variations in menu navigation‚ as some players may have additional features or slightly different button layouts.

Playing Music and Audiobooks

Playing music and audiobooks on your SanDisk MP3 player is simple. Use the navigation buttons to select your desired file from the music or audiobook folder. Press the Select button to start playback. Adjust volume using the Up/Down buttons. For audiobooks‚ ensure they are in MP3 format and stored in the correct folder. The player supports multiple formats‚ including MP3‚ WMA‚ and AAC. To pause‚ press the Play/Pause button. Skip tracks using the Forward or Backward buttons. For continuous playback‚ enable the Repeat or Shuffle options in the settings menu. Refer to your manual for specific instructions on customizing playback options‚ such as equalizer settings or bookmarking audiobooks for easy access.

Advanced Features

SanDisk MP3 players offer advanced features like timer functions‚ customizable listening options‚ and Sport Mode for enhanced performance. These features optimize your listening experience.

Using the Timer Function

The SanDisk Clip Sport Go MP3 player features a built-in timer function designed for tracking time during workouts or activities. It records time in hours‚ minutes‚ seconds‚ and hundredths of a second‚ allowing precise measurements. Users can also record and save laps‚ making it ideal for athletes or fitness enthusiasts. The timer function is easily accessible through the device’s menu‚ ensuring quick setup and operation. This feature enhances the versatility of the MP3 player‚ making it a valuable tool for both entertainment and training. The timer’s accuracy and lap-saving capability provide users with detailed performance tracking‚ supporting their fitness goals effectively.

Customizing Listening Options

SanDisk MP3 players offer customizable listening options to enhance your audio experience. Users can adjust equalizer settings to optimize sound quality according to their preferences. The devices also support multiple playback modes‚ such as shuffle and repeat‚ allowing for personalized listening sessions. Additionally‚ the Sansa Clip Sport Go model enables users to customize playlists and organize music libraries efficiently. These features ensure that listeners can tailor their audio settings to suit their lifestyle and preferences. By exploring the device’s menu‚ users can unlock various customization options‚ making their SanDisk MP3 player a highly adaptable and user-friendly music companion for any occasion.

Enabling Sport Mode

SanDisk MP3 players‚ such as the Sansa Clip Sport Go‚ feature a Sport Mode designed for active use. This mode enhances durability and water resistance‚ making it ideal for workouts or outdoor activities. To enable Sport Mode‚ navigate to the device’s settings menu and select the “Sport Mode” option. Once activated‚ the device ensures secure button locking and optimized performance in challenging environments. Sport Mode also prioritizes water resistance‚ protecting your player from sweat or moisture. For detailed steps‚ refer to your specific model’s user manual. This feature ensures uninterrupted music playback during exercises‚ making SanDisk MP3 players a reliable choice for fitness enthusiasts and active lifestyles.

Maintenance and Care

Regular maintenance ensures optimal performance of your SanDisk MP3 player. Update firmware for latest features and security. Charge correctly to extend battery life. Clean the device regularly to maintain functionality.

Updating Firmware

Regular firmware updates are crucial for enhancing your SanDisk MP3 player’s performance and security. SanDisk releases updates to add new features‚ fix bugs‚ and improve compatibility. To update‚ connect your device to a computer‚ visit the official SanDisk support website‚ and download the latest firmware version; Follow the on-screen instructions carefully to ensure a smooth update process. Always use the provided USB cable and keep the device connected until the update completes. Updating firmware helps maintain optimal functionality and ensures you have the latest improvements. Regular checks for updates are recommended to keep your MP3 player running at its best.

Charging the Battery

Charging your SanDisk MP3 player is a straightforward process. Use the provided USB cable to connect the device to a computer or a USB wall adapter. Ensure the USB port is high-quality to avoid charging issues. The battery typically takes 2-3 hours to fully charge‚ depending on the model. Avoid overcharging‚ as it may reduce battery life. If the battery is completely drained‚ allow it to charge for at least 10 minutes before turning it on. For optimal performance‚ keep the device away from extreme temperatures while charging. Always use SanDisk-approved chargers to prevent damage. Regular charging maintenance helps extend the battery’s lifespan and ensures reliable performance.

Cleaning the Device

Regular cleaning is essential to maintain your SanDisk MP3 player’s performance and longevity. Use a soft‚ dry cloth to gently wipe the exterior‚ removing dirt or fingerprints. For stubborn marks‚ lightly dampen the cloth with water‚ but avoid liquids entering the device. Never use harsh chemicals or abrasive materials‚ as they may damage the finish or harm internal components. For crevices‚ such as the USB port or headphone jack‚ use compressed air to remove dust or debris. Avoid inserting objects that could cause damage. Cleaning the screen with a microfiber cloth ensures optimal visibility. Regular maintenance prevents dust buildup and ensures smooth operation. Always power off the device before cleaning for safety.

Troubleshooting Common Issues

Troubleshooting your SanDisk MP3 player involves addressing issues like device startup problems‚ file playback errors‚ and connection difficulties. This section provides solutions to restore functionality and ensure smooth operation.

Device Not Turning On

If your SanDisk MP3 player won’t turn on‚ start by ensuring the battery is fully charged. Connect it to a computer or charger for at least 30 minutes. If no charging indicators light up‚ try a different USB cable or port. Reset the device by holding the power button for 10-15 seconds. If it still doesn’t power on‚ check for visible damage or corrosion on the battery or charging port. Consult the user manual for specific reset instructions or contact SanDisk support for further assistance. Persistent issues may require professional repair or replacement under warranty.

Files Not Playing

If your SanDisk MP3 player isn’t playing files‚ ensure the files are in a supported format‚ such as MP3 or AAC. Check the user manual for a full list of compatible formats. Corrupted or incomplete files may also fail to play. Transfer the files again from your computer to the device. Ensure the files are properly copied to the correct folder‚ such as the “MUSIC” directory. If issues persist‚ format the device or update its firmware. Resetting the player by holding the power button for 10-15 seconds may also resolve the issue. For further assistance‚ refer to the official SanDisk support website or contact their customer service team.

Connection Problems

If your SanDisk MP3 player is having connection issues‚ start by ensuring the USB cable is securely plugged into both the device and the computer. Use the original cable provided‚ as third-party cables may cause compatibility problems; Check the USB port for damage or debris and try a different port if necessary. Enable USB mode on the player by navigating to the settings menu. Restart both the device and the computer to establish a fresh connection. If the issue persists‚ update the player’s firmware to the latest version. Consult the user manual for specific instructions on connecting your model. For unresolved issues‚ contact SanDisk support for further assistance.

Model-Specific Features

SanDisk MP3 players offer unique features across models‚ such as the Sansa Clip Sport Go’s sport mode‚ Sansa Fuze’s expandable storage‚ and Sansa Clip Sport Plus’s Bluetooth connectivity.

Sansa Clip Sport Go

The Sansa Clip Sport Go is a popular SanDisk MP3 player designed for active users‚ featuring a built-in sport mode and water resistance. It supports multiple audio formats and offers customizable listening options. The device includes a timer function for tracking workouts and lap recording‚ making it ideal for fitness enthusiasts. With its compact design and durable build‚ the Clip Sport Go is perfect for on-the-go use. The user manual provides detailed instructions on enabling sport mode‚ using the timer‚ and managing audio settings. It also highlights safety precautions and maintenance tips to ensure optimal performance. This model is widely praised for its reliability and user-friendly interface‚ making it a top choice for those seeking a robust MP3 player for sports and everyday use.

Sansa Fuze

The Sansa Fuze is a versatile SanDisk MP3 player known for its sleek design and user-friendly interface. It features a large color screen‚ expandable memory‚ and support for various audio formats. The device was introduced as a competitive option in the portable media player market‚ offering a cost-effective alternative to other brands. The Sansa Fuze manual provides detailed guidance on navigating its features‚ including music management‚ video playback‚ and FM radio functionality. It also covers troubleshooting common issues and optimizing battery life. With its robust feature set and affordability‚ the Sansa Fuze remains a popular choice for music enthusiasts seeking a reliable and feature-rich MP3 player.

Sansa Clip Sport Plus

The Sansa Clip Sport Plus is a high-performance MP3 player designed for active users‚ offering Bluetooth connectivity and water resistance. It supports multiple audio formats and features expandable storage via microSD cards. The device is ideal for workouts‚ with a durable clip-on design and long battery life. The manual provides detailed instructions for pairing Bluetooth devices‚ managing music libraries‚ and troubleshooting common issues. It also highlights sport-specific features like customizable playlists and voice commands. With its robust build and versatile functionality‚ the Sansa Clip Sport Plus is a top choice for fitness enthusiasts seeking a reliable and feature-packed MP3 player. The manual ensures users maximize their device’s potential.

Legal and Safety Information

SanDisk MP3 players comply with safety regulations. Use devices responsibly‚ avoiding headphones while driving. Follow guidelines for proper usage and environmental disposal to ensure compliance with legal standards.

Important Safety Precautions

Always read the safety instructions in your SanDisk MP3 player manual before use. Avoid using headphones while driving‚ cycling‚ or operating machinery‚ as this may pose safety risks. Ensure proper handling to prevent damage. Keep the device away from extreme temperatures and moisture. Use only approved chargers and accessories to avoid malfunctions. Do not expose the device to open flames or sparks. Follow all local regulations and guidelines for electronic device usage. Properly dispose of the device at the end of its lifecycle to minimize environmental impact. For detailed safety guidelines‚ refer to the user manual provided with your SanDisk MP3 player.

Warranty and Disclaimer

Your SanDisk MP3 player is covered by a limited warranty that protects against manufacturing defects for a specified period. The warranty typically covers repairs or replacements for defective parts or workmanship. However‚ it does not cover damage caused by misuse‚ accidents‚ or normal wear and tear. SanDisk disclaims liability for indirect‚ incidental‚ or consequential damages arising from the use of the device. The warranty terms and conditions may vary depending on your region and local laws. For full details‚ refer to the warranty section in your user manual or contact SanDisk support. Always ensure you understand the warranty and disclaimer before using your device.

Environmental Information

SanDisk is committed to environmental responsibility and sustainability. Proper disposal of your MP3 player and its accessories is crucial to minimize environmental impact. Recycle your device through authorized e-waste programs to ensure safe handling of hazardous materials. Batteries should be disposed of separately‚ following local regulations. SanDisk encourages energy-efficient practices‚ such as using power-saving features and updating firmware to optimize performance. By adhering to these guidelines‚ you contribute to reducing electronic waste and promoting eco-friendly practices. For more details on recycling options and environmental policies‚ visit SanDisk’s official website or refer to the user manual. Together‚ we can help protect the environment for future generations.

Frequently Asked Questions

Common inquiries include device setup‚ file compatibility‚ and troubleshooting. Refer to your manual for detailed solutions. Firmware updates and user guides are available online for optimal performance.

General Inquiries

Users often ask about compatibility‚ file formats‚ and basic operations. SanDisk MP3 players support various audio formats like MP3‚ AAC‚ and FLAC. Manuals provide detailed guidance on transferring files‚ setting up playlists‚ and using features like sport mode. Common questions also include battery life‚ storage capacity‚ and how to update firmware. The Sansa Clip Sport Go‚ for example‚ offers customizable listening options and a built-in timer. For troubleshooting‚ users can refer to the manual or official support pages. Ensuring proper device care‚ like regular cleaning and safe charging‚ is also a frequent inquiry. Manuals are available for free download‚ covering all models‚ including the Sansa Fuze and Clip Sport Plus.

Technical Support

For technical issues‚ SanDisk provides comprehensive support through official channels. Users can download firmware updates to resolve performance issues or add new features. Manuals offer troubleshooting guides for common problems like device malfunctions or file playback issues. The Sansa Clip Sport Go‚ for instance‚ has specific firmware updates to enhance functionality. Technical support pages also address connection problems and compatibility with different operating systems. Users can access detailed FAQs or contact support directly for personalized assistance. Ensuring your device has the latest firmware is crucial for optimal performance. Refer to the official SanDisk website for the most reliable technical support resources and solutions tailored to your MP3 player model.

Compatibility Issues

SanDisk MP3 players are designed to work seamlessly with various audio formats and operating systems. However‚ compatibility issues may arise‚ particularly with non-standard file formats or outdated firmware. Users may encounter problems when transferring files from certain devices or software. The Sansa Clip Sport Go‚ for example‚ supports MP3‚ AAC‚ and FLAC formats‚ but issues may occur with DRM-protected files. Ensuring your player has the latest firmware can resolve many compatibility problems; Additionally‚ using SanDisk-approved software for file transfers is recommended. For specific model-related compatibility concerns‚ refer to the user manual or official SanDisk support resources for tailored solutions and updates.

samsung fridge rs265tdrs manual

The Samsung RS265TDRS is a 26 cu. ft. side-by-side refrigerator featuring advanced cooling technology‚ including a Twin Cooling System and Power Freeze/Cool options. Designed for efficient storage‚ it includes spill-proof glass shelves and an external ice/water dispenser. This guide covers installation‚ operation‚ and maintenance tips to help you maximize its performance and troubleshoot common issues‚ ensuring optimal cooling and longevity for your appliance.

Key Features

  • Twin Cooling System for optimal humidity and temperature control.
  • Spill Proof Glass Shelves to contain leaks and simplify cleanup.
  • Power Freeze/Cool Options for rapid cooling when needed.
  • In-door icemaker and external filtered water/ice dispenser for convenience.

Twin Cooling System

The Samsung RS265TDRS features a cutting-edge Twin Cooling System‚ which utilizes two separate evaporators to maintain optimal conditions in both the freezer and fresh food sections. This advanced technology ensures precise temperature control‚ preventing humidity and temperature fluctuations that can spoil food. By separating the cooling systems‚ the refrigerator minimizes the transfer of odors between compartments‚ keeping your groceries fresh and smelling their best.

The Twin Cooling System also enhances energy efficiency and reduces frost buildup‚ making defrosting less frequent and easier to manage. This feature is particularly beneficial for maintaining the quality of perishable items‚ as it creates a stable environment that slows down the degradation of fruits‚ vegetables‚ and meats. With this system‚ you can enjoy consistent cooling performance while preserving the freshness and flavor of your food.

Additionally‚ the Twin Cooling System contributes to quieter operation and reduced noise levels‚ making it a convenient and reliable choice for modern kitchens. Its innovative design ensures that both the freezer and refrigerator compartments operate independently‚ providing tailored cooling solutions for all your storage needs.

Spill Proof Glass Shelves

The Samsung RS265TDRS refrigerator is equipped with spill-proof glass shelves‚ designed to provide a practical and hygienic storage solution. These shelves are crafted from durable‚ tempered glass‚ ensuring they can withstand heavy loads and accidental spills without breaking. The spill-proof design features raised edges‚ which effectively contain liquids and prevent them from spilling over into other compartments.

This feature is particularly useful for storing items like beverages‚ dairy products‚ and fresh fruits‚ which are prone to leakage. The shelves are also adjustable‚ allowing you to customize the layout to fit your storage needs. Their smooth surface makes cleaning easier‚ as spills can be wiped away quickly without leaving residue.

The spill-proof glass shelves contribute to a more organized and efficient kitchen experience. By minimizing messes and keeping your refrigerator tidy‚ they help maintain a clean and pleasant environment. This thoughtful design ensures that your groceries remain fresh and your appliance stays in great condition for years to come.

Power Freeze/Cool Options

The Samsung RS265TDRS refrigerator features Power Freeze and Power Cool options‚ designed to rapidly adjust temperatures for optimal food preservation. The Power Freeze function quickly lowers the freezer temperature‚ ensuring rapid freezing of fresh items and preventing ice crystal formation. This is ideal for preserving the texture and flavor of meats‚ fish‚ and other perishables.

The Power Cool option‚ on the other hand‚ rapidly chills the refrigerator compartment‚ making it perfect for cooling beverages or chilling groceries quickly. Both functions are easily activated via the control panel and work efficiently to maintain the desired temperature. These advanced features ensure your food stays fresh for a longer period‚ while also providing convenience for everyday use.

By utilizing these settings‚ you can customize the refrigerator’s performance to meet your specific needs‚ whether you’re storing fresh produce‚ freezing meals‚ or simply keeping drinks cold. The Power Freeze/Cool options enhance the overall functionality of the appliance‚ making it a versatile and reliable choice for modern kitchens.

Installation Requirements

Proper installation is essential for the optimal performance of your Samsung RS265TDRS refrigerator. Begin by placing the appliance in a suitable location with adequate clearance from walls and surrounding surfaces to ensure proper air circulation and easy access for maintenance. The refrigerator must be installed on a firm‚ level surface to prevent uneven operation and potential damage.

The floor must be strong enough to support the weight of the fully loaded refrigerator. Ensure the area is dry and free from direct sunlight or moisture‚ as these conditions can affect performance and longevity. Additionally‚ maintain a minimum clearance of 1 inch on all sides and 2 inches at the back for proper ventilation.

Electrical installation requires a dedicated 115V‚ 60Hz power outlet. Avoid using extension cords‚ as they may cause power fluctuations; For water dispenser and ice maker functionality‚ ensure a water supply line is properly connected to a shut-off valve. Refer to the manual for specific installation instructions and contact Samsung support if you encounter any issues during setup.

Operating the Refrigerator

Operate your Samsung RS265TDRS by setting the temperature controls for optimal cooling. Use the ice and water dispenser by ensuring the water supply is connected. Regularly check and maintain the spill-proof glass shelves for organization. Refer to the manual for detailed instructions on daily use and feature customization.

Daily Use

For optimal performance‚ ensure the refrigerator is placed in a well-ventilated area with adequate clearance. Load food and beverages evenly‚ avoiding overcrowding to maintain proper air circulation. Regularly inspect door seals for tight closure to prevent cool air from escaping. Use the spill-proof glass shelves to organize items securely‚ and clean up spills immediately to prevent sticking. The ice and water dispenser should be used with a sturdy container‚ and the ice bucket should be checked and emptied as needed to maintain freshness. For families with children‚ activate the Child Lock feature to prevent accidental adjustments or dispenser use. Daily checks of the temperature settings ensure consistent cooling levels‚ while periodic wiping of shelves and walls keeps the interior clean. Refer to the manual for guidance on customizing settings for specific storage needs‚ such as Power Freeze for rapid freezing or Power Cool for quick chilling; Proper daily use enhances efficiency‚ preserves food quality‚ and extends the appliance’s lifespan.

Temperature Controls

The Samsung RS265TDRS refrigerator features intuitive temperature controls‚ allowing precise adjustment of both the freezer and fresh food sections. The digital controls are located on the dispenser panel‚ providing easy access to settings. Use the arrows to increase or decrease temperatures‚ with the freezer typically set between -14°F and 14°F and the fresh food section between 32°F and 50°F.

The Twin Cooling System ensures independent temperature control‚ maintaining optimal humidity levels in the fresh food section while keeping the freezer at a consistent temperature. This prevents odor transfer between compartments and keeps food fresh longer. For rapid cooling‚ the Power Freeze and Power Cool options quickly lower temperatures‚ ideal for freezing fresh food or chilling drinks fast.

Regularly monitor the temperature settings to ensure proper food storage. If the doors are left open‚ the sensors will detect this and may pause the fan to prevent warm air from entering. Adjustments to temperature settings should be made gradually‚ allowing the system time to stabilize. For energy efficiency‚ avoid overcooling‚ and use the Sabbath Mode if needed to disable alarms and lights during extended periods. Proper use of temperature controls ensures optimal performance and food preservation.

Ice and Water Dispenser

The Samsung RS265TDRS features an external ice and water dispenser‚ providing convenient access to fresh water and ice without opening the door. The dispenser is located on the door and offers cubed or crushed ice options‚ along with chilled water. To use the dispenser‚ ensure the water supply line is properly connected and the ice maker is turned on in the settings.

Regular maintenance is essential for optimal performance. Clean the dispenser nozzle and tray regularly to prevent mineral buildup and bacterial growth. If the dispenser stops working‚ check for blockages in the ice chute or water supply line. The water filter should be replaced every 6 months to maintain water quality and flow rate.

The ice maker can produce up to 4 pounds of ice daily. If ice production is slow‚ ensure the freezer temperature is set correctly (below 14°F). For water dispensing issues‚ check the filter or ensure the water supply valve is fully open. Proper care of the dispenser ensures consistent performance and fresh water and ice at your fingertips.

Maintenance and Care

Regular cleaning and defrosting are essential for optimal performance. Remove shelves and crispers for thorough cleaning. Check door seals for air leaks and ensure proper alignment. Defrost the unit periodically to prevent ice buildup and maintain efficiency. Clean the condenser coils annually for better airflow and energy efficiency. Replace the water filter every 6 months to ensure clean water and ice. Check and clean the drain to prevent clogs. For tough ice buildup‚ use steam to gently loosen without damaging components. Always unplug the refrigerator before performing maintenance tasks. Refer to the manual for specific instructions and recommendations to keep your appliance in top condition.

Cleaning

Regular cleaning is essential to maintain the performance and hygiene of your Samsung RS265TDRS refrigerator. Start by removing all food‚ shelves‚ and crispers. Wash shelves and bins with mild soap and warm water‚ then dry thoroughly before reinstalling. Wipe the interior walls and floor with a soft cloth dampened with a mixture of soap and water. Avoid using abrasive cleaners or scrubbers‚ as they may damage surfaces. Clean the door seals to ensure a tight closure and prevent air leaks. For tougher stains or odors‚ mix baking soda and water to create a paste‚ apply it to the area‚ and let it sit before wiping clean. Check the drain at the bottom of the freezer and fresh food sections to ensure it’s clear of debris. If clogged‚ clean it gently to prevent water buildup. Clean the exterior with a damp cloth‚ paying attention to handles and high-touch areas. For stainless steel finishes‚ use a stainless steel cleaner to maintain shine and prevent fingerprints. Regular cleaning helps prevent odors‚ maintains efficiency‚ and keeps your refrigerator in optimal condition. Always unplug the unit before deep cleaning to ensure safety. Refer to the manual for specific cleaning recommendations.

Defrosting

Defrosting your Samsung RS265TDRS refrigerator is crucial to maintain its efficiency and prevent ice buildup. If you notice ice accumulation in the freezer or fresh food section‚ it may be time to defrost. Start by removing all food‚ shelves‚ and crispers. Cover the floor and surrounding areas with towels to protect against water damage. For natural defrosting‚ unplug the refrigerator and leave the doors open‚ allowing the ice to melt naturally. This process can take up to 72 hours. For faster defrosting‚ use a steamer or warm cloth to gently loosen ice without damaging surfaces. Avoid using sharp objects‚ as they may harm the evaporator or walls. Once the ice is removed‚ wipe down the interior with a clean‚ damp cloth to remove any residue. Check and clean the drain to ensure proper water flow. After defrosting‚ dry the interior thoroughly before plugging the unit back in and restocking. Regular defrosting helps maintain airflow‚ prevents odors‚ and ensures optimal cooling performance. Always refer to the manual for specific defrosting recommendations tailored to your model.

Filter Replacement

Regular filter replacement is essential for maintaining clean water and ice in your Samsung RS265TDRS refrigerator. The water filter‚ located in the external dispenser system‚ should be replaced every 6 months or when the filter indicator light illuminates. To replace the filter‚ start by turning off the ice maker and water dispenser to avoid water flow during the process. Locate the filter‚ typically found in the upper right corner of the refrigerator or behind the lower kick plate‚ depending on your model. Use the filter wrench provided with your refrigerator to unscrew and remove the old filter. Dispose of it responsibly and install the new filter by aligning it properly and screwing it into place until it clicks. After replacement‚ run several gallons of water through the dispenser to flush out any impurities or air bubbles. Ensure the new filter is compatible with Samsung’s specifications to maintain water quality and dispenser performance. Neglecting filter replacement can lead to reduced water flow‚ poor taste‚ or even system damage. Always refer to your user manual for specific instructions tailored to your model.

Troubleshooting Common Issues

Identify common issues like cooling problems‚ error codes‚ or noise by referring to the manual. Check for proper door seals‚ sensor functionality‚ and filter conditions. Reset or replace faulty components as needed to restore optimal performance and ensure efficient operation of your Samsung RS265TDRS refrigerator.

Cooling Problems

Cooling issues in the Samsung RS265TDRS can often be traced to defrost sensor malfunctions or ice buildup. If the fresh food section isn’t cooling‚ the defrost sensor may be faulty‚ causing excessive ice accumulation behind the evaporator cover. This can obstruct the fan‚ leading to reduced airflow and poor cooling performance. To address this‚ unplug the refrigerator and defrost manually for 72 hours or use steam to clear ice blockages. Remove the lower back cover‚ disconnect the fan and sensor connectors‚ and replace the defrost sensor. Ensure it’s securely zip-tied to prevent future issues. Reassemble the components and test the fan operation by closing the door and listening for it to start. Regularly cleaning the drain and ensuring proper door seals can prevent such problems. If cooling issues persist‚ consult the manual or contact Samsung support for further assistance.

Error Codes

The Samsung RS265TDRS may display error codes to indicate specific issues. For example‚ error code “1E” typically relates to a temperature sensor malfunction‚ while “5E” indicates a problem with the ice maker. Other codes like “SE” or “bE” may point to communication errors between the main board and the display panel. If an error code appears‚ refer to the user manual or service guide for a detailed explanation. To resolve these issues‚ start by unplugging the refrigerator to reset the system. If the error persists‚ check the relevant components‚ such as sensors‚ wiring‚ or the ice maker switch. For sensor-related errors‚ ensure all connections are secure and free from damage. If the issue is with the ice maker‚ verify that it is properly aligned and the switch is functioning correctly. In some cases‚ replacing faulty sensors or components may be necessary. Always consult the manual or contact Samsung support for professional assistance if troubleshooting steps do not resolve the issue. Regular maintenance can help prevent these errors and ensure optimal performance.

Noise Issues

The Samsung RS265TDRS refrigerator may occasionally produce unusual noises‚ which can be addressed by identifying their source. Common noises include rattling‚ gurgling‚ or humming sounds. Rattling noises often come from loose parts‚ such as shelves or drawers‚ while gurgling sounds may result from the flow of refrigerant or ice melting. Humming noises are typically associated with the compressor or evaporator fan. To resolve these issues‚ ensure all shelves and drawers are securely placed. For gurgling sounds‚ check the drain for blockages or ice buildup‚ as a frozen drain can disrupt normal operation. If the noise persists‚ inspect the evaporator fan for ice accumulation‚ which can cause unusual sounds. Defrosting the unit or ensuring proper airflow can help alleviate this issue. Additionally‚ leveling the refrigerator to prevent vibrations is recommended. If the noise is excessively loud or persistent‚ consult the user manual or contact Samsung support for professional assistance. Regular maintenance‚ such as cleaning the condenser coils and ensuring proper door alignment‚ can also minimize noise issues and maintain optimal performance.

Advanced Features

The Samsung RS265TDRS features advanced settings like Child Lock to prevent accidental changes and Sabbath Mode for energy efficiency during religious observances. These modes enhance user control and customization‚ ensuring the refrigerator meets specific household needs while maintaining optimal performance and energy use.

Child Lock

The Child Lock feature on the Samsung RS265TDRS refrigerator ensures that the control panel is secured‚ preventing accidental changes or unauthorized access. This is particularly useful for households with children‚ as it avoids unintended adjustments to settings like temperature or ice dispenser functions. To activate the Child Lock‚ press and hold the “Lock” button on the control panel for a few seconds until the display confirms the feature is enabled. Once activated‚ all buttons on the interface will be disabled‚ except for the “Lock” button‚ which can be used to deactivate the feature when needed. This feature does not affect the refrigerator’s operation but merely locks the controls‚ maintaining consistent cooling performance. The Child Lock is a convenient and reliable way to maintain control over your appliance’s settings‚ ensuring that your refrigerator operates smoothly without interruptions. This feature is easy to use and provides peace of mind for parents and caregivers alike.

Sabbath Mode

Sabbath Mode on the Samsung RS265TDRS refrigerator is a feature designed to accommodate religious observances‚ particularly the Sabbath and other holy days. When activated‚ this mode disables the ice maker‚ ice and water dispensers‚ and the display lights‚ ensuring minimal noise and no electronic interference. The refrigerator will continue to maintain its set temperature‚ but all external functions that require user interaction or produce noise will be paused. To activate Sabbath Mode‚ press and hold the “Lock” and “Lighting” buttons simultaneously for 3 seconds until the display indicates the mode is active. The mode will remain enabled until manually deactivated‚ providing a peaceful and uninterrupted operation during religious observances. This feature is particularly useful for users who need to avoid operating electrical appliances during specific periods. Sabbath Mode ensures that the refrigerator remains functional while respecting the need for reduced activity‚ making it a thoughtful addition for users with religious or cultural requirements.

Warranty and Support

The Samsung RS265TDRS refrigerator is backed by a comprehensive warranty and dedicated customer support. Samsung offers a 5-year warranty on the sealed system‚ which includes the compressor and evaporator‚ ensuring long-term reliability. Additionally‚ most parts and labor are covered under a 1-year warranty‚ providing peace of mind for repairs and replacements. Certain components‚ such as the ice maker and water dispenser‚ may have extended coverage‚ typically up to 5 years. For any issues‚ users can contact Samsung’s customer service or visit their official website for troubleshooting guides‚ repair manuals‚ and downloadable resources. The warranty also covers defects in materials and workmanship‚ ensuring the refrigerator performs as expected. If you encounter problems‚ it’s recommended to register your product and keep your purchase documents handy for warranty validation. Samsung’s support team is available to assist with repairs‚ replacements‚ and maintenance‚ making it easier to resolve issues promptly. This robust warranty and support system underscores Samsung’s commitment to customer satisfaction and product quality.

The Samsung RS265TDRS refrigerator is a high-performance appliance designed to meet the needs of modern households. With its advanced Twin Cooling System‚ spill-proof glass shelves‚ and Power Freeze/Cool options‚ it offers superior cooling efficiency and convenience. The user-friendly interface‚ combined with features like the ice and water dispenser‚ makes daily use seamless. Regular maintenance‚ such as cleaning and filter replacement‚ ensures optimal performance. Troubleshooting common issues‚ like cooling problems or error codes‚ is made easier with the provided guides and Samsung’s dedicated support. The comprehensive warranty and reliable customer service further enhance the ownership experience. Whether you’re looking for advanced features or practical solutions‚ the RS265TDRS delivers a balance of innovation and durability‚ making it a standout choice for home refrigeration needs.