climbing shoes size guide

Properly fitting climbing shoes are essential for performance and comfort․ This guide explores foot shape, sizing factors, and brand-specific charts to help you choose the right pair․

Importance of Proper Fit in Climbing Shoes

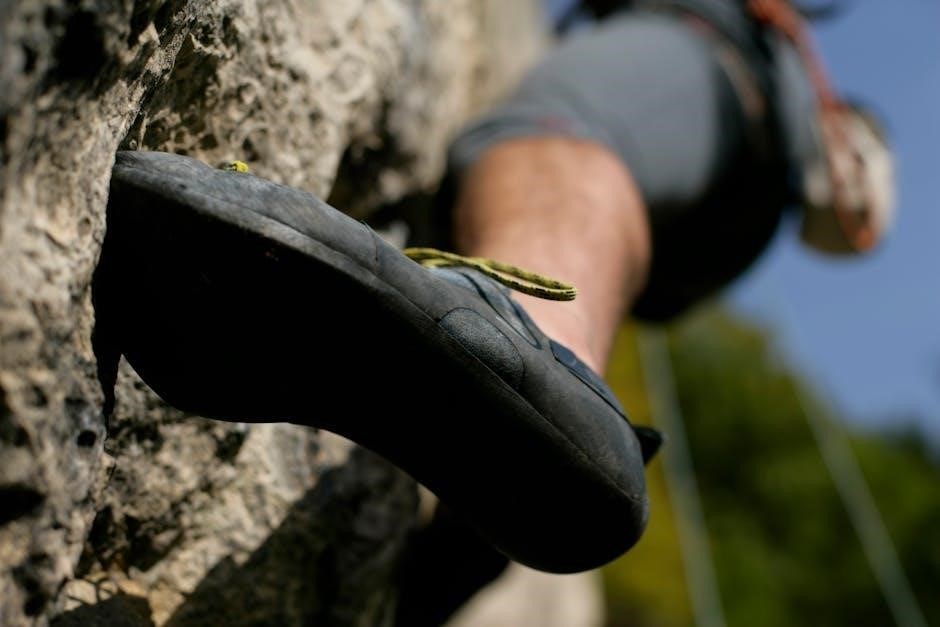
A proper fit is crucial for climbing performance and comfort․ Well-fitting shoes provide support, precision, and prevent discomfort or injuries․ Ill-fitting shoes can hinder technique and confidence, while the right fit enhances control and focus․ Properly fitted shoes ensure optimal performance, safety, and a better climbing experience․

Overview of Key Factors in Sizing

Key factors in climbing shoe sizing include foot length, width, and arch type․ Personal climbing style, shoe usage, and the break-in period also play significant roles․ Proper fit balances snugness for performance and comfort, ensuring optimal support and precision․ Understanding these elements helps climbers choose the right size for their needs, enhancing both comfort and climbing efficiency․

Understanding Foot Shape and Its Impact on Size

Foot shape significantly influences climbing shoe fit․ Variations in length, width, and arch type affect sizing, ensuring proper comfort and performance for different climbers․

Foot Length and Climbing Shoe Size

Foot length is a critical factor in determining climbing shoe size․ Proper fit ensures optimal performance and comfort․ Measure your foot length accurately, as even small discrepancies can affect precision and control․ Climbers often prefer a snug fit for better sensitivity, but ensure toes aren’t cramped․ Consider your climbing style—sport climbing may require a tighter fit, while bouldering might need a more precise toe box․ Always measure in the afternoon, as feet tend to swell during the day․

Foot Width and Its Role in Fit

Foot width significantly impacts climbing shoe fit․ Narrow feet may find tighter shoes more comfortable, while wider feet require more spacious options to prevent discomfort․ Climbing shoes come in various widths to accommodate different foot shapes; Proper width ensures optimal support and prevents issues like blisters or lack of stability․ Choosing the right width enhances performance and comfort during climbs, making it a critical factor in selecting the ideal shoe․

Arch Type and Shoe Comfort

Arch type plays a crucial role in determining climbing shoe comfort․ Climbers with high arches may prefer more cushioning, while those with flat feet often need stiffer shoes for support․ Proper arch alignment ensures optimal performance and prevents discomfort during climbs․ Understanding your arch type helps in selecting shoes that provide the right balance of snugness and flexibility, enhancing overall climbing efficiency and satisfaction․

How to Measure Your Feet Accurately

Use a flexible measuring tape or Brannock device․ Stand straight, place weight evenly, and measure both feet from heel to longest toe for precise sizing․

Tools Needed for Measurement

To accurately measure your feet, you’ll need a flexible ruler or a Brannock device, a pen, and a piece of paper․ Place the paper on a flat surface and trace your foot outline while wearing thin socks․ Measure the longest and widest points to determine length and width․ Ensure the ruler is straight and the foot is evenly aligned for precise results․ Consistency is key to finding the right climbing shoe size․

Step-by-Step Measurement Process

Stand upright, place your foot on paper, and trace its outline․ Measure the longest point for length and the widest for width․ Note the arch height․ Use a ruler or caliper for accuracy․ Ensure the foot is flat and weight-bearing․ Repeat for both feet, as sizes may differ․ Use the larger measurement to ensure comfort and performance in climbing shoes․ This method provides precise data for selecting the ideal size․

Converting Measurements to Shoe Size

After measuring your foot length and width, compare these to the brand’s size chart․ Consider factors like foot swelling during the day and sock thickness․ Snugness is crucial for performance, so align your measurements with the chart, adjusting for personal comfort and climbing style․ Some brands account for break-in periods, while others may require sizing down․ Always refer to brand-specific guidelines for accurate conversion to ensure the best fit․

Climbing Shoe Sizing Charts by Brand

Each brand offers unique sizing standards, reflecting their shoe designs․ Comparing charts helps climbers find the best fit, ensuring comfort and performance for various climbing styles․

Popular Brands and Their Sizing Differences

Leading brands like La Sportiva, Five Ten, and Black Diamond offer distinct sizing profiles․ La Sportiva tends to run snug, while Five Ten often fits roomier․ Black Diamond balances precision with comfort․ Sizing variations stem from shoe design, intended use, and brand-specific lasts․ Understanding these differences is crucial for selecting the right fit․ Always consult brand-specific charts and try shoes on when possible to ensure optimal performance and comfort during climbs․

Comparing Size Charts Across Brands

Different climbing shoe brands often have varying sizing standards, making direct comparisons challenging․ Some brands run smaller or larger than others, and fit preferences vary widely․ It’s crucial to consult brand-specific size charts and try shoes on if possible․ Pay attention to how each brand accommodates foot shape, as this can significantly impact comfort and performance․ Always consider personal comfort and climbing style when selecting a size, even if it differs from your usual choice․

How to Use Brand-Specific Sizing Guides

Consult the brand’s size chart to match your foot measurements․ Compare your foot length and width to the chart, considering your climbing style․ Some brands offer sizing guides tailored to specific disciplines, like sport or bouldering․ Pay attention to fit descriptions, as brands may vary in snugness or comfort․ Use customer reviews to validate sizing accuracy․ If unsure, contact customer support for personalized recommendations to ensure the best fit for performance and comfort․

Factors Influencing Shoe Fit

Climbing style, temperature, and break-in periods significantly impact shoe fit․ Climbing style affects tightness needs, while temperature alters shoe material flexibility․ Break-in shapes the shoe to your foot․

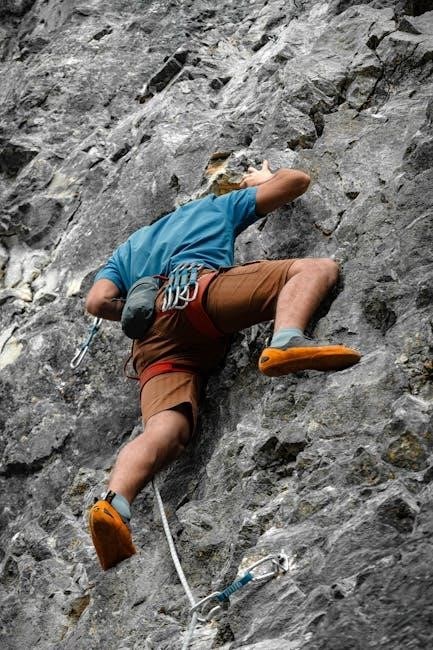
Impact of Climbing Style on Shoe Size

Different climbing styles influence shoe size preferences․ Sport climbers often opt for snug, precise fits to enhance performance on small holds․ Bouldering requires comfort for all-day wear, leading to slightly roomier choices․ Traditional climbing demands a balance between snugness and comfort for long routes․ Ice climbing necessitates a looser fit to accommodate thick socks․ Understanding your climbing style helps tailor shoe size selection for optimal performance and comfort․

Temperature and Shoe Fit

Temperature significantly impacts climbing shoe fit․ In warmer conditions, leather shoes may stretch, leading to a looser fit over time․ Conversely, in colder climates, materials stiffen, potentially causing discomfort․ Climbers should consider this when selecting sizes, opting for a snugger fit in warmer environments and ensuring adequate room in colder settings to maintain comfort and performance during their climbs․

Break-In Period and Longevity

The break-in period for climbing shoes varies by material and design․ Leather shoes stretch over time, while synthetic shoes retain their shape․ Proper care, like cleaning and storing in a cool, dry place, extends longevity․ A well-fitted shoe balances comfort and performance, ensuring durability․ Regular use impacts lifespan, but quality materials and maintenance can enhance it․ Understanding the break-in process helps climbers optimize fit and extend shoe life for better performance․

Common Mistakes in Choosing Climbing Shoe Size

Overlooking foot shape, not considering climbing style, and ignoring the break-in process are common errors that can lead to poor fit and reduced performance․

Overlooking Foot Shape

Ignoring foot shape is a common mistake when selecting climbing shoes․ Different foot shapes—narrow, wide, high arches, or flat feet—affect fit and comfort․ Shoes that don’t match your foot shape can cause discomfort, blisters, or restricted movement․ This oversight can lead to poor performance and dissatisfaction․ Always consider foot shape when choosing climbing shoes to ensure optimal fit and functionality․ Proper alignment and support are crucial for both comfort and climbing efficiency․

Not Considering Climbing Style

Ignoring your climbing style can lead to poor fit choices․ Sport climbers may prefer snug shoes for precision, while trad climbers need comfort for long routes․ Bouldering demands tight fits for sensitivity, and ice climbing requires insulation․ Failing to match your style with shoe design can compromise performance and comfort․ Always consider your primary discipline to ensure optimal fit and functionality․ This step is crucial for enhancing your climbing experience and preventing discomfort during extended use․

Ignoring the Break-In Process

Many climbers overlook the break-in period, leading to discomfort and poor performance․ New shoes often feel stiff, and skipping this step can cause blisters or restricted movement․ Allowing shoes to mold to your feet ensures better fit and sensitivity․ Ignoring this process may result in premature wear or dissatisfaction․ Patience during the break-in period is crucial for optimal comfort and climbing efficiency․ Proper sizing and gradual use help shoes adapt to your foot shape, enhancing overall performance and longevity․

How to Choose the Right Size for Different Climbing Disciplines

Different climbing styles require varying fits․ Sport climbing demands precision, while bouldering needs snugness․ Trad climbing prefers comfort, and ice climbing requires insulated, roomier shoes for warmth and support․

Sport Climbing vs․ Bouldering

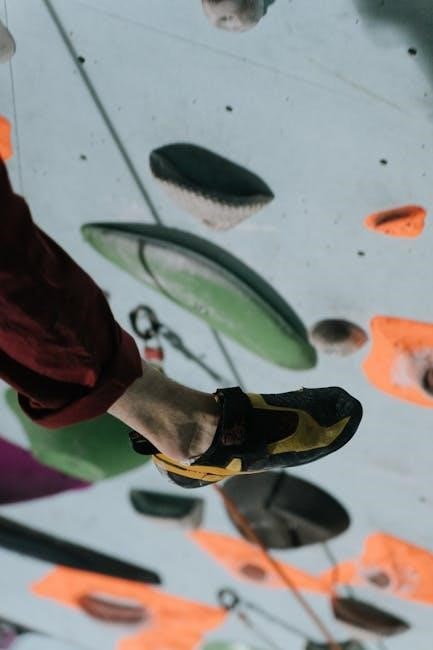
Sport climbing often requires shoes with a balance of comfort and precision for long routes, while bouldering demands snug, high-performance fits for intense movements․ Shoe size preferences differ: sport climbers may opt for a slightly roomier fit to avoid discomfort during prolonged use, whereas bouldering shoes are typically tighter to enhance sensitivity and control on smaller holds․ Understanding these differences helps climbers choose the optimal size for their discipline, ensuring both performance and comfort․

Trad Climbing and Shoe Fit

Trad climbing demands shoes that balance comfort and precision for long routes․ Opt for a snug fit to support ankles on varied terrain while allowing precise footwork․ Consider durability and traction for rough surfaces․ Ensure the shoe flexes naturally for cracks and edges․ Prioritize comfort for extended wear, as trad climbs often require patience․ Try shoes on to assess ankle support and overall fit, ensuring they meet the demands of multi-pitch adventures while maintaining performance and comfort․

Ice Climbing and Mountaineering

For ice climbing and mountaineering, choosing the right shoe size is crucial for warmth, support, and traction․ Boots should fit snugly to prevent blisters but allow room for thick socks․ Insulation and waterproofing are key, as cold conditions demand protection․ A precise fit ensures better control on icy surfaces, while flexibility aids in navigating uneven terrain․ Proper sizing balances comfort and performance, essential for long, demanding climbs in harsh environments․

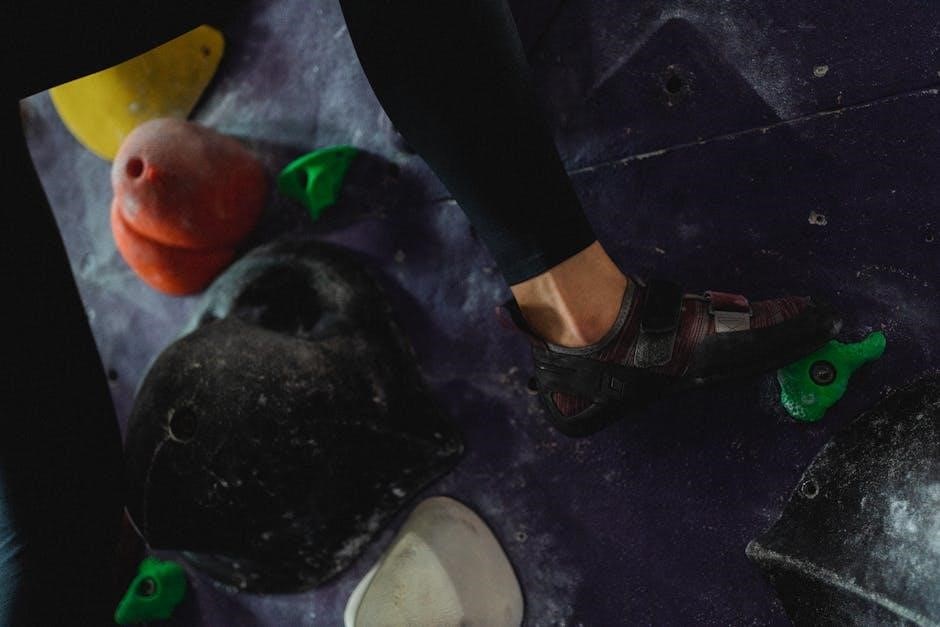
Understanding Shoe Fit for Performance

A snug yet comfortable fit enhances precision and control․ Proper support balances tightness and flexibility, ensuring optimal performance for edging, smearing, and overall climbing efficiency․

Snugness vs․ Comfort

Finding the right balance between snugness and comfort is crucial for optimal climbing performance․ Snug shoes provide precision and support, enhancing footwork accuracy, while comfort ensures long-lasting wear without pain․ Climbing style influences this balance; bouldering may require a tighter fit for dynamic moves, whereas sport climbing might prioritize comfort for endurance․ Materials and construction play a role, with softer shoes offering comfort and stiffer ones providing support․ A proper fit should avoid pressure points while maintaining performance, adapting to individual preferences and climbing disciplines․

Support and Precision in Fit

Support and precision in fit are crucial for optimal climbing performance․ A well-fitting shoe provides stability and responsiveness, allowing climbers to feel the rock’s texture․ Snugness ensures minimal foot movement, enhancing control during intricate maneuvers․ Proper support prevents fatigue, while precision fit maximizes sensitivity for better balance․ Achieving this balance is key to improving climbing technique and overall success on the wall․

Balance Between Tightness and Flexibility

Balancing Tightness and Flexibility in Climbing Shoes

Achieving the right balance between tightness and flexibility is crucial for optimal climbing performance․ Tight shoes provide support and precision, while flexibility allows natural foot movement․ The ideal fit varies based on foot shape, climbing style, and shoe materials․ Proper sizing ensures comfort and prevents issues like blisters or poor support․ Trying shoes on and considering the break-in period helps in finding the perfect balance for enhanced climbing experiences and better overall performance․

How to Test Climbing Shoes Before Purchase

Testing climbing shoes involves trying them on, ensuring a snug fit, and assessing comfort․ Walk around to gauge support and flexibility․ Consider the break-in period for optimal performance․

Trying Shoes On In-Person

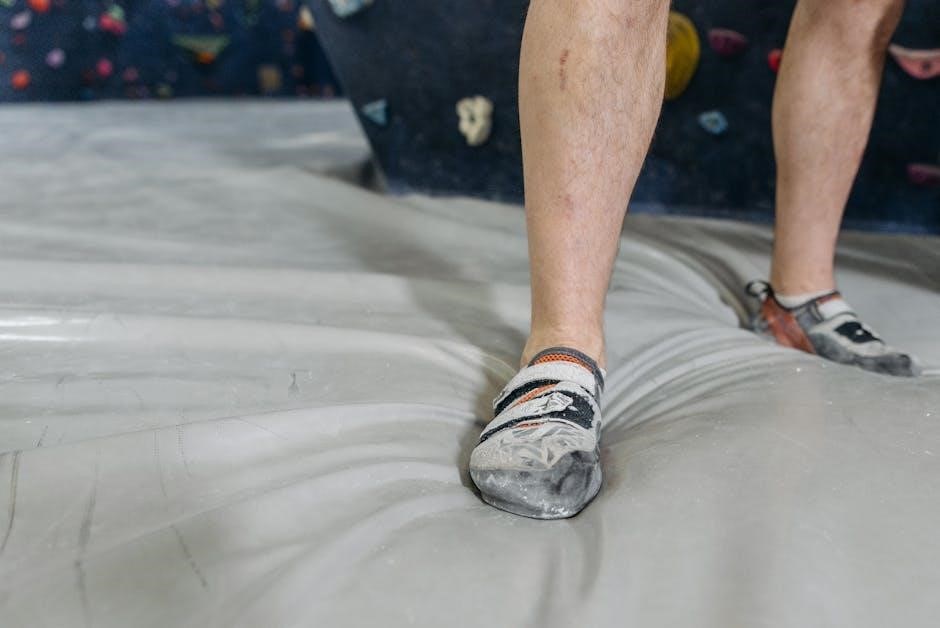
Trying climbing shoes in-person ensures the best fit․ Visit a store later in the day, as feet swell․ Wear the same socks you’ll climb in․ Check for snugness without pain, ensuring toes aren’t cramped․ Walk around to assess comfort and support․ A proper fit balances tightness and flexibility, crucial for performance․ Don’t hesitate to compare sizes and styles to find your perfect match․

Testing Fit at Home

Testing climbing shoe fit at home ensures comfort and performance․ Try shoes in the afternoon, as feet swell during the day․ Wear the same socks you’ll climb in․ Stand up to assess snugness and support․ Lace tightly but not painfully․ Walk around to check for hotspots or pressure points․ If possible, use a ruler to measure toe room․ Proper fit should feel snug yet comfortable, allowing precise control while climbing․ Ensure no excessive movement or tightness that could cause discomfort during use․

Assessing Comfort and Performance

When testing climbing shoes, prioritize comfort and performance․ Ensure snugness without pain, as tight shoes can hinder circulation․ Check support during edging and smearing, and assess flexibility for precise footwork․ Pay attention to how the shoes mold to your feet over time, as the break-in period can significantly impact long-term comfort․ Proper fit enhances sensitivity and control, crucial for optimal climbing performance across various disciplines․

Online Shopping Tips for Climbing Shoes

Use size charts, read customer reviews, and check return policies to ensure the best fit․ Compare sizes across brands for consistency and optimal comfort․

Using Size Charts Effectively

Referencing size charts is crucial for selecting the right climbing shoes․ Compare your measurements across brands, as sizing varies․ Consider foot shape and width, and note if charts account for sock thickness․ Double-checking brand-specific guides ensures accuracy․ Pay attention to conversion factors between US, EU, and UK sizes․ This approach minimizes sizing errors and enhances comfort and performance during climbs․

Reading Customer Reviews

Customer reviews provide valuable insights into how climbing shoes fit and perform․ Look for feedback on sizing accuracy, comfort, and durability․ Pay attention to patterns in reviews, as they can highlight common issues or strengths․ Reviews from climbers with similar foot shapes or preferences can help you make informed decisions․ Use this information to cross-reference with size charts and brand descriptions for a better fit․ Prioritize reviews from experienced climbers for reliable advice․

Understanding Return Policies

When shopping for climbing shoes online, understanding return policies is crucial․ Most brands offer a 30-day return window, allowing you to try shoes on and ensure proper fit․ Check if returns are free or if restocking fees apply․ Some brands require shoes to be in original condition with tags intact․ Defective or ill-fitting shoes are often eligible for exchanges or refunds․ Review the policy before purchase to avoid surprises and ensure a smooth process if adjustments are needed․

The Role of Socks in Climbing Shoe Fit

Socks influence climbing shoe fit by adding thickness, potentially altering size needs․ Thicker socks suit colder conditions, while thinner options provide a snug fit․ Moisture-wicking fabrics enhance comfort․

Impact of Sock Thickness

The thickness of socks significantly impacts climbing shoe fit․ Thicker socks can make shoes feel tighter, while thinner socks allow for a snug, precise fit․ Choosing the right sock thickness ensures comfort and performance during climbs, as it affects how the shoe molds to the foot․ Proper sock selection can prevent discomfort and blisters, enhancing overall climbing efficiency and satisfaction․

Choosing the Right Socks

Choosing the right socks is crucial for optimal climbing shoe fit and performance․ Socks can enhance comfort, prevent blisters, and maintain foot hygiene․ Thicker socks provide cushioning and warmth, while thinner ones offer a snug fit and better sensitivity․ Moisture-wicking materials are essential to keep feet dry during intense climbs․ Selecting socks that balance comfort and support ensures a better climbing experience․ Proper sock choice complements shoe fit, aiding in performance and satisfaction․

How Socks Affect Size and Comfort

Socks significantly influence climbing shoe fit and comfort․ Thicker socks can make shoes feel tighter, while thinner ones allow for a more precise fit․ Moisture-wicking socks reduce blisters and keep feet dry, enhancing performance․ The right sock choice balances support and sensitivity, ensuring optimal comfort during climbs․ Consider sock thickness when sizing to avoid overly tight or loose shoes, as this impacts both comfort and climbing precision․

Caring for Climbing Shoes

Regular cleaning with mild soap and water prevents odor․ Store in a cool, dry place to maintain shape and prevent damage․ Avoid extreme temperatures and harsh chemicals․

Cleaning and Maintenance

Regular cleaning is crucial for maintaining climbing shoes’ performance and longevity․ Use mild soap and water for leather shoes, then condition to prevent cracking․ Synthetic materials can be wiped with a damp cloth․ Avoid harsh chemicals that might damage the rubber or fabric․ Allow shoes to air dry away from direct sunlight to prevent fading․ Clean after each use to remove dirt and maintain grip, ensuring optimal performance on every climb․

Storage Tips

Store climbing shoes in a cool, dry place to prevent moisture buildup․ Avoid direct sunlight, as it can cause materials to degrade․ Use a breathable bag or container to maintain airflow․ Clean shoes thoroughly before storage to remove dirt and sweat, which can damage the materials over time․ Consider using a dehumidifier or silica gel packets to keep the environment dry․ Proper storage extends the life of your shoes and ensures optimal performance for future climbs․

Extending the Life of Your Shoes

To extend the life of your climbing shoes, regular cleaning and proper storage are essential․ For leather shoes, use a soft brush or cloth with mild soap to remove dirt, avoiding harsh chemicals that can dry out the leather․ Synthetic shoes can be cleaned with a damp cloth and soap, but avoid hot water to prevent damage․ Allow shoes to air dry in a cool, well-ventilated area, possibly stuffing them with newspaper to absorb moisture․ Store them in a breathable container away from sunlight and moisture․ Rotate between pairs if you climb frequently to distribute wear evenly․ Ensure a proper fit to prevent excessive stretching or stress on materials․ Consider resoling when soles wear down, and tailor care based on your climbing style and shoe material for optimal longevity․

Choosing the right climbing shoe size is crucial for both performance and comfort․ Use this guide to make informed decisions and enhance your climbing experience effectively․

Final Tips for Choosing the Right Size

Always try shoes in person if possible, considering both snugness and comfort․ Account for the break-in period, as shoes may stretch slightly․ Socks can impact fit, so choose them wisely․ Consult brand-specific size charts and read reviews for insights․ Don’t hesitate to return shoes that don’t meet expectations, ensuring optimal performance and comfort for your climbing adventures․

Importance of Proper Fit for Climbing Success

A proper fit in climbing shoes is crucial for optimal performance, comfort, and safety․ Ill-fitting shoes can lead to discomfort, blisters, or even poor technique, hindering your climbing ability․ Snug shoes provide better support and precision, allowing climbers to feel secure on small holds․ Proper fit also prevents foot fatigue, enabling climbers to focus on their route without distraction․ Investing time in finding the right size ensures a more enjoyable and successful climbing experience․

honeywell timer switch manual pdf

The Honeywell Timer Switch Manual PDF provides a comprehensive guide for installing, programming, and troubleshooting your timer switch, ensuring efficient and convenient control of your lighting systems.

Overview of the Honeywell Timer Switch

The Honeywell Timer Switch is a programmable device designed to control lighting and other electrical systems efficiently. It offers flexible scheduling options, allowing users to set specific on/off times for their appliances. The switch supports both single-pole and 3-way installations, making it versatile for various electrical setups. With universal wiring compatibility, it ensures seamless integration into existing systems. The timer switch also features a manual override function, enabling users to bypass programmed settings temporarily. Its sleek design mounts flush with wall plates, maintaining a modern aesthetic. The device is user-friendly, with a 3-button interface for easy operation and programming. This switch is ideal for homeowners seeking to automate lighting control while retaining manual flexibility, ensuring convenience and energy efficiency. Its robust features make it a reliable choice for smart home solutions.

Importance of the Manual for Proper Usage

The Honeywell Timer Switch Manual PDF is essential for ensuring proper installation, programming, and operation of the device. It provides step-by-step instructions to guide users through setting up schedules, understanding modes, and troubleshooting common issues. Without the manual, users may struggle to unlock the full potential of the timer switch, potentially leading to incorrect installations or programming errors. The manual also highlights safety precautions and warranty information, protecting both the user and the product. By following the guidelines outlined in the manual, users can optimize energy efficiency, extend the lifespan of the switch, and enjoy seamless control over their lighting systems. Referencing the manual ensures a smooth and hassle-free experience, making it an indispensable resource for homeowners and installers alike.

Key Features and Benefits of the Honeywell Timer Switch

The Honeywell Timer Switch offers programmable scheduling, manual override, and universal wiring compatibility, ensuring energy efficiency and seamless control over lighting systems for enhanced convenience and flexibility.

Programmable Scheduling Options

The Honeywell Timer Switch offers advanced programmable scheduling, allowing users to set custom on/off times for their lighting systems. With a 7-day programming feature, you can create unique schedules for each day of the week, ensuring your lights operate exactly when needed; The timer supports multiple on/off events per day, providing flexibility for varying routines. It is compatible with incandescent, halogen, and other lighting types, making it versatile for different setups. The programmable scheduling options are easy to navigate using the 3-button interface, and the menu flowchart guide helps users manage their settings efficiently. This feature not only enhances convenience but also promotes energy efficiency by automating lighting control. Additionally, the manual override function allows for temporary adjustments without disrupting programmed schedules, while memory protection ensures settings remain intact during power outages.

Manual Override Functionality

The Honeywell Timer Switch features a manual override option, enabling users to temporarily control their lighting without altering programmed schedules. In manual mode, the switch functions like a regular light switch, allowing you to turn lights on or off with a simple button press. This feature is ideal for unexpected situations or when you need immediate control. The manual override does not affect the programmed settings, ensuring your scheduled times remain intact. A visual icon appears on the display when the switch is in manual mode, providing clear confirmation of the current operation. This functionality enhances flexibility and convenience, making it easy to manage your lighting needs outside of automated schedules. The override feature is straightforward to use, with intuitive button controls that ensure seamless transitions between manual and automatic modes.

Universal Wiring Compatibility

The Honeywell Timer Switch is designed with universal wiring compatibility, supporting both single-pole and 3-way installations. This flexibility allows it to work seamlessly with various wiring configurations, making it suitable for different household setups. The switch is compatible with 2-wire and 3-wire connections, ensuring easy installation regardless of your home’s electrical system. It also supports a wide range of lighting types, including incandescent, halogen, LED, and fluorescent, providing versatile control over your lighting needs. This universal compatibility simplifies the installation process and ensures reliable performance across diverse electrical environments. Whether you’re upgrading an existing switch or installing a new one, the Honeywell Timer Switch adapts effortlessly to your wiring setup, offering a hassle-free solution for lighting control. This feature makes it a practical choice for homeowners seeking a versatile and efficient timer switch.

Installation Steps for the Honeywell Timer Switch

Begin by turning off the power supply and removing the old switch. Connect the wires according to the manual, ensuring proper alignment with terminals. Mount the new switch securely and restore power to test functionality. Always refer to the manual for specific wiring instructions and safety precautions.

Preparation and Tools Required

Before installing the Honeywell Timer Switch, ensure the power supply is turned off at the circuit breaker. Gather essential tools, including a screwdriver, wire strippers, and a voltage tester. Refer to the manual for specific wiring diagrams and instructions tailored to your switch model. Prepare the area by removing the old switch and ensuring all wires are properly labeled. Familiarize yourself with the timer’s components, such as the PGM button and mode indicators. Always follow safety guidelines to avoid electrical hazards. The manual provides detailed step-by-step guidance to ensure a smooth installation process. Proper preparation is key to a successful and safe setup of your Honeywell Timer Switch.

Wiring Instructions for Single-Pole and 3-Way Installations

For a single-pole installation, connect the line (hot) wire to the “LINE” terminal and the load (to light) wire to the “LOAD” terminal. In a 3-way installation, connect the line wire to the “LINE” terminal, one traveler wire to the “1WAY/3WAY” terminal, and the other traveler wire to the “LOAD” terminal. Ensure the neutral wire is securely connected to the neutral terminal. Refer to the manual’s wiring diagram for clarity. Always turn off the power supply at the circuit breaker before starting. Properly secure all connections to avoid loose wires. If unsure, consult a licensed electrician. The Honeywell Timer Switch supports both configurations, making it versatile for various lighting setups.

MOUNTING the Switch and Final Connections

Mount the Honeywell Timer Switch in a standard electrical box, ensuring it is flush with the wall plate for a sleek appearance. Before mounting, confirm the switch door is closed to prevent damage. Use the provided screws to secure the switch firmly to the electrical box. Once mounted, double-check all wire connections for accuracy and security. Ensure the neutral wire is properly connected to the neutral terminal, as specified in the wiring instructions. Finally, close the switch door and test the timer by turning the power on at the circuit breaker. Proper mounting and secure connections are crucial for safe and reliable operation of the timer switch.

Programming the Honeywell Timer Switch

Set the time and date before first use. Use the PGM button to navigate and display programs, showing On/Off times. Refer to the menu flowchart for guidance.

Setting the Time and Date

Before using the Honeywell Timer Switch, set the time and date to ensure proper functionality. Press the PGM button to display programs and their On/Off times. Use the UP and DOWN buttons to navigate and adjust settings. The manual override feature allows you to turn the load on/off without affecting programming. Confirm the mode with icon indicators. Refer to the menu flowchart for guidance on navigating the menus. This step is crucial for programming accuracy and ensures your timer operates correctly. Follow the instructions carefully to avoid errors and make the most of your timer’s features.

Creating and Editing Programs

Creating and editing programs on the Honeywell Timer Switch is straightforward. Press the PGM button to access programming mode. Use the UP and DOWN arrows to select the desired program number. Set the On and Off times using the time-setting buttons. For 7-day programming, ensure each day’s schedule is customized. To edit an existing program, navigate to the program number, adjust the times, and save. The timer allows for flexible scheduling, enabling you to tailor lighting control to your daily routines. After setting, press the PGM button to save and exit. This feature ensures precise control over your lighting systems, enhancing convenience and energy efficiency. Regularly review and update programs to maintain optimal performance.

Understanding Automatic and Manual Modes

The Honeywell Timer Switch operates in two primary modes: Automatic and Manual. In Automatic mode, the switch follows the programmed schedule, turning lights on/off at set times. This mode is ideal for maintaining consistent lighting patterns without manual intervention. In Manual mode, the switch functions like a regular toggle switch, allowing you to turn lights on/off manually. To switch modes, press and hold the switch door for 3 seconds. The Manual mode is indicated by an icon, ensuring you always know the current mode. This dual-mode functionality offers flexibility, enabling you to choose between automated control and manual operation based on your needs. Understanding these modes is essential for maximizing the timer’s efficiency and convenience in your daily routine.

Understanding Manual Mode Operation

In Manual mode, the Honeywell Timer Switch operates like a standard toggle switch, allowing manual control by pressing the main button. An icon indicates Manual mode, ensuring operations remain independent of programmed schedules.

Switching Between Manual and Automatic Modes

Switching between Manual and Automatic modes on the Honeywell Timer Switch is straightforward. To toggle modes, press and hold the switch door for 3 seconds. In Manual mode, the switch functions like a regular toggle, allowing you to turn lights on or off without affecting programmed schedules. The Automatic mode, however, follows the pre-set programs. The switch displays an icon when in Manual mode, providing clear visual confirmation. This feature ensures flexibility, letting you choose between manual control and automated operation based on your needs. The seamless transition between modes enhances user convenience, making it easy to manage lighting systems efficiently. This functionality is a key benefit of the Honeywell Timer Switch, offering both reliability and adaptability for various lighting scenarios.

Using the Manual Override Feature

The Manual Override feature on the Honeywell Timer Switch allows you to temporarily control your lights without disrupting programmed schedules. To use this feature, simply press the main button briefly to turn the lights on or off. This mode operates like a standard switch, providing immediate control over your lighting. The Manual Override does not alter any pre-set programs, ensuring your automated schedule remains intact. A visual icon appears on the display to confirm Manual mode, giving you clear feedback. This feature is particularly useful for unexpected situations or when you need temporary adjustments. It offers flexibility while maintaining the convenience of automated control, making it a practical solution for managing your lighting needs effectively. The Manual Override ensures seamless interaction between manual and automatic operations, enhancing overall user experience.

Icon Indicators for Mode Confirmation

The Honeywell Timer Switch features icon indicators that provide clear visual confirmation of the current operating mode. When in Manual mode, a specific icon appears on the display, ensuring you know the switch is functioning like a regular toggle. Similarly, in Automatic mode, a different icon indicates that the programmed schedule is active. These visual cues eliminate confusion and help you verify the switch’s status at a glance. Additionally, error indicators may appear if there are issues with programming or power outages, offering immediate feedback for troubleshooting. The intuitive design of these icons enhances user experience, making it easy to understand and manage the switch’s operation without consulting the manual. This feature ensures seamless interaction and confidence in the switch’s functionality.

Troubleshooting Common Issues

The manual addresses common issues like power outages, programming errors, and installation problems, offering step-by-step solutions to ensure your timer switch operates smoothly and efficiently.

Power Outage Recovery and Memory Protection

The Honeywell Timer Switch is designed with memory protection, ensuring programmed settings are retained during power outages. Once power is restored, the timer automatically resumes its schedule, eliminating the need to reprogram. This feature provides convenience and reliability, especially for users with complex programming setups. The manual outlines troubleshooting steps for post-outage issues, ensuring seamless recovery. With this built-in protection, users can trust their timer switch to maintain consistency and functionality, even after unexpected interruptions. This robust memory protection enhances overall user experience, making the Honeywell Timer Switch a dependable choice for smart home automation.

Resolving Programming Errors

If programming errors occur, the Honeywell Timer Switch Manual provides clear troubleshooting steps. Pressing the PGM button displays programs, helping identify issues. Ensure the time and date are correctly set, as incorrect settings can cause errors. If programs fail to activate, check for conflicts in scheduling. Resetting the timer by removing power for 10 seconds can resolve many issues. The manual also advises verifying wire connections and ensuring the switch is in the correct mode (Auto or Manual). By following these steps, users can quickly resolve programming errors and restore proper functionality. This section ensures users can troubleshoot confidently, maintaining their customized schedules without frustration.

Addressing Installation-Related Problems

The Honeywell Timer Switch Manual PDF offers detailed solutions for common installation issues. Ensure proper wiring by checking connections for single-pole and 3-way setups. Verify compatibility with your lighting type, such as incandescent or halogen. If the switch doesn’t mount flush, consult the manual for adjustment tips. Power supply issues? Confirm a 120-volt connection. For 3-way installations, ensure the traveler wires are correctly configured. If the switch doesn’t respond, review the wiring diagram in the manual. Testing the switch after installation is crucial to identify and fix any issues early. By following these guidelines, users can resolve installation-related problems efficiently, ensuring smooth operation of their Honeywell Timer Switch.

The Honeywell Timer Switch Manual PDF is an essential resource, offering clear guidance for optimal use. Explore its features and troubleshooting tips to maximize efficiency and convenience in your home.

The Honeywell Timer Switch offers programmable scheduling, manual override functionality, and universal wiring compatibility, making it versatile for various lighting setups. Its sleek design mounts flush with wall plates, ensuring a modern appearance. The switch supports single-pole (2-wire) or 3-way installations, catering to different electrical configurations. Manual mode allows users to operate it like a regular switch, while automatic mode follows programmed schedules. Programming is protected during power outages, ensuring settings remain intact. The timer is easy to use with a 3-button interface and provides clear icon indicators for mode confirmation. These features combine to offer convenience, energy efficiency, and reliable performance, making the Honeywell Timer Switch a practical solution for home automation needs.

Encouragement for Further Exploration

Exploring the Honeywell Timer Switch Manual PDF is essential to unlock its full potential. Dive into the detailed instructions to discover how programmable scheduling, manual override, and universal wiring compatibility can enhance your home automation experience. Experiment with creating and editing programs to tailor lighting schedules to your lifestyle. Familiarize yourself with troubleshooting tips to address common issues confidently. For visual learners, YouTube tutorials and installation videos provide hands-on guidance. Visit the official Honeywell website or forums for additional resources and user insights. By fully understanding your timer switch, you can maximize energy efficiency, customize settings, and enjoy a seamless smart home experience. Embrace the opportunity to explore and optimize your Honeywell Timer Switch for years of reliable performance.

introduction to criminal justice 17th edition pdf

Overview of the 17th Edition

provides a comprehensive and authoritative overview of the criminal justice system, updated with contemporary issues and research․

1․1 Key Features of the 17th Edition

offers a comprehensive update, incorporating the latest research, trends, and technologies․ It features enhanced coverage of contemporary issues like racial disparities and the impact of technology․ New case studies and interactive learning tools provide practical insights, while revised chapters ensure clarity and engagement․ The edition emphasizes evidence-based practices and ethical considerations, making it a valuable resource for both students and professionals in the field․

1․2 What’s New in the 17th Edition?

The 17th Edition introduces updated chapters on technology’s role in criminal justice, expanded discussions on racial disparities, and new insights into globalization’s impact on crime․ Enhanced digital resources, including interactive case studies and multimedia content, enrich the learning experience․ The edition also incorporates recent legal reforms and emerging trends in law enforcement and corrections, ensuring students are well-prepared for current and future challenges in the field․

1․3 Significance of the 17th Edition

The 17th Edition is a cornerstone for criminal justice education, offering a detailed exploration of the system’s complexities․ It bridges theory and practice, equipping students with essential knowledge to address real-world challenges․ The edition’s focus on contemporary issues ensures relevance, while its comprehensive approach fosters critical thinking and informed discourse․ As a trusted resource, it remains vital for both academia and professional development in criminal justice․

Criminal justice is a system designed to maintain social order and ensure compliance with laws․ It involves processes for preventing, investigating, and punishing crimes․

2․1 Definition and Scope of Criminal Justice

Criminal justice refers to the system of practices and institutions dedicated to upholding social control, deterring crime, and sanctioning offenders․ It encompasses the processes of law enforcement, adjudication, and corrections․ The scope of criminal justice includes crime prevention, investigation, prosecution, and rehabilitation, ensuring justice and maintaining societal order․ It operates at local, state, and federal levels, addressing various types of crimes and their impacts on communities․ The system integrates legal, social, and ethical principles to promote fairness and safety․

2․2 The Criminal Justice System: An Overview

The criminal justice system is a network of institutions and processes that enforce criminal law, maintain social order, and ensure justice․ It begins with crime reporting and investigation by law enforcement, followed by prosecution and adjudication in courts․ The system concludes with corrections, including incarceration, probation, or rehabilitation․ Its primary goals are to deter crime, punish offenders, and protect society․ The system operates at multiple levels, integrating federal, state, and local agencies to address criminal behavior effectively and uphold the rule of law․

2․3 Importance of Studying Criminal Justice

Studying criminal justice is essential for understanding the mechanisms that maintain social order and address criminal behavior․ It provides insights into the causes of crime, the functioning of law enforcement, courts, and corrections, and the ethical challenges within the system․ This knowledge enables individuals to critically analyze policies, advocate for reforms, and contribute to creating a fairer society․ Additionally, it prepares students for careers in law enforcement, legal professions, and public policy, equipping them to address contemporary issues and promote justice effectively․

The Criminal Justice System

The criminal justice system is a network of institutions and processes that uphold the law, ensure justice, and maintain social order through fair and equitable practices․

3․1 Components of the Criminal Justice System

The criminal justice system comprises three primary components: law enforcement, courts, and corrections․ Law enforcement agencies, such as police and federal agents, enforce laws and investigate crimes․ The courts, including trial and appellate levels, adjudicate cases, ensuring due process and determining guilt or innocence․ Corrections involves incarceration, probation, and parole, aiming to rehabilitate offenders and prevent recidivism․ Together, these components work to maintain justice, protect society, and uphold legal standards, ensuring accountability and fairness throughout the process․

3․2 How the Criminal Justice System Works

The criminal justice system operates through a sequential process․ It begins with crime reporting and investigation by law enforcement, followed by arrest and charging․ The case then proceeds to the court system, where the defendant is tried, and a verdict is reached․ If convicted, the offender is sentenced, leading to corrections, which may involve incarceration, probation, or parole․ Each stage ensures accountability, fairness, and rehabilitation, maintaining public safety and justice․ This structured process aims to address crimes effectively while protecting individual rights․

3․3 Challenges Facing the Criminal Justice System

The criminal justice system faces numerous challenges, including racial disparities, overcrowded prisons, and resource limitations․ Technological advancements, while beneficial, also pose ethical dilemmas․ Public trust is eroded by perceptions of bias and inefficiency․ Additionally, the rise of transnational crimes complicates enforcement efforts․ Addressing these issues requires systemic reforms, increased funding, and community engagement to ensure fairness, transparency, and effectiveness in upholding justice and safeguarding society․ These challenges highlight the need for ongoing evaluation and innovation within the system․

Law Enforcement

Law enforcement plays a critical role in maintaining order and enforcing laws within the criminal justice system, utilizing community policing and modern strategies to ensure public safety and integrity․

4․1 Roles and Responsibilities of Law Enforcement

Law enforcement agencies are responsible for enforcing laws, protecting communities, and maintaining public order․ Their roles include investigating crimes, making arrests, and ensuring public safety․ Officers patrol neighborhoods, respond to emergencies, and engage in community policing to build trust․ They also collaborate with other criminal justice components to prevent and reduce crime․ Effective law enforcement ensures justice is served and societal order is maintained, making it a cornerstone of the criminal justice system․

4․2 Types of Law Enforcement Agencies

Law enforcement agencies vary in jurisdiction and function․ Federal agencies, such as the FBI and DEA, handle national and international crimes․ State agencies, like state police and highway patrols, enforce laws at the state level․ Local agencies, including city police departments and sheriff’s offices, focus on community policing and county-wide issues․ Specialized agencies, such as airport security and transit police, address specific needs․ Each type plays a crucial role in maintaining public safety and upholding the law within their respective domains․

4․3 Community Policing and Modern Strategies

Community policing emphasizes building partnerships between law enforcement and the community to identify and address local issues․ Modern strategies focus on trust-building, transparency, and problem-solving approaches․ These include neighborhood patrols, community engagement programs, and collaboration with social services․ Technology, such as body cameras and data-driven policing, enhances accountability and efficiency․ By fostering cooperation, these strategies aim to create safer environments and strengthen public confidence in law enforcement․

Courts and the Judiciary

The judiciary system interprets laws, ensures justice, and resolves disputes․ Courts operate at various levels, from local to federal, handling criminal, civil, and appellate cases․

5․1 Structure of the Court System

The court system is hierarchical, with courts at local, state, and federal levels․ Local courts handle minor cases, such as traffic violations and small claims․ State courts manage most criminal and civil cases, including felonies and family disputes․ Federal courts address cases involving federal laws or the Constitution․ The Supreme Court is the highest authority, resolving appeals and interpreting laws․ This structured system ensures cases are directed to the appropriate level for fair adjudication, maintaining judicial efficiency and consistency․

5․2 The Trial Process: From Arrest to Verdict

The trial process begins with an arrest, followed by an initial appearance before a judge to set bail․ A preliminary hearing determines if there is enough evidence for a trial․ The arraignment involves the defendant entering a plea․ Pre-trial motions address legal issues․ Jury selection ensues, followed by the trial itself, where evidence is presented․ Closing arguments are made, and the jury delivers a verdict․ If guilty, sentencing occurs․ This structured process ensures fairness and justice, protecting the rights of all parties involved in the criminal justice system․

5․3 Reforms in the Judicial System

Recent reforms in the judicial system aim to enhance fairness, transparency, and efficiency․ Bail reform initiatives reduce pretrial detention for low-risk offenders․ Technology integration, like virtual hearings, improves access to justice․ Efforts to address racial disparities focus on bias training and diversifying the judiciary․ Restorative justice programs emphasize rehabilitation over punishment․ These reforms strive to modernize the system, ensuring it better serves the community and upholds justice equitably․ Ongoing efforts are crucial to maintaining public trust and adapting to societal needs․

Corrections and Rehabilitation

Corrections and rehabilitation focus on punishing offenders while preparing them for reintegration into society through counseling, education, and job training to reduce recidivism and promote community safety․

6․1 Incarceration and Prison Systems

Incarceration serves as a primary means of punishment and deterrence within the criminal justice system․ Prisons are classified into federal, state, and local facilities, each with varying security levels․ The system faces challenges such as overcrowding, resource limitations, and inmate safety concerns․ Modern reforms aim to address these issues while balancing punishment with rehabilitation․ The 17th Edition explores these dynamics, offering insights into the evolution of prison systems and their role in maintaining public safety and rehabilitating offenders․

6․2 Rehabilitation Programs and Their Effectiveness

Rehabilitation programs aim to transform offenders into productive members of society by addressing underlying issues like substance abuse, mental health, and lack of education․ These programs include counseling, vocational training, and education to reduce recidivism․ While some programs show success in changing behavior, others face challenges in implementation and funding․ The 17th Edition examines evidence-based practices and their impact on offender rehabilitation, emphasizing the importance of effective programs in criminal justice reform and community safety․

6․3 Alternatives to Incarceration

Alternatives to incarceration, such as probation, community service, and restitution, aim to reduce prison overcrowding and costs while addressing offender needs․ These programs focus on rehabilitation through counseling, education, and job training, helping individuals reintegrate into society․ They often target non-violent offenders, emphasizing restorative justice and accountability․ While these alternatives can lower recidivism rates, their effectiveness depends on proper implementation and resources․ The 17th Edition explores these options, highlighting their potential to transform the criminal justice system and improve community outcomes․

Contemporary Issues in Criminal Justice

Modern criminal justice faces challenges like racial disparities, technological advancements, and globalization, requiring adaptive strategies to ensure fairness, safety, and efficiency in addressing evolving societal needs․

7․1 Racial Disparities in the Criminal Justice System

Racial disparities persist in the criminal justice system, with disproportionate representation of minorities in arrests, convictions, and sentencing․ These inequities stem from systemic biases, socioeconomic factors, and historical discrimination․ The 17th Edition highlights how such disparities undermine public trust and perpetuate cycles of inequality․ Addressing these issues requires comprehensive reforms, including bias training, policy changes, and community engagement to ensure equitable treatment for all individuals, fostering a fairer justice system․

7․2 The Impact of Technology on Criminal Justice

Technology has revolutionized criminal justice, enhancing efficiency and accuracy through tools like surveillance, DNA analysis, and digital evidence management․ Facial recognition and predictive policing have emerged, though concerns about privacy and bias persist․ The 17th Edition explores how technology transforms investigations, prosecutions, and rehabilitation, while addressing ethical dilemmas․ It also highlights the rise of cybercrimes and the need for adaptive strategies to combat evolving threats, ensuring the system remains both effective and just in a rapidly changing world․

7․3 Globalization and Transnational Crime

Globalization has facilitated the rise of transnational crime, including human trafficking, drug smuggling, and cybercrime, which operate across borders․ Criminal organizations exploit advanced technology and international trade to expand their reach․ The 17th Edition examines how globalization challenges traditional law enforcement, requiring international cooperation and legal frameworks to combat these crimes effectively․ It also explores the intersection of global issues, such as terrorism and organized crime, and their impact on criminal justice systems worldwide, emphasizing the need for adaptive strategies to address these evolving threats․

The Future of Criminal Justice

The future of criminal justice is shaped by innovation, technology, and reform, focusing on fairness, efficiency, and public trust in an evolving societal landscape․

8․1 Emerging Trends in Criminal Justice Reform

Emerging trends in criminal justice reform include bail reform, police accountability measures, and sentencing reform․ There is a growing emphasis on reducing mass incarceration, particularly for non-violent offenses․ Restorative justice and diversion programs are gaining traction as alternatives to traditional punishment․ Technology, such as body cameras and AI-driven risk assessment tools, is being integrated to enhance transparency and fairness․ Additionally, there is a focus on addressing systemic inequities and improving community trust through policy changes and public engagement․

8․2 The Role of Technology in Shaping the Future

Technology is revolutionizing criminal justice, enhancing efficiency and transparency․ AI-driven tools improve evidence analysis and risk assessment, while body cameras increase police accountability․ Data analytics aids in crime prediction and resource allocation․ Virtual court proceedings and digital forensics are becoming standard․ However, ethical concerns like privacy violations and algorithmic bias must be addressed․ As technology advances, it promises to modernize the criminal justice system, ensuring fairness and accuracy․ Its integration is crucial for building a more equitable and responsive justice framework in the future․

8․3 Public Perception and Trust in the System

Public perception and trust in the criminal justice system are critical for its legitimacy and effectiveness․ Transparency, accountability, and fairness are essential to fostering trust․ However, historical injustices, racial disparities, and high-profile cases often erode confidence․ Community engagement and reforms can help rebuild trust․ Media coverage also plays a significant role in shaping public opinion․ Ensuring that the system is perceived as just and equitable is vital for its long-term viability and public support․ Ongoing efforts to address these issues are necessary to maintain and strengthen trust in the criminal justice system․

Key Concepts and Theories

The 17th Edition explores foundational theories of crime causation, evidence-based practices, and ethical dilemmas, providing a robust framework for understanding criminal justice systems and their complexities․

9․1 Theories of Crime Causation

The 17th Edition delves into various theories explaining crime causation, including biological, psychological, and sociological factors․ It explores how individual traits, environmental influences, and societal structures contribute to criminal behavior․ The text examines classic theories like strain theory and social learning theory, as well as modern perspectives on crime causation․ By analyzing these theories, the edition provides a holistic understanding of why crimes occur and how they can be prevented․ This section is essential for grasping the complexities of criminal behavior and its underlying causes․

9․2 The Role of Evidence-Based Practices

The 17th Edition emphasizes the importance of evidence-based practices in criminal justice, highlighting their role in shaping effective policies and interventions․ These practices rely on empirical research to guide decision-making, ensuring that strategies are grounded in proven outcomes․ The text explores how data-driven approaches improve recidivism reduction, enhance public safety, and promote fairness in the system․ By integrating research into real-world applications, evidence-based practices are transforming criminal justice operations, fostering a more efficient and equitable system․ This section underscores their critical role in modern criminal justice reform and implementation․

9․3 Ethical Issues in Criminal Justice

The 17th Edition delves into the ethical challenges within the criminal justice system, addressing issues like racial disparities, police misconduct, and the use of technology․ It explores how ethical dilemmas arise in law enforcement, courts, and corrections, emphasizing the need for accountability and fairness․ The text highlights the importance of ethical training for professionals and the impact of public trust on system legitimacy․ By examining these issues, the edition underscores the critical role of ethics in ensuring justice and upholding human rights within the system․

The Importance of Criminal Justice Education

Criminal justice education equips students with critical thinking, ethical practices, and practical skills, preparing them to address real-world challenges and promote justice in society effectively․

10․1 Preparing Students for Careers in Criminal Justice

The 17th Edition emphasizes practical skills and theoretical knowledge, equipping students for diverse careers in law enforcement, courts, and corrections․ It covers real-world scenarios, ethical dilemmas, and emerging trends, ensuring graduates are well-prepared to address modern challenges․ The text also highlights the importance of critical thinking, communication, and technological proficiency, essential for success in criminal justice professions․ By balancing theory with practice, the 17th Edition helps students navigate the complexities of the field and excel in their future roles․

10․2 The Role of Education in Criminal Justice Reform

Education plays a pivotal role in driving criminal justice reform by fostering informed professionals and promoting systemic change․ The 17th Edition highlights how education equips students with critical thinking skills to address racial disparities, ethical dilemmas, and technological advancements․ By emphasizing evidence-based practices and policy analysis, it empowers future leaders to advocate for equitable and effective justice systems․ This edition underscores the importance of educated professionals in implementing reforms that prioritize rehabilitation, transparency, and community trust, ensuring a more just and accountable criminal justice system․

10․3 The Value of the 17th Edition in Education

The 17th Edition serves as an invaluable educational resource, offering a comprehensive and updated exploration of criminal justice․ It provides students with a clear understanding of key concepts, theories, and real-world applications, preparing them for careers in law enforcement, courts, and corrections․ The edition’s emphasis on contemporary issues, such as racial disparities and technological impacts, ensures students engage with critical topics․ Its structured approach and accessible language make it an essential tool for fostering informed and ethical criminal justice professionals, bridging the gap between theory and practice effectively․

is a vital resource, offering a comprehensive understanding of the criminal justice system and its contemporary challenges․

11․1 Summary of Key Takeaways

emphasizes the interconnectedness of law enforcement, courts, and corrections․ It highlights systemic challenges, such as racial disparities and technological impacts․ The text underscores the importance of evidence-based practices and ethical considerations․ By exploring contemporary issues like globalization and criminal justice reform, it equips readers with a holistic understanding․ This edition serves as a valuable resource for students and professionals, fostering critical thinking and real-world application of criminal justice principles․

11․2 The Future of Criminal Justice: A Look Ahead

The future of criminal justice is poised for transformation, driven by technological advancements and evolving societal needs․ Innovations like AI and data analytics will enhance efficiency and transparency․ Globalization will necessitate stronger international cooperation to combat transnational crimes․ There is a growing emphasis on rehabilitation over punishment, with a focus on addressing root causes of crime․ Ethical considerations, such as bias in AI and privacy concerns, will require careful navigation․ The system must adapt to maintain trust and ensure justice for all in an increasingly complex world․

11․3 Encouraging Further Study and Engagement

Encouraging further study and engagement in criminal justice is essential for fostering a deeper understanding of the system and its complexities․ The 17th Edition provides a robust foundation, inspiring readers to explore specialized areas like law enforcement, courts, and corrections․ By highlighting real-world applications and ethical dilemmas, it motivates students to pursue careers in criminal justice․ Additionally, the text emphasizes the importance of critical thinking and lifelong learning, urging readers to stay informed about emerging trends and reforms shaping the future of the field․

essentials of the u.s. healthcare system 6th edition pdf free

The U.S. healthcare system is a complex, multifaceted entity blending private and public elements. The 6th edition of Essentials of the U.S. Health Care System by Leiyu Shi and Douglas Singh provides a concise overview, covering key characteristics, foundations, and future trends, ideal for undergraduates and newcomers to the field.

1.1 Overview

The U.S. healthcare system is a complex and multifaceted structure that combines private and public elements to deliver medical services to its population. The 6th edition of Essentials of the U.S. Health Care System by Leiyu Shi and Douglas Singh provides a concise yet comprehensive overview of this system, highlighting its key characteristics, historical development, and current challenges. This edition emphasizes the evolving nature of healthcare, including updates on managed care, integrated delivery systems, and public health responses to crises like the COVID-19 pandemic. It also explores the prospects for healthcare reform under the Biden administration and the growing role of patient advocacy organizations.

The text is designed to be reader-friendly, making it an ideal resource for undergraduate students and individuals seeking a foundational understanding of the U.S. healthcare system. By focusing on the system’s core components, such as insurance models, government programs, and market-based principles, the book offers a clear and accessible guide to navigating the complexities of American healthcare.

1.2 Purpose

The primary purpose of the 6th edition of Essentials of the U.S; Health Care System is to provide a clear, concise, and accessible overview of the American healthcare system. Authored by Leiyu Shi and Douglas Singh, this edition aims to equip readers with a foundational understanding of the system’s structure, operations, and challenges. It serves as a valuable resource for undergraduate students, healthcare professionals, and anyone seeking to grasp the complexities of the U.S. healthcare landscape.

The book is designed to be reader-friendly, with well-organized chapters that cover key topics such as healthcare financing, delivery systems, and the role of government. It also includes updated information on recent developments, including the impact of the COVID-19 pandemic and prospects for healthcare reform under the Biden administration. By focusing on the essentials, the text provides a comprehensive yet streamlined guide to understanding the U.S. healthcare system, making it an indispensable tool for education and professional development.

1.3 Target Audience

The 6th edition of Essentials of the U.S. Health Care System is primarily designed for undergraduate students and individuals new to the healthcare field. It serves as a foundational resource for those seeking to understand the complexities of the American healthcare system. The text is particularly useful for students in health sciences, public health, and related disciplines, offering a clear and concise overview of key concepts and structures.

Additionally, the book caters to healthcare professionals, policymakers, and researchers who need a streamlined reference on the U.S. healthcare system. Its updated content, including sections on COVID-19, healthcare reform, and patient advocacy, makes it relevant for practitioners staying current with industry trends. The text is also accessible to general readers interested in understanding how the system operates and evolves. By providing a balanced perspective, it bridges the gap between academic and practical knowledge, making it a versatile tool for diverse audiences.

1.4 Key Themes

The 6th edition of Essentials of the U.S. Health Care System focuses on several key themes that define the structure and operation of the American healthcare system. These include the unique blend of private and public healthcare provision, the dominance of employer-sponsored insurance, and the significant role of government programs like Medicare and Medicaid. The text also explores market-based principles that drive the system, such as competition and consumer choice, and their implications for cost and access.

Another central theme is the impact of the Affordable Care Act (ACA) and ongoing healthcare reform efforts, including updates on the Biden administration’s policies. The book delves into managed care, integrated delivery systems, and public health initiatives, particularly in the context of the COVID-19 pandemic. Additionally, it addresses patient advocacy and the evolving needs of vulnerable populations, emphasizing equity and access in healthcare delivery.

These themes are supported by the latest data, case studies, and real-world examples, providing a comprehensive understanding of the system’s strengths, challenges, and future directions. The text is designed to offer a clear and accessible exploration of these critical issues.

Key Characteristics of the U.S; Healthcare System

The U.S. healthcare system is multifaceted, blending private and public provision, with a strong emphasis on employer-sponsored insurance and government programs like Medicare and Medicaid. It is market-driven, prioritizing choice and competition, which influences costs and access. The system is also notable for its advanced medical technology and innovation, yet its complexity often leads to inequities in care delivery.

2.1 Private and Public Provision

The U.S. healthcare system uniquely combines private and public provision, creating a dual structure that influences access, cost, and quality. Private providers, including hospitals, clinics, and physician practices, dominate delivery, often operating as for-profit or non-profit entities. Public provision, such as Veterans Affairs and community health centers, targets specific populations. Insurance is primarily private, with employers sponsoring plans, but government programs like Medicare and Medicaid cover vulnerable groups. This mix results in a system where private entities drive innovation and efficiency, while public programs ensure access for millions. However, the interplay between private and public sectors often leads to complexities, such as uneven access and high costs. The Affordable Care Act expanded public-private partnerships, yet challenges persist in balancing affordability and quality. This duality is a defining feature of the U.S. system, shaping its strengths and shortcomings.

2.2 Employer-Sponsored Insurance

Employer-sponsored insurance (ESI) is a cornerstone of the U.S. healthcare system, providing coverage to millions of Americans. It is the most common way individuals obtain health insurance, with employers offering plans as a benefit to attract and retain employees. ESI is often more affordable than individual plans due to shared costs between employers and employees, as well as economies of scale in group coverage. However, not all employers offer ESI, particularly smaller businesses, leaving some workers uninsured or underinsured. The Affordable Care Act (ACA) expanded options for those without ESI, but employer-sponsored plans remain the primary source of coverage for many. Despite its prevalence, ESI faces challenges, such as rising premiums, high deductibles, and limited provider networks. Additionally, the COVID-19 pandemic highlighted vulnerabilities in tying health insurance to employment, as job losses led to coverage disruptions. ESI remains a critical component of the U.S. healthcare system, balancing accessibility and affordability for many, but its limitations underscore the need for complementary public programs and reforms.

2.3 Role of Government

The government plays a pivotal role in shaping the U.S. healthcare system through regulation, funding, and policy implementation. Federal and state governments oversee programs like Medicare, Medicaid, and the Affordable Care Act (ACA), ensuring access to care for vulnerable populations. Medicare provides coverage for seniors and individuals with disabilities, while Medicaid serves low-income families. The ACA expanded health insurance to millions by subsidizing marketplace plans and allowing young adults to stay on parental insurance. Government agencies, such as the Centers for Medicare & Medicaid Services (CMS) and the Department of Health & Human Services (HHS), regulate healthcare standards, reimburse providers, and enforce policies. Public health initiatives, like vaccination programs and disease prevention, are also government-led. Additionally, the government influences healthcare through legislative reforms, such as the Biden administration’s efforts to strengthen the ACA and expand Medicaid eligibility. Despite these efforts, debates persist over the balance between government intervention and market-driven solutions, highlighting the complex interplay of public and private roles in the U.S. healthcare system.

2.4 Market-Based Principles

Market-based principles are a cornerstone of the U.S. healthcare system, emphasizing competition, consumer choice, and private sector involvement. Unlike many other countries, the U.S. relies heavily on private insurers and providers, creating a dynamic where prices and services are influenced by market forces. This approach encourages innovation and efficiency, as healthcare organizations compete to offer high-quality care at competitive rates. Patients and employers, as consumers, can choose from a variety of insurance plans and providers, fostering a competitive environment. However, critics argue that market-based principles can lead to inequities, as those with higher incomes or better insurance coverage often have greater access to care. The 6th edition of Essentials of the U;S. Health Care System highlights how these principles shape the system’s structure and outcomes, including the role of private insurance companies and employer-sponsored plans. Despite its benefits, the market-driven model faces challenges, such as rising costs and uneven access, prompting ongoing debates about the balance between market forces and government intervention in healthcare.

Historical Development of the U.S. Healthcare System

The U.S. healthcare system has evolved significantly over time, shaped by landmark legislation like the Affordable Care Act and responses to crises such as the COVID-19 pandemic. The 6th edition of Essentials of the U.S. Health Care System details this progression, highlighting key milestones and their lasting impacts on the system’s structure and accessibility.

3.1 Evolution Over Time

The U.S. healthcare system has undergone significant transformations over the decades, shaped by societal needs, technological advancements, and policy changes. Early developments were marked by limited government involvement, with healthcare primarily provided by private entities and charities. The 20th century saw pivotal moments, such as the establishment of Medicare and Medicaid in the 1960s, which expanded access for vulnerable populations. The Affordable Care Act (ACA) of 2010 represented a landmark shift, aiming to increase healthcare accessibility and affordability. Recent years, particularly during the COVID-19 pandemic, have highlighted the system’s resilience and adaptability, with rapid innovations in telehealth and vaccine development. The 6th edition of Essentials of the U.S. Health Care System provides a detailed account of these evolutionary changes, emphasizing how historical events have influenced the system’s current structure and future directions.

3.2 Landmark Legislation

Landmark legislation has played a pivotal role in shaping the U.S. healthcare system, addressing gaps in access, affordability, and quality. The Social Security Act of 1935 laid the groundwork for federal involvement in healthcare, while the Medicare and Medicaid programs, established in 1965, revolutionized access for seniors, low-income individuals, and families. The Affordable Care Act (ACA) of 2010 marked a significant shift, expanding insurance coverage to millions and prohibiting discrimination based on pre-existing conditions. Additionally, the Health Insurance Portability and Accountability Act (HIPAA) of 1996 enhanced patient privacy and data security. These legislative milestones, as detailed in the 6th edition of Essentials of the U.S. Health Care System, reflect ongoing efforts to balance market principles with social responsibility, ensuring equitable healthcare delivery while addressing emerging challenges like pandemics and technological advancements.

3.3 Impact of Major Policies

Major policies have profoundly shaped the U.S. healthcare system, influencing access, affordability, and quality. The Affordable Care Act (ACA) of 2010 expanded insurance coverage to millions, prohibited discrimination based on pre-existing conditions, and allowed young adults to stay on parental plans until age 26. This legislation, as discussed in the 6th edition of Essentials of the U.S. Health Care System, significantly reduced the uninsured rate and emphasized preventive care. Additionally, Medicare and Medicaid, established in 1965, have been critical in providing coverage for seniors, low-income individuals, and families, though challenges like state-level Medicaid expansion persist. The COVID-19 pandemic highlighted systemic vulnerabilities, prompting emergency policies to enhance telehealth access and vaccine distribution. Recent reforms under the Biden administration aim to strengthen the ACA and address disparities. These policies, while imperfect, reflect ongoing efforts to balance market-driven principles with social responsibility, ensuring equitable healthcare delivery for diverse populations.

Healthcare Financing in the U.S.

The U.S. healthcare system relies on a mix of private and public funding. Insurance models, government programs like Medicare and Medicaid, and out-of-pocket payments are key financing methods. Employer-sponsored insurance remains a dominant source, while ACA marketplaces expand coverage for individuals, as detailed in the 6th edition.

4.1 Insurance Models

The U.S. healthcare system employs diverse insurance models to finance care. Employer-sponsored insurance remains the most common, covering approximately half the population. Individual market plans, often purchased through Affordable Care Act (ACA) marketplaces, offer coverage for those without employer benefits. Medicare, a federal program, serves seniors and individuals with disabilities, while Medicaid provides coverage for low-income populations. The 6th edition highlights the role of private insurers, who dominate the market, and the growing importance of managed care organizations. These models aim to balance cost, access, and quality, though challenges like rising premiums and deductibles persist. The ACA introduced subsidies to make individual plans more affordable, expanding coverage for millions. Despite these efforts, disparities in access and affordability remain, underscoring the complexity of the U.S. insurance landscape.

4.2 Government Programs

Government programs play a pivotal role in the U.S. healthcare system, ensuring access to care for vulnerable populations. Medicare, a federal program, provides coverage for individuals aged 65 and older, as well as those with disabilities. Medicaid, jointly funded by federal and state governments, offers health insurance to low-income individuals and families. The Affordable Care Act (ACA) expanded Medicaid eligibility, increasing enrollment significantly. Additionally, the ACA established health insurance marketplaces, subsidizing premiums for middle-income individuals. These programs aim to reduce healthcare disparities and improve access to essential services. However, challenges such as funding constraints, political debates over program expansion, and varying state-level implementation persist. The 6th edition of Essentials of the U.S. Health Care System details these programs’ structures, financing mechanisms, and their impact on healthcare delivery. Understanding these government initiatives is crucial for grasping the complexities of the U.S. healthcare system and its ongoing evolution.

4.3 Out-of-Pocket Payments

Out-of-pocket payments are a significant aspect of the U.S. healthcare system, representing direct expenses borne by individuals for medical services. These payments include deductibles, copayments, coinsurance, and costs for uncovered services. High deductibles, in particular, have become a growing concern, as they can create financial strain for patients. The 6th edition of Essentials of the U.S. Health Care System highlights how these costs impact healthcare access and utilization, especially for low-income individuals and those with chronic conditions. Despite insurance coverage, out-of-pocket expenses can lead to medical debt or delayed care. The Affordable Care Act (ACA) introduced measures to cap out-of-pocket maximums, but these limits remain high for many families. The text also explores how cost-sharing structures vary across insurance plans, influencing patient behavior and healthcare outcomes. Understanding out-of-pocket payments is crucial for grasping the financial complexities faced by individuals within the U.S. healthcare system and the ongoing debates about affordability and accessibility.

Healthcare Delivery Systems in the U;S.

The U.S. healthcare delivery system is diverse and complex, encompassing hospitals, clinics, and integrated networks. It balances private and public providers, emphasizing primary and specialty care. Challenges include accessibility, affordability, and coordination, as highlighted in the 6th edition of Essentials of the U.S. Health Care System.

5.1 Hospitals and Clinics

Hospitals and clinics are central to the U.S. healthcare delivery system, providing a wide range of medical services. Hospitals are classified into non-profit, for-profit, and public categories, each serving distinct patient populations. Non-profit hospitals, the most common type, often prioritize community care and charity services. For-profit hospitals focus on efficiency and specialized treatments, while public hospitals, funded by government, cater to underserved populations, including Medicaid recipients and the uninsured.

Clinics, including private practices and community health centers, deliver primary and specialty care. These settings emphasize preventive care, chronic disease management, and routine check-ups. The 6th edition of Essentials of the U.S. Health Care System highlights the growing role of integrated delivery systems, where hospitals and clinics collaborate to improve care coordination and reduce costs.

  • Hospitals face challenges like financial pressures, staffing shortages, and regulatory compliance.
  • Clinics, especially community health centers, play a vital role in addressing health disparities.
  • Telemedicine and outpatient services are increasingly popular, reducing the need for inpatient care.

These facilities remain essential for ensuring access to quality healthcare across diverse populations.

5.2 Primary vs. Specialty Care

Primary care serves as the first point of contact for patients within the U.S. healthcare system, focusing on preventive care, routine check-ups, and managing common illnesses. Providers such as family physicians, internists, and pediatricians play a crucial role in coordinating patient care and ensuring continuity. In contrast, specialty care is specialized for specific conditions or body systems, such as cardiology, oncology, or orthopedics, requiring advanced training and expertise.

The distinction between primary and specialty care is vital for efficient healthcare delivery. Primary care emphasizes early intervention and chronic disease management, reducing the need for costly specialized treatments. Specialty care, while essential for complex cases, often involves higher costs and shorter appointment times. The 6th edition of Essentials of the U.S. Health Care System underscores the importance of balancing these two tiers to optimize outcomes and reduce healthcare spending.

  • Primary care providers act as gatekeepers, guiding patients through the system.
  • Specialty care is often accessed through referrals, ensuring appropriate use of resources.
  • Challenges include a shortage of primary care physicians and disparities in access to specialty services.

This dual structure aims to deliver comprehensive, patient-centered care while addressing the complexities of modern medicine.

5.3 Integrated Delivery Systems

Integrated Delivery Systems (IDS) are organized networks of healthcare providers and facilities that aim to deliver comprehensive, coordinated care. These systems integrate various components, such as hospitals, clinics, and specialty services, to improve patient outcomes and reduce costs. IDS often emphasize preventive care, chronic disease management, and seamless transitions between care settings.

The 6th edition of Essentials of the U.S. Health Care System highlights the growing importance of IDS in addressing fragmented care and enhancing efficiency. Key features of IDS include shared electronic health records, standardized treatment protocols, and value-based payment models. These systems are particularly effective in managing complex conditions, such as diabetes and heart disease, by ensuring continuous care.

  • IDS promote care coordination across providers and settings.
  • They often prioritize population health and preventive services.
  • Challenges include high implementation costs and resistance to change.

By fostering collaboration and reducing duplication, IDS play a critical role in advancing the U.S. healthcare system’s goals of quality, accessibility, and affordability.

tsi math study guide pdf

Welcome to the TSI Math Study Guide, your ultimate resource for mastering the Texas Success Initiative (TSI) Mathematics exam. This comprehensive guide is designed to help students review fundamental math concepts, improve their problem-solving skills, and achieve their best scores on the TSI test. Whether you’re brushing up on algebra, geometry, or statistical reasoning, this guide provides a detailed approach to ensure you’re fully prepared.

Inside this guide, you’ll find a wide range of practice problems, tips, and strategies tailored to the TSI exam format. The guide covers key areas such as algebraic reasoning, quantitative and geometric skills, and spatial reasoning. By focusing on your strengths and weaknesses, you can create a personalized study plan to maximize your progress. Download the free PDF version to access all the resources you need in one convenient format. With the TSI Math Study Guide, you’ll gain the confidence and skills necessary to excel on the exam and succeed in college-level coursework.

1.1 What is the TSI Math Study Guide?

The TSI Math Study Guide is a comprehensive resource designed to help students prepare for the Texas Success Initiative (TSI) Mathematics exam. It is a detailed and structured study material that covers all the essential math topics tested on the TSI exam, ensuring that students are well-equipped to tackle the challenges of the test. The guide is available in a convenient PDF format, making it easily accessible for download and use on various devices.

Developed with the goal of helping students achieve their best possible scores, the TSI Math Study Guide is packed with practice problems, tips, and strategies tailored to the specific content and format of the TSI exam. It is an invaluable tool for students who need to review fundamental math concepts, improve their problem-solving skills, and gain confidence in their ability to succeed on the test. Whether you are a high school student preparing for college or an adult learner looking to refresh your math skills, this guide provides a clear and effective path to mastering the TSI Mathematics exam.

The guide is organized into sections that align with the key areas of the TSI Math test, including algebraic reasoning, quantitative skills, geometric and spatial reasoning, and statistical reasoning. Each section is designed to help students identify their strengths and weaknesses, allowing them to focus their study efforts on areas where they need the most improvement. By working through the practice problems and applying the strategies outlined in the guide, students can build a strong foundation in math and develop the skills necessary to excel on the exam.

One of the standout features of the TSI Math Study Guide is its emphasis on practical application. Rather than simply presenting formulas and concepts in an abstract way, the guide provides real-world examples and context-based problems that mirror the types of questions students will encounter on the actual test. This approach helps students understand how to apply mathematical concepts to solve problems effectively, a skill that is not only useful for the TSI exam but also for future college-level coursework.

In addition to its comprehensive content, the TSI Math Study Guide is designed with flexibility in mind. Students can use the guide at their own pace, whether they are studying independently or as part of a structured study group. The PDF format allows for easy navigation, enabling students to quickly access specific sections or review material as needed. This flexibility makes the guide an ideal resource for students with busy schedules or those who prefer to study in short, focused sessions.

Another key benefit of the TSI Math Study Guide is its focus on helping students overcome common challenges associated with math exams. Many students experience anxiety or frustration when faced with complex math problems, but the guide offers tips and strategies to help manage these feelings and stay focused during the test. By learning how to approach problems systematically and efficiently, students can reduce their stress levels and perform at their best on exam day.

The guide also includes a section dedicated to test-taking strategies, such as time management, question prioritization, and effective guessing techniques. These strategies are designed to help students make the most of their time during the exam and ensure that they are able to complete all sections confidently. By mastering these strategies, students can improve their overall performance and increase their chances of achieving a high score.

Furthermore, the TSI Math Study Guide is regularly updated to reflect any changes in the TSI exam format or content. This ensures that students have access to the most current and relevant study material available. The guide is also aligned with the learning objectives outlined by the Texas Success Initiative, guaranteeing that students are preparing for the exam in a way that is both effective and aligned with the expectations of the test administrators.

With the TSI Math Study Guide, students can take control of their preparation and ensure that they are fully ready to tackle the challenges of the exam. Whether you are just starting your preparation or looking to refine your skills, this guide provides everything you need to achieve your goals and succeed on the TSI Mathematics test.

1.2 Benefits of Using the Guide

Using the TSI Math Study Guide offers numerous benefits that can significantly enhance your preparation for the Texas Success Initiative (TSI) Mathematics exam. This comprehensive resource is designed to provide students with a structured and effective way to review math concepts, improve their problem-solving skills, and build confidence in their ability to succeed on the test. Below are some of the key benefits of using the TSI Math Study Guide:

  • Comprehensive Coverage of Math Topics: The guide covers all the essential math topics tested on the TSI exam, including algebraic reasoning, quantitative skills, geometric and spatial reasoning, and statistical reasoning. By focusing on these areas, students can ensure they are well-prepared for every type of question they will encounter on the test.
  • Practice Problems and Exercises: One of the most significant advantages of the TSI Math Study Guide is its abundance of practice problems and exercises. These problems are designed to mirror the format and difficulty of the actual TSI exam, allowing students to familiarize themselves with the test structure and improve their problem-solving techniques. Regular practice with these exercises helps students identify and address their weaknesses, ensuring they are fully prepared for exam day.
  • Strategies and Tips for Success: In addition to practice problems, the guide provides valuable strategies and tips for tackling the TSI Math exam. These include time management techniques, methods for approaching complex problems, and effective guessing strategies. By mastering these techniques, students can maximize their scores and reduce their stress levels during the test.
  • Personalized Study Plan: The TSI Math Study Guide allows students to create a personalized study plan based on their individual needs and goals. By identifying their strengths and weaknesses through practice tests and exercises, students can focus their study efforts on the areas where they need the most improvement. This targeted approach ensures that students make the most of their study time and achieve the best possible results.
  • Improved Understanding of Math Concepts: The guide is designed to help students gain a deeper understanding of the math concepts covered on the TSI exam. By breaking down complex topics into clear and concise explanations, the guide makes it easier for students to grasp difficult ideas and apply them to real-world problems. This improved understanding not only helps students perform better on the exam but also prepares them for success in future college-level math courses.
  • Convenience and Accessibility: The TSI Math Study Guide is available in a convenient PDF format, making it easy to access and use on a variety of devices. Students can study at their own pace, whether they are at home, in the library, or on the go. This flexibility allows students to fit their study sessions into even the busiest schedules, ensuring they can prepare thoroughly for the exam without feeling overwhelmed.
  • Alignment with TSI Exam Format: The guide is specifically designed to align with the format and content of the TSI Math exam. By studying with materials that closely resemble the actual test, students can build familiarity with the types of questions, the timing, and the overall structure of the exam. This alignment helps students feel more confident and prepared on test day, reducing anxiety and ensuring they are able to perform at their best.
  • Free and Affordable Resource: The TSI Math Study Guide is available as a free PDF download, making it an affordable and accessible resource for students of all backgrounds. Unlike many other study materials on the market, this guide provides high-quality content without the need for expensive textbooks or tutoring services. This affordability ensures that every student has the opportunity to prepare for the TSI exam, regardless of their financial situation.
  • Regular Updates and Relevance: The guide is regularly updated to reflect any changes in the TSI exam format or content. This ensures that students always have access to the most current and relevant study material available. By staying up-to-date with the latest developments in the TSI exam, the guide provides students with a reliable and trustworthy resource for their preparation.
  • Boosts Confidence and Reduces Anxiety: Preparing for a major exam like the TSI Math test can be a source of significant stress and anxiety for many students. However, by using the TSI Math Study Guide, students can gain a sense of control and confidence in their abilities. The guide’s structured approach and comprehensive content help students feel more prepared and less overwhelmed, allowing them to approach the exam with a positive mindset.

With the TSI Math Study Guide, you can take the first step toward mastering the math skills required for the TSI exam and setting yourself up for long-term success in your academic and professional pursuits. Don’t miss out on the opportunity to transform your math abilities and achieve your full potential with this comprehensive and effective study resource.

1.3 How to Use the Guide Effectively

Maximizing the benefits of the TSI Math Study Guide requires a strategic and consistent approach to its use. This section will outline practical steps and tips to help you make the most of this valuable resource, ensuring that your preparation for the TSI Mathematics exam is both efficient and effective.

1.3.1 Understand the Structure of the Guide

The TSI Math Study Guide is organized into clear sections, each focusing on specific math topics and skills. Before diving into your studies, take the time to familiarize yourself with the guide’s layout. This will help you navigate the content more easily and ensure that you cover all the necessary areas. The guide typically includes chapters on algebraic reasoning, quantitative skills, geometric and spatial reasoning, and statistical reasoning, among others. Understanding how these topics are presented will allow you to tailor your study sessions to your needs.

1.3.2 Set Clear Goals and Priorities

Begin your preparation by setting specific, achievable goals. Identify the areas where you need the most improvement and prioritize your study time accordingly. For example, if you struggle with algebraic reasoning, allocate more time to practicing problems in that section. By focusing on your weaknesses, you can address gaps in your knowledge and build a stronger foundation in all areas of math tested on the TSI exam.

1.3.3 Practice Regularly

Consistency is key to success when preparing for the TSI Math exam. Set aside a dedicated time each day or week to work through the practice problems and exercises in the guide. Regular practice helps reinforce your understanding of math concepts and improves your problem-solving skills; Aim to complete a set number of problems during each study session, gradually increasing the difficulty as you become more confident.

1.3.4 Review and Analyze Your Mistakes

One of the most important aspects of effective study is reviewing and learning from your mistakes. After completing a set of practice problems, take the time to go through each question you answered incorrectly. Analyze the steps you took and identify where you went wrong. The TSI Math Study Guide often provides detailed explanations for each problem, so use these to understand the correct approach. By addressing your mistakes, you can avoid repeating them in the future and improve your overall performance.

1.3.5 Utilize Additional Resources

While the TSI Math Study Guide is a comprehensive resource, it can be even more effective when used in conjunction with other study materials. Consider supplementing your preparation with online practice tests, video tutorials, and interactive math tools. These resources can provide additional perspectives on complex topics and help you stay engaged during your study sessions. Many of these materials are available for free or at a low cost, making them accessible to all students.

1.3.6 Stay Consistent and Persistent

Preparing for the TSI Math exam is a long-term process that requires consistent effort and persistence. Avoid the temptation to cram all your studying into a short period of time, as this can lead to burnout and decreased retention of the material. Instead, maintain a steady study schedule and gradually build your knowledge and skills over time. Celebrate your progress, no matter how small, and stay motivated by reminding yourself of your goals.

1.3.7 Seek Additional Help When Needed

While the TSI Math Study Guide is an excellent self-study resource, there may be times when you need additional support. Don’t hesitate to reach out to teachers, tutors, or study groups for help with difficult concepts. Discussing math problems with others can provide new insights and help you understand challenging topics from different perspectives. Many schools and community centers also offer free or low-cost tutoring services specifically for TSI exam preparation.

1.3.8 Simulate Test Conditions

To build your test-taking skills and reduce anxiety, practice taking full-length practice tests under timed conditions. This will help you become familiar with the format and time constraints of the TSI Math exam, allowing you to manage your time more effectively on test day. Use the practice tests included in the guide or find additional ones online to simulate the actual testing experience.

1.3.9 Track Your Progress

Monitoring your progress is essential to staying on track with your study plan. Keep a record of your scores on practice tests and the types of problems you find most challenging. This will help you identify areas where you need to focus your efforts and measure the improvement in your skills over time. Celebrate your successes and use them as motivation to keep moving forward.

1.3.10 Stay Positive and Confident

Finally, maintain a positive attitude throughout your preparation. Believe in your ability to succeed, and remind yourself that consistent effort will lead to improvement. Avoid negative self-talk and focus on the progress you’ve made, no matter how small. Confidence plays a crucial role in test performance, so stay calm and assured as you approach the TSI Math exam.

relias test questions and answers pdf

Relias Test Questions and Answers PDF offers a comprehensive resource for exam preparation, featuring verified answers, color-coded sections, and clinical tips to enhance learning and retention effectively.

1.1 Overview of Relias Assessments

Relias assessments are comprehensive tools designed to evaluate knowledge and skills in various healthcare fields. They cover topics like pharmacology, behavioral health, and emergency nursing through multiple-choice questions, true/false statements, and scenario-based problems. The tests emphasize practical application, ensuring professionals can apply their knowledge in real-world situations. Regular updates ensure content remains relevant and aligned with current standards. These assessments are widely used for certification and continuous professional development, helping individuals identify strengths and areas for improvement.

1.2 Importance of Using Relias Test Questions and Answers PDF

Using Relias Test Questions and Answers PDF is crucial for effective exam preparation. It provides familiarity with the exam format, helping candidates navigate questions confidently. The resource identifies knowledge gaps, allowing focused study. Verified answers ensure accuracy, while color-coded sections and clinical tips enhance understanding. Regular practice with updated materials boosts problem-solving skills and retention, ensuring readiness for real-world challenges. This tool is essential for healthcare professionals aiming to excel in their certifications and stay updated with industry standards.

Key Features of Relias Test Questions and Answers PDF

Relias Test Questions and Answers PDF offers verified answers, color-coded sections, clinical tips, and updated materials, ensuring comprehensive preparation and enhanced understanding of exam content effectively.

2.1 Proactive Approach to Problem Behavior Prevention

A proactive approach to problem behavior prevention involves identifying triggers and addressing them before issues arise. Antecedent interventions, such as modifying environments or routines, are key strategies. Relias Test Questions and Answers PDF emphasizes these methods, providing scenarios and solutions to help learners master preventive techniques effectively. This approach reduces inappropriate behaviors and promotes positive outcomes, aligning with best practices in behavioral health and nursing care.

2.2 Behavior Intervention Plan (BIP) Development

A Behavior Intervention Plan (BIP) is a tailored strategy to address and reduce problem behaviors. Relias Test Questions and Answers PDF provides guidance on developing BIPs, focusing on data collection, functional assessments, and evidence-based interventions. The materials emphasize creating clear, measurable goals and monitoring progress. By practicing with these resources, learners can master the skills to design effective BIPs, ensuring interventions are individualized and aligned with client needs for optimal outcomes.

2.3 Partial Interval Recording and Data Collection Methods

Partial Interval Recording (PIR) is a data collection method where observers note if a behavior occurs during specific time intervals. Relias Test Questions and Answers PDF explains PIR and other techniques, such as frequency recording, to track behaviors accurately. These methods are essential for assessing behavior patterns, identifying trends, and informing intervention strategies. By mastering these tools, professionals can gather reliable data to support decision-making and improve outcomes in behavioral assessments and care plans.

Nursing Specializations Covered in Relias Tests

Relias tests cover various nursing specializations, including RN Pharmacology, Behavioral Health Nursing, Emergency Department (ED) RN, and Pediatric Nursing, providing targeted exam questions and answers.

3.1 RN Pharmacology Exam Questions and Answers

The RN Pharmacology section in Relias Test Questions and Answers PDF includes detailed exam questions covering various medications, their uses, and dosage calculations. It features color-coded sections for easy review, with questions and answers clearly marked. Additionally, it provides mnemonics and cheat sheets to aid in memorizing drug classifications and critical clinical tips for NCLEX-style questions. This resource is designed to help nurses master pharmacology concepts, ensuring accurate medication administration and improving patient care outcomes through enhanced knowledge retention and application.

3.2 Behavioral Health Nursing Practice Exam Questions

The Behavioral Health Nursing Practice Exam Questions in the Relias Test Questions and Answers PDF are designed to assess critical thinking in mental health scenarios. Questions cover topics like schizophrenia interventions, crisis management, and therapeutic communication. Each question includes verified answers with rationales, ensuring nurses understand the reasoning behind each response; This section emphasizes priority actions, such as initiating one-to-one observation for suicidal clients, to prepare nurses for real-world challenges in behavioral health settings effectively.

3.3 Emergency Department (ED) RN Questions and Answers

The Emergency Department (ED) RN Questions and Answers section in the Relias Test Questions and Answers PDF focuses on critical care scenarios, patient assessment, and rapid decision-making. Questions cover topics like triage protocols, medication administration, and life-saving interventions. Designed to simulate real-life ED situations, these questions help nurses refine their problem-solving skills. Verified answers and rationales are provided to ensure understanding and preparedness for high-pressure environments, making this resource invaluable for ED RN exam preparation and professional development.

3;4 Pediatric Nursing Exam Questions and Answers

The Pediatric Nursing Exam Questions and Answers section in the Relias Test Questions and Answers PDF focuses on growth and development, pediatric assessment, and common childhood illnesses. Questions cover key milestones, assessment techniques, and conditions specific to pediatric care. Each question is accompanied by a correct answer, marked for clarity. This resource helps nurses prepare for real-world scenarios, ensuring they can provide accurate and compassionate care to children. The PDF also includes tips for identifying and managing pediatric conditions effectively.

Question Types and Formats in Relias Exams

Relias exams feature multiple-choice questions, true/false, fill-in-the-blank, and scenario-based questions, ensuring a comprehensive assessment of knowledge and real-world application skills in nursing and healthcare topics.

4.1 Multiple Choice Questions (MCQs)

Multiple Choice Questions (MCQs) are a key feature of Relias exams, designed to test knowledge across various nursing specializations. Each question presents several options, with one correct answer. MCQs cover topics like pharmacology, behavioral health, and emergency care, ensuring a broad assessment of skills. They are structured to identify knowledge gaps and reinforce understanding. The Relias Test Questions and Answers PDF provides verified answers, enabling learners to review and master concepts effectively. This format simulates real-world decision-making, preparing professionals for practical applications in their fields.

4.2 True/False and Fill-in-the-Blank Questions

True/False and Fill-in-the-Blank questions in Relias exams are designed to assess factual knowledge and comprehension. True/False questions require identifying correct statements, while Fill-in-the-Blank questions test recall of specific details. These formats enhance memory retention and critical thinking. The Relias Test Questions and Answers PDF provides verified answers, allowing learners to review and master these question types effectively. Color-coded sections highlight correct responses, making it easier to identify areas for improvement and reinforce learning outcomes. These questions are essential for building a strong foundation in nursing concepts.

4.3 Scenario-Based Questions for Real-World Application

Scenario-Based Questions in Relias exams present real-world clinical situations, requiring applicants to apply theoretical knowledge to practical patient care. These questions mimic actual nursing scenarios, such as emergency interventions or pharmacological decisions, to assess critical thinking and decision-making skills. The Relias Test Questions and Answers PDF includes detailed explanations and correct answers, helping learners understand how to approach complex cases. This format enhances problem-solving abilities and prepares professionals for real-life challenges in their nursing careers.

Study Strategies for Relias Exams

Effective strategies include using mnemonics for retention, practicing step-by-step dosage calculations, and regularly reviewing updated exam materials to master the content and ensure exam readiness.

5.1 Using Mnemonics for Better Retention

Mnemonics are powerful tools for enhancing memory and retention in exam preparation. By associating complex information with acronyms, rhymes, or visual cues, learners can better organize and recall key concepts. For example, using acronyms like “PEMDAS” for pharmacology steps or creating rhymes for behavioral interventions simplifies study materials. Mnemonics also reduce study time by making information easier to remember, ensuring quick recall during exams. This strategy is particularly effective for complex topics like drug classifications and behavioral health interventions, making it a valuable asset for Relias exam success.

5.2 Step-by-Step Dosage Calculations Practice

Mastering dosage calculations is critical for nursing exams, and the Relias Test Questions and Answers PDF provides detailed, step-by-step guides to simplify this process. Practice questions cover converting units, calculating IV rates, and determining medication doses. Clear explanations and examples help learners understand complex formulas and reduce errors. Regular practice with these materials builds confidence and ensures accuracy in real-world scenarios, making it an essential tool for pharmacology and nursing exams.

5.3 Regular Practice with Updated Exam Materials

Consistent practice with updated Relias exam materials ensures familiarity with the latest question formats and content. The PDF includes current questions, answers, and rationales, reflecting recent advancements in nursing and healthcare. Regular review helps identify knowledge gaps and strengthens understanding of key concepts. By simulating actual test conditions, learners build time management and critical thinking skills, enhancing their readiness for both the exam and real-world patient care scenarios.

Benefits of Using Relias Test Questions and Answers PDF

Using Relias Test Questions and Answers PDF enhances exam readiness by familiarizing users with formats, identifying knowledge gaps, and improving problem-solving and critical thinking skills effectively.

6.1 Familiarization with Exam Format

The Relias Test Questions and Answers PDF helps users become accustomed to the exam layout, including question types like multiple-choice and scenario-based queries. This familiarity reduces anxiety and improves navigation during actual tests. Color-coded sections and clinical tips further enhance understanding of the format, ensuring candidates can focus on content rather than structure. Regular practice with these materials builds confidence and ensures a smooth experience during the real exam, mirroring the actual test environment closely.

6.2 Identification of Knowledge Gaps

Using Relias Test Questions and Answers PDF helps identify knowledge gaps by highlighting areas where users struggle. The color-coded sections differentiate questions and answers, making it easy to review mistakes. Detailed answer rationales provide clarity, ensuring users understand their errors. Regular practice with updated materials allows learners to track progress and reinforce weak areas, ensuring comprehensive preparation and improved performance in subsequent exams. This targeted approach enhances overall understanding and exam readiness effectively.

6.3 Enhanced Problem-Solving and Critical Thinking Skills

Engaging with Relias Test Questions and Answers PDF sharpens problem-solving and critical thinking skills through scenario-based questions and real-world applications. The resource provides detailed answer rationales, enabling learners to understand complex clinical scenarios and improve decision-making. By practicing with updated materials, users develop the ability to analyze situations, prioritize actions, and apply knowledge effectively. This enhances their confidence and competence in addressing challenging patient care scenarios, making them more effective in their professional roles.

Verified and Updated Answers

Relias Test Questions and Answers PDF provides color-coded sections, critical clinical tips, and verified answers, ensuring accurate and efficient exam preparation with up-to-date information.

7.1 Color-Coded Sections for Easy Review

The Relias Test Questions and Answers PDF features color-coded sections, with questions highlighted in blue and answers in green. This visual distinction allows for quick navigation and easy review, reducing eye strain and improving study efficiency. The color-coded format helps users focus on key information, making it easier to identify and retain important details. This organized approach ensures that learners can efficiently review and master the material, enhancing their preparation for exams and real-world applications.

7.2 Critical Clinical Tips for NCLEX-Style Questions

Relias Test Questions and Answers PDF includes critical clinical tips tailored for NCLEX-style questions, providing actionable insights and strategies. These tips focus on prioritization, pharmacological interventions, and patient assessment techniques. They guide learners in identifying key concepts and applying knowledge effectively. The tips are designed to simulate real-world scenarios, helping nurses develop critical thinking and problem-solving skills. This feature ensures that users are well-prepared to tackle complex exam questions with confidence and accuracy, aligning with professional nursing standards and practices.

7.3 Drug Classifications and Nursing Pharmacology Cheat Sheets

Relias Test Questions and Answers PDF includes detailed drug classifications and nursing pharmacology cheat sheets, simplifying complex medication information. These resources organize drugs by class, mechanism of action, and side effects, aiding in quick review and retention. Cheat sheets highlight key pharmacological concepts, making it easier to understand drug interactions and patient responses. This feature is particularly useful for NCLEX-style questions, ensuring nurses can apply pharmacology knowledge confidently in both exam and real-world clinical settings.

Resources and Availability

Relias Test Questions and Answers PDF is readily available on platforms like Docsity, offering instant downloads in both online and PDF formats for convenient access and study.

8.1 Downloading Relias Test Questions and Answers PDF

Downloading Relias Test Questions and Answers PDF is straightforward, with options available on platforms like Docsity. The PDF offers instant access to 170 questions with 100 verified answers, ensuring comprehensive exam preparation. It covers various nursing specializations, including pharmacology, behavioral health, and emergency care. The document is updated annually, providing the latest exam content. Secure payment options are available, and the PDF is compatible with multiple devices, making it a convenient study resource for aspiring nurses.

8.2 Platforms Offering Relias Exam Materials

Relias exam materials are available on various platforms, including Docsity, Quizlet, and official Relias websites. Docsity offers downloadable PDFs with verified answers, while Quizlet provides interactive study sets. These platforms ensure access to updated resources, covering topics like pharmacology and behavioral health. They cater to different learning preferences, offering both PDFs and online tools, making exam preparation flexible and efficient for nursing professionals seeking reliable study aids.

8.3 Importance of Verified and Updated Materials

Using verified and updated Relias materials ensures accuracy and relevance, as they align with the latest exam content and clinical practices. Outdated resources may contain incorrect or obsolete information, leading to poor exam performance. Verified materials, such as those marked with correct answers, help identify knowledge gaps and build confidence. Regular updates incorporate new guidelines and question formats, ensuring learners are well-prepared for real-world scenarios and professional challenges.

Relias Test Questions and Answers PDF provides a comprehensive, updated, and verified resource, ensuring exam success and fostering continuous professional growth in nursing and related fields effectively.

9.1 Final Tips for Success in Relias Exams

Consistently practice with updated Relias Test Questions and Answers PDF to familiarize yourself with exam formats and identify knowledge gaps. Use mnemonics for better retention and focus on step-by-step dosage calculations. Regularly review color-coded sections and critical clinical tips to enhance problem-solving skills. Prioritize real-world application through scenario-based questions and ensure thorough preparation in pharmacology, behavioral health, and emergency nursing. Continuous learning and professional development are key to achieving success in Relias exams and advancing your nursing career.

9.2 Continuous Learning and Professional Development

Engaging in continuous learning and professional development is essential for long-term success in nursing. Regularly updating your knowledge with Relias Test Questions and Answers PDF ensures you stay current with industry advancements. Leveraging color-coded sections and clinical tips enhances retention and application of critical concepts. By committing to ongoing education, you not only improve exam performance but also refine your clinical skills, ensuring better patient outcomes and advancing your nursing career effectively.

magegee keyboard manual

Welcome to the MAGEGEE keyboard manual! This guide provides essential information to help you understand and maximize the potential of your premium mechanical keyboard․

Product Overview

The MAGEGEE mechanical keyboard is a premium product designed for both gaming and typing enthusiasts․ It features double-shot injection molded keycaps, ensuring durability and clear backlighting․ The keyboard offers multiple LED backlighting modes, with adjustable brightness and speed controlled by arrow keys․ Pressing function keys like Fn+Ins, HM, Pg, Del, or End allows users to customize lighting effects․ Built with high-quality materials, the keyboard is designed for long-lasting performance․ It supports plug-and-play functionality, making it easy to connect and use without additional software․ Whether for gaming or everyday use, the MAGEGEE keyboard delivers a seamless and enjoyable experience․ Its sleek design and customizable features make it a standout choice for those seeking a reliable and stylish mechanical keyboard․

Installation and Setup

The MAGEGEE keyboard is plug-and-play, requiring no additional software․ Simply connect it to a USB port, and your system will automatically recognize the device for immediate use․

3․1 Plug-and-Play Setup

The MAGEGEE keyboard offers a seamless plug-and-play experience, eliminating the need for complex installations․ Simply connect the keyboard to your computer’s USB port, and it will automatically be recognized by your system․ This feature ensures that you can start typing or gaming immediately without any delays․ The plug-and-play functionality is compatible with most operating systems, including Windows and macOS, making it universally accessible․ No additional drivers or software are required, which simplifies the setup process․ This convenience is particularly beneficial for users who prefer a hassle-free experience․ By plugging in the keyboard, you can instantly enjoy its premium features, such as customizable backlighting and responsive mechanical switches․ This straightforward setup ensures that you can focus on your tasks without any technical hurdles․

3․2 Mode Switching

The MAGEGEE keyboard allows users to switch between different modes seamlessly, enhancing functionality for various tasks․ To toggle between modes, locate the mode switch key or combination, often the Fn key paired with a function key․ This feature enables switching between gaming, multimedia, or normal typing modes․ Gaming mode optimizes the keyboard for competitive play, while multimedia mode prioritizes media controls․ Normal mode is ideal for everyday typing․ The process is straightforward and requires no additional software․ Simply press the designated keys to change modes․ This versatility ensures the keyboard adapts to your needs, whether you’re gaming, working, or enjoying multimedia content․ The mode switching feature is designed to be intuitive, providing a smooth transition between tasks․ Refer to the user manual for specific key combinations, as they may vary slightly between models․ This feature enhances the overall user experience, making the keyboard highly adaptable․

Key Features

Discover the standout features of the MAGEGEE keyboard, including customizable LED backlighting, premium switch types, and N-Key Rollover for enhanced performance and typing accuracy․

4․1 LED Backlighting Modes

The MAGEGEE keyboard offers stunning LED backlighting modes, designed to enhance your typing experience․ With double-shot injection molded keycaps, the backlighting is clear and vibrant, ensuring optimal visibility․ Users can press specific keys like Fn, Ins, or PgUp to adjust lighting effects․ The keyboard features multiple preset modes, including wave, breathing, and static backlighting, allowing you to customize the visual appeal․ Additionally, the arrow keys enable brightness and speed adjustments, providing full control over the lighting․ Whether you’re gaming, typing, or working in low-light environments, the LED backlighting modes ensure a seamless and visually appealing experience․ This feature is both functional and aesthetic, making the MAGEGEE keyboard a standout choice for enthusiasts and professionals alike;

4․2 Switch Types

The MAGEGEE keyboard features high-quality mechanical switches, designed for precise and responsive typing․ Available in blue, brown, and red switch types, each offers distinct characteristics to suit user preferences․ Blue switches provide a tactile bump and audible click, ideal for typists who prefer feedback․ Brown switches deliver a smoother, quieter experience with a subtle tactile bump, making them versatile for both gaming and typing․ Red switches are linear and smooth, with no tactile bump, catering to gamers who prioritize fast actuation․ All switches are built to last, with a lifespan of millions of keystrokes․ This variety ensures users can choose the switch type that best matches their typing style and preferences, enhancing both performance and comfort; The MAGEGEE keyboard’s switch options are a testament to its commitment to quality and customization․

4․3 N-Key Rollover

The MAGEGEE keyboard supports N-Key Rollover (NKRO), a feature that ensures every keystroke is registered accurately, even when multiple keys are pressed simultaneously․ This technology is particularly beneficial for gamers and typists who require precise and reliable input․ With NKRO, the keyboard can handle complex combinations without ghosting or lag, making it ideal for fast-paced gaming sessions or intensive typing tasks․ The feature is seamlessly integrated into the keyboard’s design, providing a smooth and responsive experience․ Whether you’re executing intricate commands in a game or typing at high speeds, NKRO ensures your inputs are captured with utmost accuracy․ This advanced functionality underscores the MAGEGEE keyboard’s commitment to delivering high-performance tools for both productivity and gaming enthusiasts․

Design and Build Quality

The MAGEGEE keyboard is crafted with premium materials, ensuring durability and a sleek aesthetic․ Its robust construction and ergonomic design provide a comfortable typing experience for extended use․

5․1 Materials Used

The MAGEGEE keyboard is constructed using high-quality materials to ensure durability and optimal performance․ The keycaps are made from double-shot injection molded plastic, providing a clear backlight and extreme durability; The keyboard’s frame is built with a sturdy, high-grade aluminum alloy, ensuring a solid and premium feel․ The switches, available in various types such as blue and brown, are designed for longevity and consistent tactile feedback․ The USB cable is braided for added strength and resistance to wear and tear․ Additionally, the keyboard features a sleek and professional design with a matte finish, enhancing both aesthetics and functionality․ These materials are carefully selected to provide a seamless typing and gaming experience while maintaining a sophisticated appearance․

5․2 Ergonomics and Comfort

The MAGEGEE keyboard is designed with ergonomics in mind, ensuring a comfortable typing and gaming experience․ Its compact layout reduces finger movement, while the key switches provide a smooth, tactile response․ The keyboard’s height and angle are optimized to promote natural hand positioning, reducing strain during long sessions․ The double-shot injection molded keycaps are designed for clarity and durability, with a textured surface for better grip․ Additionally, the customizable LED backlighting allows users to adjust brightness and lighting effects, enhancing visibility without causing eye strain․ The keyboard’s build quality and ergonomic design make it suitable for both gaming and productivity, offering a balance of performance and comfort․ Whether you’re typing or gaming, the MAGEGEE keyboard is crafted to deliver a seamless and enjoyable experience․

Customization Options

The MAGEGEE keyboard offers a wide range of customization options to tailor your typing and gaming experience․ Users can personalize their keyboard with interchangeable keycaps, allowing for a unique aesthetic or optimized tactile feedback․ The keyboard also supports programmable keys, enabling macros and custom shortcuts for enhanced productivity or gaming efficiency․ Additionally, the customizable LED backlighting modes provide a visually appealing experience, with adjustable brightness and lighting effects․ The device also allows for cable management customization, ensuring a clutter-free setup․ With these features, users can adapt the keyboard to their specific needs, whether for professional tasks or immersive gaming sessions․ The MAGEGEE keyboard is designed to be versatile, offering a seamless blend of functionality and personalization․

Troubleshooting Common Issues

If you encounter any issues with your MAGEGEE keyboard, this section will help you identify and resolve them․ One common problem is key malfunction, which can often be fixed by cleaning the keys or checking for dust buildup․ If the keyboard fails to connect, ensure the USB port is functional and the cable is securely plugged in․ For software-related issues, reinstalling the drivers or updating the firmware may resolve the problem․ Additionally, some users have reported unexpected behavior with the FN key commands, which can be reset by following the instructions in the manual․ If backlighting modes are not working, check the LED settings or adjust the brightness using the designated keys․ For persistent issues, refer to the warranty information or contact customer support for assistance․ Regular maintenance and proper care can prevent many of these problems․

Maintenance and Care

To ensure your MAGEGEE keyboard performs optimally, regular maintenance is essential․ Start by cleaning the keys and switches with compressed air to remove dust and debris․ Avoid using liquids or harsh chemicals, as they may damage the components․ For spills, immediately unplug the keyboard and wipe it dry with a soft cloth․ Protect the keyboard from direct sunlight and extreme temperatures to prevent warping or discoloration․ Store the keyboard in a protective case when not in use to avoid scratches․ Additionally, clean the USB port regularly to ensure a stable connection․ For optimal comfort, consider using a wrist rest to maintain proper hand positioning․ By following these care tips, you can extend the lifespan of your MAGEGEE keyboard and maintain its premium performance․ Regular maintenance ensures your keyboard remains in excellent condition for years to come․

Warranty Information

MAGEGEE keyboards are backed by a comprehensive warranty designed to protect your investment․ The standard warranty period is one year from the date of purchase, covering manufacturing defects and ensuring your keyboard performs as expected․ To obtain warranty service, register your product on the MAGEGEE website and retain your proof of purchase․ If issues arise, contact MAGEGEE support with your product details for assistance․ The warranty does not cover damage caused by misuse, tampering, or normal wear and tear․ For more details, refer to the official MAGEGEE website or the provided user manual․ MAGEGEE is committed to delivering high-quality products and stands behind their reliability․

User Guides and Manuals

MAGEGEE provides detailed user guides and manuals to ensure a seamless experience with their mechanical keyboards․ These resources are available on the official MAGEGEE website and platforms like ManualsLib․ Users can download PDF versions of manuals for specific models, such as the MK-Star75-BW, to access setup instructions, troubleshooting tips, and feature overviews․ The manuals cover topics like plug-and-play functionality, mode switching, and LED backlighting customization․ Additionally, video tutorials and FAQs are available to address common questions and enhance user understanding․ For optimal performance, MAGEGEE recommends reviewing the manual before first use․ If you encounter issues, refer to the troubleshooting section or contact customer support for assistance․ MAGEGEE is committed to providing clear, comprehensive documentation to help users make the most of their keyboard․

Advanced Features

MAGEGEE keyboards are designed to deliver a premium typing and gaming experience, offering a range of advanced features․ One standout feature is the customizable LED backlighting, which allows users to adjust lighting effects, brightness, and speed using function keys like Fn, Ins, and arrow keys․ Additionally, the keyboards support N-Key Rollover (NKRO), ensuring every key press is registered simultaneously, which is essential for fast-paced gaming and accurate typing․ The mechanical switches provide tactile feedback and durability, while the programmable keys enable users to set macros and shortcuts for enhanced productivity․ These features make MAGEGEE keyboards versatile for both gamers and typists, offering a blend of performance and personalization․

Software and Driver Installation

To enhance your MAGEGEE keyboard experience, proper software and driver installation is essential․ Most MAGEGEE keyboards are plug-and-play, requiring no additional drivers for basic functionality․ However, for advanced features like customizable backlighting, macro settings, and mode switching, downloading the official software is recommended․ Visit the MAGEGEE support website, navigate to the “SUPPORT–DRIVERS” section, and select your specific keyboard model to download the latest drivers․ Once downloaded, follow the on-screen instructions to install the software․ Ensure your keyboard is connected via USB during the installation process․ This will unlock features like LED lighting control, key remapping, and mode switching․ For troubleshooting or optimizing performance, refer to the user manual or online guides․ Proper installation ensures seamless operation and maximizes your keyboard’s potential․

FAQs

Q: Why is my backspace key malfunctioning?
A: Ensure your keyboard is properly connected and drivers are updated․ If issues persist, refer to the troubleshooting section in the user manual․

Q: How do I adjust the backlighting?
A: Use the Fn key combinations to cycle through lighting modes and adjust brightness․ Detailed instructions are available in the LED backlighting section․

Q: Can I customize the keyboard settings?
A: Yes, download the official MAGEGEE software from their support website to customize key mappings, lighting, and other features․

Q: What if my keyboard isn’t recognized?
A: Restart your computer, ensure the USB connection is secure, and reinstall drivers if necessary․ Contact support if the issue persists․
Q: Is there a warranty for MAGEGEE keyboards?
A: Yes, MAGEGEE offers warranty coverage for defects in materials and workmanship․ Visit their official website for detailed warranty terms․

Q: Where can I find more information?
A: Refer to the user manual, official website, or contact MAGEGEE support for assistance․

The MAGEGEE keyboard manual is designed to provide a comprehensive guide for users to maximize their experience with these premium mechanical keyboards․ From setup and customization to troubleshooting, this manual covers all essential aspects to ensure smooth operation․ Whether you’re a seasoned typist or a gaming enthusiast, the MAGEGEE keyboard offers unparalleled performance and durability․ By following the instructions and tips outlined in this guide, you can unlock the full potential of your keyboard and enjoy a seamless typing or gaming experience․ For further assistance, visit the official MAGEGEE website or contact their customer support team․ Happy typing!

References

For further information and support, refer to the official MAGEGEE website and user manuals․ The MAGEGEE MK-Star75-BW User Manual is available for free download on ManualsLib and provides detailed instructions for setup, customization, and troubleshooting․ Additional resources include the Captain87 Mechanical Keyboard Manual, which covers LED backlighting modes and switch types․ Visit the MAGEGEE Support page for driver downloads, FAQs, and warranty details․ For visual guidance, check out the YouTube Help channel, which offers tutorials on keyboard setup and advanced features․ Ensure to consult these resources for optimal performance and maintenance of your MAGEGEE keyboard;

the odyssey robert fagles pdf

The Odyssey, an ancient Greek epic poem attributed to Homer, has been masterfully translated by Robert Fagles, offering a compelling rendition in English. The PDF version of Fagles’ translation is widely sought after for its convenience, allowing readers to explore Odysseus’ epic journey digitally with ease and clarity. This timeless tale of perseverance, loyalty, and fate, featuring iconic characters like Odysseus and Penelope, remains a cornerstone of classical literature, now accessible in a modern, portable format.

1.1 Significance of the Odyssey in Literature

The Odyssey stands as one of the most foundational works in Western literature, shaping epic poetry and storytelling traditions for millennia. Attributed to Homer, this ancient Greek epic explores universal themes of perseverance, loyalty, and fate, resonating across cultures and time. Its intricate narrative structure, featuring Odysseus’ decade-long journey home after the Trojan War, has influenced countless literary works. The poem’s rich characterization, moral complexity, and exploration of human nature have made it a cornerstone of classical studies. Its themes of cunning, resilience, and the struggle between divine and human will continue to inspire writers and thinkers. The Odyssey’s enduring relevance lies in its ability to transcend its historical context, offering timeless insights into the human condition. As such, it remains a vital text in understanding the evolution of literature and its lasting impact on global culture.

1.2 The Role of Robert Fagles in Translating the Odyssey

Robert Fagles played a pivotal role in translating Homer’s Odyssey into English, bridging the gap between ancient and modern literature. His translation is celebrated for its poetic elegance and accessibility, making the epic poem resonate with contemporary readers. Fagles’ mastery of language captures the emotional depth and complexity of Homer’s work, preserving its timeless essence while rendering it in a rhythmic and engaging prose. His translation is particularly praised for its fidelity to the original text, ensuring that the heroic spirit of Odysseus’ journey is maintained. The PDF version of Fagles’ translation has become a popular resource, offering a seamless reading experience for both scholars and casual readers. By balancing scholarly accuracy with literary artistry, Fagles has made the Odyssey accessible to a wide audience, ensuring its continued relevance in modern times.

Background on Robert Fagles

Robert Fagles, renowned for his poetic translations of classical works, balances fidelity with accessibility, earning acclaim for his scholarly yet engaging renditions of ancient texts.

2.1 Expertise and Approach in Translation

Robert Fagles, a distinguished scholar and translator, brought unparalleled expertise to his rendition of The Odyssey. His approach balanced poetic elegance with fidelity to Homer’s original text, ensuring the epic’s emotional depth and complexity were preserved. Fagles’ mastery of language allowed him to capture the rhythmic prose and vivid imagery of the ancient Greek, making it accessible to modern readers. His translation is celebrated for its ability to bridge the gap between scholarly accuracy and literary artistry, offering a seamless reading experience. Fagles’ work is complemented by Bernard Knox’s insightful introduction and notes, further enriching the understanding of Homer’s masterpiece. His approach has set a benchmark for translating classical works, blending tradition with contemporary sensibilities to create a timeless interpretation of The Odyssey.

Key Features of Fagles’ Translation

Fagles’ translation excels in its poetic language and accessibility, preserving Homer’s essence while engaging modern readers with clarity and emotional depth, making it a timeless literary achievement.

3.1 Poetic Language and Accessibility

Robert Fagles’ translation of The Odyssey is celebrated for its poetic language and accessibility, bridging the gap between ancient Greek and modern English seamlessly. Fagles masterfully employs rhythmic prose and vivid imagery, capturing the emotional depth and complexity of Homer’s original text while ensuring readability. His use of contemporary idioms and clear diction makes the epic poem resonate with today’s audience without sacrificing its timeless essence. The translation’s poetic elegance preserves the heroic spirit of Odysseus’ journey, making it both engaging and thought-provoking. Fagles’ ability to balance fidelity to the source material with a fluid, expressive style has made his version a favorite among scholars and casual readers alike. This accessibility ensures that the themes of perseverance, loyalty, and fate are conveyed with clarity, allowing modern readers to connect deeply with the ancient narrative.

3.2 Fidelity to Homer’s Original Text

Robert Fagles’ translation of The Odyssey is renowned for its fidelity to Homer’s original text, ensuring that the essence of the ancient Greek epic is preserved. Fagles meticulously maintains the narrative structure, character dynamics, and thematic integrity of the poem, offering a faithful representation of Homer’s vision. While prioritizing readability, he avoids compromising the richness and complexity of the source material. The translation captures the poetic devices, such as similes and metaphors, that are integral to Homer’s style, while adapting them to resonate with modern readers. Fagles’ commitment to accuracy ensures that the moral and philosophical depth of the original work remains intact, making his translation a trusted resource for scholars and enthusiasts alike. This balance of fidelity and accessibility has solidified Fagles’ version as a benchmark for understanding Homer’s timeless masterpiece.

The PDF Version of Fagles’ Translation

The PDF version of Robert Fagles’ Odyssey is highly sought after for its convenience and accessibility, offering readers a portable and easily navigable format to explore Odysseus’ epic journey with clarity and ease.

4.1 Popularity and Convenience of the PDF Format

The PDF version of Robert Fagles’ Odyssey has gained immense popularity due to its convenience and accessibility. Readers appreciate the portability of the digital format, which allows seamless access across various devices, making it ideal for both academic and personal study. The PDF preserves the poetic integrity of Fagles’ translation, ensuring that the original work’s depth and beauty are maintained for a modern audience. Its widespread availability online has further enhanced its reach, making Homer’s timeless tale accessible to readers worldwide with just a few clicks; Students and scholars particularly value the format for its ease of annotation and reference, while casual readers enjoy the clarity and readability it provides. This digital rendition of Fagles’ masterful translation has become a preferred choice for many, bridging the gap between ancient literature and contemporary accessibility.

Themes and Characters in the Odyssey

The Odyssey explores timeless themes of perseverance, loyalty, and fate through iconic characters like Odysseus, the cunning hero, Penelope, his devoted wife, and Telemachus, their determined son.

5.1 Major Themes: Perseverance, Loyalty, and Fate

The Odyssey delves into universal themes of perseverance, loyalty, and fate, as embodied by Odysseus’s decade-long journey home. His resilience in facing divine and human challenges highlights the human spirit’s capacity for endurance. Loyalty is personified through Penelope’s unwavering devotion to Odysseus, despite the suitors’ relentless pursuit, and Telemachus’s steadfast search for his father. Fate, shaped by the gods, underscores the tension between divine will and human agency, as Odysseus navigates the interference of Athena and Poseidon. These themes, masterfully conveyed in Fagles’ translation, resonate with timeless truths about human nature and existence, making the epic a profound exploration of moral and emotional complexity.

5.2 Main Characters: Odysseus, Penelope, and Telemachus

The Odyssey revolves around three central figures: Odysseus, the cunning and resilient King of Ithaca; Penelope, his loyal and resourceful wife; and Telemachus, their son, who matures from a naive youth to a determined leader. Odysseus, renowned for his intelligence and perseverance, embodies the human spirit’s capacity to endure adversity, whether facing mythical creatures or divine interference. Penelope’s unwavering fidelity and clever tactics, such as weaving and unraveling Laertes’ burial shroud, exemplify her strength and devotion. Telemachus’ journey from innocence to maturity mirrors his father’s odyssey, as he seeks to reclaim his family’s honor and reunite with Odysseus. Fagles’ translation vividly portrays these characters, capturing their emotional depth and complexity. The PDF version of his work ensures their stories remain accessible and engaging for modern readers, preserving the epic’s timeless appeal.

Comparisons with Other Translations

Fagles’ Odyssey is often compared to Lattimore’s literal accuracy and Fitzgerald’s poetic flair. While Fagles balances poetic style with accessibility, his work is praised for its readability and emotional resonance, making it a popular choice for modern readers.

6.1 Comparison with Lattimore’s Translation

Robert Fagles’ translation of the Odyssey is often compared to Richmond Lattimore’s version, with Lattimore praised for his literal accuracy and fidelity to Homer’s original text. While Lattimore’s translation is highly regarded for its scholarly precision, it is criticized for being less engaging and more challenging to read due to its strict adherence to Homer’s diction and structure. Fagles, on the other hand, prioritizes poetic elegance and accessibility, making the epic more approachable for modern readers. Lattimore’s translation is often described as “turgid” and lacking in poetic flair, whereas Fagles’ version is celebrated for its rhythmic prose and emotional resonance; Despite these differences, both translations are valued for their unique strengths, with Lattimore appealing to scholars and Fagles to a broader audience. The PDF version of Fagles’ translation further enhances its accessibility, ensuring his interpretation remains a popular choice for readers seeking both fidelity and readability.

6.2 Comparison with Fitzgerald’s Translation

Robert Fagles’ translation of the Odyssey is often juxtaposed with Robert Fitzgerald’s version, which is renowned for its poetic brilliance and lyrical prose. Fitzgerald’s translation is celebrated for its ability to capture the epic’s emotional depth and poetic nuances, making it a favorite among readers who prioritize literary beauty. However, Fitzgerald’s approach is less faithful to Homer’s original text compared to Fagles, who strikes a balance between poetic elegance and scholarly accuracy. While Fitzgerald’s version is praised for its readability and artistic flair, Fagles’ translation is often considered more accessible to modern readers due to its clear and rhythmic prose. The PDF version of Fagles’ translation further enhances its appeal, offering a seamless reading experience that preserves the epic’s timeless essence. Both translations are highly regarded, but Fagles’ work is often preferred for its blend of fidelity and readability, making it a popular choice for both scholars and general readers.

Reception and Reviews of Fagles’ Translation

Robert Fagles’ translation of the Odyssey has received widespread acclaim for its poetic elegance and fidelity to Homer’s original text. Scholars and readers alike praise its accessibility and emotional depth, while the PDF version’s convenience and clarity have made it a popular choice for both academic and personal reading.

7.1 Scholarly and Reader Reception

Robert Fagles’ translation of the Odyssey has garnered widespread acclaim from both scholars and readers. His poetic yet accessible language has made Homer’s epic resonate with modern audiences while maintaining its original essence. The PDF version of Fagles’ translation is particularly praised for its convenience, allowing readers to engage with Odysseus’ journey seamlessly across digital platforms. Scholars appreciate its fidelity to the original Greek text, while general readers commend its readability and emotional depth. Fagles’ work is often highlighted in academic circles as a balanced blend of literary artistry and scholarly rigor. The translation’s popularity is further evident in its adoption in educational settings, where it serves as a standard text for teaching classical literature. Overall, Fagles’ Odyssey is celebrated as a masterful interpretation that bridges ancient and modern worlds, ensuring its enduring relevance and appeal.

Educational Use of Fagles’ Translation

Robert Fagles’ translation of the Odyssey is widely adopted in educational settings, making it a cornerstone of classical literature studies. Its poetic yet accessible language bridges the gap between ancient Greek and modern English, enabling students to grasp the epic’s complexities. The PDF version of Fagles’ translation is particularly valued in academia for its portability and ease of annotation, allowing seamless integration into digital classrooms. Many universities and colleges use Fagles’ work as a primary text due to its balance of scholarly fidelity and readability. Bernard Knox’s insightful introduction and notes further enhance its educational value, providing context and deeper understanding. While some scholars prefer more literal translations like Lattimore’s, Fagles’ version is often praised for its ability to engage students and inspire a love for classical literature. Its widespread use underscores its role as a vital educational resource for exploring Homer’s timeless masterpiece.

Digital Accessibility and Modern Appeal

The PDF version of Robert Fagles’ Odyssey translation has revolutionized access to Homer’s epic, making it readily available to a global audience. Digital formats ensure that readers can engage with the text across various devices, fostering a modern reading experience. The portability and ease of annotation in the PDF version are particularly appealing to students and scholars, who can now carry the entire epic on their devices. This accessibility has contributed to the enduring popularity of Fagles’ translation, as it meets the demands of contemporary readers who value convenience without compromising on the richness of the original work. The digital format also ensures that Fagles’ masterful rendition remains relevant, bridging the gap between ancient literature and modern technology; This seamless integration of tradition and innovation highlights the timeless appeal of the Odyssey in the digital age.

Robert Fagles’ translation of the Odyssey stands as a landmark achievement, blending poetic elegance with fidelity to Homer’s original text. The PDF version has further enhanced its accessibility, making it a preferred choice for both scholars and casual readers. Fagles’ ability to capture the emotional depth and complexity of the epic ensures its resonance with modern audiences. While other translations, such as those by Lattimore and Fitzgerald, offer unique perspectives, Fagles’ work remains a balanced and accessible option. The digital format has not only preserved the integrity of his translation but also introduced the Odyssey to a new generation of readers. As a result, Fagles’ rendition continues to be celebrated for its ability to bridge ancient and modern literature, ensuring the Odyssey’s timeless themes of perseverance, loyalty, and fate remain relevant in the digital age.

nanit wall mount instructions

Welcome to the Nanit Wall Mount Instructions guide. This comprehensive resource ensures safe and proper installation, providing a clear view of your baby while maintaining safety and peace of mind.

Importance of Proper Installation

Proper installation of the Nanit Wall Mount is essential for ensuring your baby’s safety and optimal monitor performance. A secure setup prevents the monitor from tipping or falling, reducing potential hazards. Correct installation also guarantees a clear, unobstructed view of your baby, allowing you to monitor them effectively. Additionally, proper mounting ensures the durability of the wall mount and camera, avoiding damage from improper alignment or weight distribution. Taking the time to install the mount correctly provides peace of mind and ensures long-term reliability for years to come. Always follow the manufacturer’s instructions precisely to avoid installation errors and ensure a safe, stable, and functional setup for your baby monitor.

Benefits of Using a Wall Mount

Using a Nanit Wall Mount offers numerous benefits for baby monitoring. It provides a clear, unobstructed view of your baby, ensuring optimal visibility and peace of mind. The wall mount keeps the camera out of your baby’s reach, reducing the risk of tampering or accidental damage. Its sleek design blends seamlessly into any nursery decor, maintaining a clean and organized appearance. Additionally, the mount allows for precise camera positioning, capturing the entire crib area for comprehensive monitoring. It also enhances safety by keeping wires secure and out of the way, minimizing tripping hazards. With a wall mount, you can enjoy a stable and reliable setup, ensuring long-term performance and durability. This accessory is a practical and essential addition to your baby monitoring system, offering both functionality and aesthetic appeal.

Tools and Materials Needed

A drill, screws, wall anchors, level, and stud finder are essential. Additional materials like cable covers and elbow connectors ensure a secure and organized installation setup.

Essential Tools for Installation

Installing the Nanit Wall Mount requires specific tools to ensure a secure and proper setup. A drill is necessary for creating holes in the wall, while screws and wall anchors provide stability. A level ensures the mount is straight, and a stud finder helps locate wall studs for optimal support. Additionally, a screwdriver is needed for tightening the screws, and cable covers are essential for organizing wires neatly. Having these tools ready will streamline the process and ensure a safe, professional-grade installation for your baby monitor. Proper tools guarantee a stable and reliable setup, providing peace of mind while monitoring your baby.

Additional Materials for a Secure Setup

Beyond the essential tools, having extra materials ensures a seamless and secure installation. A surge protector safeguards your monitor from power surges, while a power strip manages multiple devices. Adhesive cable strips or hooks keep wires organized without damaging walls. Cable ties and clips prevent tangled cords, enhancing safety. A pencil marks drill spots accurately, and a tape measure ensures proper alignment. Wall plugs may be needed for certain surfaces, and a soft cloth cleans the area before installation. These materials complement the tools, ensuring a secure and neat setup. They help prevent hazards, such as tripping over loose wires, and improve the overall reliability of your Nanit Wall Mount. By using these additional items, you can achieve a professional-grade installation that is both safe and visually appealing.

Preparation for Installation

Plan your setup by ensuring the crib is positioned correctly and the wall is sturdy enough to support the mount. Use a level to ensure proper alignment and stability for a secure installation.

Choosing the Right Location

Choosing the right location for your Nanit Wall Mount is crucial for optimal monitoring and safety. Position the mount at least 6 feet above the crib to ensure it’s out of your baby’s reach. Center the mount directly above the crib to capture a clear, unobstructed view of your baby. Ensure the wall is sturdy and can support the weight of the mount and camera. Use a stud finder to locate wall studs for added stability, especially in drywall or plaster walls. Align the mount with the crib’s center to ensure proper camera alignment. Double-check the wall type and weight limits to avoid installation issues. Proper placement ensures a safe, reliable, and clear view of your baby, providing peace of mind for parents.

Understanding Wall Types and Weight Limits

Understanding your wall type and its weight limits is essential for a secure Nanit Wall Mount installation. Drywall, plaster, and concrete walls have different requirements. For drywall or plaster, use a stud finder to locate wall studs for added stability, as anchors alone may not suffice. Concrete or brick walls require specific anchor screws to ensure a sturdy setup. The Nanit Wall Mount is designed to support up to 5-7 pounds, including the camera and any additional accessories. Always check the weight limits to prevent overloading. Properly securing the mount to the wall type ensures long-term stability and safety. By considering your wall’s structural capacity, you can achieve a reliable and secure installation for your baby monitor, providing peace of mind for years to come.

Step-by-Step Installation Guide

This guide provides a detailed, easy-to-follow process for installing your Nanit Wall Mount. From aligning the mount to drilling holes and securing the bracket, it ensures a safe and stable setup for your baby monitor.

Mounting the Bracket to the Wall

Begin by locating the center of the wall above the crib, ensuring it aligns with the camera’s optimal viewing angle. Use a level to ensure the bracket is straight. Mark the wall with a pencil, then drill pilot holes for the screws or anchors. Insert wall anchors if necessary, especially for drywall, to provide extra stability. Attach the mounting bracket to the wall, tightening the screws firmly. Double-check that the bracket is securely fastened and level. Finally, complete the in-app crib positioning process to ensure accurate camera alignment. This step is crucial for a stable and safe installation, providing a clear view of your baby’s crib and ensuring the monitor functions properly.

Attaching the Camera to the Mount

Once the wall bracket is securely installed, attach the Nanit camera by aligning it with the mounting base. Gently slide the camera onto the bracket, ensuring it clicks into place. Use the provided screws to tighten the camera to the mount, making sure it is firmly secured. Adjust the camera angle to achieve the optimal view of the crib, ensuring no blind spots. Tighten all screws to prevent any movement or wobbling. Use the Nanit app to complete the crib positioning feature, which helps calibrate the camera for accurate monitoring. Finally, secure any cables to the mount using cable clips or elbow connectors to prevent them from interfering with the camera’s movement or creating hazards. This ensures a stable and secure setup for reliable monitoring.

Securing Cables and Wiring

Securing cables and wiring is essential for both safety and aesthetics. Use the provided cable covers or clips to neatly organize the wires, preventing them from becoming a tripping hazard or getting damaged. Route the cables along the wall or behind furniture to keep them out of sight. Attach the cables to the wall mount using the included cable management accessories, such as elbow connectors or adhesive strips, to ensure they remain secure and untangled. This step not only enhances the appearance of your nursery but also prevents accidental tugs on the wires, which could disrupt the camera’s connection. Proper cable management ensures a safe and reliable setup, giving you peace of mind while monitoring your baby. Regularly inspect the cables to ensure they remain securely fastened and free from damage. This attention to detail guarantees optimal performance and long-term durability of your Nanit Wall Mount system.

Positioning the Camera

Position the camera at least 6 feet above the crib for optimal visibility and safety. Center it above the crib and use the in-app feature to adjust the angle accurately.

Optimal Height and Angle for Monitoring

Positioning the Nanit camera at the correct height and angle is crucial for effective monitoring. Mount the camera at least 6 feet above the crib to ensure it is out of your baby’s reach and provides an unobstructed view. This height also allows the camera to capture a wide field of view, covering the entire crib and surrounding area. Adjust the angle to focus on the crib, ensuring the mattress and sides are fully visible. Proper alignment prevents blind spots and ensures accurate monitoring. Use the in-app crib positioning feature to guide the adjustment process and achieve the perfect view. A well-positioned camera enhances safety, reduces hazards, and provides peace of mind for parents. Regularly check and adjust the angle as needed to maintain optimal monitoring conditions.

Using the In-App Crib Positioning Feature

The Nanit app offers a convenient crib positioning feature to ensure your camera is perfectly aligned with your baby’s crib. Open the Nanit app, navigate to the setup section, and follow the prompts to initiate the crib positioning process. The app will guide you through adjusting the camera angle to achieve the best possible view of your baby’s crib. This feature ensures accurate alignment, eliminating blind spots and providing a clear, unobstructed view of your baby. Once the camera is positioned correctly, confirm the setup in the app to calibrate the view. This step is essential for ensuring your baby’s safety and providing you with peace of mind. Regular use of this feature guarantees optimal monitoring conditions and enhances the overall performance of your Nanit Wall Mount setup.

Cable Management and Safety

Organize wires using elbow connectors and cable covers to prevent tripping hazards. Secure cables neatly to maintain a safe and clutter-free nursery environment, enhancing overall safety and functionality.

Organizing Wires with Elbow Connectors

Elbow connectors are essential for managing cables neatly during Nanit Wall Mount installation. Attach the connector to the camera base to route wires at a right angle, minimizing clutter. This ensures wires are securely fastened, reducing tripping hazards and keeping the nursery tidy. Proper cable organization enhances safety and maintains a clean environment. Use cable covers to further secure wires, preventing tangling and damage. This step is crucial for both functionality and aesthetics, ensuring your baby monitor operates smoothly while maintaining a safe and organized space. By organizing wires effectively, you create a reliable and visually appealing setup for long-term use.

Securing Cables to Prevent Hazards

Securing cables is a critical step in ensuring a safe and hazard-free setup for your Nanit Wall Mount. Use cable covers or adhesive strips to neatly route wires along the wall, preventing them from becoming tripping hazards or getting damaged. Cable ties can also be used to bundle wires together, keeping them organized and out of reach of your baby. Properly securing cables not only enhances safety but also maintains a tidy and clutter-free nursery environment. Regularly inspect cables for any signs of damage or fraying and replace them if necessary. By taking these precautions, you can ensure a reliable and secure connection while minimizing potential risks, providing peace of mind for parents and a safe space for your baby.

Troubleshooting Common Issues

Address connectivity problems by checking your Wi-Fi network and restarting the device. For camera alignment issues, adjust the angle and ensure the mount is securely fastened to the wall.

Resolving Connectivity Problems

If you encounter connectivity issues with your Nanit Wall Mount, start by ensuring your Wi-Fi network is stable and the monitor is within range. Restart the device and check for firmware updates in the app. Verify that all cables are securely connected and properly routed using cable covers to prevent interference. If the problem persists, refer to the user manual or in-app troubleshooting guide for additional steps. Regularly inspecting cable connections and ensuring they are tightly secured can help prevent future issues. By addressing these common connectivity challenges, you can restore a reliable connection and enjoy uninterrupted monitoring of your baby.

Adjusting Camera Alignment

Adjusting the camera alignment ensures a clear and unobstructed view of your baby. Start by positioning the camera so it captures the entire crib, including the mattress and sides. Use the elbow connectors to securely fasten the camera to the wall mount, ensuring stability. Fine-tune the angle to avoid any blind spots. Complete the in-app crib positioning process to verify the camera’s alignment and ensure optimal monitoring. Proper adjustment guarantees your baby’s safety and your peace of mind. Regularly check the alignment to ensure it remains accurate, especially if the crib or mount is moved. By following these steps, you can maintain a clear and reliable view of your baby at all times.

Maintenance and Safety Checks

Regularly inspect the mount for stability and tighten any loose screws. Clean the camera lens with a soft cloth to ensure clear visibility. Check cables for damage and secure them properly using cable covers. Perform periodic checks to ensure the mount remains level and firmly attached to the wall. This maintenance ensures optimal performance and longevity of your Nanit Wall Mount, providing continued reliability and peace of mind for monitoring your baby.

Regular Inspections for Stability

Regular inspections are crucial to ensure the Nanit Wall Mount remains stable and secure. Start by checking all screws and bolts to confirm they are tightly fastened. Over time, vibrations or minor shifts can loosen these, so tightening them periodically is essential. Next, examine the wall anchors to ensure they remain firmly embedded and haven’t shifted. If you notice any signs of wear or damage, replace the anchors immediately. Additionally, inspect the mount’s base for any wobbling or unevenness, which could indicate improper alignment. Use a level tool to verify the mount is straight and adjust if necessary. Finally, ensure the camera is securely attached to the mount and that all cables are neatly organized and out of reach. These routine checks help maintain the setup’s integrity and prevent potential hazards, ensuring your baby’s safety and your peace of mind.

Cleaning and Updating Firmware

Regular cleaning and firmware updates are essential for maintaining the Nanit Wall Mount’s performance and security. Start by gently wiping the camera lens with a soft, dry cloth to remove dust or smudges, ensuring clear visibility. Avoid using harsh chemicals or abrasive materials that could damage the lens. Next, check for firmware updates through the Nanit app. Updating the firmware ensures you have the latest features, security patches, and performance improvements. To update, open the app, navigate to the settings menu, and select “Check for Updates.” Follow the on-screen instructions to complete the process. Regular firmware updates help maintain optimal functionality and protect your device from potential vulnerabilities. By keeping your camera clean and up-to-date, you ensure reliable monitoring and enhanced safety for your baby.

Conclusion

Proper installation and maintenance of the Nanit Wall Mount ensure your baby’s safety and optimal monitoring. Follow these steps for a secure, reliable setup and lasting peace of mind.

Final Tips for a Successful Setup

For a successful Nanit Wall Mount installation, ensure the mount is securely fastened to the wall, ideally into studs, and use cable covers to organize wires neatly. Position the camera at least 6 feet above the crib for optimal visibility and safety. Double-check the camera angle using the in-app crib positioning feature to ensure accurate alignment. Regularly inspect the setup for stability and tighten any loose screws. Keep the camera lens clean and update the firmware periodically for the best performance. By following these tips, you’ll achieve a reliable and long-lasting setup, providing peace of mind while monitoring your baby.

Ensuring Long-Term Reliability

To ensure long-term reliability of your Nanit Wall Mount, regular maintenance is essential. Start by inspecting the mount for stability and tightening any loose screws to prevent wobbling. Clean the camera lens with a soft cloth to maintain clear visibility and update the firmware periodically for optimal performance. Check cables for damage and secure them properly using cable covers to prevent tangling or interference. Additionally, verify that the mount remains level and firmly attached to the wall, especially after any adjustments. By following these steps, you can ensure your Nanit Wall Mount continues to function reliably, providing you with uninterrupted monitoring and peace of mind for years to come.

northwest territory tent instruction manual

This manual provides a detailed guide for setting up and maintaining Northwest Territory tents, including models like the Front Porch and Vacation Cottage. With step-by-step instructions, safety tips, and troubleshooting advice, it ensures a seamless camping experience. Whether you’re assembling poles or securing guy ropes, this guide offers practical solutions to common challenges, helping you enjoy the outdoors with confidence.

Understanding the Tent Models

Northwest Territory offers various tent models, including the Front Porch and Vacation Cottage designs. The Front Porch model features a spacious interior and a convenient porch area, ideal for camping comfort. The Vacation Cottage tent boasts a cabin-style structure with ample room for furniture and storage, perfect for extended outdoor stays. Both models prioritize durability and ease of assembly.

Front Porch Tent

The Northwest Territory Front Porch Tent is a popular choice among campers due to its unique design and practical features. This model is known for its spacious interior and a convenient front porch area, which provides additional shelter and storage space. The tent is designed to accommodate comfort and functionality, making it ideal for both short and extended camping trips.

One of the standout features of the Front Porch Tent is its sturdy construction. It comes with pre-attached poles and a straightforward assembly process, which simplifies setup even for those new to camping. The tent also includes large windows for ventilation and natural light, ensuring a comfortable environment inside. The front porch area is perfect for relaxing or storing gear, keeping the main living space clutter-free.

The Front Porch Tent is part of Northwest Territory’s lineup of user-friendly camping products. It is backed by a 6-month replacement parts warranty, offering peace of mind for campers. The model KMT162010 is particularly noted for its durability and ease of use, with many users praising its ability to withstand various weather conditions. Proper assembly and maintenance are key to ensuring the tent’s longevity, and the provided manual offers clear instructions for both.

Overall, the Northwest Territory Front Porch Tent is a reliable option for campers seeking a balance of comfort, functionality, and affordability. Its thoughtful design and robust build make it a great choice for outdoor enthusiasts looking to enjoy nature without compromising on convenience.

Vacation Cottage Tent

The Northwest Territory Vacation Cottage Tent is a spacious and versatile camping shelter designed for comfort and convenience. This cabin-style tent features a stand-up design, allowing campers to move freely inside. It is ideal for families or groups, offering ample interior space and practical amenities for an enjoyable outdoor experience.

One of the key highlights of the Vacation Cottage Tent is its large interior, which can accommodate two queen-sized air mattresses and still leave room for additional gear. The tent also includes an 8-foot table in the entry area, perfect for dining or organizing supplies. Setup can be a bit challenging without clear instructions, but online resources and video guides are readily available to help users navigate the process.

The Vacation Cottage Tent is part of Northwest Territory’s premium lineup, known for its durability and weather resistance. Models like the Vacation Cottage III are particularly popular, offering a 10-person capacity and robust construction. While the tent is designed for ease of use, proper assembly and maintenance are crucial to ensure its longevity. The manual provides detailed steps for setting up the tent, including attaching guy ropes and securing the structure for stability in windy conditions.

Overall, the Northwest Territory Vacation Cottage Tent is a great choice for campers seeking a spacious and feature-rich shelter. Its combination of comfort, practicality, and durability makes it a standout option for outdoor adventures. By following the provided instructions, users can enjoy a hassle-free camping experience with this high-quality tent.

Assembly Process

Assembling your Northwest Territory tent involves several key steps. Start with unboxing and verifying all parts. Next, assemble the poles by connecting fiberglass sections into metal ferrules. Attach the tent fabric to the frame, ensuring it is securely fastened. Finally, stake down the tent and tighten guy ropes for stability. Follow the manual for a smooth setup.

Unboxing and Inventory

Unboxing and inventory are the first critical steps in setting up your Northwest Territory tent. Carefully open the package and verify that all components are included. For models like the Front Porch or Vacation Cottage, this typically includes the tent fabric, poles, stakes, guy ropes, and rainfly. Check for any damage or missing parts immediately.

Organize the parts by type to streamline the assembly process. Poles are usually color-coded or labeled, while stakes and ropes should be stored separately to avoid confusion. Refer to the instruction manual for a detailed list of included items and their quantities. If any parts are missing, contact the manufacturer promptly to resolve the issue under the warranty.

Take a moment to familiarize yourself with the components. The main frame is often pre-attached to the tent, while additional poles are provided for the entrance or extensions. Ensure all hardware, such as connectors and ferrules, is accounted for. Proper inventory ensures a smooth setup and prevents delays; If you notice any discrepancies, consult the Northwest Territory tent manual or contact customer support for assistance.

By carefully unboxing and organizing your tent, you set the foundation for a successful assembly. This step is crucial for avoiding frustration and ensuring all parts are ready when needed. Remember, a well-prepared setup leads to a safer and more enjoyable camping experience. Always double-check your inventory before proceeding to the next step.

Pole Assembly

Pole assembly is a crucial step in setting up your Northwest Territory tent. Begin by identifying the various pole sections, which are typically color-coded or labeled for easy identification. For models like the Front Porch or Vacation Cottage, the main frame is often pre-attached to the tent, simplifying the process. Start by connecting the fiberglass pole sections into the metal ferrules, ensuring they snap securely into place.

Next, attach the main frame to the tent by aligning the pole ends with the corresponding connectors on the tent fabric. Gently push the poles into the connectors until they click. For larger tents, such as the Vacation Cottage, you may need to assemble the roof and side poles separately before attaching them to the main frame. Always refer to the instruction manual for specific guidance on pole configuration.

Once the poles are connected, stand the tent upright and ensure all sections are fully extended. Tighten the poles by hand to create tension in the frame. For added stability, attach the roof poles to the top of the tent and secure them to the sides using the provided clips or hooks. If your model includes a front porch or extension, follow the same process to assemble and attach these sections.

Finally, double-check that all poles are securely connected and the tent is standing straight. If any section feels loose, tighten the connections or consult the Northwest Territory tent manual for troubleshooting tips. Proper pole assembly ensures a sturdy structure that can withstand wind and weather conditions, making your camping experience safe and enjoyable.

Attaching the Tent Fabric

Once the pole frame is fully assembled, the next step is to attach the tent fabric. Start by locating the tent’s sleeves, which are sewn into the fabric to accommodate the poles. Slide the fabric over the poles, ensuring it aligns with the frame. For models like the Front Porch or Vacation Cottage, the fabric may have color-coded tabs or labels to guide proper alignment.

Secure the fabric to the poles using the clips or hooks provided. These are typically attached to the tent’s corners and sides. Make sure each clip is tightly fastened to prevent the fabric from shifting in the wind. For larger tents, such as the Vacation Cottage, you may need to attach additional panels or extensions, like the front porch, following the same process.

After attaching the fabric, tighten the tent by adjusting the guy ropes. These ropes are connected to the tent’s exterior and should be staked into the ground to create tension. Ensure the fabric is taut and evenly spread to avoid sagging or wrinkles. For models with a front porch, attach the porch roof separately and secure it to the main tent using the provided connectors.

Finally, inspect the tent to ensure all sections are properly attached and the fabric is securely fastened. If any part feels loose, tighten the clips or adjust the guy ropes. Properly attaching the tent fabric ensures a sturdy and weather-tight structure, essential for a comfortable camping experience. Always refer to the Northwest Territory tent manual for model-specific instructions.

Securing with Guy Ropes

Securing your Northwest Territory tent with guy ropes is a critical step to ensure stability and protection from wind and rain. Start by identifying the guy rope attachment points on the tent fabric, usually marked with reinforced loops or tabs. These are strategically placed to distribute tension evenly across the tent.

Thread the guy ropes through the loops and attach them to the corresponding stakes. Drive the stakes into the ground at a 45-degree angle, ensuring they are firmly embedded. For added stability, extend the ropes to the outer edges of the tent and secure them to additional stakes. Tighten the ropes by pulling them taut and tying them off with the provided cord locks or knots.

For models like the Vacation Cottage or Front Porch, pay special attention to the larger surface areas, as they may require more guy ropes to maintain structural integrity. Use the included rope tighteners to adjust tension and eliminate any slack. If the tent fabric sags, tighten the ropes further or reposition the stakes for better support.

Regularly inspect the guy ropes during your camping trip, especially after rain or high winds, to ensure they remain secure. If a rope becomes loose, tighten it immediately to prevent damage to the tent poles or fabric. Properly securing the tent with guy ropes not only enhances its durability but also ensures a safe and comfortable camping experience. Always refer to the Northwest Territory tent manual for model-specific guidance on guy rope placement and tensioning.

Maintenance Tips

Regularly clean your Northwest Territory tent to prevent dirt buildup. Use mild soap and water, avoiding harsh chemicals. Allow the tent to dry completely before storage to prevent mold. Inspect for wear and tear, replacing damaged parts promptly. Store the tent in a cool, dry place, following the manual’s guidelines for proper care and longevity.

Cleaning the Tent

Cleaning your Northwest Territory tent is essential to maintain its durability and performance. Start by brushing off loose dirt and debris from the fabric using a soft-bristled brush. For more thorough cleaning, mix mild soap with lukewarm water and gently scrub the tent using a sponge or cloth. Avoid using harsh chemicals, abrasive cleaners, or bleach, as they can damage the waterproof coating or fabric.

Rinse the tent thoroughly with clean water to remove any soap residue. Allow it to air dry completely, ensuring no moisture remains, as this can lead to mold or mildew. Never machine wash or dry the tent, as this can cause irreparable damage to the fabric and seams. For stubborn stains or mud, apply a small amount of soap directly and rinse carefully.

Regular cleaning also includes inspecting and cleaning the tent poles, zippers, and guy ropes. Lubricate zippers with silicone spray to ensure smooth operation. Store the tent in a cool, dry place, away from direct sunlight, to prevent fading or deterioration. By following these steps, you can keep your Northwest Territory tent in excellent condition for future camping adventures.

Spot cleaning is recommended after each use to prevent dirt buildup. Always refer to the manual for specific care instructions tailored to your tent model. Regular maintenance ensures your tent remains waterproof, sturdy, and ready for years of outdoor use.

Proper Storage

Proper storage of your Northwest Territory tent is crucial to maintain its quality and longevity. Before storing, ensure the tent is completely dry to prevent mold and mildew. If the tent is damp, set it up in a shaded, well-ventilated area to air dry. Once dry, fold or roll the tent neatly to avoid creasing or damaging the fabric.

Store the tent in a cool, dry place away from direct sunlight, which can cause fading or deterioration. Use the original storage bag or a breathable, moisture-resistant bag to protect the tent from dust and pests. Avoid compressing the tent tightly, as this can cause unnecessary stress on the fabric and seams.

Keep the tent poles, stakes, and guy ropes in separate, labeled bags to avoid misplacement. Store these accessories in a dry, secure location to prevent rust or damage. Never store the tent in a damp basement, garage, or outdoor shed, as moisture can lead to mildew or structural issues.

For long-term storage, consider cleaning the tent before storing it to remove dirt and stains that may worsen over time. Avoid using plastic bins or airtight containers, as they can trap moisture. Instead, opt for a well-ventilated storage solution to ensure the tent remains dry and fresh.

Regularly inspect the tent before and after storage to check for signs of wear or damage. Address any issues promptly to prevent them from worsening. By following these storage guidelines, you can ensure your Northwest Territory tent remains in excellent condition for future camping trips.

Remember, proper storage is an essential part of tent maintenance, helping to preserve its waterproof coating, fabric integrity, and overall performance. Always refer to the manual for model-specific storage recommendations.

Troubleshooting Common Issues

When setting up or using your Northwest Territory tent, you may encounter common issues that can be easily resolved with the right approach. Leaks, damaged poles, and torn fabric are among the most frequent problems reported by users. To address these, start by identifying the root cause and applying the appropriate solution.

Leaks: If water is seeping through the tent fabric, check the seams and any areas around poles or vents. Ensure the tent is properly sealed using a waterproofing spray or seam sealer. If the issue persists, inspect for pinholes or small tears and repair them with a patch kit. Regular maintenance can prevent leaks by reinforcing the tent’s waterproof coating.

Damaged Poles: Bent or broken poles can make assembly difficult. Inspect the poles for any visible damage and replace them if necessary. If a pole section is bent but not broken, gently straighten it and secure it with a pole sleeve or splint. Always handle poles with care to avoid further damage during setup or takedown.

Torn Fabric: Small tears in the tent fabric can be repaired using a fabric repair kit. Apply a patch to both sides of the tear for added strength. For larger tears, consider professional repair or contact the manufacturer for replacement parts. Regular inspections can help catch minor damage before it becomes a major issue.

Stake Issues: If stakes are bending or not holding the tent securely, ensure the ground is soft and free of rocks. Use a mallet to drive stakes in at an angle for better grip. Replace any bent or rusted stakes to maintain the tent’s stability, especially in windy conditions.

By addressing these common issues promptly, you can extend the life of your Northwest Territory tent and ensure a safe and enjoyable camping experience. Always refer to the manual for specific guidance tailored to your tent model.