The Tuya Smart Lock is an advanced intelligent door lock with 4 core patents, supporting multiple languages and available in 159 countries. It integrates biometric recognition and dynamic password technology for enhanced security and convenience, making it a global solution for smart home security needs.
Product Overview
The Tuya Smart Lock is a cutting-edge intelligent door lock designed for global use, supporting multiple languages and available in 159 countries. It features advanced biometric recognition and dynamic password technology, ensuring secure and convenient access. With 4 core patents, this lock integrates seamlessly with the Tuya Smart App, enabling real-time message reporting and local unlocking events without requiring a gateway. Its compatibility with various devices and ease of installation make it a versatile solution for modern smart homes. The lock’s robust security features, including temporary password validity and cloud connectivity, provide users with enhanced control and peace of mind. Its sleek design and intelligent functionality cater to diverse security needs worldwide.

Key Features of Tuya Smart Lock
The Tuya Smart Lock stands out with its advanced biometric recognition technology, offering secure and convenient access. It supports dynamic passwords and temporary authorization, enhancing security for users. Real-time message reporting ensures users are informed about unlocking events without needing a gateway. The lock is compatible with the Tuya Smart App, enabling seamless control and monitoring. With 4 core patents, it provides reliable performance and global accessibility, available in 159 countries. Its intelligent design integrates with modern smart home systems, making it a versatile and secure solution for various security needs. The lock’s advanced features ensure ease of use while maintaining high security standards, catering to a wide range of users worldwide.
Tuya Smart Lock Manual PDF Overview
The Tuya Smart Lock Manual PDF provides essential guidance for installation, setup, and troubleshooting. It serves as a comprehensive guide, ensuring users can easily understand and utilize the lock’s features. Available for download, the manual supports models like YGS-8835B and S1-TYB, offering detailed instructions for optimal performance and configuration.
Importance of the Manual
The Tuya Smart Lock Manual PDF is crucial for understanding and utilizing the lock’s features effectively. It provides detailed instructions for installation, setup, and troubleshooting, ensuring users can resolve issues quickly. The manual covers essential aspects like biometric recognition, dynamic passwords, and real-time reporting, helping users maximize security and convenience. Available for models such as YGS-8835B and S1-TYB, the guide is a go-to resource for optimal performance. By following the manual, users can ensure proper configuration and maintain their lock’s functionality, making it indispensable for both new and experienced users seeking to enhance their smart home security experience.
How to Download the Manual
To download the Tuya Smart Lock Manual PDF, visit the official Tuya website or authorized platforms. Scan the provided QR code or search for “Tuya Smart Lock Manual” in your browser. Models like YGS-8835B and S1-TYB have dedicated PDF guides available for download. Ensure you select the correct model to access accurate instructions. The manual is also accessible via the Tuya Smart App by navigating to the support or settings section. Downloading the manual ensures easy installation, setup, and troubleshooting, making it essential for optimal lock performance and user experience. Always verify the source to avoid unauthorized versions and maintain security.
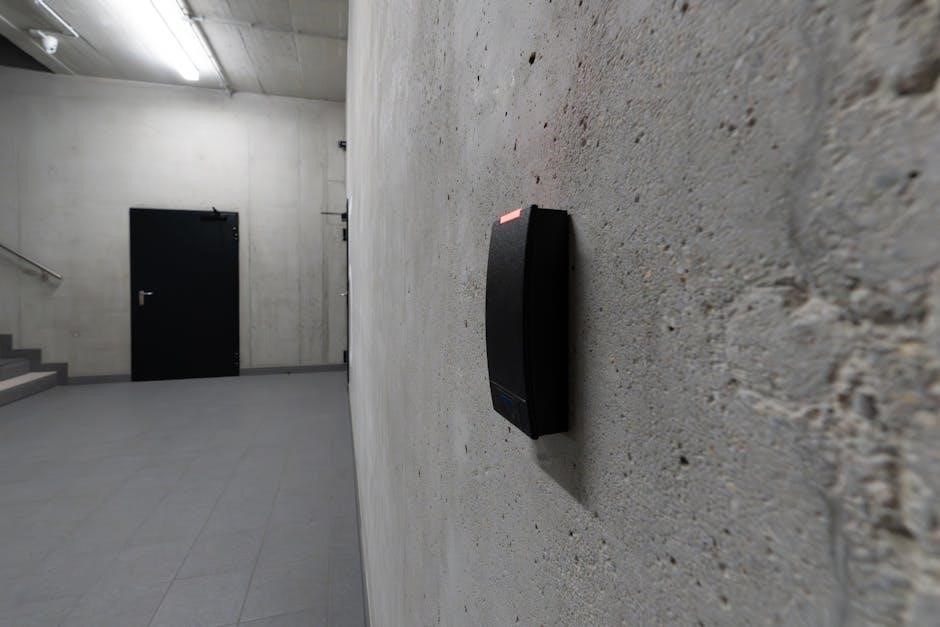
Installation of Tuya Smart Lock
The Tuya Smart Lock installation is straightforward with the manual PDF, guiding hardware setup and software pairing via Bluetooth. It features biometric recognition and is available globally for enhanced security.
Hardware Installation Steps
Installing the Tuya Smart Lock involves several straightforward steps. First, prepare the necessary tools, such as a screwdriver and measuring tape. Remove the old lock and align the new smart lock with the door’s pre-drilled holes. Secure the lock body using screws, ensuring proper alignment. Next, install the handle or lever, making sure it fits snugly. Connect the cable to the lock and the external handle. Finally, test the lock to ensure it functions correctly. Follow the manual PDF for detailed diagrams and specific instructions tailored to your door type. Proper installation ensures smooth operation and optimal security features.
Software Setup and Pairing
After hardware installation, download and install the Tuya Smart App from the app store or by scanning the provided QR code. Open the app and create an account or log in if you already have one. Enable Bluetooth on your device and ensure the lock is in pairing mode. The app will automatically detect the lock and guide you through the pairing process. Follow the in-app instructions to complete the setup, ensuring the lock is connected to your Wi-Fi network. Once paired, you can configure settings, manage passwords, and enable biometric recognition through the app. The manual PDF provides detailed steps for a seamless setup experience.
Connecting the Lock to Wi-Fi
Connect the Tuya Smart Lock to your Wi-Fi network by enabling Bluetooth on your phone and opening the Tuya Smart App. The app will guide you through the pairing process. Ensure the lock is in pairing mode and follow the in-app instructions to connect it to your Wi-Fi. The lock directly connects to your router without requiring a gateway, enabling real-time message reporting of local unlocking events to the cloud. Once connected, you can monitor and control the lock remotely via the app. The manual PDF provides detailed steps for a smooth Wi-Fi setup, ensuring optimal performance and connectivity for your smart lock.

Using the Tuya Smart App
The Tuya Smart App enables seamless control of your smart lock, offering real-time notifications, remote monitoring, and customizable settings. Download and install the app to manage your lock efficiently, ensuring enhanced security and convenience for your smart home experience.
Downloading and Installing the App
To begin using the Tuya Smart Lock, download the Tuya Smart App from the app store or by scanning the provided QR code. Ensure your device has Bluetooth enabled for seamless connectivity. Once downloaded, install the app and grant necessary permissions, such as autostart and battery usage detection, to ensure proper functionality. For Android users, a notification test message may appear; follow the prompts to enable these settings. After installation, open the app and prepare to pair it with your Tuya Smart Lock. This step is essential for unlocking the full range of smart features and remote monitoring capabilities. Proper installation ensures a smooth and secure user experience.
Pairing the Lock with the App
To pair the Tuya Smart Lock with the app, start by enabling Bluetooth on your smartphone. Open the Tuya Smart App and navigate to the device pairing section. Activate the lock’s keyboard to initiate the pairing process. The app will automatically detect and display the lock as a nearby device. Select the lock from the list to establish a connection. Follow the in-app instructions to complete the pairing process. Once paired, the lock will be fully integrated with the app, allowing you to control and monitor it remotely. Ensure a stable internet connection for smooth communication between the lock and the app. This step is crucial for unlocking advanced features like biometric recognition and real-time notifications.

Navigating the App Interface
The Tuya Smart App features an intuitive interface designed for easy navigation. Upon opening the app, the home screen displays all connected devices, including the smart lock. Users can access lock controls, notification settings, and customization options through the menu. The app allows users to toggle between different sections, such as device control, settings, and notifications, with clear icons and labels. The lock’s status, including battery level and security alerts, is prominently displayed. Users can also customize the interface by rearranging devices or adjusting notification preferences. Real-time updates and alerts ensure users stay informed about their lock’s activity, providing a seamless and user-friendly experience for managing their smart lock.
Key Features of Tuya Smart Lock
The Tuya Smart Lock offers biometric recognition, temporary authorization, and real-time message reporting. It supports dynamic passwords and is compatible with the Tuya Smart App globally.
Biometric Recognition Technology
The Tuya Smart Lock features advanced biometric recognition, enabling secure and convenient access through fingerprint scanning. This technology ensures quick and accurate identification, eliminating the need for keys or passwords. With its intelligent recognition capabilities, the lock provides enhanced security and ease of use. The biometric system is designed to work seamlessly, offering a reliable and efficient solution for smart home security. This feature is particularly useful for busy individuals seeking a hassle-free locking mechanism. The integration of biometric technology makes the Tuya Smart Lock a modern and innovative solution for home security needs.
Temporary Authorization and Password Management
The Tuya Smart Lock offers dynamic password and temporary password validity features, enhancing security and flexibility. Users can grant temporary access to guests or service providers with time-limited passwords, ensuring secure entry without compromising long-term security. The system supports real-time reporting of local unlocking events, providing transparency and control. Through the Tuya Smart App, users can easily manage and revoke temporary authorizations, ensuring only authorized individuals gain access. This feature is particularly useful for homeowners, property managers, and businesses needing to grant limited access. The password management system is intuitive, allowing seamless adjustments to access permissions as needed.
Real-Time Message Reporting
The Tuya Smart Lock provides real-time message reporting, ensuring users are informed about all unlocking events instantly. Without requiring a gateway, the lock directly connects to a router, enabling local unlocking events to be reported to the cloud in real time. This feature enhances security by keeping users updated on who accesses their property and when. Notifications are sent through the Tuya Smart App, offering peace of mind and immediate awareness of any lock activity. This real-time reporting is a key aspect of the lock’s advanced security features, ensuring users are always informed and in control of their home’s access points.

Advanced Security Features
The Tuya Smart Lock offers advanced security with dynamic passwords and temporary password validity, ensuring secure access and preventing unauthorized entry, enhancing overall protection for your property.
Dynamic Password and Temporary Password Validity
The Tuya Smart Lock features dynamic passwords and temporary password validity, enhancing security by ensuring that each access code is unique and time-limited. This prevents unauthorized access and reduces the risk of password compromise. Temporary passwords can be set for guests or service providers, granting access for a specific period without revealing the main password. The dynamic password system generates one-time codes, adding an extra layer of protection against potential breaches. These features are managed seamlessly through the Tuya Smart App, allowing users to control and monitor access efficiently. This advanced security measure ensures that your property remains protected with cutting-edge technology.
Local Unlocking Event Reporting
The Tuya Smart Lock offers real-time local unlocking event reporting without requiring a gateway, ensuring users are informed immediately. By connecting directly to a router, the lock reports all local unlocking events to the cloud, providing seamless monitoring. This feature enhances security by keeping users updated on who accesses their property. Notifications are sent through the Tuya Smart App, allowing for remote monitoring and peace of mind. The system ensures that every unlock event is documented and communicated promptly, offering a reliable and efficient way to track access. This real-time reporting capability is a key feature that sets the Tuya Smart Lock apart in smart home security solutions.
Cloud Connectivity for Remote Monitoring
The Tuya Smart Lock leverages cloud connectivity to enable remote monitoring, providing users with real-time updates and notifications. Through the Tuya Smart App, users can monitor their lock’s status from anywhere, ensuring enhanced security and convenience. The lock directly connects to a router, eliminating the need for a gateway, and reports local unlocking events to the cloud. This seamless integration allows for instant notifications, keeping users informed about access events. The cloud-based system ensures that users can manage and monitor their smart lock remotely, offering peace of mind and advanced security features. This connectivity is a cornerstone of the Tuya Smart Lock’s functionality, making it a robust solution for modern smart home security needs.
Troubleshooting Common Issues
The Tuya Smart Lock manual provides solutions for connectivity problems, sensor malfunctions, and resetting the lock to factory settings, ensuring smooth operation and resolving common issues effectively.
Connectivity Problems and Solutions
Connectivity issues with the Tuya Smart Lock often arise from unstable Wi-Fi connections or incorrect network configurations. Ensure the lock is connected to a stable router and the Wi-Fi password is entered correctly. If the lock fails to pair with the Tuya Smart App, restart the router and ensure Bluetooth is enabled on your device. Check that the lock is in pairing mode and within range of the network. If problems persist, re-register the device in the app or perform a factory reset. Regularly update the lock’s firmware to maintain optimal connectivity. For persistent issues, consult the manual or contact Tuya support for assistance.
Sensor Malfunction and Repair Tips
Sensor malfunctions in the Tuya Smart Lock can occur due to dirt, misalignment, or firmware issues. Clean the sensors regularly with a soft cloth to ensure accurate readings. If the lock’s biometric or proximity sensors are unresponsive, check for proper alignment and ensure no obstructions are present. Restarting the lock or resetting it to factory settings may resolve software-related issues. For persistent problems, update the lock’s firmware via the Tuya Smart App. If hardware damage is suspected, contact Tuya support for professional repair or replacement. Refer to the manual for detailed troubleshooting steps to address sensor-related issues effectively and maintain optimal functionality.
Resetting the Lock to Factory Settings
Resetting the Tuya Smart Lock to factory settings restores it to its original configuration, erasing all user data and customized settings. To reset, locate the small reset button on the lock’s interior, typically near the battery compartment. Using a pin or similar tool, press and hold the reset button for 5-10 seconds until the lock’s indicator light flashes. Release the button and wait for the lock to reboot. Once completed, all previously saved passwords, biometric data, and Wi-Fi connections will be cleared. The lock will revert to its default state, requiring re-pairing with the Tuya Smart App. Refer to the manual for detailed instructions to ensure a successful reset and reconfiguration.
Customization and Settings
Customize user access, adjust sensitivity, and manage permissions for enhanced convenience and security. Tailor settings to fit your preferences for optimal performance and personalized control.
Adjusting Lock Sensitivity and Settings
Adjusting the sensitivity and settings of your Tuya Smart Lock ensures optimal performance. Through the Tuya Smart App, users can fine-tune sensitivity levels to prevent false triggers. The lock allows customization of notification preferences, such as real-time alerts for unlocking events. Additionally, sensitivity calibration can be performed during installation to adapt to specific door conditions. The manual provides detailed steps for adjusting these settings, ensuring a seamless user experience. By personalizing these configurations, users can enhance both security and convenience, tailoring the lock’s behavior to their unique needs. Regular updates and app notifications ensure settings remain optimized for reliable operation.
Customizing User Access and Permissions
The Tuya Smart Lock allows users to customize access and permissions, ensuring enhanced security and convenience. Through the Tuya Smart App, users can easily add or remove authorized individuals, set temporary access permissions, and revoke access when needed. Temporary authorization features, such as dynamic passwords and validity periods, provide flexibility for guests or service providers. The lock also supports real-time notifications, alerting users to any changes in access settings. By personalizing user permissions, homeowners can ensure only trusted individuals gain entry. The manual provides step-by-step guidance on configuring these settings, making it easy to tailor access controls to specific needs. This feature-rich system offers both security and flexibility for modern lifestyles.

Maintenance and Care
Regular cleaning with a soft cloth and avoiding harsh chemicals ensures the lock’s longevity. Inspect and replace batteries as needed, using compatible types. Check for firmware updates to maintain optimal performance and security.
Cleaning and Physical Maintenance
Regular cleaning is essential to maintain the Tuya Smart Lock’s functionality and appearance. Use a soft, dry cloth to wipe the exterior, avoiding harsh chemicals or abrasive materials. For the biometric sensor, gently clean with a slightly damp cloth to remove fingerprints or residue. Ensure the keypad is free from dust and debris for smooth operation. Avoid exposing the lock to direct water or excessive moisture. Check the manual for specific cleaning solutions recommended by the manufacturer. Additionally, inspect the lock’s physical components periodically for wear and tear. Lubricate hinges if necessary, and ensure all parts are securely fastened. Proper maintenance ensures long-term reliability and performance.
Battery Care and Replacement
Proper battery care is crucial for maintaining the Tuya Smart Lock’s performance. Use high-quality, rechargeable batteries recommended in the manual to ensure optimal functionality. Avoid exposing batteries to extreme temperatures or moisture, as this can reduce their lifespan. Check battery voltage regularly and replace them when the lock indicates low power. To replace batteries, open the compartment carefully, ensuring no damage to internal components. Dispose of old batteries responsibly. Refer to the manual for specific guidelines on compatible battery types and replacement procedures. Regular maintenance ensures uninterrupted operation and extends the lock’s service life. Always follow safety precautions when handling batteries to avoid any potential risks.
The Tuya Smart Lock offers unparalleled convenience and security, making it an essential upgrade for modern homes. Follow the manual for optimal performance and peace of mind.
The Tuya Smart Lock manual PDF provides a comprehensive guide to installing, configuring, and troubleshooting the lock. It ensures seamless integration with the Tuya Smart App, enabling features like biometric recognition, dynamic passwords, and real-time message reporting. The manual helps users maximize security and convenience, offering step-by-step instructions for setup and maintenance. With global compatibility and advanced technology, the Tuya Smart Lock enhances home security while simplifying daily access. The manual is an essential resource for optimizing the lock’s performance and ensuring a hassle-free experience. By following the guide, users can fully utilize the lock’s innovative features and enjoy enhanced peace of mind.
Final Tips for Optimal Usage
For optimal use of the Tuya Smart Lock, ensure regular software updates and refer to the manual for troubleshooting. Adjust sensitivity settings to prevent false triggers and customize user access for enhanced security. Regularly clean the lock’s surface and maintain battery health to avoid performance issues. Utilize the Tuya Smart App for remote monitoring and enable notifications for real-time updates. Always test dynamic passwords and temporary authorizations to ensure functionality. For any issues, consult the manual or contact support. By exploring all features and following these tips, users can maximize the lock’s potential and enjoy a seamless, secure experience with their Tuya Smart Lock.