Welcome to the Pit Boss Manual, your ultimate guide to mastering pellet grilling and smoking. This comprehensive resource offers detailed assembly instructions, operating tips, and troubleshooting solutions to ensure optimal performance. Discover safety guidelines, maintenance advice, and expert techniques to enhance your grilling experience. Download the PDF now for instant access to everything you need to get the most out of your Pit Boss Grill.
1.1 Overview of the Pit Boss Grill and Smoker
The Pit Boss Grill and Smoker is a versatile cooking solution designed for both grilling and smoking. Known for its durability and advanced features, it combines the convenience of a pellet grill with the rich flavor of traditional smoking. The grill features a digital control board for precise temperature management and a robust construction that ensures long-lasting performance. Whether you’re a novice or an experienced griller, the Pit Boss offers a user-friendly experience. Its ability to handle a wide range of cooking techniques makes it a popular choice for outdoor enthusiasts. Download the manual to explore its full potential.
1.2 Importance of the Pit Boss Manual
The Pit Boss Manual is essential for maximizing the performance and longevity of your grill. It provides detailed assembly instructions, operating guidelines, and troubleshooting tips to ensure a seamless grilling experience. The manual also includes safety precautions and maintenance advice to prevent common issues. By following the guide, users can avoid costly mistakes and optimize their cooking results. Whether you’re assembling, operating, or maintaining your Pit Boss Grill, the manual serves as an invaluable resource. Download the PDF to unlock expert tips and ensure your grill operates at its best for years to come.
1.3 Benefits of Downloading the Pit Boss Manual PDF
Downloading the Pit Boss Manual PDF offers unparalleled convenience and accessibility. It provides instant access to detailed assembly instructions, operating guidelines, and troubleshooting tips. The digital format allows for easy navigation and quick reference, ensuring you can address any issue swiftly. Additionally, the PDF includes expert grilling techniques and maintenance advice to enhance your cooking experience. By downloading the manual, you gain a comprehensive resource that helps you maximize your grill’s potential, avoid common mistakes, and enjoy optimal performance for years to come.

Assembly and Operation Instructions
This section provides a detailed guide to assembling and operating your Pit Boss Grill. It includes lists of required tools, step-by-step assembly instructions, and essential operation tips.
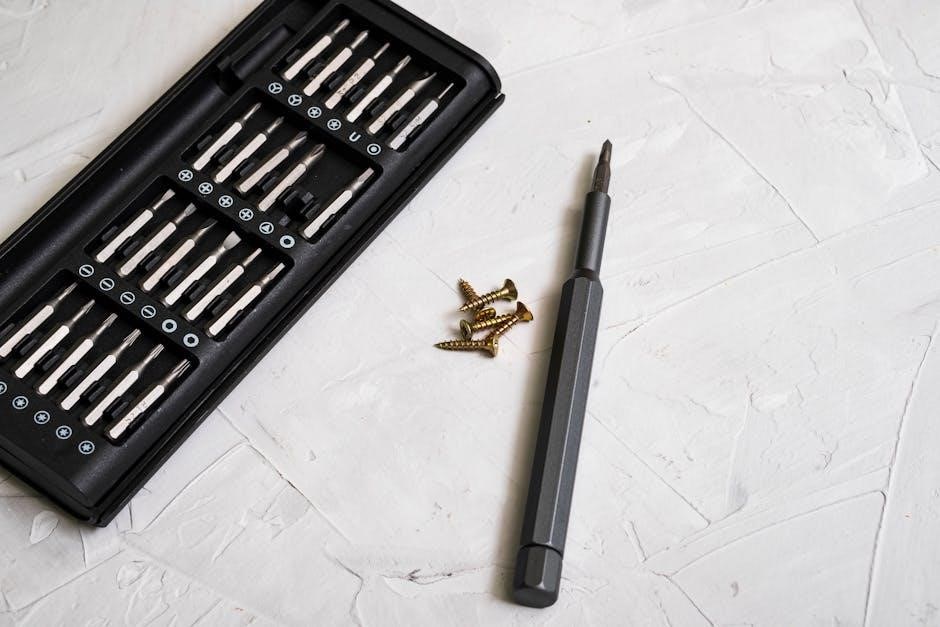
2.1 Tools and Materials Required for Assembly
Assembling your Pit Boss Grill requires specific tools and materials to ensure a smooth process. Essential tools include a screwdriver, wrench, and pliers, while materials like screws, bolts, and washers are provided. Additional items such as a power source, wood pellets, and protective gloves are recommended. Refer to the manual for a detailed list to avoid missing any components. Proper preparation ensures a hassle-free assembly experience and optimal grill performance. Make sure all parts are accounted for before starting the assembly process.
2.2 Step-by-Step Assembly Guide for Pit Boss Grills
Begin by unpacking and organizing all components. Follow the manual’s visual guide to attach legs, wheels, and handles securely. Next, connect the hopper to the main grill unit, ensuring proper alignment. Install the heat deflector and flame broiler, then connect electrical components like the control panel. Tighten all bolts and screws firmly. Finally, test the ignition and auger system to ensure everything functions correctly. Refer to the PDF manual for detailed diagrams and step-by-step instructions to complete the assembly efficiently and safely.
2.3 Operating Instructions for Pit Boss Pellet Grills
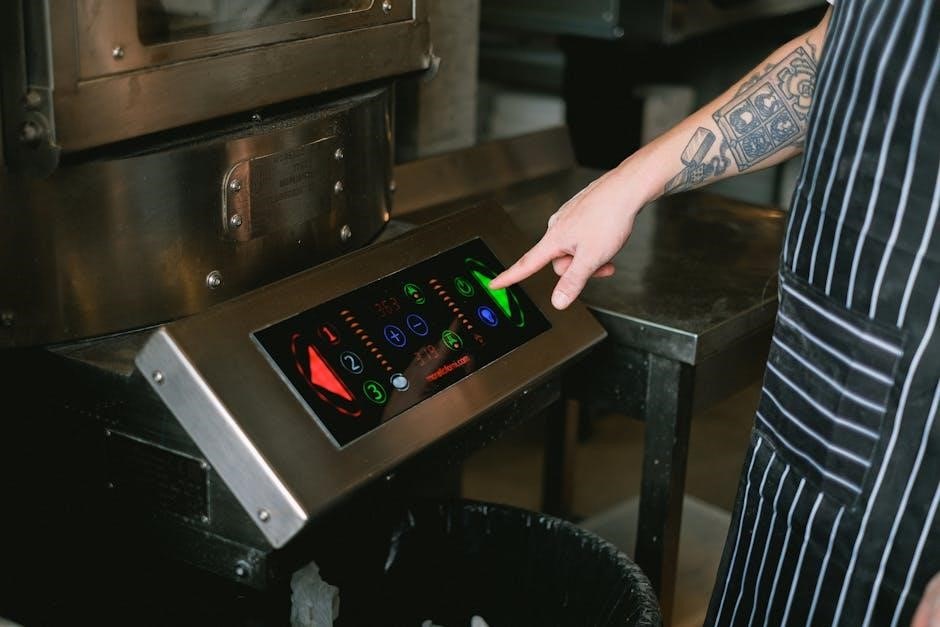
Start by powering on the grill and setting your desired temperature using the control panel. Allow the grill to preheat for 10-15 minutes. Load the hopper with recommended wood pellets, ensuring proper flow; Select smoke or grill mode based on your preference. Adjust temperature settings as needed and monitor the internal temperature gauge. Place food on the grates, leaving space for even cooking. Use the digital controls to maintain consistent heat. After cooking, turn off the grill and let it cool before cleaning. Refer to the manual for detailed operating tips and safety precautions.

Safety Tips and Precautions
Always use natural BBQ wood pellets and ensure proper ventilation. Keep the grill clean and avoid modifications. Monitor temperature and follow manual guidelines for safe operation.
3.1 General Safety Guidelines for Pit Boss Grills
Always read the manual before use. Ensure proper ventilation and keep the grill away from flammable materials. Use only natural BBQ wood pellets designed for pellet grills. Regularly clean and maintain the grill to prevent grease buildup. Never leave the grill unattended while in operation. Monitor temperature settings to avoid overheating. Keep children and pets away from the grill. Avoid modifications to the grill, as this can void the warranty and create safety hazards. Follow all guidelines in the Pit Boss manual to ensure safe and enjoyable grilling experiences.
3.2 Proper Use of Wood Pellets in Pit Boss Grills
Use only 100% natural BBQ wood pellets specifically designed for pellet grills. Avoid using treated or softwoods, as they can release harmful chemicals. Store pellets in a dry, cool place to maintain quality. Ensure the hopper is filled correctly, and always clean out old pellets before adding new ones. Proper pellet usage enhances flavor and ensures efficient burning. Follow the manual’s guidelines for pellet storage and handling to optimize performance and safety. Experiment with different wood pellet flavors to achieve unique and delicious results for your grilling and smoking needs.
3.3 Maintenance and Cleaning for Safe Operation
Regular cleaning and maintenance are crucial for safe and efficient operation of your Pit Boss Grill. Clean the grates, burn pot, and grease traps after each use to prevent residue buildup. Inspect and clear the auger and fire pot regularly to ensure proper pellet flow. Always unplug the grill before cleaning and avoid using abrasive materials that could damage surfaces. Proper maintenance prevents rust, reduces fire risks, and maintains optimal performance. Follow the manual’s cleaning guidelines to extend the life of your grill and ensure a safe grilling experience. Regular upkeep is key to achieving consistent results and longevity.

Troubleshooting Common Issues
Identify and resolve common Pit Boss Grill issues like auger jams, ignition failures, and temperature fluctuations. Refer to the manual for step-by-step solutions and expert advice.
4.1 Common Problems with Pit Boss Grills
Pit Boss grills may encounter issues like auger jams, ignition failures, and temperature fluctuations. These problems often arise from improper assembly, pellet quality, or lack of maintenance. Regular cleaning of the auger and burn pot can prevent jams. Ignition issues may stem from faulty wiring or a clogged fire pot. Temperature fluctuations can be addressed by ensuring proper airflow and using high-quality pellets. Refer to the manual for troubleshooting steps to resolve these common problems and maintain optimal grill performance.
4.2 Solutions for Auger and Ignition Issues
To address auger jams, clean the auger and ensure pellets are dry. For ignition problems, check the fire pot for blockages and verify proper power supply. If issues persist, perform a manual start-up by lighting the pellets with a torch. Regularly inspect and clean the auger motor and ignition components. Ensure the grill is on a level surface and pellets are of high quality. Refer to the Pit Boss manual for detailed troubleshooting steps to resolve these issues effectively and maintain smooth operation.
4.3 Troubleshooting Temperature Control Problems
Temperature fluctuations can often be resolved by ensuring the grill is clean and free of debris. Check the RTD sensor for accuracy and clean it if necessary. Verify that the pellet hopper is filled with high-quality pellets, as poor pellet quality can disrupt temperature control. Ensure proper airflow by keeping the lid closed during cooking and checking for blockages in the chimney or vents. If issues persist, reset the grill to factory settings or consult the Pit Boss manual for advanced troubleshooting steps to restore precise temperature management.

Pellet Management and Usage
Proper pellet management ensures optimal grilling performance. Use only high-quality, all-natural wood pellets designed for pellet grills. Store pellets in a dry, cool place to maintain flavor and burn efficiency. Regularly clean the hopper and auger to prevent jams. The priming function helps initialize pellet flow, ensuring smooth startups. Always follow the manual’s guidelines for pellet usage to achieve consistent results and enhance your grilling experience.
5.1 Choosing the Right Wood Pellets for Your Grill
Selecting the right wood pellets is crucial for optimal grilling performance. Use only 100% natural, food-grade pellets specifically designed for pellet grills. Avoid additives or fillers, as they can compromise flavor and grill efficiency. Hardwood pellets like hickory, oak, and maple are popular for their rich, smoky flavors. Softwoods, however, are not recommended due to resin content. Store pellets in a dry, cool place to preserve quality. Experiment with different wood types to find the perfect flavor profile for your dishes. Proper pellet selection enhances both taste and grill longevity.
5.2 Understanding the Priming Function on Pit Boss Grills
The Priming function on Pit Boss grills allows manual control of the auger speed, ensuring consistent pellet flow. This feature is essential for starting the grill, especially when cold, as it helps establish a steady flame. Proper priming prevents stalls and maintains optimal temperature. Regular use of this function ensures efficient pellet burning and even heat distribution. It also serves as a diagnostic tool to check auger performance. Mastering the priming process enhances your grilling experience and guarantees reliable operation of your Pit Boss grill.
5.3 Tips for Efficient Pellet Burning
For efficient pellet burning, use only all-natural BBQ wood pellets designed for pellet grills; Ensure pellets are dry and stored properly to maintain quality. Regularly clean the grill, including the burn pot and auger, to prevent blockages. Proper priming of the auger before cooking ensures consistent pellet flow. Monitor pellet consumption and adjust cooking times based on pellet quality. Always follow the manufacturer’s guidelines for pellet usage and maintenance to optimize performance and flavor. These practices ensure your Pit Boss grill operates efficiently and delivers exceptional results every time.

Advanced Grilling Techniques
Master advanced grilling techniques with Pit Boss, focusing on smoke and temperature control. Explore expert tips for achieving perfect flavors and discovering new cooking possibilities.
6.1 Mastering Smoke and Temperature Control
Mastering smoke and temperature control is key to achieving perfect grilling results. The Pit Boss Manual provides detailed insights into optimizing your grill’s performance. Learn how to use the digital control system for precise temperature management and understand the role of wood pellets in generating consistent smoke. Discover tips for maintaining steady heat during long cooks and how to adjust settings for different types of meat. Proper pellet management and regular cleaning ensure efficient smoke production. Experiment with various pellet flavors to enhance your dishes and explore advanced techniques for smoke infusion.
6.2 Advanced Cooking Methods with Pit Boss Grills
Take your grilling skills to the next level with advanced cooking methods tailored for Pit Boss Grills. Explore techniques like low-and-slow cooking, pellet blending, and precision temperature control. Learn how to achieve tender, flavorful meats by mastering the art of smoke layering. The Pit Boss Manual guides you through advanced pellet management, ensuring consistent results. Discover how to utilize the priming function for optimal startup and temperature stability. Experiment with indirect and direct heat cooking to diversify your culinary creations. Elevate your grilling game with these expert methods and unlock new possibilities for delicious, restaurant-quality dishes at home.
6.3 Expert Tips for Achieving Perfect Grilled Flavors
Elevate your grilling game with expert tips for achieving mouthwatering flavors. Start by selecting high-quality, all-natural wood pellets that complement your dish. Preheat your Pit Boss Grill to the ideal temperature for even cooking. Experiment with pellet blending to create unique smoke profiles. Don’t forget to clean and maintain your grill regularly to prevent residue from altering flavors. Master the balance between smoke and heat for a perfect sear. Finally, explore advanced pellet management techniques to ensure consistent fuel flow and optimal flavor distribution. These tips will help you craft unforgettable, professionally grilled meals every time.

Accessories and Replacement Parts
Enhance your Pit Boss Grill with genuine accessories and replacement parts. Explore options like grill covers, pellet storage solutions, and upgraded features to optimize performance and longevity. Visit the official Pit Boss website for authentic products designed to elevate your grilling experience. Ensure compatibility and quality by choosing verified accessories tailored for your specific model. Upgrading your grill has never been easier with a wide range of available enhancements. Maintain peak performance with durable, long-lasting replacement parts. Discover the perfect additions to take your grilling to the next level.
7.1 Recommended Accessories for Pit Boss Grills
Enhance your grilling experience with Pit Boss-approved accessories. Essential items include durable grill covers, pellet storage solutions, and flavor-enhancing wood pellet varieties. Upgrade your setup with a grill cart, front shelf, or smokebox for added convenience. Maintenance kits, including brushes and cleaning tools, help keep your grill in top condition. Explore Pit Boss’s official range of accessories to find the perfect additions for your model. These products are designed to optimize performance, durability, and versatility, ensuring your grill continues to deliver exceptional results for years to come. Elevate your grilling game with these must-have accessories.
7.2 Finding Replacement Parts for Your Pit Boss Grill
Locating replacement parts for your Pit Boss Grill is straightforward. Visit the official Pit Boss website or authorized retailers to find genuine components. Use your grill’s model number to search for specific parts, such as burn pots, heat deflectors, or igniter kits. The Pit Boss manual PDF also provides part diagrams and descriptions to help identify what you need. Ensure compatibility by purchasing only Pit Boss-approved parts to maintain safety and performance. For assistance, contact Pit Boss customer support or refer to their online resources for guidance.
7.3 Upgrading Your Pit Boss Grill with Additional Features
Enhance your grilling experience by upgrading your Pit Boss Grill with accessories like grill covers, pellet hoppers, or temperature control systems. The Pit Boss manual PDF highlights compatible upgrades to improve performance and versatility. Visit the official Pit Boss website or authorized retailers to explore options tailored to your model. Upgrades like smoke boxes or grill mats can also elevate your cooking capabilities. Always ensure compatibility and follow installation guidelines to maintain warranty and safety standards. Upgrading is a great way to customize your grill and achieve even better results.

Downloading the Pit Boss Manual
Access the Pit Boss Manual PDF for free, offering detailed guides, troubleshooting, and expert tips. Download instantly for easy-to-follow instructions to enhance your grilling experience.
8.1 How to Download the Pit Boss Manual PDF
To download the Pit Boss Manual PDF, visit the official Pit Boss website and navigate to the “Support” or “Manuals” section. Select your specific grill model from the list to access the corresponding PDF. Click the download link to save the manual to your device. Ensure you have a PDF reader installed to view the guide. This free resource provides detailed assembly instructions, operating tips, and troubleshooting solutions. Download now to unlock expert grilling techniques and maintain your grill’s optimal performance effortlessly.
8.2 Navigating the Pit Boss Official Website
Navigating the Pit Boss official website is straightforward and user-friendly. Start by visiting pitboss-grills.com and explore the menu options. Click on “Support” or “Manuals” to find downloadable resources. Use the search bar to quickly locate your specific grill model. Browse through product categories or visit the “Products” section for detailed information. The website also offers a “Where to Buy” feature and access to customer support. Easily find replacement parts, accessories, and guides to enhance your grilling experience. The site is designed to provide a seamless experience for Pit Boss users.
8.3 Benefits of Having a Digital Copy of the Manual
A digital copy of the Pit Boss manual offers unparalleled convenience. Access it instantly from any device, eliminating the need for physical storage. Easily search for specific topics using keywords, saving time and effort. The PDF format ensures clarity and readability on screens of all sizes. Plus, digital copies are environmentally friendly and can be shared or printed as needed. Having a digital manual ensures you always have critical information at your fingertips, making grilling and troubleshooting effortless and efficient.
Mastering your Pit Boss Grill is now within reach. With the manual, ensure safety, efficiency, and delicious results. Happy grilling and enjoy your culinary adventures!

9.1 Summary of Key Points
The Pit Boss Manual is a comprehensive guide designed to help users maximize their grilling experience. It covers assembly, operation, safety, and maintenance, ensuring safe and efficient use. The manual also provides troubleshooting tips and pellet management advice, while offering advanced techniques for mastering smoke and temperature control. By following the guidelines, users can achieve perfect grilled flavors and extend the lifespan of their grill. Downloading the PDF ensures easy access to expert tips and solutions, making it an essential resource for both beginners and experienced grillers.
9.2 Final Tips for Getting the Most Out of Your Pit Boss Grill
To maximize your Pit Boss Grill experience, always use high-quality, all-natural wood pellets for optimal flavor. Regularly clean and maintain your grill to prevent damage and ensure smooth operation. Experiment with different cooking techniques and pellet flavors to explore new recipes. Utilize the priming function to control the auger speed for consistent fuel flow. Keep the manual handy for troubleshooting and guidance. By following these tips, you’ll achieve professional-grade results and extend the lifespan of your grill, making every grilling session a success.
9.3 Encouragement to Explore More Grilling Possibilities
Embrace the endless possibilities your Pit Boss Grill offers! Experiment with new recipes, pellet flavors, and cooking techniques to elevate your grilling game. From smoking tender brisket to searing perfect steaks, your creativity is the limit. Don’t hesitate to try unconventional dishes like smoked desserts or roasted vegetables. Share your creations and learn from the grilling community to inspire fresh ideas. With the Pit Boss Manual as your guide, keep exploring, innovating, and enjoying the art of grilling. The journey to culinary mastery is just beginning!