
Welcome to the VEVOR Heat Press Manual‚ your comprehensive guide to mastering heat press operations. This manual covers setup‚ operation‚ safety‚ and maintenance for optimal performance. Perfect for beginners and experienced users alike‚ it ensures smooth and efficient heat pressing experiences.
Key Features and Specifications
The VEVOR Heat Press is designed for versatility and efficiency‚ offering a range of models such as the F910‚ 15×15‚ and 8-in-1 machines. These presses feature digital temperature control (up to 210°C/410°F) and adjustable pressure settings for precise results. The 15×15 inch heating plate is ideal for large projects‚ while the 8-in-1 model includes interchangeable platens for hats‚ mugs‚ and small items. Built with durable materials‚ these machines ensure consistent performance. The user-friendly interface and quick heating function make them suitable for both beginners and professionals. Compatibility with heat transfer vinyl (HTV)‚ sublimation‚ and transfer papers expands their creative possibilities. Refer to the manual for specific model details and technical specifications to maximize your heat pressing experience.
Safety Precautions and Guidelines
Before operating the VEVOR Heat Press‚ ensure you follow all safety guidelines to avoid accidents. Always read the manual thoroughly and understand the machine’s components. Keep children and pets away during operation. Wear heat-resistant gloves to protect your hands from burns. Ensure proper ventilation in your workspace to prevent inhaling fumes from materials like sublimation ink or heat transfer vinyl. Never leave the machine unattended while it is powered on. Avoid overheating by setting the temperature and timer according to the material’s specifications. The maximum temperature is 210°C (410°F)‚ and the timer can be set up to 999 seconds. If you encounter any issues‚ refer to the troubleshooting section in the manual for solutions.
Installation and Assembly
Welcome to the VEVOR Heat Press Manual installation guide. Begin by unboxing and inventorying all components. Follow the step-by-step assembly instructions carefully‚ ensuring proper placement and alignment. Place the machine on a stable‚ heat-resistant surface and refer to the manual for specific assembly details to ensure safe and correct setup.
4.1 Unboxing and Inventory
Begin by carefully unboxing your VEVOR Heat Press machine and verifying all components. Ensure the package includes the heat press‚ power cord‚ user manual‚ and any additional accessories. Check for the warranty card and contact information for customer support. Inspect each item for damage or defects. Familiarize yourself with the machine’s parts‚ such as the heating plate‚ pressure knob‚ and control panel. Organize the components to ensure a smooth assembly process. If any items are missing or damaged‚ contact VEVOR support immediately. Proper inventory ensures a hassle-free setup and operation experience.
4.2 Step-by-Step Assembly
Start by referring to the VEVOR Heat Press Manual for a detailed parts list and assembly diagram. Ensure all components are included and undamaged. Attach the handle securely to the machine using the provided bolts. Next‚ install the heating plate by aligning it with the base and tightening the screws. Connect the power cord to the designated socket and ensure it is firmly plugged in. If your model includes additional attachments‚ follow the manual’s instructions for proper installation. Double-check all connections and tighten any loose bolts. Finally‚ test the machine by turning it on and ensuring all functions operate smoothly. Proper assembly is crucial for safe and efficient operation.
4.3 Placement and Workspace Setup
Position the VEVOR Heat Press on a stable‚ flat surface‚ ensuring it is level and secure. Choose a location away from flammable materials and with good ventilation to prevent fume inhalation. Keep the workspace clear of clutter to avoid accidents. Place a heat-resistant mat or silicone sheet under the press to protect the surface from heat and spills. Ensure the power cord is safely routed and not tangled. Maintain a comfortable working distance to operate the machine easily. For optimal efficiency‚ organize your tools and materials nearby. Refer to the VEVOR Heat Press Manual for specific placement recommendations to ensure safe and effective operation.
Operating the Heat Press
Adjust the temperature‚ timer‚ and pressure according to your material. Preheat the press‚ place the item‚ and close the lid. Ensure proper alignment and safety precautions.
5.1 Temperature Settings
Proper temperature settings are crucial for achieving optimal results. The VEVOR heat press allows you to adjust temperatures between 200°F to 400°F (90°C to 200°C). For heat transfer vinyl (HTV)‚ set temperatures between 280°F to 300°F (138°C to 149°C). Sublimation printing typically requires higher temperatures‚ around 380°F to 400°F (193°C to 204°C). Always refer to the material manufacturer’s guidelines for specific temperature recommendations. Use the digital control panel to set the desired temperature and ensure the press preheats for 5-10 minutes before use. Proper calibration ensures even heat distribution and prevents damage to your materials or the press itself.
5.2 Time and Pressure Controls
The VEVOR heat press features digital time and pressure controls for precise operation. The timer ranges from 10 to 120 seconds for standard applications‚ while sublimation may require up to 999 seconds. Pressure settings are adjustable via a knob‚ offering low‚ medium‚ or high pressure. For heat transfer vinyl (HTV)‚ medium pressure is typically sufficient‚ while sublimation may require higher pressure. Always calibrate the press by turning the pressure knob counterclockwise to ensure even force distribution. Preheating the press before use ensures optimal results; Refer to the material manufacturer’s guidelines for specific time and pressure recommendations to achieve professional-quality prints every time.
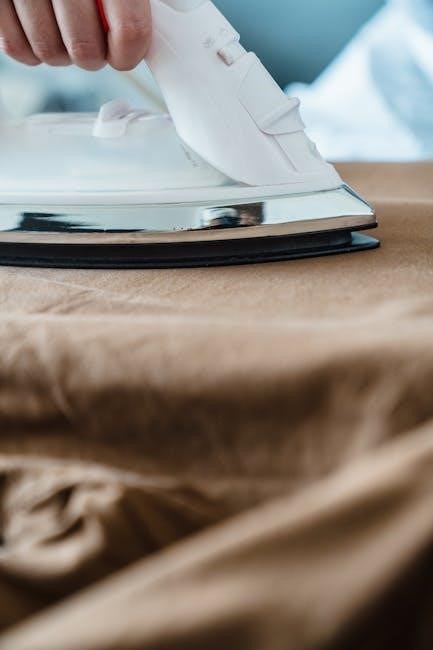
5.3 Basic Operation Steps
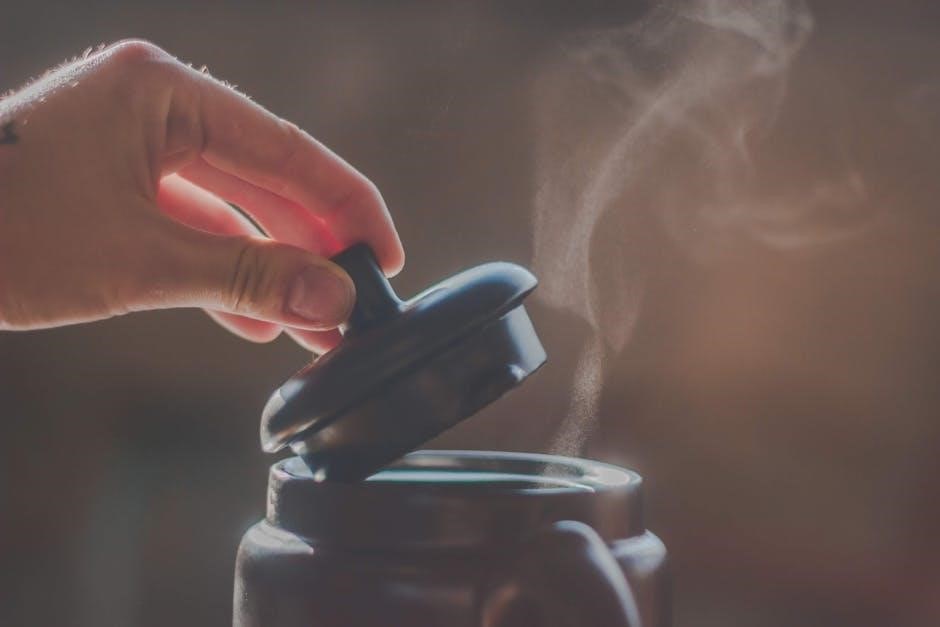
Operating the VEVOR heat press involves a few straightforward steps. First‚ preheat the press to the desired temperature based on your material. Next‚ place the item to be pressed on the lower platen‚ ensuring proper alignment. Set the timer according to the material’s requirements‚ typically between 10 to 999 seconds. Adjust the pressure knob to the recommended setting for your application. Close the press firmly and allow it to complete the cycle. Once the timer beeps‚ carefully open the press and remove the item. Let it cool slightly before handling to ensure the design adheres properly. Always follow the manufacturer’s guidelines for specific materials to achieve the best results.
Common Applications
The VEVOR heat press is ideal for t-shirt printing‚ hat pressing‚ mug and ceramic printing‚ and phone case printing‚ offering versatility for various projects.
6.1 T-Shirt Printing
The VEVOR heat press is perfect for t-shirt printing‚ supporting heat transfer vinyl (HTV) and sublimation. Achieve vibrant‚ long-lasting designs by following the manual’s temperature and pressure guidelines. Ideal for cotton and polyester blends‚ it ensures even heat distribution. Pre-wash fabrics to remove finishes that might affect adhesion. Use the recommended settings for materials like HTV‚ which typically require 300°F ⎻ 320°F and 15-20 seconds. The press’s digital controls allow precise adjustments for consistent results. Troubleshoot issues like peeling by checking pressure and time. This machine is a must-have for crafters and small businesses aiming for professional-quality t-shirt prints.
6.2 Hat Pressing
The VEVOR heat press is ideal for hat pressing‚ offering precise temperature and pressure control for consistent results. Suitable for caps‚ beanies‚ and other headwear‚ it works well with heat transfer vinyl (HTV) and sublimation. Preheat the press to 300°F ⎯ 320°F‚ depending on the material. Use medium to high pressure for optimal adhesion. Place the hat firmly on the press‚ ensuring the design aligns perfectly. Press for 10-15 seconds‚ then allow it to cool before handling. For curved surfaces‚ adjust the pressure knob to avoid uneven application. Achieve professional-quality prints with ease‚ making it perfect for custom hat designs and small business projects.
6.3 Mug and Ceramic Printing
The VEVOR heat press is perfect for mug and ceramic printing‚ allowing you to create vibrant‚ long-lasting designs. Preheat the press to 300°F ⎻ 350°F‚ depending on the material. Use medium pressure and press for 3-5 minutes to ensure proper adhesion. Place the mug firmly on the press‚ ensuring the design aligns with the handle. For curved surfaces‚ adjust the pressure knob to avoid uneven application. Allow the mug to cool before handling. This method works well with sublimation and heat transfer vinyl (HTV). Follow the manual’s guidelines for specific materials to achieve professional-quality results‚ ideal for personalized gifts or small business projects.
6.4 Phone Case and Small Items
The VEVOR heat press is ideal for customizing phone cases and small items. Preheat the press to 300°F ⎻ 320°F‚ depending on the material. Use medium to low pressure to avoid damaging delicate surfaces. Place the phone case on the press‚ ensuring the design aligns perfectly. Press for 2-3 minutes to ensure proper adhesion. For curved or uneven surfaces‚ use a silicone pad for even pressure distribution. This method works well with sublimation and heat transfer vinyl (HTV). Follow the manual’s guidelines for specific materials to achieve professional-quality results‚ perfect for personalized phone cases‚ keychains‚ or other small accessories.
Maintenance and Upkeep
Regular maintenance is crucial to ensure the longevity and efficiency of your VEVOR heat press. Start by cleaning the heat press after each use with a soft cloth to remove any residue or debris. Avoid using harsh chemicals‚ as they may damage the surface. Lubricate the moving parts periodically to prevent wear and tear. Check the power cord and plug for any damage or fraying and replace them if necessary. Inspect the heating elements and pressure adjustments regularly to ensure proper alignment and function. Store the machine in a dry‚ cool place when not in use to protect it from moisture and dust. Follow these tips to maintain your heat press and ensure optimal performance for years to come.
Troubleshooting Common Issues
Identify and resolve common issues with your VEVOR heat press by checking temperature‚ pressure‚ and time settings. Ensure proper alignment and consult the manual for solutions to ensure optimal performance.
8.1 Identifying and Diagnosing Problems
Start by checking the power supply and ensuring all connections are secure. If the heat press doesn’t turn on‚ verify the outlet and power cord. For temperature issues‚ ensure the thermostat is calibrated correctly. If the material doesn’t stick‚ review pressure settings and heating times. Check for error codes or unusual noises‚ which may indicate mechanical issues. Refer to the troubleshooting section in the VEVOR heat press manual for specific guidance. Always consult the manual before attempting repairs to avoid further damage. If problems persist‚ contact VEVOR customer support for professional assistance.
8.2 Solutions and Repairs
For power issues‚ ensure the machine is properly plugged in and the outlet is functioning. If the heat press overheats‚ allow it to cool down before restarting. Adjust the temperature and pressure settings according to the VEVOR manual guidelines. For sticking issues‚ clean the platens with a soft cloth and ensure proper alignment. If the machine doesn’t press evenly‚ check the pressure knob and tighten any loose parts. Refer to the troubleshooting section for specific solutions. If repairs are needed‚ contact VEVOR customer support for authorized service. Always follow the manual’s repair instructions to avoid voiding the warranty.

Warranty and Customer Support
VEVOR offers a comprehensive warranty program‚ ensuring your heat press is protected against manufacturing defects. The warranty period varies by product‚ typically covering parts and labor for up to one year. For defective items‚ contact VEVOR customer support via email or their official website. Provide your order ID and a detailed description of the issue for prompt assistance. Refunds or replacements are available within the first 30 days. For repairs‚ only use authorized parts to maintain warranty validity. VEVOR also provides dedicated support for troubleshooting and maintenance‚ ensuring optimal performance of your heat press machine.
Downloading the VEVOR Heat Press Manual PDF
Download the VEVOR Heat Press Manual PDF directly from the official VEVOR website or authorized retailers. This guide provides detailed instructions for setup‚ operation‚ and troubleshooting.
10.1 Where to Find the Manual
The VEVOR Heat Press Manual PDF is readily available on the official VEVOR website and authorized online platforms like ManualsLib. Visit the product page or support section to access the download link. For specific models‚ such as the P8001 or PD150‚ manuals can be found directly through their respective product listings. Additionally‚ platforms like Amazon or eBay may host downloadable versions for purchased machines. Ensure you verify the source for authenticity to avoid incorrect or outdated guides. Customer support can also assist with manual retrieval if needed. Downloading the PDF ensures you have a convenient‚ offline resource for setup‚ operation‚ and troubleshooting.
10.2 What to Expect in the Manual
The VEVOR Heat Press Manual PDF provides detailed instructions for setup‚ operation‚ and maintenance. It includes sections on safety precautions‚ assembly steps‚ and troubleshooting common issues. Users will find specific guidelines for temperature settings‚ pressure adjustments‚ and time controls tailored to different materials like HTV‚ sublimation‚ and transfer papers. The manual also covers calibration processes‚ such as pressure knob adjustments‚ and offers tips for achieving optimal printing results. Diagrams and part overviews‚ like the P8001 model‚ help users understand machine components. Warranty information and customer support details are included for added convenience. This comprehensive guide ensures users can maximize their heat press’s potential with confidence and ease.
Advanced Techniques and Tips
Explore expert tips for optimizing your VEVOR Heat Press‚ including custom temperature settings‚ material-specific adjustments‚ and advanced calibration methods. Learn to enhance print quality and machine longevity with ease.
11.1 Custom Heat Press Settings
Customizing your VEVOR Heat Press settings can significantly enhance your printing results. Start by calibrating the machine according to the material you’re using‚ ensuring optimal temperature and pressure levels. For heat transfer vinyl (HTV)‚ medium pressure and temperatures between 270°F to 300°F are ideal. Sublimation printing may require higher temperatures‚ around 400°F‚ with shorter press times. Experiment with these settings to achieve vibrant‚ long-lasting designs. Always refer to the manufacturer’s guidelines for specific materials to avoid damage. Adjusting the pressure knob and timer accurately ensures even application. Fine-tuning these settings will help you achieve professional-quality prints every time.
11.2 Using Different Materials and Accessories
Exploring various materials and accessories with your VEVOR Heat Press can expand your creative possibilities. Heat transfer vinyl (HTV)‚ sublimation paper‚ and inkjet paper are popular choices for different projects. For HTV‚ ensure proper temperature and pressure settings to avoid peeling. Sublimation paper works best with high temperatures and short press times‚ ideal for vibrant‚ full-color designs. Accessories like platens‚ silicone pads‚ and protective sheets enhance performance and prevent damage. Experiment with materials to find what works best for your needs. Always refer to the manual for specific guidelines on material compatibility and accessory usage to achieve professional results safely and effectively.
Customer Reviews and Feedback
Customers praise the VEVOR Heat Press for its ease of use and versatility in handling various materials. Many highlight its durability and consistent performance‚ making it a favorite for both hobbyists and small businesses. Positive feedback often mentions the clear instructions in the manual‚ which simplify the learning process. Some users appreciate the machine’s portability and space-saving design. However‚ a few note that assembly can be challenging for beginners. Overall‚ the VEVOR Heat Press receives high ratings for its value‚ reliability‚ and customer support. Feedback underscores its effectiveness for projects like t-shirts‚ mugs‚ and hats‚ solidifying its reputation as a dependable tool for heat pressing needs.

Frequently Asked Questions
Q: What is the ideal temperature for heat pressing?
A: The optimal temperature varies by material‚ typically ranging from 300°F for vinyl to 400°F for sublimation. Always consult the manual for specific settings.
Q: How do I calibrate the pressure?
A: Adjust the pressure knob while the platens are cold to ensure even force distribution. Refer to the manual for detailed calibration steps.
Q: Can I use this press for mugs and hats?
A: Yes‚ the VEVOR Heat Press supports various attachments for mugs‚ hats‚ and small items‚ making it versatile for diverse projects.
Q: Why isn’t my design sticking?
A: Check temperature‚ time‚ and pressure settings. Ensure they align with the material’s requirements. Increase pressure if necessary.
These FAQs address common concerns‚ helping users troubleshoot and optimize their heat pressing experience. For more details‚ consult the VEVOR Heat Press Manual.